| ||||
|
| ||||
| ||||||||||||||||||||
|
| Add to Friends List | Send Private Message |
|
| Laian's Last 25 Game Guides |
Evoland 04-04-19 10:03 AM |
Walkthrough Evoland Hi folks! Laian here, back to the saddle with a brand new walkthrough. It's been a while but I had to take care of various stuff. Recently, I heard of a bundle regrouping two fantastic games that some of you might have heard of as well: the Evoland series. Called "Evoland: the Legendary Edition" and released for Switch and other systems, I decided to replay the first episode. What is Evoland, by the way? For starters, that game was originally a free game made in 48 hours for a Ludum Dare by Shiro Games. It has been inspired by famous RPGs such as Dragon Quest, Final Fantasy, The Legend of Zelda... The idea is to play through the evolution of the RPG genre by unlocking features during the game. Years later, the developpers went ahead and remade the game for PC. The game has been a success and they made a sequel released for PC. And now, you can play both games in the new version available for Switch, XBOX One, PS4 and PC. Isn't that great? For someone like me who tried the free version and the reboot, it is. I could replay the Legenday Edition (since I bought it on Switch and finished Evoland once) but I felt like replaying the original Evoland on PC. So I hope you're ready for that trip because I am and I'll be your commander for the entire journey. Welcome to Evoland. Oh and that walkthrough also works with the Legendary Edition. [b][orange]STARTING THE QUEST[/color][/b] First thing you might ask is: is there a plot, a goal? There is one actually but you'll get it in due time. Go right as the instruction says then go left. No need to press a button to open the chest, just bump into them. Move forward until you come to another chest to open. Head south, open the chest to the left and keep in mind the chest you cannot open. There is a lot of backtracking to do in this game if you want to get all the collectibles and achievements. Cross the bridge, go south and get [b][green]the sword[/color][/... Read the rest of this Guide |
Picross 2 02-28-18 10:53 AM |
First steps to "Mario's Picross 2" Hello everyone, this is Laian and I welcome you to another game guide. It's been a while, yeah. Things took a turn in my life so I had a bit of trouble to publish a fresh new walkthrough. Here we are with a game guide for beginners for the sequel to Mario's Picross: Mario's Picross 2. A game that never saw the occidental lands, sadly. - HOW TO START - Directional pad - control the cursor and Mario A button - select / chisel (black squares) B button - cancel / place X in a square Start - pause Select - Switch to another part of the puzzle (during the puzzle solving parts only) You have three categories: "How to play", "Easy Picross" and "Mario's Picross". The first one stands for the tutorial part if you are not used to that kind of game. Pretty cool from Nintendo. The second one and the last one are two differents series of puzzles to solve. Start with the easy ones if you wish to get used to this. There's just a few of them to solve so it should be really quick. You control Mario with the directional pad. All you need to do is move him to a puzzle and he will look at it. Press the A button afterwards to start the puzzle. As for the the last category, it's basically the adventure mode. You have to go through nine worlds by solving each of the puzzles in every area. The only difference between the "easy picross" mode and "Mario's picross" mode is the fact that, in the adventure mode, it's not a one-shot. By that, I mean you need to solve the four parts of the puzzle to create the picture and fully complete it. Once you are done with one part, the games asks you which one you'd like to take care of. Use the directional pad to move the square in the big one at the top left hand corner then press the A button to confirm. The total of time spent will be shown when the puzzle is complete. Other than that, there's no specific order: you're free to try any puzzle you want, as long as every sin... Read the rest of this Guide |
Toonstruck 10-31-17 12:04 PM |
Walkthrough Toonstruck Hello everybody, this is Laian and I welcome you to a brand new walkthrough. This month, no horror game. Maybe I'll bring one next month, I have a few of them in store for you. No, this time, it's about a game you might not know called "Toonstruck". What's that "Toonstruck", Laian? It's a gem of the game history. A great point'n'click game released for PC in 1995 starring a lot of guests like Christopher Lloyd, Tim Curry... I'm not kidding, this game is amazing. It's kinda like the movie "Who framed Roger Rabbit?" with lot of humor. Oh and I had to apologize for the disappearance of screenshots for this walkthrough. I knew how to take screen capture around the end of the game so it was too late. Oh well, at least it keeps the surprise if you ever want to play this game. So let's jump into it, shall we? ROYAL PALACE First of all, go to the trophy room and talk to the footman. You will notice that he's really pleasant to discuss with. You have two items to take in this room but, with the footman here, it won't be possible at the moment. Go to the laboratory next to the locked cabinet to meet the engineer. He's lost his glasses so he won't talk to you at the moment. Go talk to the footman once more about the glasses and go back to the laboratory. Talk to the engineer now to get your mission. You'll get the plan for the Malevolator and the bottomless bag. The room to the right leads to the Cutifier. Go outside to see two guards. Talk to them. You'll see that the guard to the left drops a key when he does with his partner the little greeting dance. You need that key. You can talk to them about the king and other stuff but ask them to re-do that little dance and grab the key. Return to the castle and open the door downstairs to the left to access the king's bedroom. Ask Flux to get on the bed (right click to get the face of Flux and click on the bed) in order to find a rental coupon. Take the music box on the furniture and interact with th... Read the rest of this Guide |
Mario's Picross 09-01-17 05:51 AM |
First steps to Mario's Picross Hello everyone, Laian here with another game guide. Well, in a rush because of technical issues I won't explain, I made a short one this time. Welcome to my game guide of "Mario's Picross", a game released for Game Boy in 1995. Fun fact: I saw the commercial when I was a kid and I really wanted this game. Never got it (sadness...). It's a puzzle game, I know. Let me go straight to the point. I won't spoil anything, I won't show the solutions to the puzzles. It would totally ruin the fun out of this game. See this guide as a guide for beginners, like the one I made for Fatal Labyrinth, with useful tips and all. So let's get started right now! PART 1: MARIO'S PICROSS, WHAT'S THIS? As I said in the introduction, it's a puzzle game. A picture puzzle game, to be fair. Which means the solution of the puzzle will represent a picture. There are over 200 puzzles, waiting for you to be solved. First of all, you choose one of the three files available. Then, you can see three categories. "How to play" is the tutorial (or how to play the game... without playing it, since everything will be automatic an you'll just have to press the "A" button to proceed to the next tip). So why is this game guide useful? There is stuff the game does not tell you, so I'll tell the hidden stuff. It's just a few tips and that's all. Then, "Easy picross" is a first series of puzzles you can solve. Easy stuff, starting with these puzzles is highly recommended. You can choose any puzzle you want to solve, there's no order. And finally we have the last category "Picross". More puzzles to solve in two other categories named "Kinoko" and "Star". When you start the game, you can only access the "Kinoko" section. The other category is locked and you have to complete the other puzzles in order to be able to solve the last puzzles of the game. PART 2: CONTROLS AND TIPS (AND ADVICES) Directional cross: move the cursorA button: select/chisel (black square) B button: cancel... Read the rest of this Guide |
Wizards & Warriors X - The Fortress of Fear 04-29-17 09:50 AM |
Walkthrough Wizards and Warriors X: The Fortress of Fear Hey folks, Laian here and today we're going to play another game I used to play when I was a kid called "Wizards and Warriors X: The Fortress of Fear". I used to play this game on my uncle's Gameboy at that time since he only had this game and Tetris. I couldn't beat it when I was an innocent but, thanks to the magic of save states, it's now buried once and for all. I've always wanted to beat it, to see the final boss and all. Let me tell you, this game is quite challenging to beat. Not impossible but really hard so be prepared. Time to jump into the world of "Wizards and Warriors X: The Fortress of Fear". STAGE 1,0This stage has a problem you may find irritating: there are two rows of platforms, which make the progress quite tedious. Remember you have three lives and sudden death is your prize if you fall down. Jump on the first platform to find a locked chest and a gem. Grab the key, go open the chest to get three gems or keep it for later. Yeah, you have to manage your stock of keys. I suggest you to keep it for later, there's a better loot in another chest later in this level. Keep going east, collect the chalice, step on the clouds to cross the gap and open the locked chest if you kept the key you found earlier to get a bonus life. Otherwise, say goodbye to that loot and carry on. Pick up the piece of meat and enter the castle. STAGE 1,1 Just keep moving forward and make those gaps until you find a key. You can go open the chest you found a few steps earlier to find a life potion (which fully restores your life and it's instantly consumed) or you can go up and open the other chest that contains a shield. The door down below leads to a room with some goodies and the other door leads to the next level. STAGE 1,2 You're back here, on the upper part of the ramparts this time. Slow progress is strongly recommended as you will encounter a new type of enemy with two patterns. There's also a chest to unlock that contains a resistance spell... Read the rest of this Guide |
Trace Memory 02-27-17 09:33 AM |
Walkthrough Trace Memory Hello folks, Laian here with a new game guide. Today, it's a DS game I played a lot called «Trace Memory» (a.k.a «Another Code» in the European version). It feels good to replay this game and make a game guide for you, frankly. Besides Ghost Trick: Phantom Detective, Phoenix Wright and other games of that kind, I really like this game. So, if you're ready for a memory lane (or not, if you're new to this series then you're welcome aboard), I suggest we start that game guide without wasting any more time. Let's just jump into it, shall we? CHAPTER 1 First things first, talk to the lady. She's your father's little sister, Jessica. Talk about all the topics available to learn more about the story. The red text will always open new topics to talk about. Click on the «back» icon below to end the conversation and carry on. Once you landed on Blood Edward Island, talk to the captain. Once more, talk about all the available topics then click on the «back» button. You'll get some candies from the captain. Go search Jessica. You'll hear a scream right when you will reach the drawbridge. Unfortunately, you can't get to the other part of the island if the drawbridge is raised. Check the panel to your right, turn the wheel twice and carry on. Check the stone then move on until you get to a gate and a signboard. The gate is locked, sadly. However, there's a puzzle to solve. Just check the signboard. Remember the symbol to its right once you fixed it (or take a picture so you will get it memorized), it will come to an use later in the game. Go right now, skip the road blocked by big rocks and go right. You will get to a cemetery. Check the tombstones then the stone slab that blocks another way. Move it to unlock the path and see a letter carved on the back of the stone. Talk to the ghost kid afterwards. Carry on after the discussion to get past the obstacle you saw earlier and go forth. Check the grinder and try to clean t... Read the rest of this Guide |
Harry Potter and the Sorcerer's Stone 12-29-16 07:27 AM |
Walkthrough Harry Potter and the Sorcerer's Stone Hello everyone! Laian here and welcome to another game guide. Get your wand ready, this time we go see Harry Potter in his wonderful world called Hogwarts. Today's menu is "Harry Potter and the Sorcerer's Stone". This is the game guide for the Playstation version, do not use it if you play the PC version of that game. So let's get into it without wasting time! WELCOME TO HOGWARTS, HARRY! The great journey of witchcraft and wizardry begins here, in the great hall of Hogwarts. Albus Dumblebore greets you and gives you the words of wisdom. I really like the part of his speech when he talks about dangerous secrets. When your name is "Laian", no secret is dangerous and hard to find. I might as well take that advice seriously, coming from the headmaster of the school, oh well. There's nothing you can really do at the moment except opening the portrait room to the right (which leads to... a portrait in search of the password, woo side quest!) and the Gryffindor's tower upstairs then to the left. It's where you must go but keep in mind the portrait room is here, just in case you get the code in the future from, say, a student or anyone else. Go to Gryffindor's tower, then go downstairs, push the bookshelf and get the card "Merlin" (refer to the bonus part of the game guide to have a reminder of the cards mentioned during the first part of the walkthrough and the one that won't be mentioned). There are 17 cards to find in the game. Don't know if you are the kind of player who likes to "try hard" a game to its completion like me but I wanted to let you know about this. Talk to Fred and Georges next to the portrait of the Fat Lady. In exchange of yellow beans (50 to be exact), you'll get the one for the portrait of the baron in the portrait room. Once you got the yellow beans required, talk to the Fat Lady to go to the room and talk to Fred and Georges to get the password. Go upstairs to meet Ron Weasley. He will tell you that a bad boy entered the room before yo... Read the rest of this Guide |
Eternal Darkness: Sanity's Requiem 11-30-16 03:03 PM |
Walkthrough Eternal Darkness: Sanity's requiem Hello everyone, Laian here with a brand new walkthrough (oh boy!). Yeah, it's been a while since I published one. Work kept me busy but I'm ready to publish that one. Are you ready for a great adventure? Well then, welcome to «Eternal Darkness: Sanity's Requiem», a game released for Gamecube. Here's a fun fact: that game was supposed to be released for Nintendo 64 but they cancelled the project and brought it back to the surface a few years later, as it was diving down into the abyss of darkness (get it?). I really like this game, a lot to be honest. I'm not going to say a lot about this game, play it for yourself. That's all I can suggest to you in all honesty. With or without that game guide, it doesn't really matter to me. Just play it when you have time, you'll see what a good survival-horror game needs to get the player's attention. It has its own recipe that you must find out by yourself. Anyway, let's jump into this... abyssal journey, shall we? ALEXANDRA'S PATH You start in a small room, controlling Edward's ganddaughter armed a shotgun. Shoot the undeads coming at you until the cutscene triggers. This was all a bad dream, though the police calls Alexandra because an accident happened at the Roivas Family Estate. After the next cutscene, you're inside the mansion, two weeks later. Check the clock behind you to find the dresser key (1). Also, keep in mind the hour shown on the clock. Now go open the door to the right to get to the library and go to the clock at the far east of the map. Set it to the same hour as the clock in the foyer to open a secret passageway. Go there, open the door and grab the gladius on the wall next to the fireplace. Read the book on the desk to proceed to the next part of the story. THE CHOSEN ONE (PIOUS AUGUSTUS' PATH) After the cutscene, climb down the ladder and face three skeletons then pick up the granite block. Open the door, kill the foes and grab another granite block. Open the next door,... Read the rest of this Guide |
Alex Kidd - High-Tech World 07-27-16 11:46 AM |
Walkthrough Alex Kidd in High Tech World NOTE: Due to work and other stuff, this game guide is short. My apologies, folks. Though, the bright side is this one is complete from start to finish. Enjoy! :) Hello everyone, this is your host Laian coming at you with a brand new game guide, as always. So, to be honest, I never thought I would play this game at some point in my life. I heard lot of things about this game, like it's unforgivable, difficult, crappy... But you know, Laian is used to that kind of stuff. Well, to be fair... I don't know how many neurons I have left inside my brain after playing all these games. Anyway, let's just stop rambling and jump into the game I chose for this month: «Alex Kidd in High Tech World». PART 1: THE 8 PAGES, ERRR PIECES OF NOTE PAPERS So yeah, you must get the pieces together back in order to get the complete map required to go to the arcade. B opens the inventory and A is used for interaction with some of the elements around you. In order to go up and down the stairs, press the specific diagonal direction. To interact with objects, press up button in front of an item then press A. Here is where you will find the pieces: 1- The first piece is given by your father, located in the first to the left at the beginning. He will give you a fake piece of paper first so you will have to check your inventory and go back to the game to ask for the first piece of paper. 2- Go to the far east of the 3rd floor and enter the room. Pass the test by answering the following answers «Tokyo», «Vicel», «450», «Athens», «5050», «226», «50», «Lira», «Mozart» and «500» and you'll get the piece of paper. 3- Keep going left, cross the bridge, go down and check the pot to get a miniature ladder. Now, go to the 3rd floor and check the clock next to the room in which you can pass the test. You will fix the clock and get the piece of paper. 4- Pass the test then go see James in his room, in the 4th floor. His room is down the stairs before the bridge.... Read the rest of this Guide |
Card City Nights 06-30-16 05:13 PM |
Card City Nights game guide (a.k.a how to be the best card battler) Hello everyone! Laian here, with a new game guide! Once again, it's going to be some kind of tips and other stuff about the game, like the last walkthrough. I may look like a lazy person, I'm sorry if it's what you think I am now. Perhaps I'll bring something massive next month to celebrate my 50th game guide on Vizzed, who knows. For now on, we're going to jump into Card City Nights, a trading card game made by Ludosity, the indie game company which made Ittle Dew (that I'll be pleased to replay and make a walkthrough out of it someday for you folks). Short introduction as always so we can dive into the game itself. Ready for the tournament then? What are you waiting for? Get your deck ready and go beat the other duelists! It's time to du-du-duel! (sorry, had to do that:P ). CHAPTER 1: WAIT LAIAN, WHAT IS THIS GAME ABOUT? Well, if you have played Pokemon Trading Cards, keep the story only. Though, instead of badges, you need to collect eight legendary cards hold by the leader of each place you will visit so you can challenge the Card king. And, in order to get a chance to challenge the leader, you need to beat the other duelists once. It looks similar to Pokemon Trading Cards, indeed. As for the duel mechanism, it should be slightly familiar to the Triple Triad mini-game from Final Fantasy VIII. Though the value of the cards are attack, defence, assist and neutral symbols and arrows pointing at various directions. First things first, you will create your character. Choose the skin you want and name it as you wish. Then, you start in your house, well the bedroom. I suggest you to look everywhere by clicking on suspicious things to get the coins hidden here and there, and that in the other areas. Also, remember that you're new in town and people will react strangely the first time. Since you're taking part to the tournament, people will challenge and you will have to challenge them to collect the eight legendary cards required to take part to t... Read the rest of this Guide |
Fatal Labyrinth 05-31-16 04:09 PM |
"Fatal Labyrinth", the survival game guide Hello everyone, Laian here, with a new game guide. Well, let's just call that one «game guide survival» since it's going to be a mix of everything you need to know about the game and a few extra tips in order to make your quest easier. You'll see why I cannot write a typical walkthrough as usual in a moment. The monthly walkthrough will deal with a Sega Genesis game called «Fatal Labyrinth». I'm not going to ramble as always. We're going to start that walkthrough right now and jump into the «Fatal Labyrinth» folks. CHAPTER 1: WHAT IS «FATAL LABYRINTH» ABOUT? Well my dear, that game is a RPG, dungeon crawling with randomly generated dungeons. See why I cannot write a typical walkthrough? Because of «randomly generated dungeons». That means everytime you will start a new game, the dungeon won't be the same, you won't find the same items to the same locations, the potions won't have the same effect... If you're new to that type of game, you've been warned now. You can survive and make it to the end but you may die in the very first floors (that unfortunately happens sometimes). Also, there's a plot that you can figure out by talking to the NPCs at the beginning of the game. Basically, you enter the dungeon, you bring back the holy goblet stolen by a goblin and that's it. Now, how long will it take to get there? That is up to you and how you will play the game. That is why I will help you the best I can in order to survive as long as you can and eventually beat the game. CHAPTER 2: FIRST STEPS After pressing the start button, you will appear at the village. You can talk to the people to get your goal but it's optional. Don't expect any optional quest and starters stuff, oh no. This is «Fatal Labyrinth». Once you entered the dungeon, you'll be on your own and will have to survive to the top. You can skip that part by pressing the «start» button once more to be teleported to ... Read the rest of this Guide |
Exhumed 04-30-16 05:36 AM |
Walkthrough Exhumed NOTE: I've been forced to do something I would have never done before: publishing the walkthrough, not at 100% though. Due to problems I've encountered with the emulator of the RGR and mine, I can only publish the main quest (with the parts of the transmitter required for the good ending) at the moment. There's a few ankhs collected as well but I'll rewrite these and the parts of the transmitter in the second part of the walkthrough, do not worry. I don't know when the second part will be added to the guide. Maybe next month with the next walkthrough or in a year or two, that will depend on one thing: the capricious emulators, yeah. I'll edit the walkthrough in due time. Now, let's start the walkthrough like it always starts: with a nice and short introduction made in Laian. cough cough Hello everyone, Laian here and proud to present the new walkthrough. Who enjoys killing aliens in Ancient Egypt? You? You too? Good, because I like doing this with badass music and that's why I played Exhumed this month, released for PSX, Saturn and PC (also known as Powerslave, which is obviously a reference to the Iron Maiden album and song). The only difference between these three versions is, well actually... I think there's more than one difference. The Saturn and the PSX are exactly the same, the PC is not with the removal of the hidden dolls and some other stuff. And of course, the PC version is called Powerslave EX as far as I recall but we're not here for a video game fact, lesson thingy, whichever you wanna call that. You're here to read the fantastic game guide right? Well then, let's go! Ancient Egypt, here we come! TOMB OF RAMSES The introduction to the game so don't expect anything dangerous. It's just a short level filled with a few scorpions to kill. You start with a machete but a pistol awaits you after going up the stairs. Grab it to open the door and kill the scorpion. You noticed that the blue bar drops down everytime you shoot with the gun. Tha... Read the rest of this Guide |
Rolan's Curse 01-30-16 02:45 AM |
Walkthrough Rolan's curse Hello everyone, Laian here with the monthly walkthrough. Boy, I really dug deep down in the depths of the Retro Game Room to find the game of this month. It's crazy what you can find when you spend some time looking for a game to play. Question: do you know about the game called "Rolan's curse"? Yes? No? Possibly? Well, this is what I found and I'm going to share this with you. Welcome to the walkthrough of "Rolan's curse", made by your host Laian. I hope you will enjoy this adventure. Let's just jump into it without wasting any more time, shall we? CHAPTER 1 You start in a town with only three houses you can't go in and some NPCs. You can talk to them but they won't give you any useful information, just the typical plot stuff. Before leaving the town, you might want to grab the potion of life inside the lonely chest to the left of the only gate of the town. That could be useful if you're reckless like me. Now, let's go on the great adventure, shall we? Leave the town and take one of the paths to the lake. On your way to the lake, kill some enemies to eventually get a minor potion of life. As opposed to the big one, you don't keep it in your inventory bar. You instantly drink it when taken. Once there, go left to find a magic axe (yep, that looks like a pickaxe for some reason) and a life max up. The magic axe will replace the potion of life if you haven't used it yet. Also, don't even bother to go back to the village and pick the potion up in the future: it's gone forever. Great, isn't it? You have to pay attention to what you want to take otherwise you might be stuck. Go back to the lake, then go north and get rid of the bush with the magic axe. Careful here, the wolf that appears here usually drops a potion of life when he dies. Do I have to tell you that, if you accidentally take it, you lose the magic axe forever? You should give up the potion and keep the magic axe if that happens, even if you desperately need to reco... Read the rest of this Guide |
Legacy of Kain: Soul Reaver 12-03-15 05:04 AM |
Walkthrough Legacy of Kain: Soul Reaver Hello folks, Laian here coming at you with another walkthrough! So it's October... oh no wait, that's two months later. Yup, lot of things happen; that is why it's been delayed. I don't wanna talk about these shenanigans guys and gals. Anyway, it's not "Phantasmagoria 2: A puzzle of flesh". I'll do that one later. This time, I'll make the walkthrough of "Legacy of Kain: Soul Reaver" for PSX. The story is simple: you are Raziel, Kain killed you for a transgression and you've been saved from an eternal damnation and death in order to avenge yourself. That's pretty much it. So let's get into it, shall we? BACK FROM THE DEAD Raziel does not approve the fact that he has been saved from death. Geez, he should be happy. Anyway, this is the tutorial part. As any other game, you'll learn how to use the controls. Go through the hallway to find a portal. It will be useful to fast travel through the world. Unfortunately, you need to find the other portals first and activate them. Keep moving forward, follow the instructions given by the game and the voice. Weaken the enemies a bit further and absorb their soul to completely destroy them and climb up the ledge. Use the blue portal to go to the normal world (yes, you were in the parallel world, also known as the spiritual world). You can't go through the gate to the left at the moment so go right, leap over the pool of water and open the door. Stun your enemies and use the surroundings to finish them. There's also a bonus to get behind a gate underwater but we shall see that in due time. For now, push the block to the left to reach the passageway up there and open the door. You'll reach the sanctuary. Notice the piece behind the gate (1), kill the two creatures (don't forget to absorb their soul) and carry on. Open the door with the symbol carved on it to activate the first portal for the fast travel system. Leave the room, kill the enemy and carry on. Go left after the cutscene, kill the enemy and open th... Read the rest of this Guide |
Mickey Mania 09-30-15 09:32 AM |
Walkthrough Mickey Mania: The Timeless Adventures of Mickey Mouse Hello everyone, this is Laian and I'm back! For real! Back with a new walkthrough after a long period of work during the summer holidays. So this month, we're going to join our favorite mouse on another adventure. After "Mickey Mouse 5: Magic Wand" and "Castle of Illusion starring Mickey Mouse", now is the time to play "Mickey Mania: The Timeless Adventures of Mickey Mouse", released for Sega Genesis and other systems such as the PSX later. As I'd like to play the remake on PSX, I'll go with the Sega Genesis version because... it seriously lacks of Genesis games on "my walkthroughs done list", yeah. So let's not waste our time blabbering and let's jump into it, shall we? STEAMBOAT WILLIE This is probably one of my favorite Disney short cartoon starring Mickey Mouse. I even made a recreation of the boat on the server as a tribute to Mister Walter Elias Disney but that's beside the point. The whole stage is interesting to say the least. No, no, there's no problem with your screen. The first part is in black and white because you will go through the very first Steamboat Willie. Colors didn't exist when the first version was released so that's perfectly normal. First things first, jump on the bottle to throw the cork away, right into the mouth of the unfortunate singing goat to the right and carry on. Climb up the bunch of crates, avoid the smoke from the chimneys and talk to your clone of the past to the left. He will go away. You can play with the bell if you want to, otherwise, jump on the cat and go through the floor you just destroyed to find some ammo and a star (it recovers one health point symbolized by the glove and the fingers at the top right hand corner). Push the crates to the left to leave the place and carry on. Avoid the heads popping out from the crates and jump on the top crate to cross the gap and finish the first part of the level. Grab the ammos and avoid the wrecking balls ( you expect the Miley Cyrus joke? Nope, dre... Read the rest of this Guide |
Journey to Silius 06-27-15 08:48 AM |
Walkthrough Journey to Silius Hello everyone and welcome to a new walkthrough, brought to you by your host Laian. So for starters, I'll be honest with you. I didn't want to make a short walkthrough this month but, because of a problem I've encountered with the Philips CD-I emulator, I had to do a short one (or something that is not longer than the one I originally planned). So, here we are with a NES game called "Journey to Silius". It's really short (five levels) so I apologize for this. Next month, I'll make sure it's going to be a long walkthrough. So let's get into it, shall we? STAGE 1The first level takes place outside in this post-apocalyptic world. Shots come from the background and will explode as you move forward so watch out for these projectiles. You start with two weapons: the handgun and the shotgun. The handgun has unlimited shots and doesn't consume your power bar beneath your health bar. It's one shot that goes straight forward and has a good rate of fire. The shotgun shoots three shots, two diagonally and one straight forward. Each shot consumes some power points. That being said, let's start this level. Move forward, destroy the robots and face the first turret. Turn back, shoot the robot and the turret. Avoid the shot, leap over the hole and carry on. Destroy the land mine, let the robot fall into the hole (must be a depressed one), destroy the turret, duck and shoot the cannon. Move forward a bit, turn back and shoot the robot. You'll see a bit farther two land mines. This is a tough part if you want to land between the two mines. Carry on, destroy the cannon then the turret and land between the two land mines a bit further. Carry on and prepare to face the mini-boss. Your opponent attacks twice. The first time, he stands up and shoots once. The second time, he ducks and shoot twice. You can jump over the first shot then duck to avoid the next one and strike back. Another cheap technique is coming closer to him, equip the shotgun, crouch and spam your sho... Read the rest of this Guide |
The 7th Guest 05-28-15 11:14 AM |
Walkthrough The 7th Guest Welcome curious souls, to a new walkthrough. My name's Laian and I'll be your host for this great adventure, as always. Back in 1993 when a strange mansion, lair of the toy maker Henry Stauf, existed. A few people were invited to play a game. What game, may you ask? Puzzles scattered all over the place, in these rooms. Oh don't worry, you're the new guest but I'll be on your side. Hey , we need all the help we can get, don't you? So here we go, back in 1993, in Stauf's mansion. Welcome to the 7th guest. I hope you will enjoy your stay while you're figuring out this mystery. Oh, one more thing: this walkthrough will be slightly different. Since each room of the mansion has a puzzle to solve, I'll explain the gimmick and how to solve it. Except for one puzzle (which is insanely hard to solve but we shall see that in due time), I'll explain each of these puzzles step by step. Well, how I made it of course. There must be an easier way to solve it and eventually you'll figure it out. Besides all the puzzles part, you are free to click anywhere that seems suspicious to you if you want to know more about the story or trigger specific events. Well I guess we can dive into the heart of that walkthrough this time. FIRST FLOOR DINING ROOM DIFFICULTY: EASY This is the first puzzle of the game. After this one, you are free to explore and do any puzzle you want. Examine the table to trigger an event. Then, click on the cake to start the puzzle. You have to cut the cake as long as each guest has a slice with two tombstones, two skulls and an empty square. Here is how you have to solve it: A cutscene will be triggered after solving the puzzle. You can go back to the main hall now. MAIN HALL DIFFICULTY: NORMAL The puzzle is behind you when you start the game. Yeah, it's that big door. An event will be triggered when you interact with the door. Although, you can't solve ... Read the rest of this Guide |
Shenmue 04-30-15 10:14 AM |
Walkthrough Shenmue Hello everyone! Welcome to a new walkthrough, brought to you by Laian. So, it's the month of Dreamcast apparently, which is really exciting, don't you think so? That also means the walkthrough of April will be a Dreamcast game. Yeah, that's a first and that's not a joke. And look what I got in store for you folks: a walkthrough of Shenmue, hurray! Oh boy, you must be so hyped like I was when I played this game for the first time. This brings back lot of memories for most of the people here. Maybe you (Yeah you! Staring at your screen! :P ) already played it or heard of this jewel. So for some people, it's going to be a discovery. For the others, a memory lane. Enough ramble, let's jump into it! DISC 1 After that introduction scene, you start at Ryo's room. I think you understood what you have to do to complete the game. If you answered «retrieve these bad guys and kick their butt until they give you back what they stole last time», you are correct. But you need a lead. For starters, go to the desk, hold the R trigger and stare at the tape on the desk. Take the Shenmue tape, then open the drawers to find a tape player, a photo of your friends and another tape. You can save your progress if you interact with the bed. There is nothing else in this room to take so leave your room to talk to Ine-San. She will give you some cash. Now, before heading to the dojo and talk to our buddy, check the room to your right to find in the drawer a photo of your family. Go in the next room to the left to find some batteries in the furniture. Leave this room, enter the room to the far left to find on the desk the scroll called «Shadow reaper». This is a new fighting move you can learn if you go in your inventory and select the scroll. Leave the room and go to the right. Enter the room to your left to find a box of matches next to the altar. One of the drawers contains some candles. Now, open the door to the left, open the basket to the left to fin... Read the rest of this Guide |
realMyst 03-31-15 10:23 AM |
Walkthrough realMYST Hello everyone, guess what? It's March and it's not Imperial ha ha *feels ashamed of that terrible joke* Sorry, I'm just excited because it means new game guide, brought to you by your host Laian. So this month, we go back to the PC system with a remake of an old point and click game. Some people here know this game. I personally know this game and used to play it in the past, before giving up since I couldn't make any damn progress. Yeah, I didn't have the same patience and extraordinary spirit of puzzle solving that I now have. Anyway, the remake has the same story, don't worry. You're on the island of Myst and you have to do the same exact things like in the original game. Although, it includes a bonus level unlockable at the end of the game, a new game mode and some kind of little Q&A that can help you to solve the puzzles. The only way to make it appear is pressing «esc» then click on the question mark icon at the bottom. As for the new game mode, it's called «Free roam», which allows you to explore and move freely. To the people who don't know this game, the original Myst didn't have that option obviously. The only way to move on and explore the island was with the cursor of your mouse. No arrows, just the mouse. If you are not used to it, I suggest you to play with the «Free roam» option. It won't affect the story at all. Though, it helps if you want to get some Steam achievements. I'll make a bonus part for the bonus area at the end of the walkthrough, as usual. But let's see that in due time, ok? It would be great if this game guide starts once and for all, right? Well then, enough bla bla and let's go! To Myst, woohoo! WELCOME TO THE ISLAND OF MYST After the introduction and the title screen, you will face a book. Touch it and click on the picture to be teleported to a whole new world. No, I'm not going to sing the song. Welcome to the island of Myst, folks. This is the main place of the adventure. To yo... Read the rest of this Guide |
Castle of Illusion Starring Mickey Mouse 02-28-15 03:33 PM |
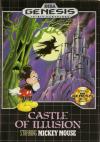
Walkthrough Castle of Illusion starring Mickey Mouse Hello, hello everyone! Laian here with a new walkthrough. For starters, it'll be a short walkthrough of a game I used to play when I was a kid. The main reason why it's a short walkthrough is because I worked during the holidays and couldn't start it before. So if some people are asking me why it's a short walkthrough this time, you now have the answer to your question. It's not laziness, trust me. Well, I wanted to replay that game for ages and make the walkthrough. So here we are, with a Disney game called Castle of Illusion starring Mickey Mouse. Yeah, Donald was not the only one who had a game released for Sega Master System. Castle of Illusion starring Mickey Mouse also has a Sega Genesis with better graphics (that makes sense). But the only thing I hate with the Sega Genesis version is the fact that you can't choose the levels compared to the original version. So that's why I'm going to play the Sega Master System instead. I do believe there's some differences between the versions so I don't recommend to use this walkthrough for the Sega Genesis version. Anyway, time to start this walkthrough, that's enough story I guess. Welcome to Castle of Illusion starring Mickey Mouse, folks. WHERE EVERYTHING BEGINS So, Minnie has been kidnapped by a witch because Minnie is too lovely and bla bla bla, let's skip the story. You can choose between practice mode and normal mode. The difference between these two modes is the number of gems you'll collect to finish the game. In the practice mode, you'll explore the three first levels and end the game afterwards. The normal mode will allow you to play the full game, including the final boss. That's it, you don't face the witch at the end of the practice mode. Then, the game starts. An old man talks to Mickey at the entrance of the castle. He mentions seven gems of the rainbow kept by the masters of illusion. Then, you enter the castle and notices three doors. This is where it begins and you can control Mickey. There... Read the rest of this Guide |
Mummy, The 01-31-15 10:00 AM |
Walkthrough The Mummy Hello everyone, Laian here and welcome to a new walkthrough. So I wanted to make the walkthrough of a DS game but I'm still playing it on my DS, trying to finish all that side stuff so it might take a while to see which game I'm talking about, considering I don't find the time to keep playing it ha ha. Anyway, let's go back to the Playstation with a game based of a movie (or adapted, rather) called The Mummy. I really liked that movie, the second one was not as good as the first movie and the third one... let's just say there's a time when you must stop before it's too late. I'm not going to rant about the movies, nor the game. I'm a walkthrough writer and I'm here every month to suffer for you guys and gals. The game itself is not that bad, I've honestly seen worse but, like any other game, there's some issues really irritating. But that doesn't forbid Laian to play the game and have a brain meltdown once again, right? Anyhoo, let's jump into the action, the mummies and the pyramids without wasting any more time, shall we? THE UPPER RUINS This is the hub of the game. For now on, one level is unlocked. It's the one nearby Evelyn. She found a mysterious panel that can be «read» if you light them. Technically, you can't read them, however they will be helpful and finding a lot of these is highly recommended. You need to light the torch then go to the panel and it will automatically shine. When you have 8 panels of Ra activated, you'll get an extra life. You'll also find relics. Get 4 relics to gain a special weapon that instantly kills your opponents (except for the bosses) when it's correctly used. After the cutscene, you'll be in the ruins of Hamunaptra, the first level of the game. THE RUINS OF HAMUNAPTRA Go downstairs, equip your pistols, leap over the gap and kill the miner. Jump on the ledge to find two relics and two panels of Ra to light with your torch. The next pit contains two relics and some ammo for the revolvers. ... Read the rest of this Guide |
Castlevania II - Belmont's Revenge 12-27-14 10:56 AM |
Walkthrough Castlevania 2: Belmont's Revenge Hello everyone, Laian here and welcome to the new walkthrough. I honestly didn't know which game I was gonna play this time. I delivered a PSX game involving Christmas called «The Grinch» and it was fun so I didn't feel like playing another Christmas involved game. I like Christmas, I like winter and snow but I hate catching a cold and, trust me, I've been sick during this month. So I decided to play a short game for Gameboy called «Castlevania 2: Belmont's Revenge». In this game, you play as Christopher Belmont and your mission, like the good Belmont you are, is to eradicate the Lord of Darkness, Count Dracula. However, his castle won't appear until you get rid of the first four castles: the crystal castle, the plant castle, the rock castle and the cloud castle. There's no specific order to complete them. You can choose the one you wanna take care of, as long as you do the job correctly. And by that, I mean you kill the boss at the end of the stage. All four castles destroyed will make your main objective appear: Dracula's castle. So let's start without wasting any more time. The walkthrough will begin with my favorite castle: the crystal castle. Then, the plant castle, the rock castle and the cloud castle. Finally, we go in the last castle after all that hard work put into the first castles. CRYSTAL CASTLE Right at the beginning, you'll find a power up in the very first candlestick. Kill the crow, then use the platforms to make your progress, grab some hearts in the candlesticks and the axe in the last one at the far left of the screen. Go up (because down below, it's sudden death and you lose a life), get the second upgrade for the whip, kill the bat, use the rope to get on the platform, kill the other enemy from here, break the candlesticks to find the holy water and a coin then go through the door. That's the first checkpoint of the game. Everytime you die, you restart at the last door you went through. The candlestick und... Read the rest of this Guide |
Grinch, The 11-28-14 01:05 PM |
Walkthrough The Grinch Hello everyone, it's your host Laian coming at you and welcome to a new walkthrough. Happy Halloween, folks! Wait, what? It's... over? Oh really? *looks at the schedule* Ah yeah, indeed. Well then, happy Christmas! What? It's not Christmas either? Awww. But the game I chose this month is «The Grinch» for PSX since it's the month of Playstation! You meanies, how am I going to change the monthly walkthrough now? Alright, so even though it's not Christmas and Halloween is over, we're going to help The Grinch with a sabotage mission, ok? No Christmas for the townfolks of Whoville ha ha! So start this mission without wasting any more time, shall we? AREA 1: DOWNTOWN WHOVILLE You'll start with a tutorial, explaining how to control The Grinch and Max the dog and how to use their abilities. The first room will teach you how to use your green butt to crush all kind of stuff. Find the key hidden in one of the crates, open the door and carry on. In the next room, stand before the rock and move it to unlock the path to the next room. Use Max to grab the key at the other side of the door, give it to The Grinch and unlock the door with it. Now, use your smelly breath on the machine to carry on, activate the switch to go down, keep in mind that giant computer (it'll be useful for the creation of your gadgets once you'll have collected the specific plans) and go up. These doors are the mini-games you can unlock once you smashed the number of gifts required to open it. For now, go back down and use the vaccum tube leading to Downtown Whoville. MISSION 1: SHUFFLING THE MAILS In order to accomplish this mission, you need a disguise first. Go back where the guard is sleeping. Don't wake him up, use the stealth skill to reach the door and open it. Go in the building, grab the Who cloak to your left and leave the building. It's in this building that you can also accomplish the mission 6 of that area. Now, go to any phone box you'll see, use the di... Read the rest of this Guide |
Phantasmagoria 10-13-14 10:30 AM |
Walkthrough Phantasmagoria Hello everyone, how are you doing today? It's your host Laian coming at you and welcome to another walkthrough. Ok, so October didn't start well for me but lot of stuff happens on Vizzed. Such as... the PC section in the Video Game Room, yeah! Oh my, my, you can't imagine how that update made my day. I have lot of games to show you, games that you probably haven't heard of. So let's celebrate that new update with a PC game, why don't we? Let's dive into the horror for this month of October and let's go back in 1995. This game I chose is still considered nowadays as one of the best horror games ever created. A remake has been released for the Sega Saturn. Sadly, they forgot that all the people living on planet earth don't speak Japanese, oh well. That's why I'm going to play the PC version. Because it's the roots and I will understand the dialogues so I won't get stuck at a puzzle. But enough ramble, let's just jump into it, folks. Let's unlock the door to... CHAPTER 1 Since the game is divided into seven chapters, let's use these chapters to make that walkthrough. After the cutscene, note that door behind you. Open it, move the carpet and try to open the hatch. It won't budge. Go back to the kitchen, open the drawer to the right to get the matches then leave the kitchen. In the next room, pick up the poker next to the fireplace then go back to the kitchen and open the hatch with the poker this time (don't forget to turn the light on, otherwise you won't be able to interact with the hatch). It works! However, it's too dark to see anything so you need a source of light. Go back to dining room then go to the next room. Collect the newspaper on the floor next to the fireplace and try to open both of the doors. Weird, they are locked. Well then, go upstairs. Check the room to the right to find a deck of tarot cards, then open the drawer next to the bed and read the letter. Now, go in the room to the left. Note the ring in the box and the cigarettes i... Read the rest of this Guide |
Teenage Mutant Ninja Turtles III - Radical Rescue 09-25-14 02:17 PM |
Walkthrough Teenage Mutant Ninja Turtles 3: Radical Rescue Hello everyone, it's your host Laian, coming at you, with a new walkthrough. How are you doing today? Good? Ok. So, this time, it's the walkthrough of a Gameboy game called «Teenage Mutant Ninja Turtles 3: Radical Rescue». It's a Metroidvania game for starters, not long but quite challenging at some points. You may notice that this walkthrough is short and «soft» compared to the last ones. September was not a good month for me. Some people know why. I lost my grandpa and I had to stop doing some stuff such as that walkthrough due to the lack of motivation. But I moved on and don't worry, I'll make something more interesting next month. Hopefully nothing bad will happen. So, let's jump into this adventure without wasting any more time, shall we? CHAPTER 1: LEONARDO So, our adventure begins not so far from the entrance of the mines, with our buddy Michaelangelo. You can either jump from tree to tree like a ninja or use the casual way. Either way, you'll kill your first enemies with your nunchaku. You can also do the helicopter and land on the platforms if you press the jump button twice, which will come in handy, trust me. Once you are in the mines, this is where the map will become useful (press "select" button to open the map). If only it was an easy map to read. Yeah, compared to any other Metroidvania game you would play, the gimmick of this game is quite simple (you need to find a boss, kick its booty, grab the key and go save one of your friends... typical, isn't it?) but the map is a pain in the butt. That's why I recreated the map just for you, folks, with the useful infos (with a beautiful legend, all that made with my slave, errr I meant my good ally «Paint» ) you need to know, because I'm nice :D You'll find at the far right of the room a pizza (1). That item cannot be stacked, you can only take up to one everytime. It fully recovers your health if you die, it's a second chance, since there's no ... Read the rest of this Guide |
| Laian's Last 7 Game screenshots (911 total) (view last 250) |
|
|
| Laian's Last Game Videos (3 total) |
|
|
| Laian's Game History |
| (), (), |
| Game Boy Advance Games Laian owns (45) |
| Super Nintendo Games Laian owns (11) |
| Nintendo 64 Games Laian owns (13) |
| Nintendo NES Games Laian owns (13) |
| Game Boy Color Games Laian owns (46) |
| Sega Genesis Games Laian owns (11) |
| Game Boy Games Laian owns (9) |
| Sega Master System Games Laian owns (7) |
| Sega Game Gear Games Laian owns (1) |
| Sega CD Games Laian owns (1) |
| Site Info | Sponsor | |||
|
Vizzed.com © was created, designed, coded by & is property of:
David Auchampach All Rights Reserved 2002 - 2015 Powered By: Vizzed Board, Acmlm Board and Adeon Dev. | Affiliates: get-your-rom.com - mybiblegames.com - |












































.jpg)
















.jpg)













































.jpg)




.jpg)
