

 User Notice
 Forum Links
It only contains main story (with the good ending). The side stuff will come later (read first paragraph for more info, thanks)

Thread Information
Thread Actions


Walkthrough Exhumed
04-30-16 05:36 AM
Laian is Offline
| ID: 1266884 | 6754 Words

POSTS: 2137/2232
POST EXP: 457173
LVL EXP: 7706386
CP: 23738.9
VIZ: 3570490

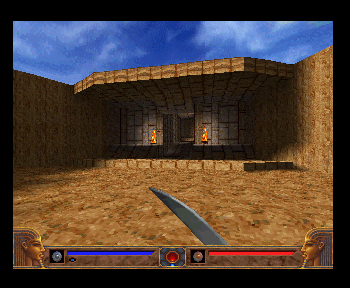
NOTE: I've been forced to do something I would have never done before: publishing the walkthrough, not at 100% though. Due to problems I've encountered with the emulator of the RGR and mine, I can only publish the main quest (with the parts of the transmitter required for the good ending) at the moment. There's a few ankhs collected as well but I'll rewrite these and the parts of the transmitter in the second part of the walkthrough, do not worry. I don't know when the second part will be added to the guide. Maybe next month with the next walkthrough or in a year or two, that will depend on one thing: the capricious emulators, yeah. I'll edit the walkthrough in due time. Now, let's start the walkthrough like it always starts: with a nice and short introduction made in Laian. cough cough Hello everyone, Laian here and proud to present the new walkthrough. Who enjoys killing aliens in Ancient Egypt? You? You too? Good, because I like doing this with badass music and that's why I played Exhumed this month, released for PSX, Saturn and PC (also known as Powerslave, which is obviously a reference to the Iron Maiden album and song). The only difference between these three versions is, well actually... I think there's more than one difference. The Saturn and the PSX are exactly the same, the PC is not with the removal of the hidden dolls and some other stuff. And of course, the PC version is called Powerslave EX as far as I recall but we're not here for a video game fact, lesson thingy, whichever you wanna call that. You're here to read the fantastic game guide right? Well then, let's go! Ancient Egypt, here we come! TOMB OF RAMSES The introduction to the game so don't expect anything dangerous. It's just a short level filled with a few scorpions to kill. You start with a machete but a pistol awaits you after going up the stairs. Grab it to open the door and kill the scorpion. You noticed that the blue bar drops down everytime you shoot with the gun. That blue bar is your ammo capacity. Don't worry, like in any other FPS, you'll find something which will refill that bar. It's symbolized by a blue orb. There are three types of orbs and the same goes to the health bar (symbolized by a red orb though): the small one, the big one and the special one. The quantity refilled by the orb depends on the size of it. The special orbs are kinda hidden sometimes, which forces you to look everywhere in order to find suspicious spots during your exploration of the level. They fully recover the health bars. Yes, I said "the health bars" and you'll see why later in the game. Except for the special orbs, the small and big ones can be dropped by enemies after they die or in the pots, statues after breaking them... Watch out for nasty enemies hidden in the pots though. Also, in each level, there's a map to find, either hidden in a pot or placed somewhere in the level. Its position is randomly generated apparently so don't expect to find in this walkthrough where to find the map. After getting your new weapon and killing your first enemy, carry on to kill two other scorpions and step on the elevator to the north to go down. Kill the next enemies, blast the wall by shooting the explosives pots and move on to the next room. Get rid of the scorpions, activate the switch to the left, carry on and open the next door by pressing the button. Step on the tile before the sarcophagus to talk to Ramses. He tells you to go to Karnak so you can get to the first sanctuary, in which you'll find the first artefact. After the discussion, go towards the camel, save your progress and travel to Karnak.
KARNAK (FIRST TIME) This level is the branching path leading to three other places, including the sanctuary you must go first. The other exits cannot be reached at the moment so you'll have to come back here more than once. For now, go in the temple. Kill the scorpions, open the door and face a new enemy: some kind of Anubis' minion. Let's call this one like that, I'm out of inspiration. Go in the hallway, kill the next enemies, open the door and kill the scorpions. Turn right to find some explosives pots. Blast them with your gun, then the ones to the right after the broken wall. Kill the scorpions, turn left, press the button to open the doors to your left and kill the enemies. Take the symbol of war (1) and the other goodies (there's a special blue orb), turn back and carry on. Open the door to the left, kill the creatures and open the next door with the symbol you just collected. Kill the scorpions, DON'T go towards the camel now, turn right instead and shoot through the opening to clear the room in which the symbol of is located. Go back, ignore the door in front of you and go left. Shoot the pots, run and jump to get to the other ledge. Interact with the fake wall to grab the symbol of time. Go back to the door you just passed by, open it with the new symbol, kill the enemy and go up. Press the button to unlock the gate, beware of the trap and collect the ankh. You now have a new health bar, symbolized by the red dot down below the health bar. The ankhs work exactly like the energy tanks from the Metroid games. Now, you can go back to the camel, save your progress and travel to the sanctuary.
KARNAK SANCTUARY (FIRST TIME) The first artefact awaits you in this level. Also, new enemy right at the beginning. Take care of them, break the pots for some goodies and open the door. Standing right before you, a new toy. Note the barrier to the left with the ankh, you'll come back here later. To the right, you can break some pots. Grab the machine gun and get ready for the upcoming assault. Two Anubis minions appear behind the wall in front of you. Kill them and carry on. Kill another minion, then two scorpions and go to the right at the branching path. Kill the scorpions, move towards the wall and collect the symbol of time. Go west now, kill the enemies and open the door with the key you just got. Kill more enemies, then go through the hallway to the left after the slope, kill the scorpions, note the door that requires another symbol to be opened and jump on the platform to get the symbol of war. Jump to the right if you need to recover a great amount of health with the special orb and go back to branching path. Open the door, kill both of the minions, then blast the pots to the north to grab the symbol of earth (2). Go back to the last locked door you saw (watch out for the new creatures that appeared on your way back to the door), unlock it with the symbol of earth and blast the pots. You opened a new path but triggered a booby trap as well. Run to the other side, kill the enemies and go down. Beware of the scorpions hidden behind the fences, leap over the one to the left, activate the switch and go back. Kill another enemy, activate another switch and go to the right. Kill the next enemies, get on the platform, turn back and carry on. After the minion, step on the elevator and get rid of the birds keeping the artefact. Pick up the sandals of Ikumptet, which increases your jumping ability. You can now jump higher and reach places you couldn't without that artefact. Turn back and jump on the ledge to instantly head back to the Tomb of Ramses. King Ramses II will congratulate you and will tell you to head to the next sanctuary, where the next artefact is hidden. Your health will be fully recovered as well. Time to head back to Karnak.
KARNAK (SECOND TIME) Head back to the wide open room and open the door to the left. Kill the enemies, open the door and carry on. With the sandals, you can reach the upper platforms and get to the next area. Ignore the pool to your right, you need a specific artefact to swim underwater. Kill the enemies and interact with the camel to travel to Sobek Pass.
SOBEK PASS You heard some kind of "bip" repeating over and over again on the world map. That means there's a part of the transmitter to find in this level. Also, new enemy, yeah. Break the pots, bump into the wall to the right and open the door. Kill the enemies, go right, kill the scorpions and go right. Blast the pots on the platform and go grab the symbol of war. The other path leads to two locked doors and booby traps so you will go back there later. Head back to the room after the door and go left. Blast the pots to reveal a secret with a special blue orb and move on. Another secret can be revealed a bit farther if you blast the pots. It contains a special red orb. Carry on, kill the enemies, don't open the door before you on the bridge, go down, activate the switch and reach the other ledge with the floating platform. Activate the switch to stop the trap and go grab the first part of the transmitter (3). Go back on the bridge, open the door, kill the scorpion then jump on the ledge to the right and go get the symbol of time. Go down, kill the scorpions if you want to, grab the special blue orb and head back to the wide open area with the booby traps. Open the door with the new symbol. Open the door, kill the enemies, then open the next door and grab the symbol of earth without stepping on the pressure plate (otherwise you will trigger the fireballs traps). Go back and open the next door to travel to the next stage.
SOBEK MOUNTAIN SHRINE (FIRST TIME) Here is where the second artefact is hidden. Walk in the hallway to the entrance of the shrine, kill the creatures, blast the statues to get some goodies and open the door. Kill the next creatures, open the door, clean the room up, then get rid of the statues to see the artefact. Unfortunately, you need to do all the way to the door behind it. It wouldn't be amusing after all. Go to the left first, get rid of the creatures, ignore the force field at the far left of the corridor, blast the pots to the right and carry on. Kill the creatures, grab the symbol of war and head back to the front hall. Go east, kill the enemies, blast the pots and kill the next enemies. Unlock the door, step on the elevator, open the door, kill the enemies and go forth. There's another enemy to get rid of. Step on the elevator, then on the pressure plate, collect the special orb and go through the opening to the right. Step on the platform, kill the bug and activate the switch to open the door below. Go there, kill the Anubis minions, then blast the pots and jump from platform to platform to reach the other side. Destroy the pots to blast the wall, clear the path and go left. Grab the symbol of earth at the end of the line, head back to the previous room and open the door with the symbol. The symbol of time awaits you at the end of the hallway. Time to head back to the door with the symbol of time carved on it. Grab the Sobek mask, the second artefact and dive into the water down below. Touch the pyramid to head back to the Tomb of Ramses. As always, King Ramses II will be proud of you for returning the second artefact and you'll be fully healed. Let's go to Karnak and get a few things before going to the next area.
KARNAK (THIRD TIME) It's the last time you will go back there. Go back to the place leading to the last level, go right and dive underwater. Activate the switch, carry on and kill the enemies once you're back to the surface. Grab the ankh, open the door, clean the room and collect the symbol of power in the next room. Head back to the wide open room, go up the stairs to the right, kill the scorpions, activate the switch to open the hatch to the left and find a special red orb kept by two scorpions and open the locked door. Dodge the fireballs, kill the enemies, make the gap and carry on. Dive into the pool and swim to reach the surface. Be careful though, there are nasty fishes underwater this time so you better swim fast and avoid them. Kill the last enemies and travel to the next stage.
AMUN MINES (FIRST TIME) Kill the first enemy you're going to encounter, then break the barrels for some goodies and go down with the elevator. Kill the enemies, get on the platform, grab the special blue orb in the opening and get on the ledge afterwards. Open the door, kill the enemies, pick up the symbol of time (beware of the hole of sudden death) and go back to the branching path. Kill the scorpions, then the minion and open the door to the right. Go to the west, then straight forward and grab the symbol of earth. Unlock the other door, clean the room and grab your new weapon: the Amun bomb. With that weapon, the weakest walls will be gone.Go to the east, kill the enemies, and blast the wall to the right between the barrels to reveal a secret with a part of the transmitter hidden inside. That part of the map can be shown if you have the map and you use it. You might have noticed that suspicious wall at the branching path earlier: go blast it. Step on the platform and activate all the switches around you to disable the trap, make the platform go up and open the door. Kill the next enemies, dive into the pool, activate the switch at the end of the path, go back in the pool and step on the pressure plate to activate the mechanism. Go back to the surface, go up, open the door and kill the enemies. Go right, kill more enemies and get the symbol of earth. Go forth, make the gap, open the door and kill the enemies. Use the platforms to make your progress and blast the walls with your new toy. Turn left at the end of the line, throw a bomb at the wall and touch the camel to travel to the next area.
SET PALACE Clear the area and find the switch to open the entrance of the palace. Kill the new enemy and carry on. You can go down to get lot of goodies but it's supposed to be the way back to the upper part of the level if you fall down at some point. Note the symbol of power to the right and carry on. Avoid the trap, blast the wall, kill the enemy, then go down to activate the switch and open the door. Go get the symbol of power and go left. Open the door to the right, kill the horde of scorpion and go right. Grab the symbol of time, turn back and get rid of the enemies. Note the part of the transmitter, go open the door with the symbol of time carved on it, activate the switch to the left and make the gap. Turn right and use the platform's to reach the next switch. Activate it, go back to the beginning of the parkour and move on. Activate the next switch, then the other one, ignore the camel and go down. Find the elevator, blast the wall behind you and go get the part of the transmitter. Now go back to the camel to travel to the next area.
SET ARENA You think "boss fight upcoming"? You're damn right, folks. Though, before heading to the arena, blast the pillars to get the special blue and the red orb. Now time to face that tough enemy King Ramses II mentioned. That guy is not that hard. Equip the machine gun, shoot your opponent and sidestep when he leaps on you. Keep your distance and repeat the method until he dies. Use the bombs if you're out of ammo for the machine gun and watch out for his secret attack when he's nearly dead. Grab the third artefact: the shawl of Isis. It allows you to float down when you fall to land easily without dying, by pressing and holding the jump button. Use that new ability to glide away and reach the pyramid in order to head back to the Tomb of Ramses.
AMUN MINES (SECOND TIME) In order to go to the next area, you must head to the hole of sudden death. Now that you have the new artefact you can land easily at the bottom of the pit without breaking your legs. Kill the scorpions and touch the camel to travel to the next area.
CAVERN OF PERIL Kill the bug right at the beginning, then the other enemies and carry on. Blast the pots to find a new weapon: the flame thrower. Destroy the pots, then kill the enemies and float down into the pit. Kill the creatures, note the door, go through the hallway to the right and kill the creatures. Get on the platform, kill the enemies and step on the platform. Open the door, activate the switch and go back to the room with the door. Go through the other hallway, kill the creatures, note the locked door at the other side of the gap and go down with the floating platforms. Land on the platform below, kill the bug and glide away to the floating platform. Kill the creature up above, step on the elevator and activate the switch. Time to head back to the door. Open it, kill the creatures and go get the symbol of power. Go back to the locked door, unlock it with the symbol and travel to the next stage with the camel.
NILE GORGE Kill the creatures and float down to reach the shore. Step on the elevator, go left, kill the creatures and dive down into the pool to the right. Activate the switch to the right, go back up and go get the symbol of time. Head back to the branching path and go east. Kill the creatures, open the door, kill the bugs and go down. Kill the fishes, then into the hole and blast the suspicious wall. You'll find a secret area with a part of the transmitter. Head back to the surface, glide to the moving platform to the right and blast the pot to activate the switch. Go back underwater, into the hole then through the corridor and kill the fishes on your way to the surface. Kill the bugs and the fishes, then pick up the symbol of power hidden behind a column underwater (4). Head back to area with the hole underwater, get back on the elevator, turn back and fly to the locked door. Get rid of the creature to the left, note the columns and carry on. Turn left before opening the door and blast the pots. Open the door, kill the creature and grab the special blue orb to the right. Also, note the symbol of war behind the fence. There's a special red orb underwater kept by some nasty fishes. Otherwise, glide to the ledge to the right to collect the symbol of war. Head back to the branching path at the beginning of the stage and open the door with the symbol of war carved on it. Kill the creature, activate the switch and float down into the hole (beware of the traps). There's a lot of traps underground and a few creatures to kill. Ignore the door to the right and go activate the switch. It will lower one of the pillars on the surface and open the door you saw earlier. Go there, kill the enemies and get on the elevator. Open the door. You're back to the shore. Go back to the bridge after the door with the symbol of war and fly to the platform then to the other one to the left. Glide to get the special red orb, then land on the ledge below and go activate the switches to the left and to the right. Go back up by the pool and go left. Avoid the traps, step on the pressure plate and go back to the place where you found the symbol of time. Instead of activating the switch, dive into the pool and grab the symbol of earth. Now open the giant door above, fly to the ledge and travel to the next area.
THOTH TREASURE RELIQUARY (FIRST TIME) Open the door, kill the scorpions and open the door in the middle room. Activate the switch, go back and go left. Kill the scorpions, open the door and face a new enemy. This annoying enemy likes to vanish and teleport himself behind after a few hits you so you better stay alert. Kill the scorpions, note the door with the symbol of power carved on it, activate the switch and grab the symbol of time in the alcove behind you. Go back to the previous room, open the door with the symbol of time carved on it and carry on. Note the symbol of earth behind the fence and open the door. Clean the room up, open the door and step on the elevator. Kill the scorpions, blast the pots and carry on. Grab the symbol of power, go back to the said locked door, kill the enemies and go through the door to the north. Another force field... guess we will have to go here as well later in the game. Kill the creatures, blast the ground with a bomb and float down to get the symbol of earth. Go back to the door with that symbol, open it and grab the new artefact: the protective anklets. You can now walk on the green goo and the lava without dying horribly. Though you will lose health while walking on these surfaces. Touch the pyramid to go back to the Tomb of Ramses.
KARNAK SANCTUARY (SECOND TIME) Now that you can walk on lava and green goo, you can explore the part of Karnak Sanctuary you couldn't go earlier. It's behind the door with the symbol of time. Grab the goodies and touch the camel to open the path leading to Heket Marsh.
HEKET MARSH The pool at the beginning leads to the part of the transmitter. You can hear a signal but a sealed door will block the way. For now, kill the scorpions, blow up the grate to reveal a full ammo orb and go west. Kill the enemies, carry on until you face a locked door with the symbol of war carved on it and fall down to get the symbol of time behind the doors. Go back to the beginning and go through the locked door with the symbol of time carved on it. Grab the cobra staff, destroy the enemies, note the force field with the part of the transmitter. You'll find a switch which opens the sealed door in order to go back to the beginning. Look up before the door to find an alcove in which the symbol of war is hidden. Go back to the locked door to the west, get rid of the enemies, open the door to the left, kill the two creatures keeping the switch and activate it. Go up, kill the creatures and grab the symbol of power. Go back to the beginning, go east, clean the room and blow up the suspicious wall. Kill another enemy, open the door, kill the enemies and activate both of the switches. Carry on and get rid of the enemies you'll encounter until you reach the last symbol. There's also a full ammo orb to your left before the door leading to the symbol of earth. Grab the symbol of earth and go back where you found the cobra staff. Open the door, kill the scorpion and touch the camel to travel to the next area.
SUNKEN PALACE OF KHNUM Sunken, which means most of the level takes place underwater. And obviously nasty fishes. Oh, and bombs you can shoot to make them blow up. Dive into the pool, kill the fishes and go east. Note the locked door and open the one to the left. Kill the fishes with the cobra staff and go back to the surface. Keep in mind the location of the symbol of war to your right and go back underwater. Note the symbol of power standing on the unreachable platform, go up, grab the symbol of time and carry on. Kill the fishes and go back to the surface. Dive and carry on to leap back to the entrance. Open the door right in front of you, blast the bombs and go through the new opening. Go up to take some breath and go back down. Kill the fishes and the bombs and pick up the symbol of earth. Head back to the beginning of the level, go to the east and open the door to the right. Make your way to the door, pick up the symbol of war and head back to the locked door to the left, before you got the symbol of earth. Open the door, go through the hole, grab the last symbol and go quickly to the right before the doors close. Kill the fish, go to the surface and open the door. Pick up the full ammo orb and go back to the east. Since you triggered the trap, the sealed doors there are open and you can collect a full health orb. Now, head back to the door at the beginning, open it and touch the camel to end the level.
DESERTED SLAVE CAMP Get rid of the enemies, open the door to the left, kill more enemies and carry on. Step on the first pressure plate to open the sealed door, kill the creature and pick up the full ammo orb. Carry on, step on the next pressure plate, kill the creatures and grab the symbol of power. Head back to the beginning, enter the column in the middle and go open the door after killing the scorpions. Throw a bomb to kill the scorpions down below, activate the switch, moonwalk to the opening behind you, re-open the door, activate the switch behind you and go back up to go through the door to the right. Collect the symbol of time (5), step on the pressure plate, kill the two enemies, activate the switch and go back to the beginning. Open the door with the symbol of time carved on it, kill the scorpions, open the door and kill the enemies. Blast the wall, go in the passageway and make your way to the interior of the building. Go up, open the door, kill the bugs and jump to the other side. Turn left to notice a suspicious part of the wall, blast it, turn left, blast the pots and fly to the ledge. Do the same with the other ledge and go get the part of the transmitter. Head back to the ledge and go through the other passageway to the right. Open the door before you, press the button and go back down. Now make your way to the pressure plate (there's a full health and a full ammo orb), step on it and go right. Glide to the platform behind the wall, kill the scorpions, turn back, activate the switch, then jump to your right to activate the other one and go back where you fought the scorpions. Go get the symbol of earth, head back to the beginning and open the door. Go to the pressure plate, then back to activate a switch to the east and go back to pressure plate without stepping on it. Go get the symbol of war, turn back to find a full ammo and a full health orb, go open the door after the room of deathtraps and glide to the camel to end the level.
SELKIS PATH Kill the first enemies, activate the switch to the right, then the one to the left and go down. Kill the enemies, fly to the ledge to the north, kill the creatures and grab the symbol of power. Go back to the previous room, fly to the ledge in front of you and go open the door. Go on the floating platform after killing the enemy and grab the symbol of war. Now, head back to the previous room, go left and open the door. Clean the room, open the door in front of you, go on the platform and activate the switch to the left. Go quickly to the other ledge, kill the enemy and go on the other ledge after pressing the button. Ignore the switch, kill the creature, go up, step on the pressure plate and go get the symbol of earth. Head back to the switch you just passed by, activate it and go to the other ledge. Kill the enemies, open the door, use the green ledges to make your way to the end of the level. Two creatures keep the camel, feel free to choose if you want to kill them or leave them alone.
SELKIS BURROW Boss fight incoming folks! Open the door, climb down the stairs, open the door, go behind the painting of a pharaoh and blast the wall to get a full health orb. Open the door, go down the hole slowly and look for the boss. Yep, it's a giant scorpion man throwing those deadly red missiles at you. Avoid his shots and use your weapons to kill him. A horde of little scorpions will appear when your opponent will be dead. And more are coming from the alcove. Go back to the giant room, kill the scorpions and grab the new artefact: the Kilmaat scepter. It removes the force fields you saw in some of the levels. Stand before the one in front of you and go back to the Tomb of Ramses.
SOBEK MOUNTAIN SHRINE (SECOND TIME) Remember the barrier in the western part of the level, kept by a few scorpions hidden some explosive pots and three creatures? Go there, kill the monster and touch the camel to travel to the magma fields.
MAGMA FIELDS Kill the creatures, go down, kill the new type of creature and activate the switch to open the alcove to the left. Collect the ring of Ra (a new weapon that throws little spiked balls at your enemies), destroy the enemies and go activate the switch. Go back up, carry on jump on the platform to the left then the one to the right and follow the river of lava to get a part of the transmitter. Now, head back to the bridge, activate the switch and carry on. Kill the enemies, dive into the hole and float all the way to the depths of the volcano. Kill the enemies, grab the orbs to the left and to the right and carry on. Kill the scorpions and keep moving forward to reach the end of the level.
HORUS PEAK Use the platforms to get to the door, open it, kill the creatures, activate the switch to the left, then the one to the right and finally the one behind the gate to the left. Go up, run to the other side of the crumbling bridge and jump on the platform. Carry on, step on the pressure plate to trigger the trap, activate the switch in front of you, turn back and use the floating platform to reach the other switch, turn back, fall down and activate the last switch to disable the remaining traps. Now, you can go all the way up easily. Do not step on the pressure plate or the trap will be activated once again and you'll have to activate the three switches. Open the door, get on the roof and go in the peak to get the last artefact: the Horus feather. It allows you to levitate in the air by pressing and holding the jump button while jumping. Use your new ability to cross the gap and go back to the Tomb of Ramses.
THOTH TREASURE RELIQUARY (SECOND TIME) Remember where you blew up the ground in order to get the symbol of earth? Carry on, fly to the ledge and blast the part of the wall to make a new path. Glide to the camel to go back to the world map and unlock the next stage.
CANYONS OF CHAOS There's a new enemy in this level but it only appears on the lava. Right at the beginning, you have to deal with two creatures. Also, you can hear the "bip" of the transmitter. Go down, fly down to the locked door and blast the pots. Levitate to the platform, then to the other one, turn back and jump on the platform. Equip the bombs, levitate to the fake wall, blast it and go up to find a part of the transmitter (which should be at this point of the game the next to last part of the transmitter necessary to get the good ending). Now, levitate to get on the platform to the right, kill the creature and grab the symbol of earth. Head back to the locked door, open it, grab the symbol of power and the goodies in the room. Head back where you exactly landed to get to this part of the map, levitate to the opening at the far left and kill the creatures. Kill more creatures and fly to the ledge behind the wall you're facing to get a new weapon: the sacred manacle. The more you hold the fire button, the more damages you deal. This is the most powerful weapon of the game and my favorite toy to play with in this game. From here, levitate to head back to the beginning and then keep flying to the right and to the far left to reach the door with the symbol of time carved on it. Destroy the enemies, open the door to the left, press the button and go get the symbol of time. Head back to the door with the symbol of time carved on it, open it, destroy the enemies and go left. Go through the passageway underneath the platform, kill the creatures and go get the symbol of war. Kill the creature, leave the room and levitate to the lower part of the river. Reach the other ledge with the power of levitation, turn back and levitate to the door. Open it, get rid of the last enemies and touch the camel to go to the next area.
KILMAAT COLONY Destroy the wall to the right, kill the bugs, go up and blast the wall at the end of the hallway. Grab the symbol of power down below, go back to the beginning, kill the two creatures and open the door. Clean the enemies, go left, step on the platform and grab the symbol of time in the alcove to the right. Kill the enemy, go up with the elevator, kill the creature and go back to the corridor by touching the wall to the left. Go left, go down into the room, kill the creature and blow up the upper part of the wall to the left. Go behind the column, open the door, levitate to the switch to disable the trap and go up. Press the pressure plate to open the door, go back to the door with the symbol of time and step on the platform to its left then the one behind you. Open the door to the left. Kill the creatures with a bomb, grab the full health orb, go down and grab the symbol of war and the full ammo orb. Head back up, jump on the elevator, cross the pool of lava and go down. Kill the enemies, open the door and kill the last enemies before exiting the level. Be very careful with the traps of instant death (ah, those developers ^^ ). Time go to the last level, or get the last goodies. Especially the parts of the transmitter, necessary if you want the good ending. Skip to the part “Kilmaat Haunt” if you want to carry on.
THE QUEST FOR THE GOODIES The goodies hunt, if you want to go to a full exploration and goodies run. First on the list: the ankh in Karnak sanctuary. Where you found the galting gun, turn left and get the ankh. Now, time to head to Seket marsh in order to get the part of the transmitter behind the force field, behind the door with the symbol of time carved on it. Need a full health and full ammo orbs? There's a force field in Thoth treasure reliquary, next to an elevator. It leads to these bonus. There will be more added to the second part of the walkthrough. For now, you only have that short part revealing the last part of the transmitter, necessary to get the good ending.
KILMAAT HAUNT Open the door, then enter the sphinx and grab the full ammo orb and the full health orb before opening the door. Open the door in front of you, go down and step on the pressure plates to unlock the way to the chamber. Step into the teleporter to go to the arena.
KILMAAT ARENA Open the door and go forth to face the boss. It's a floating platform so you better watch out. You can fall easily if you are careless. This boss has two forms. Use the sacred manacle to kill the first form. He only throws projectiles at you that you can dodge with no problem. When he gets mad, he will try to push you out of the ring. Stand to the center and let him hit you. Then, strike back until he dies, as he summons some minions to help him in this fight. The second form is tricky. It's a snake. His weak spot is like the boss form The Legend of Zelda: A Link to the Past. You can only hit the head if the other parts of his body are dead. Use the cobra staff, let him hit you and strike back with some homing shots. One by one, the spiky balls will disappear and the head will be weaken so you can finish him off. This ends the boss fight but it's not over. Open the door and go collect the mummy of King Ramses to head back to the tomb of Ramses.
TOMB OF RAMSES This is the final line to the end of the game. After hearing King Ramses' speech, you have to get the hell out of here. Walk carefully, as many explosions and fireballs will appear during your escape. Jump on the chopper (it shouldn't be here if you didn't collect all the parts and then you'll get the bad ending) and watch the final cutscene. Congratulations, you beat Exhumed.
That's all folks. Hope you enjoyed that first part of the walkthrough. The second part will come later, don't know when though). I see you in the next walkthrough. Bye and take care EDIT: So I seem to have forgotten one thing: I can't split the walkthrough. Oh well, it's fine. I'll edit the walkthrough then when the side stuff is ready to be served NOTE: I've been forced to do something I would have never done before: publishing the walkthrough, not at 100% though. Due to problems I've encountered with the emulator of the RGR and mine, I can only publish the main quest (with the parts of the transmitter required for the good ending) at the moment. There's a few ankhs collected as well but I'll rewrite these and the parts of the transmitter in the second part of the walkthrough, do not worry. I don't know when the second part will be added to the guide. Maybe next month with the next walkthrough or in a year or two, that will depend on one thing: the capricious emulators, yeah. I'll edit the walkthrough in due time. Now, let's start the walkthrough like it always starts: with a nice and short introduction made in Laian. cough cough Hello everyone, Laian here and proud to present the new walkthrough. Who enjoys killing aliens in Ancient Egypt? You? You too? Good, because I like doing this with badass music and that's why I played Exhumed this month, released for PSX, Saturn and PC (also known as Powerslave, which is obviously a reference to the Iron Maiden album and song). The only difference between these three versions is, well actually... I think there's more than one difference. The Saturn and the PSX are exactly the same, the PC is not with the removal of the hidden dolls and some other stuff. And of course, the PC version is called Powerslave EX as far as I recall but we're not here for a video game fact, lesson thingy, whichever you wanna call that. You're here to read the fantastic game guide right? Well then, let's go! Ancient Egypt, here we come! TOMB OF RAMSES The introduction to the game so don't expect anything dangerous. It's just a short level filled with a few scorpions to kill. You start with a machete but a pistol awaits you after going up the stairs. Grab it to open the door and kill the scorpion. You noticed that the blue bar drops down everytime you shoot with the gun. That blue bar is your ammo capacity. Don't worry, like in any other FPS, you'll find something which will refill that bar. It's symbolized by a blue orb. There are three types of orbs and the same goes to the health bar (symbolized by a red orb though): the small one, the big one and the special one. The quantity refilled by the orb depends on the size of it. The special orbs are kinda hidden sometimes, which forces you to look everywhere in order to find suspicious spots during your exploration of the level. They fully recover the health bars. Yes, I said "the health bars" and you'll see why later in the game. Except for the special orbs, the small and big ones can be dropped by enemies after they die or in the pots, statues after breaking them... Watch out for nasty enemies hidden in the pots though. Also, in each level, there's a map to find, either hidden in a pot or placed somewhere in the level. Its position is randomly generated apparently so don't expect to find in this walkthrough where to find the map. After getting your new weapon and killing your first enemy, carry on to kill two other scorpions and step on the elevator to the north to go down. Kill the next enemies, blast the wall by shooting the explosives pots and move on to the next room. Get rid of the scorpions, activate the switch to the left, carry on and open the next door by pressing the button. Step on the tile before the sarcophagus to talk to Ramses. He tells you to go to Karnak so you can get to the first sanctuary, in which you'll find the first artefact. After the discussion, go towards the camel, save your progress and travel to Karnak.
KARNAK (FIRST TIME) This level is the branching path leading to three other places, including the sanctuary you must go first. The other exits cannot be reached at the moment so you'll have to come back here more than once. For now, go in the temple. Kill the scorpions, open the door and face a new enemy: some kind of Anubis' minion. Let's call this one like that, I'm out of inspiration. Go in the hallway, kill the next enemies, open the door and kill the scorpions. Turn right to find some explosives pots. Blast them with your gun, then the ones to the right after the broken wall. Kill the scorpions, turn left, press the button to open the doors to your left and kill the enemies. Take the symbol of war (1) and the other goodies (there's a special blue orb), turn back and carry on. Open the door to the left, kill the creatures and open the next door with the symbol you just collected. Kill the scorpions, DON'T go towards the camel now, turn right instead and shoot through the opening to clear the room in which the symbol of is located. Go back, ignore the door in front of you and go left. Shoot the pots, run and jump to get to the other ledge. Interact with the fake wall to grab the symbol of time. Go back to the door you just passed by, open it with the new symbol, kill the enemy and go up. Press the button to unlock the gate, beware of the trap and collect the ankh. You now have a new health bar, symbolized by the red dot down below the health bar. The ankhs work exactly like the energy tanks from the Metroid games. Now, you can go back to the camel, save your progress and travel to the sanctuary.
KARNAK SANCTUARY (FIRST TIME) The first artefact awaits you in this level. Also, new enemy right at the beginning. Take care of them, break the pots for some goodies and open the door. Standing right before you, a new toy. Note the barrier to the left with the ankh, you'll come back here later. To the right, you can break some pots. Grab the machine gun and get ready for the upcoming assault. Two Anubis minions appear behind the wall in front of you. Kill them and carry on. Kill another minion, then two scorpions and go to the right at the branching path. Kill the scorpions, move towards the wall and collect the symbol of time. Go west now, kill the enemies and open the door with the key you just got. Kill more enemies, then go through the hallway to the left after the slope, kill the scorpions, note the door that requires another symbol to be opened and jump on the platform to get the symbol of war. Jump to the right if you need to recover a great amount of health with the special orb and go back to branching path. Open the door, kill both of the minions, then blast the pots to the north to grab the symbol of earth (2). Go back to the last locked door you saw (watch out for the new creatures that appeared on your way back to the door), unlock it with the symbol of earth and blast the pots. You opened a new path but triggered a booby trap as well. Run to the other side, kill the enemies and go down. Beware of the scorpions hidden behind the fences, leap over the one to the left, activate the switch and go back. Kill another enemy, activate another switch and go to the right. Kill the next enemies, get on the platform, turn back and carry on. After the minion, step on the elevator and get rid of the birds keeping the artefact. Pick up the sandals of Ikumptet, which increases your jumping ability. You can now jump higher and reach places you couldn't without that artefact. Turn back and jump on the ledge to instantly head back to the Tomb of Ramses. King Ramses II will congratulate you and will tell you to head to the next sanctuary, where the next artefact is hidden. Your health will be fully recovered as well. Time to head back to Karnak.
KARNAK (SECOND TIME) Head back to the wide open room and open the door to the left. Kill the enemies, open the door and carry on. With the sandals, you can reach the upper platforms and get to the next area. Ignore the pool to your right, you need a specific artefact to swim underwater. Kill the enemies and interact with the camel to travel to Sobek Pass.
SOBEK PASS You heard some kind of "bip" repeating over and over again on the world map. That means there's a part of the transmitter to find in this level. Also, new enemy, yeah. Break the pots, bump into the wall to the right and open the door. Kill the enemies, go right, kill the scorpions and go right. Blast the pots on the platform and go grab the symbol of war. The other path leads to two locked doors and booby traps so you will go back there later. Head back to the room after the door and go left. Blast the pots to reveal a secret with a special blue orb and move on. Another secret can be revealed a bit farther if you blast the pots. It contains a special red orb. Carry on, kill the enemies, don't open the door before you on the bridge, go down, activate the switch and reach the other ledge with the floating platform. Activate the switch to stop the trap and go grab the first part of the transmitter (3). Go back on the bridge, open the door, kill the scorpion then jump on the ledge to the right and go get the symbol of time. Go down, kill the scorpions if you want to, grab the special blue orb and head back to the wide open area with the booby traps. Open the door with the new symbol. Open the door, kill the enemies, then open the next door and grab the symbol of earth without stepping on the pressure plate (otherwise you will trigger the fireballs traps). Go back and open the next door to travel to the next stage.
SOBEK MOUNTAIN SHRINE (FIRST TIME) Here is where the second artefact is hidden. Walk in the hallway to the entrance of the shrine, kill the creatures, blast the statues to get some goodies and open the door. Kill the next creatures, open the door, clean the room up, then get rid of the statues to see the artefact. Unfortunately, you need to do all the way to the door behind it. It wouldn't be amusing after all. Go to the left first, get rid of the creatures, ignore the force field at the far left of the corridor, blast the pots to the right and carry on. Kill the creatures, grab the symbol of war and head back to the front hall. Go east, kill the enemies, blast the pots and kill the next enemies. Unlock the door, step on the elevator, open the door, kill the enemies and go forth. There's another enemy to get rid of. Step on the elevator, then on the pressure plate, collect the special orb and go through the opening to the right. Step on the platform, kill the bug and activate the switch to open the door below. Go there, kill the Anubis minions, then blast the pots and jump from platform to platform to reach the other side. Destroy the pots to blast the wall, clear the path and go left. Grab the symbol of earth at the end of the line, head back to the previous room and open the door with the symbol. The symbol of time awaits you at the end of the hallway. Time to head back to the door with the symbol of time carved on it. Grab the Sobek mask, the second artefact and dive into the water down below. Touch the pyramid to head back to the Tomb of Ramses. As always, King Ramses II will be proud of you for returning the second artefact and you'll be fully healed. Let's go to Karnak and get a few things before going to the next area.
KARNAK (THIRD TIME) It's the last time you will go back there. Go back to the place leading to the last level, go right and dive underwater. Activate the switch, carry on and kill the enemies once you're back to the surface. Grab the ankh, open the door, clean the room and collect the symbol of power in the next room. Head back to the wide open room, go up the stairs to the right, kill the scorpions, activate the switch to open the hatch to the left and find a special red orb kept by two scorpions and open the locked door. Dodge the fireballs, kill the enemies, make the gap and carry on. Dive into the pool and swim to reach the surface. Be careful though, there are nasty fishes underwater this time so you better swim fast and avoid them. Kill the last enemies and travel to the next stage.
AMUN MINES (FIRST TIME) Kill the first enemy you're going to encounter, then break the barrels for some goodies and go down with the elevator. Kill the enemies, get on the platform, grab the special blue orb in the opening and get on the ledge afterwards. Open the door, kill the enemies, pick up the symbol of time (beware of the hole of sudden death) and go back to the branching path. Kill the scorpions, then the minion and open the door to the right. Go to the west, then straight forward and grab the symbol of earth. Unlock the other door, clean the room and grab your new weapon: the Amun bomb. With that weapon, the weakest walls will be gone.Go to the east, kill the enemies, and blast the wall to the right between the barrels to reveal a secret with a part of the transmitter hidden inside. That part of the map can be shown if you have the map and you use it. You might have noticed that suspicious wall at the branching path earlier: go blast it. Step on the platform and activate all the switches around you to disable the trap, make the platform go up and open the door. Kill the next enemies, dive into the pool, activate the switch at the end of the path, go back in the pool and step on the pressure plate to activate the mechanism. Go back to the surface, go up, open the door and kill the enemies. Go right, kill more enemies and get the symbol of earth. Go forth, make the gap, open the door and kill the enemies. Use the platforms to make your progress and blast the walls with your new toy. Turn left at the end of the line, throw a bomb at the wall and touch the camel to travel to the next area.
SET PALACE Clear the area and find the switch to open the entrance of the palace. Kill the new enemy and carry on. You can go down to get lot of goodies but it's supposed to be the way back to the upper part of the level if you fall down at some point. Note the symbol of power to the right and carry on. Avoid the trap, blast the wall, kill the enemy, then go down to activate the switch and open the door. Go get the symbol of power and go left. Open the door to the right, kill the horde of scorpion and go right. Grab the symbol of time, turn back and get rid of the enemies. Note the part of the transmitter, go open the door with the symbol of time carved on it, activate the switch to the left and make the gap. Turn right and use the platform's to reach the next switch. Activate it, go back to the beginning of the parkour and move on. Activate the next switch, then the other one, ignore the camel and go down. Find the elevator, blast the wall behind you and go get the part of the transmitter. Now go back to the camel to travel to the next area.
SET ARENA You think "boss fight upcoming"? You're damn right, folks. Though, before heading to the arena, blast the pillars to get the special blue and the red orb. Now time to face that tough enemy King Ramses II mentioned. That guy is not that hard. Equip the machine gun, shoot your opponent and sidestep when he leaps on you. Keep your distance and repeat the method until he dies. Use the bombs if you're out of ammo for the machine gun and watch out for his secret attack when he's nearly dead. Grab the third artefact: the shawl of Isis. It allows you to float down when you fall to land easily without dying, by pressing and holding the jump button. Use that new ability to glide away and reach the pyramid in order to head back to the Tomb of Ramses.
AMUN MINES (SECOND TIME) In order to go to the next area, you must head to the hole of sudden death. Now that you have the new artefact you can land easily at the bottom of the pit without breaking your legs. Kill the scorpions and touch the camel to travel to the next area.
CAVERN OF PERIL Kill the bug right at the beginning, then the other enemies and carry on. Blast the pots to find a new weapon: the flame thrower. Destroy the pots, then kill the enemies and float down into the pit. Kill the creatures, note the door, go through the hallway to the right and kill the creatures. Get on the platform, kill the enemies and step on the platform. Open the door, activate the switch and go back to the room with the door. Go through the other hallway, kill the creatures, note the locked door at the other side of the gap and go down with the floating platforms. Land on the platform below, kill the bug and glide away to the floating platform. Kill the creature up above, step on the elevator and activate the switch. Time to head back to the door. Open it, kill the creatures and go get the symbol of power. Go back to the locked door, unlock it with the symbol and travel to the next stage with the camel.
NILE GORGE Kill the creatures and float down to reach the shore. Step on the elevator, go left, kill the creatures and dive down into the pool to the right. Activate the switch to the right, go back up and go get the symbol of time. Head back to the branching path and go east. Kill the creatures, open the door, kill the bugs and go down. Kill the fishes, then into the hole and blast the suspicious wall. You'll find a secret area with a part of the transmitter. Head back to the surface, glide to the moving platform to the right and blast the pot to activate the switch. Go back underwater, into the hole then through the corridor and kill the fishes on your way to the surface. Kill the bugs and the fishes, then pick up the symbol of power hidden behind a column underwater (4). Head back to area with the hole underwater, get back on the elevator, turn back and fly to the locked door. Get rid of the creature to the left, note the columns and carry on. Turn left before opening the door and blast the pots. Open the door, kill the creature and grab the special blue orb to the right. Also, note the symbol of war behind the fence. There's a special red orb underwater kept by some nasty fishes. Otherwise, glide to the ledge to the right to collect the symbol of war. Head back to the branching path at the beginning of the stage and open the door with the symbol of war carved on it. Kill the creature, activate the switch and float down into the hole (beware of the traps). There's a lot of traps underground and a few creatures to kill. Ignore the door to the right and go activate the switch. It will lower one of the pillars on the surface and open the door you saw earlier. Go there, kill the enemies and get on the elevator. Open the door. You're back to the shore. Go back to the bridge after the door with the symbol of war and fly to the platform then to the other one to the left. Glide to get the special red orb, then land on the ledge below and go activate the switches to the left and to the right. Go back up by the pool and go left. Avoid the traps, step on the pressure plate and go back to the place where you found the symbol of time. Instead of activating the switch, dive into the pool and grab the symbol of earth. Now open the giant door above, fly to the ledge and travel to the next area.
THOTH TREASURE RELIQUARY (FIRST TIME) Open the door, kill the scorpions and open the door in the middle room. Activate the switch, go back and go left. Kill the scorpions, open the door and face a new enemy. This annoying enemy likes to vanish and teleport himself behind after a few hits you so you better stay alert. Kill the scorpions, note the door with the symbol of power carved on it, activate the switch and grab the symbol of time in the alcove behind you. Go back to the previous room, open the door with the symbol of time carved on it and carry on. Note the symbol of earth behind the fence and open the door. Clean the room up, open the door and step on the elevator. Kill the scorpions, blast the pots and carry on. Grab the symbol of power, go back to the said locked door, kill the enemies and go through the door to the north. Another force field... guess we will have to go here as well later in the game. Kill the creatures, blast the ground with a bomb and float down to get the symbol of earth. Go back to the door with that symbol, open it and grab the new artefact: the protective anklets. You can now walk on the green goo and the lava without dying horribly. Though you will lose health while walking on these surfaces. Touch the pyramid to go back to the Tomb of Ramses.
KARNAK SANCTUARY (SECOND TIME) Now that you can walk on lava and green goo, you can explore the part of Karnak Sanctuary you couldn't go earlier. It's behind the door with the symbol of time. Grab the goodies and touch the camel to open the path leading to Heket Marsh.
HEKET MARSH The pool at the beginning leads to the part of the transmitter. You can hear a signal but a sealed door will block the way. For now, kill the scorpions, blow up the grate to reveal a full ammo orb and go west. Kill the enemies, carry on until you face a locked door with the symbol of war carved on it and fall down to get the symbol of time behind the doors. Go back to the beginning and go through the locked door with the symbol of time carved on it. Grab the cobra staff, destroy the enemies, note the force field with the part of the transmitter. You'll find a switch which opens the sealed door in order to go back to the beginning. Look up before the door to find an alcove in which the symbol of war is hidden. Go back to the locked door to the west, get rid of the enemies, open the door to the left, kill the two creatures keeping the switch and activate it. Go up, kill the creatures and grab the symbol of power. Go back to the beginning, go east, clean the room and blow up the suspicious wall. Kill another enemy, open the door, kill the enemies and activate both of the switches. Carry on and get rid of the enemies you'll encounter until you reach the last symbol. There's also a full ammo orb to your left before the door leading to the symbol of earth. Grab the symbol of earth and go back where you found the cobra staff. Open the door, kill the scorpion and touch the camel to travel to the next area.
SUNKEN PALACE OF KHNUM Sunken, which means most of the level takes place underwater. And obviously nasty fishes. Oh, and bombs you can shoot to make them blow up. Dive into the pool, kill the fishes and go east. Note the locked door and open the one to the left. Kill the fishes with the cobra staff and go back to the surface. Keep in mind the location of the symbol of war to your right and go back underwater. Note the symbol of power standing on the unreachable platform, go up, grab the symbol of time and carry on. Kill the fishes and go back to the surface. Dive and carry on to leap back to the entrance. Open the door right in front of you, blast the bombs and go through the new opening. Go up to take some breath and go back down. Kill the fishes and the bombs and pick up the symbol of earth. Head back to the beginning of the level, go to the east and open the door to the right. Make your way to the door, pick up the symbol of war and head back to the locked door to the left, before you got the symbol of earth. Open the door, go through the hole, grab the last symbol and go quickly to the right before the doors close. Kill the fish, go to the surface and open the door. Pick up the full ammo orb and go back to the east. Since you triggered the trap, the sealed doors there are open and you can collect a full health orb. Now, head back to the door at the beginning, open it and touch the camel to end the level.
DESERTED SLAVE CAMP Get rid of the enemies, open the door to the left, kill more enemies and carry on. Step on the first pressure plate to open the sealed door, kill the creature and pick up the full ammo orb. Carry on, step on the next pressure plate, kill the creatures and grab the symbol of power. Head back to the beginning, enter the column in the middle and go open the door after killing the scorpions. Throw a bomb to kill the scorpions down below, activate the switch, moonwalk to the opening behind you, re-open the door, activate the switch behind you and go back up to go through the door to the right. Collect the symbol of time (5), step on the pressure plate, kill the two enemies, activate the switch and go back to the beginning. Open the door with the symbol of time carved on it, kill the scorpions, open the door and kill the enemies. Blast the wall, go in the passageway and make your way to the interior of the building. Go up, open the door, kill the bugs and jump to the other side. Turn left to notice a suspicious part of the wall, blast it, turn left, blast the pots and fly to the ledge. Do the same with the other ledge and go get the part of the transmitter. Head back to the ledge and go through the other passageway to the right. Open the door before you, press the button and go back down. Now make your way to the pressure plate (there's a full health and a full ammo orb), step on it and go right. Glide to the platform behind the wall, kill the scorpions, turn back, activate the switch, then jump to your right to activate the other one and go back where you fought the scorpions. Go get the symbol of earth, head back to the beginning and open the door. Go to the pressure plate, then back to activate a switch to the east and go back to pressure plate without stepping on it. Go get the symbol of war, turn back to find a full ammo and a full health orb, go open the door after the room of deathtraps and glide to the camel to end the level.
SELKIS PATH Kill the first enemies, activate the switch to the right, then the one to the left and go down. Kill the enemies, fly to the ledge to the north, kill the creatures and grab the symbol of power. Go back to the previous room, fly to the ledge in front of you and go open the door. Go on the floating platform after killing the enemy and grab the symbol of war. Now, head back to the previous room, go left and open the door. Clean the room, open the door in front of you, go on the platform and activate the switch to the left. Go quickly to the other ledge, kill the enemy and go on the other ledge after pressing the button. Ignore the switch, kill the creature, go up, step on the pressure plate and go get the symbol of earth. Head back to the switch you just passed by, activate it and go to the other ledge. Kill the enemies, open the door, use the green ledges to make your way to the end of the level. Two creatures keep the camel, feel free to choose if you want to kill them or leave them alone.
SELKIS BURROW Boss fight incoming folks! Open the door, climb down the stairs, open the door, go behind the painting of a pharaoh and blast the wall to get a full health orb. Open the door, go down the hole slowly and look for the boss. Yep, it's a giant scorpion man throwing those deadly red missiles at you. Avoid his shots and use your weapons to kill him. A horde of little scorpions will appear when your opponent will be dead. And more are coming from the alcove. Go back to the giant room, kill the scorpions and grab the new artefact: the Kilmaat scepter. It removes the force fields you saw in some of the levels. Stand before the one in front of you and go back to the Tomb of Ramses.
SOBEK MOUNTAIN SHRINE (SECOND TIME) Remember the barrier in the western part of the level, kept by a few scorpions hidden some explosive pots and three creatures? Go there, kill the monster and touch the camel to travel to the magma fields.
MAGMA FIELDS Kill the creatures, go down, kill the new type of creature and activate the switch to open the alcove to the left. Collect the ring of Ra (a new weapon that throws little spiked balls at your enemies), destroy the enemies and go activate the switch. Go back up, carry on jump on the platform to the left then the one to the right and follow the river of lava to get a part of the transmitter. Now, head back to the bridge, activate the switch and carry on. Kill the enemies, dive into the hole and float all the way to the depths of the volcano. Kill the enemies, grab the orbs to the left and to the right and carry on. Kill the scorpions and keep moving forward to reach the end of the level.
HORUS PEAK Use the platforms to get to the door, open it, kill the creatures, activate the switch to the left, then the one to the right and finally the one behind the gate to the left. Go up, run to the other side of the crumbling bridge and jump on the platform. Carry on, step on the pressure plate to trigger the trap, activate the switch in front of you, turn back and use the floating platform to reach the other switch, turn back, fall down and activate the last switch to disable the remaining traps. Now, you can go all the way up easily. Do not step on the pressure plate or the trap will be activated once again and you'll have to activate the three switches. Open the door, get on the roof and go in the peak to get the last artefact: the Horus feather. It allows you to levitate in the air by pressing and holding the jump button while jumping. Use your new ability to cross the gap and go back to the Tomb of Ramses.
THOTH TREASURE RELIQUARY (SECOND TIME) Remember where you blew up the ground in order to get the symbol of earth? Carry on, fly to the ledge and blast the part of the wall to make a new path. Glide to the camel to go back to the world map and unlock the next stage.
CANYONS OF CHAOS There's a new enemy in this level but it only appears on the lava. Right at the beginning, you have to deal with two creatures. Also, you can hear the "bip" of the transmitter. Go down, fly down to the locked door and blast the pots. Levitate to the platform, then to the other one, turn back and jump on the platform. Equip the bombs, levitate to the fake wall, blast it and go up to find a part of the transmitter (which should be at this point of the game the next to last part of the transmitter necessary to get the good ending). Now, levitate to get on the platform to the right, kill the creature and grab the symbol of earth. Head back to the locked door, open it, grab the symbol of power and the goodies in the room. Head back where you exactly landed to get to this part of the map, levitate to the opening at the far left and kill the creatures. Kill more creatures and fly to the ledge behind the wall you're facing to get a new weapon: the sacred manacle. The more you hold the fire button, the more damages you deal. This is the most powerful weapon of the game and my favorite toy to play with in this game. From here, levitate to head back to the beginning and then keep flying to the right and to the far left to reach the door with the symbol of time carved on it. Destroy the enemies, open the door to the left, press the button and go get the symbol of time. Head back to the door with the symbol of time carved on it, open it, destroy the enemies and go left. Go through the passageway underneath the platform, kill the creatures and go get the symbol of war. Kill the creature, leave the room and levitate to the lower part of the river. Reach the other ledge with the power of levitation, turn back and levitate to the door. Open it, get rid of the last enemies and touch the camel to go to the next area.
KILMAAT COLONY Destroy the wall to the right, kill the bugs, go up and blast the wall at the end of the hallway. Grab the symbol of power down below, go back to the beginning, kill the two creatures and open the door. Clean the enemies, go left, step on the platform and grab the symbol of time in the alcove to the right. Kill the enemy, go up with the elevator, kill the creature and go back to the corridor by touching the wall to the left. Go left, go down into the room, kill the creature and blow up the upper part of the wall to the left. Go behind the column, open the door, levitate to the switch to disable the trap and go up. Press the pressure plate to open the door, go back to the door with the symbol of time and step on the platform to its left then the one behind you. Open the door to the left. Kill the creatures with a bomb, grab the full health orb, go down and grab the symbol of war and the full ammo orb. Head back up, jump on the elevator, cross the pool of lava and go down. Kill the enemies, open the door and kill the last enemies before exiting the level. Be very careful with the traps of instant death (ah, those developers ^^ ). Time go to the last level, or get the last goodies. Especially the parts of the transmitter, necessary if you want the good ending. Skip to the part “Kilmaat Haunt” if you want to carry on.
THE QUEST FOR THE GOODIES The goodies hunt, if you want to go to a full exploration and goodies run. First on the list: the ankh in Karnak sanctuary. Where you found the galting gun, turn left and get the ankh. Now, time to head to Seket marsh in order to get the part of the transmitter behind the force field, behind the door with the symbol of time carved on it. Need a full health and full ammo orbs? There's a force field in Thoth treasure reliquary, next to an elevator. It leads to these bonus. There will be more added to the second part of the walkthrough. For now, you only have that short part revealing the last part of the transmitter, necessary to get the good ending.
KILMAAT HAUNT Open the door, then enter the sphinx and grab the full ammo orb and the full health orb before opening the door. Open the door in front of you, go down and step on the pressure plates to unlock the way to the chamber. Step into the teleporter to go to the arena.
KILMAAT ARENA Open the door and go forth to face the boss. It's a floating platform so you better watch out. You can fall easily if you are careless. This boss has two forms. Use the sacred manacle to kill the first form. He only throws projectiles at you that you can dodge with no problem. When he gets mad, he will try to push you out of the ring. Stand to the center and let him hit you. Then, strike back until he dies, as he summons some minions to help him in this fight. The second form is tricky. It's a snake. His weak spot is like the boss form The Legend of Zelda: A Link to the Past. You can only hit the head if the other parts of his body are dead. Use the cobra staff, let him hit you and strike back with some homing shots. One by one, the spiky balls will disappear and the head will be weaken so you can finish him off. This ends the boss fight but it's not over. Open the door and go collect the mummy of King Ramses to head back to the tomb of Ramses.
TOMB OF RAMSES This is the final line to the end of the game. After hearing King Ramses' speech, you have to get the hell out of here. Walk carefully, as many explosions and fireballs will appear during your escape. Jump on the chopper (it shouldn't be here if you didn't collect all the parts and then you'll get the bad ending) and watch the final cutscene. Congratulations, you beat Exhumed.
That's all folks. Hope you enjoyed that first part of the walkthrough. The second part will come later, don't know when though). I see you in the next walkthrough. Bye and take care EDIT: So I seem to have forgotten one thing: I can't split the walkthrough. Oh well, it's fine. I'll edit the walkthrough then when the side stuff is ready to be served -------------------- |


| Games have secrets, I have my eagle gaze. |
Affected by 'Laziness Syndrome'
Registered: 10-21-11
Location: France
Last Post: 2612 days
Last Active: 1786 days
