

 User Notice
 Forum Links


Thread Information
Thread Actions


Walkthrough The Grinch
11-28-14 01:05 PM
Laian is Offline
| ID: 1108991 | 8352 Words

POSTS: 1850/2232
POST EXP: 457173
LVL EXP: 7731129
CP: 23738.9
VIZ: 3570490

Hello everyone, it's your host Laian coming at you and welcome to a new walkthrough. Happy Halloween, folks! Wait, what? It's... over? Oh really? *looks at the schedule* Ah yeah, indeed. Well then, happy Christmas! What? It's not Christmas either? Awww. But the game I chose this month is «The Grinch» for PSX since it's the month of Playstation! You meanies, how am I going to change the monthly walkthrough now? Alright, so even though it's not Christmas and Halloween is over, we're going to help The Grinch with a sabotage mission, ok? No Christmas for the townfolks of Whoville ha ha! So start this mission without wasting any more time, shall we?
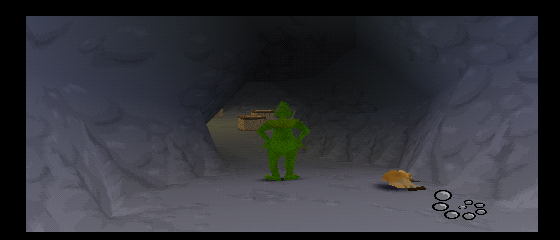
AREA 1: DOWNTOWN WHOVILLE You'll start with a tutorial, explaining how to control The Grinch and Max the dog and how to use their abilities. The first room will teach you how to use your green butt to crush all kind of stuff. Find the key hidden in one of the crates, open the door and carry on. In the next room, stand before the rock and move it to unlock the path to the next room. Use Max to grab the key at the other side of the door, give it to The Grinch and unlock the door with it. Now, use your smelly breath on the machine to carry on, activate the switch to go down, keep in mind that giant computer (it'll be useful for the creation of your gadgets once you'll have collected the specific plans) and go up. These doors are the mini-games you can unlock once you smashed the number of gifts required to open it. For now, go back down and use the vaccum tube leading to Downtown Whoville.
MISSION 1: SHUFFLING THE MAILS In order to accomplish this mission, you need a disguise first. Go back where the guard is
MISSION 2: SMASHING SNOWMEN There are ten snowmen to destroy in this first level. Right at the beginning, you'll find the first snowman to destroy with your butt. Another snowman is located on the platform to the left, where a kid holding a gift and a poster of the mayor to paint are. Nearby the giant Christmas tree, you'll find two other snowmen. Another one is between the eggs and a gift. To its right, on the platform, you can find (oh, what a surprise) another snowman. Go down, then to your left to find another snowman. Now, go back to the Christmas tree, head north, destroy the snowman, then go east, pass by the town hall and destroy another snowman. The last snowman is to the east from the Christmas tree.
MISSION 3: PAINTING THE MAYOR'S POSTERS For this mission, you must find the painting. You should see a scaffolding to the right, up the stairs. There's a worker up there. Go bother him to get the painting. However, he won't let you get his stuff so easily. As you can see, he moves from a plank to another plank. So how to get his stuff, may you ask? Well, wait until he goes to the other plank, jump and use your butt to send him say hello to the Christmas tree. Grab the painting bucket. Now, time to find the posters and be creative. The first poster is to your right. Go on the platform and paint the poster (1). To the left, there's another poster. There's another one to the far right. Now, go left, paint another poster, then go on the brown building and paint another poster. Go to the Christmas tree, then head to the east, paint the poster on the platform nearby the
MISSION 4: LAUNCHING EGGES INTO HOUSES For this mission, you need the rotten egg launcher. Refer to the part below «The blueprints» to find the four pieces then head back to the headquarter to use the computer and create the gadget. Don't forget to rotate one of the four pieces otherwise you might spend lot of time saying to yourself «Why isn't this working?!». Now that you have the rotten egg launcher, go back to Downtown Whoville and look for rotten eggs if you haven't any. You can find them easily, they look like plants. You can get up to 200 rotten eggs. That gadget is not the only one to use rotten eggs. The others you'll get later in the game use this (except for the rotten egg shooter which can shoot other projectiles). Then, it's time to look for the windows and launch an egg in each of these windows when the shutters are open. Here is where you can find the windows: 1 – Face east from where you start then look up. You'll see the first window. 2 - Above the post office, to the right from where you start the level (2). 4 - One above a children to the right, from the starting point. 5 - Another one to the left of the Christmas tree. 6 - One to the right of the Christmas tree. 7 and 8 - One to the right of the town hall, above the kid and to his left. 9 - From the brown building cross the bridge to your right and look up to your right to find the window. 10 - The building with the strange ornments nearby the Christmas tree has one. The townfolks will leave the house and the mission will be done.
MISSION 5: MODIFYING THE MAYOR'S STATUE First things first, you need the rotten egg launcher. It's important to open the town hall. Shoot a few eggs on the clock and voila! Now, go in, check the room by pressing the triangle button to open the door down the stairs to find some blueprints for the binoculars (3) and go upstairs. Now be quiet, hide behind the pillars to make your way to the next room. Open the big door, grab the blueprint for the Grinch copter, move the drawer to find the safe. Use your butt attack to open the safe, grab the sculpting tools, leave the room and go in the other room. There's a blueprint for the Grinch copter and the statue. Be careful, there's a security device and, if you trigger it, the guards will catch you, and to the main hall you'll be back. Use your bad breath to make the laser beams appear and leap over them to reach the panel. Deactivate the security device and modify the statue. The mission is now complete, you can leave the city hall.
MISSION 6: ADVANCING THE COUNTDOWN TO CHRISTMAS CLOCK You'll need the rocket spring for this mission. All the blueprints can be found at Whoforest (refer to the section «The blueprints» ). Once you have collected all the parts, go back to the computer and craft the rocket spring. Now, head back to Downtown Whoville and go in the building, where the guard is
MISSION 7: SQUASHING ALL THE GIFTS There's a total of 500 gifts to crush with your butt in this area. Since their value is different everytime you crush a gift, it would be a pain to tell you the location and the value of each gift. They are everywhere, just look closely every single roof and corner, everywhere. The kids outside hold some of them. Use the rotten egg launcher to calm them down and get the present. You can also find them in the other buildings. You'll need a specific gadget for a good part of the gifts though since you can find some of them on unreachable places such as garlands so you'll have to come back here once you'll have the required gadgets. Don't forget to shoot your buddy the painter at the top of the tree with your rotten egg launcher. Ah and these ice walls, there's some gifts behind. Shoot the crack to blast them. Otherwise, this mission is a piece of cake with a cherry at the top (and some ice cream if you want
------------
AREA 2: WHOFOREST At one point, you'll be able to access this area. In order to go there, go back to your lair and use the vaccum tube next to the one leading to Downtown Whoville. Here you are, at Whoforest. A nice land with houses and new missions to accomplish, weeeeeeee!
MISSION 1: MAKING CHRISTMAS TREES DROOP For this mission, all you have to do is use your bad breath on the evergreens you'll find in the area. The first one is right at the beginning. The others are guarded by a guy. In order to make them droop, you need to stun the guy with a rotten egg and use the bad breath when he's stunned. This mission is not that hard once you know the technique. Ah, keep in mind there's a cliff to climb up with the poles, just in case you're wondering where the last trees are. The mission will be complete once you have have taken care of the ten Christmas trees.
MISSION 2: SABOTAGING SNOW CANNON WITH GLUE You'll need the rotten egg launcher and the rocket spring for this mission. Right behind the giant tree, you'll see a cliff with some poles. Use them to go up then go west. Step on the platform below, equip the rotten egg launcher and shoot the crack of the ice wall to break it down. Grab the glue bucket and go back up. You see that giant thingy? It's the snow cannon. Equip the rocket spring to step on it and use the glue bucket. Mission done.
MISSION 3: PUTTING BEEHIVES INTO CABINS See these trees with beehives? You must shoot the beehives with your rotten egg launcher, grab a beehive and bring it to the chimney of one of these lovely cottages. The first tree is safe but it'll be useful for the first two cabins. The time limit doesn't allow you to keep a beehive as long as you want. The second house is tricky, you need the rocket spring to reach the roof. The next trees are protected by a hungry creature. If you stay close to it, you'll get punched. So how to make it go away. Well, that creature really likes beehives so shoot the beehives, then use your stealth ability while the monster is distracted by its food and use your bad breath to send it back home. Now, you can shoot the beehives once more and take care of the two nearest cottages. Keep in mind you'll need the rocket spring for some of the house since you can jump high enough to get on it with a single jump. Once you took care of all the houses, the mission is complete.
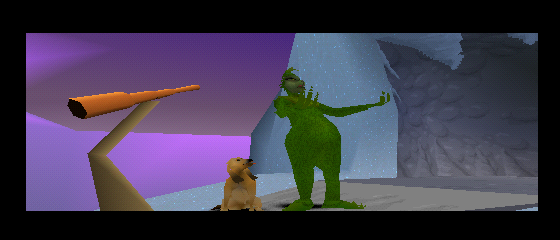
MISSION 4: SLIMING THE MAYOR'S SKIS For this mission, you must complete the third task of Whoforest and get the slime shooter. Refer to the part named «The blueprints» in this walkthrough to find the parts for this gadget. Craft it with the computer and head back to Whoforest. Go in the second house to see a locked chest. Use the slime shooter to trap the bees and use your butt to open the chest and grab the cable car access card. Leave the house and go to the cable railway. Use the card and go in the cable car. Welcome to the ski resort. Sneak past the guard and go to the right to find the second heart-of-stone of the game. Go down and head to the your right. You'll see the mayor's estate but a dog is guarding the skis. So, you need to find a way to stun the dog. The top of a tree has some snow (4). Equip the rotten egg launcher, then wait until the dog is underneath the snow and shoot the top of the tree to make the snow drop down and stun the dog. Now, switch to the slime shooter and go slime the skis to the right of the mayor's estate. The mission will be done.
MISSION 5: REPLACING THE CANDLES ON THE CAKE WITH FIREWORKS You need the octopus climbing device in order to complete the mission. Refer to the section «The blueprints» to find them all. Craft the gadget then go back to Whoforest. Now, you must head to the civic center. But where is it? You might have seen these ice walls at Whoforest. The first one leads to some gifts. The second one leads to the civic center. Use your new toy to climb the ice wall, then activate the switch to raise the bridge up here and climb up the other ice wall. Shoot the target, then cross the bridge and grab the first firework stick for the surprise cake. You need to find the nine other fireworks then locate the cake and use them on the cake. These targets will make a firework stick fall down everytime you shoot them so find them all and collect the remaining fireworks. Use max to go in the small opening in order to smash some gifts in the room. Activate another switch, cross the bridge, shoot the two targets to the left of the house to get two more firework sticks, then the two targets on the house and the one behind you. You should get six firework sticks. Go in the tunnel, use the bad breath to scare the creature and the guard then shoot the yodellers to make them fall down. Don't forget to use the pancake attack to get the gift they kept safe (don't ask me where, please). Now, shoot the two targets to get two more firework sticks then face south west and shoot the last targets. Now, leap over the fence, use the rocket spring to reach the entrance of the cave, get the ninth firework stick and go in without waking the bats up. That means «use your stealth skill». Go down, shoot the stalactite to grab the blueprint for the grinch copter trapped in the ice block and make some kind of stairs in order to get on the next platforms. Go up, scare the monster and break the snow wall with a rotten egg. Now, get rid of the guy, then grab the poles to your right to grab the last firework stick. Go to that giant house, shoot the chains holding the sign to knock the guard out and go in. Use the fireworks on the cake to complete the mission.
MISSION 6: SQUASHING ALL GIFTS Same thing like in Downtown Whoville. This time, there's a total of 750 gifts to crush with your butt. You'll have to come back here with the specific gadgets for some of the gifts. As always, use your bad breath to scare the guards with their freeze gun and the kids. Don't forget to use the pancake attack on the kids to get another gift and the yodellers at the civic center to get their gifts. Otherwise, look everywhere and have fun!
------------
AREA 3: THE DUMP That area will be unlocked after completing a few missions at Whoforest. New missions as always, some bluprints to find and these gifts to smash. To be honest, I don't like that level for two reasons. You'll see why.
MISSION 1: STEALING FOOD FROM BIRDS That mission is quite easy. You must find the birds, walk toward them and shoot the one with the food in its mouth to get it. There's nothing else to do. You'll find three group of birds in the first area, then four in the area after the blue tunnel, two in the area after the green tunnel, one in the area with the rats. Ah yeah, one thing to know about the third group of the first section: the steam prevents you to go there. You need to connect the first nine pipes to disable that smoke screen. The last group of birds is there with your last slice of pizza. The mission will be done afterwards.
MISSION 2: FEEDING COMPUTER WITH ROBOTS PARTS For this mission, you must locate these tiny robots. Not the flying orbs, the other type of robot. Also, you need nitro eggs to blast them. Nitro eggs are, compared to rotten eggs, red and glows. You can only carry five of these. Use them to blast these tiny robots and get their parts. One of the robots is behind the steam to the right when you start the level. You must connect the first nine pipes to go there. Grab a nitro egg, blast the last robot and return to the zone after the green tunnel. Now, find the computer and offer these tasty parts. See that fence with the glowing arrow above? It's the computer. Blast the fence with a nitro egg and give the parts to complete the mission.
MISSION 3: INFESTING THE MAYOR'S HOUSE WITH RATS That mission is kinda tedious and obnoxious. It's one of the reasons why I don't really like that level. First, open the hatch of the first column, press the button behind the electric cables and use the rocket spring to leave the underground area. Then go through the green tunnel then the red tunnel to the left. Here is the area with the rats and a pipe to link (the big pipe to the north). Equip the rotten egg launcher and shoot the five planks above your head. They will create the path for our friends. Now, take the nitro egg and blast the fence leading to the mayor's house. And here is where it becomes obnoxious and tedious, like I said. Don't try to use The Grinch to lead the rats to the goal. Use Max and move slowly. Yeah, slowly otherwise they will stop following you. Needless to lead them one by one: you can lead more than one but they are kinda stubborn in group. You can bark with the X button to call them if you have some troubles with these rats, it might help. Once all the ten rats reached the goal, the mission will be done.
MISSION 4: CONDUCTING THE STINKY GAS TO WHO-BRIS' SHACK You need to find the ten pipes to link in order to complete that mission. How to recognize these pipes? Some smoke emanates from a part of the pipe and there's a pole to grab, exactly like this:
In order to link the pipes, grab the pole and spin until it's linked. There are two other types of pipes to link: one with a rotating part (use the rotten egg launcher to make it spin and link it) and another one you need to push (located in the area with the rats after the red tunnel). You should find three pipes in the first area, one in the area with the rats, three pipes in the area after the blue tunnel and two pipes in the area after the green tunnel. The last pipe is a puzzle to solve and it's located behind the steam. Connect the other pipes to access that last part of the dump. First things first, turn off the valve to stop the steam, then activate the switch near the valve. Activate the next one to the right then the one behind. Finally, activate the very first switch and turn on the valve to complete the mission.
MISSION 5: SHAVING THE DUMP GUARDIAN In order to complete that mission, you must head to the dump guardian's house. First, open the hatch if it's not done yet, go down, press the switch, go back to the surface and go through the green tunnel. Don't go through the red tunnel, pass by the certain computer of the second task, get rid of the orb and go to the next zone. See that giant house over there? The dump guardian is there. But it's not that easy to get there. That part gave me some troubles. It's one of the two reasons why I hate that level. First, shoot the three mattresses then stun the flying with some slime. Now, you have exactly one minute to go there with the help of the rocket spring. If the time runs out, the orb will be free and will shoot at you. Also, try not to land on the ground. If you haven't noticed the sign at the entrance, it says «land mines». Once you reach the other side of the land mines field, go to the right with the rocket spring, grab the blueprint for the octopus climbing device to the right of the garage and go in. Take the scissors (5), leave the garage and grab the blueprint and the third heart-of-stone around the big house and go in. Use your stealth skill now, grab the other blueprint for the octopus climbing device and go upstairs to see the dump guardian
MISSION 6: SHORT-CIRCUITING POWER PLANT You'll need the octopus climbing device and the slime shooter for this mission. Go through the blue tunnel after pressing the switch in the underground, then slime the two devices to the left and to the right of the power plant main door. Now, equip the octopus climbing device and climb the door up to enter the power plant. Go north to find a blueprint for the grinch copter, go back to the device at the beginning and use your bad breath three times in a row. The platform behind you will move and you will be able to reach the upper platform. Step on it, use your rotten egg launcher to shoot the button, grab the wire and go to the next platform. Use the bad breath on the guard and shoot the other button with the rotten egg launcher. Grab the wire, use Max to press the button at the other side of the protection field and press the three other buttons in the openings to the left and to the right. You'll get rid of the protection field. Use the bad breath on the guard, carry on, use the rocket spring to get on the pipe and then on the platform. Shoot the two buttons, then the two obstacles on the wire, grab the wire and grab it. Shoot the next buttons, grab the wire, use Max once more to activate the switches and disable the protection field. There's also a blueprint for the grinch copter to your right. Carry on, go down and activate the three devices. Now, go back up and use the spinning platforms to proceed to the next area. I can tell this bit is quite obnoxious, especially with that camera angle. In the next area, use the wire to reach the place with the column, shoot the button then go back up and use the wire to go to the balcony and enter the power plant core.
Note the blueprint in the sphere, go right, use the slime shooter to stun the guard then your bad breath to make him go away. Use the elvator to go up, grab some eggs and knock the next guard out. Climb the walls up with the octopus climbing device then slime the two cameras and shoot the button to deactivate one quarter of the power. Go back, use the moving platform to go to the left, shoot the button then grab the wire. Use the slime shooter to disable the electricity in order to climb up the walls easily with the octopus climbing device, then grab the wire, slime the cameras and get rid of the guard and the robot. Shoot the button to disable half of the power, go back and carry on. Slime the cameras, go through the passageway and shoot the button behind you to disable 75% of the power. Climb up the wall, shoot the button, then grab the wire, shoot another button and carry on. Slime the wall then climb it up, grab the blueprint for the grinch copter and shoot the button to fully short-circuit the power plant and complete the mission. Grab the last blueprint for the grinch copter of this area before leaving the power plant.
MISSION 7: SQUASHING ALL GIFTS 750 gifts to destroy in this area. You know the score, don't you? Look everywhere, every single corner and place with no exception. If you need a specific gadget (for example the gift above the giant pipe above your head right at the beginning), come back when you'll have it. Most of the gifts will be found in the power plant. The electrical fences will never be disabled, even after completing the mission «short-circuiting power plant». You'll need some nitro eggs to break them.
------------
AREA 4: WHOLAKE This is the last area of the game and, like the others, it will be unlocked after a few missions done at the dump (three, I do believe). The last pranks to do to the lovely people of Whoville. And as always, these gifts to find and crush with your butt.
MISSION 1: PUTTING THISTLES IN SHORTS For that mission, you need to get some thistles from these little creatures (6). Shoot a rotten egg at them and take their thistles. You can get up to 5 thistles. Once you have the thistles, locate the shorts (they should be nearby a tent) and shoot the thistles. Like the tents, you have to look everywhere in the southern shore. Don't forget there's a wooden wall behind a kid you can climb up with the octopus climbing device. Once you put the thistles in each short (there are ten shorts to find here), the mission will be done.
MISSION 2: SABOTAGING THE TENTS That mission is not that hard. When you see a tent, use the pancake attack to sabotage it, that's it. The first one is nearby the first wooden bridge. There's also some shorts. Use the octopus climbing device to climb the wooden part behind the kid and get on the ledge up there. Shoot the beehive above the beast to make it go away and sabotage the two tents. There's also a blueprint for the marine mobile behind the tent. Now, grab the wire and go to the other side to find another tent to sabotage and another blueprint for the marine mobile. Drop down to the right, sabotage the three tents to your left and move the rock block to find another tent on the platform and a blueprint for the marine mobile. Head to the gate to find the last two tents to sabotage. Mission complete.
MISSION 3: DRILLING HOLES IN CANOES At the end of the south shore, there's a gate. Unfortunately, the scout won't let you in. Go back to the first bridge, cross it and use the poles to reach the platform. With the rocket spring, step on the roof, grab the blueprint for the marine mobile and go in the cabin by the chimney. See that fat scout? You need his clothes. While he's eating that delicious meal, add a bit of bad breath to it. He will be mad at you and will start up a fight. Spin around him while he's shooting his projectiles and use your bad breath afterwards. Pick up the hat and stay focused for the second round. As always, spin around to avoid the projectiles, use the bad breath and then use the pancake attack to steal the t-shirt. Last round, it's time to change a rule in this fight. You may have noticed these deer heads on the walls. Stand in front of one of these and wait until he charges at you. I think you have to do that twice to end the battle and get the short. If you fail, don't worry: dodge the projectiles and repeat the method. You now have the scout clothes so you can go through the gate. Head back there, use the small cabin to use the disguise and go to the next area. Now, find the pink shack and grab the drill inside. The shack is at the top of the hill to the north. Use the poles to go there. Now, go check the shore to find most of the canoes. Three are guarded by a big guy and you need to scare him in order to sabotage these three canoes. With Max, go in the blue shack to the west and find a wild badger outside. Bring it to the scout to scare him. Now that the way is clear, you can sabotage the canoes there. Don't forget to grab the blueprint for the marine mobile behind the shack and the last heart-of-stone. In order to get the two above the car, just move the block nearby and get on the car to sabotage the two canoes. And finally, the three canoes on the water must be back to the shore with the crank. Grab it and spin. The last canoe is behind the blue shack to the west. Once you sabotage all the canoes, the mission is complete.
MISSION 4: MODIFYING THE MARINEMOBILE You'll need the marine mobile (no joking!) for this mission. Check the section «the blueprints» to see the locations of all the blueprints for this gadget. At the beginning of the area, you'll see the marine mobile. Get in. Welcome to the submarine world, folks. You need to find five parts in order to modify the submarine and scare the little scouts. First of all, use the speed boost function to grab the two swimming fishes. Those are two parts. The third part is trapped within the seaweeds next to a strange yet nice creature. Use the boost to tackle him and he will eat the seaweeds and set the part free. It requires a specific angle and direction to get this one. Just stand in front of your target and use the speed boost. If it's good enough, the creature of the deep blue sea will take of the rest. Now, the last two parts are hidden in some secrets caves. To the left and to the right, you should notice two suspicious walls. Use the speed boost to break them down. To the right, you'll find a shipwreck and a stalactite above. Use the second function (the dolphin jump) to make it fall off and break the shipwreck. You'll find the fourth part. To the left, you'll see the part trapped within some kind of glass bell. Go to the surface and use the dolphin jump function to hit the target and release the last part. And that will end the mission.
MISSION 5: HOOKING THE MAYOR'S BED TO THE MOTORBOAT You'll need two items for this mission: a hook and a rope. And the last gadget but we shall see that in due time. Put your disguise and go to the northern shore. Cross the bridge then go east to reach the mayor's villa. You'll see a canoe right in front of you. Put your disguise off and use the rocket spring to step on the platform and raise the boat. Use Max to get the rope. Now time to find the hook. Go underneath the villa, look up and shoot the two wooden beams to make the rock fall down. Now, use the catapult to reach the mayor's villa, use the rocket spring to get on the roof grab the blueprint for the grinch copter on the branch and the last one at the entrance of the cave. Go in the cave to talk to an old man who will ask you a favor. The reward is his hook, which is what we need. Go back to your lair to craft the grinch copter (if you have collected all the parts, otherwise refer to the part «the blueprints» to see where to find the others). Head back to the villa, it's time to find five scarfs. The scouts around the villa wear one and you have to defeat them in order to get it. The one on the stump is not that hard. First, spin the crank to set the device then shoot the beehive above his head and press the button. You'll get his scarf. Now, the one next to the motorboat needs a bath. Avoid his projectiles and keep using the bad breath until he falls off into the water. That's the second scarf to get. Go at top of the villa to see a guy. You'll notice a part of the fence is missing. Good, I think the guy is ready for a leap of faith. Bring him to the opening, dodge his attack, use your bad breath and keep shooting at him some rotten eggs until he falls off. And that's three scarfs for you, two more to go. Go back to the old man's cave to spot the two last targets. One is flying in the air when you come close to him. Ok, let's go for a sky battle. Chase him with your new toy and, when you are close to him, use the bad breath. Four scarfs, one more to go. The last one is not that hard either. From the entrance of the cave go down to see the man. Avoid the projectiles he throws at you and use the bad breath to let him take a bath. You'll get the last scarf. Go talk to the old man and you'll get the hook. Now, put the disguise, use the catapult to reach the main entrance of the villa and go in. Use your stealth skill to get close to the bed and use the hook and the rope on the bed. Enjoy the trip, mister mayor! Mission complete.
MISSION 6: SQUASHING ALL GIFTS Are you ready for the ultimate quest for the gifts? I hope so because there's a total of 1000 gifts to find and smash. Yes, you heard me: a thousand of gifts hidden here. Look everywhere as always and try to find'em all. There are four areas in this level, don't forget that. Kill the enemies to get some gifts (except for the crows and the mosquitos).
------------
GETTING THE PARTS FOR THE SLEIGH Well, despite all what you've done to the townfolks of Whoville, they still celebrate Christmas. No way! You must stop this at any times. And the plan is... become Santa and steal Christmas to these people. For this mission, you must go back to each area and look for the missing parts for the sleigh. Except for Wholake, the other areas have one part. I suggest you to complete your last missions before looking for the missing parts. Well, if you want to complete the game at 100% of course. Otherwise, time to fix the sleigh and ruin Christmas once and for all.
DOWNTOWN WHOVILLE Find the truck patrolling around the Christmas tree, equip the rotten egg launcher and follow it. When the back is open, shoot a few eggs. Repeat this until it breaks and pick up the part of the sleigh.
WHOFOREST A man next to the first house wants to challenge your dog. Accept and get ready for the race. Th at race is quite challenging and you might need a few tries to manage to get the skis of your opponents. Max can't jump, your opponent can. Which means you'll have to pass by the second house by the left to overcome the first obstacle. No mistake is accepted is you want to win that race so try it as many times as you want until you find the correct way to go to the finish line. Your victory will grant you the skis, one of the five parts of the sleigh.
THE DUMP Go to the right at the beginning of the area, use the rocket spring to leap over the fence and use the binoculars to look at the open window. Memorize the pattern (the white square being where the piece must be placed) and move each piece you'll find around the shack to its specific location. The garage will be open and you will be able to collect the part of the sleigh.
WHOLAKE-SOUTHERN SHORE The part can be obtained if you talk to the boy in front of the first wooden bridge. He asks you to kill ten crows within 15 seconds. It's quite challenging, trust me. You may need a few tries. Also, it uses your own ammos so you may have to look for rotten eggs from time to time. You'll get the GPS if you manage to shoot the number of crows requested by the boy.
WHOLAKE - SUBMARINE WORLD You'll get that part after helping a friend under the sea. Talk to him, accept the challenge and grab all the pearls within the time limit. Use the speed function (square button), it's highly recommended. Oh yeah, beware of the walls. They hit, just a bit. I'm not joking. Otherwise, the pearls mark a specific path around the main isle where you can get one of the parts for the mission «modifying the marine mobile» so it should be easy to get them all. ------------
THE SLEIGH RIDE Once you collected the five parts, a cutscene will be triggered. If you're looking for a 100% completion, make sure you did all the mission in each area before going back to the sleigh. Time for a joy ride, folks! In this last mission, you must chase the real Santa Claus and steal all the presents he leaves behind. No mistakes is accepted during this part. If you miss a gift, it's back to the start. That part is quite challenging to be honest. After collecting the gifts, you must get rid of the real Santa Claus. And I think a dozen of rotten egg in the face should do the trick. You must hit him ten times within the time limit. Once you got rid of him, the final part will end. Watch the cutscene. Congratulations, you completed the game.
But wait, there is more! If you destroyed all the gifts in the game, you'll be rewarded with a really nice mini-game. To be honest, that mini-game is better than the three others. Unfortunately, you can't play it with a friend, which kinda stinks compared to the others. I suggest you to go back to the lair and save your progress so you don't have to remake the last part. I guess I'll end this walkthrough with that bonus. You'll see, it rocks! For now, time to add the extra part of the game guide: the location of all the blueprints. ------------
THE BLUEPRINTS You remember the blueprints, don't you? You need to find them to craft your gadgets. Here is where you can find them all.
THE BINOCULARS Note: all the blueprints can be found in Downtown Whoville. - A blueprint for the binoculars is on a roof to the right, from where you start. - Go in the archives room down the stairs once you're in the town hall, check the first drawer to the right ot find one blueprint for the binoculars. - In the archives room, check the second drawer of the row in front of you to find another blueprint for the binoculars. - Check the third drawer to your left in the archives room to find the last blueprint for the binoculars.
THE ROTTEN EGG LAUNCHER Note: Same here. They're all at Downtown Whoville. - A blueprint for the plan rotten egg launcher is on a platform nearby the guard you mustn't wake up. Use the pole to reach it. - Another blueprint for the rotten egg launcher is on a platform nearby the town hall. - Another blueprint for the rotten egg launcher is inside the room 5 of the post office.- The last blueprint for the rotten egg launcher will be at the entrance of the post office, once you completed the mission 1.
ROCKET SPRING - Right behind the vaccum tube at the beginning of Whoforest, you'll find a blueprint. - One blueprint is nearby the second house, in Whoforest.- Another blueprint is nearby the tree in Whoforest. - Another one is next to a kid when you go to the right from the giant tree in Whoforest. - There's a blueprint behind the house nearby the cable railway in Whoforest. -At Whoforest, use the poles to climb up the cliff, then go to the right. There are two blueprints: one on the platform, the other one nearby the nearest house. - Near the second house to the right, you'll find another blueprint. - The last blueprint might be a bit hard to get. Once you did climb up the cliff, go right, leap over the gap, use the binoculars to spot a strange and round button above the giant tree and activate with the rotten egg launcher (7). The platform will lower and you could grab the last blueprint for the rocket spring.
OCTOPUS CLIMBING DEVICE - Break the top of the column at the dump with your pancake attack, turn back and grab the blueprint next to the red switch. - Go through the blue tunnel, then face the powerplant. Turn back and you'll see a blueprint.- Go through the blue tunnel, then smash the hatch of the column to go underground. Besides a switch and a pipe to link, you'll find a blueprint. - Behind the fence in the area with the rats. Use a nitro egg to blast it and get the blueprint. - A blueprint is in the big house at the other side of the land mine field. - There's a blueprint at the other side of the land mine field, nearby the third heart-of-stone. - Next to the garage, after the land mine field, you'll find another blueprint.- There's a blueprint right underneath the hatch, guarded by the mean guy. Use the boulder nearby to get rid of him, then open the hatch with your butt and grab the blueprint. - A blueprint is located behind the steam to your right, at the beginning of the level.
SLIME SHOOTER All the blueprints are hidden in the cottages in Whoforest. Complete the mission «Putting beehives into cabins» to find them all. Beware of the bees: they're still in the cabins and not really happy that you bothered them.
MARINE MOBILE All the blueprints can be found at Wholake. Since there are two sides (or shores), it'll be useful to use these terms for your hunt. Each shore has eight blueprints. Ah, one more thing: you start at the the south shore.
(SOUTH SHORE) - A blueprint is located to the wooden bridge nearby a tent. You can't really miss it actually. - There's a blueprint nearby a tent.- On your way to the second wooden bridge, go right to find another blueprint. - Locate a rock block to move nearby the second set of shorts, move it to reach the platform and grab the blueprint nearby the tent. - A blueprint is on the roof of the big cabin above the platform. - Nearby the changing booth, there's another blueprint. - Behind the Summer beast, you'll find another blueprint. - Use the wire nearby the Summer beast to reach the other side and grab the blueprint.
(NORTH SHORE) - Below the first bridge, you'll find a blueprint on a ledge. - A blueprint is hidden in a garbage bin nearby the gate. Note the block above, push it to crush the garbage bin and get the blueprint.- Behind the cabin in which you must send Max, there's a blueprint. - Push the block nearby the house in which you must send Max to crush the garbage bin down below and get another blueprint. - In the house with the small opening, grab the blueprint with Max. - Behind the house, in the part guarded by the big guy. Go in the house with Max to become a badger, find another wild badger outside and bring it back to the guy. Now that he's gone, you can collect the bluprint behind the house and the last heart-of-stone. - In the cabin in which you can get the drill, you'll find a blueprint behind the wall. - Next to the pink shack, there's a sonic scarecrow. Use it to scare the crow on the pole and use the poles to get on the platform at the other side. The blueprint is there.
THE GRINCH COPTER There are four blueprints to find in each area.
(DOWNTOWN WHOVILLE) - Two blueprints in Downtown Whoville: both of them in the city hall of Downtown Whoville. One is in the room with the safe, the other one is in the room with the statue. - There's a blueprint in the room with the bell picture.- Inside the countdown clock tower, you'll find a blueprint.
(WHOFOREST) - After the second heart of stone to collect, leap over the gap, then go right then down and send Max in the small opening. A blueprint is hidden inside with some gifts. - There's a blueprint where the dog is, at the ski resort, to the right.- In the cave, you'll see a blueprint trapped in a cage of ice you can't break with your butt. Look up to see a stalactite. Shoot it to make it fall down and break the ice block. Go grab your reward. - There's another blueprint in this cave but it took me a while to figure out how to get it. Cross the first bridge and note the ledge to the left (8). Grab it to reach the platform to the left. Pick up the blueprint and smash the gift.
(WHO DUMP) - Grab the blueprint in the small opening, at the power plant. - On a platform to the right, where the second protection field is.- Right in front of you when you enter the power plant core. Fully shut down the power to get it. - On your way to the button that disable the third generator in the power plant core.
(WHOLAKE) - Two blueprints can be found in the submarine world, once you got the marine mobile. - Go to the mayor's villa area. One is standing on a branch after the roof of the villa and the last one is at the entrance of the cave with the old man inside.
So that concludes the walkthrough. Ready for the surprise? No, it's not hidden this time. It's right here. Until next time, take care folks and Merry Christmas... Hey, I know it's not Christmas. Not yet. Maybe I'll wish you a happy Easter day next month, who knows. Who said we all have the same reasoning of time and space? Ok, I stop! I see you in the next game guide. Bye, bye, folks! o/
Hello everyone, it's your host Laian coming at you and welcome to a new walkthrough. Happy Halloween, folks! Wait, what? It's... over? Oh really? *looks at the schedule* Ah yeah, indeed. Well then, happy Christmas! What? It's not Christmas either? Awww. But the game I chose this month is «The Grinch» for PSX since it's the month of Playstation! You meanies, how am I going to change the monthly walkthrough now? Alright, so even though it's not Christmas and Halloween is over, we're going to help The Grinch with a sabotage mission, ok? No Christmas for the townfolks of Whoville ha ha! So start this mission without wasting any more time, shall we?
AREA 1: DOWNTOWN WHOVILLE You'll start with a tutorial, explaining how to control The Grinch and Max the dog and how to use their abilities. The first room will teach you how to use your green butt to crush all kind of stuff. Find the key hidden in one of the crates, open the door and carry on. In the next room, stand before the rock and move it to unlock the path to the next room. Use Max to grab the key at the other side of the door, give it to The Grinch and unlock the door with it. Now, use your smelly breath on the machine to carry on, activate the switch to go down, keep in mind that giant computer (it'll be useful for the creation of your gadgets once you'll have collected the specific plans) and go up. These doors are the mini-games you can unlock once you smashed the number of gifts required to open it. For now, go back down and use the vaccum tube leading to Downtown Whoville.
MISSION 1: SHUFFLING THE MAILS In order to accomplish this mission, you need a disguise first. Go back where the guard is
MISSION 2: SMASHING SNOWMEN There are ten snowmen to destroy in this first level. Right at the beginning, you'll find the first snowman to destroy with your butt. Another snowman is located on the platform to the left, where a kid holding a gift and a poster of the mayor to paint are. Nearby the giant Christmas tree, you'll find two other snowmen. Another one is between the eggs and a gift. To its right, on the platform, you can find (oh, what a surprise) another snowman. Go down, then to your left to find another snowman. Now, go back to the Christmas tree, head north, destroy the snowman, then go east, pass by the town hall and destroy another snowman. The last snowman is to the east from the Christmas tree.
MISSION 3: PAINTING THE MAYOR'S POSTERS For this mission, you must find the painting. You should see a scaffolding to the right, up the stairs. There's a worker up there. Go bother him to get the painting. However, he won't let you get his stuff so easily. As you can see, he moves from a plank to another plank. So how to get his stuff, may you ask? Well, wait until he goes to the other plank, jump and use your butt to send him say hello to the Christmas tree. Grab the painting bucket. Now, time to find the posters and be creative. The first poster is to your right. Go on the platform and paint the poster (1). To the left, there's another poster. There's another one to the far right. Now, go left, paint another poster, then go on the brown building and paint another poster. Go to the Christmas tree, then head to the east, paint the poster on the platform nearby the
MISSION 4: LAUNCHING EGGES INTO HOUSES For this mission, you need the rotten egg launcher. Refer to the part below «The blueprints» to find the four pieces then head back to the headquarter to use the computer and create the gadget. Don't forget to rotate one of the four pieces otherwise you might spend lot of time saying to yourself «Why isn't this working?!». Now that you have the rotten egg launcher, go back to Downtown Whoville and look for rotten eggs if you haven't any. You can find them easily, they look like plants. You can get up to 200 rotten eggs. That gadget is not the only one to use rotten eggs. The others you'll get later in the game use this (except for the rotten egg shooter which can shoot other projectiles). Then, it's time to look for the windows and launch an egg in each of these windows when the shutters are open. Here is where you can find the windows: 1 – Face east from where you start then look up. You'll see the first window. 2 - Above the post office, to the right from where you start the level (2). 4 - One above a children to the right, from the starting point. 5 - Another one to the left of the Christmas tree. 6 - One to the right of the Christmas tree. 7 and 8 - One to the right of the town hall, above the kid and to his left. 9 - From the brown building cross the bridge to your right and look up to your right to find the window. 10 - The building with the strange ornments nearby the Christmas tree has one. The townfolks will leave the house and the mission will be done.
MISSION 5: MODIFYING THE MAYOR'S STATUE First things first, you need the rotten egg launcher. It's important to open the town hall. Shoot a few eggs on the clock and voila! Now, go in, check the room by pressing the triangle button to open the door down the stairs to find some blueprints for the binoculars (3) and go upstairs. Now be quiet, hide behind the pillars to make your way to the next room. Open the big door, grab the blueprint for the Grinch copter, move the drawer to find the safe. Use your butt attack to open the safe, grab the sculpting tools, leave the room and go in the other room. There's a blueprint for the Grinch copter and the statue. Be careful, there's a security device and, if you trigger it, the guards will catch you, and to the main hall you'll be back. Use your bad breath to make the laser beams appear and leap over them to reach the panel. Deactivate the security device and modify the statue. The mission is now complete, you can leave the city hall.
MISSION 6: ADVANCING THE COUNTDOWN TO CHRISTMAS CLOCK You'll need the rocket spring for this mission. All the blueprints can be found at Whoforest (refer to the section «The blueprints» ). Once you have collected all the parts, go back to the computer and craft the rocket spring. Now, head back to Downtown Whoville and go in the building, where the guard is
MISSION 7: SQUASHING ALL THE GIFTS There's a total of 500 gifts to crush with your butt in this area. Since their value is different everytime you crush a gift, it would be a pain to tell you the location and the value of each gift. They are everywhere, just look closely every single roof and corner, everywhere. The kids outside hold some of them. Use the rotten egg launcher to calm them down and get the present. You can also find them in the other buildings. You'll need a specific gadget for a good part of the gifts though since you can find some of them on unreachable places such as garlands so you'll have to come back here once you'll have the required gadgets. Don't forget to shoot your buddy the painter at the top of the tree with your rotten egg launcher. Ah and these ice walls, there's some gifts behind. Shoot the crack to blast them. Otherwise, this mission is a piece of cake with a cherry at the top (and some ice cream if you want
------------
AREA 2: WHOFOREST At one point, you'll be able to access this area. In order to go there, go back to your lair and use the vaccum tube next to the one leading to Downtown Whoville. Here you are, at Whoforest. A nice land with houses and new missions to accomplish, weeeeeeee!
MISSION 1: MAKING CHRISTMAS TREES DROOP For this mission, all you have to do is use your bad breath on the evergreens you'll find in the area. The first one is right at the beginning. The others are guarded by a guy. In order to make them droop, you need to stun the guy with a rotten egg and use the bad breath when he's stunned. This mission is not that hard once you know the technique. Ah, keep in mind there's a cliff to climb up with the poles, just in case you're wondering where the last trees are. The mission will be complete once you have have taken care of the ten Christmas trees.
MISSION 2: SABOTAGING SNOW CANNON WITH GLUE You'll need the rotten egg launcher and the rocket spring for this mission. Right behind the giant tree, you'll see a cliff with some poles. Use them to go up then go west. Step on the platform below, equip the rotten egg launcher and shoot the crack of the ice wall to break it down. Grab the glue bucket and go back up. You see that giant thingy? It's the snow cannon. Equip the rocket spring to step on it and use the glue bucket. Mission done.
MISSION 3: PUTTING BEEHIVES INTO CABINS See these trees with beehives? You must shoot the beehives with your rotten egg launcher, grab a beehive and bring it to the chimney of one of these lovely cottages. The first tree is safe but it'll be useful for the first two cabins. The time limit doesn't allow you to keep a beehive as long as you want. The second house is tricky, you need the rocket spring to reach the roof. The next trees are protected by a hungry creature. If you stay close to it, you'll get punched. So how to make it go away. Well, that creature really likes beehives so shoot the beehives, then use your stealth ability while the monster is distracted by its food and use your bad breath to send it back home. Now, you can shoot the beehives once more and take care of the two nearest cottages. Keep in mind you'll need the rocket spring for some of the house since you can jump high enough to get on it with a single jump. Once you took care of all the houses, the mission is complete.
MISSION 4: SLIMING THE MAYOR'S SKIS For this mission, you must complete the third task of Whoforest and get the slime shooter. Refer to the part named «The blueprints» in this walkthrough to find the parts for this gadget. Craft it with the computer and head back to Whoforest. Go in the second house to see a locked chest. Use the slime shooter to trap the bees and use your butt to open the chest and grab the cable car access card. Leave the house and go to the cable railway. Use the card and go in the cable car. Welcome to the ski resort. Sneak past the guard and go to the right to find the second heart-of-stone of the game. Go down and head to the your right. You'll see the mayor's estate but a dog is guarding the skis. So, you need to find a way to stun the dog. The top of a tree has some snow (4). Equip the rotten egg launcher, then wait until the dog is underneath the snow and shoot the top of the tree to make the snow drop down and stun the dog. Now, switch to the slime shooter and go slime the skis to the right of the mayor's estate. The mission will be done.
MISSION 5: REPLACING THE CANDLES ON THE CAKE WITH FIREWORKS You need the octopus climbing device in order to complete the mission. Refer to the section «The blueprints» to find them all. Craft the gadget then go back to Whoforest. Now, you must head to the civic center. But where is it? You might have seen these ice walls at Whoforest. The first one leads to some gifts. The second one leads to the civic center. Use your new toy to climb the ice wall, then activate the switch to raise the bridge up here and climb up the other ice wall. Shoot the target, then cross the bridge and grab the first firework stick for the surprise cake. You need to find the nine other fireworks then locate the cake and use them on the cake. These targets will make a firework stick fall down everytime you shoot them so find them all and collect the remaining fireworks. Use max to go in the small opening in order to smash some gifts in the room. Activate another switch, cross the bridge, shoot the two targets to the left of the house to get two more firework sticks, then the two targets on the house and the one behind you. You should get six firework sticks. Go in the tunnel, use the bad breath to scare the creature and the guard then shoot the yodellers to make them fall down. Don't forget to use the pancake attack to get the gift they kept safe (don't ask me where, please). Now, shoot the two targets to get two more firework sticks then face south west and shoot the last targets. Now, leap over the fence, use the rocket spring to reach the entrance of the cave, get the ninth firework stick and go in without waking the bats up. That means «use your stealth skill». Go down, shoot the stalactite to grab the blueprint for the grinch copter trapped in the ice block and make some kind of stairs in order to get on the next platforms. Go up, scare the monster and break the snow wall with a rotten egg. Now, get rid of the guy, then grab the poles to your right to grab the last firework stick. Go to that giant house, shoot the chains holding the sign to knock the guard out and go in. Use the fireworks on the cake to complete the mission.
MISSION 6: SQUASHING ALL GIFTS Same thing like in Downtown Whoville. This time, there's a total of 750 gifts to crush with your butt. You'll have to come back here with the specific gadgets for some of the gifts. As always, use your bad breath to scare the guards with their freeze gun and the kids. Don't forget to use the pancake attack on the kids to get another gift and the yodellers at the civic center to get their gifts. Otherwise, look everywhere and have fun!
------------
AREA 3: THE DUMP That area will be unlocked after completing a few missions at Whoforest. New missions as always, some bluprints to find and these gifts to smash. To be honest, I don't like that level for two reasons. You'll see why.
MISSION 1: STEALING FOOD FROM BIRDS That mission is quite easy. You must find the birds, walk toward them and shoot the one with the food in its mouth to get it. There's nothing else to do. You'll find three group of birds in the first area, then four in the area after the blue tunnel, two in the area after the green tunnel, one in the area with the rats. Ah yeah, one thing to know about the third group of the first section: the steam prevents you to go there. You need to connect the first nine pipes to disable that smoke screen. The last group of birds is there with your last slice of pizza. The mission will be done afterwards.
MISSION 2: FEEDING COMPUTER WITH ROBOTS PARTS For this mission, you must locate these tiny robots. Not the flying orbs, the other type of robot. Also, you need nitro eggs to blast them. Nitro eggs are, compared to rotten eggs, red and glows. You can only carry five of these. Use them to blast these tiny robots and get their parts. One of the robots is behind the steam to the right when you start the level. You must connect the first nine pipes to go there. Grab a nitro egg, blast the last robot and return to the zone after the green tunnel. Now, find the computer and offer these tasty parts. See that fence with the glowing arrow above? It's the computer. Blast the fence with a nitro egg and give the parts to complete the mission.
MISSION 3: INFESTING THE MAYOR'S HOUSE WITH RATS That mission is kinda tedious and obnoxious. It's one of the reasons why I don't really like that level. First, open the hatch of the first column, press the button behind the electric cables and use the rocket spring to leave the underground area. Then go through the green tunnel then the red tunnel to the left. Here is the area with the rats and a pipe to link (the big pipe to the north). Equip the rotten egg launcher and shoot the five planks above your head. They will create the path for our friends. Now, take the nitro egg and blast the fence leading to the mayor's house. And here is where it becomes obnoxious and tedious, like I said. Don't try to use The Grinch to lead the rats to the goal. Use Max and move slowly. Yeah, slowly otherwise they will stop following you. Needless to lead them one by one: you can lead more than one but they are kinda stubborn in group. You can bark with the X button to call them if you have some troubles with these rats, it might help. Once all the ten rats reached the goal, the mission will be done.
MISSION 4: CONDUCTING THE STINKY GAS TO WHO-BRIS' SHACK You need to find the ten pipes to link in order to complete that mission. How to recognize these pipes? Some smoke emanates from a part of the pipe and there's a pole to grab, exactly like this:
In order to link the pipes, grab the pole and spin until it's linked. There are two other types of pipes to link: one with a rotating part (use the rotten egg launcher to make it spin and link it) and another one you need to push (located in the area with the rats after the red tunnel). You should find three pipes in the first area, one in the area with the rats, three pipes in the area after the blue tunnel and two pipes in the area after the green tunnel. The last pipe is a puzzle to solve and it's located behind the steam. Connect the other pipes to access that last part of the dump. First things first, turn off the valve to stop the steam, then activate the switch near the valve. Activate the next one to the right then the one behind. Finally, activate the very first switch and turn on the valve to complete the mission.
MISSION 5: SHAVING THE DUMP GUARDIAN In order to complete that mission, you must head to the dump guardian's house. First, open the hatch if it's not done yet, go down, press the switch, go back to the surface and go through the green tunnel. Don't go through the red tunnel, pass by the certain computer of the second task, get rid of the orb and go to the next zone. See that giant house over there? The dump guardian is there. But it's not that easy to get there. That part gave me some troubles. It's one of the two reasons why I hate that level. First, shoot the three mattresses then stun the flying with some slime. Now, you have exactly one minute to go there with the help of the rocket spring. If the time runs out, the orb will be free and will shoot at you. Also, try not to land on the ground. If you haven't noticed the sign at the entrance, it says «land mines». Once you reach the other side of the land mines field, go to the right with the rocket spring, grab the blueprint for the octopus climbing device to the right of the garage and go in. Take the scissors (5), leave the garage and grab the blueprint and the third heart-of-stone around the big house and go in. Use your stealth skill now, grab the other blueprint for the octopus climbing device and go upstairs to see the dump guardian
MISSION 6: SHORT-CIRCUITING POWER PLANT You'll need the octopus climbing device and the slime shooter for this mission. Go through the blue tunnel after pressing the switch in the underground, then slime the two devices to the left and to the right of the power plant main door. Now, equip the octopus climbing device and climb the door up to enter the power plant. Go north to find a blueprint for the grinch copter, go back to the device at the beginning and use your bad breath three times in a row. The platform behind you will move and you will be able to reach the upper platform. Step on it, use your rotten egg launcher to shoot the button, grab the wire and go to the next platform. Use the bad breath on the guard and shoot the other button with the rotten egg launcher. Grab the wire, use Max to press the button at the other side of the protection field and press the three other buttons in the openings to the left and to the right. You'll get rid of the protection field. Use the bad breath on the guard, carry on, use the rocket spring to get on the pipe and then on the platform. Shoot the two buttons, then the two obstacles on the wire, grab the wire and grab it. Shoot the next buttons, grab the wire, use Max once more to activate the switches and disable the protection field. There's also a blueprint for the grinch copter to your right. Carry on, go down and activate the three devices. Now, go back up and use the spinning platforms to proceed to the next area. I can tell this bit is quite obnoxious, especially with that camera angle. In the next area, use the wire to reach the place with the column, shoot the button then go back up and use the wire to go to the balcony and enter the power plant core.
Note the blueprint in the sphere, go right, use the slime shooter to stun the guard then your bad breath to make him go away. Use the elvator to go up, grab some eggs and knock the next guard out. Climb the walls up with the octopus climbing device then slime the two cameras and shoot the button to deactivate one quarter of the power. Go back, use the moving platform to go to the left, shoot the button then grab the wire. Use the slime shooter to disable the electricity in order to climb up the walls easily with the octopus climbing device, then grab the wire, slime the cameras and get rid of the guard and the robot. Shoot the button to disable half of the power, go back and carry on. Slime the cameras, go through the passageway and shoot the button behind you to disable 75% of the power. Climb up the wall, shoot the button, then grab the wire, shoot another button and carry on. Slime the wall then climb it up, grab the blueprint for the grinch copter and shoot the button to fully short-circuit the power plant and complete the mission. Grab the last blueprint for the grinch copter of this area before leaving the power plant.
MISSION 7: SQUASHING ALL GIFTS 750 gifts to destroy in this area. You know the score, don't you? Look everywhere, every single corner and place with no exception. If you need a specific gadget (for example the gift above the giant pipe above your head right at the beginning), come back when you'll have it. Most of the gifts will be found in the power plant. The electrical fences will never be disabled, even after completing the mission «short-circuiting power plant». You'll need some nitro eggs to break them.
------------
AREA 4: WHOLAKE This is the last area of the game and, like the others, it will be unlocked after a few missions done at the dump (three, I do believe). The last pranks to do to the lovely people of Whoville. And as always, these gifts to find and crush with your butt.
MISSION 1: PUTTING THISTLES IN SHORTS For that mission, you need to get some thistles from these little creatures (6). Shoot a rotten egg at them and take their thistles. You can get up to 5 thistles. Once you have the thistles, locate the shorts (they should be nearby a tent) and shoot the thistles. Like the tents, you have to look everywhere in the southern shore. Don't forget there's a wooden wall behind a kid you can climb up with the octopus climbing device. Once you put the thistles in each short (there are ten shorts to find here), the mission will be done.
MISSION 2: SABOTAGING THE TENTS That mission is not that hard. When you see a tent, use the pancake attack to sabotage it, that's it. The first one is nearby the first wooden bridge. There's also some shorts. Use the octopus climbing device to climb the wooden part behind the kid and get on the ledge up there. Shoot the beehive above the beast to make it go away and sabotage the two tents. There's also a blueprint for the marine mobile behind the tent. Now, grab the wire and go to the other side to find another tent to sabotage and another blueprint for the marine mobile. Drop down to the right, sabotage the three tents to your left and move the rock block to find another tent on the platform and a blueprint for the marine mobile. Head to the gate to find the last two tents to sabotage. Mission complete.
MISSION 3: DRILLING HOLES IN CANOES At the end of the south shore, there's a gate. Unfortunately, the scout won't let you in. Go back to the first bridge, cross it and use the poles to reach the platform. With the rocket spring, step on the roof, grab the blueprint for the marine mobile and go in the cabin by the chimney. See that fat scout? You need his clothes. While he's eating that delicious meal, add a bit of bad breath to it. He will be mad at you and will start up a fight. Spin around him while he's shooting his projectiles and use your bad breath afterwards. Pick up the hat and stay focused for the second round. As always, spin around to avoid the projectiles, use the bad breath and then use the pancake attack to steal the t-shirt. Last round, it's time to change a rule in this fight. You may have noticed these deer heads on the walls. Stand in front of one of these and wait until he charges at you. I think you have to do that twice to end the battle and get the short. If you fail, don't worry: dodge the projectiles and repeat the method. You now have the scout clothes so you can go through the gate. Head back there, use the small cabin to use the disguise and go to the next area. Now, find the pink shack and grab the drill inside. The shack is at the top of the hill to the north. Use the poles to go there. Now, go check the shore to find most of the canoes. Three are guarded by a big guy and you need to scare him in order to sabotage these three canoes. With Max, go in the blue shack to the west and find a wild badger outside. Bring it to the scout to scare him. Now that the way is clear, you can sabotage the canoes there. Don't forget to grab the blueprint for the marine mobile behind the shack and the last heart-of-stone. In order to get the two above the car, just move the block nearby and get on the car to sabotage the two canoes. And finally, the three canoes on the water must be back to the shore with the crank. Grab it and spin. The last canoe is behind the blue shack to the west. Once you sabotage all the canoes, the mission is complete.
MISSION 4: MODIFYING THE MARINEMOBILE You'll need the marine mobile (no joking!) for this mission. Check the section «the blueprints» to see the locations of all the blueprints for this gadget. At the beginning of the area, you'll see the marine mobile. Get in. Welcome to the submarine world, folks. You need to find five parts in order to modify the submarine and scare the little scouts. First of all, use the speed boost function to grab the two swimming fishes. Those are two parts. The third part is trapped within the seaweeds next to a strange yet nice creature. Use the boost to tackle him and he will eat the seaweeds and set the part free. It requires a specific angle and direction to get this one. Just stand in front of your target and use the speed boost. If it's good enough, the creature of the deep blue sea will take of the rest. Now, the last two parts are hidden in some secrets caves. To the left and to the right, you should notice two suspicious walls. Use the speed boost to break them down. To the right, you'll find a shipwreck and a stalactite above. Use the second function (the dolphin jump) to make it fall off and break the shipwreck. You'll find the fourth part. To the left, you'll see the part trapped within some kind of glass bell. Go to the surface and use the dolphin jump function to hit the target and release the last part. And that will end the mission.
MISSION 5: HOOKING THE MAYOR'S BED TO THE MOTORBOAT You'll need two items for this mission: a hook and a rope. And the last gadget but we shall see that in due time. Put your disguise and go to the northern shore. Cross the bridge then go east to reach the mayor's villa. You'll see a canoe right in front of you. Put your disguise off and use the rocket spring to step on the platform and raise the boat. Use Max to get the rope. Now time to find the hook. Go underneath the villa, look up and shoot the two wooden beams to make the rock fall down. Now, use the catapult to reach the mayor's villa, use the rocket spring to get on the roof grab the blueprint for the grinch copter on the branch and the last one at the entrance of the cave. Go in the cave to talk to an old man who will ask you a favor. The reward is his hook, which is what we need. Go back to your lair to craft the grinch copter (if you have collected all the parts, otherwise refer to the part «the blueprints» to see where to find the others). Head back to the villa, it's time to find five scarfs. The scouts around the villa wear one and you have to defeat them in order to get it. The one on the stump is not that hard. First, spin the crank to set the device then shoot the beehive above his head and press the button. You'll get his scarf. Now, the one next to the motorboat needs a bath. Avoid his projectiles and keep using the bad breath until he falls off into the water. That's the second scarf to get. Go at top of the villa to see a guy. You'll notice a part of the fence is missing. Good, I think the guy is ready for a leap of faith. Bring him to the opening, dodge his attack, use your bad breath and keep shooting at him some rotten eggs until he falls off. And that's three scarfs for you, two more to go. Go back to the old man's cave to spot the two last targets. One is flying in the air when you come close to him. Ok, let's go for a sky battle. Chase him with your new toy and, when you are close to him, use the bad breath. Four scarfs, one more to go. The last one is not that hard either. From the entrance of the cave go down to see the man. Avoid the projectiles he throws at you and use the bad breath to let him take a bath. You'll get the last scarf. Go talk to the old man and you'll get the hook. Now, put the disguise, use the catapult to reach the main entrance of the villa and go in. Use your stealth skill to get close to the bed and use the hook and the rope on the bed. Enjoy the trip, mister mayor! Mission complete.
MISSION 6: SQUASHING ALL GIFTS Are you ready for the ultimate quest for the gifts? I hope so because there's a total of 1000 gifts to find and smash. Yes, you heard me: a thousand of gifts hidden here. Look everywhere as always and try to find'em all. There are four areas in this level, don't forget that. Kill the enemies to get some gifts (except for the crows and the mosquitos).
------------
GETTING THE PARTS FOR THE SLEIGH Well, despite all what you've done to the townfolks of Whoville, they still celebrate Christmas. No way! You must stop this at any times. And the plan is... become Santa and steal Christmas to these people. For this mission, you must go back to each area and look for the missing parts for the sleigh. Except for Wholake, the other areas have one part. I suggest you to complete your last missions before looking for the missing parts. Well, if you want to complete the game at 100% of course. Otherwise, time to fix the sleigh and ruin Christmas once and for all.
DOWNTOWN WHOVILLE Find the truck patrolling around the Christmas tree, equip the rotten egg launcher and follow it. When the back is open, shoot a few eggs. Repeat this until it breaks and pick up the part of the sleigh.
WHOFOREST A man next to the first house wants to challenge your dog. Accept and get ready for the race. Th at race is quite challenging and you might need a few tries to manage to get the skis of your opponents. Max can't jump, your opponent can. Which means you'll have to pass by the second house by the left to overcome the first obstacle. No mistake is accepted is you want to win that race so try it as many times as you want until you find the correct way to go to the finish line. Your victory will grant you the skis, one of the five parts of the sleigh.
THE DUMP Go to the right at the beginning of the area, use the rocket spring to leap over the fence and use the binoculars to look at the open window. Memorize the pattern (the white square being where the piece must be placed) and move each piece you'll find around the shack to its specific location. The garage will be open and you will be able to collect the part of the sleigh.
WHOLAKE-SOUTHERN SHORE The part can be obtained if you talk to the boy in front of the first wooden bridge. He asks you to kill ten crows within 15 seconds. It's quite challenging, trust me. You may need a few tries. Also, it uses your own ammos so you may have to look for rotten eggs from time to time. You'll get the GPS if you manage to shoot the number of crows requested by the boy.
WHOLAKE - SUBMARINE WORLD You'll get that part after helping a friend under the sea. Talk to him, accept the challenge and grab all the pearls within the time limit. Use the speed function (square button), it's highly recommended. Oh yeah, beware of the walls. They hit, just a bit. I'm not joking. Otherwise, the pearls mark a specific path around the main isle where you can get one of the parts for the mission «modifying the marine mobile» so it should be easy to get them all. ------------
THE SLEIGH RIDE Once you collected the five parts, a cutscene will be triggered. If you're looking for a 100% completion, make sure you did all the mission in each area before going back to the sleigh. Time for a joy ride, folks! In this last mission, you must chase the real Santa Claus and steal all the presents he leaves behind. No mistakes is accepted during this part. If you miss a gift, it's back to the start. That part is quite challenging to be honest. After collecting the gifts, you must get rid of the real Santa Claus. And I think a dozen of rotten egg in the face should do the trick. You must hit him ten times within the time limit. Once you got rid of him, the final part will end. Watch the cutscene. Congratulations, you completed the game.
But wait, there is more! If you destroyed all the gifts in the game, you'll be rewarded with a really nice mini-game. To be honest, that mini-game is better than the three others. Unfortunately, you can't play it with a friend, which kinda stinks compared to the others. I suggest you to go back to the lair and save your progress so you don't have to remake the last part. I guess I'll end this walkthrough with that bonus. You'll see, it rocks! For now, time to add the extra part of the game guide: the location of all the blueprints. ------------
THE BLUEPRINTS You remember the blueprints, don't you? You need to find them to craft your gadgets. Here is where you can find them all.
THE BINOCULARS Note: all the blueprints can be found in Downtown Whoville. - A blueprint for the binoculars is on a roof to the right, from where you start. - Go in the archives room down the stairs once you're in the town hall, check the first drawer to the right ot find one blueprint for the binoculars. - In the archives room, check the second drawer of the row in front of you to find another blueprint for the binoculars. - Check the third drawer to your left in the archives room to find the last blueprint for the binoculars.
THE ROTTEN EGG LAUNCHER Note: Same here. They're all at Downtown Whoville. - A blueprint for the plan rotten egg launcher is on a platform nearby the guard you mustn't wake up. Use the pole to reach it. - Another blueprint for the rotten egg launcher is on a platform nearby the town hall. - Another blueprint for the rotten egg launcher is inside the room 5 of the post office.- The last blueprint for the rotten egg launcher will be at the entrance of the post office, once you completed the mission 1.
ROCKET SPRING - Right behind the vaccum tube at the beginning of Whoforest, you'll find a blueprint. - One blueprint is nearby the second house, in Whoforest.- Another blueprint is nearby the tree in Whoforest. - Another one is next to a kid when you go to the right from the giant tree in Whoforest. - There's a blueprint behind the house nearby the cable railway in Whoforest. -At Whoforest, use the poles to climb up the cliff, then go to the right. There are two blueprints: one on the platform, the other one nearby the nearest house. - Near the second house to the right, you'll find another blueprint. - The last blueprint might be a bit hard to get. Once you did climb up the cliff, go right, leap over the gap, use the binoculars to spot a strange and round button above the giant tree and activate with the rotten egg launcher (7). The platform will lower and you could grab the last blueprint for the rocket spring.
OCTOPUS CLIMBING DEVICE - Break the top of the column at the dump with your pancake attack, turn back and grab the blueprint next to the red switch. - Go through the blue tunnel, then face the powerplant. Turn back and you'll see a blueprint.- Go through the blue tunnel, then smash the hatch of the column to go underground. Besides a switch and a pipe to link, you'll find a blueprint. - Behind the fence in the area with the rats. Use a nitro egg to blast it and get the blueprint. - A blueprint is in the big house at the other side of the land mine field. - There's a blueprint at the other side of the land mine field, nearby the third heart-of-stone. - Next to the garage, after the land mine field, you'll find another blueprint.- There's a blueprint right underneath the hatch, guarded by the mean guy. Use the boulder nearby to get rid of him, then open the hatch with your butt and grab the blueprint. - A blueprint is located behind the steam to your right, at the beginning of the level.
SLIME SHOOTER All the blueprints are hidden in the cottages in Whoforest. Complete the mission «Putting beehives into cabins» to find them all. Beware of the bees: they're still in the cabins and not really happy that you bothered them.
MARINE MOBILE All the blueprints can be found at Wholake. Since there are two sides (or shores), it'll be useful to use these terms for your hunt. Each shore has eight blueprints. Ah, one more thing: you start at the the south shore.
(SOUTH SHORE) - A blueprint is located to the wooden bridge nearby a tent. You can't really miss it actually. - There's a blueprint nearby a tent.- On your way to the second wooden bridge, go right to find another blueprint. - Locate a rock block to move nearby the second set of shorts, move it to reach the platform and grab the blueprint nearby the tent. - A blueprint is on the roof of the big cabin above the platform. - Nearby the changing booth, there's another blueprint. - Behind the Summer beast, you'll find another blueprint. - Use the wire nearby the Summer beast to reach the other side and grab the blueprint.
(NORTH SHORE) - Below the first bridge, you'll find a blueprint on a ledge. - A blueprint is hidden in a garbage bin nearby the gate. Note the block above, push it to crush the garbage bin and get the blueprint.- Behind the cabin in which you must send Max, there's a blueprint. - Push the block nearby the house in which you must send Max to crush the garbage bin down below and get another blueprint. - In the house with the small opening, grab the blueprint with Max. - Behind the house, in the part guarded by the big guy. Go in the house with Max to become a badger, find another wild badger outside and bring it back to the guy. Now that he's gone, you can collect the bluprint behind the house and the last heart-of-stone. - In the cabin in which you can get the drill, you'll find a blueprint behind the wall. - Next to the pink shack, there's a sonic scarecrow. Use it to scare the crow on the pole and use the poles to get on the platform at the other side. The blueprint is there.
THE GRINCH COPTER There are four blueprints to find in each area.
(DOWNTOWN WHOVILLE) - Two blueprints in Downtown Whoville: both of them in the city hall of Downtown Whoville. One is in the room with the safe, the other one is in the room with the statue. - There's a blueprint in the room with the bell picture.- Inside the countdown clock tower, you'll find a blueprint.
(WHOFOREST) - After the second heart of stone to collect, leap over the gap, then go right then down and send Max in the small opening. A blueprint is hidden inside with some gifts. - There's a blueprint where the dog is, at the ski resort, to the right.- In the cave, you'll see a blueprint trapped in a cage of ice you can't break with your butt. Look up to see a stalactite. Shoot it to make it fall down and break the ice block. Go grab your reward. - There's another blueprint in this cave but it took me a while to figure out how to get it. Cross the first bridge and note the ledge to the left (8). Grab it to reach the platform to the left. Pick up the blueprint and smash the gift.
(WHO DUMP) - Grab the blueprint in the small opening, at the power plant. - On a platform to the right, where the second protection field is.- Right in front of you when you enter the power plant core. Fully shut down the power to get it. - On your way to the button that disable the third generator in the power plant core.
(WHOLAKE) - Two blueprints can be found in the submarine world, once you got the marine mobile. - Go to the mayor's villa area. One is standing on a branch after the roof of the villa and the last one is at the entrance of the cave with the old man inside.
So that concludes the walkthrough. Ready for the surprise? No, it's not hidden this time. It's right here. Until next time, take care folks and Merry Christmas... Hey, I know it's not Christmas. Not yet. Maybe I'll wish you a happy Easter day next month, who knows. Who said we all have the same reasoning of time and space? Ok, I stop! I see you in the next game guide. Bye, bye, folks! o/ -------------------- |

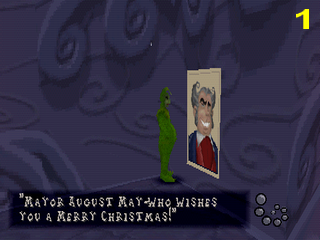

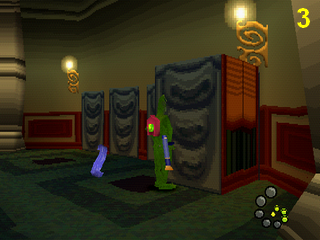
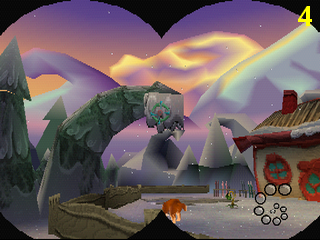


| Games have secrets, I have my eagle gaze. |
Affected by 'Laziness Syndrome'
Registered: 10-21-11
Location: France
Last Post: 2647 days
Last Active: 1820 days
