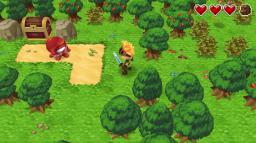
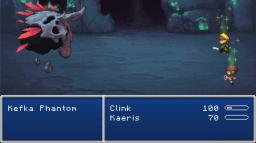
Forum Links
Play Evoland Online
Thread Information
Thread Actions
Order
Walkthrough Evoland
04-04-19 10:03 AM
Laian is Offline
| ID: 1371001 | 4935 Words
| ID: 1371001 | 4935 Words
Laian
Level: 90


POSTS: 2230/2232
POST EXP: 457173
LVL EXP: 7122880
CP: 23726.2
VIZ: 3569925

POSTS: 2230/2232
POST EXP: 457173
LVL EXP: 7122880
CP: 23726.2
VIZ: 3569925

Likes: 4 Dislikes: 0
Hi folks! Laian here, back to the saddle with a brand new walkthrough. It's been a while but I had to take care of various stuff. Recently, I heard of a bundle regrouping two fantastic games that some of you might have heard of as well: the Evoland series. Called "Evoland: the Legendary Edition" and released for Switch and other systems, I decided to replay the first episode.
What is Evoland, by the way? For starters, that game was originally a free game made in 48 hours for a Ludum Dare by Shiro Games. It has been inspired by famous RPGs such as Dragon Quest, Final Fantasy, The Legend of Zelda... The idea is to play through the evolution of the RPG genre by unlocking features during the game. Years later, the developpers went ahead and remade the game for PC. The game has been a success and they made a sequel released for PC. And now, you can play both games in the new version available for Switch, XBOX One, PS4 and PC. Isn't that great? For someone like me who tried the free version and the reboot, it is. I could replay the Legenday Edition (since I bought it on Switch and finished Evoland once) but I felt like replaying the original Evoland on PC. So I hope you're ready for that trip because I am and I'll be your commander for the entire journey. Welcome to Evoland. Oh and that walkthrough also works with the Legendary Edition. STARTING THE QUEST First thing you might ask is: is there a plot, a goal? There is one actually but you'll get it in due time. Go right as the instruction says then go left. No need to press a button to open the chest, just bump into them. Move forward until you come to another chest to open. Head south, open the chest to the left and keep in mind the chest you cannot open. There is a lot of backtracking to do in this game if you want to get all the collectibles and achievements. Cross the bridge, go south and get the sword. Now, you can cut grass and kill enemies. Before going east, go back to the starting point and cut the grass to the bottom right hand corner to get to the chest you saw earlier and pick up your first collectible: the card "Octorac". There are twenty-three cards to collect in this game, necessary to play a mini-game later and get two achievements of the game. Also, cut the grass to the left in the second screen to get another collectible: a star. That is the second and last collectible you can collect to get three achievements (one for each milestone of ten stars collected), which means you have a total of thirty stars to find in the world of Evoland. Time to go east and carry on the quest. You'll find a strange symbol on the ground. Open the chest to activate the save points. Go west to find a star in the chest and the card "bat" after cutting some grass. Secret within secret, yeah. Go back, head south, open the chest to get the 16-bit colors and move to the next save point. There is a breakable rock to the right before the save point but you need another item so keep in mind that there is a rock here. Not that far from the new save point, there's a star to the north. Open the chest to the left to get the long-awaited (and so deep and rich) plot then the next ones. You'll come to a point where you will be blocked by a black stone known as dimensional stone. Go back to the first signboard and go between the rocks. Save your progress and face the statues. These can only be hit from the back or the sides. After this fight, note the breakable stone to the right guarding the chest and go north. Welcome to the overworld, folks! This is where you can start farming glis like you were in a turn based RPG. Why is that? Because there's the first village a bit further to the north. When you reached the meadow, do not touch the statues right now, save your progress before then crush one by one your foes. Open the chest to unlock Papunika Village. Open the chest to the right. You can talk to the NPCs but there's a problem: you're a kid and they are not sociable towards kids. Time to grow up so eat some vegetables and soup (and wait years and years). That is the realistic way of life. Although, it's a game and there is a faster way. Talk to a kid who is going to mention something about a seed lost in the well. Interesting... you might check this out then. Down in the well, the seed is easily noticeable to the left. Get it to grow taller and go south to find the card "Worm". Go back to the surface, then west, open the chests and check all the houses to find some stuff including the card "Tork". The locked house contains something interesting. Next to the well, there's a secret opening behind the house. Collect the card "Kobra Zero" and go get the star inside the house to the left by entering a hole in the wall. Now, in order to get to the north caves, you need better equipment. The storekeeper sells that (and the rare card "Emuk" for 500 glis). If you are short on money, leave the village and go farm some glis outside. It shouldn't take that long to buy the sword and the armor since the enemies drop 50 glis each time you kill one. Once you are well-equipped, go east and leave the village. THE CRYSTAL CAVES You will get into a forced battle a bit further. Get rid of the enemies and say "yes" to the ally (considering you cannot decline the request, sadly). Your new ally needs a name. You can keep Kaeris or give another name. For the sake of that walkthrough, I did not change it. She is basically the healer of the team and... the ONLY ally you will get during the game. Go west before entering the north caves to the north (that's what they are called "the north caves") to find a secret area. You can easily find it since one of the trees in the overworld have a few red pixels. Here is one of the secret areas of the game: the hidden meadow. Pick up the card "slime" in the chest then go in the hole. In the hidden cave, there are enemies and a few things to get. Go all the way south, check the crate to find a potion then open the chest to get a star and go through the secret passageway to the east close to the water to find the card "The seed". There's also a secret within secret if you go through the passageway to the right, leading to a crate and a funny joke for completionists like your host Laian. There's a pile of crates and barrel to the far south with a potion and that's it for the hidden cave. Time to go in the north caves or the crystal caves. And since your ally has a name, it's your turn to get a name. I did not change it either, I went with "Clink". Go north then east to find 50 glis and two potions in the crates and barrels. Keep going north, then go west to find a chest containing the experience points upgrade and go through the secret passageway to the left close to the water to get to the other side and find a star. There's another star in the chest blocked by the rocks, just go a bit to the east then south. Go east to unlock the fountain and go south to find a switch and the card "scaven". Go save your progress with the fountain and head north to find the crystal. Touch it to face the first boss of the game: Kefka's ghost. He is not that hard if you heal constantly with Kaeris. There's just a moment when you need to be patient: exactly when he turns blue. He becomes invisible for a short period of time; which means you can't touch your opponent. After this fight, step on the yellow mark to the north to leave the cave and come to the next area: Edel Vale. THE NORIA MINES The next destination is... well, as the title says, the Noria Mines. Grab the rewards in the chests, cut the grass to the south to get a star and the card "Zoomba". Carry on, cut some grass to the left and collect the card "Pakkun" in the chest. Head south, open the chest and pass the dimensional stone. Remember that place? It's the beginning of the game. Go south and pass another dimensional stone. Open the chest to the right then the one to the left and carry on. Cut the grass to the south to find the card "Wasp" after the bridges and open the chest to the east to pick up a star. Before going south and leaving the area, go east to open the chest and get another star. Now, time to go to the Noria Mines to the south. That dungeon is more like a "Legend of Zelda" dungeon compared to the last one that was more a "Final Fantasy" one. There are cracks in the walls and secret passageways so keep an eye on them. Open the chest and go north since you don't have much of a choice at this point. Open the chest and go east to open another chest. Press the pressure plates to unlock another path and go there. Kill the red wizard, go west, open the chest and kill the bats to make another chest appear. Grab the key inside, open the chest and kill the skeleton. Go south, kill the red wizard and press the button. Go back, ignore the chest at the other side of the water and go get the one next to the first gate you opened to find a star. Go back, open the chests to unlock the labyrinth then get the key and another star and open the locked door. Beat the skeletons and push the block in the next room. Kill the bats, push the blocks and carry on. Next to the pot, there's a secret passageway leading to a pressure plate. Step on it to unlock a gate. Now go south, kill the enemies and carry on. Kaeris will feel guilty for not helping you and will heal your wounds. Open the chest, push the enemy into the hole and go to the next room. Open the chest and the one to the left (that means you pressed the button in the little secret room earlier) to get the card "A'tuin". Press the pressure plates, kill the enemies and carry on. Pass the first two traps and jump into the third hole to get to the isolated chest you saw earlier. Inside, you'll find your card, well the card of your hero... you know what I mean. Head all the way back to the next room, kill the wizards and open the chest. Solve the puzzle, kill the bats and go right to get a key. Open the door, then the chest and save your progress. The next room needs to be crossed with patience. Find your way to the other side, keep in mind the crack in the wall and go to the next room. Go through the passageway to the left to find the card "Spider" and avoid the fireballs. Kill all the enemies in the room and open the chest to get the boss room key. Also, next to the chest, there's a secret path leading to a chest with a star inside. Time to face the boss of the dungeon. Oh and don't worry about the cracks in the wall: like I said, there's a lot of backtracking to do in this game if you want to get all the collectibles. That boss is a dark version of you and can only be hit when he is stunned. Get close to a wall, bait him and dodge his tackle to knock him out then strike. He will summon bats and shoot projectiles at you from time to time. Note that there's an achievement if you beat him without being hit once. That includes the bats, the fireballs and the tackles. None of these attacks. Kinda tense but it's possible. And no worries, you can kick his butt over and over again after this fight once you come back to the mines. Go get your reward and leave the mines. THE SACRED GROVE Go east and enter Aogai City. Talk to the people to the north to know the existence of the bombs and someone who can give you that item. There a chest in the next screen to the right. Now, head to the eastern part of the city and open the chests. You will unlock new NPCs such as a storekeeper selling some new stuff like another rare card for 10000 glis (named "the Undead King"), a Double Twin player and a guy who wants to see a complete collection of Double Twin cards. These two last NPCs will only unlock achievements if you managed to complete and show your card collection and beat the champion. I think you don't need to get all the cards to beat the four difficulty levels of the Double Twin mini-game but it's best if you get them all. But enough talk about that, let's get the bombs. You need to talk to almost all the NPCs of the village, from one to another until you get to talk to the kid running around the well like a dummy (after a butterfly). You will get the bombs. Up to you to go back now to the places you explored to get some stuff or go south to the sacred grove in order to get the first part of the amulet of Gorn. I'll make a whole part before the last part of the walkthrough for that. Leave the town and go south. Equip the bombs and blast the rocks then go east to find a blue crystal. Touch it to enable the time travel. Everytime you will beat a crystal like this one, you will go back and forth in time. That means when you're in 2D mode, you can pass the small trees but not the dimensional stones and vice versa in the 3D mode. Go north, read the sign (important clue for later), then go west. Touch the crystal, pass the dimensional stone and enter the dungeon. Move cautiously around the room to reach the chest in the center of the lava maze and get the bow. There's also a secret passageway to the right with a star inside the chest and a cracked wall to blast with another star inside a chest. Time to leave the mini-dungeon and carry on. Go back to the past, stand before the torch and shoot an arrow towards the small tree to get rid of it once and for all. Yeah, you will change the future as well, that's neat. Go back to the 3D world, carry on, equip the bombs, put on next to the crystal and pass the dimensional stone to the north before it explodes. Go get the card "Kefka's ghost" inside the chest and do the same exact thing with the other crystal next to the chest to cross the small tree and go back to the 3D world. Touch the crystal after the dimensional stone to go back to the 2D world, pass the small tree, blast the rock to the right and light the torch up with an arrow. Burn both of the small trees and go back to the 3D world to collect the star in the chest to the right and go south. Blast the rock blocking the way to the torch and go east then north. Blast the rock, get rid of the monsters and go get the star in the chest. Cross the bridge to the east, shoot the crystal with the bow and pass the small tree. Note the entrance to another dungeon to the right, blast the rock, then go back on the second bridge, face east and shoot an arrow. You will light one of the torches necessary to open the way to the dungeon. Go south, then all the way around the small lake with the crystal, don't touch the crystal right now, cut the grass then shoot the torch and the tree with an arrow and blast the rock. At this point, you partially unlocked the way to the dungeon. Partially, you just removed the statue but there's a dimensional stone blocking the way. Touch the crystal to go to the 3D world and enter the dungeon. Kill the bats, push the torches and go to the next room. Kill the enemies, pick up the first half of the amulet in the chest and blast the wall to get a star in the chest. Leave the dungeon, pass the dimensional stone to the west and touch the crystal. Stand before the torch, face north and shoot an arrow. Go back to the crystal, put a bomb and pass the stone. Go light the last torch and face south to burn the small tree. Head back over there, touch the crystal, then the other one and go north to get the card "Kaeris" inside the chest. Leave the sacred grove with the way to the south and go back to Aogai City. THE RUINS OF SARUDNAHK Talk to Kaeris' uncle then go north-east to leave the town and go to your next destination: the ruins of Sarudnahk. You'll see the Black Citadel to the right but you can't go in there right now. Enter the ruins, open the chest and choose between both of the characters. Time to get the second half of that amulet. This is where you can get lots of glis. And equipment stuff, yeah. Although, the equipment you will find is meaningless, just for the "hack'n'slash" touch. You can get an achievement if you get your inventory complete. Kill the spiders and open the chests you will see on your way. Go to the far east and get the card "Dopple" after the bats. That one can be easily missed since it's out of bounds and the mini-map, once gotten, barely show the the path. Go north now, then get the map upgrade nearby the the northern way and go west to find a star in the chest. Save your progress, head north then carry on. Go north, beat the wasps then get a star from the chest and go south. Before the boss fight, there's a save point to the left and your way out of the ruins to the right. Open the chest to summon the boss and face it. The undead king is not that hard. His melee attacks does nearly nothing to you and the only threat that might worry you a bit is the magic missiles he spreads around him quite often. Other than that, he is super easy to beat. Go get the second half of the amulet after that fight, open the other chest that just appeared from nowhere to make a portal appear. Go back to Aogai City, save your progress and go to the Black Citadel to face the bad guy. DEJA-VU! (AND THE POWER OF LOVE) You will understand why I named that part with such a title. You are greeted by the bad guy who's named... Zephyros. It's a scr COLLECTIBLES FETCHING Besides the collectibles, there are achievements to unlock to get the 100%. Yeah, you need to find all the stars, cards and get all the achievements possible; which I find quite stupid to be fair. You cannot check in-game the achievements you got from this point and some of them can be missed. Anyway, let's focus on the last collectibles. Nearby the meadow, there's a tent. It's a merchant and he needs food. A good cooked Choboko meat will do the trick. You can only find chobokos in the field a bit to the north. It might take a while before finding one. The choboko is a strong enemy. If you have Babamut ready, use it! You will get raw Choboko meat. Go to Aogai village and talk to the old woman next to the desperate man to get the cooked Choboko meat. Bring it back to the merchant to get the extra heart. That's the only extra heart you will get, by the way. You might have seen a cave nearby the tent: go there. Welcome to one of the three secret areas of the game: the Shrine of the Babamut. No boss fight like in the Noria Mines (we will go back there, do not worry), just some stuff to find. Go right, try to go south and kill the skeletons. The bow is really effective on them, one shot and one bites the dust. Press the button, go left, avoid the whirlwinds and press another button. Go back, go north, cross the lava maze, press the button to the north ang go east. Blast the wall next to the statue to find a star in the chest and carry on. You will find a light puzzle further. Blast the wall to the north to find a star, solve the puzzle and go in the next room. Kill the enmies, grab the card "Babamut" leave the dungeon. Let's go to the last secret area of the game. And from the Shrine of the Babamut, it's not that far. Go a bit to the east after one of Edel Vale entrances to find a group of trees isolated. Enter the Forbidden lake. This is one of these places where getting all the stuff is a bit tricky. It requires bombs and bow and knowledge of the basics of time travel. Light the torch to the east with an arrow and go to the small island on the lake by the bridge. Stand before the torch you just lit, face north and shoot. Now, go north, ignore the rock and the crystal, cut the grass and go get the star in the chest. Head back to the crystal, put a bomb and go back near the lake. Burn the tree, go east, blast the rock, face south behind the torch and shoot. Leave the Forbidden Lake and go back there now to go the eastern part of the area. Go north to get a star in the chest, then east and south east to get another star. Cross the bridge, touch the crystal, go back to the nearest torch, face south and south. Head back to the crystal, touch it then put a bomb near the crystal and pass the small tree. Blast the rocks, then light the torches up and burn the small tree to the left. Shoot the crystal, pick up the star in the chest behind the dimensional stone, carry on, travel to the 2D world, put a bomb and pass the tree. Grab the star then the card "Zephyros" in the chests. You can leave the area now. Let's go back to Edel Vale, also known as the first area of the game. We have some stuff to collect here, waiting for us for a long time. For example, the chest blocked by a rock, east of the sign. Blast the rock to get the "Red Wizard" card. Go south-east after the small sandy island, blast the rock and cut the grass to get the card "Skeleton". That should be the last card of the game to find so you can now go beat the guy at Aogai City and show your collection to the other guy. The last destination is the Noria Mines, indeed. That's where the last collectibles are. All these cracked walls ready to be blow up with bombs. Go north, to find one of them and get a star. There's a cracked wall in the lava maze with a star and the last star is behind the crack in the wall before the boss room. Now you can do some preparation, save your progress and go in the Mana Tree located to the north of Aogai City. THE LAST BATTLE Time to face Zephyros for the last time. He kinda changed since the last battle. That boss can be a pain in your bottom since his main attack is a laser beam and he can trap you in the area of effect with his hands. You need to damage the hands first of all until they change color. Then, you will have to strike the red jewel on his torso and go as fast as possible behind him to strike the red orb before it goes back to its owner. Do this four times to break the stone armor and face the real Zephyros. You need to avoid the red balls and send the blue ones back to him with your sword. Be careful, you need good accuracy and timing to really hurt him with that projectile. Do this four times and Zephyros will be defeated. Congratulations, you saved the world and beat the game. BONUS PART: THE ACHIEVEMENTS Here is the achievements you can get in this game. Getting all of them is required to fully complete the game at 100% and unlock the sound test. LEFT KEY – No need to explain this one. You get it automatically at the beginning of the game. 16 COLORS – Get this achievement when you unlocked the 16-bit colors. 3D – Unlock the 3D world. EXPERIENCE POINTS – Unlocked when you get the "experience points" feature. STORYLINE – Unlocked when you get the "storyline" feature (the scrolling text). DVD PLAYER – Buy the DVD player from the merchant in Aogai City. CARD CHAMPION – Beat the Double Twin player in Aogai City (all the difficulty levels). CARD MASTER – Find all the Double Twin cards. EXTERMINATOR – Kill a bat with a bomb (can be done anywhere). SNIPER – Kill a skeleton with an arrow (can only be done in the Shrine of the Babamut and the Noria Mines) TAKOYAKI – Kill an Octorac with a flaming arrow (the Forbidden Lake is, to my knowledge, the best place to get that achievement easily). CHOBOKO HUNTER – Find and kill a Choboko (easily unlocked if you do the travelling merchant quest for the extra heart). STAR OF EVOLAND – Collect 10 stars. SUPERSTAR OF EVOLAND – Collect 20 stars. MEGASTAR OF EVOLAND – Collect the 30 stars of the game. CARD PLAYER – Win the easy difficult level of the Double Twin mini-game. CARD COLLECTOR – Find 15 cards. UNDERTAKER – Kill 100 skeletons. TURTLE SOUP – Kill 10 A'Tuins. HEAVY PURSE – Get 20000 glis in one play. HOARDER – Get 50000 glis in one play. IT WAS AN ACCIDENT – Break 20 pots in one play. EXCAVATIONS – Break a wall with a bomb. TIME TRAVELLER – Travel through time 12 times with the crystals. DODGEBALL – Kill the Noria Mines boss without getting a single hit. TRUE EXPLORER – Find the Hidden Cave. DUNGEON CRAWLER – Find the Shrine of the Babamut. CARTOGRAPHER – Find the Forbidden Lake. HERO – Defeat Zephyros in the Mana Tree (in other words, beat the game). That's all, folks. This has been the walkthrough of Evoland and Ihope you enjoyed it. We will do the second episode, no worries. Although, I never played Evoland 2 but it should be ok. I like exploring uncharted territories when it comes to video games, ha ha. Until next time, take care! What is Evoland, by the way? For starters, that game was originally a free game made in 48 hours for a Ludum Dare by Shiro Games. It has been inspired by famous RPGs such as Dragon Quest, Final Fantasy, The Legend of Zelda... The idea is to play through the evolution of the RPG genre by unlocking features during the game. Years later, the developpers went ahead and remade the game for PC. The game has been a success and they made a sequel released for PC. And now, you can play both games in the new version available for Switch, XBOX One, PS4 and PC. Isn't that great? For someone like me who tried the free version and the reboot, it is. I could replay the Legenday Edition (since I bought it on Switch and finished Evoland once) but I felt like replaying the original Evoland on PC. So I hope you're ready for that trip because I am and I'll be your commander for the entire journey. Welcome to Evoland. Oh and that walkthrough also works with the Legendary Edition. STARTING THE QUEST First thing you might ask is: is there a plot, a goal? There is one actually but you'll get it in due time. Go right as the instruction says then go left. No need to press a button to open the chest, just bump into them. Move forward until you come to another chest to open. Head south, open the chest to the left and keep in mind the chest you cannot open. There is a lot of backtracking to do in this game if you want to get all the collectibles and achievements. Cross the bridge, go south and get the sword. Now, you can cut grass and kill enemies. Before going east, go back to the starting point and cut the grass to the bottom right hand corner to get to the chest you saw earlier and pick up your first collectible: the card "Octorac". There are twenty-three cards to collect in this game, necessary to play a mini-game later and get two achievements of the game. Also, cut the grass to the left in the second screen to get another collectible: a star. That is the second and last collectible you can collect to get three achievements (one for each milestone of ten stars collected), which means you have a total of thirty stars to find in the world of Evoland. Time to go east and carry on the quest. You'll find a strange symbol on the ground. Open the chest to activate the save points. Go west to find a star in the chest and the card "bat" after cutting some grass. Secret within secret, yeah. Go back, head south, open the chest to get the 16-bit colors and move to the next save point. There is a breakable rock to the right before the save point but you need another item so keep in mind that there is a rock here. Not that far from the new save point, there's a star to the north. Open the chest to the left to get the long-awaited (and so deep and rich) plot then the next ones. You'll come to a point where you will be blocked by a black stone known as dimensional stone. Go back to the first signboard and go between the rocks. Save your progress and face the statues. These can only be hit from the back or the sides. After this fight, note the breakable stone to the right guarding the chest and go north. Welcome to the overworld, folks! This is where you can start farming glis like you were in a turn based RPG. Why is that? Because there's the first village a bit further to the north. When you reached the meadow, do not touch the statues right now, save your progress before then crush one by one your foes. Open the chest to unlock Papunika Village. Open the chest to the right. You can talk to the NPCs but there's a problem: you're a kid and they are not sociable towards kids. Time to grow up so eat some vegetables and soup (and wait years and years). That is the realistic way of life. Although, it's a game and there is a faster way. Talk to a kid who is going to mention something about a seed lost in the well. Interesting... you might check this out then. Down in the well, the seed is easily noticeable to the left. Get it to grow taller and go south to find the card "Worm". Go back to the surface, then west, open the chests and check all the houses to find some stuff including the card "Tork". The locked house contains something interesting. Next to the well, there's a secret opening behind the house. Collect the card "Kobra Zero" and go get the star inside the house to the left by entering a hole in the wall. Now, in order to get to the north caves, you need better equipment. The storekeeper sells that (and the rare card "Emuk" for 500 glis). If you are short on money, leave the village and go farm some glis outside. It shouldn't take that long to buy the sword and the armor since the enemies drop 50 glis each time you kill one. Once you are well-equipped, go east and leave the village. THE CRYSTAL CAVES You will get into a forced battle a bit further. Get rid of the enemies and say "yes" to the ally (considering you cannot decline the request, sadly). Your new ally needs a name. You can keep Kaeris or give another name. For the sake of that walkthrough, I did not change it. She is basically the healer of the team and... the ONLY ally you will get during the game. Go west before entering the north caves to the north (that's what they are called "the north caves") to find a secret area. You can easily find it since one of the trees in the overworld have a few red pixels. Here is one of the secret areas of the game: the hidden meadow. Pick up the card "slime" in the chest then go in the hole. In the hidden cave, there are enemies and a few things to get. Go all the way south, check the crate to find a potion then open the chest to get a star and go through the secret passageway to the east close to the water to find the card "The seed". There's also a secret within secret if you go through the passageway to the right, leading to a crate and a funny joke for completionists like your host Laian. There's a pile of crates and barrel to the far south with a potion and that's it for the hidden cave. Time to go in the north caves or the crystal caves. And since your ally has a name, it's your turn to get a name. I did not change it either, I went with "Clink". Go north then east to find 50 glis and two potions in the crates and barrels. Keep going north, then go west to find a chest containing the experience points upgrade and go through the secret passageway to the left close to the water to get to the other side and find a star. There's another star in the chest blocked by the rocks, just go a bit to the east then south. Go east to unlock the fountain and go south to find a switch and the card "scaven". Go save your progress with the fountain and head north to find the crystal. Touch it to face the first boss of the game: Kefka's ghost. He is not that hard if you heal constantly with Kaeris. There's just a moment when you need to be patient: exactly when he turns blue. He becomes invisible for a short period of time; which means you can't touch your opponent. After this fight, step on the yellow mark to the north to leave the cave and come to the next area: Edel Vale. THE NORIA MINES The next destination is... well, as the title says, the Noria Mines. Grab the rewards in the chests, cut the grass to the south to get a star and the card "Zoomba". Carry on, cut some grass to the left and collect the card "Pakkun" in the chest. Head south, open the chest and pass the dimensional stone. Remember that place? It's the beginning of the game. Go south and pass another dimensional stone. Open the chest to the right then the one to the left and carry on. Cut the grass to the south to find the card "Wasp" after the bridges and open the chest to the east to pick up a star. Before going south and leaving the area, go east to open the chest and get another star. Now, time to go to the Noria Mines to the south. That dungeon is more like a "Legend of Zelda" dungeon compared to the last one that was more a "Final Fantasy" one. There are cracks in the walls and secret passageways so keep an eye on them. Open the chest and go north since you don't have much of a choice at this point. Open the chest and go east to open another chest. Press the pressure plates to unlock another path and go there. Kill the red wizard, go west, open the chest and kill the bats to make another chest appear. Grab the key inside, open the chest and kill the skeleton. Go south, kill the red wizard and press the button. Go back, ignore the chest at the other side of the water and go get the one next to the first gate you opened to find a star. Go back, open the chests to unlock the labyrinth then get the key and another star and open the locked door. Beat the skeletons and push the block in the next room. Kill the bats, push the blocks and carry on. Next to the pot, there's a secret passageway leading to a pressure plate. Step on it to unlock a gate. Now go south, kill the enemies and carry on. Kaeris will feel guilty for not helping you and will heal your wounds. Open the chest, push the enemy into the hole and go to the next room. Open the chest and the one to the left (that means you pressed the button in the little secret room earlier) to get the card "A'tuin". Press the pressure plates, kill the enemies and carry on. Pass the first two traps and jump into the third hole to get to the isolated chest you saw earlier. Inside, you'll find your card, well the card of your hero... you know what I mean. Head all the way back to the next room, kill the wizards and open the chest. Solve the puzzle, kill the bats and go right to get a key. Open the door, then the chest and save your progress. The next room needs to be crossed with patience. Find your way to the other side, keep in mind the crack in the wall and go to the next room. Go through the passageway to the left to find the card "Spider" and avoid the fireballs. Kill all the enemies in the room and open the chest to get the boss room key. Also, next to the chest, there's a secret path leading to a chest with a star inside. Time to face the boss of the dungeon. Oh and don't worry about the cracks in the wall: like I said, there's a lot of backtracking to do in this game if you want to get all the collectibles. That boss is a dark version of you and can only be hit when he is stunned. Get close to a wall, bait him and dodge his tackle to knock him out then strike. He will summon bats and shoot projectiles at you from time to time. Note that there's an achievement if you beat him without being hit once. That includes the bats, the fireballs and the tackles. None of these attacks. Kinda tense but it's possible. And no worries, you can kick his butt over and over again after this fight once you come back to the mines. Go get your reward and leave the mines. THE SACRED GROVE Go east and enter Aogai City. Talk to the people to the north to know the existence of the bombs and someone who can give you that item. There a chest in the next screen to the right. Now, head to the eastern part of the city and open the chests. You will unlock new NPCs such as a storekeeper selling some new stuff like another rare card for 10000 glis (named "the Undead King"), a Double Twin player and a guy who wants to see a complete collection of Double Twin cards. These two last NPCs will only unlock achievements if you managed to complete and show your card collection and beat the champion. I think you don't need to get all the cards to beat the four difficulty levels of the Double Twin mini-game but it's best if you get them all. But enough talk about that, let's get the bombs. You need to talk to almost all the NPCs of the village, from one to another until you get to talk to the kid running around the well like a dummy (after a butterfly). You will get the bombs. Up to you to go back now to the places you explored to get some stuff or go south to the sacred grove in order to get the first part of the amulet of Gorn. I'll make a whole part before the last part of the walkthrough for that. Leave the town and go south. Equip the bombs and blast the rocks then go east to find a blue crystal. Touch it to enable the time travel. Everytime you will beat a crystal like this one, you will go back and forth in time. That means when you're in 2D mode, you can pass the small trees but not the dimensional stones and vice versa in the 3D mode. Go north, read the sign (important clue for later), then go west. Touch the crystal, pass the dimensional stone and enter the dungeon. Move cautiously around the room to reach the chest in the center of the lava maze and get the bow. There's also a secret passageway to the right with a star inside the chest and a cracked wall to blast with another star inside a chest. Time to leave the mini-dungeon and carry on. Go back to the past, stand before the torch and shoot an arrow towards the small tree to get rid of it once and for all. Yeah, you will change the future as well, that's neat. Go back to the 3D world, carry on, equip the bombs, put on next to the crystal and pass the dimensional stone to the north before it explodes. Go get the card "Kefka's ghost" inside the chest and do the same exact thing with the other crystal next to the chest to cross the small tree and go back to the 3D world. Touch the crystal after the dimensional stone to go back to the 2D world, pass the small tree, blast the rock to the right and light the torch up with an arrow. Burn both of the small trees and go back to the 3D world to collect the star in the chest to the right and go south. Blast the rock blocking the way to the torch and go east then north. Blast the rock, get rid of the monsters and go get the star in the chest. Cross the bridge to the east, shoot the crystal with the bow and pass the small tree. Note the entrance to another dungeon to the right, blast the rock, then go back on the second bridge, face east and shoot an arrow. You will light one of the torches necessary to open the way to the dungeon. Go south, then all the way around the small lake with the crystal, don't touch the crystal right now, cut the grass then shoot the torch and the tree with an arrow and blast the rock. At this point, you partially unlocked the way to the dungeon. Partially, you just removed the statue but there's a dimensional stone blocking the way. Touch the crystal to go to the 3D world and enter the dungeon. Kill the bats, push the torches and go to the next room. Kill the enemies, pick up the first half of the amulet in the chest and blast the wall to get a star in the chest. Leave the dungeon, pass the dimensional stone to the west and touch the crystal. Stand before the torch, face north and shoot an arrow. Go back to the crystal, put a bomb and pass the stone. Go light the last torch and face south to burn the small tree. Head back over there, touch the crystal, then the other one and go north to get the card "Kaeris" inside the chest. Leave the sacred grove with the way to the south and go back to Aogai City. THE RUINS OF SARUDNAHK Talk to Kaeris' uncle then go north-east to leave the town and go to your next destination: the ruins of Sarudnahk. You'll see the Black Citadel to the right but you can't go in there right now. Enter the ruins, open the chest and choose between both of the characters. Time to get the second half of that amulet. This is where you can get lots of glis. And equipment stuff, yeah. Although, the equipment you will find is meaningless, just for the "hack'n'slash" touch. You can get an achievement if you get your inventory complete. Kill the spiders and open the chests you will see on your way. Go to the far east and get the card "Dopple" after the bats. That one can be easily missed since it's out of bounds and the mini-map, once gotten, barely show the the path. Go north now, then get the map upgrade nearby the the northern way and go west to find a star in the chest. Save your progress, head north then carry on. Go north, beat the wasps then get a star from the chest and go south. Before the boss fight, there's a save point to the left and your way out of the ruins to the right. Open the chest to summon the boss and face it. The undead king is not that hard. His melee attacks does nearly nothing to you and the only threat that might worry you a bit is the magic missiles he spreads around him quite often. Other than that, he is super easy to beat. Go get the second half of the amulet after that fight, open the other chest that just appeared from nowhere to make a portal appear. Go back to Aogai City, save your progress and go to the Black Citadel to face the bad guy. DEJA-VU! (AND THE POWER OF LOVE) You will understand why I named that part with such a title. You are greeted by the bad guy who's named... Zephyros. It's a scr COLLECTIBLES FETCHING Besides the collectibles, there are achievements to unlock to get the 100%. Yeah, you need to find all the stars, cards and get all the achievements possible; which I find quite stupid to be fair. You cannot check in-game the achievements you got from this point and some of them can be missed. Anyway, let's focus on the last collectibles. Nearby the meadow, there's a tent. It's a merchant and he needs food. A good cooked Choboko meat will do the trick. You can only find chobokos in the field a bit to the north. It might take a while before finding one. The choboko is a strong enemy. If you have Babamut ready, use it! You will get raw Choboko meat. Go to Aogai village and talk to the old woman next to the desperate man to get the cooked Choboko meat. Bring it back to the merchant to get the extra heart. That's the only extra heart you will get, by the way. You might have seen a cave nearby the tent: go there. Welcome to one of the three secret areas of the game: the Shrine of the Babamut. No boss fight like in the Noria Mines (we will go back there, do not worry), just some stuff to find. Go right, try to go south and kill the skeletons. The bow is really effective on them, one shot and one bites the dust. Press the button, go left, avoid the whirlwinds and press another button. Go back, go north, cross the lava maze, press the button to the north ang go east. Blast the wall next to the statue to find a star in the chest and carry on. You will find a light puzzle further. Blast the wall to the north to find a star, solve the puzzle and go in the next room. Kill the enmies, grab the card "Babamut" leave the dungeon. Let's go to the last secret area of the game. And from the Shrine of the Babamut, it's not that far. Go a bit to the east after one of Edel Vale entrances to find a group of trees isolated. Enter the Forbidden lake. This is one of these places where getting all the stuff is a bit tricky. It requires bombs and bow and knowledge of the basics of time travel. Light the torch to the east with an arrow and go to the small island on the lake by the bridge. Stand before the torch you just lit, face north and shoot. Now, go north, ignore the rock and the crystal, cut the grass and go get the star in the chest. Head back to the crystal, put a bomb and go back near the lake. Burn the tree, go east, blast the rock, face south behind the torch and shoot. Leave the Forbidden Lake and go back there now to go the eastern part of the area. Go north to get a star in the chest, then east and south east to get another star. Cross the bridge, touch the crystal, go back to the nearest torch, face south and south. Head back to the crystal, touch it then put a bomb near the crystal and pass the small tree. Blast the rocks, then light the torches up and burn the small tree to the left. Shoot the crystal, pick up the star in the chest behind the dimensional stone, carry on, travel to the 2D world, put a bomb and pass the tree. Grab the star then the card "Zephyros" in the chests. You can leave the area now. Let's go back to Edel Vale, also known as the first area of the game. We have some stuff to collect here, waiting for us for a long time. For example, the chest blocked by a rock, east of the sign. Blast the rock to get the "Red Wizard" card. Go south-east after the small sandy island, blast the rock and cut the grass to get the card "Skeleton". That should be the last card of the game to find so you can now go beat the guy at Aogai City and show your collection to the other guy. The last destination is the Noria Mines, indeed. That's where the last collectibles are. All these cracked walls ready to be blow up with bombs. Go north, to find one of them and get a star. There's a cracked wall in the lava maze with a star and the last star is behind the crack in the wall before the boss room. Now you can do some preparation, save your progress and go in the Mana Tree located to the north of Aogai City. THE LAST BATTLE Time to face Zephyros for the last time. He kinda changed since the last battle. That boss can be a pain in your bottom since his main attack is a laser beam and he can trap you in the area of effect with his hands. You need to damage the hands first of all until they change color. Then, you will have to strike the red jewel on his torso and go as fast as possible behind him to strike the red orb before it goes back to its owner. Do this four times to break the stone armor and face the real Zephyros. You need to avoid the red balls and send the blue ones back to him with your sword. Be careful, you need good accuracy and timing to really hurt him with that projectile. Do this four times and Zephyros will be defeated. Congratulations, you saved the world and beat the game. BONUS PART: THE ACHIEVEMENTS Here is the achievements you can get in this game. Getting all of them is required to fully complete the game at 100% and unlock the sound test. LEFT KEY – No need to explain this one. You get it automatically at the beginning of the game. 16 COLORS – Get this achievement when you unlocked the 16-bit colors. 3D – Unlock the 3D world. EXPERIENCE POINTS – Unlocked when you get the "experience points" feature. STORYLINE – Unlocked when you get the "storyline" feature (the scrolling text). DVD PLAYER – Buy the DVD player from the merchant in Aogai City. CARD CHAMPION – Beat the Double Twin player in Aogai City (all the difficulty levels). CARD MASTER – Find all the Double Twin cards. EXTERMINATOR – Kill a bat with a bomb (can be done anywhere). SNIPER – Kill a skeleton with an arrow (can only be done in the Shrine of the Babamut and the Noria Mines) TAKOYAKI – Kill an Octorac with a flaming arrow (the Forbidden Lake is, to my knowledge, the best place to get that achievement easily). CHOBOKO HUNTER – Find and kill a Choboko (easily unlocked if you do the travelling merchant quest for the extra heart). STAR OF EVOLAND – Collect 10 stars. SUPERSTAR OF EVOLAND – Collect 20 stars. MEGASTAR OF EVOLAND – Collect the 30 stars of the game. CARD PLAYER – Win the easy difficult level of the Double Twin mini-game. CARD COLLECTOR – Find 15 cards. UNDERTAKER – Kill 100 skeletons. TURTLE SOUP – Kill 10 A'Tuins. HEAVY PURSE – Get 20000 glis in one play. HOARDER – Get 50000 glis in one play. IT WAS AN ACCIDENT – Break 20 pots in one play. EXCAVATIONS – Break a wall with a bomb. TIME TRAVELLER – Travel through time 12 times with the crystals. DODGEBALL – Kill the Noria Mines boss without getting a single hit. TRUE EXPLORER – Find the Hidden Cave. DUNGEON CRAWLER – Find the Shrine of the Babamut. CARTOGRAPHER – Find the Forbidden Lake. HERO – Defeat Zephyros in the Mana Tree (in other words, beat the game). That's all, folks. This has been the walkthrough of Evoland and Ihope you enjoyed it. We will do the second episode, no worries. Although, I never played Evoland 2 but it should be ok. I like exploring uncharted territories when it comes to video games, ha ha. Until next time, take care! |
Vizzed Elite
Affected by 'Laziness Syndrome'
Registered: 10-21-11
Location: France
Last Post: 1834 days
Last Active: 1008 days
| Games have secrets, I have my eagle gaze. |
Affected by 'Laziness Syndrome'
Registered: 10-21-11
Location: France
Last Post: 1834 days
Last Active: 1008 days
04-04-19 10:39 AM
 EX Palen is Offline
| ID: 1371002 | 125 Words
 EX Palen is Offline
| ID: 1371002 | 125 Words
EX Palen
Spanish Davideo7
Spanish Davideo7
Level: 137


POSTS: 4788/6179
POST EXP: 1095491
LVL EXP: 30492751
CP: 187979.5
VIZ: 10664962

POSTS: 4788/6179
POST EXP: 1095491
LVL EXP: 30492751
CP: 187979.5
VIZ: 10664962

Likes: 0 Dislikes: 0
It's been a very long while, old friend, great to see you're as dedicated as ever to the passion of writing guides.
Due to my staff role, I should probably write a few lines of feedback. However, it is you who has given me valuable feedback, because reading this guide has cleared a few doubts I had on my incoming projects, so all I can say is thank you for returning, and even more at this timing. I wish we can see more of your projects in the future, it's always a pleasure to have you around. Keep up the good work, and keep being an inspiration for the site in general and your lieutenants in particular (who are back in office, by the way). Due to my staff role, I should probably write a few lines of feedback. However, it is you who has given me valuable feedback, because reading this guide has cleared a few doubts I had on my incoming projects, so all I can say is thank you for returning, and even more at this timing. I wish we can see more of your projects in the future, it's always a pleasure to have you around. Keep up the good work, and keep being an inspiration for the site in general and your lieutenants in particular (who are back in office, by the way). |
Administrator
Site Staff Manager, Content Writer, Console Manager
Affected by 'Carpal Tunnel Syndrome'
Registered: 07-03-13
Location: Barcelona, Spain
Last Post: 13 hours
Last Active: 6 hours
Site Staff Manager, Content Writer, Console Manager
| Vizzed #1 Hardstyle fan |
Affected by 'Carpal Tunnel Syndrome'
Registered: 07-03-13
Location: Barcelona, Spain
Last Post: 13 hours
Last Active: 6 hours
04-04-19 11:34 AM
Laian is Offline
| ID: 1371004 | 214 Words
| ID: 1371004 | 214 Words
Laian
Level: 90


POSTS: 2231/2232
POST EXP: 457173
LVL EXP: 7122880
CP: 23726.2
VIZ: 3569925

POSTS: 2231/2232
POST EXP: 457173
LVL EXP: 7122880
CP: 23726.2
VIZ: 3569925

Likes: 0 Dislikes: 0
EX Palen :
Thank you, dear old friend. Truthfully, that hurt me to see that I'm still inspiring people... when the person who inspires these people is not a good example to follow at all. I am no longer a staff member and I am the only one to blame for this. I went through lot of stuff since September, going back and forth just to sort things out. I never found the time to write a single line of walkthrough and slowly lost motivation. It is a miracle that I managed to bring a new guide for that website. So, when you say that I'm "dedicated as ever to the passion of writing guides"... I want to say this was before. There was a time when I could write a guide per month, there was a time when I really enjoyed making them. That time might have ended before I rose from the shadows. I am not saying I did not enjoy making that one... I did not feel like back a few years ago. That doesn't mean I'll stop making guides. And maybe, someday, I'll get back to the staff. Maybe I'll be able to handle the pace and the pressure. For now, I'll do guides for Vizzed, at my own pace. Thank you, dear old friend. Truthfully, that hurt me to see that I'm still inspiring people... when the person who inspires these people is not a good example to follow at all. I am no longer a staff member and I am the only one to blame for this. I went through lot of stuff since September, going back and forth just to sort things out. I never found the time to write a single line of walkthrough and slowly lost motivation. It is a miracle that I managed to bring a new guide for that website. So, when you say that I'm "dedicated as ever to the passion of writing guides"... I want to say this was before. There was a time when I could write a guide per month, there was a time when I really enjoyed making them. That time might have ended before I rose from the shadows. I am not saying I did not enjoy making that one... I did not feel like back a few years ago. That doesn't mean I'll stop making guides. And maybe, someday, I'll get back to the staff. Maybe I'll be able to handle the pace and the pressure. For now, I'll do guides for Vizzed, at my own pace. |
Vizzed Elite
Affected by 'Laziness Syndrome'
Registered: 10-21-11
Location: France
Last Post: 1834 days
Last Active: 1008 days
| Games have secrets, I have my eagle gaze. |
Affected by 'Laziness Syndrome'
Registered: 10-21-11
Location: France
Last Post: 1834 days
Last Active: 1008 days
04-04-19 01:19 PM
 EX Palen is Offline
| ID: 1371005 | 405 Words
 EX Palen is Offline
| ID: 1371005 | 405 Words
EX Palen
Spanish Davideo7
Spanish Davideo7
Level: 137


POSTS: 4789/6179
POST EXP: 1095491
LVL EXP: 30492751
CP: 187979.5
VIZ: 10664962

POSTS: 4789/6179
POST EXP: 1095491
LVL EXP: 30492751
CP: 187979.5
VIZ: 10664962

Likes: 1 Dislikes: 0
Laian : I totally feel you, man. I also fell off the grid when I left the round table in late 2016, and while I still pushed through in another site, I mostly made adjustments to my existing work, only writing two projects from scratch in almost three years.
When you've been doing guides at a big pace, which is the one we had years ago, you eventually lose the motivation as you complete one by one the games you had planned to write for. And if real life gets in the way, you rarely find time for it anymore. I've amassed like 6 projects still unfinished, all because I can't get the right motivation to fully write them. And I could include several more on the list if we also count those I've collected the needed data but still haven't written anything. However, we two are still here. Whatever life throws at us, we still find some time to write, even if a single project takes us triple the time or more to complete. The will to continue after so many years is also dedication. The reason you inspire us is because your first guide traces back to November 2011, more than seven years ago. Very few people stay that long on the site in general, let alone focusing on such a taxing job as it's writing guides. Also, every time a member awakens from their slumber gives us active members one more reason to not slack off. Besides, familiar faces always boost your mood, which in turn increases your motivation to work. It'd be nice to recreate the round table once again, if Eni and I stay in our roles (though I've always considered my role would belong to an active Laian first and foremost). However, the three of us are now immersed in real life, only writing for the fun of it and maybe the memories, the big reason most of us came here in the first place. I hope you manage to stabilize your real life, and I hope you keep coming on here even if it's just to check the news. David has in mind reworking the "New Thread" page and make it the same as the "New Post" page, so keep an eye on that because posting guides will be made a bit (or a lot) harder from then on and feedback from another guide-writer would be of great help. When you've been doing guides at a big pace, which is the one we had years ago, you eventually lose the motivation as you complete one by one the games you had planned to write for. And if real life gets in the way, you rarely find time for it anymore. I've amassed like 6 projects still unfinished, all because I can't get the right motivation to fully write them. And I could include several more on the list if we also count those I've collected the needed data but still haven't written anything. However, we two are still here. Whatever life throws at us, we still find some time to write, even if a single project takes us triple the time or more to complete. The will to continue after so many years is also dedication. The reason you inspire us is because your first guide traces back to November 2011, more than seven years ago. Very few people stay that long on the site in general, let alone focusing on such a taxing job as it's writing guides. Also, every time a member awakens from their slumber gives us active members one more reason to not slack off. Besides, familiar faces always boost your mood, which in turn increases your motivation to work. It'd be nice to recreate the round table once again, if Eni and I stay in our roles (though I've always considered my role would belong to an active Laian first and foremost). However, the three of us are now immersed in real life, only writing for the fun of it and maybe the memories, the big reason most of us came here in the first place. I hope you manage to stabilize your real life, and I hope you keep coming on here even if it's just to check the news. David has in mind reworking the "New Thread" page and make it the same as the "New Post" page, so keep an eye on that because posting guides will be made a bit (or a lot) harder from then on and feedback from another guide-writer would be of great help. |
Administrator
Site Staff Manager, Content Writer, Console Manager
Affected by 'Carpal Tunnel Syndrome'
Registered: 07-03-13
Location: Barcelona, Spain
Last Post: 13 hours
Last Active: 6 hours
Site Staff Manager, Content Writer, Console Manager
| Vizzed #1 Hardstyle fan |
Affected by 'Carpal Tunnel Syndrome'
Registered: 07-03-13
Location: Barcelona, Spain
Last Post: 13 hours
Last Active: 6 hours
Post Rating: 1 Liked By: Laian,
04-08-19 08:20 AM
 Eniitan is Offline
| ID: 1371233 | 40 Words
 Eniitan is Offline
| ID: 1371233 | 40 Words
Eniitan
Level: 174



POSTS: 10400/10522
POST EXP: 959649
LVL EXP: 70467395
CP: 55215.8
VIZ: 2613215

POSTS: 10400/10522
POST EXP: 959649
LVL EXP: 70467395
CP: 55215.8
VIZ: 2613215

Likes: 0 Dislikes: 0
hi big bro can you teach me how to use the new post reply for my guides please? because that will give me a hard time. plus wonderful guide as always as soon as I saw it I squealed. XD |
Vizzed Elite
Affected by 'Laziness Syndrome'
Registered: 08-16-12
Last Post: 564 days
Last Active: 52 days
  Number 1 Sailor Moon, Final Fantasy And Freedom Planet Fan On Vizzed! Number 1 Sailor Moon, Final Fantasy And Freedom Planet Fan On Vizzed! |
Affected by 'Laziness Syndrome'
Registered: 08-16-12
Last Post: 564 days
Last Active: 52 days
04-08-19 12:23 PM
 EX Palen is Offline
| ID: 1371239 | 99 Words
 EX Palen is Offline
| ID: 1371239 | 99 Words
EX Palen
Spanish Davideo7
Spanish Davideo7
Level: 137


POSTS: 4798/6179
POST EXP: 1095491
LVL EXP: 30492751
CP: 187979.5
VIZ: 10664962

POSTS: 4798/6179
POST EXP: 1095491
LVL EXP: 30492751
CP: 187979.5
VIZ: 10664962

Likes: 0 Dislikes: 0
Eniitan : The "New Thread" page hasn't been migrated yet, so posting threads of any kind (including guides and reviews) is done like usual, and so far there's no word on when will it be migrated.
I did search for a few tips to use on the new coding already: colored text, linking sections and highlighting text. I haven't fully tested them yet, but the initial tests have proven successful. I originally wanted to PM this to you so as to not go slightly off-topic, but I ultimately posted this here just in case Laian could be interested as well. I did search for a few tips to use on the new coding already: colored text, linking sections and highlighting text. I haven't fully tested them yet, but the initial tests have proven successful. I originally wanted to PM this to you so as to not go slightly off-topic, but I ultimately posted this here just in case Laian could be interested as well. |
Administrator
Site Staff Manager, Content Writer, Console Manager
Affected by 'Carpal Tunnel Syndrome'
Registered: 07-03-13
Location: Barcelona, Spain
Last Post: 13 hours
Last Active: 6 hours
Site Staff Manager, Content Writer, Console Manager
| Vizzed #1 Hardstyle fan |
Affected by 'Carpal Tunnel Syndrome'
Registered: 07-03-13
Location: Barcelona, Spain
Last Post: 13 hours
Last Active: 6 hours
04-10-19 08:16 AM
Laian is Offline
| ID: 1371363 | 88 Words
| ID: 1371363 | 88 Words
Laian
Level: 90


POSTS: 2232/2232
POST EXP: 457173
LVL EXP: 7122880
CP: 23726.2
VIZ: 3569925

POSTS: 2232/2232
POST EXP: 457173
LVL EXP: 7122880
CP: 23726.2
VIZ: 3569925

Likes: 0 Dislikes: 0
Eniitan :
EX Palen : Truthfully, I got troubles to post that guide and had to remove the screenshots considering I still haven't figured this out. Hopefully I finally manage to Anyway, I'm glad you enjoyed that new walkthrough. I was worried that, with my looooooooong hiatus, it would have gone down the bottomless pit. The sequel is planned, for reminder. Maybe the next one? EX Palen : Truthfully, I got troubles to post that guide and had to remove the screenshots considering I still haven't figured this out. Hopefully I finally manage to Anyway, I'm glad you enjoyed that new walkthrough. I was worried that, with my looooooooong hiatus, it would have gone down the bottomless pit. The sequel is planned, for reminder. Maybe the next one? |
Vizzed Elite
Affected by 'Laziness Syndrome'
Registered: 10-21-11
Location: France
Last Post: 1834 days
Last Active: 1008 days
| Games have secrets, I have my eagle gaze. |
Affected by 'Laziness Syndrome'
Registered: 10-21-11
Location: France
Last Post: 1834 days
Last Active: 1008 days
04-10-19 10:44 AM
 EX Palen is Offline
| ID: 1371374 | 112 Words
 EX Palen is Offline
| ID: 1371374 | 112 Words
EX Palen
Spanish Davideo7
Spanish Davideo7
Level: 137


POSTS: 4806/6179
POST EXP: 1095491
LVL EXP: 30492751
CP: 187979.5
VIZ: 10664962

POSTS: 4806/6179
POST EXP: 1095491
LVL EXP: 30492751
CP: 187979.5
VIZ: 10664962

Likes: 0 Dislikes: 0
Laian : Yeah, the old coding is full of bugs and glitches, no surprise it gave you trouble.
I posted a guide just yesterday, and for whatever weird reason, one of the paragraphs was heavily glitched. I had to manually re-add all of the coloring, and it was awfully painful because they weren't basic colors. The rest of the guide was just fine, only the underlining was bugged but it was an easy and quick fix. I'm a bit worried about the screenshots, because my next guide(s) would have made use of them. I'll now have to decide whether I make tests to see its viability or I switch to a screenshot-free guide. I posted a guide just yesterday, and for whatever weird reason, one of the paragraphs was heavily glitched. I had to manually re-add all of the coloring, and it was awfully painful because they weren't basic colors. The rest of the guide was just fine, only the underlining was bugged but it was an easy and quick fix. I'm a bit worried about the screenshots, because my next guide(s) would have made use of them. I'll now have to decide whether I make tests to see its viability or I switch to a screenshot-free guide. |
Administrator
Site Staff Manager, Content Writer, Console Manager
Affected by 'Carpal Tunnel Syndrome'
Registered: 07-03-13
Location: Barcelona, Spain
Last Post: 13 hours
Last Active: 6 hours
Site Staff Manager, Content Writer, Console Manager
| Vizzed #1 Hardstyle fan |
Affected by 'Carpal Tunnel Syndrome'
Registered: 07-03-13
Location: Barcelona, Spain
Last Post: 13 hours
Last Active: 6 hours


 User Notice
