Considering the utter hell-spawn of a map that was Death's Embrace, this one is a heck of a lot easier. Again, there will be spoilers, so view at your own risk.
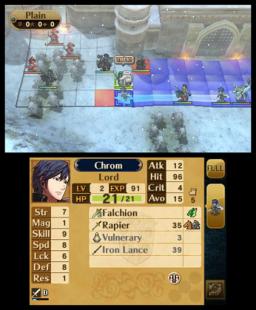
Map Summary: If I remember correctly, you also start with Chrom and 11 other units for this map. The entire area is lined to the teeth with lava panels that you cannot sit your units on period (not that you'll die, no unit is capable of sitting on them, even if they are fliers). Also, the five Annas you have to protect are on the side of the map opposite where your units are positioned, and they are standing on lava panels. The good news is they cannot die from standing on them too long. Only the Risen can land the final blow.
Things to watch out for: A large percentage of the units on this map consist of flying units and most of them are Wyvern Lords and Griffon Riders. They also carry breaker skills of some sort, but it's mostly things like Swordbreaker and Lancebreaker, so bringing an effective weapon can hinder them. Most of them will be centered around killing the Annas who have very weak stats and Miracle and Axebreaker won't help them very much. Another thing you want to be careful about: don't let reinforcements swamp the entire map. If you do that and you have a lack of units that can actually deal with the enemies, they will get to the Annas before you can even blink! This is even worse in Normal Mode as reinforcements appear as soon as the turn starts (meaning the beginning of your phase). Also, for those playing on casual mode, the Snipers carry Galeforce with them, so get rid of them ASAP if you want to avoid running into immense trouble by losing a bunch of units.
Here are some skills that can help you with this map if you're having trouble (Galeforce excluded for obvious reasons (it's useful everywhere barring Double Duel)):
1. Deliverer: Since fliers are the most useful units to have for this map, this skill will be MANDATORY if you need to get to far-off enemies in the blink.
2. Renewal: If you're worried about damage build-up on a unit, this can save you in a pinch.
3. Limit Breaker: It isn't really that big of a priority here, but it still helps to have extra stats.
4. Pavise: You won't be reduced to one HP every single time on this map, so this skill becomes a huge asset to units with low defense.
5. Aegis: Same reason as Pavise, but it works better for units weak against arrows or magic.
6. Iote's Shield: This skill is obtainable after beating Smash Brethren 3. It removes the weaknesses that flying units have, and it's a lot better than taking risks with Pavise or Aegis.
Other tips: You want to bring as may fliers as you can for this map (Dark Fliers, Falcon Knights, Wyvern Lords, and Griffon Riders). Doing so will allow you to get to the units that you can't get to due to lava blocking your path. Also, keep pairings that you intend to use in a side-to-side manner. You'll be packed on one side, making it very difficult to pair up units if they're distanced from each other (you need at least one free space to pair up units). Another thing to follow: if a non-flier has Galeforce, use them first. That way, you can switch over to your flier, get another Galeforce turn, and head to a different area with Risen lying around.
That's the end of this DLC guide! I'll have more strategy guides up in the coming days, so be sure to look around. Until then, adieu!
EDIT: One thing that I forgot to mention is that Rescue staves are unusable for this map. Considering the utter hell-spawn of a map that was Death's Embrace, this one is a heck of a lot easier. Again, there will be spoilers, so view at your own risk.
Map Summary: If I remember correctly, you also start with Chrom and 11 other units for this map. The entire area is lined to the teeth with lava panels that you cannot sit your units on period (not that you'll die, no unit is capable of sitting on them, even if they are fliers). Also, the five Annas you have to protect are on the side of the map opposite where your units are positioned, and they are standing on lava panels. The good news is they cannot die from standing on them too long. Only the Risen can land the final blow.
Things to watch out for: A large percentage of the units on this map consist of flying units and most of them are Wyvern Lords and Griffon Riders. They also carry breaker skills of some sort, but it's mostly things like Swordbreaker and Lancebreaker, so bringing an effective weapon can hinder them. Most of them will be centered around killing the Annas who have very weak stats and Miracle and Axebreaker won't help them very much. Another thing you want to be careful about: don't let reinforcements swamp the entire map. If you do that and you have a lack of units that can actually deal with the enemies, they will get to the Annas before you can even blink! This is even worse in Normal Mode as reinforcements appear as soon as the turn starts (meaning the beginning of your phase). Also, for those playing on casual mode, the Snipers carry Galeforce with them, so get rid of them ASAP if you want to avoid running into immense trouble by losing a bunch of units.
Here are some skills that can help you with this map if you're having trouble (Galeforce excluded for obvious reasons (it's useful everywhere barring Double Duel)):
1. Deliverer: Since fliers are the most useful units to have for this map, this skill will be MANDATORY if you need to get to far-off enemies in the blink.
2. Renewal: If you're worried about damage build-up on a unit, this can save you in a pinch.
3. Limit Breaker: It isn't really that big of a priority here, but it still helps to have extra stats.
4. Pavise: You won't be reduced to one HP every single time on this map, so this skill becomes a huge asset to units with low defense.
5. Aegis: Same reason as Pavise, but it works better for units weak against arrows or magic.
6. Iote's Shield: This skill is obtainable after beating Smash Brethren 3. It removes the weaknesses that flying units have, and it's a lot better than taking risks with Pavise or Aegis.
Other tips: You want to bring as may fliers as you can for this map (Dark Fliers, Falcon Knights, Wyvern Lords, and Griffon Riders). Doing so will allow you to get to the units that you can't get to due to lava blocking your path. Also, keep pairings that you intend to use in a side-to-side manner. You'll be packed on one side, making it very difficult to pair up units if they're distanced from each other (you need at least one free space to pair up units). Another thing to follow: if a non-flier has Galeforce, use them first. That way, you can switch over to your flier, get another Galeforce turn, and head to a different area with Risen lying around.
That's the end of this DLC guide! I'll have more strategy guides up in the coming days, so be sure to look around. Until then, adieu!
EDIT: One thing that I forgot to mention is that Rescue staves are unusable for this map.
____________________
|


 User Notice


 pokepower101 is Offline
| ID: 1019477 | 646 Words
pokepower101 is Offline
| ID: 1019477 | 646 Words
 pokepower101 is Offline


