

 User Notice
 Forum Links
Thread Information
Thread Actions


Walkthrough Survival Kids
03-31-13 06:41 AM
Laian is Offline
| ID: 767062 | 4132 Words

POSTS: 1466/2232
POST EXP: 457173
LVL EXP: 7741582
CP: 23744.4
VIZ: 3571020

Hello everyone. It’s your host Laian with another walkthrough. This time, let’s go on an adventure really epic and special. This adventure is called “Stranded Kids” but it’s also known as “Survival Kids”, it was released on Gameboy Color. I will make this introduction short, don’t worry. I just want to tell you that everything is written in this walkthrough. The adventure, the endings, the mini-games, EVERYTHING! I made a bonus chapter at the end of the walkthrough for the endings and the mini-games. So yeah, without wasting any more time, let’s start the adventure, shall we?
BEFORE STARTING THE ADVENTURE When you start a new game, you can choose between the boy and the girl. Ok, I will spoil a bit: note that the one you won’t choose will automatically be the other kid stranded on the island later in the game. For this walkthrough, I will choose the boy and name him Yuki. Yes, Yuki! Like the main character from Grandia 3 except he doesn’t have an aviator suit and he is younger ha ha. It will be up to you to choose your kid at the beginning of this adventure. Now that we have our hero and its name, time to go on an epic adventure!
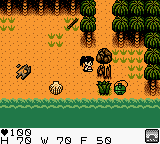
CHAPTER 1: FINDING THE SHED You are on the shore. As you can see, the boat is destroyed and you can notice some wrecks. Check the sand dunes in order to find your knapsack and get a knife, the matches and the radio. Oh cool, we have a radio, we can send a SOS to the world and hope that someone will get the message (not in the bottle). Unfortunately, the radio doesn’t work, you’ll need some batteries. Also, the matches will be useless because they are wet so they won’t work anymore. Go to the inventory and equip the knife. That will help you to cut the grass and kill some monsters. Take the clams, the stick to the east, cut the grass to grab the canteen and cut the grass to the west in order to carry on. Take the bird feather and the tree bark, merge the tree bark with the stick in order to get the kindling (1). You must keep this item in your knapsack during the adventure, this will help you a lot. Go ahead, use it and cook your clams. Now, you have some food. However, that won’t last forever. After one day, those clams will be rotten and not tasty like the meat. You can increase the length if you use some stuff like round berries. Ah, also, the tools you will make won’t never break, which is good but kind of surrealistic, oh well. Go to the east, then to the north and you will discover a shed. Yuki will automatically go inside. You can’t do anything else except using or merging some items, resting, sleeping, saving your progress and stopping the game. Eat your clams and sleep.
CHAPTER 2: THE MONKEY! OH, IT RAN AWAY! From this point, you have to care about your hunger, your water and your fatigue. You’ll need to find lot of food in order to survive now. Watch out though, some food is dangerous for your health (for example hollow mushrooms, color mushrooms and obviously the rotten meat and clam). Store the bird feather, go outside, then to the north and to the east. Hey, look! It’s the monkey! Oh shoot, it ran away. You disturbed the monkey whereas it was drinking some water. Hmm, perhaps this water is tasty? Drink some water to recover your thirst and look around in order to find two flexible sticks, an ivy, some thin grass, some berries and a big rock. You must take the big rock, the ivy and one of the flexible stricks. Combine the flexible stick with the ivy to make a bow. However, without any arrows, this bow is useless. Oh well, we’ll see that later, don’t worry. Go to the east now. Take the fishing gut, ignore the tree with the big berries and carry on. Welcome to the swamp area. Go to the east to find a big stick. This thing will help you to move some rocks. Go back where you started the adventure, move the rock to the right to create a shortcut. Now go back to the shed, store your bow and the fishing gut and go to sleep. CHAPTER 3: AN AMAZING MAZE Go outside, then go to the north and move the rock. To the north, there’s another rock to move. Sadly, you can’t go inside the cave yet. You need a torch. Go back and go to the west instead. Cut the grass, take the stick and proceed to the next area. Oh no! The monkey took your knapsack. Go get it back! This forest is a maze. If you have played The Legend of Zelda on NES, it’s the same thing. However, if you follow my instructions, this shouldn’t be a problem. Ignore the evergreen, you can’t take anything right now. Go to the north, then to the east, then to the south and finally to the west. You will find the monkey and you will get your knapsack back. Check this place to get a pointy rock then go back to the evergreen in order to take some tree sap. Combine the tree sap with the stick to make a torch. Now, we can go to the cave. Hey wait a second! Don’t be so hasty, we’ll explore the cave tomorrow (awwwww…). Find another stick somewhere, go back to the shed, take your feather back and merge the pointy rock, the stick and the feather to make the unlimited arrows (woohoo!). Now go back where the monkey was drinking, fill your canteen if it’s necessary, take a flexible stick, go back to the shed, take the fishing gut back and make a fishing rod with the flexible stick and the fishing gut. Now, store the fishing rod and go take a nap.
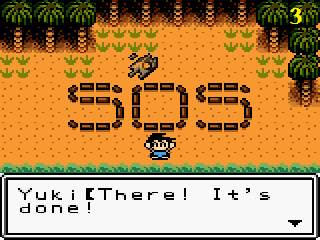
CHAPTER 4: BATTERIES!!! Time to explore the cave. Enter the cave, use the kindling and use the torch with the fire. Now, you are set so explore this cave, find the two sticks and carry on until you find the exit. Go to the east to see the monkey. Unfortunately, you can’t cut the trees with your knife, you’ll need an axe. Go to the next cave and find the iron chunk. Now combine one of the sticks with the iron chunk and you’ll get… the axe (2). Go back, equip the axe and cut the trees. Check the hole to find a broken radio. Yuki will take the batteries. You know what that means? Now, your radio will work. Explore this area and the caves to find some stuff. You can find a notebook close to a skeleton inside a cave which will teach you how to make traps to capture the animals. Outside, you will find a rhombus gem. There’s a shed if you are tired (don’t forget to make a fire with the kindling though). Now go to the east, take the umbrella leaf next to the waterfall, move the rock and go back to the shed. Store the other stick and the rhombus gem, then take the radio back and combine it with the batteries. Your radio is now working. Save your progress, wait until the night comes, use the radio to get a message from the helicopter and go to the beach in order to make the sign (3). Now wait a few days until the helicopter arrives. Don’t save during this period of time! A cutscene will be activated and the adventure will end. Congratulations, you… Wait a minute, you think it’s over? Oh no, there’s more! This is just one of the 8 endings of the game and it’s not the best ending. I will explain you how to get all the endings and the three mini-games later. Load your game, store the radio and go to sleep.
CHAPTER 5: DAMN STORM! You hear a message from the radio. The helicopter did stop the search. Now, you have to find another way to escape from this island. In other words, you need to build a raft and get the hell out of here. Go to the beach and check the parts of the boat to find some nails, then check the driftwood to put a nail on it and make the monkey appear for a second (that’s what we call a cameo 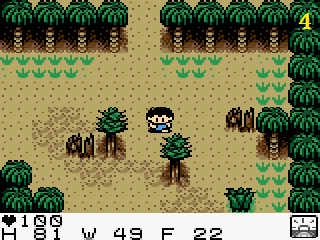   After the storm, the earthquake! You have a few days to get the hell out of here otherwise you will die. Store all your stuff except the kindling, the umbrella leaf, the torch, the canteen and the knife, take lot of food and fill your canteen, rest until your fatigue is down to 0 (otherwise you will get the ending 2), eat, drink and go back to the raft. Leave poor Tiki behind and get the hell out of this island. Unfortunately, the storm is back and won’t manage to escape this island.
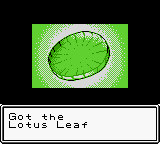
LAST CHAPTER: THE BOAT AND THE GEMS You awake on the other side of the island. You lost all your stuff except the knife and the canteen. Take the clam to your right then carry on. Oh, it’s Tiki! Your friend will give you a weird berry. Eat it and your hunger and your thirst will go up to 100 and your stamina will go down to 0. Take the star gem and carry on. There’s a ship! Perhaps you can use it to escape from this island. Use the star gem on the star shape and the chain will disappear. You need to find the six other gems. Well, remember that you did store one in the first shed so that means you need to find the five last gems. Check the interior of the boat. There’s a chest in this boat too. However, it’s not connected to the chest of the first shed. Now go outside and leave this place. You will have to make some tools like the kindling or the torch. Take the stick to the right, check everywhere in order to find some tree sap, a tree bark and a big stick hidden in the grass (6). Combine the tree bark and the stick to make a kindling. Carry on, take the umbrella leaf in the next area and use the big stick to move the rock to the west. This will make a passageway. Watch out, this is a one way passageway. You can’t do anything with the alligators right now, you’ll need some nasty mushrooms or rotten food to get rid of them. Go back to the first shed, take the bow, the arrow, the stick, the big stick and the rhombus gem and take a nap. Combine the stick with the tree sap in order to make a torch, go back to the waterfall to the east, shoot the rock above your head with the bow and carry on. You’ll see a cave behind the waterfall. Move the rocks to make a passageway and take the ivy before going in the cave. Make your progress until you are stuck. Use the ivy to make a bridge. Go down then to the right, move the rock and get the palace key (7). Now, go back, go to the north, use a big stick to make a bridge (that’s why you needed another big stick) and leave the cave. Go back to the ship, use the rhombus gem then go in the ship, store the palace key, the bow and the arrows and go to sleep. Five gems to go. Go back to the first shed, take the axe and the fishing rod take a look in the jungle to see a campfire then go back to the waterfall. Go up, take a nap in the shed and go to the north the next day. Take a look around to note another campfire, a tree with an egg on it (it’s a mini-game) and the round gem. When you try to get it, it will fall down and be eaten by a fish. You’ll also find a hot spring and two caves. Inside the caves, you’ll find some stuff (including a plain mushroom that you need to take and NOT eat, you’ll see why later). Now go back to the shed at the top of the waterfall, take a nap and go down. Use the fishing rod to catch the big fish and get the round gem. This will probably take a while. Once you have the gem, go back to the shed at the top of the waterfall and take a nap. Go back to the ship now. You’ll find another stranded and unconscious kid on your way back to the ship if you have checked the two campfires of course. Use the round gem on the specific shape, go in the ship and take a nap. You need to feed the girl before carrying on your quest for the last gems. Go find some food. Don’t use the plain mushroom on the girl, use it on the alligator to the right in the swamp area to get rid of him (rotten food works too). Carry on, cut the trees to the north, use your canteen to clean the stone slab and see a map of the island. There’s one specific spot to remember, it’s where the dot is. Check the statue staring at the west, it will become useful once you’ll get the “key”. Go back to the ship now, store the axe, give some food to the girl (or the boy) in order to wake her (or him) up and give her (or him) a name. For this walkthrough, I will call this kid Lana since it’s a girl. The kid will give you the oval gem. Leave the ship and put this gem in the specific shape. Three gems to go! You deserve a nap, Yuki. 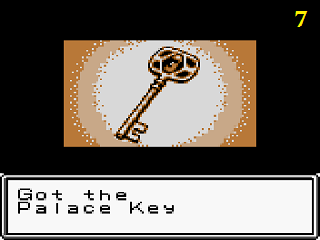  Now, I have a good or a bad news, it’s up to you. In order to get the best ending, you have to give some stuff to the other kid until he (or she) falls in love with you. You’ll see a heart above your head that will tell you accomplished this quest. It’s just a side quest but you have to do it if you want the best ending. Now, let’s carry on the quest for the gems, shall we? If you haven’t poisoned the other alligator, you won’t be able to make any progress. You need at least a plain mushroom or some rotten food to get rid of this animal. The jungle has lot of nasty mushrooms. Once you have one of these items, go back to the swamp area, give this item to the alligator to the south and carry on. There’s a shed if you need to take a nap. Now, you need to cross the swamps to the east with the lotus leaves. Move the rocks, Tiki will fall in the water. Don’t worry, he will come back to you and you will be able to get the lotus leaf thanks to this monkey (8). Now go back, use the other lotus leaf, move the rock, use the lotus leaf. You can’t reach the gem unless you use the lotus leaf you just got earlier. So use it and grab the square gem. The level of the water will decrease and you will be able to go to the desert to the east now. However, before going there, take the iron lump, take the stick on your way back to the ship, put the square gem in the specific shape, store the big stick, combine the stick with the iron lump to make a hammer and take a nap inside the ship.
Time to go to the desert. This desert is wide and you can easily be lost. However, follow my instructions and it will be alright. From the entrance of this area, go the south-east until you find the skeleton of an animal. Check the sparkling spot to the east to get the pendant (or the gem if you haven’t met the other kid). Now, go to the south until you see three stone statues. Break the one located in the middle to get the eye gem. Remember the stone statue that has a missing eye? Yeah, where the map was! Go there, use the eye and a path will appear. This leads to the triangle gem. Now go back to the ship, use the triangle gem on the specific spot, a cutscene will be activated. Go in the ship, give the pendant to the kid and take a nap. Tomorrow, you will head to the ruins.   Take your kindling, the big stick, your bow, your arrows, your hammer, the palace key, the torch, the umbrella leaf, the knife and your canteen and head to the ruins. You have to make this amazing maze first. Not a big deal, just go north, then east, then south and west. Use the palace key in order to open the door and carry on. Don’t go through the first door, go to the next building, go up, take the panel and go back to the first building. Solve the puzzle to the right, use the panel and take the sun key (9). Use the key on the locked door, go to the west, enter the building and go down the stairs. This part is an amazing maze of stairs. The lowest stairs lead to three sticks. The stairs to the north lead to one half of the star key and more stairs. Go down the ones to the right, then the same stairs and activate the switch. Now go back outside, go down the middle stairs, then the ones to the south and the ones to the east. Grab the moon key, go back outside, open the door to the south, cut the grass to find the other part of the star key, combine the two parts of the star key and open the last door where the stone statues are with this key. Enter the next building and prepare yourself for the final challenge: the compilation of puzzles. You’ll need to make lot of backtrackings to the shed if you want to make it. It’s impossible to make this part during one day. So take some nap when it’s necessary. Go to the east, activate the switch and carry on. Break the cracked wall with the hammer, go back and go to the north. Use the canteen in order to light the flames off, this will open the door to the west. Carry on, smash the wall with the hammer then use the big stick to move the rock. Take a break now and carry on the next day. Go north from the entrance, break the wall down with the hammer, carry on, use the bow in order to shoot the moon button, push another button, shoot the previous button one more time and carry on. Ignore the locked door with the two candlesticks, use the hammer to break the wall down, push the button to open the door and take a nap outside. Go back to the locked door, use the kindling to light the candlesticks on, push the button farther, then the one down, then the one to the south-west, then the one behind the pillars then the one to the east and the one down. Carry on, push the two moon buttons, take a nap if necessary and carry on. Here is the last trial: the invisible maze. Move the rock with the big stick, push the button located in the north-east of the labyrinth. Take your time, don’t panic and it should be alright. It’s a labyrinth, it’s supposed to test your sanity (oh thank you Laian, you’re a great help!
BONUS CHAPTER: ENDINGS AND MINI-GAMES Let’s start with the mini-games, shall we? -MINI-GAME 1: GET BERRY! HOW TO GET IT? You unlock this mini-game once you have checked the tree with the big berry.
-MINI-GAME 2: PUSH & FISH! HOW TO GET IT? In the area where the monkey was drinking, take the big rock and use it in front of you. You’ll get a fish. Go back there the next day and repeat the same method in order to unlock the mini-game.
-MINI-GAME 3: EGG CATCH! HOW TO GET IT? You unlock this mini-game once you have checked the tree with the egg at the top of the mountain. ------------------------- Now let’s see how to unlock all the 8 endings. ENDING 1 HOW TO GET IT? Once your radio works, spend the night using the radio until you have a message. Go to the beach, make the sign and wait a few days. The helicopter will come and rescue you.
ENDING 2 HOW TO GET IT? After building the raft, don’t take ANY food in your knapsack and escape from the island. You will die, starved on your raft in the middle of the ocean.
ENDING 3 HOW TO GET IT? Check the two campfires, find the other kid and the monkey and survive until the 100th day. You will live forever on the island with the other kid and the monkey.
ENDING 4 HOW TO GET IT? Don’t check the two campfires and escape from the island with the old ship.
ENDING 5 HOW TO GET IT? Find the other kid, wake him/her up and give some bad food to him/her. Then escape from the island with the boat after a long period of days. The other kid will be sick and die.
ENDING 6 HOWTO GET IT? Find the other kid, wake him/her up and escape from the island with the boat.
ENDING 7 HOW TO GET IT? Don’t make the raft, wait until the 100th day. You and the monkey will live forever on the island. Note that it’s not necessary to be friend with the monkey.
ENDING 8 (THE BEST ENDING) HOW TO GET IT? Find the other kid, wake him/her up and give lot of food and stuff until he/she falls in love with you. Then escape from the island with the boat. Ten years later, the two kids will marry each other.
Hello everyone. It’s your host Laian with another walkthrough. This time, let’s go on an adventure really epic and special. This adventure is called “Stranded Kids” but it’s also known as “Survival Kids”, it was released on Gameboy Color. I will make this introduction short, don’t worry. I just want to tell you that everything is written in this walkthrough. The adventure, the endings, the mini-games, EVERYTHING! I made a bonus chapter at the end of the walkthrough for the endings and the mini-games. So yeah, without wasting any more time, let’s start the adventure, shall we?
BEFORE STARTING THE ADVENTURE When you start a new game, you can choose between the boy and the girl. Ok, I will spoil a bit: note that the one you won’t choose will automatically be the other kid stranded on the island later in the game. For this walkthrough, I will choose the boy and name him Yuki. Yes, Yuki! Like the main character from Grandia 3 except he doesn’t have an aviator suit and he is younger ha ha. It will be up to you to choose your kid at the beginning of this adventure. Now that we have our hero and its name, time to go on an epic adventure!
CHAPTER 1: FINDING THE SHED You are on the shore. As you can see, the boat is destroyed and you can notice some wrecks. Check the sand dunes in order to find your knapsack and get a knife, the matches and the radio. Oh cool, we have a radio, we can send a SOS to the world and hope that someone will get the message (not in the bottle). Unfortunately, the radio doesn’t work, you’ll need some batteries. Also, the matches will be useless because they are wet so they won’t work anymore. Go to the inventory and equip the knife. That will help you to cut the grass and kill some monsters. Take the clams, the stick to the east, cut the grass to grab the canteen and cut the grass to the west in order to carry on. Take the bird feather and the tree bark, merge the tree bark with the stick in order to get the kindling (1). You must keep this item in your knapsack during the adventure, this will help you a lot. Go ahead, use it and cook your clams. Now, you have some food. However, that won’t last forever. After one day, those clams will be rotten and not tasty like the meat. You can increase the length if you use some stuff like round berries. Ah, also, the tools you will make won’t never break, which is good but kind of surrealistic, oh well. Go to the east, then to the north and you will discover a shed. Yuki will automatically go inside. You can’t do anything else except using or merging some items, resting, sleeping, saving your progress and stopping the game. Eat your clams and sleep.
CHAPTER 2: THE MONKEY! OH, IT RAN AWAY! From this point, you have to care about your hunger, your water and your fatigue. You’ll need to find lot of food in order to survive now. Watch out though, some food is dangerous for your health (for example hollow mushrooms, color mushrooms and obviously the rotten meat and clam). Store the bird feather, go outside, then to the north and to the east. Hey, look! It’s the monkey! Oh shoot, it ran away. You disturbed the monkey whereas it was drinking some water. Hmm, perhaps this water is tasty? Drink some water to recover your thirst and look around in order to find two flexible sticks, an ivy, some thin grass, some berries and a big rock. You must take the big rock, the ivy and one of the flexible stricks. Combine the flexible stick with the ivy to make a bow. However, without any arrows, this bow is useless. Oh well, we’ll see that later, don’t worry. Go to the east now. Take the fishing gut, ignore the tree with the big berries and carry on. Welcome to the swamp area. Go to the east to find a big stick. This thing will help you to move some rocks. Go back where you started the adventure, move the rock to the right to create a shortcut. Now go back to the shed, store your bow and the fishing gut and go to sleep. CHAPTER 3: AN AMAZING MAZE Go outside, then go to the north and move the rock. To the north, there’s another rock to move. Sadly, you can’t go inside the cave yet. You need a torch. Go back and go to the west instead. Cut the grass, take the stick and proceed to the next area. Oh no! The monkey took your knapsack. Go get it back! This forest is a maze. If you have played The Legend of Zelda on NES, it’s the same thing. However, if you follow my instructions, this shouldn’t be a problem. Ignore the evergreen, you can’t take anything right now. Go to the north, then to the east, then to the south and finally to the west. You will find the monkey and you will get your knapsack back. Check this place to get a pointy rock then go back to the evergreen in order to take some tree sap. Combine the tree sap with the stick to make a torch. Now, we can go to the cave. Hey wait a second! Don’t be so hasty, we’ll explore the cave tomorrow (awwwww…). Find another stick somewhere, go back to the shed, take your feather back and merge the pointy rock, the stick and the feather to make the unlimited arrows (woohoo!). Now go back where the monkey was drinking, fill your canteen if it’s necessary, take a flexible stick, go back to the shed, take the fishing gut back and make a fishing rod with the flexible stick and the fishing gut. Now, store the fishing rod and go take a nap.
CHAPTER 4: BATTERIES!!! Time to explore the cave. Enter the cave, use the kindling and use the torch with the fire. Now, you are set so explore this cave, find the two sticks and carry on until you find the exit. Go to the east to see the monkey. Unfortunately, you can’t cut the trees with your knife, you’ll need an axe. Go to the next cave and find the iron chunk. Now combine one of the sticks with the iron chunk and you’ll get… the axe (2). Go back, equip the axe and cut the trees. Check the hole to find a broken radio. Yuki will take the batteries. You know what that means? Now, your radio will work. Explore this area and the caves to find some stuff. You can find a notebook close to a skeleton inside a cave which will teach you how to make traps to capture the animals. Outside, you will find a rhombus gem. There’s a shed if you are tired (don’t forget to make a fire with the kindling though). Now go to the east, take the umbrella leaf next to the waterfall, move the rock and go back to the shed. Store the other stick and the rhombus gem, then take the radio back and combine it with the batteries. Your radio is now working. Save your progress, wait until the night comes, use the radio to get a message from the helicopter and go to the beach in order to make the sign (3). Now wait a few days until the helicopter arrives. Don’t save during this period of time! A cutscene will be activated and the adventure will end. Congratulations, you… Wait a minute, you think it’s over? Oh no, there’s more! This is just one of the 8 endings of the game and it’s not the best ending. I will explain you how to get all the endings and the three mini-games later. Load your game, store the radio and go to sleep.
CHAPTER 5: DAMN STORM! You hear a message from the radio. The helicopter did stop the search. Now, you have to find another way to escape from this island. In other words, you need to build a raft and get the hell out of here. Go to the beach and check the parts of the boat to find some nails, then check the driftwood to put a nail on it and make the monkey appear for a second (that’s what we call a cameo After the storm, the earthquake! You have a few days to get the hell out of here otherwise you will die. Store all your stuff except the kindling, the umbrella leaf, the torch, the canteen and the knife, take lot of food and fill your canteen, rest until your fatigue is down to 0 (otherwise you will get the ending 2), eat, drink and go back to the raft. Leave poor Tiki behind and get the hell out of this island. Unfortunately, the storm is back and won’t manage to escape this island.
LAST CHAPTER: THE BOAT AND THE GEMS You awake on the other side of the island. You lost all your stuff except the knife and the canteen. Take the clam to your right then carry on. Oh, it’s Tiki! Your friend will give you a weird berry. Eat it and your hunger and your thirst will go up to 100 and your stamina will go down to 0. Take the star gem and carry on. There’s a ship! Perhaps you can use it to escape from this island. Use the star gem on the star shape and the chain will disappear. You need to find the six other gems. Well, remember that you did store one in the first shed so that means you need to find the five last gems. Check the interior of the boat. There’s a chest in this boat too. However, it’s not connected to the chest of the first shed. Now go outside and leave this place. You will have to make some tools like the kindling or the torch. Take the stick to the right, check everywhere in order to find some tree sap, a tree bark and a big stick hidden in the grass (6). Combine the tree bark and the stick to make a kindling. Carry on, take the umbrella leaf in the next area and use the big stick to move the rock to the west. This will make a passageway. Watch out, this is a one way passageway. You can’t do anything with the alligators right now, you’ll need some nasty mushrooms or rotten food to get rid of them. Go back to the first shed, take the bow, the arrow, the stick, the big stick and the rhombus gem and take a nap. Combine the stick with the tree sap in order to make a torch, go back to the waterfall to the east, shoot the rock above your head with the bow and carry on. You’ll see a cave behind the waterfall. Move the rocks to make a passageway and take the ivy before going in the cave. Make your progress until you are stuck. Use the ivy to make a bridge. Go down then to the right, move the rock and get the palace key (7). Now, go back, go to the north, use a big stick to make a bridge (that’s why you needed another big stick) and leave the cave. Go back to the ship, use the rhombus gem then go in the ship, store the palace key, the bow and the arrows and go to sleep. Five gems to go. Go back to the first shed, take the axe and the fishing rod take a look in the jungle to see a campfire then go back to the waterfall. Go up, take a nap in the shed and go to the north the next day. Take a look around to note another campfire, a tree with an egg on it (it’s a mini-game) and the round gem. When you try to get it, it will fall down and be eaten by a fish. You’ll also find a hot spring and two caves. Inside the caves, you’ll find some stuff (including a plain mushroom that you need to take and NOT eat, you’ll see why later). Now go back to the shed at the top of the waterfall, take a nap and go down. Use the fishing rod to catch the big fish and get the round gem. This will probably take a while. Once you have the gem, go back to the shed at the top of the waterfall and take a nap. Go back to the ship now. You’ll find another stranded and unconscious kid on your way back to the ship if you have checked the two campfires of course. Use the round gem on the specific shape, go in the ship and take a nap. You need to feed the girl before carrying on your quest for the last gems. Go find some food. Don’t use the plain mushroom on the girl, use it on the alligator to the right in the swamp area to get rid of him (rotten food works too). Carry on, cut the trees to the north, use your canteen to clean the stone slab and see a map of the island. There’s one specific spot to remember, it’s where the dot is. Check the statue staring at the west, it will become useful once you’ll get the “key”. Go back to the ship now, store the axe, give some food to the girl (or the boy) in order to wake her (or him) up and give her (or him) a name. For this walkthrough, I will call this kid Lana since it’s a girl. The kid will give you the oval gem. Leave the ship and put this gem in the specific shape. Three gems to go! You deserve a nap, Yuki. Now, I have a good or a bad news, it’s up to you. In order to get the best ending, you have to give some stuff to the other kid until he (or she) falls in love with you. You’ll see a heart above your head that will tell you accomplished this quest. It’s just a side quest but you have to do it if you want the best ending. Now, let’s carry on the quest for the gems, shall we? If you haven’t poisoned the other alligator, you won’t be able to make any progress. You need at least a plain mushroom or some rotten food to get rid of this animal. The jungle has lot of nasty mushrooms. Once you have one of these items, go back to the swamp area, give this item to the alligator to the south and carry on. There’s a shed if you need to take a nap. Now, you need to cross the swamps to the east with the lotus leaves. Move the rocks, Tiki will fall in the water. Don’t worry, he will come back to you and you will be able to get the lotus leaf thanks to this monkey (8). Now go back, use the other lotus leaf, move the rock, use the lotus leaf. You can’t reach the gem unless you use the lotus leaf you just got earlier. So use it and grab the square gem. The level of the water will decrease and you will be able to go to the desert to the east now. However, before going there, take the iron lump, take the stick on your way back to the ship, put the square gem in the specific shape, store the big stick, combine the stick with the iron lump to make a hammer and take a nap inside the ship.
Time to go to the desert. This desert is wide and you can easily be lost. However, follow my instructions and it will be alright. From the entrance of this area, go the south-east until you find the skeleton of an animal. Check the sparkling spot to the east to get the pendant (or the gem if you haven’t met the other kid). Now, go to the south until you see three stone statues. Break the one located in the middle to get the eye gem. Remember the stone statue that has a missing eye? Yeah, where the map was! Go there, use the eye and a path will appear. This leads to the triangle gem. Now go back to the ship, use the triangle gem on the specific spot, a cutscene will be activated. Go in the ship, give the pendant to the kid and take a nap. Tomorrow, you will head to the ruins. Take your kindling, the big stick, your bow, your arrows, your hammer, the palace key, the torch, the umbrella leaf, the knife and your canteen and head to the ruins. You have to make this amazing maze first. Not a big deal, just go north, then east, then south and west. Use the palace key in order to open the door and carry on. Don’t go through the first door, go to the next building, go up, take the panel and go back to the first building. Solve the puzzle to the right, use the panel and take the sun key (9). Use the key on the locked door, go to the west, enter the building and go down the stairs. This part is an amazing maze of stairs. The lowest stairs lead to three sticks. The stairs to the north lead to one half of the star key and more stairs. Go down the ones to the right, then the same stairs and activate the switch. Now go back outside, go down the middle stairs, then the ones to the south and the ones to the east. Grab the moon key, go back outside, open the door to the south, cut the grass to find the other part of the star key, combine the two parts of the star key and open the last door where the stone statues are with this key. Enter the next building and prepare yourself for the final challenge: the compilation of puzzles. You’ll need to make lot of backtrackings to the shed if you want to make it. It’s impossible to make this part during one day. So take some nap when it’s necessary. Go to the east, activate the switch and carry on. Break the cracked wall with the hammer, go back and go to the north. Use the canteen in order to light the flames off, this will open the door to the west. Carry on, smash the wall with the hammer then use the big stick to move the rock. Take a break now and carry on the next day. Go north from the entrance, break the wall down with the hammer, carry on, use the bow in order to shoot the moon button, push another button, shoot the previous button one more time and carry on. Ignore the locked door with the two candlesticks, use the hammer to break the wall down, push the button to open the door and take a nap outside. Go back to the locked door, use the kindling to light the candlesticks on, push the button farther, then the one down, then the one to the south-west, then the one behind the pillars then the one to the east and the one down. Carry on, push the two moon buttons, take a nap if necessary and carry on. Here is the last trial: the invisible maze. Move the rock with the big stick, push the button located in the north-east of the labyrinth. Take your time, don’t panic and it should be alright. It’s a labyrinth, it’s supposed to test your sanity (oh thank you Laian, you’re a great help!
BONUS CHAPTER: ENDINGS AND MINI-GAMES Let’s start with the mini-games, shall we? -MINI-GAME 1: GET BERRY! HOW TO GET IT? You unlock this mini-game once you have checked the tree with the big berry.
-MINI-GAME 2: PUSH & FISH! HOW TO GET IT? In the area where the monkey was drinking, take the big rock and use it in front of you. You’ll get a fish. Go back there the next day and repeat the same method in order to unlock the mini-game.
-MINI-GAME 3: EGG CATCH! HOW TO GET IT? You unlock this mini-game once you have checked the tree with the egg at the top of the mountain. ------------------------- Now let’s see how to unlock all the 8 endings. ENDING 1 HOW TO GET IT? Once your radio works, spend the night using the radio until you have a message. Go to the beach, make the sign and wait a few days. The helicopter will come and rescue you.
ENDING 2 HOW TO GET IT? After building the raft, don’t take ANY food in your knapsack and escape from the island. You will die, starved on your raft in the middle of the ocean.
ENDING 3 HOW TO GET IT? Check the two campfires, find the other kid and the monkey and survive until the 100th day. You will live forever on the island with the other kid and the monkey.
ENDING 4 HOW TO GET IT? Don’t check the two campfires and escape from the island with the old ship.
ENDING 5 HOW TO GET IT? Find the other kid, wake him/her up and give some bad food to him/her. Then escape from the island with the boat after a long period of days. The other kid will be sick and die.
ENDING 6 HOWTO GET IT? Find the other kid, wake him/her up and escape from the island with the boat.
ENDING 7 HOW TO GET IT? Don’t make the raft, wait until the 100th day. You and the monkey will live forever on the island. Note that it’s not necessary to be friend with the monkey.
ENDING 8 (THE BEST ENDING) HOW TO GET IT? Find the other kid, wake him/her up and give lot of food and stuff until he/she falls in love with you. Then escape from the island with the boat. Ten years later, the two kids will marry each other.
-------------------- |


| Games have secrets, I have my eagle gaze. |
Affected by 'Laziness Syndrome'
Registered: 10-21-11
Location: France
Last Post: 2661 days
Last Active: 1835 days
03-31-13 06:51 AM
 Singelli is Offline
| ID: 767064 | 67 Words
Singelli is Offline
| ID: 767064 | 67 Words
 Singelli is Offline

POSTS: 3628/8698
POST EXP: 1189395
LVL EXP: 57911316
CP: 67409.3
VIZ: 3154470
I'm so glad you did this. This was the very first game I tried as a registered member of vizzed. I got stuck and after fumbling around for perhaps an hour, I gave up on the game. And I NEVER returned to it. I'm going to use your walkthrough and try to get through the game this time. LOL Thanks for your hard work! Amazing, as always! Psalms 3:6 I will not be afraid of ten thousands of people, that have set themselves against me round about. |
| Singelli |
Affected by 'Laziness Syndrome'
Registered: 08-09-12
Location: Alabama
Last Post: 3346 days
Last Active: 3322 days
04-03-13 04:40 PM
Laian is Offline
| ID: 770376 | 77 Words
POSTS: 1468/2232
POST EXP: 457173
LVL EXP: 7741582
CP: 23744.4
VIZ: 3571020
Singelli : Glad to hear that this walkthrough will help you to restart or carry on your adventure ha ha This game is quite hard indeed. That's why I wanted to make a walkthrough of this game. Honestly, I beat this game twice. The first time, it took me so long to get the best ending. Over 90 days I do believe, the max being 100 days... yeah, it was too close. Thanks for the feedback Glad to hear that this walkthrough will help you to restart or carry on your adventure ha ha This game is quite hard indeed. That's why I wanted to make a walkthrough of this game. Honestly, I beat this game twice. The first time, it took me so long to get the best ending. Over 90 days I do believe, the max being 100 days... yeah, it was too close. Thanks for the feedback -------------------- |
| Games have secrets, I have my eagle gaze. |
Affected by 'Laziness Syndrome'
Registered: 10-21-11
Location: France
Last Post: 2661 days
Last Active: 1835 days
04-03-13 04:43 PM
Singelli is Offline
| ID: 770383 | 76 Words
Singelli is Offline
POSTS: 3659/8698
POST EXP: 1189395
LVL EXP: 57911316
CP: 67409.3
VIZ: 3154470
laian : Oh, I'll definitely have to restart it, as I don't remember a thing about what I had done or what I was trying to do. As I said, it was one of the first games I explored on vizzed, almost nine or ten months ago. I don't even think I got very far, sadly. I tried so many things... I bet I'll get mad when I see the solution. Psalms 3:6 I will not be afraid of ten thousands of people, that have set themselves against me round about. |
| Singelli |
Affected by 'Laziness Syndrome'
Registered: 08-09-12
Location: Alabama
Last Post: 3346 days
Last Active: 3322 days
04-03-13 04:46 PM
 Kyle! is Offline
| ID: 770388 | 41 Words
Kyle! is Offline
| ID: 770388 | 41 Words
 Kyle! is Offline
BluemageKyle

POSTS: 1270/1775
POST EXP: 83520
LVL EXP: 5414538
CP: 2602.5
VIZ: -129441
This walkthrough was great! I love how it was so detailed and well written! This is a goal I hope to achieve on a level of making reviews and maybe my own walkthroughs! Thanks for delivering us such a good walkthrough! |
Affected by 'Laziness Syndrome'
Registered: 03-16-12
Last Post: 2078 days
Last Active: 1345 days
04-03-13 04:47 PM
 earthwarrior is Offline
| ID: 770389 | 17 Words
earthwarrior is Offline
| ID: 770389 | 17 Words
 earthwarrior is Offline

POSTS: 2136/4807
POST EXP: 221310
LVL EXP: 23878543
CP: 21887.8
VIZ: 137389
Another great walkthrough! Good job with them. Do you ever get tired of writing all of these? Do you ever get tired of writing all of these? -------------------- |
Vizzed's #1 Kid Icarus Uprising Fan! 2nd place in December 2012 VCS! |
Affected by 'Laziness Syndrome'
Registered: 07-03-12
Location: Mars
Last Post: 2751 days
Last Active: 2681 days
04-07-13 10:55 PM
 iN008 is Offline
| ID: 774677 | 18 Words
iN008 is Offline
| ID: 774677 | 18 Words
 iN008 is Offline

POSTS: 1294/2358
POST EXP: 173853
LVL EXP: 8058389
CP: 21861.7
VIZ: 216725
Great walkthrough, I was going to play Survival kids next once I had finished the minish cap A post by... ... iN008 |
Affected by 'Laziness Syndrome'
Registered: 12-31-12
Location: Central Scotland
Last Post: 3753 days
Last Active: 2199 days
04-08-13 12:28 PM
Laian is Offline
| ID: 774935 | 156 Words
POSTS: 1469/2232
POST EXP: 457173
LVL EXP: 7741582
CP: 23744.4
VIZ: 3571020
Thanks for the feedbacks, everyone. BluemageKyle : You will achieve this goal, don't worry earthwarrior : No, and all I know is I don't wanna stop, like Ozzy Osborne did sing in the past ha ha Even if, each time I make a walkthrough, I probably lose my sanity, I keep doing that over and over again. Ok it's hard sometimes, but I know that will help some people later. iN008 : Well, good luck, man. No, don't worry, the game is hard at some points but it's possible to beat it. Will it be the first time you will play this game? I don't want to make you scare but it took me over 90 days to beat it the first time (the max being 100 days). The second time, at least 40 days. When you know how to make and use some items, all you need to care is the dangers on the island BluemageKyle : You will achieve this goal, don't worry earthwarrior : No, and all I know is I don't wanna stop, like Ozzy Osborne did sing in the past ha ha Even if, each time I make a walkthrough, I probably lose my sanity, I keep doing that over and over again. Ok it's hard sometimes, but I know that will help some people later. iN008 : Well, good luck, man. No, don't worry, the game is hard at some points but it's possible to beat it. Will it be the first time you will play this game? I don't want to make you scare but it took me over 90 days to beat it the first time (the max being 100 days). The second time, at least 40 days. When you know how to make and use some items, all you need to care is the dangers on the island -------------------- |
| Games have secrets, I have my eagle gaze. |
Affected by 'Laziness Syndrome'
Registered: 10-21-11
Location: France
Last Post: 2661 days
Last Active: 1835 days
04-18-13 09:20 PM
 supercool22 is Offline
| ID: 781815 | 23 Words
supercool22 is Offline
| ID: 781815 | 23 Words
 supercool22 is Offline

POSTS: 1285/5232
POST EXP: 198048
LVL EXP: 26715697
CP: 90041.1
VIZ: 5469483
great walkthrough , this game good , really good im mean but its kind of hard to beat but this walkthrough helps . ____________________ |
PC/Steam Manager, Content Adder, also Former Admin
| Winter 2024 TDV Winner |
Affected by 'Laziness Syndrome'
Registered: 11-30-12
Last Post: 1 day
Last Active: 1 day
04-25-13 09:19 PM
thing1 is Offline
| ID: 787511 | 36 Words
Thingywingy

POSTS: 5297/17401
POST EXP: 936870
LVL EXP: 172530409
CP: 32470.1
VIZ: 342070
You should do a XBOX 360 game, dude. There are not any of those, and that would get the XBOX 360 some major credit that it deserves. It does not get discussed enough on this site. ____________________ |
| What is life? |
Affected by 'Laziness Syndrome'
Registered: 02-03-11
Location: Washington DC Area
Last Post: 88 days
Last Active: 8 hours
07-16-26 12:11 AM
Sevr is Offline
| ID: 1422015 | 743 Words
Laian : Thanks so much for the walkthrough, I honestly wouldn’t have been able to figure out half the stuff in this game without the extra help (older games can be so cryptic sometimes). I’d also like to add a few things of my own to the guide that weren’t covered as in-depth for the benefit of future viewers. I played Survival Kids on the Nintendo Switch “Game Boy - Nintendo Classics” so it’s possible some of the information I provide may be wrong. In the labyrinth section of the game, the quickest way I found (40 moves) to complete the “ship image puzzle” was to move the controls in the following order: ➡️➡️⬇️⬇️⬅️⬅️⬆️➡️➡️⬇️⬅️⬅️⬆️➡️➡️⬇️ Or in other words - Right x2, Down x2, Left x2, Up x1, Right x2, Down x1, Left x2, Up x1, Right x2 Down x1. At this point the puzzle should look like this:  If your puzzle is looking like the photo above then you’re on the right track. The only thing we need to move into place is the bottom left piece which actually belongs in the bottom right. To do so you’re gonna want to move the pieces using this last sequence: ⬅️⬅️⬆️⬆️➡️➡️⬇️⬅️⬅️⬆️➡️➡️⬇️⬅️⬆️➡️⬇️⬅️⬆️⬅️⬇️⬇️➡️➡️ Or in other words - Left x2, Up x2, Right x2, Down x1, Left x2, Up x1, Right x2, Down x1, Left x1, Up x1, Right x1, Down x1, Left x1, Up x1, Left x1, Down x2, Right x2 If you followed the instructions correctly the puzzle should now be finished and you can now place the panel item into the blank spot to complete it. (See below for finished puzzle images)   As for the “invisible maze” at the end of the labyrinth, the below map and instructions (both crudely created by me) may be of some help:  What you’re seeing in the above picture is the path you should take to successfully navigate through. You’ll want to take the red path to the switch and then finish by following the black path to the room with the “moon gem”. For simplicity I’ve split the maze into a grid with each box representing a “step” that the character can take. Each “step” is equal to about 2 of the small boxes (in length) that make up the walls. With this in mind, we can move through the maze using the walls as a reference for how far to go each way. Start between the pillars and then follow the path shown in the image by moving in these (singular)“steps”: ⬆️⬅️⬆️⬆️⬆️⬆️➡️➡️⬆️⬆️⬅️⬅️⬆️⬆️➡️➡️⬆️⬆️⬅️⬅️⬅️⬆️⬆️➡️➡️➡️⬆️➡️➡️➡️➡️⬆️⬆️⬆️⬆️⬆️ By now you should be standing on the switch that opens the door to the last area. Now you just need to follow these last few “steps”: ⬇️⬇️⬇️⬇️⬇️⬅️⬅️⬅️⬅️⬆️⬆️➡️⬆️⬆️⬆️⬆️ Congrats! If all went well, you should now officially be able to claim the final gem! If these instructions don’t seem to match up, are incorrect in any way, or are worded in a confusing or otherwise unclear manner, feel free to reply with feedback so I can revise or fix them accordingly. Regarding the “New game +” mode for anyone who may be interested: The game switches (or randomizes) the function of certain food items such as the fruits, grass, and I believe mushrooms. For example, the “slick fruit” may recover fatigue now rather than quench your thirst or the “thin grass” may now cause temporary paralysis rather than whatever it did in the first/normal play-through. I haven’t played much of this mode so that’s all I really know about it, but I’m pretty sure there are a few other differences that I just didn’t notice. I would’ve posted this sooner (late last year) but I was having trouble getting things to work since I’m really new to the website. All the images provided were made by me from when I originally tried (and failed) posting this additional information last year. Lastly, I’d like to once again express my deep appreciation to Laian for the walkthrough. Without some of their advice I wouldn’t have been able to appreciate and treasure “Survival Kids” as much as I’ve come to and I most certainly wouldn’t have been able to get all the endings on my own. It’s crazy how even 12+ years later, a simple post and guide like that can still be helping people like me muddle through these hidden gems of gaming. So, on behalf of the many readers and gamers who you’ve guided and will continue to guide, thank you. In the labyrinth section of the game, the quickest way I found (40 moves) to complete the “ship image puzzle” was to move the controls in the following order: ➡️➡️⬇️⬇️⬅️⬅️⬆️➡️➡️⬇️⬅️⬅️⬆️➡️➡️⬇️ Or in other words - Right x2, Down x2, Left x2, Up x1, Right x2, Down x1, Left x2, Up x1, Right x2 Down x1. At this point the puzzle should look like this: If your puzzle is looking like the photo above then you’re on the right track. The only thing we need to move into place is the bottom left piece which actually belongs in the bottom right. To do so you’re gonna want to move the pieces using this last sequence: ⬅️⬅️⬆️⬆️➡️➡️⬇️⬅️⬅️⬆️➡️➡️⬇️⬅️⬆️➡️⬇️⬅️⬆️⬅️⬇️⬇️➡️➡️ Or in other words - Left x2, Up x2, Right x2, Down x1, Left x2, Up x1, Right x2, Down x1, Left x1, Up x1, Right x1, Down x1, Left x1, Up x1, Left x1, Down x2, Right x2 If you followed the instructions correctly the puzzle should now be finished and you can now place the panel item into the blank spot to complete it. (See below for finished puzzle images) As for the “invisible maze” at the end of the labyrinth, the below map and instructions (both crudely created by me) may be of some help: What you’re seeing in the above picture is the path you should take to successfully navigate through. You’ll want to take the red path to the switch and then finish by following the black path to the room with the “moon gem”. For simplicity I’ve split the maze into a grid with each box representing a “step” that the character can take. Each “step” is equal to about 2 of the small boxes (in length) that make up the walls. With this in mind, we can move through the maze using the walls as a reference for how far to go each way. Start between the pillars and then follow the path shown in the image by moving in these (singular)“steps”: ⬆️⬅️⬆️⬆️⬆️⬆️➡️➡️⬆️⬆️⬅️⬅️⬆️⬆️➡️➡️⬆️⬆️⬅️⬅️⬅️⬆️⬆️➡️➡️➡️⬆️➡️➡️➡️➡️⬆️⬆️⬆️⬆️⬆️ By now you should be standing on the switch that opens the door to the last area. Now you just need to follow these last few “steps”: ⬇️⬇️⬇️⬇️⬇️⬅️⬅️⬅️⬅️⬆️⬆️➡️⬆️⬆️⬆️⬆️ Congrats! If all went well, you should now officially be able to claim the final gem! If these instructions don’t seem to match up, are incorrect in any way, or are worded in a confusing or otherwise unclear manner, feel free to reply with feedback so I can revise or fix them accordingly. Regarding the “New game +” mode for anyone who may be interested: The game switches (or randomizes) the function of certain food items such as the fruits, grass, and I believe mushrooms. For example, the “slick fruit” may recover fatigue now rather than quench your thirst or the “thin grass” may now cause temporary paralysis rather than whatever it did in the first/normal play-through. I haven’t played much of this mode so that’s all I really know about it, but I’m pretty sure there are a few other differences that I just didn’t notice. I would’ve posted this sooner (late last year) but I was having trouble getting things to work since I’m really new to the website. All the images provided were made by me from when I originally tried (and failed) posting this additional information last year. Lastly, I’d like to once again express my deep appreciation to Laian for the walkthrough. Without some of their advice I wouldn’t have been able to appreciate and treasure “Survival Kids” as much as I’ve come to and I most certainly wouldn’t have been able to get all the endings on my own. It’s crazy how even 12+ years later, a simple post and guide like that can still be helping people like me muddle through these hidden gems of gaming. So, on behalf of the many readers and gamers who you’ve guided and will continue to guide, thank you. -------------------- |
