

 User Notice
 Forum Links
Thread Information
Thread Actions


Walkthrough Megaman Zero 3
12-31-12 11:22 AM
Laian is Offline
| ID: 711676 | 8144 Words

POSTS: 1454/2232
POST EXP: 457173
LVL EXP: 7718023
CP: 23738.9
VIZ: 3570490

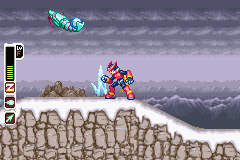
Hello everyone. This is your host Laian the walkthrough writer with a new walkthrough. It's a request this time. One of my friends on Vizzed suggested me Megaman Zero 3. I said to him I love the Megaman universe but I was so bad at the games. Really bad, I can tell you. This walkthrough is just how to beat the game and get some stuff, you know the score. Some stuff is missing, like the Ex skills and two or three secrets disks but don't worry, I'll add that content in due time. Ok, I won't make a long introduction this time so let's start this walkthrough without wasting anymore time, shall we? Your first mission is simple: you have to go to the east and check a spaceship. It’s probably where the Dark Elf is. You start the game with the buster shot as a main weapon (press B button to fire) and the Z saber as a sub weapon (hold R trigger and press B button). Go to the east, destroying all the ice turrets and other enemies you will encounter on your way. Break the containers, you’ll find some stuff inside. Go down the first hole covered with snow to find the secret disk 024 (1). Destroy the turret, watch the cutscene and carry on. Break the ice blocks, jump over the pit, dash to the left and jump to get the secret disk 037. Further, on a platform to the right, there’s the secret disk 101. Kill the enemy, break the container in order to get the secret disk 111. Carry on, jump to the right to get the health if you need that, kill some enemies, break the first block to the left and climb the others to get the E-crystals and the secret disk 050 (2), climb up the wall to the right, dash and jump to the left to reach the platform with the container and get the secret disk 007 (no, I won’t make the joke or the reference Another cutscene starts. After the discussion, don’t go see Cerveau yet, visit the Resistance base in order to get some secret disks. Go to the left, go in the room and collect the secret disk 170 behind the woman (3). Speak with her to get the secret disk 167, leave this room, go to the left, go in the next room, take the secret disk 176 and leave the room. The guy to the left will tell you about the Cyberspace, just in case you are interested in this. Use the elevator to go to the 5th floor, talk to the guard in the right turret to get the secret disk 058, then go to the roof of the base, wall jump the left turret to get the secret disk 106. Now go to the 3rd floor and if you go to the left, you’ll meet Mr. Andrew. Talk to him three times and remember his story: it will be useful later. Go to the east, open the door and check the last room to get the secret disk 099. Now, let’s go to the 2nd floor, shall we? Check the hall to the left to get the secret disk 168. Go to the first floor, meet Perroquiet who will explain how the Cyber-Elves work, go in the room next to him to get the secret disk 171, leave the room, go to the right, enter the room and collect the secret disk 172 behind Autruche. Leave the room, go to the right, talk to the little man and answer “Perroquiet” to his question. You’ll get the secret disk 175. Now go back to the command room, go to the right, go in Ciel’s room and take the secret disk 165. Go to the laboratory, take the secret disk 166 and talk to Cerveau. You’ll get the recoil rod and the S. boomerang. Cerveau can also analyze the secret disks you’ll find during your adventure so go see him quite often. Go back and see Cerveau again and analyze all the secrets disks you have in your possession then go to the command room. After the cutscene, select the third mission.
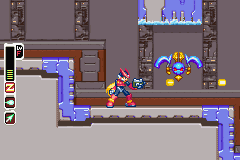
PART 2: A VAMPIRIC GENTLEMAN In this level, one of your objectives is the destruction of the cameras. Don’t miss any of those cameras if you look for the A-rank of this mission. Destroy the first camera, kill some enemies and climb up the ladder. Jump over the swinging hammer, climb up another ladder, jump over the next hammer and carry on. When you’ll encounter the next swinging hammer, break the container to get the secret disk 012 (4). Above your head, you’ll see another secret disk and some E-crystals. You have to use a charged recoil rod attack on the hammer to break some parts of the ceiling and get the goodies including the secret disk 115. Carry on, jump over the pools of junks, kill some enemies, avoid the next swinging hammer, take the secret disk 104 and go down. Collect the E-crystals, open the door and proceed to the next part of the level. Oh god a giant mecha-hive! Don’t worry, no big bees will come at you. Well, two mecha-bees will pop out everytime the hive will open its heart. And you have to break this heart in order to beat this mini-boss. A few hits and you’ll get the secret disk 093 (5). Oh there’s something funny to do with this mini-boss: if you charge a recoil rod attack and hit a bee, this one will be ejected right into the hive and hurt the heart… sometimes. Anyway, proceed to the next part. 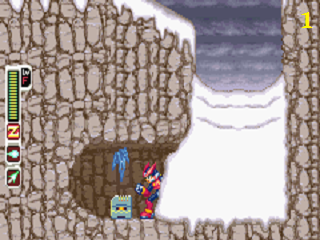   I hope you enjoy the conveyor belts because there will be lot of this thing in this part of the level. And believe me, this part will probably give you some troubles. You can use the portal to the cyberspace right at the beginning of this part but remember that you won’t get anything dropped by the enemies. Also, just in case you are not aware of that, spikes mean instant death in Megaman games so avoid this fate. Make your progress, get the secret disk 100 further, go down, dash and jump to get the secret disk 084 on the platform and fall down. Destroy the pile of junks, climb down a ladder, destroy a nest of mecha-mouses, go down and break the container to get the secret disk 053. Go up killing all the enemies you will encounter and prepare to fight the boss of this area: Devilbat Schilt. The method takes a while to beat him but if you have the perfect timing, you can cancel two of his three attacks: the bats and the little electric balls. Charge your recoil rod and hit him with your best hit before he attacks. You can also use a charged attack with the Z saber in order to inflict more damages than a charged recoil rod attack but you won’t cancel those two attacks. The shockwaves, his third and last attack, can’t be cancelled, however it can be easily avoided if you go either to the left or to the right. He will fly high in the air when he will do this attack, will fly midair in order to do the bats attack and will stay on the ground to do the little electric balls attack. After a few hits, he will die, a cutscene will start and this will end this mission. You’ll also get the thunder body chip.
PART 3: A FIGHT UNDER THE SEA No, I won’t insert the lyrics of this song, I just had no other title in mind ha ha. Anyway, before picking up your second mission, go talk to Cerveau in order to get the secret disk 092 analyze all the secret disks you have. Then go back to the command room and select the second mission. A flying dark orb goes to the east. Is it the Dark Elf? Time to chase this thing. Go down first, charge your recoil rod to break a part of the pillar and get some goodies including the secret disk 005. Go back to the surface and carry on. You will meet the boss of this area. Already? No, this one wants to play with you. How about a rush? You versus one of Lord Weil’s henchmen. Go underwater, kill the enemy and slide down the right wall of the pit. There’s the secret disk 075 and some E-crystals (6). Leave the hole then go up to get some E-crystals and the secret disk 009, carry on, jump over the spiked barrier and go on the platform to find the secret disk 059. Carry on, fall down and break the container to the right to get some health. Carry on, go on the platform, kill some enemies and proceed to the next part of the level. You will have to face a Neo-Arcadian cursed by the Dark Elf. This mini-boss may be a pain in the butt. He has four different attacks: the laser beam, the green arrows, the fall of rocks and the claws. You can dodge the laser beam like Zero did during the cutscene: wait for it and jump. The arrows are a big deal but if you stay between two of those arrows, you won’t be hit. The fall of rocks, it’s like the claws: dash in order to avoid them. Ah, you should equip the thunder body chip and charge your buster shot. A few hits right in the head and this boss is an old story. You’ll get the secret disk 079 and could proceed to the next part of the level.  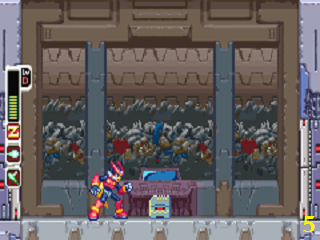 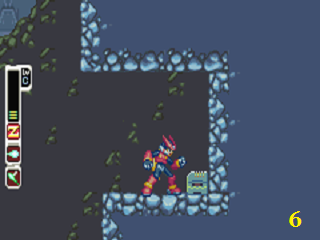 Use the platforms further to reach the secret disk 049, carry on, jump over the first hole then use the wall jump to go to the other side of the obstacle and go down to get the secret disk 113 (7). Carry on, get rid of the piranhas, use the wall jump to go to the other side of the obstacle, kill some enemies, go down and open the door leading to the boss of this level. Now, you have to beat the guy you met earlier: Childre Inarabitta. First of all, use the Z saber, then don’t charge your attack and do the triple attacks combo. This boss is quite easy to beat. When he bounces, dash underneath him. When he throws the giant spike at you, jump over it or use the wall jump. When he flies and wants to hit you with his diving attack, use the wall jump. When he flies and makes ice balls fall down, stay between two ice balls. Finally, when he throws some missiles at you, use the wall jump to avoid them or destroy them with your Z saber. That’s how to avoid all his attacks. You see it’s simple. Now, I don’t have to mention that you have to hit him with your Z saber when you can seize an opportunity to strike. It shouldn’t take so long with the Z saber, a few combos perfectly done and this boss is a pushover. After the cutscene, you’ll get the ice body chip. This will end this mission.
PART 4: INSIDE THE VOLCANO Go back to the laboratory and analyze the secret disks you found. Now, if you have found the secret disk 005, you’ll get the splash jump. This foot chip allows you to jump on the water. That will let you get an extra life you couldn’t get before in the first part of the level where you fought Childre Inarabitta. However, you’ll need a good timing in order to get it otherwise you’ll go underwater and have to restart from the beginning (not really… sorry I didn’t mean to frighten you, you can use the ice blocks to go back to the surface The way to the volcano is not really hard. Kill some enemies, avoid the eruptions and the pools of lava. Once you reached the geysers of lava, jump from platform to platform, use the third one to reach the platform, kill an enemy and get the secret disk 047. Go back on the platform, make your progress cautiously and there you are, inside the volcano. Now, this is where the things will get seriously serious (like Serious Sam
PART 5: URBAN JUNGLE Time to get rid of the last of the four first leaders. If you have some secret disks, go talk to Cerveau and analyze them. Then, select the last mission available and here we go. Equip the flame body chip and charge your buster shot to get rid of the leaves and the ivies. Sometimes, you’ll find some good stuff. Also, check the residences. Kill some enemies, open the first door and get some health and the secret disk 039 (9). Go back, jump on the platform, take the E-crystals to the left, kil the Neo-Arcadian, burn the root and open the door. You’ll find some goodies including the secret disk 001 (break the block with a charged recoil rod attack in order to get it). Go back, climb up the ladder, destroy the flower and the blocks with a charged recoil rod attack (don’t forget to press the down button), open the door, kill the enemy and pick up the secret disk 112. Go back, go to the east, burn the root above your head and go this way to get an extra life. Burn the mushrooms to the right to make a secret ladder appear, go to the west, open the door, kill the enemies, then burn the mushrooms, go down, kill another enemy and get the extra life and the secret disk 074. Go to the east, kill the enemy, open the door and watch the cutscene. Here is Crea and Prea, as known as the Baby Elves. 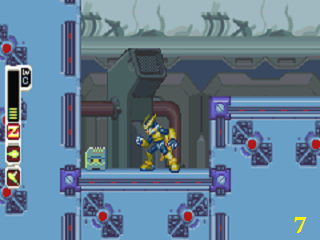   After the cutscene, open the door, burn the leaves, go up and open the door. No secret disks but some E-crystals, that’s better than nothing. Go back, go to the east, go down cautiously with the crumbling floor and carry on. This is the mini-boss of this level: a mecha-worm. See the green part on its body? It’s the weak point. The pattern is easy: go in and go out. Now the timing is either short or long. When it’s short, you’ll notice that the side of its body where the green thing is doesn’t shoot any projectiles. Charge your recoil rod to hit the green thing at least once (or twice if you have a good timing). When it’s long, just hit once when you see the green thing then dash to the other side, jump over the projectile and hit the green thing a second time. A dozen of hits should take care of this enemy and allow you to get the secret disk 067. Carry on, kill the Neo-Arcadians, burn the leaves to find some health, kill the flower, go up, kill the bombermen, destroy the container to get the secret disk 028 and carry on. Wall jump the wall to the right to get some health, go through the wall and open the door. It’s a shortcut with some interesting thing. If you are interested, well go down, take the goodies and the secret disk 048 (10) and go to the left. Go back on the platform, then fall down to the west and get the secret disk 013. Go to the right, jump from platform to platform killing the annoying turrets, then destroy the flower and the Neo-Arcadians and prepare to fight the boss of the area: Death Mantisk. This boss will only use his scythes all the time. His attacks are deadly get used of the wall jump, the jump and the dash during this fight because you’ll need those skills in order to survive and be victorious. His first attack is the cross combo. He jumps on a wall, dashes in your direction then go to the other wall and does the same thing. Nothing really hard: use the dash to go behind him and strike. The second attack is the spinning scythes. He jumps on a wall and throws one of his scythes at you. Jump over it. The third attack is the deadly boomerangs. He uses his scythes as boomerangs. Dash underneath the scythes and it should be ok. The fourth and last attack he has is easy to dodge: use the wall jump and his scythe won’t hit you. Oh and don’t stay close to him or he will slice you into pieces. Now, in order to beat him, equip the ice body chip and charge your buster shot to hurt him. After this fight, you will get the light body chip, a cutscene will start and you will be transferred back to the base.
PART 5: STOP THE MISSILE! After beating four terrible leaders, you need some rest indeed. A cutscene starts and the red alert in the base is on. The missile is ready to be launched and Omega is on board too. You are quickly transferred where the missile is in order to stop it. Start your progress, kill some enemies, then go up then to the left, jump over the spikes to get the secret disk 057. Climb up the ladder, destroy the Neo-Arcadian, climb up another ladder, get the secret disk 030 on the platform (11) and carry on. Use the elevator after the first conveyor belt to reach the second one, go on the platform above your head to get the secret disk 090 then the secret disk 055 to the left and carry on. Break the container to get the secret disk 117, use the elevator to go up, kill some enemies, get the E-crystals and go up. Above your head, you’ll see a hole. Dash and grab the wall to the left to get the secret disk 021 inside the container, go back and make your progress. Too late, the missile is launched but you managed to go on the missile. There’s no secret disk except the ones dropped by the enemies. Otherwise, the only goodies you can get are an extra life, some health and some E-crystals. The E-crystals are easy to get and are located in the second part of the missile, up and down (and all around
PART 6: AN ARMY IN THE DESERT Go to Ciel’s room, talk to the girl twice and answer “Probably…” to her question. You will get the secret disk 116. Now go talk to Andrew, answer “yes” twice and “bread maker”, “picnic”, “doughnut”, “3-leaf clover” and “I don’t know” (because he never mentioned the name of the girl in his story). You will get the secret disk 107. Go to the second floor, talk to the guy to the left and answer “yeah…”. He will give you the secret disk 169. The soldier in the last room to the east will give you the secret disk 023 if you answer “Shrimpolin”, then “Volcaire” and “7”. Now, analyze all the secret disks, go back to the command room and select the first mission.  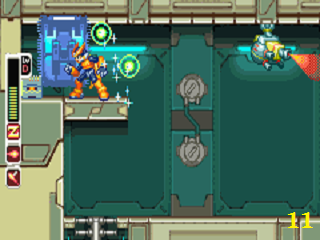  Ok, I know what you will say: there will be a pyramid or a temple dedicated to an ancient civilization. Forget about that. You will walk in the desert killing a bunch of enemies and the leader of this army who is waiting for you to the east. This level is really short, I can tell you. Well, it’s a desert, so you will see some quicksands. Anyway, go to the east, kill some enemies, break the containers on your way to find some goodies, cross the first quicksand and carry on. Jump from platform to platform to cross the second quicksand further, get the secret disk 085 inside a container and face the mini-boss of this area: the mecha sand worm. Use the Z saber to get rid of the projectiles and the flying things and the charged buster shot to shoot the mecha sand worm. Also, stay at the top of the slope, it’s the perfect spot to make this fight easier. Not only you will be able to avoid or kill the projectiles and the flying things but you will have a perfect range for your shots right in its mouth. If you keep spamming your buster shot and use your Z saber for close attacks, it shouldn’t be a problem. Take the secret disk 089 at the end of the fight (12), cross the quicksand, destroy the enemies and get the secret disk 031 and 022 and the health on the columns. In order to get the secret disk 022, an enemy will prevent you to get this item. Jump and go back on the platform to trick the enemy then dash and jump to get the secret disk. A helicopter is waiting for you further. Use some charged shots to get rid of it and carry on. Two columns have the secret disk 105 and 118. Use the recoil rod special jump move to land on the lowest one, take the secret disk, then jump on the other one and get the other secret disk. Go down, carry on, cross a quicksand then kill a helicopter and prepare to face the leader of this area.
The first attack of this boss is the scepter attack. He throws the stick at you, goes to the other side of the screen and takes back his weapon. Dash underneath the scepter to avoid it. The second attack is the sarcophagus. He will go under the sand, summon three or four sarcophagus to crush you and reappear. Just jump over the sarcophagus to dodge them. He invites some mummies to the party too and will change the ground sometimes to make the fight a bit hard. Kill the mummies if they are annoying. Now, use the Z saber with the ice body chip and charge your attacks. You’ll make this fight easier. Jump and attack him. Five hits and you will destroy this leader. After the cutscene, you will be back to the base.
PART 7: IN THE FOREST Start your progress killing all the enemies on your way, go on the tree, burn the leaves to the left with your buster shot, jump on the platforms to get an extra life and the secret disk 063 (13). Burn the leaves to the right, jump from platform to platform, land on another tree, burn more leaves and jump from platform to platform to get the secret disk 002. Go inside the building, push the button, go underneath the block, use the charged recoil rod to push the blocks on the switches in order to make some progress, take the secret disk 071, step on the switch to raise the giant block, dash underneath it, step on another switch, go on the block, kill the upper turret with the buster shot, dash and jump to reach the platform and get the secret disk 014. Go down, step on another switch, dash quickly to the right, take the secret disk 119, step on the switch and go to the right as fast as possible, push the block until it’s close to the spikes, dash over the spikes and get the secret disk 108. Go back, push the button to move the block then dash and jump on the platform to the right, do the same thing to the left to wall jump the block, kill the enemy and take the sub tank (14). Go back on the platform, don’t pay attention to the switch, you’ll need to come back later. Kill the turrets, destroy the blocks with some charged recoil rod attacks, take the health and the secret disk 040 and go through the door. Equip the thunder body chip, charge your buster shot and shoot when he finished his attack. This boss will summon some monkeys to hurt you but, like the previous boss and his mummies, use the Z saber to get rid of them. He has a diving attack too but, if you dash underneath him, you can counter-attack with a shot easily. He also bounces and destroys the blocks around the room. Just wait until he finished his attack and shoot him. The last attack is the fireballs. Three fireballs to be exact. Nothing really hard too, jump over the lowest fireball and it will be ok. This boss is not that hard when you know how to beat him. A few charged shots will stop him playing with fire once and for all. After the cutscene, you will be transferred back to the base.
PART 8: FIGHT ON ICE The first part of this level has two ways leading to the same place: where the boss is waiting for you. However, the way down has nothing really interesting compared to the way up except some E-crystals and probably the secrets disks of the enemies. The way up has the secret disk 066 and some health. However, you’ll need to equip the splash jump in order to go this way. Now, choose your path. If you have chosen the way up, once you are inside the building, use the recoil rod jump attack, grab the wall to the right, dash and jump to get the secret disk 109. You can wait until you have the upgrade given by the boss of this area but it’s possible to get it using this method with a good timing. Carry on, avoid the steams, break the container to get the secret disk 015 and the secret disk 032 after the two pools. Open the door, go up, take the E-crystals and the secret disk 035 (15), carry on, jump over the spikes, kill the enemies and go down. Kill the Neo-Arcadians, break the container to get the secret disk 120, then go up, take the secret disk 068 kept by a Neo-Arcadian, go up one more time, kill the enemies and prepare yourself for the boss fight. Equip the flame body chip and use the charged buster shot. This fight shouldn’t be so hard, all you need is the dash. Dash in order to go behind him when he wants to crush you with a bodyslam, dash in order to face his arctic wind and probably dash in order to avoid his iced spikes. This boss, if you combine the flame body chip and use the charged shots, is a pushover seriously. After the cutscene, you are back to the base for the next mission.
PART 9: THE CONSPIRACY Time to kick Copy X’s butt. Start your progress, after the second camera, dash and jump to reach the platform and get some health and the secret disk 110 (16). Down, inside the container, you’ll find the secret disk 121. Jump from moving platform to moving platform, step on the fourth one to get the secret disk 062, carry on, go through the laser beams (they won’t hurt you, however, some enemies will appear), go up, take the secret disk 034 inside the container and carry on. Now, you have to go up, using the moving platforms and avoiding the spikes of doom. The first container has the secret disk 042. Further, you’ll see the secret disk 070 then the secret disk 077. Now, go to the right and make your progress until you reach the door leading to the boss. Don’t open it yet, go to the left, use the platforms to get the secret disks 061 and 069. Now, time to face Copy X.   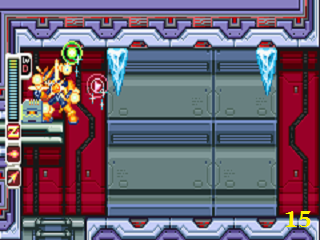 This boss is a pain. He has all the elements and switch to any element whenever he wants, which is obnoxious. Plus he will recover some health at one point, which is awesome. At least, he can use this power only once. However, if you want to beat him, you know what you have to do: change your body chip everytime. This fight is one of the toughest ones in this game, not the hardest one though. If you use your skills wisely, you’ll get a chance to hit him with your best shot (or hit, whatever you choose). Once you beat him, Copy X is destroyed by one of Lord Weil’s traps, you get the quick body chip, Lord Weil comes and takes control of the Neo Arcadia clan. Yeah, Copy X was a puppet and Lord Weil was the master of puppets since the beginning. The alliance (was it really an alliance, hmm?) is now broken and Lord Weil wants to rule the world. So, you have to beat him.
PART 10: NINJA FOX Before choosing your next mission, go to the right, talk to Cerveau’s assistant twice and he will give you the secret disk 174. Leave the command room, go to the left, talk to the man and answer “Milan”, then “Elpizo” and finally “Forest of Dysis”. You will get the secret disk 173. Now go talk to Cerveau, analyze all your secret disks and choose the first mission. Find the ladder to the right, go down, hit the pillar with a charged attack to light the room, kill the moths and go down. Kill some enemies, break the container to get the secret disk 056, hit the pillar then go up, climb up the ladder to the right to get some health and the secret disk 124 (17) then go up climbing up the other ladders. The container contains the secret disk 082. Light the room with the two pillars, go down and open the door. You have to make the generator work. How? Easy: hit the cubes to push them. Keep spamming your attacks, do that three times with each cube and proceed to the next area. In this little zone, hit the pillar, go up, take the health, hit another pillar and open the door. This generator is the mini-boss of this level. You have to stay on a platform, wait until he opens the heart and shoot. Easy? Ok, but mister generator will use fire and ice breaths. Ice is not a big deal, however fire is a big deal. A few hits with the Z saber combined with the thunder body chip and you’ll get the secret disk 149. In the next part, the platforms will help to cross the spikes but the trip will not be peaceful. First, hit the switch to get a secret disk, then hit the switch, move the platform in order to avoid the spikes and get the secret disk 095 at the end of the trip. Go down, take the health, open the door and activate a new generator, this time with a difference: enemies! Once you took care of this generator, open the door, go right where the thing was swinging to find the secret disk 078 then go up, carry on and go down. The moving platforms are back, the spikes too and you have to reach the top, to the right exactly. Hit the switch, go up and take the secret disk 004 and an extra life. Now, hit the switch one more time and go to the right. Open the door and prepare to face the boss of this area. Cubit Foxten is quite tough to beat. But you know the score: use all the skills you have to beat this enemy. The dash, the jump… everything you can do in order to avoid the attacks. Also, charge your buster shot AND equip the thunder body chip, it’s my advice. A few shots will kill this ninja fox. You’ll get the double jump foot chip.
PART 11: HELPING THE GUARDS Analyze your secret disks and go back to the forest of Anatre. You remember the block you couldn’t get before. With the double jump, it’s now possible. Press the button, then double jump to grab the block and get the secret disk 076. Now, press start button, select escape and choose the second mission. In this mission, you have to help the guards, killing the army and their leader. In other words you have to do their job because they are not paid enough for that and they are scared of a possible ambush. Alright, now that the joke is made, we can start this mission. Go to the east, kill some enemies, jump over the pit and get the secret disk 003 down the slope, hidden by a wall of snow (hit everywhere until you find it). You’ll see two paths further. The way down has the secret disk 103 hidden behind the wall of snow in the second hole, the way up has the secret disk 025 (18) and the secret disk 029. Carry on, kill some flying enemies and face the snow worm. Use the fire body chip and the Z saber and hit this worm with a few hits right in its mouth in order to get the secret disk 060. Carry on, get the secret disk 123 inside the container, go up, take the secret disk 086 and carry on. Kill some enemies, open the door and prepare to face the boss. This boss… is really easy. Equip the fire body chip, charge your buster shot and shoot right after one of his attacks. You can’t shoot him while he is walking because his balls will stop the shot. You can hit him in the back too, that works… sometimes. All you have to do is keep your distances, watch out the ice spikes falling down and avoid his attacks. When he tries to crush you with his big belly (sorry, I couldn’t resist
PART 12: THE FOUR DATAS Analyze the secret disks and select the third mission. Welcome to the sunken library, a level that I enjoy. However, my favorite level is the volcano. I don’t know why but I love levels which take place in a library. For example, in the game Castlevania Symphony of the Night on PSX (I will probably make a walkthrough of this game in the future because it’s one of my favorite Castlevania games), the Long Library is my favorite area. Ok, enough ramble, let’s start the mission.   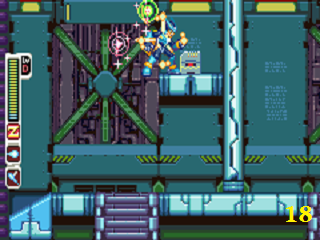 Hit the shells to cross the pool of water electrified (you can go underwater but you have to go back to the surface as soon as possible otherwise you will lose some health due to the electricity). Don’t forget to get the health and the secret disk 125 on the platform above the second shell, go underwater in the second pool to take the secret disk 051 and carry on. Cross the pools cautiously, break the container in the last one to get the secret disk 043, then the secret disk 033 and make your progress through this deadly and long pool. Take the secret disk underwater, go up take the secret disk 096 and open the door. Use the computer to locate the four datas and carry on. Kill the enemies, go underwater and collect the four datas. I suggest you to check before the others storage rooms in order to get some good stuff. Once you collect the four datas, the boss will come. Equip the ice body chip, charge your buster shot and hit him with your best shot. This boss is really easy and will hides like an eel in those holes and shows his face in order to throws an electrified ball at you. Seize this opportunity to shoot his face. When he is not in a hole, shoot him with a charged shot. Easy like ABC, I can tell you. A few shots and he will die horribly. After the cutscene, you’ll get the shadow dash foot chip and return to the base for the next mission.
PART 13: IN TOO DEEP Right at the beginning, equip the recoil rod, use the jump attack then jump to go on the platform and dash and jump to the left to get the secret disk 041. Carry on, use the jump attack if you want the extra life to the left, go down, then go up, dash and jump to reach the platform and break the container to get the secret disk 080. Before going down, dash and jump to get some E-crystals and the secret disk 054. Now, go down, destroys the floating bombs, break the container to get the secret disk 122, make your progress and open the door. Welcome to the elevator of doom. Not really tough. In fact, some enemies will be on the elevator and will try to eject you. You can do the same thing with them but make sure you have their secret disks (if you want them) before doing that. After this nice trip on an elevator with plenty of enemies trying to eject you, open the door, go down, kill the Neo-Arcadians, the cameras and the bombs on your way, watch out the spikes during your progress, take the health and get ready for the boss fight. This boss has lot of health, three health bars to be exact. Plus he is tough and has one weak point: the head. It seems that the ice has a better effect on him though so you should equip the ice body chip and charge your buster shot. Three health bars as I said earlier and three attacks: the first attack is the purple balls. Jump over those purple balls. He will also throw either a crate or a steel bar at you, that’s his second attack. Keep your distances and it should be ok. The last attack is predictable. When you start the battle, you noticed that this bully has two friends with him. That’s his last attack: he will send his friends to reap you. Oh and he will try to crush you too, that’s so common with heavy fat bad guys. Just shoot his face, remember it’s the only part you can hurt. This will take a while compared to the other bosses but don’t worry: the real challenge comes later. After this fight, you’ll get the absorber body chip. After the next cutscene, go see Harpuia in the room next to the command room. He will go away without thanking you (yeah for good manners
PART 14: GOODBYE, BABY ELVES… Start you progress killing all the enemies on your way, go down, take the secret disk 036 above the enemy and carry on. Moving platforms and spikes Go on the platform, then on the one to the left and open the door. You’ll find the secret disk 038 (19). Go back on the first platform, then take the one to the right and get the secret disk 081. Go back on the first platform, go down, then go on the one to the right and get the extra life. Below, you can see the door. Don’t go there yet, go back on the platform and get the secret disk 180 on the pillar. Now, go open the door, break the container to get the secret disk 087, carry on, go down, break another container which contains the secret disk 083. Go down, open the door and watch a cold meeting between you and Lord Weil. Time to fight once again Crea and Prea. You know the score, you beat them in the missile, right? So teach them a lesson… the last one though.
LAST PART: THE FINAL SHOWDOWN It’s time to kick Lord Weil’s butt. Talk to the operator to be teleported where you will find him and Omega. The first container you will encounter contains the secret disk 097 (yes, there’s still more secret disks to get even if it’s the end of the game). Jump from platform to platform to cross the spiky part, use the double jump when you are on the last platform to go up and get the secret disk 177. Carry on, open the door and it’s time for… the boss rush part 1! Any Megaman game has the boss rush at the end, it’s a tradition. In this game, the boss rush is split in two parts. The first part has the following bosses: Devilbat Schilt, Blazin’ Flizard, Death Mantisk and Childre Inarabitta. Ok, I don’t have to tell you how to beat those four bosses, you already kicked their butt at the beginning of the game. You’ll get some health after each fight. Once you beat all the four leaders, open the door, go up, break the container to get the secret disk 151, jump over the holes of spikes, the next container contains the secret disk 019 (20). Go down, break another container to get the secret disk 020, then the secret disk 178 behind the laser beam and carry on. A container contains the secret disk 164 further. Go up, open the door and face the four last bosses of the boss rush: T. Kelverian, Glacier Le Cacktank, Cubit Foxtar and Volteel Biblio. Same thing, you know how to beat those guys. Like the first part of the boss rush, after each fight, you will get some health.  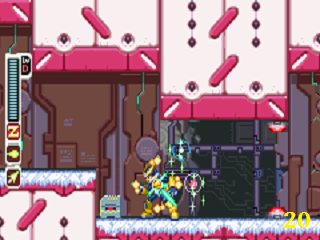 Open the door, break the container to get the secret disk 179, then go down, get the secret disk 011 inside the container , beware of the spikes while you are going down, open the door and prepare to face… Omega. No, it’s not Lord Weil, it’s this giant robot. He has a new attack: the sword. It’s like the Damocles sword: he will try to hurt you with his blade. Dash when he does this attack. Otherwise you know his other attacks, do you? After this fight, it’s time for the round 2. This time he has the power of Dark Elf and he becomes a gigantic colossus. You have to hit the head with some charged buster shots. The big cannon shoot a laser beam you can’t really dodge and a giant ball that you can dodge if you use the double jump. His head will shoot three laser beams that you can easily dodge. Jump over the one which will come at you. Also, he will throw a ball at you, a homing ball. Jump over this ball. And the last attack is… the giant paralyzing ball! This horn above the head shoots a homing ball which will paralyze and lead you to the horn if you touch it. Use the double jump to avoid this ball until it disappears. After this round, you’ll face the last form of Omega: Omega Zero. This last form is really really really hard. Hey, it’s the last battle, that means “epic fight”, no? Move constantly, use all your skills to avoid his attacks and, jump over Omega Zero and hit his back with your Z saber. This fight will give you lot of troubles, that why I hope you have filled your sub tank and have some red Cyber-Elves to heal you. After this fight, watch the final cutscene and save your data. Congratulations, you beat Megaman Zero 3 and unlocked some mini-games and… the hard mode woohoo!
That's all for this walkthrough. As I said before, I will add the missing content like the Ex Skills and the few secrets disks I missed. Anyway, I meet you back at the next walkthrough, another request. Oh and if you have any requests, go ahead, I don't refuse any requests Hello everyone. This is your host Laian the walkthrough writer with a new walkthrough. It's a request this time. One of my friends on Vizzed suggested me Megaman Zero 3. I said to him I love the Megaman universe but I was so bad at the games. Really bad, I can tell you. This walkthrough is just how to beat the game and get some stuff, you know the score. Some stuff is missing, like the Ex skills and two or three secrets disks but don't worry, I'll add that content in due time. Ok, I won't make a long introduction this time so let's start this walkthrough without wasting anymore time, shall we? Your first mission is simple: you have to go to the east and check a spaceship. It’s probably where the Dark Elf is. You start the game with the buster shot as a main weapon (press B button to fire) and the Z saber as a sub weapon (hold R trigger and press B button). Go to the east, destroying all the ice turrets and other enemies you will encounter on your way. Break the containers, you’ll find some stuff inside. Go down the first hole covered with snow to find the secret disk 024 (1). Destroy the turret, watch the cutscene and carry on. Break the ice blocks, jump over the pit, dash to the left and jump to get the secret disk 037. Further, on a platform to the right, there’s the secret disk 101. Kill the enemy, break the container in order to get the secret disk 111. Carry on, jump to the right to get the health if you need that, kill some enemies, break the first block to the left and climb the others to get the E-crystals and the secret disk 050 (2), climb up the wall to the right, dash and jump to the left to reach the platform with the container and get the secret disk 007 (no, I won’t make the joke or the reference Another cutscene starts. After the discussion, don’t go see Cerveau yet, visit the Resistance base in order to get some secret disks. Go to the left, go in the room and collect the secret disk 170 behind the woman (3). Speak with her to get the secret disk 167, leave this room, go to the left, go in the next room, take the secret disk 176 and leave the room. The guy to the left will tell you about the Cyberspace, just in case you are interested in this. Use the elevator to go to the 5th floor, talk to the guard in the right turret to get the secret disk 058, then go to the roof of the base, wall jump the left turret to get the secret disk 106. Now go to the 3rd floor and if you go to the left, you’ll meet Mr. Andrew. Talk to him three times and remember his story: it will be useful later. Go to the east, open the door and check the last room to get the secret disk 099. Now, let’s go to the 2nd floor, shall we? Check the hall to the left to get the secret disk 168. Go to the first floor, meet Perroquiet who will explain how the Cyber-Elves work, go in the room next to him to get the secret disk 171, leave the room, go to the right, enter the room and collect the secret disk 172 behind Autruche. Leave the room, go to the right, talk to the little man and answer “Perroquiet” to his question. You’ll get the secret disk 175. Now go back to the command room, go to the right, go in Ciel’s room and take the secret disk 165. Go to the laboratory, take the secret disk 166 and talk to Cerveau. You’ll get the recoil rod and the S. boomerang. Cerveau can also analyze the secret disks you’ll find during your adventure so go see him quite often. Go back and see Cerveau again and analyze all the secrets disks you have in your possession then go to the command room. After the cutscene, select the third mission.
PART 2: A VAMPIRIC GENTLEMAN In this level, one of your objectives is the destruction of the cameras. Don’t miss any of those cameras if you look for the A-rank of this mission. Destroy the first camera, kill some enemies and climb up the ladder. Jump over the swinging hammer, climb up another ladder, jump over the next hammer and carry on. When you’ll encounter the next swinging hammer, break the container to get the secret disk 012 (4). Above your head, you’ll see another secret disk and some E-crystals. You have to use a charged recoil rod attack on the hammer to break some parts of the ceiling and get the goodies including the secret disk 115. Carry on, jump over the pools of junks, kill some enemies, avoid the next swinging hammer, take the secret disk 104 and go down. Collect the E-crystals, open the door and proceed to the next part of the level. Oh god a giant mecha-hive! Don’t worry, no big bees will come at you. Well, two mecha-bees will pop out everytime the hive will open its heart. And you have to break this heart in order to beat this mini-boss. A few hits and you’ll get the secret disk 093 (5). Oh there’s something funny to do with this mini-boss: if you charge a recoil rod attack and hit a bee, this one will be ejected right into the hive and hurt the heart… sometimes. Anyway, proceed to the next part. I hope you enjoy the conveyor belts because there will be lot of this thing in this part of the level. And believe me, this part will probably give you some troubles. You can use the portal to the cyberspace right at the beginning of this part but remember that you won’t get anything dropped by the enemies. Also, just in case you are not aware of that, spikes mean instant death in Megaman games so avoid this fate. Make your progress, get the secret disk 100 further, go down, dash and jump to get the secret disk 084 on the platform and fall down. Destroy the pile of junks, climb down a ladder, destroy a nest of mecha-mouses, go down and break the container to get the secret disk 053. Go up killing all the enemies you will encounter and prepare to fight the boss of this area: Devilbat Schilt. The method takes a while to beat him but if you have the perfect timing, you can cancel two of his three attacks: the bats and the little electric balls. Charge your recoil rod and hit him with your best hit before he attacks. You can also use a charged attack with the Z saber in order to inflict more damages than a charged recoil rod attack but you won’t cancel those two attacks. The shockwaves, his third and last attack, can’t be cancelled, however it can be easily avoided if you go either to the left or to the right. He will fly high in the air when he will do this attack, will fly midair in order to do the bats attack and will stay on the ground to do the little electric balls attack. After a few hits, he will die, a cutscene will start and this will end this mission. You’ll also get the thunder body chip.
PART 3: A FIGHT UNDER THE SEA No, I won’t insert the lyrics of this song, I just had no other title in mind ha ha. Anyway, before picking up your second mission, go talk to Cerveau in order to get the secret disk 092 analyze all the secret disks you have. Then go back to the command room and select the second mission. A flying dark orb goes to the east. Is it the Dark Elf? Time to chase this thing. Go down first, charge your recoil rod to break a part of the pillar and get some goodies including the secret disk 005. Go back to the surface and carry on. You will meet the boss of this area. Already? No, this one wants to play with you. How about a rush? You versus one of Lord Weil’s henchmen. Go underwater, kill the enemy and slide down the right wall of the pit. There’s the secret disk 075 and some E-crystals (6). Leave the hole then go up to get some E-crystals and the secret disk 009, carry on, jump over the spiked barrier and go on the platform to find the secret disk 059. Carry on, fall down and break the container to the right to get some health. Carry on, go on the platform, kill some enemies and proceed to the next part of the level. You will have to face a Neo-Arcadian cursed by the Dark Elf. This mini-boss may be a pain in the butt. He has four different attacks: the laser beam, the green arrows, the fall of rocks and the claws. You can dodge the laser beam like Zero did during the cutscene: wait for it and jump. The arrows are a big deal but if you stay between two of those arrows, you won’t be hit. The fall of rocks, it’s like the claws: dash in order to avoid them. Ah, you should equip the thunder body chip and charge your buster shot. A few hits right in the head and this boss is an old story. You’ll get the secret disk 079 and could proceed to the next part of the level. Use the platforms further to reach the secret disk 049, carry on, jump over the first hole then use the wall jump to go to the other side of the obstacle and go down to get the secret disk 113 (7). Carry on, get rid of the piranhas, use the wall jump to go to the other side of the obstacle, kill some enemies, go down and open the door leading to the boss of this level. Now, you have to beat the guy you met earlier: Childre Inarabitta. First of all, use the Z saber, then don’t charge your attack and do the triple attacks combo. This boss is quite easy to beat. When he bounces, dash underneath him. When he throws the giant spike at you, jump over it or use the wall jump. When he flies and wants to hit you with his diving attack, use the wall jump. When he flies and makes ice balls fall down, stay between two ice balls. Finally, when he throws some missiles at you, use the wall jump to avoid them or destroy them with your Z saber. That’s how to avoid all his attacks. You see it’s simple. Now, I don’t have to mention that you have to hit him with your Z saber when you can seize an opportunity to strike. It shouldn’t take so long with the Z saber, a few combos perfectly done and this boss is a pushover. After the cutscene, you’ll get the ice body chip. This will end this mission.
PART 4: INSIDE THE VOLCANO Go back to the laboratory and analyze the secret disks you found. Now, if you have found the secret disk 005, you’ll get the splash jump. This foot chip allows you to jump on the water. That will let you get an extra life you couldn’t get before in the first part of the level where you fought Childre Inarabitta. However, you’ll need a good timing in order to get it otherwise you’ll go underwater and have to restart from the beginning (not really… sorry I didn’t mean to frighten you, you can use the ice blocks to go back to the surface The way to the volcano is not really hard. Kill some enemies, avoid the eruptions and the pools of lava. Once you reached the geysers of lava, jump from platform to platform, use the third one to reach the platform, kill an enemy and get the secret disk 047. Go back on the platform, make your progress cautiously and there you are, inside the volcano. Now, this is where the things will get seriously serious (like Serious Sam
PART 5: URBAN JUNGLE Time to get rid of the last of the four first leaders. If you have some secret disks, go talk to Cerveau and analyze them. Then, select the last mission available and here we go. Equip the flame body chip and charge your buster shot to get rid of the leaves and the ivies. Sometimes, you’ll find some good stuff. Also, check the residences. Kill some enemies, open the first door and get some health and the secret disk 039 (9). Go back, jump on the platform, take the E-crystals to the left, kil the Neo-Arcadian, burn the root and open the door. You’ll find some goodies including the secret disk 001 (break the block with a charged recoil rod attack in order to get it). Go back, climb up the ladder, destroy the flower and the blocks with a charged recoil rod attack (don’t forget to press the down button), open the door, kill the enemy and pick up the secret disk 112. Go back, go to the east, burn the root above your head and go this way to get an extra life. Burn the mushrooms to the right to make a secret ladder appear, go to the west, open the door, kill the enemies, then burn the mushrooms, go down, kill another enemy and get the extra life and the secret disk 074. Go to the east, kill the enemy, open the door and watch the cutscene. Here is Crea and Prea, as known as the Baby Elves. After the cutscene, open the door, burn the leaves, go up and open the door. No secret disks but some E-crystals, that’s better than nothing. Go back, go to the east, go down cautiously with the crumbling floor and carry on. This is the mini-boss of this level: a mecha-worm. See the green part on its body? It’s the weak point. The pattern is easy: go in and go out. Now the timing is either short or long. When it’s short, you’ll notice that the side of its body where the green thing is doesn’t shoot any projectiles. Charge your recoil rod to hit the green thing at least once (or twice if you have a good timing). When it’s long, just hit once when you see the green thing then dash to the other side, jump over the projectile and hit the green thing a second time. A dozen of hits should take care of this enemy and allow you to get the secret disk 067. Carry on, kill the Neo-Arcadians, burn the leaves to find some health, kill the flower, go up, kill the bombermen, destroy the container to get the secret disk 028 and carry on. Wall jump the wall to the right to get some health, go through the wall and open the door. It’s a shortcut with some interesting thing. If you are interested, well go down, take the goodies and the secret disk 048 (10) and go to the left. Go back on the platform, then fall down to the west and get the secret disk 013. Go to the right, jump from platform to platform killing the annoying turrets, then destroy the flower and the Neo-Arcadians and prepare to fight the boss of the area: Death Mantisk. This boss will only use his scythes all the time. His attacks are deadly get used of the wall jump, the jump and the dash during this fight because you’ll need those skills in order to survive and be victorious. His first attack is the cross combo. He jumps on a wall, dashes in your direction then go to the other wall and does the same thing. Nothing really hard: use the dash to go behind him and strike. The second attack is the spinning scythes. He jumps on a wall and throws one of his scythes at you. Jump over it. The third attack is the deadly boomerangs. He uses his scythes as boomerangs. Dash underneath the scythes and it should be ok. The fourth and last attack he has is easy to dodge: use the wall jump and his scythe won’t hit you. Oh and don’t stay close to him or he will slice you into pieces. Now, in order to beat him, equip the ice body chip and charge your buster shot to hurt him. After this fight, you will get the light body chip, a cutscene will start and you will be transferred back to the base.
PART 5: STOP THE MISSILE! After beating four terrible leaders, you need some rest indeed. A cutscene starts and the red alert in the base is on. The missile is ready to be launched and Omega is on board too. You are quickly transferred where the missile is in order to stop it. Start your progress, kill some enemies, then go up then to the left, jump over the spikes to get the secret disk 057. Climb up the ladder, destroy the Neo-Arcadian, climb up another ladder, get the secret disk 030 on the platform (11) and carry on. Use the elevator after the first conveyor belt to reach the second one, go on the platform above your head to get the secret disk 090 then the secret disk 055 to the left and carry on. Break the container to get the secret disk 117, use the elevator to go up, kill some enemies, get the E-crystals and go up. Above your head, you’ll see a hole. Dash and grab the wall to the left to get the secret disk 021 inside the container, go back and make your progress. Too late, the missile is launched but you managed to go on the missile. There’s no secret disk except the ones dropped by the enemies. Otherwise, the only goodies you can get are an extra life, some health and some E-crystals. The E-crystals are easy to get and are located in the second part of the missile, up and down (and all around
PART 6: AN ARMY IN THE DESERT Go to Ciel’s room, talk to the girl twice and answer “Probably…” to her question. You will get the secret disk 116. Now go talk to Andrew, answer “yes” twice and “bread maker”, “picnic”, “doughnut”, “3-leaf clover” and “I don’t know” (because he never mentioned the name of the girl in his story). You will get the secret disk 107. Go to the second floor, talk to the guy to the left and answer “yeah…”. He will give you the secret disk 169. The soldier in the last room to the east will give you the secret disk 023 if you answer “Shrimpolin”, then “Volcaire” and “7”. Now, analyze all the secret disks, go back to the command room and select the first mission. Ok, I know what you will say: there will be a pyramid or a temple dedicated to an ancient civilization. Forget about that. You will walk in the desert killing a bunch of enemies and the leader of this army who is waiting for you to the east. This level is really short, I can tell you. Well, it’s a desert, so you will see some quicksands. Anyway, go to the east, kill some enemies, break the containers on your way to find some goodies, cross the first quicksand and carry on. Jump from platform to platform to cross the second quicksand further, get the secret disk 085 inside a container and face the mini-boss of this area: the mecha sand worm. Use the Z saber to get rid of the projectiles and the flying things and the charged buster shot to shoot the mecha sand worm. Also, stay at the top of the slope, it’s the perfect spot to make this fight easier. Not only you will be able to avoid or kill the projectiles and the flying things but you will have a perfect range for your shots right in its mouth. If you keep spamming your buster shot and use your Z saber for close attacks, it shouldn’t be a problem. Take the secret disk 089 at the end of the fight (12), cross the quicksand, destroy the enemies and get the secret disk 031 and 022 and the health on the columns. In order to get the secret disk 022, an enemy will prevent you to get this item. Jump and go back on the platform to trick the enemy then dash and jump to get the secret disk. A helicopter is waiting for you further. Use some charged shots to get rid of it and carry on. Two columns have the secret disk 105 and 118. Use the recoil rod special jump move to land on the lowest one, take the secret disk, then jump on the other one and get the other secret disk. Go down, carry on, cross a quicksand then kill a helicopter and prepare to face the leader of this area.
The first attack of this boss is the scepter attack. He throws the stick at you, goes to the other side of the screen and takes back his weapon. Dash underneath the scepter to avoid it. The second attack is the sarcophagus. He will go under the sand, summon three or four sarcophagus to crush you and reappear. Just jump over the sarcophagus to dodge them. He invites some mummies to the party too and will change the ground sometimes to make the fight a bit hard. Kill the mummies if they are annoying. Now, use the Z saber with the ice body chip and charge your attacks. You’ll make this fight easier. Jump and attack him. Five hits and you will destroy this leader. After the cutscene, you will be back to the base.
PART 7: IN THE FOREST Start your progress killing all the enemies on your way, go on the tree, burn the leaves to the left with your buster shot, jump on the platforms to get an extra life and the secret disk 063 (13). Burn the leaves to the right, jump from platform to platform, land on another tree, burn more leaves and jump from platform to platform to get the secret disk 002. Go inside the building, push the button, go underneath the block, use the charged recoil rod to push the blocks on the switches in order to make some progress, take the secret disk 071, step on the switch to raise the giant block, dash underneath it, step on another switch, go on the block, kill the upper turret with the buster shot, dash and jump to reach the platform and get the secret disk 014. Go down, step on another switch, dash quickly to the right, take the secret disk 119, step on the switch and go to the right as fast as possible, push the block until it’s close to the spikes, dash over the spikes and get the secret disk 108. Go back, push the button to move the block then dash and jump on the platform to the right, do the same thing to the left to wall jump the block, kill the enemy and take the sub tank (14). Go back on the platform, don’t pay attention to the switch, you’ll need to come back later. Kill the turrets, destroy the blocks with some charged recoil rod attacks, take the health and the secret disk 040 and go through the door. Equip the thunder body chip, charge your buster shot and shoot when he finished his attack. This boss will summon some monkeys to hurt you but, like the previous boss and his mummies, use the Z saber to get rid of them. He has a diving attack too but, if you dash underneath him, you can counter-attack with a shot easily. He also bounces and destroys the blocks around the room. Just wait until he finished his attack and shoot him. The last attack is the fireballs. Three fireballs to be exact. Nothing really hard too, jump over the lowest fireball and it will be ok. This boss is not that hard when you know how to beat him. A few charged shots will stop him playing with fire once and for all. After the cutscene, you will be transferred back to the base.
PART 8: FIGHT ON ICE The first part of this level has two ways leading to the same place: where the boss is waiting for you. However, the way down has nothing really interesting compared to the way up except some E-crystals and probably the secrets disks of the enemies. The way up has the secret disk 066 and some health. However, you’ll need to equip the splash jump in order to go this way. Now, choose your path. If you have chosen the way up, once you are inside the building, use the recoil rod jump attack, grab the wall to the right, dash and jump to get the secret disk 109. You can wait until you have the upgrade given by the boss of this area but it’s possible to get it using this method with a good timing. Carry on, avoid the steams, break the container to get the secret disk 015 and the secret disk 032 after the two pools. Open the door, go up, take the E-crystals and the secret disk 035 (15), carry on, jump over the spikes, kill the enemies and go down. Kill the Neo-Arcadians, break the container to get the secret disk 120, then go up, take the secret disk 068 kept by a Neo-Arcadian, go up one more time, kill the enemies and prepare yourself for the boss fight. Equip the flame body chip and use the charged buster shot. This fight shouldn’t be so hard, all you need is the dash. Dash in order to go behind him when he wants to crush you with a bodyslam, dash in order to face his arctic wind and probably dash in order to avoid his iced spikes. This boss, if you combine the flame body chip and use the charged shots, is a pushover seriously. After the cutscene, you are back to the base for the next mission.
PART 9: THE CONSPIRACY Time to kick Copy X’s butt. Start your progress, after the second camera, dash and jump to reach the platform and get some health and the secret disk 110 (16). Down, inside the container, you’ll find the secret disk 121. Jump from moving platform to moving platform, step on the fourth one to get the secret disk 062, carry on, go through the laser beams (they won’t hurt you, however, some enemies will appear), go up, take the secret disk 034 inside the container and carry on. Now, you have to go up, using the moving platforms and avoiding the spikes of doom. The first container has the secret disk 042. Further, you’ll see the secret disk 070 then the secret disk 077. Now, go to the right and make your progress until you reach the door leading to the boss. Don’t open it yet, go to the left, use the platforms to get the secret disks 061 and 069. Now, time to face Copy X. This boss is a pain. He has all the elements and switch to any element whenever he wants, which is obnoxious. Plus he will recover some health at one point, which is awesome. At least, he can use this power only once. However, if you want to beat him, you know what you have to do: change your body chip everytime. This fight is one of the toughest ones in this game, not the hardest one though. If you use your skills wisely, you’ll get a chance to hit him with your best shot (or hit, whatever you choose). Once you beat him, Copy X is destroyed by one of Lord Weil’s traps, you get the quick body chip, Lord Weil comes and takes control of the Neo Arcadia clan. Yeah, Copy X was a puppet and Lord Weil was the master of puppets since the beginning. The alliance (was it really an alliance, hmm?) is now broken and Lord Weil wants to rule the world. So, you have to beat him.
PART 10: NINJA FOX Before choosing your next mission, go to the right, talk to Cerveau’s assistant twice and he will give you the secret disk 174. Leave the command room, go to the left, talk to the man and answer “Milan”, then “Elpizo” and finally “Forest of Dysis”. You will get the secret disk 173. Now go talk to Cerveau, analyze all your secret disks and choose the first mission. Find the ladder to the right, go down, hit the pillar with a charged attack to light the room, kill the moths and go down. Kill some enemies, break the container to get the secret disk 056, hit the pillar then go up, climb up the ladder to the right to get some health and the secret disk 124 (17) then go up climbing up the other ladders. The container contains the secret disk 082. Light the room with the two pillars, go down and open the door. You have to make the generator work. How? Easy: hit the cubes to push them. Keep spamming your attacks, do that three times with each cube and proceed to the next area. In this little zone, hit the pillar, go up, take the health, hit another pillar and open the door. This generator is the mini-boss of this level. You have to stay on a platform, wait until he opens the heart and shoot. Easy? Ok, but mister generator will use fire and ice breaths. Ice is not a big deal, however fire is a big deal. A few hits with the Z saber combined with the thunder body chip and you’ll get the secret disk 149. In the next part, the platforms will help to cross the spikes but the trip will not be peaceful. First, hit the switch to get a secret disk, then hit the switch, move the platform in order to avoid the spikes and get the secret disk 095 at the end of the trip. Go down, take the health, open the door and activate a new generator, this time with a difference: enemies! Once you took care of this generator, open the door, go right where the thing was swinging to find the secret disk 078 then go up, carry on and go down. The moving platforms are back, the spikes too and you have to reach the top, to the right exactly. Hit the switch, go up and take the secret disk 004 and an extra life. Now, hit the switch one more time and go to the right. Open the door and prepare to face the boss of this area. Cubit Foxten is quite tough to beat. But you know the score: use all the skills you have to beat this enemy. The dash, the jump… everything you can do in order to avoid the attacks. Also, charge your buster shot AND equip the thunder body chip, it’s my advice. A few shots will kill this ninja fox. You’ll get the double jump foot chip.
PART 11: HELPING THE GUARDS Analyze your secret disks and go back to the forest of Anatre. You remember the block you couldn’t get before. With the double jump, it’s now possible. Press the button, then double jump to grab the block and get the secret disk 076. Now, press start button, select escape and choose the second mission. In this mission, you have to help the guards, killing the army and their leader. In other words you have to do their job because they are not paid enough for that and they are scared of a possible ambush. Alright, now that the joke is made, we can start this mission. Go to the east, kill some enemies, jump over the pit and get the secret disk 003 down the slope, hidden by a wall of snow (hit everywhere until you find it). You’ll see two paths further. The way down has the secret disk 103 hidden behind the wall of snow in the second hole, the way up has the secret disk 025 (18) and the secret disk 029. Carry on, kill some flying enemies and face the snow worm. Use the fire body chip and the Z saber and hit this worm with a few hits right in its mouth in order to get the secret disk 060. Carry on, get the secret disk 123 inside the container, go up, take the secret disk 086 and carry on. Kill some enemies, open the door and prepare to face the boss. This boss… is really easy. Equip the fire body chip, charge your buster shot and shoot right after one of his attacks. You can’t shoot him while he is walking because his balls will stop the shot. You can hit him in the back too, that works… sometimes. All you have to do is keep your distances, watch out the ice spikes falling down and avoid his attacks. When he tries to crush you with his big belly (sorry, I couldn’t resist
PART 12: THE FOUR DATAS Analyze the secret disks and select the third mission. Welcome to the sunken library, a level that I enjoy. However, my favorite level is the volcano. I don’t know why but I love levels which take place in a library. For example, in the game Castlevania Symphony of the Night on PSX (I will probably make a walkthrough of this game in the future because it’s one of my favorite Castlevania games), the Long Library is my favorite area. Ok, enough ramble, let’s start the mission. Hit the shells to cross the pool of water electrified (you can go underwater but you have to go back to the surface as soon as possible otherwise you will lose some health due to the electricity). Don’t forget to get the health and the secret disk 125 on the platform above the second shell, go underwater in the second pool to take the secret disk 051 and carry on. Cross the pools cautiously, break the container in the last one to get the secret disk 043, then the secret disk 033 and make your progress through this deadly and long pool. Take the secret disk underwater, go up take the secret disk 096 and open the door. Use the computer to locate the four datas and carry on. Kill the enemies, go underwater and collect the four datas. I suggest you to check before the others storage rooms in order to get some good stuff. Once you collect the four datas, the boss will come. Equip the ice body chip, charge your buster shot and hit him with your best shot. This boss is really easy and will hides like an eel in those holes and shows his face in order to throws an electrified ball at you. Seize this opportunity to shoot his face. When he is not in a hole, shoot him with a charged shot. Easy like ABC, I can tell you. A few shots and he will die horribly. After the cutscene, you’ll get the shadow dash foot chip and return to the base for the next mission.
PART 13: IN TOO DEEP Right at the beginning, equip the recoil rod, use the jump attack then jump to go on the platform and dash and jump to the left to get the secret disk 041. Carry on, use the jump attack if you want the extra life to the left, go down, then go up, dash and jump to reach the platform and break the container to get the secret disk 080. Before going down, dash and jump to get some E-crystals and the secret disk 054. Now, go down, destroys the floating bombs, break the container to get the secret disk 122, make your progress and open the door. Welcome to the elevator of doom. Not really tough. In fact, some enemies will be on the elevator and will try to eject you. You can do the same thing with them but make sure you have their secret disks (if you want them) before doing that. After this nice trip on an elevator with plenty of enemies trying to eject you, open the door, go down, kill the Neo-Arcadians, the cameras and the bombs on your way, watch out the spikes during your progress, take the health and get ready for the boss fight. This boss has lot of health, three health bars to be exact. Plus he is tough and has one weak point: the head. It seems that the ice has a better effect on him though so you should equip the ice body chip and charge your buster shot. Three health bars as I said earlier and three attacks: the first attack is the purple balls. Jump over those purple balls. He will also throw either a crate or a steel bar at you, that’s his second attack. Keep your distances and it should be ok. The last attack is predictable. When you start the battle, you noticed that this bully has two friends with him. That’s his last attack: he will send his friends to reap you. Oh and he will try to crush you too, that’s so common with heavy fat bad guys. Just shoot his face, remember it’s the only part you can hurt. This will take a while compared to the other bosses but don’t worry: the real challenge comes later. After this fight, you’ll get the absorber body chip. After the next cutscene, go see Harpuia in the room next to the command room. He will go away without thanking you (yeah for good manners
PART 14: GOODBYE, BABY ELVES… Start you progress killing all the enemies on your way, go down, take the secret disk 036 above the enemy and carry on. Moving platforms and spikes Go on the platform, then on the one to the left and open the door. You’ll find the secret disk 038 (19). Go back on the first platform, then take the one to the right and get the secret disk 081. Go back on the first platform, go down, then go on the one to the right and get the extra life. Below, you can see the door. Don’t go there yet, go back on the platform and get the secret disk 180 on the pillar. Now, go open the door, break the container to get the secret disk 087, carry on, go down, break another container which contains the secret disk 083. Go down, open the door and watch a cold meeting between you and Lord Weil. Time to fight once again Crea and Prea. You know the score, you beat them in the missile, right? So teach them a lesson… the last one though.
LAST PART: THE FINAL SHOWDOWN It’s time to kick Lord Weil’s butt. Talk to the operator to be teleported where you will find him and Omega. The first container you will encounter contains the secret disk 097 (yes, there’s still more secret disks to get even if it’s the end of the game). Jump from platform to platform to cross the spiky part, use the double jump when you are on the last platform to go up and get the secret disk 177. Carry on, open the door and it’s time for… the boss rush part 1! Any Megaman game has the boss rush at the end, it’s a tradition. In this game, the boss rush is split in two parts. The first part has the following bosses: Devilbat Schilt, Blazin’ Flizard, Death Mantisk and Childre Inarabitta. Ok, I don’t have to tell you how to beat those four bosses, you already kicked their butt at the beginning of the game. You’ll get some health after each fight. Once you beat all the four leaders, open the door, go up, break the container to get the secret disk 151, jump over the holes of spikes, the next container contains the secret disk 019 (20). Go down, break another container to get the secret disk 020, then the secret disk 178 behind the laser beam and carry on. A container contains the secret disk 164 further. Go up, open the door and face the four last bosses of the boss rush: T. Kelverian, Glacier Le Cacktank, Cubit Foxtar and Volteel Biblio. Same thing, you know how to beat those guys. Like the first part of the boss rush, after each fight, you will get some health. Open the door, break the container to get the secret disk 179, then go down, get the secret disk 011 inside the container , beware of the spikes while you are going down, open the door and prepare to face… Omega. No, it’s not Lord Weil, it’s this giant robot. He has a new attack: the sword. It’s like the Damocles sword: he will try to hurt you with his blade. Dash when he does this attack. Otherwise you know his other attacks, do you? After this fight, it’s time for the round 2. This time he has the power of Dark Elf and he becomes a gigantic colossus. You have to hit the head with some charged buster shots. The big cannon shoot a laser beam you can’t really dodge and a giant ball that you can dodge if you use the double jump. His head will shoot three laser beams that you can easily dodge. Jump over the one which will come at you. Also, he will throw a ball at you, a homing ball. Jump over this ball. And the last attack is… the giant paralyzing ball! This horn above the head shoots a homing ball which will paralyze and lead you to the horn if you touch it. Use the double jump to avoid this ball until it disappears. After this round, you’ll face the last form of Omega: Omega Zero. This last form is really really really hard. Hey, it’s the last battle, that means “epic fight”, no? Move constantly, use all your skills to avoid his attacks and, jump over Omega Zero and hit his back with your Z saber. This fight will give you lot of troubles, that why I hope you have filled your sub tank and have some red Cyber-Elves to heal you. After this fight, watch the final cutscene and save your data. Congratulations, you beat Megaman Zero 3 and unlocked some mini-games and… the hard mode woohoo!
That's all for this walkthrough. As I said before, I will add the missing content like the Ex Skills and the few secrets disks I missed. Anyway, I meet you back at the next walkthrough, another request. Oh and if you have any requests, go ahead, I don't refuse any requests -------------------- |
| Games have secrets, I have my eagle gaze. |
Affected by 'Laziness Syndrome'
Registered: 10-21-11
Location: France
Last Post: 2629 days
Last Active: 1802 days
12-31-12 12:08 PM
 megamanmaniac is Offline
| ID: 711696 | 22 Words
megamanmaniac is Offline
| ID: 711696 | 22 Words
 megamanmaniac is Offline

POSTS: 1442/4966
POST EXP: 452698
LVL EXP: 25193414
CP: 17270.3
VIZ: 153068
O.O This was an amazing walkthrough. Very nice sir, very nice. The Planned Accident : I'm sure you'd like to see this. The Planned Accident : I'm sure you'd like to see this. |
| Triple M |
Affected by 'Laziness Syndrome'
Registered: 04-12-12
Location: Access withheld from you
Last Post: 3311 days
Last Active: 3307 days
12-31-12 12:59 PM
 earthwarrior is Offline
| ID: 711737 | 11 Words
earthwarrior is Offline
| ID: 711737 | 11 Words
 earthwarrior is Offline

POSTS: 873/4807
POST EXP: 221310
LVL EXP: 23802238
CP: 21877.0
VIZ: 137351
Great walkthrough. How long did it take you to make it? How long did it take you to make it? -------------------- By earthwarrior |
Vizzed's #1 Kid Icarus Uprising Fan! 2nd place in December 2012 VCS! |
Affected by 'Laziness Syndrome'
Registered: 07-03-12
Location: Mars
Last Post: 2718 days
Last Active: 2648 days
01-01-13 06:40 AM
Laian is Offline
| ID: 712301 | 89 Words
POSTS: 1455/2232
POST EXP: 457173
LVL EXP: 7718023
CP: 23738.9
VIZ: 3570490
earthwarrior : Ah, I was expecting this question. It's the one I see in most of my walkthroughs Are you ready? Ready, ready? For real? Well, it took me... one month! One month to make this walkthrough, like most of the walkthroughs I've made before. Thanks for the comment, man megamanmaniac : I also thank you my friend, even if I already did that; Oh well, twice is better than once ha ha ha ;D The Planned Accident : megamanmaniac has probably failed the summon, so I summon you Are you ready? Ready, ready? For real? Well, it took me... one month! One month to make this walkthrough, like most of the walkthroughs I've made before. Thanks for the comment, man megamanmaniac : I also thank you my friend, even if I already did that; Oh well, twice is better than once ha ha ha ;D The Planned Accident : megamanmaniac has probably failed the summon, so I summon you -------------------- |
| Games have secrets, I have my eagle gaze. |
Affected by 'Laziness Syndrome'
Registered: 10-21-11
Location: France
Last Post: 2629 days
Last Active: 1802 days
