


 User Notice
806 Posts Found by Azul Fria
10-22-12 04:23 AM
| ID: 677098 | 106 Words
| ID: 677098 | 106 Words



I'm a west coast fan myself. I'm still a fan of Lakers and Clippers though I live in Arizona now. I thought the Lakers were something when they got 3 major players in Howard, Nash, and Jamison but if they play in the regular season like they do in the preseason then the Clippers are going win the Pacific Division by a landslide. At least the Clippers have a bench that can win a game all by themselves: Eric Bledsoe, Lamar Odom, Grant Hill, Jamal Crawford, Ronny Turiaf, Willie Green (when Billups returns), Ryan Hollis, Matt Barnes and these are just the bench players I named. -------------------- |
Vizzed Elite
Affected by 'Laziness Syndrome'
Registered: 10-06-12
Last Post: 2727 days
Last Active: 227 days
| Ice Queen Zero |
Affected by 'Laziness Syndrome'
Registered: 10-06-12
Last Post: 2727 days
Last Active: 227 days
10-22-12 04:10 AM
| ID: 677095 | 1041 Words
| ID: 677095 | 1041 Words
Experience the intensity of the Formula One world like the player would have never thought was possible. Formula One Championship Edition on Playstation 3 offers high definition visuals, full surround sound audio, extensive circuit and car details, progressive lighting effects and car damage resulting in the most realistic racing experience to date. This game contains all the official drivers, cars, circuits, rules, and teams from 2006 including Scuderia Toro Rosso, Super Aguri F1 Team and Midland F1 Racing in their debut year. There is also more pickup and play moments in the game with racing assists, automatic breaking, and spin recovery. It gives the player the chance to feel the real pressure of a Grand Prix with faster cars and unexpected collisions and race incidents. Now just because this game is related to racing, don’t think of it as a walk in the park if the player hasn’t played a 3-D racing game before or much of them. Sure, one may have played many racing games in 2-D such as RC Pro Am for the NES and Super Off-Road for the 16-bit systems but with for games like F1: Championship Edition, the player definitely has to be in total focus if he/she expects to win a race because those curves on the track have the “make or break you” feel to them. The first thing the player does when turning on the game is to create a profile or load a previous one. While the player’s profile is generally not important for offline play except for a few modes, it does however tell everyone how good of a racer the player are doing online play and the best way to give everyone a good impression is to start in career mode to build up the player’s character. When the player starts a career, he/she enjoys the life as a rookie driver and as the player complete or fail tasks while bringing his/her driver up to racing pro, the player earns skill points that shows his/her online competition how well the player’s skill level is. People with high skill are more likely to have a race with someone who is good at the game rather than someone who doesn’t know anything about racing and can take the fun out of the race. One thing to note to is that unlike most of the other racing games, there are rules to prevent from driving recklessly and they are the same rules one may see during a racing event. These rules are enforced by flags. Whatever flag is displayed, the player must obey it unless he/she doesn’t mind being shown the black flag which means disqualification. There are pits stops too but even I don’t know how make one yet, the manual never gave any instruction on them. The controls are top of the line for the most part. The only thing to worry about is the steering which I, myself, have a problem with since if the player goes too fast then it hard to clear curves without losing control of the vehicle. F1 Championship Edition, to my knowledge, is one of the first games to utilize the six-axis control scheme (Go to the control options and choose Configuration Type F). For those familiar with Nintendo Wii’s Wiimote, the control style of the PS3 controller is similar in terms of how one plays this game. On other Control Configuration Types, the player uses the Left Analog to steer left or right but with Configuration Type F, the player can tilt the controller to the sides to control his/her steering. However, it is harder to steer using this configuration without practice. The graphics are crystal clear. Thanks to the PS3’s Blue-ray and HDMI technology, all of the characters, cars, tracks, props and everything else look absolutely realistic. The game’s polygons blend in perfectly and even the inside of the car when using the inside-car first person view looks exactly like the inside of a race car with the gas meter, pit stop callers, MPH indicator, etc. This racing game could have also doubled as a simulation game if it had the extra stuff to be one. It doesn’t stop there, if the player is racing on a rainy day, he/she gets to see what it’s like to race in the rain by giving the player a little blurry view (which is really rainwater running down the windshield). Ps3 was really starting to bear it's fangs when it first came out. The sounds are great except for the music part. There is nothing wrong with the music but it’s not up to par with the NASCAR series created by EA Sports whom use music done by real musical artists in its games. The best sounds in the game are the ones that occur in the middle of the race. The announcer calls the race as he sees it and he does not make any silly comments during the race, he just informs the players who is in the lead, the conditions of the tracks is keeps his commentary all professional. The crew chief informs the player of how he/she is doing, the condition of the race car, and when to make a pit stop. Pluses: At the time I played it, online competition is fierce just the way I like it. The new Six-Axis control lets you control the steering with the tilt of the controller. The sound is awesome. Realistic feel and look of the game. Minuses: The driving displays are not displayed correctly since it’s hard to tell what gear the car is in. Rookies can easily lose control of their vehicle. Lack of controller vibration (Damn you, Immerson and your patent at the time of this game's release). The manual is almost no help. Whether you are new to racing games or not, give this game a shot and try to picture yourself driving the race car for real. Just try playing with Control Type F and you’ll see how well your race car driving skills would have been on a real track. All you need is the focus and the will to accept frustration when thing go wrong. Sooner or later, you’ll grow to like this game as a way of taking on a tough challenge. This game contains all the official drivers, cars, circuits, rules, and teams from 2006 including Scuderia Toro Rosso, Super Aguri F1 Team and Midland F1 Racing in their debut year. There is also more pickup and play moments in the game with racing assists, automatic breaking, and spin recovery. It gives the player the chance to feel the real pressure of a Grand Prix with faster cars and unexpected collisions and race incidents. Now just because this game is related to racing, don’t think of it as a walk in the park if the player hasn’t played a 3-D racing game before or much of them. Sure, one may have played many racing games in 2-D such as RC Pro Am for the NES and Super Off-Road for the 16-bit systems but with for games like F1: Championship Edition, the player definitely has to be in total focus if he/she expects to win a race because those curves on the track have the “make or break you” feel to them. The first thing the player does when turning on the game is to create a profile or load a previous one. While the player’s profile is generally not important for offline play except for a few modes, it does however tell everyone how good of a racer the player are doing online play and the best way to give everyone a good impression is to start in career mode to build up the player’s character. When the player starts a career, he/she enjoys the life as a rookie driver and as the player complete or fail tasks while bringing his/her driver up to racing pro, the player earns skill points that shows his/her online competition how well the player’s skill level is. People with high skill are more likely to have a race with someone who is good at the game rather than someone who doesn’t know anything about racing and can take the fun out of the race. One thing to note to is that unlike most of the other racing games, there are rules to prevent from driving recklessly and they are the same rules one may see during a racing event. These rules are enforced by flags. Whatever flag is displayed, the player must obey it unless he/she doesn’t mind being shown the black flag which means disqualification. There are pits stops too but even I don’t know how make one yet, the manual never gave any instruction on them. The controls are top of the line for the most part. The only thing to worry about is the steering which I, myself, have a problem with since if the player goes too fast then it hard to clear curves without losing control of the vehicle. F1 Championship Edition, to my knowledge, is one of the first games to utilize the six-axis control scheme (Go to the control options and choose Configuration Type F). For those familiar with Nintendo Wii’s Wiimote, the control style of the PS3 controller is similar in terms of how one plays this game. On other Control Configuration Types, the player uses the Left Analog to steer left or right but with Configuration Type F, the player can tilt the controller to the sides to control his/her steering. However, it is harder to steer using this configuration without practice. The graphics are crystal clear. Thanks to the PS3’s Blue-ray and HDMI technology, all of the characters, cars, tracks, props and everything else look absolutely realistic. The game’s polygons blend in perfectly and even the inside of the car when using the inside-car first person view looks exactly like the inside of a race car with the gas meter, pit stop callers, MPH indicator, etc. This racing game could have also doubled as a simulation game if it had the extra stuff to be one. It doesn’t stop there, if the player is racing on a rainy day, he/she gets to see what it’s like to race in the rain by giving the player a little blurry view (which is really rainwater running down the windshield). Ps3 was really starting to bear it's fangs when it first came out. The sounds are great except for the music part. There is nothing wrong with the music but it’s not up to par with the NASCAR series created by EA Sports whom use music done by real musical artists in its games. The best sounds in the game are the ones that occur in the middle of the race. The announcer calls the race as he sees it and he does not make any silly comments during the race, he just informs the players who is in the lead, the conditions of the tracks is keeps his commentary all professional. The crew chief informs the player of how he/she is doing, the condition of the race car, and when to make a pit stop. Pluses: At the time I played it, online competition is fierce just the way I like it. The new Six-Axis control lets you control the steering with the tilt of the controller. The sound is awesome. Realistic feel and look of the game. Minuses: The driving displays are not displayed correctly since it’s hard to tell what gear the car is in. Rookies can easily lose control of their vehicle. Lack of controller vibration (Damn you, Immerson and your patent at the time of this game's release). The manual is almost no help. Whether you are new to racing games or not, give this game a shot and try to picture yourself driving the race car for real. Just try playing with Control Type F and you’ll see how well your race car driving skills would have been on a real track. All you need is the focus and the will to accept frustration when thing go wrong. Sooner or later, you’ll grow to like this game as a way of taking on a tough challenge. -------------------- |
Vizzed Elite
Affected by 'Laziness Syndrome'
Registered: 10-06-12
Last Post: 2727 days
Last Active: 227 days
| Ice Queen Zero |
Affected by 'Laziness Syndrome'
Registered: 10-06-12
Last Post: 2727 days
Last Active: 227 days
10-22-12 03:26 AM
| ID: 677084 | 25 Words
| ID: 677084 | 25 Words
First one for me was Pokemon Card Game for the Gameboy Color. I actually learned how to play the actual card game thanks to it. -------------------- |
Vizzed Elite
Affected by 'Laziness Syndrome'
Registered: 10-06-12
Last Post: 2727 days
Last Active: 227 days
| Ice Queen Zero |
Affected by 'Laziness Syndrome'
Registered: 10-06-12
Last Post: 2727 days
Last Active: 227 days
10-22-12 01:14 AM
| ID: 677054 | 88 Words
| ID: 677054 | 88 Words
I can be a game reviewer. While I may be more recognizable as guide writer today, I first stepped into the limelight doing game reviews and my guide writing skills actually spawned from it. Back then they used to be AVGN-ish before anybody knew who he was but I know how to stay family friendly and give a horrible game a bad review without any using any "monkey diarrhea" comments. I posted a couple old reviews for Ninja Gaiden for the NES and for Assault for the 2600. I posted a couple old reviews for Ninja Gaiden for the NES and for Assault for the 2600. -------------------- |
Vizzed Elite
Affected by 'Laziness Syndrome'
Registered: 10-06-12
Last Post: 2727 days
Last Active: 227 days
| Ice Queen Zero |
Affected by 'Laziness Syndrome'
Registered: 10-06-12
Last Post: 2727 days
Last Active: 227 days
10-22-12 01:01 AM
| ID: 677049 | 83 Words
| ID: 677049 | 83 Words
DeadlyFart : Yes I'm Ice Queen Zero, I'm more recognized for my gaming guides nowadays but game reviews were where my roots began except I used to be AVGNish with them before anyone knew who AVGN was. I recently changed my custom title to Ice Queen Zero in case someone like you was going to try to play hero. I'm not playing for any jerseys anyway. I'm putting up a couple old reviews so I can be eligible to apply for the Reviewer job. Yes I'm Ice Queen Zero, I'm more recognized for my gaming guides nowadays but game reviews were where my roots began except I used to be AVGNish with them before anyone knew who AVGN was. I recently changed my custom title to Ice Queen Zero in case someone like you was going to try to play hero. I'm not playing for any jerseys anyway. I'm putting up a couple old reviews so I can be eligible to apply for the Reviewer job. -------------------- |
Vizzed Elite
Affected by 'Laziness Syndrome'
Registered: 10-06-12
Last Post: 2727 days
Last Active: 227 days
| Ice Queen Zero |
Affected by 'Laziness Syndrome'
Registered: 10-06-12
Last Post: 2727 days
Last Active: 227 days
10-22-12 12:52 AM
| ID: 677046 | 3 Words
| ID: 677046 | 3 Words
Ahem, that's me. -------------------- |
Vizzed Elite
Affected by 'Laziness Syndrome'
Registered: 10-06-12
Last Post: 2727 days
Last Active: 227 days
| Ice Queen Zero |
Affected by 'Laziness Syndrome'
Registered: 10-06-12
Last Post: 2727 days
Last Active: 227 days
10-22-12 12:42 AM
| ID: 677041 | 746 Words
| ID: 677041 | 746 Words
The tagline is just a simple reference to Ocelot's line from Metal Gear Solid 1 and I'll explain why later on. Assault is a classic shooter game similar to Space Invaders for the Atari 2600. It was created by a company called Bomb; whom did not get very far in the game-making business. The object of this game here is to shoot as many of the alien ships as you can while the mother-ship keeps deploying them in waves. Each time a wave is completed, a new type of ship will come out using a different weapon. Eventually, you will "start over" and I quote that because while you are still active, the enemies cycle will repeat only now they will divide in to smaller pieces when shot. A word of advice, don't even bother trying to kill the mother-ship itself. It's invincible, it's a waste of ammo, and most of all it could kill you. I'll give this game it's due considering that it is an Atari 2600 game. The graphics are well-drawn out as you can differentiate the enemy ships from each other and some of the enemy bullets are in good detail especially the ninja star-shaped ones in wave 4, 8, etc. that fall to the floor then moves towards the player and force the player to shoot at it to stay alive. The mother-ship and the player ship are somewhat OK but the mother ship looks a multi-colored fat lay floating back and forth in space. It doesn't help its cause that when it deploys a ship, it look like it took a dump (remember, it looks a fat lady). What really puts the graphics over the top is the game making good use of the color scheme. Most games in those days barely used anymore than three colors at a time or in the game period. Assault uses just about the whole spectrum. The enemies are all two toned and the mother-ship itself is pretty colorful as I've mentioned earlier. I'll be brief with the controls here. They respond pretty well to your movements and the majority of the time you will only be shooting upwards but if you have a ninja-star projectile on your tail in Wave 4, 8, etc. then you can move into its direction and fire at it. At least you will not be a sitting duck for stuff like that. Earlier in the tagline, I mentioned something about rapid-fire being a bad idea. While Ocelot might have been bluffing in his case, this game makes you pay for doing so with your life. Over on the lower right you will see a bar that will fill up or recede. That is your heat bar. If you constantly shoot like there is no tomorrow, it will fill up and turn red. If it reaches its maximum point, the player will overheat and die. What I like about this mechanism is that it teaches the player to be patient, be calm, and be conservative. An aggressive player will never get far into the game as the overheating factor will be his or her downfall. If manage to get past Wave 4 then consider yourself a semi-pro because now you got to deal with splitting ships. You'll be considered a pro if you make it past Wave 8. There really isn't any music in the game except for maybe a few jingles that play when starting to overheat and when ships are deployed. The sounds are basic as you hear them in just about any other old game (shooting, exploding ships, etc.) so I won't take much points off for that. This game does get addicting in a hurry as you'll find yourself losing lives quickly when playing the game for the first time if haven't read the manual before hand. The game loops on forever so you are really just playing the game for points until your last ship is destroyed but its fun to try and see all of what this game has to offer. What more can I say? I admit that this game was decent. It gives the player the option of asking himself, "To shoot or not to shoot?" as it plays the role in the difference between life and death. Fast and furious gets you killed. Slow and steady keeps you alive. If you are looking for an old game to try out for nostalgia purposes, Assault is a game to check out. I'll give this game it's due considering that it is an Atari 2600 game. The graphics are well-drawn out as you can differentiate the enemy ships from each other and some of the enemy bullets are in good detail especially the ninja star-shaped ones in wave 4, 8, etc. that fall to the floor then moves towards the player and force the player to shoot at it to stay alive. The mother-ship and the player ship are somewhat OK but the mother ship looks a multi-colored fat lay floating back and forth in space. It doesn't help its cause that when it deploys a ship, it look like it took a dump (remember, it looks a fat lady). What really puts the graphics over the top is the game making good use of the color scheme. Most games in those days barely used anymore than three colors at a time or in the game period. Assault uses just about the whole spectrum. The enemies are all two toned and the mother-ship itself is pretty colorful as I've mentioned earlier. I'll be brief with the controls here. They respond pretty well to your movements and the majority of the time you will only be shooting upwards but if you have a ninja-star projectile on your tail in Wave 4, 8, etc. then you can move into its direction and fire at it. At least you will not be a sitting duck for stuff like that. Earlier in the tagline, I mentioned something about rapid-fire being a bad idea. While Ocelot might have been bluffing in his case, this game makes you pay for doing so with your life. Over on the lower right you will see a bar that will fill up or recede. That is your heat bar. If you constantly shoot like there is no tomorrow, it will fill up and turn red. If it reaches its maximum point, the player will overheat and die. What I like about this mechanism is that it teaches the player to be patient, be calm, and be conservative. An aggressive player will never get far into the game as the overheating factor will be his or her downfall. If manage to get past Wave 4 then consider yourself a semi-pro because now you got to deal with splitting ships. You'll be considered a pro if you make it past Wave 8. There really isn't any music in the game except for maybe a few jingles that play when starting to overheat and when ships are deployed. The sounds are basic as you hear them in just about any other old game (shooting, exploding ships, etc.) so I won't take much points off for that. This game does get addicting in a hurry as you'll find yourself losing lives quickly when playing the game for the first time if haven't read the manual before hand. The game loops on forever so you are really just playing the game for points until your last ship is destroyed but its fun to try and see all of what this game has to offer. What more can I say? I admit that this game was decent. It gives the player the option of asking himself, "To shoot or not to shoot?" as it plays the role in the difference between life and death. Fast and furious gets you killed. Slow and steady keeps you alive. If you are looking for an old game to try out for nostalgia purposes, Assault is a game to check out. -------------------- |
Vizzed Elite
Affected by 'Laziness Syndrome'
Registered: 10-06-12
Last Post: 2727 days
Last Active: 227 days
| Ice Queen Zero |
Affected by 'Laziness Syndrome'
Registered: 10-06-12
Last Post: 2727 days
Last Active: 227 days
10-22-12 12:28 AM
| ID: 677026 | 696 Words
| ID: 677026 | 696 Words
Overwiew Ninja Gaiden for the Nintendo Entertainment System is about a ninja named Ryu Hayabusa who comes to America from Japan to avenge the defeat of his father whom you have seen defeated during the opening sequence of the game. Upon arrival in America he meets an agent named Irene Lew whom was ordered to keep an eye on Ryu during his adventures. Ryu must take on the Malice Four: Barbarian, Bomberhead, Basaquar, and Bloody Malth. The latter is the one who defeated Ryu's father, Ken Hayabusa. He must also take on Kelbeross before taking on Jacquio himself. Once he falls, there is the demon statue that you fought so hard to keep separate only to fight it at the end. Gameplay 8/10 Tecmo did a good job keeping me entertained in this game. The difficulty ranges from easy for the first two levels, medium once you get to level 3 and 4. But, once you get to level 5, stuff just start getting hard especially when you get to level 5-2 when you have to make that difficult jump to grab part of a wall so you can reach a lower platform. Unlike Ninja Gaiden 2 and 3, you couldn't climb up and down a wall. When you get to level 6-2, it gets totally ridiculous. When you get to the final bosses, you better bring your A game with you. If you die at any of the three last bosses, it's back to 6-1 instead of to 6-3. The reason I had to take off points from the game is because there are times when you sword won't register a hit and it totally messes up your gameplan when you are trying to run through the game. This usually happens after you take a hit. Another problem I had with the game was the recoil from getting hit being too much. You can be a foot away from a pit and get hit and end up being knocked into it. Then there are those enemy spawn points that seem to make jumping over pits hard because the enemies can come out at the wrong time unless you know what to expect but the first time you play through the game, you will be unprepared. Story 10/10 The story is excellent and well planned out. You are this kid living in Japan and find out that your father was defeated. You arrive in America and meet a nice young lady who knocks you and as the game goes on, you have a task of keeping the light and the dark demon statue separated from each other before the lunar eclipse which obviously everyone knows is going to fail at the end of the game. Girl has gotten kidnapped, Ryu saves her, they kiss. The End. Graphics 9/10 The graphics have been neatly drawn out. You got excellent graphic displays of Crystal Lake (3-1), Amazon (4-1), Jay's Bar (1-2) to name a few. The colors fit in perfectly but there are some levels where the graphics may confuse the player like enemy shots will sometimes blend in with the background and it's almost hard to see which walls are climbable or not in some levels but other than that, good work. Sound 10/10 Although I can't say that the sound is good as the games of today for the era it came from, the sound is nice. The sound track that is played in The Cave (5-1), the Place of Red Execution (5-4), and the Final Showdown (6-5) has good display of opera-themed battle music. The other music fit their stages perfectly. Replayability 10/10 If you have beaten the game one, then you know you are itching for more because it was fun beating it once, now it's time to hit the reset button or reset it if you got it on Virtual Console and play it again. Final Recommendation This game I give a 9/10. It caught my eye the first time I tried it and it got me hooked on the gameplay. Through all frustration, I managed to persevere and beat the game. You too, will feel the same way once you play it. Ninja Gaiden for the Nintendo Entertainment System is about a ninja named Ryu Hayabusa who comes to America from Japan to avenge the defeat of his father whom you have seen defeated during the opening sequence of the game. Upon arrival in America he meets an agent named Irene Lew whom was ordered to keep an eye on Ryu during his adventures. Ryu must take on the Malice Four: Barbarian, Bomberhead, Basaquar, and Bloody Malth. The latter is the one who defeated Ryu's father, Ken Hayabusa. He must also take on Kelbeross before taking on Jacquio himself. Once he falls, there is the demon statue that you fought so hard to keep separate only to fight it at the end. Gameplay 8/10 Tecmo did a good job keeping me entertained in this game. The difficulty ranges from easy for the first two levels, medium once you get to level 3 and 4. But, once you get to level 5, stuff just start getting hard especially when you get to level 5-2 when you have to make that difficult jump to grab part of a wall so you can reach a lower platform. Unlike Ninja Gaiden 2 and 3, you couldn't climb up and down a wall. When you get to level 6-2, it gets totally ridiculous. When you get to the final bosses, you better bring your A game with you. If you die at any of the three last bosses, it's back to 6-1 instead of to 6-3. The reason I had to take off points from the game is because there are times when you sword won't register a hit and it totally messes up your gameplan when you are trying to run through the game. This usually happens after you take a hit. Another problem I had with the game was the recoil from getting hit being too much. You can be a foot away from a pit and get hit and end up being knocked into it. Then there are those enemy spawn points that seem to make jumping over pits hard because the enemies can come out at the wrong time unless you know what to expect but the first time you play through the game, you will be unprepared. Story 10/10 The story is excellent and well planned out. You are this kid living in Japan and find out that your father was defeated. You arrive in America and meet a nice young lady who knocks you and as the game goes on, you have a task of keeping the light and the dark demon statue separated from each other before the lunar eclipse which obviously everyone knows is going to fail at the end of the game. Girl has gotten kidnapped, Ryu saves her, they kiss. The End. Graphics 9/10 The graphics have been neatly drawn out. You got excellent graphic displays of Crystal Lake (3-1), Amazon (4-1), Jay's Bar (1-2) to name a few. The colors fit in perfectly but there are some levels where the graphics may confuse the player like enemy shots will sometimes blend in with the background and it's almost hard to see which walls are climbable or not in some levels but other than that, good work. Sound 10/10 Although I can't say that the sound is good as the games of today for the era it came from, the sound is nice. The sound track that is played in The Cave (5-1), the Place of Red Execution (5-4), and the Final Showdown (6-5) has good display of opera-themed battle music. The other music fit their stages perfectly. Replayability 10/10 If you have beaten the game one, then you know you are itching for more because it was fun beating it once, now it's time to hit the reset button or reset it if you got it on Virtual Console and play it again. Final Recommendation This game I give a 9/10. It caught my eye the first time I tried it and it got me hooked on the gameplay. Through all frustration, I managed to persevere and beat the game. You too, will feel the same way once you play it. -------------------- |
Vizzed Elite
Affected by 'Laziness Syndrome'
Registered: 10-06-12
Last Post: 2727 days
Last Active: 227 days
| Ice Queen Zero |
Affected by 'Laziness Syndrome'
Registered: 10-06-12
Last Post: 2727 days
Last Active: 227 days
10-20-12 12:23 AM
| ID: 675783 | 439 Words
| ID: 675783 | 439 Words
Me, Kage Negra, and our sisters Roja Calor and Yushira have a ton of arcade PCBs
currently in our possession thanks to our paternal grandpa and we are currently making
videos off of them and guides too.
First game on the list is S.O.S.
Stumbled along this game when checking out Grandpa's stash of Arcade PCB boards from when he ran an arcade business. This game sure shows its age as it came out in 1979 and it is only a two-color game (lilac background with black sprites). All you ever do is shoot planes that come at you. I've already did a video recording of this game being played and it is yet to appear on YouTube. This game will test your speed and accuracy
as the bullets you fire don't fly straight while moving.
You are a fighter plane called a Shinryaku and your goal is to shoot as many of the enemy
planes as possible while keeping them from reaching the bottom of the screen. If too many
get by you then the game is over regardless of lives that are remaining.
CONTROLS
Joystick - move left or right Shoot - Attack with your weapon.
GAMEPLAY
-Your plane only stays at the bottom of the screen so you can only move left or right.
-You can only shoot one shot at a time and won't be able to shoot another shot until it goes off screen via reaching the top or shooting an enemy.
-Aim your shots carefully because while you are still, the shot travels straight but if you are moving while shooting, the trajectory of the bullet will angle in the direction you are moving.
-Anytime an enemy plane gets past you, it will add up a counter which if it gets to 100, the game is over immediately. You can delay the inevitable with SOSs being answered by flying
to the side of the screen it's on within 10 seconds. -You get 30 points and lower the counter by random values after the 2nd SOS call and beyond. -You may think you are safe by shooting down planes but its best to let some go by if they are too close. The explosion from the planes being blown up can also kill you. Cheap death
I know.
-Every 2000 points you get, the game will pause for a coffee break and let you rest for a few moments before starting up again. You get an extra life when you reach the coffee break scene.
-There is no ending. The object of this game is to get the highest amount of points possible.
GOOD LUCK and KEEP SHOOTING!!!
-------------------- |
Vizzed Elite
Affected by 'Laziness Syndrome'
Registered: 10-06-12
Last Post: 2727 days
Last Active: 227 days
| Ice Queen Zero |
Affected by 'Laziness Syndrome'
Registered: 10-06-12
Last Post: 2727 days
Last Active: 227 days
10-18-12 02:51 AM
| ID: 674676 | 27 Words
| ID: 674676 | 27 Words
Yep exactly what Kage implied, luckily he is sticking with the same girl rather than sleeping around with other women and add more fuel to the flames. -------------------- |
Vizzed Elite
Affected by 'Laziness Syndrome'
Registered: 10-06-12
Last Post: 2727 days
Last Active: 227 days
| Ice Queen Zero |
Affected by 'Laziness Syndrome'
Registered: 10-06-12
Last Post: 2727 days
Last Active: 227 days
10-18-12 02:34 AM
| ID: 674671 | 1373 Words
| ID: 674671 | 1373 Words
Updated with Weapons info. The next post will have Walkthrough. MAP A1 A2 A3 A4 A5 A6 A7 A8 A9 A10 A11 A12 A13 A14 A15 A16 B1 B2 B3 B4 B5 B6 B7 B8 B9 B10 B11 B12 B13 B14 B15 B16 . . . . . H1 H2 H3 H4 H5 H6 H7 H8 H9 H10 H11 H12 H13 H14 H15 H16
 Your quest starts in H8. Go inside that cave and an old man who gives you a wooden sword.  Hitoride Hakikenja Kore wo Sazukeyou (It's too dangerous to go alone, take this!) Once out of the cave with your sword, do some rupy farming by traveling around killing enemies and looking for secret rupies. Some secret rupies are easy to find but others require you to burn a bush, blow up a wall, or (in the second quest) toot the recorder in certain spots. You'll earn ten, thirty, or even a hundred rupies.
   Minnani Naishodayo (It's a secret for everyone)
Just keep in mind that you cannot have more than 255 Rupies. Any extra ones will not count. The reason for this is that the rupy count was designed in hexadecimal. 255 = the numeral value for FF (max).
The first two items that take priority for purchasing are the Blue Candle found in G7 shop and the bombs found in E5 shop. The shopkeeper has awful manners in the earlier releases of Zelda and more polite in later releases he's more polite.
 Nankakoutewareya (Buy something, will ya?/Please buy something) If you are still want to do some pre-dungeon farming then you can also visit the secret shop and by the Blue Ring off the bat to take half-damage (located in D5 under the top middle Armos and it is worth a whopping 250 Rupees). There is also magical shield which you notice the 160 Rupy price tag but that's downright ridiculous. Once you get the Blue Candle, you can find the Magic Shield for 90 Rupies by burning the top-leftmost bush in E7. The next screen (E8) to the right has a burnable bush too. Here you will find a old man who gives you the choice of getting a Red Potion or Life Container. Always pick the Life Container as you can always by a red potion (or blue) when you give the prescr
   Sukina Houwo Sazukeyou (Choose Life or Medicine) With 4 hearts, I still say it's not quite time to go dungeon exploring just yet. You do want a White Sword to deal double the damage after all. The first dungeon is located in D8 but skip that for now and head to C13 and blow up the wall on the small rock for another life container. Now we got the required number of hearts to get the White Sword without having to kill any bosses.
 From here, go up one screen, left 3 screens, and up one (A10). Kill the Lynel if necessary and get the white sword.
 Tsukai Konaserunara Korewo Sazukeyou (those who master this sword can hold this) Now that we hopefully got the White Sword, Magic Shield and Blue Ring, we are heavily armed to the teeth and ready to tackle the first dungeon but for good measure, lets get the sixth heart since it's still physically possible. The other 2 overworld hearts require a ladder and a raft respectively so we'll ignore those. Head over to H12 and blow up the wall.
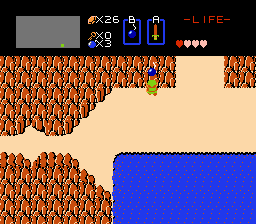 Now onward to D8 where our first dungeon awaits.
  Tune in next time as we tackle the first dungeon.
MAP A1 A2 A3 A4 A5 A6 A7 A8 A9 A10 A11 A12 A13 A14 A15 A16 B1 B2 B3 B4 B5 B6 B7 B8 B9 B10 B11 B12 B13 B14 B15 B16 . . . . . H1 H2 H3 H4 H5 H6 H7 H8 H9 H10 H11 H12 H13 H14 H15 H16
Your quest starts in H8. Go inside that cave and an old man who gives you a wooden sword.
Hitoride Hakikenja Kore wo Sazukeyou (It's too dangerous to go alone, take this!)Once out of the cave with your sword, do some rupy farming by traveling around killing enemies and looking for secret rupies. Some secret rupies are easy to find but others require you to burn a bush, blow up a wall, or (in the second quest) toot the recorder in certain spots. You'll earn ten, thirty, or even a hundred rupies.
Minnani Naishodayo (It's a secret for everyone)
Just keep in mind that you cannot have more than 255 Rupies. Any extra ones will not count. The reason for this is that the rupy count was designed in hexadecimal. 255 = the numeral value for FF (max).
The first two items that take priority for purchasing are the Blue Candle found in G7 shop and the bombs found in E5 shop. The shopkeeper has awful manners in the earlier releases of Zelda and more polite in later releases he's more polite.
Nankakoutewareya (Buy something, will ya?/Please buy something) If you are still want to do some pre-dungeon farming then you can also visit the secret shop and by the Blue Ring off the bat to take half-damage (located in D5 under the top middle Armos and it is worth a whopping 250 Rupees). There is also magical shield which you notice the 160 Rupy price tag but that's downright ridiculous. Once you get the Blue Candle, you can find the Magic Shield for 90 Rupies by burning the top-leftmost bush in E7. The next screen (E8) to the right has a burnable bush too. Here you will find a old man who gives you the choice of getting a Red Potion or Life Container. Always pick the Life Container as you can always by a red potion (or blue) when you give the prescr
Sukina Houwo Sazukeyou (Choose Life or Medicine)With 4 hearts, I still say it's not quite time to go dungeon exploring just yet. You do want a White Sword to deal double the damage after all. The first dungeon is located in D8 but skip that for now and head to C13 and blow up the wall on the small rock for another life container. Now we got the required number of hearts to get the White Sword without having to kill any bosses.
From here, go up one screen, left 3 screens, and up one (A10). Kill the Lynel if necessary and get the white sword.
Tsukai Konaserunara Korewo Sazukeyou (those who master this sword can hold this)Now that we hopefully got the White Sword, Magic Shield and Blue Ring, we are heavily armed to the teeth and ready to tackle the first dungeon but for good measure, lets get the sixth heart since it's still physically possible. The other 2 overworld hearts require a ladder and a raft respectively so we'll ignore those. Head over to H12 and blow up the wall.
Now onward to D8 where our first dungeon awaits.
Tune in next time as we tackle the first dungeon.
-------------------- |
Vizzed Elite
Affected by 'Laziness Syndrome'
Registered: 10-06-12
Last Post: 2727 days
Last Active: 227 days
| Ice Queen Zero |
Affected by 'Laziness Syndrome'
Registered: 10-06-12
Last Post: 2727 days
Last Active: 227 days
10-11-12 11:35 PM
| ID: 671196 | 44 Words
| ID: 671196 | 44 Words
Today, I just celebrated my 17th birthday. There was no school today due to the holiday so I was able to spend some quality time with daughter as did Kage Negra with her son. Parenthood is something to take one day at a time. -------------------- |
Vizzed Elite
Affected by 'Laziness Syndrome'
Registered: 10-06-12
Last Post: 2727 days
Last Active: 227 days
| Ice Queen Zero |
Affected by 'Laziness Syndrome'
Registered: 10-06-12
Last Post: 2727 days
Last Active: 227 days
10-09-12 02:25 PM
| ID: 669487 | 7 Words
| ID: 669487 | 7 Words
Updated with the Dungeon enemies and Bosses. -------------------- |
Vizzed Elite
Affected by 'Laziness Syndrome'
Registered: 10-06-12
Last Post: 2727 days
Last Active: 227 days
| Ice Queen Zero |
Affected by 'Laziness Syndrome'
Registered: 10-06-12
Last Post: 2727 days
Last Active: 227 days
10-09-12 12:53 PM
| ID: 669391 | 18 Words
| ID: 669391 | 18 Words
Another difference is that you can blow in the microphone on COntroller 2 to kill Pols Voices (rabbits). -------------------- |
Vizzed Elite
Affected by 'Laziness Syndrome'
Registered: 10-06-12
Last Post: 2727 days
Last Active: 227 days
| Ice Queen Zero |
Affected by 'Laziness Syndrome'
Registered: 10-06-12
Last Post: 2727 days
Last Active: 227 days
10-09-12 12:46 AM
| ID: 669170 | 1392 Words
| ID: 669170 | 1392 Words
Note: This is the 1st Vizzed-exclusive (non-GameFAQs) walkthrough. Because of certain games having too many FAQs, they are rejected due to oversaturation. If I come across a game like that I want to make a guide for, I'll post them here as an exclusive though they'll also end up on my website.
Zelda no Densetsu: The Hyrule Fantasy System: Famicom Disk System/Nintendo Entertainment System INTRODUCTION Journey to the Land of Hyrule where people of every race roam around. You are stunning young lad named Link and your quest is to journey through nine dungeons and collect the 8 pieces of the Triforce of Wisdom that Princess Zelda had scattered all over the land to keep it out of the Evil Gannon's hands then once all pieces are gathered, head over to Death Mountain to defeat Gannon whom already controls the Triforce of Power and save the Land of Hyrule from impending doom. CONTROLS D-pad = Move in that direction (no diagonal movements) B button = Use Sub-item/Sub-Weapon A button = Sword Start button = Inventory Select button = Pause ENEMIES - OVERWORLD   Octorock The Octorocks will spit rocks at link but they can be defleted by his Shield when he is not attacking them. Blue ones take an extra hit to destroy with a regular sword.   Tektite The Tektites are spider-like creatures that hop around the screen and try to land on you. The blue ones seem to drop more 5-Rupies.   Leever Leevers rise from the ground and try to crash into Link. Red ones will try to sprout from somewhere underneath him and follow him around. Blue ones cause more damage to Link and wander aimlessly.   Moblin Moblins are dog-faced enemies that appear and shoot arrows in Link's direction. the blue ones take more hits to destroy.   Lynel Lynels heave Swords at Link similar to the ones that Link throws when he is at full health. They do sever damage if Link doesn't have a Blue or Red Ring on him. Blue ones take more damage to defeat. The swords can only be deflected by the Magic Shield.  Peahat Peahats are enemies who fly around aimlessly then stop for a few seconds before flying again. You can only hit them while they are still or you can blow them up with a bomb.  Zora Zoras hide in the water and only come out to attack with a spherical beam that can only be deflected by a Magic Shield.  Ghini Ghini is a ghost that appears in the graveyard area of Hyrule. The first one you see is the only one that can be harmed. Touching a tombstone will make more come out but they can't be harmed. Killing the head Ghini will kill them though and they will drop hearts or rupies.  Armos Despite having what looks like a shield, they are not invincible from the front. They are still until you touch them. Don't touch them from the front or they will damage you. They often guard secret areas including the entrance to the 2nd dungeon in Quest 2.  Boulder They are not really enemies but they do come tumbling down on certain screens and damage Link if they make contact with him. ENEMIES - DUNGEON  Keese Keese are bats that serve as annoying pests to get rid of. They can be defeated by anything that does damage to them including the boomerang.  Gel Small enemies that move around the room in random patterns. They can be killed by Boomerangs too.  Zol When you kill these with the normal sword, they split into two Gels.  Stalfos Skeletons that move around in random patterns. In Quest 2, they shoot sword beams.  Like Like Watch out for these guys. If you have a Magic Shield, they will eat it up if they catch you and you don't beat them off in time.  Pols Voice Rabbit heads that hop around the room. They do heavy damage if they crash into you. The arrows can defeat them in one shot. On the Famicom Disk System version, you can blow into the microphone on Controller 2 to kill them and make them drop items.  Vire Hops all around the room, killing them with a normal or white swords splits them into two red Keese.  Wallmaster They guard boss rooms. If they catch you, they'll drag you back to the beginning of the dungeon.  Gibdo These mummies move around aimlessly. What makes them so dangerous is that they pack up quickly and take lots of damage before they die.  Blade Trap When Link is level with them, they try to close up on him. Move in then move out to make them close then move forward when they reset.  Moldorm They'll sprout out the ground and move around the room wildly. They compose of many sections that must be destroyed to defeat it completely.  Stone Statue Some of these statues will spit orbs wherever Link stands. Magic Shields can repel bullets.  Patra Found only in the 9th dungeon, it lets the Mini Patras damage you. You must kill all the mini-Patras in order to harm Patra whom offers no resistance once defenseless.   Goriya They heave boomerangs at Link. Blue ones take more damage to kill. There is a certain red one named "Grumble Grumble" that appears in some dungeouns that you must give it Meat to pass through to the next section of the dungeon.   Darknut These are the most annoying enemies in the game. They block frontal attacks so you have to maneuver around them at the right angle to get a stab in. Blue ones take more damage.   Wizzrobe Wizzrobes come in two varieties that both shoot magic spells that can only be deflected by the Magic Shield. Orange ones will disappear then appear at spots level with Link and shoot before disappearing again. Blue ones will float over to a spot level with Link and rapidly shoot spells as long as they are level with him.   Lanmola They'll sprout out the ground and move around the room wildly. They compose of many sections that must be destroyed to defeat it completely. Blue ones move faster.   Rope When level with Link, they dart towards him. Flashing ones appear in Quest 2 and dish out more damage.    Bubble If a Bubble hits Link, he'll be unable to use his sword for a few seconds unless he uses the Recorder. Red and Blue ones appear in Quest 2. Red ones will take away his sword permanently unless he touches a Blue one to restore it or visits a fairy fountain on the outside. BOSSES  Aquamentus The first boss you'll likely meet in the game. They'll shoot three orbs in Link's direction simultaneously. You can move between the orbs to get to it and start stabbing at it or fire at it from afar with full health.  Dodongo Nothing can penetrate Dodongo's armor unless you blow it up from the inside. Feed it a bomb by placing one in its line of travel. If it eats it, it'll blow up in its belly. 2 bombs will do the trick. Another way to kill it is to plant a bomb that it doesn't eat but the explosion will stun it and allow you to slash it once with your sword to kill it.  Manhandla You must destroy all four arms to kill it. The more arms it loses, the master it moves. One well placed bomb can kill all four in one blast.  Gleeok They have 2, 3 or 4 heads depending on the dungeoun you are in. You must defeat each head to defeat it completely. Each defeated head turns red and starts moving around the room shooting at Link.  Digdogger If you blow the recorder, Digdogger will shrink down to the size of Link and sometimes split into 3 miniature Digdoggers. Once shrunken, it will move around the room and be vulnerable to sword slashes.  Gohma Gohma can only be hurt by shooting an arrow into its eye while it's completely open. They shoot orbs at Link's location.  Ganon The head boss himself will turn invisible and warp around different parts of the room shooting orbs. If you manage to hit him, he'll appear and then disappear again. After you do enough damage to him, he turns brown and one Silver Arrow will finish him off. Zelda no Densetsu: The Hyrule Fantasy System: Famicom Disk System/Nintendo Entertainment System INTRODUCTION Journey to the Land of Hyrule where people of every race roam around. You are stunning young lad named Link and your quest is to journey through nine dungeons and collect the 8 pieces of the Triforce of Wisdom that Princess Zelda had scattered all over the land to keep it out of the Evil Gannon's hands then once all pieces are gathered, head over to Death Mountain to defeat Gannon whom already controls the Triforce of Power and save the Land of Hyrule from impending doom. CONTROLS D-pad = Move in that direction (no diagonal movements) B button = Use Sub-item/Sub-Weapon A button = Sword Start button = Inventory Select button = Pause ENEMIES - OVERWORLD OctorockThe Octorocks will spit rocks at link but they can be defleted by his Shield when he is not attacking them. Blue ones take an extra hit to destroy with a regular sword. TektiteThe Tektites are spider-like creatures that hop around the screen and try to land on you. The blue ones seem to drop more 5-Rupies. LeeverLeevers rise from the ground and try to crash into Link. Red ones will try to sprout from somewhere underneath him and follow him around. Blue ones cause more damage to Link and wander aimlessly. MoblinMoblins are dog-faced enemies that appear and shoot arrows in Link's direction. the blue ones take more hits to destroy. LynelLynels heave Swords at Link similar to the ones that Link throws when he is at full health. They do sever damage if Link doesn't have a Blue or Red Ring on him. Blue ones take more damage to defeat. The swords can only be deflected by the Magic Shield. PeahatPeahats are enemies who fly around aimlessly then stop for a few seconds before flying again. You can only hit them while they are still or you can blow them up with a bomb. ZoraZoras hide in the water and only come out to attack with a spherical beam that can only be deflected by a Magic Shield. GhiniGhini is a ghost that appears in the graveyard area of Hyrule. The first one you see is the only one that can be harmed. Touching a tombstone will make more come out but they can't be harmed. Killing the head Ghini will kill them though and they will drop hearts or rupies. ArmosDespite having what looks like a shield, they are not invincible from the front. They are still until you touch them. Don't touch them from the front or they will damage you. They often guard secret areas including the entrance to the 2nd dungeon in Quest 2. BoulderThey are not really enemies but they do come tumbling down on certain screens and damage Link if they make contact with him. ENEMIES - DUNGEON KeeseKeese are bats that serve as annoying pests to get rid of. They can be defeated by anything that does damage to them including the boomerang. GelSmall enemies that move around the room in random patterns. They can be killed by Boomerangs too. ZolWhen you kill these with the normal sword, they split into two Gels. StalfosSkeletons that move around in random patterns. In Quest 2, they shoot sword beams. Like LikeWatch out for these guys. If you have a Magic Shield, they will eat it up if they catch you and you don't beat them off in time. Pols VoiceRabbit heads that hop around the room. They do heavy damage if they crash into you. The arrows can defeat them in one shot. On the Famicom Disk System version, you can blow into the microphone on Controller 2 to kill them and make them drop items. VireHops all around the room, killing them with a normal or white swords splits them into two red Keese. WallmasterThey guard boss rooms. If they catch you, they'll drag you back to the beginning of the dungeon. GibdoThese mummies move around aimlessly. What makes them so dangerous is that they pack up quickly and take lots of damage before they die. Blade TrapWhen Link is level with them, they try to close up on him. Move in then move out to make them close then move forward when they reset. MoldormThey'll sprout out the ground and move around the room wildly. They compose of many sections that must be destroyed to defeat it completely. Stone StatueSome of these statues will spit orbs wherever Link stands. Magic Shields can repel bullets. PatraFound only in the 9th dungeon, it lets the Mini Patras damage you. You must kill all the mini-Patras in order to harm Patra whom offers no resistance once defenseless. GoriyaThey heave boomerangs at Link. Blue ones take more damage to kill. There is a certain red one named "Grumble Grumble" that appears in some dungeouns that you must give it Meat to pass through to the next section of the dungeon. DarknutThese are the most annoying enemies in the game. They block frontal attacks so you have to maneuver around them at the right angle to get a stab in. Blue ones take more damage. WizzrobeWizzrobes come in two varieties that both shoot magic spells that can only be deflected by the Magic Shield. Orange ones will disappear then appear at spots level with Link and shoot before disappearing again. Blue ones will float over to a spot level with Link and rapidly shoot spells as long as they are level with him. LanmolaThey'll sprout out the ground and move around the room wildly. They compose of many sections that must be destroyed to defeat it completely. Blue ones move faster. RopeWhen level with Link, they dart towards him. Flashing ones appear in Quest 2 and dish out more damage. BubbleIf a Bubble hits Link, he'll be unable to use his sword for a few seconds unless he uses the Recorder. Red and Blue ones appear in Quest 2. Red ones will take away his sword permanently unless he touches a Blue one to restore it or visits a fairy fountain on the outside. BOSSES AquamentusThe first boss you'll likely meet in the game. They'll shoot three orbs in Link's direction simultaneously. You can move between the orbs to get to it and start stabbing at it or fire at it from afar with full health. DodongoNothing can penetrate Dodongo's armor unless you blow it up from the inside. Feed it a bomb by placing one in its line of travel. If it eats it, it'll blow up in its belly. 2 bombs will do the trick. Another way to kill it is to plant a bomb that it doesn't eat but the explosion will stun it and allow you to slash it once with your sword to kill it. ManhandlaYou must destroy all four arms to kill it. The more arms it loses, the master it moves. One well placed bomb can kill all four in one blast. GleeokThey have 2, 3 or 4 heads depending on the dungeoun you are in. You must defeat each head to defeat it completely. Each defeated head turns red and starts moving around the room shooting at Link. DigdoggerIf you blow the recorder, Digdogger will shrink down to the size of Link and sometimes split into 3 miniature Digdoggers. Once shrunken, it will move around the room and be vulnerable to sword slashes. GohmaGohma can only be hurt by shooting an arrow into its eye while it's completely open. They shoot orbs at Link's location. GanonThe head boss himself will turn invisible and warp around different parts of the room shooting orbs. If you manage to hit him, he'll appear and then disappear again. After you do enough damage to him, he turns brown and one Silver Arrow will finish him off. -------------------- |
Vizzed Elite
Affected by 'Laziness Syndrome'
Registered: 10-06-12
Last Post: 2727 days
Last Active: 227 days
| Ice Queen Zero |
Affected by 'Laziness Syndrome'
Registered: 10-06-12
Last Post: 2727 days
Last Active: 227 days
10-08-12 02:52 PM
| ID: 668451 | 29 Words
| ID: 668451 | 29 Words
Thanks for the Viz. I'll submit some screen shots for this thing because little ol' me made a boo-boo by putting the Beta Ticket Item where the Laptop was. I'll submit some screen shots for this thing because little ol' me made a boo-boo by putting the Beta Ticket Item where the Laptop was. -------------------- |
Vizzed Elite
Affected by 'Laziness Syndrome'
Registered: 10-06-12
Last Post: 2727 days
Last Active: 227 days
| Ice Queen Zero |
Affected by 'Laziness Syndrome'
Registered: 10-06-12
Last Post: 2727 days
Last Active: 227 days
10-08-12 03:40 AM
| ID: 668105 | 2499 Words
| ID: 668105 | 2499 Words
Edit: This forum's formatting is atrocious. I meant to post this in the walkthrough section
Game : Space Harrier 3-D The intergalactic warrior Space Harrier returns... in an all-new 3D adventure! The peaceful Land of the Dragons is again under attack. Evil creatures fill the land and sky. Euria, the magnificent white dragon, is being held prisoner in a diabolical trap. Only you, the Space Harrier, can set him free. But this time, the challenge is greater than ever before! Put on your SegaScope 3D Glasses. The screen will come alive with new 3D graphics, enemies and wild new battle scenes! Only you stand between the peaceful dragons and defeat. Get ready for the battle of a lifetime! INTRODUCTION Space Harrier 3-D for the Sega Master System is one of eight SMS games that are made in 3-D and require the Sega 3D glasses in order to play it properly. It is the sequel to the original Space Harrier not the same game. Therefore the secret options code won't work in this version of the game though. STORY Once, the peaceful Land of the Dragons had suffered under a reign of terror. Evil creatures stalked the land, leaving death and destruction in their wake. A call went out to the farthest reaches of the Galaxy for a Champion brave enough to challenge this evil. The call was answered by Space Harrier, a young warrior with an atomic blaster and the ability to fly. With the help of Euria, the true Dragon Prince, Space Harrier defeated the enemies of the Land of the Dragons and returned the Dragon King to his throne. With peace again ruling the land, Space Harrier departed. Then, one year later, the Dragon King died... and the Land of the Dragons was thrown into chaos! As Euria prepared to take the throne, his evil cousin invaded Euria's castle and took the throne. Even worse... Euria disappeared! Now Space Harrier has returned to the Land of Dragons to find Euria and restore him to the rightful throne. But this time, he must journey farther than he ever has before, right into the jaws of the most vicious monsters in the galaxy! To complete this mission, Space Harrier needs your help. The Land of the Dragons is depending on you! CONTROLS D-pad = move around the area in any direction 1 or 2 button = Start game/Shoot ENEMIES + SCORING You earn 10 points for every second you are alive. You even earn points this way even after the game is already won so it's more like you get points everytime the screen itself is actively moving. Blossom: 1,000pts Turbo Jet: 3,000pts Flyer: 3,000pts Loidal: 3,000pts Rathon: 3,000pts Be: 1,000pts Slime: 1,000pts Ice Pole: 1,000pts Laser: 3,000pts Clone: 3,000pts Moula (non-boss): 10,000pts Apparition: 3,000pts TFO: 3,000pts Hobogoblin: 3,000pts Qab: 3,000pts Kentar: 3,000pts Ogre: 3,000pts Do-Go: 3,000pts Meye: 10,000pts Mount: 1,000pts - 3,000pts (Round 9) Collo: 3,000pts Inazoomi: 5,000pts Sunzu: 3,000pts Crystal: 5,000pts Aei Manta: 3,000pts Gongue: 3,000pts Hand: 3,000pts Janue-Eye: 3,000pts Cam: 3,000pts UFO: 3,000pts Guard: 3,000pts Mitokonda: 3,000pts Elecker: 10,000pts ~Boss~ Dylos: 50,000pts Moula: 30,000pts Zapple: 50,000pts Gomest: 50,000pts Musha: 30,000pts Yorde: 50,000pts Janue: 50,000pts Mecadence: 50,000pts Cool Damonia: 50,000pts Almer: 5,000pts King Doht: 50,000pts Evil Dragon King: 50,000pts ~These enemies can't be destroyed~ Pole Tower Be-Bo Rock Dog Dai Nurwall Pole-2 Samurai GAMEPLAY -You die by getting shot or collision with an enemy or object. -You gain lives every 5 million points. -After you lose all lives the game is over. -This game is in 3-D so you will need the 3-D glasses to initially play the game but if you get a high score. You can insert the word THREE in the high scores table to turn the game into 2-D. You must use the 2nd controller to insert the name. -With the same method, you can insert the word SOUND for a sound test and LEVEL to adjust the difficulty. -Difficulties is as goes: EASY = 4 Lives, NORMAL = 3 Lives, HARD = 2 Lives -If you lose all lives, press 2, 1, 2, 1, 1 before the words GAME OVER appears and you will Continue the game where you left off. WALKTHROUGH ~Level 1: Platia~Enemies: Blossom, Flyer, Turbo Jet, Tower, Dylos (Boss) Start off by running on the ground and killing the Blossoms to rack up points. The Flyers will come in waves next and will shoot at you. After a couple waves, more Blossoms appear followed by another wave of Flyers. Run past a few Towers as they can't be destroyed. The Turbo Jets will come in and shoot at you. When they reach the front of the screen, they'll fly upward and show their underside and be vulnerable to shots. After a wave of them, they'll leave for a little while then return. Continue fighting while avoiding the Towers. Flyers will come in from the rear. They can't kill you by doing this though. Shoot them the first chance you get so that's less shots to avoid. After a few seconds, they'll start flying towards you. Shoot more Blossoms as the Flyers come in from the rear then back towards you. Avoid more Towers then kill three more Turbo Jets. The first boss, Dylos appears. Boss Fight: Dylos If you've played any Space Harrier game before, then you'll know how the dragon type bosses are. They come waving in as they shoot their bullets. When they get to the front, they'll stop shooting and show their full face for all to see then wave back to retreat and shoot at you when they get far back away. The pattern repeats. They all end up eating bullets this way and the more damage they take, their color will change until they die. Dylos is no different than the others and he'll most likely fall on the first pass if fast enough. ~Level 2: Moura~Enemies: Pole, Slime, Rathon, Loidal, Moula (boss) You are in for it now. Poles can appear from the top or the bottom. They are indestructible. The ones from the top can kill you if you run into them when they touch down onto the ground. Avoid the top poles then start shooting at the slime as you avoid poles from either top or bottom. The Rathons behave like the Flyers from earlier except they don't attack in packs. They try to shoot and fly into you from random spots. Avoid more poles and kill the Loidals who do attack in packs. After several waves of Rathons, you face MoulaBoss Fight: Moula You will see three of them form in like Transformers. They will stand there and take damage before moving around in a ellipse motion. Like the planets revolving around the sun from a frontal view. Shoot each one as they pass by while you are avoiding their shots. Kill all three to advance to the next level. ~Level 3: Bits~ Enemies: Be, Be-Bo, Clone, TFO, Zapple 1 + Laser (boss) You start out shooting at the Bes. The indestructible object here is the Be-Bo which is a Be on a pole. Avoid those while shooting the Bes. The Clones arrive and they only try to collide with you. The TFOs arrive and they try to get in one shot before leaving the screen. After several waves of shooting Bes, TFOs, and Clones while avoiding Be-Bos you face off against Zapple. Boss Fight: Zapple Round 1 This is the first battle against Zapple and its a quick one. All you got to do here is shoot away the Lasers that surround him. Then get in a few shot and he goes down so quickly. Kill off any remaining Lasers to complete the level. ~Level 4: Hardegga~ Boss: Ice Pole, Apparition, Kentar, Do-Go, Qab, Gomest + Hobgolin (boss) Avoid the Ice Poles and take out the Apparitions. Next you'll go up against some Kentars that fly in and out while spitting fireballs. Kill them as the Ice Poles get in your way. Do-Gos will rain down and try to collide with you or spit fire. Qabs arrive next and they attack in wave packs. After they're gone. You face a couple wave of Kentars and Apparitions before going against Gomest. Boss Fight: Gomest Gomest ain't so tough either. Concentrate on doing away with his Hobgoblins and once they are all gone, the next shot will kill him. ~Level 5: Heam~ Enemies: Mount, Flyer, Dai, Ogre, Rock Dog, Meye, Musha (boss) It's getting hot in here but don't take off all your clothes. You start off by shooting through a series of Mounts. A wave of Flyers come in from behind and they shoot hot rocks. This is where things can be tough, you got an obstacle called Dais that come bouncing at you and they can't be destroyed. Find yourself an opening quickly to get past them. Ogres come in to pester you but they are just like the Loidals. Indestructible Rock Dogs come in and try to collide with you by getting in the way on the ground then trying to extend themselves when you are airborne. A trio of Meyes come spiraling in and they stop in front of you and open their eyes to shoot. They can only be killed when their eyes are opened. They'll go away if their not killed so killing them is not a must. Get past more Dais and kill more Mounts. Destroy another pack of Meyes and more of the Flyers. Get past more Mounts and Rock Dogs. Boss Fight: Musha You face a trio of them. The object here is avoid the fireballs they shoot by slashing downwards. The first two will fall easily. The last one will take a few shots then retreat before attacking again a couple times. Destroy it like you did the other two. ~Level 6: Yorde~ Enemies: Pole, Collo, Rathon, Lodai, Moula (non-boss), Yorde (boss) Avoid the Poles as you shoot the Collos. Just like in Level 2, the poles can get you from the top or the bottom. Kill the Rathons and several waves of Lodais. Non-boss Moula appear from behind for a few waves then they form in front of you to fight you but they fall easily. After they are dead, you face Yorde. Boss Fight: Yorde Are you kidding me? He dies in 7 or 8 shots. All you got to do is shoot him when not staying in the same spot and he is gone. ~Level 7: Dayamon~ Enemies: Nurwall, Sunzu, Hand, Inazoomi, Janue (boss) Avoid the Nurwalls as they are indestructible. Worry about killing the Sunzus and Hands as well as the Inazoomis coming from the rear who behave just like the Moulas from Yorde. You face another wave of Sunzus and Inazoomis then you face the boss already. Boss Fight: Janue Round 1 This is the toughest boss fight up to this point. Janue will send dual fireballs where you stand and they are fast. You have to be constantly on the move to get past them. What makes it even tougher is that Janue takes several shots to kill. ~Level 8: Manmo~ Enemies: Ice Pole, Kentar, Do-Go, Qab, Apparition, Mecadence (boss) The Ice Poles can't be destroyed. Avoid them and shoot the Kentars. The Do-Gos will rain in then you got Qabs to take out too as well as a wave of Apparitions and more Kentars and Qabs. The Ice Poles move in fast. After all enemies are down you face Mecadence. Boss Fight: Mecadence He fights like Dylos except he is only faster and takes more hits. ~Level 9: Alphamic~ Enemies: Pole-2, Crystal, Aei Manta, Gongue, Cool Damonia + Mount (boss) This level consists of dodging Pole-2s and shooting Crystals, Aei Mantas, and Gongues and that's pretty much it. The Pole-2 move extremely fast as do the enemy shots. Boss: Cool Damonia Shoot away all the Mounts that come in as you get in shots on Cool Damonia. It will take some quick dodging to survive here. Stay on your toes. ~Level 10: Mecamanim~ Enemies: Tower, UFO, Flyer, Aei Manta, Almer (boss) Dodge the Towers and kill the UFOs. Flyers will come in from the front and the back. Take out a few Aei Mantas here and there and more Flyers as you dodge more Towers and kill Aei Mantas on route to the boss. Boss Fight: Almer There are bunch of them that rain in and turn into igloos after they touch the ground and shoot rapidly. Fly in a circle to avoid their shots then kill them off one by one till victory. Some will even retreat and that'll help you a lot. ~Level 11: Godde~ Enemies: Hand, Mitokonda, Nurwall, Sunzu Janue + Janue Eye (boss) Shoot the Hands on the ground for points. Then shoot the Mitokonda. The Hands in the air will shoot at you. Stay in the air to avoid the Nurwall and shoot the Sunzus. Kill more Hands and Mitokondas while airborne. The ground Hands will start to shoot near the end of the level. Survive here for Round 2 with Janue. Boss Fight: Janue Round 2 This fight starts out with Janue shooting eyes at you. Shoot them all and Janue will fight you like before and shoot dual fireballs rapidly. At least Janue does not take much damage this time. ~Level 12: Doht~ Enemies: Pole 2, Meye, Cam, Rock Dog, Flyer, Ogre, King Doht (boss) Avoid the Pole 2s and soon you'll come across a wall of Meyes. Kill some of them until they retreat. Keep avoiding those Pole 2s as you take out some Cams. Now you got to avoid the Rock Dogs. Once past them, kill some Flyers and Ogres. Get past a Trio of Meyes and some Rock Dogs. Another Meye wal appears, kill them as you please but watch out for Pole 2s. A few Flyers and Ogres later and you face King Doht. Boss Fight: King Doht There are 2 of them. They fight like the Dragons except they come spiraling in rather than waving in. Like them, they stop shooting when in your face and take heavy damage before retreating for another go around. Defeat them both to win.~Level 13: Meltedia~ Enemies: Be, Be-Bo, Elecker, Clone, TFO, Laser, Zappos + Guard (boss) Avoid the Be-Bos as you shoot the Bes. Kill some Eleckers, Clones, Lasers, and TFOs too. After dealing with several waves of Eleckers you fight Zappos again. Boss Fight: Zapple Instead of Lasers, Zapple protects itself with Guards. Shoot them away then just shoot it three times and it's finished.~Boss Rush~ You face all the bosses in order, one by one. Use the same strategies as you did before to beat them. Final Boss: Dark Uriah This is the same fight with Dylos and Mecadence except Dark Uria does not stay in your face for too long thus he the fastest of the three but his pattern of attack is still the same defeat him and Euria is free. Game : Space Harrier 3-D The intergalactic warrior Space Harrier returns... in an all-new 3D adventure! The peaceful Land of the Dragons is again under attack. Evil creatures fill the land and sky. Euria, the magnificent white dragon, is being held prisoner in a diabolical trap. Only you, the Space Harrier, can set him free. But this time, the challenge is greater than ever before! Put on your SegaScope 3D Glasses. The screen will come alive with new 3D graphics, enemies and wild new battle scenes! Only you stand between the peaceful dragons and defeat. Get ready for the battle of a lifetime! INTRODUCTION Space Harrier 3-D for the Sega Master System is one of eight SMS games that are made in 3-D and require the Sega 3D glasses in order to play it properly. It is the sequel to the original Space Harrier not the same game. Therefore the secret options code won't work in this version of the game though. STORY Once, the peaceful Land of the Dragons had suffered under a reign of terror. Evil creatures stalked the land, leaving death and destruction in their wake. A call went out to the farthest reaches of the Galaxy for a Champion brave enough to challenge this evil. The call was answered by Space Harrier, a young warrior with an atomic blaster and the ability to fly. With the help of Euria, the true Dragon Prince, Space Harrier defeated the enemies of the Land of the Dragons and returned the Dragon King to his throne. With peace again ruling the land, Space Harrier departed. Then, one year later, the Dragon King died... and the Land of the Dragons was thrown into chaos! As Euria prepared to take the throne, his evil cousin invaded Euria's castle and took the throne. Even worse... Euria disappeared! Now Space Harrier has returned to the Land of Dragons to find Euria and restore him to the rightful throne. But this time, he must journey farther than he ever has before, right into the jaws of the most vicious monsters in the galaxy! To complete this mission, Space Harrier needs your help. The Land of the Dragons is depending on you! CONTROLS D-pad = move around the area in any direction 1 or 2 button = Start game/Shoot ENEMIES + SCORING You earn 10 points for every second you are alive. You even earn points this way even after the game is already won so it's more like you get points everytime the screen itself is actively moving. Blossom: 1,000pts Turbo Jet: 3,000pts Flyer: 3,000pts Loidal: 3,000pts Rathon: 3,000pts Be: 1,000pts Slime: 1,000pts Ice Pole: 1,000pts Laser: 3,000pts Clone: 3,000pts Moula (non-boss): 10,000pts Apparition: 3,000pts TFO: 3,000pts Hobogoblin: 3,000pts Qab: 3,000pts Kentar: 3,000pts Ogre: 3,000pts Do-Go: 3,000pts Meye: 10,000pts Mount: 1,000pts - 3,000pts (Round 9) Collo: 3,000pts Inazoomi: 5,000pts Sunzu: 3,000pts Crystal: 5,000pts Aei Manta: 3,000pts Gongue: 3,000pts Hand: 3,000pts Janue-Eye: 3,000pts Cam: 3,000pts UFO: 3,000pts Guard: 3,000pts Mitokonda: 3,000pts Elecker: 10,000pts ~Boss~ Dylos: 50,000pts Moula: 30,000pts Zapple: 50,000pts Gomest: 50,000pts Musha: 30,000pts Yorde: 50,000pts Janue: 50,000pts Mecadence: 50,000pts Cool Damonia: 50,000pts Almer: 5,000pts King Doht: 50,000pts Evil Dragon King: 50,000pts ~These enemies can't be destroyed~ Pole Tower Be-Bo Rock Dog Dai Nurwall Pole-2 Samurai GAMEPLAY -You die by getting shot or collision with an enemy or object. -You gain lives every 5 million points. -After you lose all lives the game is over. -This game is in 3-D so you will need the 3-D glasses to initially play the game but if you get a high score. You can insert the word THREE in the high scores table to turn the game into 2-D. You must use the 2nd controller to insert the name. -With the same method, you can insert the word SOUND for a sound test and LEVEL to adjust the difficulty. -Difficulties is as goes: EASY = 4 Lives, NORMAL = 3 Lives, HARD = 2 Lives -If you lose all lives, press 2, 1, 2, 1, 1 before the words GAME OVER appears and you will Continue the game where you left off. WALKTHROUGH ~Level 1: Platia~Enemies: Blossom, Flyer, Turbo Jet, Tower, Dylos (Boss) Start off by running on the ground and killing the Blossoms to rack up points. The Flyers will come in waves next and will shoot at you. After a couple waves, more Blossoms appear followed by another wave of Flyers. Run past a few Towers as they can't be destroyed. The Turbo Jets will come in and shoot at you. When they reach the front of the screen, they'll fly upward and show their underside and be vulnerable to shots. After a wave of them, they'll leave for a little while then return. Continue fighting while avoiding the Towers. Flyers will come in from the rear. They can't kill you by doing this though. Shoot them the first chance you get so that's less shots to avoid. After a few seconds, they'll start flying towards you. Shoot more Blossoms as the Flyers come in from the rear then back towards you. Avoid more Towers then kill three more Turbo Jets. The first boss, Dylos appears. Boss Fight: Dylos If you've played any Space Harrier game before, then you'll know how the dragon type bosses are. They come waving in as they shoot their bullets. When they get to the front, they'll stop shooting and show their full face for all to see then wave back to retreat and shoot at you when they get far back away. The pattern repeats. They all end up eating bullets this way and the more damage they take, their color will change until they die. Dylos is no different than the others and he'll most likely fall on the first pass if fast enough. ~Level 2: Moura~Enemies: Pole, Slime, Rathon, Loidal, Moula (boss) You are in for it now. Poles can appear from the top or the bottom. They are indestructible. The ones from the top can kill you if you run into them when they touch down onto the ground. Avoid the top poles then start shooting at the slime as you avoid poles from either top or bottom. The Rathons behave like the Flyers from earlier except they don't attack in packs. They try to shoot and fly into you from random spots. Avoid more poles and kill the Loidals who do attack in packs. After several waves of Rathons, you face MoulaBoss Fight: Moula You will see three of them form in like Transformers. They will stand there and take damage before moving around in a ellipse motion. Like the planets revolving around the sun from a frontal view. Shoot each one as they pass by while you are avoiding their shots. Kill all three to advance to the next level. ~Level 3: Bits~ Enemies: Be, Be-Bo, Clone, TFO, Zapple 1 + Laser (boss) You start out shooting at the Bes. The indestructible object here is the Be-Bo which is a Be on a pole. Avoid those while shooting the Bes. The Clones arrive and they only try to collide with you. The TFOs arrive and they try to get in one shot before leaving the screen. After several waves of shooting Bes, TFOs, and Clones while avoiding Be-Bos you face off against Zapple. Boss Fight: Zapple Round 1 This is the first battle against Zapple and its a quick one. All you got to do here is shoot away the Lasers that surround him. Then get in a few shot and he goes down so quickly. Kill off any remaining Lasers to complete the level. ~Level 4: Hardegga~ Boss: Ice Pole, Apparition, Kentar, Do-Go, Qab, Gomest + Hobgolin (boss) Avoid the Ice Poles and take out the Apparitions. Next you'll go up against some Kentars that fly in and out while spitting fireballs. Kill them as the Ice Poles get in your way. Do-Gos will rain down and try to collide with you or spit fire. Qabs arrive next and they attack in wave packs. After they're gone. You face a couple wave of Kentars and Apparitions before going against Gomest. Boss Fight: Gomest Gomest ain't so tough either. Concentrate on doing away with his Hobgoblins and once they are all gone, the next shot will kill him. ~Level 5: Heam~ Enemies: Mount, Flyer, Dai, Ogre, Rock Dog, Meye, Musha (boss) It's getting hot in here but don't take off all your clothes. You start off by shooting through a series of Mounts. A wave of Flyers come in from behind and they shoot hot rocks. This is where things can be tough, you got an obstacle called Dais that come bouncing at you and they can't be destroyed. Find yourself an opening quickly to get past them. Ogres come in to pester you but they are just like the Loidals. Indestructible Rock Dogs come in and try to collide with you by getting in the way on the ground then trying to extend themselves when you are airborne. A trio of Meyes come spiraling in and they stop in front of you and open their eyes to shoot. They can only be killed when their eyes are opened. They'll go away if their not killed so killing them is not a must. Get past more Dais and kill more Mounts. Destroy another pack of Meyes and more of the Flyers. Get past more Mounts and Rock Dogs. Boss Fight: Musha You face a trio of them. The object here is avoid the fireballs they shoot by slashing downwards. The first two will fall easily. The last one will take a few shots then retreat before attacking again a couple times. Destroy it like you did the other two. ~Level 6: Yorde~ Enemies: Pole, Collo, Rathon, Lodai, Moula (non-boss), Yorde (boss) Avoid the Poles as you shoot the Collos. Just like in Level 2, the poles can get you from the top or the bottom. Kill the Rathons and several waves of Lodais. Non-boss Moula appear from behind for a few waves then they form in front of you to fight you but they fall easily. After they are dead, you face Yorde. Boss Fight: Yorde Are you kidding me? He dies in 7 or 8 shots. All you got to do is shoot him when not staying in the same spot and he is gone. ~Level 7: Dayamon~ Enemies: Nurwall, Sunzu, Hand, Inazoomi, Janue (boss) Avoid the Nurwalls as they are indestructible. Worry about killing the Sunzus and Hands as well as the Inazoomis coming from the rear who behave just like the Moulas from Yorde. You face another wave of Sunzus and Inazoomis then you face the boss already. Boss Fight: Janue Round 1 This is the toughest boss fight up to this point. Janue will send dual fireballs where you stand and they are fast. You have to be constantly on the move to get past them. What makes it even tougher is that Janue takes several shots to kill. ~Level 8: Manmo~ Enemies: Ice Pole, Kentar, Do-Go, Qab, Apparition, Mecadence (boss) The Ice Poles can't be destroyed. Avoid them and shoot the Kentars. The Do-Gos will rain in then you got Qabs to take out too as well as a wave of Apparitions and more Kentars and Qabs. The Ice Poles move in fast. After all enemies are down you face Mecadence. Boss Fight: Mecadence He fights like Dylos except he is only faster and takes more hits. ~Level 9: Alphamic~ Enemies: Pole-2, Crystal, Aei Manta, Gongue, Cool Damonia + Mount (boss) This level consists of dodging Pole-2s and shooting Crystals, Aei Mantas, and Gongues and that's pretty much it. The Pole-2 move extremely fast as do the enemy shots. Boss: Cool Damonia Shoot away all the Mounts that come in as you get in shots on Cool Damonia. It will take some quick dodging to survive here. Stay on your toes. ~Level 10: Mecamanim~ Enemies: Tower, UFO, Flyer, Aei Manta, Almer (boss) Dodge the Towers and kill the UFOs. Flyers will come in from the front and the back. Take out a few Aei Mantas here and there and more Flyers as you dodge more Towers and kill Aei Mantas on route to the boss. Boss Fight: Almer There are bunch of them that rain in and turn into igloos after they touch the ground and shoot rapidly. Fly in a circle to avoid their shots then kill them off one by one till victory. Some will even retreat and that'll help you a lot. ~Level 11: Godde~ Enemies: Hand, Mitokonda, Nurwall, Sunzu Janue + Janue Eye (boss) Shoot the Hands on the ground for points. Then shoot the Mitokonda. The Hands in the air will shoot at you. Stay in the air to avoid the Nurwall and shoot the Sunzus. Kill more Hands and Mitokondas while airborne. The ground Hands will start to shoot near the end of the level. Survive here for Round 2 with Janue. Boss Fight: Janue Round 2 This fight starts out with Janue shooting eyes at you. Shoot them all and Janue will fight you like before and shoot dual fireballs rapidly. At least Janue does not take much damage this time. ~Level 12: Doht~ Enemies: Pole 2, Meye, Cam, Rock Dog, Flyer, Ogre, King Doht (boss) Avoid the Pole 2s and soon you'll come across a wall of Meyes. Kill some of them until they retreat. Keep avoiding those Pole 2s as you take out some Cams. Now you got to avoid the Rock Dogs. Once past them, kill some Flyers and Ogres. Get past a Trio of Meyes and some Rock Dogs. Another Meye wal appears, kill them as you please but watch out for Pole 2s. A few Flyers and Ogres later and you face King Doht. Boss Fight: King Doht There are 2 of them. They fight like the Dragons except they come spiraling in rather than waving in. Like them, they stop shooting when in your face and take heavy damage before retreating for another go around. Defeat them both to win.~Level 13: Meltedia~ Enemies: Be, Be-Bo, Elecker, Clone, TFO, Laser, Zappos + Guard (boss) Avoid the Be-Bos as you shoot the Bes. Kill some Eleckers, Clones, Lasers, and TFOs too. After dealing with several waves of Eleckers you fight Zappos again. Boss Fight: Zapple Instead of Lasers, Zapple protects itself with Guards. Shoot them away then just shoot it three times and it's finished.~Boss Rush~ You face all the bosses in order, one by one. Use the same strategies as you did before to beat them. Final Boss: Dark Uriah This is the same fight with Dylos and Mecadence except Dark Uria does not stay in your face for too long thus he the fastest of the three but his pattern of attack is still the same defeat him and Euria is free. -------------------- |
Vizzed Elite
Affected by 'Laziness Syndrome'
Registered: 10-06-12
Last Post: 2727 days
Last Active: 227 days
| Ice Queen Zero |
Affected by 'Laziness Syndrome'
Registered: 10-06-12
Last Post: 2727 days
Last Active: 227 days
10-06-12 09:42 PM
| ID: 667097 | 81 Words
| ID: 667097 | 81 Words
I'm 16 (17 as of Oct 11th) and I'm a giant compared to girls and most boys my age and it comes from the fact that on mom's side of the family nobody is usually shorter than 6ft 5in including the women by the time we reach adulthood. Mom's damn near 6'11", my aunt is 6'9", I've just caught up to my grandma who is 6'7" and I'm 6'6 1/2". Kage Negra is 6'4" and she is 15 and still growing. -------------------- |
Vizzed Elite
Affected by 'Laziness Syndrome'
Registered: 10-06-12
Last Post: 2727 days
Last Active: 227 days
| Ice Queen Zero |
Affected by 'Laziness Syndrome'
Registered: 10-06-12
Last Post: 2727 days
Last Active: 227 days
10-06-12 09:31 PM
| ID: 667076 | 34 Words
| ID: 667076 | 34 Words
Nah! Portuguese was never a strong subject for me even though I know I understand a few bits and pieces of it thanks to one of my facebook buddies I speak to on MSN. -------------------- |
Vizzed Elite
Affected by 'Laziness Syndrome'
Registered: 10-06-12
Last Post: 2727 days
Last Active: 227 days
| Ice Queen Zero |
Affected by 'Laziness Syndrome'
Registered: 10-06-12
Last Post: 2727 days
Last Active: 227 days
10-06-12 09:19 PM
| ID: 667061 | 29 Words
| ID: 667061 | 29 Words
Howdy, Davideo7. You rang? I'm here as requested. I'll be glad to bring the show over to Vizzed.com after all it has helped me a bunch in recent weeks. I'm here as requested. I'll be glad to bring the show over to Vizzed.com after all it has helped me a bunch in recent weeks. -------------------- |
Vizzed Elite
Affected by 'Laziness Syndrome'
Registered: 10-06-12
Last Post: 2727 days
Last Active: 227 days
| Ice Queen Zero |
Affected by 'Laziness Syndrome'
Registered: 10-06-12
Last Post: 2727 days
Last Active: 227 days

Page Comments
Dove4JS - 12-12-20 05:26 AM
no image
joldboy70 - 07-10-20 11:13 AM
test
joldboy70 - 07-10-20 11:12 AM
test
savage23157 - 04-08-20 01:33 PM
Hi im new vizzed
zokuza - 11-18-19 09:08 AM
final got playstaion games unlock yes baby digimon world here i com
yoshirulez! - 02-10-17 08:45 PM
MAY MAYS
yoshirulez! - 02-10-17 08:45 PM
maymays
yoshirulez! - 02-07-17 11:13 PM
OwO what's this?
yoshirulez! - 02-07-17 11:13 PM
OwO what's this?
yoshirulez! - 02-07-17 11:13 PM
OwO what's this?