

 User Notice
 Forum Links

Thread Information
Thread Actions


Dragon Warrior IV Guide
10-01-16 08:28 AM
janus is Offline
| ID: 1304262 | 8532 Words
SecureYourCodeDavid
POSTS: 4533/4824
POST EXP: 567678
LVL EXP: 23534433
CP: 64465.3
VIZ: 636962

Hello gamers and welcome to another one of my game guides, where you’ll learn to navigate quickly through the game, grind your levels and find useful treasures. Note that in chapter 5, like in the first four chapters when “bonus” characters join you, you will only be able to control the hero / heroin (the sex accounts for minor differences in clothing). You can give a general outline to the others but they will generally act on their own, which means that magic casters will pretty much waste their magic points. Chapter 1: The Royal Soldiers Village: Burland After the King’s speech, exit Burland and walk northwest to enter a cave Dungeon: Cave to Izmit Follow the path and go right at the first “dark” intersection (it reveals itself once you enter it) to get medical herbs. Go back, walk northwest around a lake and enter the dark intersection to get to obtain gold. Walk north to exit the cave and walk northeast to enter the next village. Village: Izmit Enter the village at night (walk around if needed) and visit the jail (between the priest and the weapon shop, downstairs). Talk to the man and walk all the way back to Burland. Enter the house in the southwest corner, go on the second floor and talk to the woman. Bring her to Izmit and go back to jail. After that, exit the village and go there
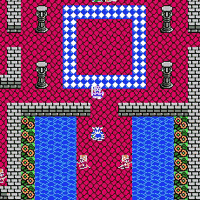
Dungeon: Old Well Walk straight into the well, follow the eastern wall down, around a lake, left, down and straight right (ignore the voice saying the opposite) to eventually get a medical herb. Walk back and this time walk down in the intersection to go downstairs. Follow the path and walk straight right once again and you will eventually reach Healie, you best chance in this chapter against the boss (even though it’s uncontrollable). Walk back, walk all the way up at the intersection and right to get gold. Walk back, keep walking left and get the flying shoes. Walk back to the first floor to the dark intersection you first missed. Enter it, jump down the hole, go upstairs and search the vase right in front of you for medical herbs; the one to the right has an agility seed. Go upstairs and walk out of the area. Now walk west to the tower on an island and use the flying shoes. Dungeon: Tower West of Izmit Walk downstairs, walk down and to the right (you will meet a friendly soldier) to go downstairs some more. Open the big door and open the chest for gold. Walk up to go upstairs and get strength seed. Walk back downstairs, walk around the “grid” down and left, enter it between columns to get scale shield and continue up to go downstairs. Open the door above you and walk left to get Sword of Malice (not cursed) and to the right to get luck seed. Walk back towards the stairs and walk down some more to go downstairs and on a healing panel. Walk back upstairs, follow the path on the left (you’re at the lower entrance of the tower now), enter the grid, go downstairs and follow the path for a fight. Be around level 7 or 8. Boss fight: Saro’s Shadow, Giant Eyeball Dispose of the eye first then attack Saro. Healie should be able to keep you healthy, but keep one or two medical herbs just in case. Watch out for his fireball and blaze spells. After that fight it seems that all random fights are over. Make it all the way back to the top (don’t forget about the healing tile if need be) and jump outside the tower. Walk back to Izmit, and then make your way back to Burland. Go to the king, exit the castle and conclude the first chapter. Chapter 2: Princess Alena’s Adventure Village: Santeem Castle One you can control Alena, talk to the bearded man in the throne room, the guard on the left on the main level (straight down from the stairs) and the man with a cap in the church (straight east of the stairs; the backroom has fairy water in the second drawer from the left). Come back upstairs, go to your room (you can see a wooden wall in it). The second drawer from the left has a feather hat; now search the wall, say yes and jump to eventually end up outside. Walk a few steps outside to have Brey and Cristo join you. Village: Surene There isn’t much to do here except upgrade your equipment. Do it as needed and exit the village. Follow the clearing to the northeast. Walk straight east from the road sign you will encounter to enter the next village. Village: Tempe Go talk to the man in blue in the first house to your right, say yes and walk to the house north of the well. Talk with the priest, say yes, walk in the basket and get ready to fight. Being around level 4 should do Boss fight: Rabidhound*2 (but appear separated), Chameleon Humanoid Make sure you have plenty of medical herbs/ magic points to heal because you will need them. Dispose of the hounds first. Sap can work on the Chameleon (but he can cast heal). After the fight simply exit the village from the back (beyond the altar where you fought). You can visit the item shop west of the shaman’s house if you’re short. Simply follow the clearing to reach the next village. Village: Frenor Walk south to a pond surrounded by flowers and go upstairs in the building to the left. Follow the people (you will end up outside) and walk south to a cave. Dungeon: Cave south of Frenor Walk south, enter the dark intersection to get wing of the wyvern. Come back, walk west and north in a dark passage to get gold. Come back, go on the altar to get agility seed and walk around it to eventually go down a level. Walk east, west after you’ve reach a set of four pillars and get a magic potion. Come back to the pillars, walk down in a dark passage and make your way in the small maze to get golden bracelet. Now make your way back to the village at night. Walk behind the inn (where the “princess” was kidnapped), pass a room with stairs and walk down across a bridge in the cemetery. Say yes, and you will get the thief’s key. The shop opposite of the inn has weapons, if ever you need new ones. Exit the village. Walk southwest pass the cave and enter the green square in the desert into the next village. Village: Bazaar Walk west to talk to a guard and exit the bazaar. Walk as far west as you can and enter a tower. Dungeon: Tower South of Santeem Go around the grid to the west, open the door and go upstairs. Walk to the western wall and follow it south to go upstairs again. Follow the left-hand wall up and enter the grid to get strength seed and gold. Go back downstairs, go back towards the staircase that first brought you up and walk east, south and follow the passage to go upstairs. Walk straight west, avoiding all the holes and pitfalls and go up one floor. Walk south to go upstairs and search for the birdsong nectar here
Exit the tower and make your way back to Santeem. Go upstairs and use the nectar on the king. Jump back from your room again, enter the room to your left and get a wing of the wyvern. Exit Santeem, go back to Bazaar and enter the warp shrine. Once on the other side follow the clearing to the southeast to enter the next village during the day. But if you use savestates walk around a little to fight metal babbles. Village: Endor (no Ewoks to be seen anywhere) Downstairs from the inn is the casino. If you abuse savestates then you can get Cristo and Brey a metal babble shield in no time and a meteorite armband to double your speed (and wizard rings to recover magic). Play as you need (cards are easier than the monster arena) and walk straight into the castle. Go upstairs, talk with the king, go back down, exit and enter the right-hand door. Walk straight down the corridor, enter the next building you see and go upstairs into the coliseum. Enter the room to the left, buy plenty of herbs (and the iron claw) and go upstairs once you’re ready. Be ready to fight alone; however you will be allowed to use medical herbs after each fight from your team’s stash. Note that the order may vary Boss fight: Hun I was at level 16, so he quickly became history Boss fight: Roric His attack is slightly stronger than Hun, but he’s nothing to worry about. Boss fight: Vivian She looks like a witch because she uses (weak) magic. Dispose of her Boss fight: Sampson His physical attack is the strongest, so make sure your hit points don’t fall down too much. Boss fight: Linguar Without savestates this fight will last for a long time. You need to hit his right doppelganger, otherwise you won’t damage him. He can cast some magic. After winning the tournament exit the castle and return to Santeem. Go upstairs to your room, jump down and exit the castle. The chapter will end. Chapter 3: Taloon the Arms Merchant This is the most tedious chapter ever. Although you will not have to fight a boss, you will still have to accumulate a lot of money and key items in order to proceed. You will also encounter at times a merchant in your way. You can buy/sell items as you wish. Optional – Village: Lakanaba But if you want, you can proceed step by step. First, exit your house (there is a medical herb in a pot downstairs) and walk straight west to a house with a blue man. Talk to him, and try to buy and sell so you can accumulate a lot of money. There is a possibility to get a Sword of Malice if you’re lucky, so work and bargain hard (use savestates too). Anyway when you’re tired go downstairs and get your (meager) commission. If you always die before you can return to a village safely, walk northeast in the clearing to a cave. Optional cave: Cave north of Lakanaba Follow the straightforward path (you can’t get lost) until you are given the option to push a switch. Say no and keep walking to a chest with a chain sickle. Go back to the switch, press it and walk northwest to go downstairs. Follow the path and walk west as soon as you hear the rock rolling. Direct it east, south and west, making sure you stay ahead of it. Walk down the stairs, push the rock to your left towards a chest at the end of the path containing iron safe. Push the rock where the chest was and go back outside (when you fall in the hole, simply walk up to go upstairs, and you will be back close to the rolling rock). Now walk straight south in the clearing until you see a village in the trees. Keep walking south, around mountains, to the next village. Village: Bonmalmo Castle Walk behind the throne to the left, follow the corridor and go downstairs. In jail, make sure no guard sees you or you will have to start over. Anyway walk right, talk to the blue man
And give him a wing of the wyvern. Make sure you have one of your own to warp back immediately to Lakanaba. Once in town walk straight east to the old man’s house (it’s right of the house of healing) and open the door behind him to talk to his son. Go outside and enter the village in the woods you skipped earlier at night. Village of the Fox Walk east, up the first path you see and follow the dog once it starts barking. You will receive a full plate armor; keep it preciously. Return to Bonalmo. Village: Bonalmo Castle Talk to the king, talk to the prince (in the room just west of the throne room) and exit the city to return at night. Walk up and turn right just before entering the castle. Make your way behind the weapon shop and talk with the prince to receive a letter. Now exit the Castle, cross the newly repaired bridge and keep walking south to see a familiar place (enter during the day). Village: Endor Castle Enter the castle, walk straight upstairs and use the letter in front of the princess. You will receive a Royal Scroll; now go back to Bonalmo. Village: Bonalmo Castle Go talk to the king (straight ahead) and use the Royal Scroll. Now warp back to Endor and cross the bridge east. Walk straight up pass a cave, between a narrow passage among impassable mountains and into a cave surrounded by poisonous marshes. To make your life easier, you can always hire (for a fee) mercenaries here and there in Bonalmo. Note that you will get so many treasures, you might need more than one trip Dungeon: Cave of the Silver Statuette Follow the passage, walk east of the stairs going down and take the ship. Take it down a hole, follow the passage, get the wing of the wyvern and walk back east all the way, and then down to some stairs. Follow the passage west, press on the button you see and come back. Enter the first room west for a morning star (ignore the stairs for now), walk southeast and up for gold, down for medical herb, up again (in the room next to the gold chest) for iron spear and southeast to go downstairs. Take the ship, navigate up, west and down for a broadsword. Go back up, west and north (you will see statues) to go downstairs. Follow the passage up to get silver statuette. Go back upstairs, take the ship west and up for half plate mail. Take the ship and navigate all the way to the stairs going up. Go back where you got the morning star, take the stairs and walk south to exit the cave. Go back to Bonalmo. Talk to the old man below the room where you first talked to the prince (and where the maid was shocked she talked to commoners). Sell all your armors here to get top gold and go back to Endor. Village: Endor Castle Walk straight, east and enter the tall building above you (where the guard starts his round). Go on the second floor and talk to the man to give him the silver statuette. With all that money you should be able to buy the shop from the old man (35,000 gold). Just make sure you talk with the King first. Walk straight west from the guard and enter the building right before the western gate. Go upstairs, say yes and the shop is yours. From now one you can give Neta things to sell and make a profit (I never really tried it though). Anyway, your next mission is the tough part of this chapter: accumulate seven broadswords and seven half-plate mails. To get those you must fight. A lot. Enemies drop objects at random, including these two. Accumulate them (give them to the duo just northeast of the stairs leading to the throne room) and receive 60k gold. Exit the castle and enter the cave you skipped on your way to the silver statuette. Dungeon: Cave to Branca Follow the passage, say yes to the old man and exit and enter the cave to talk with the man again. Go back to Endor, go to your house to talk with Neta and go to the casino. Gamble a little, go back to your house to talk with Neta and return to the cave to cross the tunnel. The chapter will end. Chapter 4: The Sisters of Monbaraba Village: Monbaraba One of the jars has a medical herb, and one of the drawer (where you saw the intro scene with the Master) has a strength seed. Exit the village and follow the clearing north until you see a village. Skip it for now (you can rest for free if you need, and there is a lifeforce nut inside Edgar’s house in the NE part of town) and cross the bridge north of it. Follow the coastline, cross another bridge and enter a cave. Dungeon: Cave West of Kievs Follow the main path, and when you see a water pond enter the dark intersection straight north to get wing of the wyvern. Come back, follow the path east and walk on a yellow square to activate the elevator. Follow the path, go around a water pond (ignore the dark intersection) and walk west to get to a chest with gold. Come back, continue east at the intersection and take the next dark intersection you see to get lifeforce nuts. Come back, walk south and follow the path to another elevator shaft. Follow the next path to another elevator and walk up to get sphere of silence. Backtrack all the way to the dark intersection you missed (near the water pond and take it to take another elevator. Walk straight east to a wall and follow the path down to get lamp of darkness (creates instant night) and Orin in your team. Exit the cave. Come back to the village you skipped; skip it again and walk east, following the clearing to the north to the next village (just enter/exit to facilitate warping back). Walk straight west from the castle, and then north when you start seeing sand to the next village. Enter at night. Village: Atkemto Walk straight up, walk about the jail gate and go downstairs Dungeon: Atkemto Mine Walk east to get mystic acorn and come back to the main corridor. Walk up, east to a water pond, up, east and northwest to get silver tarot cards. Come back to the intersection, walk east and down a ladder. Walk straight up (ignore the dark intersection), walk east to another dark intersection and down another ladder. Get the gunpowder and go back to Keeleon. Village: Keeleon Castle Enter the right-hand door and go down the corridor next to the Counsel’s room. Use the gunpowder jar and start following the Counsel discreetly. Check the wall where he moved and press the switch. Get ready to fight after talking to the creature on the throne; be around level 7 or 8. Boss Battle: Balzack Have the fastest among Mara and Nara use the sphere of silence immediately to make the fight easier (the effect is not permanent, so be careful). Sap works well to lower his defense. Just stay healthy and pummel him to death. Right after the fight you will be in a non-winnable battle with Keeleon. After the fight walk down, take the Boarding Pass and walk straight east of the chest and escape jail. Go out of Keeleon and walk straight up north to the next village. Village: Haville Walk northwest to the port (above the house of healing), go to the captain and say yes. Enjoy the sailing as the chapter ends. Chapter 5: The Chosen Ones 5.1: Recruiting your friends Village of the hero Go northeast of your house to talk with your father. Come back to your house, say yes to your mother and watch a scene. Once it’s over walk to the next room and look at the top jar for a medical herb. Escape the “prison”, get a feather hat here
And exit the city. South is a little cottage where you can get leather armor, medical herb and 50 gold (and meet your real father). Keep walking southeast to the next town. Optional village: Branca Castle There’s really nothing to see here. But when you have better keys you will be able to get some treasures. Walk southwest of Branca and go through the tunnel to Endor. Once on the other side walk west to Endor. Village: Endor Castle Walk around the inn to the left to talk to Nara (say yes, if you have 10 gold). Go to the casino to get Mara (by the slots), get them both a metal babble shield and exit the city. Note that Taloon’s shop can be used as a vault to store unwanted items. Walk north back to Bonalmo (to memorize it) and make your way back to Branca. Walk straight east in the clearing, going between impassable mountains, crossing three bridges to a cave. Dungeon: Cave east of Branca Follow the straightforward passage, and when the sisters fall go downstairs. Follow “them” and talk to them for a fight. Be around level 9 Boss fight: Liclick*2 (appear separate) They are relatively easy. After the fight, talk to “them” again for another fight. Boss fight: Vampire bat*2, Tricksy Urchin*2 The vampire bats are quite weak. Dispose of all of them After the fight go up a couples of floors until you see the sisters again. Talk to them, say no and they will join you again. Take the stairs up, walk down to more stairs and resume your way before the sisters fell in a hole. Destroy the rock to go downstairs, follow the path and go towards the room with large rocks to uncover Symbol of Faith. Exit the cave and walk down a path here (just east of Branca)
And enter the shrine. Shrine of the desert You can get a lunch by walking above the inn. Talk to the man in purple and he will join your party with his wagon, where you can put extra party members. Walk straight south across the desert and turn right when you hit impassable mountains to go to the next village. Optional village: Aneaux You can get a strength seed on the middle tombstone in the NW part of town. Once you’re down, exit the village and keep walking south in the clearing to the next village. Village: Konenber Enter the port (west of the house of healing), enter the ship, go downstairs and look here
To get a small medal. Exit town, walk east in the clearing, go north to a bridge and follow the shore south to a tower. Dungeon: Tower east of Konenber Open the door, walk around the grid to the left, talk with Taloon (say yes, then no) and go where he walks to get luck seed and gold. Go upstairs, west and into the 2nd corridor to enter a grid leading you upstairs. Follow the path to a magic potion, backtrack and once outside the grid walk straight east. Follow the path to a strength seed, backtrack and walk straight down from the first flight of stairs to go upstairs. Mind the gap, make your way south across a grid and follow the path without deviation to get full moon herbs. Exit that room, walk west across a grid to get boomerang (on the grid) and man-eating chest (against the wall. Backtrack to the statues you passed and go upstairs. Walk straight south to get Fire of Serenity and take the NE stairs up. Circle the room to the left, enter the grid on the left side to get a golden bracelet. Exit the room, walk south and make your way to the middle of the room for a fight. Be around level 15. Boss fight: Lighthouse Bengal, Flamer*2 (but are separated) Flamers like to abuse fireball, and the Bengal can heal (and paralyze people for one round). Nevertheless focus on one flamer at the time to avoid the magic. Pray that you get healed on time and dispose of the monsters. Walk to the fire pit and use the Fire of Serenity. Walk straight south to jump outside the tower and make your way back to Konenber. Village: Konenber Walk back towards the ship, talk with Taloon (say yes and he will join you) and you will now have your own ship. Sail south until you see land; then go east under passable mountains and enter the next village. Note that there is a shrine south on Endor (accessible by boat) where you can find metal babbles. Use savestates and you can skyrocket your experience. Village: Mintos Enter the inn, go on the second floor and talk with Brey so he can join you (say yes). You can get a small medal by looking around the well south of the inn
Exit the city, walk straight east and enter the small shrine. Circle around the building to the right and enter the narrow corridor for a small medal
Now walk to the SE, along impassable mountains and you will reach the next village. Village: Soretta Castle For now, just enter and exit (and heal as needed) for later. Walk SW of the castle of passable mountains to the next dungeon. Dungeon: Padequia Seed Cave Walk west, go down to the arrows pointing left and get agility seed. Walk right, follow the path to go downstairs, walk NW to take the second arrows pointing up and you will circle the upper room (pass a chest). Walk SE to take the arrows on the left-hand wall, take the furthest arrows pointing down and walk up against the wall, opening a door leading to robe of serenity. Take the left-hand arrows leading down, take the farthest up arrows to your left and get mystic acorn. Walk on the arrows to your right, take the same path that lead you to the robe but instead of walking in that direction walk on an arrow pointing right to get gold. Walk on the arrows, take the left-hand arrows pointing down and walk east of the arrows to go downstairs
In this room walk to the northeast and go on the arrow pointing up. In that section take the third arrow pointing down to get man-eater chest. Go back up and take the arrow directly pointing at the chest to get to it – there is the Padequia Seed. Exit, go back to Soretta and talk with the king (SE of the village, in a field). You will obtain a Padequia root; go back to the Mintos inn and give the root to Cristo. Alena and Cristo will join you. Exit the village and Hector will leave the party. Go back to your ship and navigate due west until you hit the land; disembark and enter and exit the castle (for memory). Walk south back to Kievs, and then enter the cave west of it once more. Dungeon: Cave West of Kievs Go back to where you found Orin; examine the chest, press the switch and go downstairs. Make your way through the doors (a jar has a small medal) and get the magic key. Exit the cave and make your way back to Keeleon. Village: Keeleon Castle Enter the right-hand door and go back to the King’s secret room. Talk with Ragnar and talk to Keeleon to fight. I was around level 21 from all the grinding. Boss fight: Keeleon Make sure Alena is in your active party; her luck makes her hit critically more often. Keeleon can attack twice in a row and know fireball and freezing wind. The sisters are useful in this fight too since their healing/attack magic is very efficient. Pummel him to death. After the fight talk to Ragnar and he will join you. 5.2: The Legendary Weapons Exit the castle and warp back to Endor. Enter the castle and open a hidden door between the two doors (just downstairs from the throne room). Go upstairs a couple of floors, fall down and go downstairs to get multi-edge sword (cursed) and strength seed. Go back one floor to jump off the building and return to the castle. If you’re there at night, just enter the throne room when the sentinel isn’t facing you. Go upstairs by the stairs in the left-hand room and make your way to get pink leotard and feather hat. A dresser also has a small medal. When you’re done board your ship and navigate west of the shrine with the metal babbles. Once you hit the land navigate slightly north to the next village. Village: Seaside Village Search here for the Stone of Drought
You can also get a small medal here
Exit the village, navigate south to about there
And navigate east to a small island. Enter it and search a pot to get a small medal. Once you’re done, exit the house, navigate back west, and then south to a land with passable mountain to get Atkemto in your warp memory. Exit the village, navigate around the shore to the west and then straight south until you hit the land. Navigate east among islands, turning south east of impassable mountains. Go south until you see passable mountains; disembark and walk to a castle. Village: Stancia Castle Talk to the blue man blocking your way and walk up straight into a ship. Get a small medal to the far northeast house (second floor, in a jar). Go back to the center and enter the castle. Continue navigating straight, go up two floors and stand behind the people facing the king. Talk to him, exit the room and enter the right-hand gate. Enter the first room above you and open a dresser to get a small medial. Exit the castle, warp back to Aktemto and navigate south, following the shoreline back to Monbaraba (disembark around here and walk SE)
Village: Monbaraba Go back to the theater (straight up from the entrance) and talk with the man with the manager (Panon). Now warp back to Stancia, have Panon lead you and talk to the king. You will receive the Zenethian Helm. Exit the castle and Panon will leave your group. Warp back to Aktemto, navigate west and then north when you hit the land. Once you see land keep navigating north until you see passable mountains; navigate west to a small shrine on an island. Optional village; King Medal Castle You can give him your medals to free up space. He sells Staff of Punishment (1 medal) Hat of Happiness (4 medals) Sword of Miracles (6 medals, recover as you attack) Metal Babble Helm (20 medals) You can buy as many items as you want, as long as you have enough medals. So if you’re lucky you could get two metal babble helms. Purchase what you need, exit the castle and warp back to Aktemto. Follow the shore around the village and navigate north, east of forested islands. Go around an island with a tower and keep navigate north to enter a familiar place. Village: Santeem Castle Go straight to the throne room and talk to the person on the throne for a fight. Be around level 25-28 Boss fight: Balsack (not Honoré) He can cast snowstorm (30-40 damage), emit freezing wind and attack twice in a row. After you defeat him, walk downstairs and go to the treasure room northeast (cast stepguard) to get flute of uncovering, magma staff and strength seed. Warp back to Stancia, navigate due east and go north once you see impassable mountains. Go around a peninsula with a cave, keep going east and go down a river. Keep going down and navigate to the end, to a lake. Disembark south between impassable mountains and use the magma staff in front of an impassable mountain blocking the way to a castle. Enter it during the day. Village: Gardenbur Castle Walk straight into the castle, then enter the kitchen to your left; a pot has a small medal. Walk to the right and enter the room right of the stairs leading to the throne room. Talk to the man and watch a scene. Say no, then yes; talk with the guard to change the hostage. Exit the castle, walk SE on the passable mountains and enter a cave Dungeon: Cave south of Gardenbur Walk down, go west down some stairs and turn right after the lake. Keep walking to get a small medal. Backtrack to the lake, walk to the wall and follow the passage. Go down the first change you get, follow the passage (ignore to flights of stairs) and keep going to get an agility seed. Backtrack to the stairs (take the upper one), walk to the wall and down the stairs to get gold. Backtrack to the stairs, walk left and down the first corridor you meet and follow it to eventually end up downstairs. Go down the stairs to your left and down a corridor around a promontory to get strength seed. Go down the stairs to your right, up a small promontory, up some stairs and down those to your left and up to get iron mask. Now walk all the way down to get dragon shield. Backtrack to the twin stairs, get down your promontory and walk down. Go up another promontory, walk left (going up, down and down) and you will go down more stairs. Walk to the bed, talk with the man and chase him to enter a fight. Boss fight: Bakor He can cast snowstorm and increase (cast zap if you learned it), but he’s not really a menace. Just kill him, but be careful with his build up; he will double his strength for the next round. After the fight make your way back to the Queen. She will give you the final key, which opens every door. Go to the basement to get the Zenethian Shield and exit the castle. Warp to Branca, enter the castle and turn left before the stairs leading to the throne room to get mystic acorn, gold and small medal. Now warp to Haville and enter the jail (right by the eastern exit). The first and third cells have small medal*2. Now warp to Konenger and go upstairs in the inn to get sword of decimation (cursed). Warp to Izmit, navigate west and south around the cave. Keep going to enter Lakanaba. Go back to Taloon’s first employment place and get ice blade (can be used in battle), chain sickle and strength seed. From Konenber, navigate east and follow the coastline. When you see a tower keep going east and go up the first river you see. Go to Rosaville if you want (play the flute of uncovering east of the tower) as Saro Knight gives decent experience (and can call other monsters). Otherwise keep navigating and once it gets open navigate north until you see passable mountains. Go east to the Medal King Castle as you need, and then go north into a cave. Dungeon: Zenethia Armor Cave Navigate east and disembark west at the fourth opening you see. Get the small medal and go back to the ship. Follow the water road, go slightly west in the next room, follow the path and go south in the next room to go downstairs. Get the small medal and Zenethian Armor and exit the cave. 5.3: Towards Zenithia Navigate east of the Medal King, south and follow the coastline east. Keep going south to here before going on the shore
Walk NW, along impassable mountain, to the next cave. Dungeon: Waterfall Cave Walk north and use the Stone of Drought where there seems to be a hidden door (up a flight of stairs). Get the Sandglass of Regression (comes back to the beginning of a fight), keep walking and when you have a choice go south. Then go north for a small medal, go as far south as you can, follow the path and you will eventually go downstairs. Go south, down two flight of stairs to get a mask of corruption (cursed). Backtrack up the two flights of stairs, go east another to flights of stairs to get gold. Walk NE up a flight of stairs, SE to the slimmer flight of stairs and you will go down some more. Follow the path and get the metal babble sword. Warp outside, to Endor and go back in your ship. Navigate south into the shrine. Dungeon: Shrine south of Endor Walk straight north, into the wall and downstairs. Take the far-right up-pointing arrows and go downstairs. Take the lower set of arrows and go downstairs. Take the arrows and walk north for a staff on antimagic. Follow the path west, turn right when you can (avoid the arrow) and follow the path to get small medal. Resume your path south and walk until you see a dark intersection; take it to go upstairs. Follow the path (go up for healing tiles), keep going south around the arrows and enter the dark intersection to go upstairs. Walk west to a dark intersection, follow the path and get staff of transform. Warp back to Konenber. Take your ship and navigate south. Follow the shoreline west, then west when you hit impassable mountains, down a river to the east to your next village (in the river). Village: Riverton Powerup and recover as you need and exit the village south. Keep navigating until you enter a shrine. Dungeon: the Water Colossus Walk west to enter the Colossus proper. Walk around the stairs going down to get a small medal. Go downstairs, walk left to get gold and walk to the far right and up to go upstairs. Go upstairs and walk to the far right to get agility seed. Go down the very net corridor and follow the path upstairs. Go around the “grid” to the right to go upstairs and walk down on the right hand to get demon hammer. Backtrack to the “grid” and enter it from above. Go upstairs, walk right and up for a Mimic and then go upstairs. Fall through the left eye and follow the path until you reach the command room. Go to the levers, say yes and exit through the right side once on the other shore. Walk east, north around impassable mountains and into a castle. Village: Dire Palace As long as you look like monsters with the Staff of Transform you are safe. Walk up, go downstairs and search the pots for a small medal. Go back, walk east and go upstairs. Walk west, talk with the orange creature and then the green one next to you. Jump down the first opening you see, cast Stepguard and walk on the barrier floor going east. Go downstairs, take a lifeforce nut and exit the Castle. Come back in, go back to the throne room and take the stairs east of it. Follow the path, go up one step after the trees and follow the path to take stairs. You will get to (starting in the third quadrant) Mimic, small medal, Aeolus’ Shield and Mimic. Go back to Aktemto. Dungeon: Aktemto Mine Go back to where you got the gunpowder. Walk north, west around the lake, east in a dark intersection, north, east in another dark intersection and go downstairs. Go NE in a dark intersection and east; search around the water to get small medal. Go NW, never deviating from your path to enter Esturk Palace. Dungeon: Esturk’s Palace Walk into the first building for a recovery tile then keep walking east to enter the main building. Walk straight up, get a small medal, Mimic, gold, agility seed, strength seed and go upstairs. Follow the path, ignore the stairs going up and go downstairs. Get small medal and Mimic (right-hand), walk left into a dark intersection and eventually go up two floors. Talk to the purple monster, say no and be ready to fight. Be around level 30 Boss fight: Rhinoking, Bengal Rhinoking can cast bounce so watch out for your magic casters. Otherwise they are fairly easy. But be careful as you will immediately engage in another fight when you face the throne. Boss fight: Esturk Even though he’s a Start walking down for a scene and backtrack to the treasure guarded by a skeleton. You will get gas canister. Exit the castle vicinity and exit Aktemto. Warp back to Riverton and enter during the night. Village: Riverton Enter the first house to your right (with a ship parked in front of it) and go upstairs to talk to the blue man. Always say yes, spend a night at the inn (in front of the island with a purple man) and go to the item shop (where the man you gave the canister to is). Exit the village south and you will have a hot-air balloon just for you. Note that, like the phoenix in Dragon Warrior III you must press A to land since it keeps flying one you start moving. Anyway warp to Mintos and start flying east until you hit impassable mountains. Go north to a desert and land near some trees. Enter the village with only 3 people. Village: Elfville Powerup/recover as you need and enter the next dungeon Dungeon: World Tree Tower Walk straight up to a ladder that leads to a staff of healing. Fall of the tree, go back in the tree and follow the path right up a ladder. Go down, follow the path upstairs, go down to a ladder and get dew of world tree (cures all hit points for everyone). Go back down, walk north pass the down ladder and circle all around the tree on the foliage to go up a floor. Follow the foliage to the left, go down and move towards the trunk when you can (hugging it) to go up a ladder. GO south on the branch, talk with the Zenethian (who will join you) and keep walking SE to get the Zenethian Sword. Jump down, warp to Riverton and ride your balloon north until you see an island surrounded by impassable rocks. Fly over it and you will automatically land. Walk north, go between two impassable mountain ranges and go down a clearing to enter a village. Village: Gottside Enter the house north of the entrance (with a downwards staircase) to get small medal. Otherwise powerup/rest as you need and exit the village. Walk NE around an impassable mountain range and enter the shrine you see. Dungeon: Shrine east of Gottside Walk straight up north down a hole, go downstairs and get the baron’s horn. Go back upstairs, jump in the hole and take the elevator. Now take the stairs to your left and follow the path all the way down to a dress of radiance. Exit the shrine, warp back to Gottside and walk south, follow the path to the next dungeon. Dungeon: Tower to Zenithia Enter the tower, walk to the NE upstairs, enter the dark room and get mystic acorn. Exit that room, go up to flights of stairs to another room, go downstairs and follow the path to a small medal. Go back up, down, walk up to go upstairs 2 floors, walk down and follow the path to go downstairs. Follow the path, exit the room down (ignore the stairs) and follow the path to get a mysterious bolero. Backtrack to the room where you ignored the stairs and take them. Enter the room and follow the path until you enter a room with a huge 0 to your right.
Walk towards it to get a dragon shield. Now follow the path west, go down between columns and follow the path to go upstairs. Walk on the altar wearing ALL the Zenithian Gear and you will be lifted to Zenithia. Village; Zenithia Castle Lucia will leave you as soon as you enter. Enter the left door and open the next one to get dew of world tree as you need it. The next room over (your mother’s) there is a small medal in the right-hand drawer. Go to the far right downstairs; talk to Lucia and Doran will join you. Walk down to exit on the cloud; exit and enter the castle again. Walk all the way up into the castle and follow the path to talk with Master Dragon. After talking to him the Zenithian sword will become more powerful. Exit his chamber, walk right and down a flight of stairs to enter a room and exit Lucia’s room to fall down a hole in the cloud. Enter the cave. 5.4: The end Dungeon: Cave to the Dark World Walk up, open the door and get dress of radiance. Go back one room, go left, up, follow the path and turn left when you can. Walk on the arrow pointing down and walk south to get small medal. Walk on the arrow pointing up, leave the room and follow the path down. Keep following the path down at a dark intersection, and in the room with poison marsh cast stepguard (note that any team member walking on it, even if it’s not you, will be damage). Walk to the NW corner to get lifeforce nuts. Follow the western wall now, step on the arrows to get water flying cloth, exit the room and backtrack to the dark intersection you skipped. Always walk west and you will get staff of jubilation. Exit that room, follow the path (watch for poison marsh) – the treasure is a Mimic – and you will go up some stairs. Walk around the whole to get to the arrow pointing down (against the wall) and you will get demon armor. Walk east, step on the arrow pointing right after the arrow pointing up and go down some stairs. The treasures contain (clockwise, second quadrant) gold, strength seed, agility seed and lifeforce nuts. Go downstairs, take the ship and navigate due east to go downstairs. Follow the path, jump down the hole you see to get mirror shield, jump down and go back up one floor to get lifeforce nuts. Jump back down and exit the cave. You can re-enter the shrine to heal and save if you need. 5.4.1: Destroying the barrier Walk north, then west and south (watch for the poison marsh) to enter the first shrine. Dungeon: Dark World Shrine 1 Walk around on the poison marsh to get small medal at the very end on the building
Go back to the entrance and walk on the grass to go downstairs, right back up and down the other flight of stairs. Move up three steps, left four steps, up one step, right three steps and go up to the next room (cast stepguard before). Talk with the monster, try to move and be ready to fight. Boss fight: Gigademon He can attack twice in a row, and his physical attack has quite a punch even around level 33. Combined with Defence it can be deadly if you have weaker characters. After you defeat him exit the shrine (you have to walk) and make your way up northwest to the next shrine. Dungeon: Dark World Shrine 2 This one is straightforward: walk into the building for a fight Boss fight: Infurnus Shadow He can cast explodet, attack physically, scream to make you lose the next turn and emit a blizzard. Oh and he attacks twice in a row. His defense is also higher so pray for a critical hit. After the fight, warp back to the Last Refuge as needed and walk east to the next shrine. Dungeon: Dark World Shrine 4 Follow the path before you, walk left when you can and walk to the throne for a fight. Boss fight: Anderoug*3 (appears as 3*1) Use savestates to see who your team mates attack so you can focus better. The dragons can emit scorching gas and attack physically. Fortunately they are fairly weak and each can go down in less than two rounds. After the fight walk NE to the last barrier shrine. Dungeon: Dark World Shrine 3 Go downstairs, take the NE stairs to get to zombie mail and backtrack to take the other staircase. Follow the path and be ready to fight the one who kidnapped Rosa. Boss fight: demighoul*3, Radimvice The demighouls can avoid your attacks and get pretty annoying. Radimvice can cast inferno, infernmost, blizzard and twice in a row. After you’re done, go back to the last refuge and enter Necrosaro’s domain. 5.4.2: The final fight Final Dungeon: Necrosaro’s Castle Walk straight into the castle, cast stepguard and walk on the barrier floor to avoid the moving statues and follow the eastern wall. Follow the straightforward path and go downstairs when you can to walk on poison marsh (straight south for the stairs) to get small medal. Go back upstairs, take the stairs going up to your right and follow the path (ignore the elevator you cross) to go upstairs. Avoid the barrier floor, walk east and eventually get lifeforce nuts and staff of thunder (can be used). Walk back to the room with barrier floor and statues; move straight up from the stairs, follow the path and you will go outside to get a sage’s stone (recovers hit points to everyone). Backtrack to the elevator; take it, follow the path south and you will eventually end up taking another elevator. Go upstairs, follow the path, go south in a room with a stone pool, take the first door you see once outside and you will be behind the volcano (there are poison marshes). Use the Baron Horn is needed to call the caravan and have the non-playing characters heal you. Walk to the mountain, follow the trail and be ready for the final battle. Being around level 40 should do; there are plenty of metal babble and King Metal in the castle to increase your level. Final boss: Necrosaro In his orange form, he can attack (physically) twice as long as he has two arms. When he loses both, he casts increase to boost his defense; he can also cast snowstorm and sweet breath to put you a In that form he emits freezing rays cancelling out any boosting spell. He grows hands in his next stage and starts attacking twice again (and can emit scorching gas). In his next stage he grows larger legs, which seems to boost his strength. For his last stage, he grows another head and spikes on his knees (the music changes too). That form can emit a violent blaze, icy gust wind which will probably make the hero cast healusall often. He can of course cancel support spells. Stay healthy and finish him. After the Master Dragon’s speech, exit his room, walk right and take the entrance downstairs. Make your way to the main entrance, exit and enjoy the end credits. Hello gamers and welcome to another one of my game guides, where you’ll learn to navigate quickly through the game, grind your levels and find useful treasures. Note that in chapter 5, like in the first four chapters when “bonus” characters join you, you will only be able to control the hero / heroin (the sex accounts for minor differences in clothing). You can give a general outline to the others but they will generally act on their own, which means that magic casters will pretty much waste their magic points. Chapter 1: The Royal Soldiers Village: Burland After the King’s speech, exit Burland and walk northwest to enter a cave Dungeon: Cave to Izmit Follow the path and go right at the first “dark” intersection (it reveals itself once you enter it) to get medical herbs. Go back, walk northwest around a lake and enter the dark intersection to get to obtain gold. Walk north to exit the cave and walk northeast to enter the next village. Village: Izmit Enter the village at night (walk around if needed) and visit the jail (between the priest and the weapon shop, downstairs). Talk to the man and walk all the way back to Burland. Enter the house in the southwest corner, go on the second floor and talk to the woman. Bring her to Izmit and go back to jail. After that, exit the village and go there
Dungeon: Old Well Walk straight into the well, follow the eastern wall down, around a lake, left, down and straight right (ignore the voice saying the opposite) to eventually get a medical herb. Walk back and this time walk down in the intersection to go downstairs. Follow the path and walk straight right once again and you will eventually reach Healie, you best chance in this chapter against the boss (even though it’s uncontrollable). Walk back, walk all the way up at the intersection and right to get gold. Walk back, keep walking left and get the flying shoes. Walk back to the first floor to the dark intersection you first missed. Enter it, jump down the hole, go upstairs and search the vase right in front of you for medical herbs; the one to the right has an agility seed. Go upstairs and walk out of the area. Now walk west to the tower on an island and use the flying shoes. Dungeon: Tower West of Izmit Walk downstairs, walk down and to the right (you will meet a friendly soldier) to go downstairs some more. Open the big door and open the chest for gold. Walk up to go upstairs and get strength seed. Walk back downstairs, walk around the “grid” down and left, enter it between columns to get scale shield and continue up to go downstairs. Open the door above you and walk left to get Sword of Malice (not cursed) and to the right to get luck seed. Walk back towards the stairs and walk down some more to go downstairs and on a healing panel. Walk back upstairs, follow the path on the left (you’re at the lower entrance of the tower now), enter the grid, go downstairs and follow the path for a fight. Be around level 7 or 8. Boss fight: Saro’s Shadow, Giant Eyeball Dispose of the eye first then attack Saro. Healie should be able to keep you healthy, but keep one or two medical herbs just in case. Watch out for his fireball and blaze spells. After that fight it seems that all random fights are over. Make it all the way back to the top (don’t forget about the healing tile if need be) and jump outside the tower. Walk back to Izmit, and then make your way back to Burland. Go to the king, exit the castle and conclude the first chapter. Chapter 2: Princess Alena’s Adventure Village: Santeem Castle One you can control Alena, talk to the bearded man in the throne room, the guard on the left on the main level (straight down from the stairs) and the man with a cap in the church (straight east of the stairs; the backroom has fairy water in the second drawer from the left). Come back upstairs, go to your room (you can see a wooden wall in it). The second drawer from the left has a feather hat; now search the wall, say yes and jump to eventually end up outside. Walk a few steps outside to have Brey and Cristo join you. Village: Surene There isn’t much to do here except upgrade your equipment. Do it as needed and exit the village. Follow the clearing to the northeast. Walk straight east from the road sign you will encounter to enter the next village. Village: Tempe Go talk to the man in blue in the first house to your right, say yes and walk to the house north of the well. Talk with the priest, say yes, walk in the basket and get ready to fight. Being around level 4 should do Boss fight: Rabidhound*2 (but appear separated), Chameleon Humanoid Make sure you have plenty of medical herbs/ magic points to heal because you will need them. Dispose of the hounds first. Sap can work on the Chameleon (but he can cast heal). After the fight simply exit the village from the back (beyond the altar where you fought). You can visit the item shop west of the shaman’s house if you’re short. Simply follow the clearing to reach the next village. Village: Frenor Walk south to a pond surrounded by flowers and go upstairs in the building to the left. Follow the people (you will end up outside) and walk south to a cave. Dungeon: Cave south of Frenor Walk south, enter the dark intersection to get wing of the wyvern. Come back, walk west and north in a dark passage to get gold. Come back, go on the altar to get agility seed and walk around it to eventually go down a level. Walk east, west after you’ve reach a set of four pillars and get a magic potion. Come back to the pillars, walk down in a dark passage and make your way in the small maze to get golden bracelet. Now make your way back to the village at night. Walk behind the inn (where the “princess” was kidnapped), pass a room with stairs and walk down across a bridge in the cemetery. Say yes, and you will get the thief’s key. The shop opposite of the inn has weapons, if ever you need new ones. Exit the village. Walk southwest pass the cave and enter the green square in the desert into the next village. Village: Bazaar Walk west to talk to a guard and exit the bazaar. Walk as far west as you can and enter a tower. Dungeon: Tower South of Santeem Go around the grid to the west, open the door and go upstairs. Walk to the western wall and follow it south to go upstairs again. Follow the left-hand wall up and enter the grid to get strength seed and gold. Go back downstairs, go back towards the staircase that first brought you up and walk east, south and follow the passage to go upstairs. Walk straight west, avoiding all the holes and pitfalls and go up one floor. Walk south to go upstairs and search for the birdsong nectar here
Exit the tower and make your way back to Santeem. Go upstairs and use the nectar on the king. Jump back from your room again, enter the room to your left and get a wing of the wyvern. Exit Santeem, go back to Bazaar and enter the warp shrine. Once on the other side follow the clearing to the southeast to enter the next village during the day. But if you use savestates walk around a little to fight metal babbles. Village: Endor (no Ewoks to be seen anywhere) Downstairs from the inn is the casino. If you abuse savestates then you can get Cristo and Brey a metal babble shield in no time and a meteorite armband to double your speed (and wizard rings to recover magic). Play as you need (cards are easier than the monster arena) and walk straight into the castle. Go upstairs, talk with the king, go back down, exit and enter the right-hand door. Walk straight down the corridor, enter the next building you see and go upstairs into the coliseum. Enter the room to the left, buy plenty of herbs (and the iron claw) and go upstairs once you’re ready. Be ready to fight alone; however you will be allowed to use medical herbs after each fight from your team’s stash. Note that the order may vary Boss fight: Hun I was at level 16, so he quickly became history Boss fight: Roric His attack is slightly stronger than Hun, but he’s nothing to worry about. Boss fight: Vivian She looks like a witch because she uses (weak) magic. Dispose of her Boss fight: Sampson His physical attack is the strongest, so make sure your hit points don’t fall down too much. Boss fight: Linguar Without savestates this fight will last for a long time. You need to hit his right doppelganger, otherwise you won’t damage him. He can cast some magic. After winning the tournament exit the castle and return to Santeem. Go upstairs to your room, jump down and exit the castle. The chapter will end. Chapter 3: Taloon the Arms Merchant This is the most tedious chapter ever. Although you will not have to fight a boss, you will still have to accumulate a lot of money and key items in order to proceed. You will also encounter at times a merchant in your way. You can buy/sell items as you wish. Optional – Village: Lakanaba But if you want, you can proceed step by step. First, exit your house (there is a medical herb in a pot downstairs) and walk straight west to a house with a blue man. Talk to him, and try to buy and sell so you can accumulate a lot of money. There is a possibility to get a Sword of Malice if you’re lucky, so work and bargain hard (use savestates too). Anyway when you’re tired go downstairs and get your (meager) commission. If you always die before you can return to a village safely, walk northeast in the clearing to a cave. Optional cave: Cave north of Lakanaba Follow the straightforward path (you can’t get lost) until you are given the option to push a switch. Say no and keep walking to a chest with a chain sickle. Go back to the switch, press it and walk northwest to go downstairs. Follow the path and walk west as soon as you hear the rock rolling. Direct it east, south and west, making sure you stay ahead of it. Walk down the stairs, push the rock to your left towards a chest at the end of the path containing iron safe. Push the rock where the chest was and go back outside (when you fall in the hole, simply walk up to go upstairs, and you will be back close to the rolling rock). Now walk straight south in the clearing until you see a village in the trees. Keep walking south, around mountains, to the next village. Village: Bonmalmo Castle Walk behind the throne to the left, follow the corridor and go downstairs. In jail, make sure no guard sees you or you will have to start over. Anyway walk right, talk to the blue man
And give him a wing of the wyvern. Make sure you have one of your own to warp back immediately to Lakanaba. Once in town walk straight east to the old man’s house (it’s right of the house of healing) and open the door behind him to talk to his son. Go outside and enter the village in the woods you skipped earlier at night. Village of the Fox Walk east, up the first path you see and follow the dog once it starts barking. You will receive a full plate armor; keep it preciously. Return to Bonalmo. Village: Bonalmo Castle Talk to the king, talk to the prince (in the room just west of the throne room) and exit the city to return at night. Walk up and turn right just before entering the castle. Make your way behind the weapon shop and talk with the prince to receive a letter. Now exit the Castle, cross the newly repaired bridge and keep walking south to see a familiar place (enter during the day). Village: Endor Castle Enter the castle, walk straight upstairs and use the letter in front of the princess. You will receive a Royal Scroll; now go back to Bonalmo. Village: Bonalmo Castle Go talk to the king (straight ahead) and use the Royal Scroll. Now warp back to Endor and cross the bridge east. Walk straight up pass a cave, between a narrow passage among impassable mountains and into a cave surrounded by poisonous marshes. To make your life easier, you can always hire (for a fee) mercenaries here and there in Bonalmo. Note that you will get so many treasures, you might need more than one trip Dungeon: Cave of the Silver Statuette Follow the passage, walk east of the stairs going down and take the ship. Take it down a hole, follow the passage, get the wing of the wyvern and walk back east all the way, and then down to some stairs. Follow the passage west, press on the button you see and come back. Enter the first room west for a morning star (ignore the stairs for now), walk southeast and up for gold, down for medical herb, up again (in the room next to the gold chest) for iron spear and southeast to go downstairs. Take the ship, navigate up, west and down for a broadsword. Go back up, west and north (you will see statues) to go downstairs. Follow the passage up to get silver statuette. Go back upstairs, take the ship west and up for half plate mail. Take the ship and navigate all the way to the stairs going up. Go back where you got the morning star, take the stairs and walk south to exit the cave. Go back to Bonalmo. Talk to the old man below the room where you first talked to the prince (and where the maid was shocked she talked to commoners). Sell all your armors here to get top gold and go back to Endor. Village: Endor Castle Walk straight, east and enter the tall building above you (where the guard starts his round). Go on the second floor and talk to the man to give him the silver statuette. With all that money you should be able to buy the shop from the old man (35,000 gold). Just make sure you talk with the King first. Walk straight west from the guard and enter the building right before the western gate. Go upstairs, say yes and the shop is yours. From now one you can give Neta things to sell and make a profit (I never really tried it though). Anyway, your next mission is the tough part of this chapter: accumulate seven broadswords and seven half-plate mails. To get those you must fight. A lot. Enemies drop objects at random, including these two. Accumulate them (give them to the duo just northeast of the stairs leading to the throne room) and receive 60k gold. Exit the castle and enter the cave you skipped on your way to the silver statuette. Dungeon: Cave to Branca Follow the passage, say yes to the old man and exit and enter the cave to talk with the man again. Go back to Endor, go to your house to talk with Neta and go to the casino. Gamble a little, go back to your house to talk with Neta and return to the cave to cross the tunnel. The chapter will end. Chapter 4: The Sisters of Monbaraba Village: Monbaraba One of the jars has a medical herb, and one of the drawer (where you saw the intro scene with the Master) has a strength seed. Exit the village and follow the clearing north until you see a village. Skip it for now (you can rest for free if you need, and there is a lifeforce nut inside Edgar’s house in the NE part of town) and cross the bridge north of it. Follow the coastline, cross another bridge and enter a cave. Dungeon: Cave West of Kievs Follow the main path, and when you see a water pond enter the dark intersection straight north to get wing of the wyvern. Come back, follow the path east and walk on a yellow square to activate the elevator. Follow the path, go around a water pond (ignore the dark intersection) and walk west to get to a chest with gold. Come back, continue east at the intersection and take the next dark intersection you see to get lifeforce nuts. Come back, walk south and follow the path to another elevator shaft. Follow the next path to another elevator and walk up to get sphere of silence. Backtrack all the way to the dark intersection you missed (near the water pond and take it to take another elevator. Walk straight east to a wall and follow the path down to get lamp of darkness (creates instant night) and Orin in your team. Exit the cave. Come back to the village you skipped; skip it again and walk east, following the clearing to the north to the next village (just enter/exit to facilitate warping back). Walk straight west from the castle, and then north when you start seeing sand to the next village. Enter at night. Village: Atkemto Walk straight up, walk about the jail gate and go downstairs Dungeon: Atkemto Mine Walk east to get mystic acorn and come back to the main corridor. Walk up, east to a water pond, up, east and northwest to get silver tarot cards. Come back to the intersection, walk east and down a ladder. Walk straight up (ignore the dark intersection), walk east to another dark intersection and down another ladder. Get the gunpowder and go back to Keeleon. Village: Keeleon Castle Enter the right-hand door and go down the corridor next to the Counsel’s room. Use the gunpowder jar and start following the Counsel discreetly. Check the wall where he moved and press the switch. Get ready to fight after talking to the creature on the throne; be around level 7 or 8. Boss Battle: Balzack Have the fastest among Mara and Nara use the sphere of silence immediately to make the fight easier (the effect is not permanent, so be careful). Sap works well to lower his defense. Just stay healthy and pummel him to death. Right after the fight you will be in a non-winnable battle with Keeleon. After the fight walk down, take the Boarding Pass and walk straight east of the chest and escape jail. Go out of Keeleon and walk straight up north to the next village. Village: Haville Walk northwest to the port (above the house of healing), go to the captain and say yes. Enjoy the sailing as the chapter ends. Chapter 5: The Chosen Ones 5.1: Recruiting your friends Village of the hero Go northeast of your house to talk with your father. Come back to your house, say yes to your mother and watch a scene. Once it’s over walk to the next room and look at the top jar for a medical herb. Escape the “prison”, get a feather hat here
And exit the city. South is a little cottage where you can get leather armor, medical herb and 50 gold (and meet your real father). Keep walking southeast to the next town. Optional village: Branca Castle There’s really nothing to see here. But when you have better keys you will be able to get some treasures. Walk southwest of Branca and go through the tunnel to Endor. Once on the other side walk west to Endor. Village: Endor Castle Walk around the inn to the left to talk to Nara (say yes, if you have 10 gold). Go to the casino to get Mara (by the slots), get them both a metal babble shield and exit the city. Note that Taloon’s shop can be used as a vault to store unwanted items. Walk north back to Bonalmo (to memorize it) and make your way back to Branca. Walk straight east in the clearing, going between impassable mountains, crossing three bridges to a cave. Dungeon: Cave east of Branca Follow the straightforward passage, and when the sisters fall go downstairs. Follow “them” and talk to them for a fight. Be around level 9 Boss fight: Liclick*2 (appear separate) They are relatively easy. After the fight, talk to “them” again for another fight. Boss fight: Vampire bat*2, Tricksy Urchin*2 The vampire bats are quite weak. Dispose of all of them After the fight go up a couples of floors until you see the sisters again. Talk to them, say no and they will join you again. Take the stairs up, walk down to more stairs and resume your way before the sisters fell in a hole. Destroy the rock to go downstairs, follow the path and go towards the room with large rocks to uncover Symbol of Faith. Exit the cave and walk down a path here (just east of Branca)
And enter the shrine. Shrine of the desert You can get a lunch by walking above the inn. Talk to the man in purple and he will join your party with his wagon, where you can put extra party members. Walk straight south across the desert and turn right when you hit impassable mountains to go to the next village. Optional village: Aneaux You can get a strength seed on the middle tombstone in the NW part of town. Once you’re down, exit the village and keep walking south in the clearing to the next village. Village: Konenber Enter the port (west of the house of healing), enter the ship, go downstairs and look here
To get a small medal. Exit town, walk east in the clearing, go north to a bridge and follow the shore south to a tower. Dungeon: Tower east of Konenber Open the door, walk around the grid to the left, talk with Taloon (say yes, then no) and go where he walks to get luck seed and gold. Go upstairs, west and into the 2nd corridor to enter a grid leading you upstairs. Follow the path to a magic potion, backtrack and once outside the grid walk straight east. Follow the path to a strength seed, backtrack and walk straight down from the first flight of stairs to go upstairs. Mind the gap, make your way south across a grid and follow the path without deviation to get full moon herbs. Exit that room, walk west across a grid to get boomerang (on the grid) and man-eating chest (against the wall. Backtrack to the statues you passed and go upstairs. Walk straight south to get Fire of Serenity and take the NE stairs up. Circle the room to the left, enter the grid on the left side to get a golden bracelet. Exit the room, walk south and make your way to the middle of the room for a fight. Be around level 15. Boss fight: Lighthouse Bengal, Flamer*2 (but are separated) Flamers like to abuse fireball, and the Bengal can heal (and paralyze people for one round). Nevertheless focus on one flamer at the time to avoid the magic. Pray that you get healed on time and dispose of the monsters. Walk to the fire pit and use the Fire of Serenity. Walk straight south to jump outside the tower and make your way back to Konenber. Village: Konenber Walk back towards the ship, talk with Taloon (say yes and he will join you) and you will now have your own ship. Sail south until you see land; then go east under passable mountains and enter the next village. Note that there is a shrine south on Endor (accessible by boat) where you can find metal babbles. Use savestates and you can skyrocket your experience. Village: Mintos Enter the inn, go on the second floor and talk with Brey so he can join you (say yes). You can get a small medal by looking around the well south of the inn
Exit the city, walk straight east and enter the small shrine. Circle around the building to the right and enter the narrow corridor for a small medal
Now walk to the SE, along impassable mountains and you will reach the next village. Village: Soretta Castle For now, just enter and exit (and heal as needed) for later. Walk SW of the castle of passable mountains to the next dungeon. Dungeon: Padequia Seed Cave Walk west, go down to the arrows pointing left and get agility seed. Walk right, follow the path to go downstairs, walk NW to take the second arrows pointing up and you will circle the upper room (pass a chest). Walk SE to take the arrows on the left-hand wall, take the furthest arrows pointing down and walk up against the wall, opening a door leading to robe of serenity. Take the left-hand arrows leading down, take the farthest up arrows to your left and get mystic acorn. Walk on the arrows to your right, take the same path that lead you to the robe but instead of walking in that direction walk on an arrow pointing right to get gold. Walk on the arrows, take the left-hand arrows pointing down and walk east of the arrows to go downstairs
In this room walk to the northeast and go on the arrow pointing up. In that section take the third arrow pointing down to get man-eater chest. Go back up and take the arrow directly pointing at the chest to get to it – there is the Padequia Seed. Exit, go back to Soretta and talk with the king (SE of the village, in a field). You will obtain a Padequia root; go back to the Mintos inn and give the root to Cristo. Alena and Cristo will join you. Exit the village and Hector will leave the party. Go back to your ship and navigate due west until you hit the land; disembark and enter and exit the castle (for memory). Walk south back to Kievs, and then enter the cave west of it once more. Dungeon: Cave West of Kievs Go back to where you found Orin; examine the chest, press the switch and go downstairs. Make your way through the doors (a jar has a small medal) and get the magic key. Exit the cave and make your way back to Keeleon. Village: Keeleon Castle Enter the right-hand door and go back to the King’s secret room. Talk with Ragnar and talk to Keeleon to fight. I was around level 21 from all the grinding. Boss fight: Keeleon Make sure Alena is in your active party; her luck makes her hit critically more often. Keeleon can attack twice in a row and know fireball and freezing wind. The sisters are useful in this fight too since their healing/attack magic is very efficient. Pummel him to death. After the fight talk to Ragnar and he will join you. 5.2: The Legendary Weapons Exit the castle and warp back to Endor. Enter the castle and open a hidden door between the two doors (just downstairs from the throne room). Go upstairs a couple of floors, fall down and go downstairs to get multi-edge sword (cursed) and strength seed. Go back one floor to jump off the building and return to the castle. If you’re there at night, just enter the throne room when the sentinel isn’t facing you. Go upstairs by the stairs in the left-hand room and make your way to get pink leotard and feather hat. A dresser also has a small medal. When you’re done board your ship and navigate west of the shrine with the metal babbles. Once you hit the land navigate slightly north to the next village. Village: Seaside Village Search here for the Stone of Drought
You can also get a small medal here
Exit the village, navigate south to about there
And navigate east to a small island. Enter it and search a pot to get a small medal. Once you’re done, exit the house, navigate back west, and then south to a land with passable mountain to get Atkemto in your warp memory. Exit the village, navigate around the shore to the west and then straight south until you hit the land. Navigate east among islands, turning south east of impassable mountains. Go south until you see passable mountains; disembark and walk to a castle. Village: Stancia Castle Talk to the blue man blocking your way and walk up straight into a ship. Get a small medal to the far northeast house (second floor, in a jar). Go back to the center and enter the castle. Continue navigating straight, go up two floors and stand behind the people facing the king. Talk to him, exit the room and enter the right-hand gate. Enter the first room above you and open a dresser to get a small medial. Exit the castle, warp back to Aktemto and navigate south, following the shoreline back to Monbaraba (disembark around here and walk SE)
Village: Monbaraba Go back to the theater (straight up from the entrance) and talk with the man with the manager (Panon). Now warp back to Stancia, have Panon lead you and talk to the king. You will receive the Zenethian Helm. Exit the castle and Panon will leave your group. Warp back to Aktemto, navigate west and then north when you hit the land. Once you see land keep navigating north until you see passable mountains; navigate west to a small shrine on an island. Optional village; King Medal Castle You can give him your medals to free up space. He sells Staff of Punishment (1 medal) Hat of Happiness (4 medals) Sword of Miracles (6 medals, recover as you attack) Metal Babble Helm (20 medals) You can buy as many items as you want, as long as you have enough medals. So if you’re lucky you could get two metal babble helms. Purchase what you need, exit the castle and warp back to Aktemto. Follow the shore around the village and navigate north, east of forested islands. Go around an island with a tower and keep navigate north to enter a familiar place. Village: Santeem Castle Go straight to the throne room and talk to the person on the throne for a fight. Be around level 25-28 Boss fight: Balsack (not Honoré) He can cast snowstorm (30-40 damage), emit freezing wind and attack twice in a row. After you defeat him, walk downstairs and go to the treasure room northeast (cast stepguard) to get flute of uncovering, magma staff and strength seed. Warp back to Stancia, navigate due east and go north once you see impassable mountains. Go around a peninsula with a cave, keep going east and go down a river. Keep going down and navigate to the end, to a lake. Disembark south between impassable mountains and use the magma staff in front of an impassable mountain blocking the way to a castle. Enter it during the day. Village: Gardenbur Castle Walk straight into the castle, then enter the kitchen to your left; a pot has a small medal. Walk to the right and enter the room right of the stairs leading to the throne room. Talk to the man and watch a scene. Say no, then yes; talk with the guard to change the hostage. Exit the castle, walk SE on the passable mountains and enter a cave Dungeon: Cave south of Gardenbur Walk down, go west down some stairs and turn right after the lake. Keep walking to get a small medal. Backtrack to the lake, walk to the wall and follow the passage. Go down the first change you get, follow the passage (ignore to flights of stairs) and keep going to get an agility seed. Backtrack to the stairs (take the upper one), walk to the wall and down the stairs to get gold. Backtrack to the stairs, walk left and down the first corridor you meet and follow it to eventually end up downstairs. Go down the stairs to your left and down a corridor around a promontory to get strength seed. Go down the stairs to your right, up a small promontory, up some stairs and down those to your left and up to get iron mask. Now walk all the way down to get dragon shield. Backtrack to the twin stairs, get down your promontory and walk down. Go up another promontory, walk left (going up, down and down) and you will go down more stairs. Walk to the bed, talk with the man and chase him to enter a fight. Boss fight: Bakor He can cast snowstorm and increase (cast zap if you learned it), but he’s not really a menace. Just kill him, but be careful with his build up; he will double his strength for the next round. After the fight make your way back to the Queen. She will give you the final key, which opens every door. Go to the basement to get the Zenethian Shield and exit the castle. Warp to Branca, enter the castle and turn left before the stairs leading to the throne room to get mystic acorn, gold and small medal. Now warp to Haville and enter the jail (right by the eastern exit). The first and third cells have small medal*2. Now warp to Konenger and go upstairs in the inn to get sword of decimation (cursed). Warp to Izmit, navigate west and south around the cave. Keep going to enter Lakanaba. Go back to Taloon’s first employment place and get ice blade (can be used in battle), chain sickle and strength seed. From Konenber, navigate east and follow the coastline. When you see a tower keep going east and go up the first river you see. Go to Rosaville if you want (play the flute of uncovering east of the tower) as Saro Knight gives decent experience (and can call other monsters). Otherwise keep navigating and once it gets open navigate north until you see passable mountains. Go east to the Medal King Castle as you need, and then go north into a cave. Dungeon: Zenethia Armor Cave Navigate east and disembark west at the fourth opening you see. Get the small medal and go back to the ship. Follow the water road, go slightly west in the next room, follow the path and go south in the next room to go downstairs. Get the small medal and Zenethian Armor and exit the cave. 5.3: Towards Zenithia Navigate east of the Medal King, south and follow the coastline east. Keep going south to here before going on the shore
Walk NW, along impassable mountain, to the next cave. Dungeon: Waterfall Cave Walk north and use the Stone of Drought where there seems to be a hidden door (up a flight of stairs). Get the Sandglass of Regression (comes back to the beginning of a fight), keep walking and when you have a choice go south. Then go north for a small medal, go as far south as you can, follow the path and you will eventually go downstairs. Go south, down two flight of stairs to get a mask of corruption (cursed). Backtrack up the two flights of stairs, go east another to flights of stairs to get gold. Walk NE up a flight of stairs, SE to the slimmer flight of stairs and you will go down some more. Follow the path and get the metal babble sword. Warp outside, to Endor and go back in your ship. Navigate south into the shrine. Dungeon: Shrine south of Endor Walk straight north, into the wall and downstairs. Take the far-right up-pointing arrows and go downstairs. Take the lower set of arrows and go downstairs. Take the arrows and walk north for a staff on antimagic. Follow the path west, turn right when you can (avoid the arrow) and follow the path to get small medal. Resume your path south and walk until you see a dark intersection; take it to go upstairs. Follow the path (go up for healing tiles), keep going south around the arrows and enter the dark intersection to go upstairs. Walk west to a dark intersection, follow the path and get staff of transform. Warp back to Konenber. Take your ship and navigate south. Follow the shoreline west, then west when you hit impassable mountains, down a river to the east to your next village (in the river). Village: Riverton Powerup and recover as you need and exit the village south. Keep navigating until you enter a shrine. Dungeon: the Water Colossus Walk west to enter the Colossus proper. Walk around the stairs going down to get a small medal. Go downstairs, walk left to get gold and walk to the far right and up to go upstairs. Go upstairs and walk to the far right to get agility seed. Go down the very net corridor and follow the path upstairs. Go around the “grid” to the right to go upstairs and walk down on the right hand to get demon hammer. Backtrack to the “grid” and enter it from above. Go upstairs, walk right and up for a Mimic and then go upstairs. Fall through the left eye and follow the path until you reach the command room. Go to the levers, say yes and exit through the right side once on the other shore. Walk east, north around impassable mountains and into a castle. Village: Dire Palace As long as you look like monsters with the Staff of Transform you are safe. Walk up, go downstairs and search the pots for a small medal. Go back, walk east and go upstairs. Walk west, talk with the orange creature and then the green one next to you. Jump down the first opening you see, cast Stepguard and walk on the barrier floor going east. Go downstairs, take a lifeforce nut and exit the Castle. Come back in, go back to the throne room and take the stairs east of it. Follow the path, go up one step after the trees and follow the path to take stairs. You will get to (starting in the third quadrant) Mimic, small medal, Aeolus’ Shield and Mimic. Go back to Aktemto. Dungeon: Aktemto Mine Go back to where you got the gunpowder. Walk north, west around the lake, east in a dark intersection, north, east in another dark intersection and go downstairs. Go NE in a dark intersection and east; search around the water to get small medal. Go NW, never deviating from your path to enter Esturk Palace. Dungeon: Esturk’s Palace Walk into the first building for a recovery tile then keep walking east to enter the main building. Walk straight up, get a small medal, Mimic, gold, agility seed, strength seed and go upstairs. Follow the path, ignore the stairs going up and go downstairs. Get small medal and Mimic (right-hand), walk left into a dark intersection and eventually go up two floors. Talk to the purple monster, say no and be ready to fight. Be around level 30 Boss fight: Rhinoking, Bengal Rhinoking can cast bounce so watch out for your magic casters. Otherwise they are fairly easy. But be careful as you will immediately engage in another fight when you face the throne. Boss fight: Esturk Even though he’s a Start walking down for a scene and backtrack to the treasure guarded by a skeleton. You will get gas canister. Exit the castle vicinity and exit Aktemto. Warp back to Riverton and enter during the night. Village: Riverton Enter the first house to your right (with a ship parked in front of it) and go upstairs to talk to the blue man. Always say yes, spend a night at the inn (in front of the island with a purple man) and go to the item shop (where the man you gave the canister to is). Exit the village south and you will have a hot-air balloon just for you. Note that, like the phoenix in Dragon Warrior III you must press A to land since it keeps flying one you start moving. Anyway warp to Mintos and start flying east until you hit impassable mountains. Go north to a desert and land near some trees. Enter the village with only 3 people. Village: Elfville Powerup/recover as you need and enter the next dungeon Dungeon: World Tree Tower Walk straight up to a ladder that leads to a staff of healing. Fall of the tree, go back in the tree and follow the path right up a ladder. Go down, follow the path upstairs, go down to a ladder and get dew of world tree (cures all hit points for everyone). Go back down, walk north pass the down ladder and circle all around the tree on the foliage to go up a floor. Follow the foliage to the left, go down and move towards the trunk when you can (hugging it) to go up a ladder. GO south on the branch, talk with the Zenethian (who will join you) and keep walking SE to get the Zenethian Sword. Jump down, warp to Riverton and ride your balloon north until you see an island surrounded by impassable rocks. Fly over it and you will automatically land. Walk north, go between two impassable mountain ranges and go down a clearing to enter a village. Village: Gottside Enter the house north of the entrance (with a downwards staircase) to get small medal. Otherwise powerup/rest as you need and exit the village. Walk NE around an impassable mountain range and enter the shrine you see. Dungeon: Shrine east of Gottside Walk straight up north down a hole, go downstairs and get the baron’s horn. Go back upstairs, jump in the hole and take the elevator. Now take the stairs to your left and follow the path all the way down to a dress of radiance. Exit the shrine, warp back to Gottside and walk south, follow the path to the next dungeon. Dungeon: Tower to Zenithia Enter the tower, walk to the NE upstairs, enter the dark room and get mystic acorn. Exit that room, go up to flights of stairs to another room, go downstairs and follow the path to a small medal. Go back up, down, walk up to go upstairs 2 floors, walk down and follow the path to go downstairs. Follow the path, exit the room down (ignore the stairs) and follow the path to get a mysterious bolero. Backtrack to the room where you ignored the stairs and take them. Enter the room and follow the path until you enter a room with a huge 0 to your right.
Walk towards it to get a dragon shield. Now follow the path west, go down between columns and follow the path to go upstairs. Walk on the altar wearing ALL the Zenithian Gear and you will be lifted to Zenithia. Village; Zenithia Castle Lucia will leave you as soon as you enter. Enter the left door and open the next one to get dew of world tree as you need it. The next room over (your mother’s) there is a small medal in the right-hand drawer. Go to the far right downstairs; talk to Lucia and Doran will join you. Walk down to exit on the cloud; exit and enter the castle again. Walk all the way up into the castle and follow the path to talk with Master Dragon. After talking to him the Zenithian sword will become more powerful. Exit his chamber, walk right and down a flight of stairs to enter a room and exit Lucia’s room to fall down a hole in the cloud. Enter the cave. 5.4: The end Dungeon: Cave to the Dark World Walk up, open the door and get dress of radiance. Go back one room, go left, up, follow the path and turn left when you can. Walk on the arrow pointing down and walk south to get small medal. Walk on the arrow pointing up, leave the room and follow the path down. Keep following the path down at a dark intersection, and in the room with poison marsh cast stepguard (note that any team member walking on it, even if it’s not you, will be damage). Walk to the NW corner to get lifeforce nuts. Follow the western wall now, step on the arrows to get water flying cloth, exit the room and backtrack to the dark intersection you skipped. Always walk west and you will get staff of jubilation. Exit that room, follow the path (watch for poison marsh) – the treasure is a Mimic – and you will go up some stairs. Walk around the whole to get to the arrow pointing down (against the wall) and you will get demon armor. Walk east, step on the arrow pointing right after the arrow pointing up and go down some stairs. The treasures contain (clockwise, second quadrant) gold, strength seed, agility seed and lifeforce nuts. Go downstairs, take the ship and navigate due east to go downstairs. Follow the path, jump down the hole you see to get mirror shield, jump down and go back up one floor to get lifeforce nuts. Jump back down and exit the cave. You can re-enter the shrine to heal and save if you need. 5.4.1: Destroying the barrier Walk north, then west and south (watch for the poison marsh) to enter the first shrine. Dungeon: Dark World Shrine 1 Walk around on the poison marsh to get small medal at the very end on the building
Go back to the entrance and walk on the grass to go downstairs, right back up and down the other flight of stairs. Move up three steps, left four steps, up one step, right three steps and go up to the next room (cast stepguard before). Talk with the monster, try to move and be ready to fight. Boss fight: Gigademon He can attack twice in a row, and his physical attack has quite a punch even around level 33. Combined with Defence it can be deadly if you have weaker characters. After you defeat him exit the shrine (you have to walk) and make your way up northwest to the next shrine. Dungeon: Dark World Shrine 2 This one is straightforward: walk into the building for a fight Boss fight: Infurnus Shadow He can cast explodet, attack physically, scream to make you lose the next turn and emit a blizzard. Oh and he attacks twice in a row. His defense is also higher so pray for a critical hit. After the fight, warp back to the Last Refuge as needed and walk east to the next shrine. Dungeon: Dark World Shrine 4 Follow the path before you, walk left when you can and walk to the throne for a fight. Boss fight: Anderoug*3 (appears as 3*1) Use savestates to see who your team mates attack so you can focus better. The dragons can emit scorching gas and attack physically. Fortunately they are fairly weak and each can go down in less than two rounds. After the fight walk NE to the last barrier shrine. Dungeon: Dark World Shrine 3 Go downstairs, take the NE stairs to get to zombie mail and backtrack to take the other staircase. Follow the path and be ready to fight the one who kidnapped Rosa. Boss fight: demighoul*3, Radimvice The demighouls can avoid your attacks and get pretty annoying. Radimvice can cast inferno, infernmost, blizzard and twice in a row. After you’re done, go back to the last refuge and enter Necrosaro’s domain. 5.4.2: The final fight Final Dungeon: Necrosaro’s Castle Walk straight into the castle, cast stepguard and walk on the barrier floor to avoid the moving statues and follow the eastern wall. Follow the straightforward path and go downstairs when you can to walk on poison marsh (straight south for the stairs) to get small medal. Go back upstairs, take the stairs going up to your right and follow the path (ignore the elevator you cross) to go upstairs. Avoid the barrier floor, walk east and eventually get lifeforce nuts and staff of thunder (can be used). Walk back to the room with barrier floor and statues; move straight up from the stairs, follow the path and you will go outside to get a sage’s stone (recovers hit points to everyone). Backtrack to the elevator; take it, follow the path south and you will eventually end up taking another elevator. Go upstairs, follow the path, go south in a room with a stone pool, take the first door you see once outside and you will be behind the volcano (there are poison marshes). Use the Baron Horn is needed to call the caravan and have the non-playing characters heal you. Walk to the mountain, follow the trail and be ready for the final battle. Being around level 40 should do; there are plenty of metal babble and King Metal in the castle to increase your level. Final boss: Necrosaro In his orange form, he can attack (physically) twice as long as he has two arms. When he loses both, he casts increase to boost his defense; he can also cast snowstorm and sweet breath to put you a In that form he emits freezing rays cancelling out any boosting spell. He grows hands in his next stage and starts attacking twice again (and can emit scorching gas). In his next stage he grows larger legs, which seems to boost his strength. For his last stage, he grows another head and spikes on his knees (the music changes too). That form can emit a violent blaze, icy gust wind which will probably make the hero cast healusall often. He can of course cancel support spells. Stay healthy and finish him. After the Master Dragon’s speech, exit his room, walk right and take the entrance downstairs. Make your way to the main entrance, exit and enjoy the end credits. -------------------- |
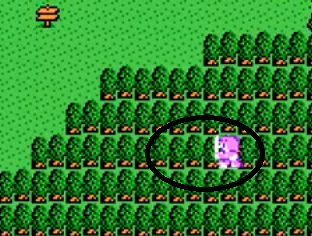


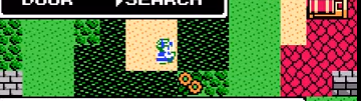


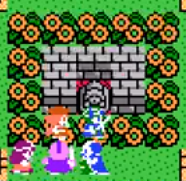


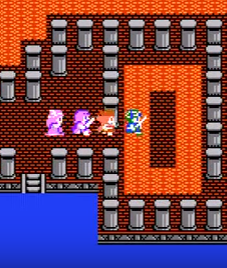

YouTube Video Editor
| the unknown |
Affected by 'Laziness Syndrome'
Registered: 12-14-12
Location: Murica
Last Post: 138 days
Last Active: 11 hours
10-01-16 08:39 AM
 Eniitan is Offline
| ID: 1304268 | 75 Words
Eniitan is Offline
| ID: 1304268 | 75 Words
 Eniitan is Offline

POSTS: 7489/10522
POST EXP: 959649
LVL EXP: 76731918
CP: 55531.6
VIZ: 2643586
Good very good I don't have much to say. I just skimmed through this a bit, and read some parts as well. I don't really have time to read 8000 words of guide as a whole. Just to see how it looks is what I am going for here, and I like what I am seeing. I like reading guides that are pleasant that has colours in them explaining parts of each section as well. -------------------- |
  Number 1 Sailor Moon, Final Fantasy And Freedom Planet Fan On Vizzed! Number 1 Sailor Moon, Final Fantasy And Freedom Planet Fan On Vizzed! |
Affected by 'Laziness Syndrome'
Registered: 08-16-12
Last Post: 1356 days
Last Active: 459 days
10-01-16 08:41 AM
janus is Offline
| ID: 1304269 | 39 Words
SecureYourCodeDavid
POSTS: 4534/4824
POST EXP: 567678
LVL EXP: 23534433
CP: 64465.3
VIZ: 636962
I'm glad you like it. But like always you should come back in a bit in order to see the real guide; I've been caught too many times having to copy and paste because the editing took too long. -------------------- |
YouTube Video Editor
| the unknown |
Affected by 'Laziness Syndrome'
Registered: 12-14-12
Location: Murica
Last Post: 138 days
Last Active: 11 hours
10-01-16 08:44 AM
Eniitan is Offline
| ID: 1304272 | 17 Words
Eniitan is Offline
POSTS: 7491/10522
POST EXP: 959649
LVL EXP: 76731918
CP: 55531.6
VIZ: 2643586
janus : If that is your wish then so it shall be granted for next time around. ^-^ -------------------- |
| Number 1 Sailor Moon, Final Fantasy And Freedom Planet Fan On Vizzed! |
Affected by 'Laziness Syndrome'
Registered: 08-16-12
Last Post: 1356 days
Last Active: 459 days
