

 User Notice
 Forum Links
Play Pac-Man World 20th Anniversary Online


Thread Information
Views
763
Replies
6
Rating
0
Status
OPEN
Thread
Creator
Creator
FaithFighter
07-28-16 04:38 PM
07-28-16 04:38 PM
Last
Post
Post
FaithFighter
07-30-16 12:04 PM
07-30-16 12:04 PM
System
9.5
Views: 496
Today: 0
Users: 1 unique
Today: 0
Users: 1 unique
Thread Actions


Order
Pac Man World Pt 5
Game's Ratings
Overall
Graphics
Sound
Addictiveness
Depth
Story
Difficulty
Average User Score
9.5
9
9
10
10
8
9
07-28-16 04:38 PM
 FaithFighter is Offline
| ID: 1290840 | 4378 Words
FaithFighter is Offline
| ID: 1290840 | 4378 Words
 FaithFighter is Offline
| ID: 1290840 | 4378 Words
FaithFighter
Level: 67


POSTS: 1104/1208
POST EXP: 167129
LVL EXP: 2520469
CP: 10750.4
VIZ: 26175

POSTS: 1104/1208
POST EXP: 167129
LVL EXP: 2520469
CP: 10750.4
VIZ: 26175
Likes: 0 Dislikes: 0
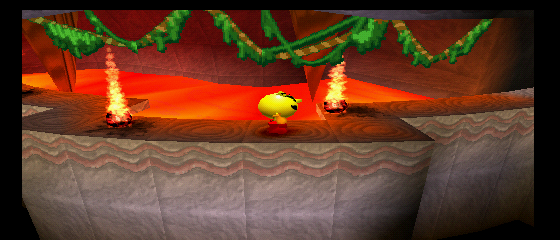
After a very long absentee state, I have returned, and I am going to finish the project that I started a while back: to complete a game guide to complete Pac-Man world 100%. Fortunately, vizzed saved my old game file, so now I no longer need to complete all the levels all over again. Last time that I left off, I had just finished the fun house world. So let us move on to the factory… Edit: I was originally intending to do this last game guide section level by level, but I was informed that splitting game guides (unless over 20,000 words is now not permitted. So I will now be editing all of the final levels into this final portion. Factory Lvl. 1: Perilous Pipes Exiting from the fun house boss level, go to the right…into the factory level's plaza, and enter the first door. This level is called Perilous Pipes…Let’s just see how dangerous it is. Open the box that is on your left, and grab the pac-dots within. In this area, you will see some strange, I guess welder bots? Anyways, bounce on the ones that have the flame pointing forward, and rev roll the ones pointing up. Or you could just avoid them, it doesn’t really matter. If you need some health, break the crate atop those silver platform cubes to the right of where you first appear in the level. There is nothing else to collect here, so head to the right until you see the drop-off with the arrow. Wait for the magnet platform, and hop on. Oddly enough, if you stomp on these, they will drop whatever it is they were carrying, but the platform itself will not fall, and neither will you. Once on the other side, hit that green switch you see. It will generate a pac-dot chain that leads back to the other side, where you will see either an extra life or a health wedge. Once you get back to the green switch you will notice another magnet platform, this one going up and down If you ride it to the top platform, you’ll get an extra life up there, as well as at the bottom platform. Behind the middle platform, however, there is a crate that contains a lemon. Use your B-bounce to spring around the ledge and to the other side. (you probably could just jump too.) From there, you can continue on to the right. Watch out for the magnet platform It will try to stomp you! There’s nothing to collect up here other than a few pac-dots, which are also effective against the welder-bots. If you go farther right, you will see a platform down below the one that you are on. Go down to it and open the lemon door to get the letter “p”. Once you have this, go back to the top platform and use the step-block platforms to board the magnet platform. Upon reaching the right side platform. Rev Roll across the ramp. On the other side, you will go past a checkpoint and a pumpkin door. Continue on past them into the ghost maze. In the lower left corner of the maze is a green switch that activates a set of pac-dots, the power pellet, and the pumpkin that you need to open the door. The power pellet is located at the far right side of the ghost maze. Take care not to fall off the front side of the maze. Once you get everything, go open the door, and hit the blue switch inside. This will blow up the block covering the hole in front of the door. Activate the helivator by taking it to the top, then let it fall all the way down, where you be able to get the letter “A”. Again, be careful not to fall off the front of the platform. Once you get back to the top, go back to the right through the ghost maze. You will see two pistons in the background. For some reason you can jump on them, but they don’t seem to be there for any reason. Head all the way to the right and rev across the gap. You’ll walk past the galaxian door. Watch out for steam and make your way around the ledge. Also, don’t touch the red-hot pipes along the way. Once you get all the way to the back, and are ready to go back to the right. Use a pac-dot to get the welder-bot out of your way. Continue heading along the path, avoiding the steam, pipes, and bots. When you see the yellow switch, hit it. It temporarily shuts off the steam that blocks the way to the galaxian. So hurry and get it. Hit the blue switch and take the pac-dot chain. Use the super bounce pellet on the other side to clear out the bots. Hit the checkpoint and make your way back to the galaxian door to complete the maze. Beware of the steam in this maze, you can tell where it will show up the easiest by looking at the floor. The spots where you see the cracks are where the steam will spew from the pipes periodically. See you at the last checkpoint before this. From the checkpoint you will see some pistons. Be care crossing these. Make your way toward the rear platforms, and take care not to be squashed by the magnet. If you board it, you will be able to collect the extra life. From there jump off to the right, and head to the next platform. Shoot the welder-bot and hit that blue switch you see. Then follow the trail of pac-dots. You’ll notice that where the extra life was, there is now the letter “C”. Now head past that blue switch and hit the checkpoint. Continuing along the path, you should find a wider room and some b-boing pads. Climb those and hit the blue switch. Rev up the ramp, but be careful to stop with “x” before you fly into the water. Collect the steel pellet, then dive into the pool and break open the crates. You will find a health wedge, a bunch of bananas, and an extra life. Now you can go all the way across and open the banana door. Hitting the green switch inside will open some pac dots, and allow you to chow down on that yummy ghost. Moving on, you will see a blue switch that activates the letter “M”. Hit that and then, go down to the lower path. Once you get around on that, you will see another blue switch. This will activate a pacdot chain that you can rev roll into and will allow you to collect the letter. Moving past that and the steam gauntlet. You will see more of those steel boxes, as well as some ghosts. Towards the front of the screen however, there is a lower platform, where you can find another lemon. If you see that box in the left back corner of the first set, you can break it and get an extra life. From there, head to the right. Grab the bell that’s on the stack of crates to the right, then proceed to open the lemon door in the back and hit the blue switch. Try to board the magnet in the back so you can get the second “A”. Once you hit the second switch, you will need to board the magnet in front to reach the power pellet and eat those ghosts. After this, continue on to the right, and use the helivator. Once you hit the checkpoint, get across the pipes at the top. I find it easiest to just bounce across them. It makes it easier to avoid the steam. Be sure to hit the switch on the other side, as well as collect the strawberry in the back. Then you can go down to the bottom to eat the ghosts and open the door. Inside is another switch that opens the way forward. Beware the welder past the wall and dive into the water on the right. Avoid the pipes and collect the “N”. Go back to the top and head past the ramp. Good thing you got that bell earlier, because there’s the bell door! Hit the switch inside to get the extra life; then proceed to the end of the level. Now we get to the mini-game. This one is pretty easy. All you have to do is run to the right, quickly collecting the fruit and avoiding the magnets. Also, be sure to hit the blue switches along the way. Once at the end, hop on that stack of steel blocks. Hit the blue switch and ride the pac-dot chain to 100% completion ! Factory Lvl. 2: Under Pressure All right, yesterday I finished the first level of the factory, so let's move to the second. We'll enter the now open door to level 2, Under Pressure. As soon as you are in the level, you will notice two different welder-bots. dodge them and get the pac dots in the crate so that you can shoot them down. From there, go up the stairs and cross the gauntlet of pistons and platforms till you reach safety on the other side. You'll pass a pumpkin door as well as a ghost with a hard hat. (By the way, very clever design choice!) Heading past them, jump the gap and hit the yellow switch. Hitting this switch activates the falling platform to your right. If you take that platform downbelow, you will find another switch. Hitting this one will activate the platform's higher setting. This platform allows you to get the extra life on the left as well as the pumpkin (and the way forward.) If you open the pumpkin door and hit the switch, a pac dot chain will be activated on the left. This will take you a few platform back closer to the beginning. Go back towards the ghost and collect the Power Pellet along the way so that you can eat the ghost, and get a health wedge back. You'll have to reactivate the yellow switches again to get up top and move on. From there, you will notice two pistons that move very high and low. Take the left piston to the bottom and hit the blue switch and collect the cherry that appears. Then go to the right piston and hit the pac-dot chain to arrive at a hidden platform. The left crate on the platform holds a super bounce, save that. The right holds some pac-dots. Lastly, there is the letter "P" hiding behind the steel boxes. Now make your way to the lower platform on the same side. Now you can use your super bounce to wipe out all the welder bots. Continuing on, you will hit another yellow switch. This one raised the piston behind you higher, and you will be able to collect an extra life. If you continue on the path from here, you'll run across a conveyor belt with a bunch of steam pipes. I find that the easiest and safest way to cross it is to just b-bounce across. On the other side you will find an apple door, and more belts. Make your way down the belt while dodging the steam, and head to the left at the end. There you should find the apple needed to open the door. Once you go back and open the door, hit the switch inside. Doing so activates more steam, but also a stream of pac-dots. Try to stay in between the first two steam bursts, and you will eventually collect the letter "A". Now if you go down the belt and head to the left, we can move on... You'll cross a couple more pistons and make it to another checkpoint. Take the piston to the top, and you will find a health wedge on a platform, the way forward is to the left of this. You will need to cross another conveyor belt, but this one is a bit more tricky. Instead of steam, this one seems to have some sort of drill stamp. Try to stay on the belt, and wait for it to go down, once it raises again try to do some jumps to get past it. (DO NOT B-Bounce, you will hit the drill!) After that, jump over to the next belt and make your way down while avoiding the steam. This will cause pac-dots to drop out of the pipe behind you. There is also an extra life that falls, but nothing that is all that important, so you don't really need to worry about it. Continuing past that, you will cross yet another conveyor. This one is a little easier, as you do not have to fight the belt, but you will have to time it to avoid both steam and drill stamps. Once across, hit the green button and jump back to the belt. This changes the direction of the belt and again drops pac-dots and an extra life. This one is easier to get than the last one, so I would recommend it. Continuing on to the next checkpoint, you will need to cross another belt. This time, I would recommend using a rev roll to get past the drill stamps. Do be careful not to charge them too long though, you might get dragged into a hazard or off the belt altogether! Once at the end, you may need to wait for the magnet that will take you across. On the other side there is a galaxian in one of the crates, while the others have Pac-dots. Watch out for the magnet that will try to stomp you here, as well as the welder-bots. Make your way for the maze... This maze was slightly easier than the last one. Again we have the stage hazard of the steam, this time coming from the floor itself. Again, just watch the cracks and the steam patterns and you should be fine! Now, back to the level... Head across the conveyor belt. I think this one is going slower, as I was easily able to cross it just by walking. At the end of it, you will see the letter "C", but no platforms. Don't be alarmed, just grab the letter and fall down into the water. You'll sink pretty far, so go back up to the surface of the water and hit the checkpoint before going any further. Swim on down, but watch out for the sharks! These guys just swim in a straight line, so if you just stay above or below them, you should be okay. Also be sure to avoid the scalding hot pipes. If you head to the left and up, you will see the steel pellet, Use it to hit the box just below, then bounce into the pit below to get the crate down there, and get the extra life before the pellet wears off. After you get back to where you were, head to the right past all the pipes. Head down into the tunnel and follow it all the way to the end to find the letter "M". Upon exiting the tunnel you will need to get past the shark and the pipe that stands in your way, then swim up the tunnel and get out of the water. Climb up to the top and hit that checkpoint. Go to the right and use the helivator, watch your time so as to avoid the steam. On the way up, you will notice another letter "A". Once at the top, the green button does nothing except give you some dots. So now head to the left and climb across the platforms. Use the helivators, again watch your timing to avoid the steam. Once you get past both the helivators, at the top you will see a blue switch, hit it, and an extra life will appear. Go past the checkpoint and continue down the path, taking care not to fall off! Also watch out for another welder bot. Get past him and you will have to climb a sort of staircase to get across to a ghost area. Head to the back, and hit the blue switch (that is telling you not to). Hitting this causes gears to start falling in different spots, activates a power pellet, and the way forward. Now go back across the staircase. As you can see, a new path is open. Also, be sure to grab that bell that you can see at the bottom of the screen if you are standing on the other side. Moving on, be careful as you cross the small, steam-bursting platforms, and make your way across. You'll see a couple more bots (You know what to do) as well as some b-boings. Be careful using these, as steam seems to be bursting from the bottom one as well. Once you climb these, you will see two b-boings. The one towards the front of the screen will take you across and you will see a bell door, behind which is the letter "N". The rear b-boing takes you farther up to the end of the level. Factory Lvl. 3: Down the Tubes As soon as you enter the level, you will notice that there is a patrolling welder bot. Just try to avoid him for now. Continuing down the path, you will have to cross some unstable platforms. Be careful not to let them tilt so much that you roll off of them. After the second platform, you will see a cherry door. Continue past it and rev up the ramp, timing it to avoid the steam. Across from the ramp, you will run into some b-boing pads. Take these about halfway up. You will land on a platform, where you should see a cherry floating above a somewhat slanted section of the platform. Bounce to grab the cherry, then head back for the door. At the bottom where you started, you will see a helivator, this will take you back to the door. Once the door is open, hit the green switch inside. This activates a pac-dot chain that takes you back to the beginning of the level. Quickly use one of your pac-dots to defeat the welder-bot, and collect the letter "P" that you now see at the beginning of the level. Now, make your way back to the b-boings, and climb all the way to the top. Agian, watch the steam on the way up...Once you are at the top of the tower, you will notice a galaxian door, as well as a relatively annoying sound. This is an indicator of gears falling all over the place, so watch your step. You will cross two unstable platforms. Wait for the third platform to come to you, and also make sure it is safe to jump. Otherwise, a gear will fall on you, stop you in your tracks, and you will fall down and die! If you exit the platform to the right, you will find nothing but pac-dots. Collect them if you want. However, it is the platform towards the back that opens the way forward. Watch for the gears, and cross the platforms. On the second small platform, you will find the galaxian that you need. Go back and enter the maze... Nothing noteworthy about this maze, just watch the steam, and you will be fine.... Now make your way back to where you found the galaxian. From there, board the helivator, but be sure to watch the steam. Take that one to the end, and jump on the one that you see on the left. Board the next helivator, and DO NOT jump on the platform, for some reason, it does not seem that you can jump back. Take this one all the way to the right. Go ahead and hit the checkpoint, and continue down the path. Deal with the welder bot, and go up the ramp. Once you get to the top, press the "X" button twice to bounce and collect the letter "A" Hit the blue switch that you see down below. Watch out for the ghosts and get to the platform toward the front of the screen on your left. If you hit the switch, there will be a power pellet there and you will now be able to eat the ghosts. Then head back up top and cross the gap this time. You'll roll down a little slope, be sure not to roll off the platform. Be sure to watch the steam as you climb the stairs. (You can also cheat at this part by b-bouncing on the edge of each step!) Go past the banana door and carefully cross the two unstable platforms that you see and the the helivator up. Once at the top of the helivator, climb the b-boings and break the crate with the bananas on the first solid platform that you come to. Fall back down and go to the door. Hit the switch and follow the dots! And...apparently that is all it was, just some dots. Anyways, back to where we got the banana. Continue climbing all the way to the top. Roll down the tube on the right, and get to that checkpoint. From here, you should be able to see Pac Jr. in the back of the room. Hit the yellow switch to get the steel pellet, which will let you hit the green switch in the water. Go down and you will notice that the tunnels have numbers. But the first two tunnels that you see both have the number one. Taking the tunnel down and left, you will notice a crate that you can break with the yellow switch steel pellet if you are quick enough, as well as the letter "C". Inside the crate is an extra life. Before we go down to tunnel 2, let's go back and explore the other tunnel 1. Go back up and to the right past the pipes, Once you see the tunnel slope up to the left, be sure to check out the chamber on the left. Grab that steel pellet and use it to open the crate that has the letter "N". The tunnel, just goes up and to the left to the end of the level, so unless you are just tired of my rambling and want to finish the level, go back to the tunnel where we were before. This time, go down, and we will begin exploring tunnel 2. Following the tunnel, we find another checkpoint. Going down past that, we get to the third area. Keep swimming and watch out for sharks! After you see the first shark in the third area, the tunnel splits. I went to the right first. Upon doing so I discovered two crates and platforms above the water. So for now, let's surface. On the first platform, you will find another checkpoint. If we keep going, we will see a pumpkin door that seems to be holding the steel pellet that we need. Keep going to the right, and you will see more water, but before that, a yellow switch. Hit that so the helivator that you took to get here will stay so you can take it back. In the water, there are two sections, divided by scalding pipes and what I realize now is a robotic shark. Go on the top half past the shark and get the cherry. Surface and go on the platform to the right, and you will notice a cherry door. Open it to gain a steel pellet. Which you can use to get the pumpkin that is in the left crate(the right crate just has a health wedge) on the bottom of where you got the cherry. After that, you can open the pumpkin door and retrieve the extra life and the letter "a" in the crates below. Now go down to the tunnel below. Going through this tunnel (area 4), you will a similar scenario.You will pass a banana door, a pumpkin door, and a cherry door. First, go down into the water where the cherry door is. To the far right you will find the cherry. Open the door and break the two crates to the left in this water area to get an extra life and the banana. From there, open the banana door and use the pellet to get the pumpkin in the one crate on the right, as well as the letter "M" on the far left. Opening the pumpkin door give you a bell. Now let's head back to the area where Pac Jr. is being held. Now go to the right of that room and through the opening. Through the corridor and up the stairs, and there's the bell door! Head through and to the right. Continuing down the path, you will find the ghosts yet again. Hit the blue switch at the back of the room to get the key and power pellet. You know what to do with those ghosts! Now, to rescue Pac Jr. I don't think that I need to tell you how to exit the level again, since Pac Jr. did it for me! Se ya in the boss battle! Factory Boss Battle: Krome Kreeper Basically, you have to hit all the switches to hurt this boss, but all the switches are too hot to touch. You'll need to get the steel pellets and avoid the magnets to get them all. Hit the wooden crates to get health wedges and steel pellets, while avoiding the wooden crates. It takes a lot of work. If you do happen to get stuck on a magnet, you can wriggle free. His attacks do not seem to progress at all, but this battle does require a lot of patience, it is easy to get messed up because of not getting enough steel pellets or getting sucked up by cranes. If you watch their shadow, you should be able to stay out of their way easily enough. Be patient, perservere, and you will be victorious! Edit: I was originally intending to do this last game guide section level by level, but I was informed that splitting game guides (unless over 20,000 words is now not permitted. So I will now be editing all of the final levels into this final portion. Factory Lvl. 1: Perilous Pipes Exiting from the fun house boss level, go to the right…into the factory level's plaza, and enter the first door. This level is called Perilous Pipes…Let’s just see how dangerous it is. Open the box that is on your left, and grab the pac-dots within. In this area, you will see some strange, I guess welder bots? Anyways, bounce on the ones that have the flame pointing forward, and rev roll the ones pointing up. Or you could just avoid them, it doesn’t really matter. If you need some health, break the crate atop those silver platform cubes to the right of where you first appear in the level. There is nothing else to collect here, so head to the right until you see the drop-off with the arrow. Wait for the magnet platform, and hop on. Oddly enough, if you stomp on these, they will drop whatever it is they were carrying, but the platform itself will not fall, and neither will you. Once on the other side, hit that green switch you see. It will generate a pac-dot chain that leads back to the other side, where you will see either an extra life or a health wedge. Once you get back to the green switch you will notice another magnet platform, this one going up and down If you ride it to the top platform, you’ll get an extra life up there, as well as at the bottom platform. Behind the middle platform, however, there is a crate that contains a lemon. Use your B-bounce to spring around the ledge and to the other side. (you probably could just jump too.) From there, you can continue on to the right. Watch out for the magnet platform It will try to stomp you! There’s nothing to collect up here other than a few pac-dots, which are also effective against the welder-bots. If you go farther right, you will see a platform down below the one that you are on. Go down to it and open the lemon door to get the letter “p”. Once you have this, go back to the top platform and use the step-block platforms to board the magnet platform. Upon reaching the right side platform. Rev Roll across the ramp. On the other side, you will go past a checkpoint and a pumpkin door. Continue on past them into the ghost maze. In the lower left corner of the maze is a green switch that activates a set of pac-dots, the power pellet, and the pumpkin that you need to open the door. The power pellet is located at the far right side of the ghost maze. Take care not to fall off the front side of the maze. Once you get everything, go open the door, and hit the blue switch inside. This will blow up the block covering the hole in front of the door. Activate the helivator by taking it to the top, then let it fall all the way down, where you be able to get the letter “A”. Again, be careful not to fall off the front of the platform. Once you get back to the top, go back to the right through the ghost maze. You will see two pistons in the background. For some reason you can jump on them, but they don’t seem to be there for any reason. Head all the way to the right and rev across the gap. You’ll walk past the galaxian door. Watch out for steam and make your way around the ledge. Also, don’t touch the red-hot pipes along the way. Once you get all the way to the back, and are ready to go back to the right. Use a pac-dot to get the welder-bot out of your way. Continue heading along the path, avoiding the steam, pipes, and bots. When you see the yellow switch, hit it. It temporarily shuts off the steam that blocks the way to the galaxian. So hurry and get it. Hit the blue switch and take the pac-dot chain. Use the super bounce pellet on the other side to clear out the bots. Hit the checkpoint and make your way back to the galaxian door to complete the maze. Beware of the steam in this maze, you can tell where it will show up the easiest by looking at the floor. The spots where you see the cracks are where the steam will spew from the pipes periodically. See you at the last checkpoint before this. From the checkpoint you will see some pistons. Be care crossing these. Make your way toward the rear platforms, and take care not to be squashed by the magnet. If you board it, you will be able to collect the extra life. From there jump off to the right, and head to the next platform. Shoot the welder-bot and hit that blue switch you see. Then follow the trail of pac-dots. You’ll notice that where the extra life was, there is now the letter “C”. Now head past that blue switch and hit the checkpoint. Continuing along the path, you should find a wider room and some b-boing pads. Climb those and hit the blue switch. Rev up the ramp, but be careful to stop with “x” before you fly into the water. Collect the steel pellet, then dive into the pool and break open the crates. You will find a health wedge, a bunch of bananas, and an extra life. Now you can go all the way across and open the banana door. Hitting the green switch inside will open some pac dots, and allow you to chow down on that yummy ghost. Moving on, you will see a blue switch that activates the letter “M”. Hit that and then, go down to the lower path. Once you get around on that, you will see another blue switch. This will activate a pacdot chain that you can rev roll into and will allow you to collect the letter. Moving past that and the steam gauntlet. You will see more of those steel boxes, as well as some ghosts. Towards the front of the screen however, there is a lower platform, where you can find another lemon. If you see that box in the left back corner of the first set, you can break it and get an extra life. From there, head to the right. Grab the bell that’s on the stack of crates to the right, then proceed to open the lemon door in the back and hit the blue switch. Try to board the magnet in the back so you can get the second “A”. Once you hit the second switch, you will need to board the magnet in front to reach the power pellet and eat those ghosts. After this, continue on to the right, and use the helivator. Once you hit the checkpoint, get across the pipes at the top. I find it easiest to just bounce across them. It makes it easier to avoid the steam. Be sure to hit the switch on the other side, as well as collect the strawberry in the back. Then you can go down to the bottom to eat the ghosts and open the door. Inside is another switch that opens the way forward. Beware the welder past the wall and dive into the water on the right. Avoid the pipes and collect the “N”. Go back to the top and head past the ramp. Good thing you got that bell earlier, because there’s the bell door! Hit the switch inside to get the extra life; then proceed to the end of the level. Now we get to the mini-game. This one is pretty easy. All you have to do is run to the right, quickly collecting the fruit and avoiding the magnets. Also, be sure to hit the blue switches along the way. Once at the end, hop on that stack of steel blocks. Hit the blue switch and ride the pac-dot chain to 100% completion ! Factory Lvl. 2: Under Pressure All right, yesterday I finished the first level of the factory, so let's move to the second. We'll enter the now open door to level 2, Under Pressure. As soon as you are in the level, you will notice two different welder-bots. dodge them and get the pac dots in the crate so that you can shoot them down. From there, go up the stairs and cross the gauntlet of pistons and platforms till you reach safety on the other side. You'll pass a pumpkin door as well as a ghost with a hard hat. (By the way, very clever design choice!) Heading past them, jump the gap and hit the yellow switch. Hitting this switch activates the falling platform to your right. If you take that platform downbelow, you will find another switch. Hitting this one will activate the platform's higher setting. This platform allows you to get the extra life on the left as well as the pumpkin (and the way forward.) If you open the pumpkin door and hit the switch, a pac dot chain will be activated on the left. This will take you a few platform back closer to the beginning. Go back towards the ghost and collect the Power Pellet along the way so that you can eat the ghost, and get a health wedge back. You'll have to reactivate the yellow switches again to get up top and move on. From there, you will notice two pistons that move very high and low. Take the left piston to the bottom and hit the blue switch and collect the cherry that appears. Then go to the right piston and hit the pac-dot chain to arrive at a hidden platform. The left crate on the platform holds a super bounce, save that. The right holds some pac-dots. Lastly, there is the letter "P" hiding behind the steel boxes. Now make your way to the lower platform on the same side. Now you can use your super bounce to wipe out all the welder bots. Continuing on, you will hit another yellow switch. This one raised the piston behind you higher, and you will be able to collect an extra life. If you continue on the path from here, you'll run across a conveyor belt with a bunch of steam pipes. I find that the easiest and safest way to cross it is to just b-bounce across. On the other side you will find an apple door, and more belts. Make your way down the belt while dodging the steam, and head to the left at the end. There you should find the apple needed to open the door. Once you go back and open the door, hit the switch inside. Doing so activates more steam, but also a stream of pac-dots. Try to stay in between the first two steam bursts, and you will eventually collect the letter "A". Now if you go down the belt and head to the left, we can move on... You'll cross a couple more pistons and make it to another checkpoint. Take the piston to the top, and you will find a health wedge on a platform, the way forward is to the left of this. You will need to cross another conveyor belt, but this one is a bit more tricky. Instead of steam, this one seems to have some sort of drill stamp. Try to stay on the belt, and wait for it to go down, once it raises again try to do some jumps to get past it. (DO NOT B-Bounce, you will hit the drill!) After that, jump over to the next belt and make your way down while avoiding the steam. This will cause pac-dots to drop out of the pipe behind you. There is also an extra life that falls, but nothing that is all that important, so you don't really need to worry about it. Continuing past that, you will cross yet another conveyor. This one is a little easier, as you do not have to fight the belt, but you will have to time it to avoid both steam and drill stamps. Once across, hit the green button and jump back to the belt. This changes the direction of the belt and again drops pac-dots and an extra life. This one is easier to get than the last one, so I would recommend it. Continuing on to the next checkpoint, you will need to cross another belt. This time, I would recommend using a rev roll to get past the drill stamps. Do be careful not to charge them too long though, you might get dragged into a hazard or off the belt altogether! Once at the end, you may need to wait for the magnet that will take you across. On the other side there is a galaxian in one of the crates, while the others have Pac-dots. Watch out for the magnet that will try to stomp you here, as well as the welder-bots. Make your way for the maze... This maze was slightly easier than the last one. Again we have the stage hazard of the steam, this time coming from the floor itself. Again, just watch the cracks and the steam patterns and you should be fine! Now, back to the level... Head across the conveyor belt. I think this one is going slower, as I was easily able to cross it just by walking. At the end of it, you will see the letter "C", but no platforms. Don't be alarmed, just grab the letter and fall down into the water. You'll sink pretty far, so go back up to the surface of the water and hit the checkpoint before going any further. Swim on down, but watch out for the sharks! These guys just swim in a straight line, so if you just stay above or below them, you should be okay. Also be sure to avoid the scalding hot pipes. If you head to the left and up, you will see the steel pellet, Use it to hit the box just below, then bounce into the pit below to get the crate down there, and get the extra life before the pellet wears off. After you get back to where you were, head to the right past all the pipes. Head down into the tunnel and follow it all the way to the end to find the letter "M". Upon exiting the tunnel you will need to get past the shark and the pipe that stands in your way, then swim up the tunnel and get out of the water. Climb up to the top and hit that checkpoint. Go to the right and use the helivator, watch your time so as to avoid the steam. On the way up, you will notice another letter "A". Once at the top, the green button does nothing except give you some dots. So now head to the left and climb across the platforms. Use the helivators, again watch your timing to avoid the steam. Once you get past both the helivators, at the top you will see a blue switch, hit it, and an extra life will appear. Go past the checkpoint and continue down the path, taking care not to fall off! Also watch out for another welder bot. Get past him and you will have to climb a sort of staircase to get across to a ghost area. Head to the back, and hit the blue switch (that is telling you not to). Hitting this causes gears to start falling in different spots, activates a power pellet, and the way forward. Now go back across the staircase. As you can see, a new path is open. Also, be sure to grab that bell that you can see at the bottom of the screen if you are standing on the other side. Moving on, be careful as you cross the small, steam-bursting platforms, and make your way across. You'll see a couple more bots (You know what to do) as well as some b-boings. Be careful using these, as steam seems to be bursting from the bottom one as well. Once you climb these, you will see two b-boings. The one towards the front of the screen will take you across and you will see a bell door, behind which is the letter "N". The rear b-boing takes you farther up to the end of the level. Factory Lvl. 3: Down the Tubes As soon as you enter the level, you will notice that there is a patrolling welder bot. Just try to avoid him for now. Continuing down the path, you will have to cross some unstable platforms. Be careful not to let them tilt so much that you roll off of them. After the second platform, you will see a cherry door. Continue past it and rev up the ramp, timing it to avoid the steam. Across from the ramp, you will run into some b-boing pads. Take these about halfway up. You will land on a platform, where you should see a cherry floating above a somewhat slanted section of the platform. Bounce to grab the cherry, then head back for the door. At the bottom where you started, you will see a helivator, this will take you back to the door. Once the door is open, hit the green switch inside. This activates a pac-dot chain that takes you back to the beginning of the level. Quickly use one of your pac-dots to defeat the welder-bot, and collect the letter "P" that you now see at the beginning of the level. Now, make your way back to the b-boings, and climb all the way to the top. Agian, watch the steam on the way up...Once you are at the top of the tower, you will notice a galaxian door, as well as a relatively annoying sound. This is an indicator of gears falling all over the place, so watch your step. You will cross two unstable platforms. Wait for the third platform to come to you, and also make sure it is safe to jump. Otherwise, a gear will fall on you, stop you in your tracks, and you will fall down and die! If you exit the platform to the right, you will find nothing but pac-dots. Collect them if you want. However, it is the platform towards the back that opens the way forward. Watch for the gears, and cross the platforms. On the second small platform, you will find the galaxian that you need. Go back and enter the maze... Nothing noteworthy about this maze, just watch the steam, and you will be fine.... Now make your way back to where you found the galaxian. From there, board the helivator, but be sure to watch the steam. Take that one to the end, and jump on the one that you see on the left. Board the next helivator, and DO NOT jump on the platform, for some reason, it does not seem that you can jump back. Take this one all the way to the right. Go ahead and hit the checkpoint, and continue down the path. Deal with the welder bot, and go up the ramp. Once you get to the top, press the "X" button twice to bounce and collect the letter "A" Hit the blue switch that you see down below. Watch out for the ghosts and get to the platform toward the front of the screen on your left. If you hit the switch, there will be a power pellet there and you will now be able to eat the ghosts. Then head back up top and cross the gap this time. You'll roll down a little slope, be sure not to roll off the platform. Be sure to watch the steam as you climb the stairs. (You can also cheat at this part by b-bouncing on the edge of each step!) Go past the banana door and carefully cross the two unstable platforms that you see and the the helivator up. Once at the top of the helivator, climb the b-boings and break the crate with the bananas on the first solid platform that you come to. Fall back down and go to the door. Hit the switch and follow the dots! And...apparently that is all it was, just some dots. Anyways, back to where we got the banana. Continue climbing all the way to the top. Roll down the tube on the right, and get to that checkpoint. From here, you should be able to see Pac Jr. in the back of the room. Hit the yellow switch to get the steel pellet, which will let you hit the green switch in the water. Go down and you will notice that the tunnels have numbers. But the first two tunnels that you see both have the number one. Taking the tunnel down and left, you will notice a crate that you can break with the yellow switch steel pellet if you are quick enough, as well as the letter "C". Inside the crate is an extra life. Before we go down to tunnel 2, let's go back and explore the other tunnel 1. Go back up and to the right past the pipes, Once you see the tunnel slope up to the left, be sure to check out the chamber on the left. Grab that steel pellet and use it to open the crate that has the letter "N". The tunnel, just goes up and to the left to the end of the level, so unless you are just tired of my rambling and want to finish the level, go back to the tunnel where we were before. This time, go down, and we will begin exploring tunnel 2. Following the tunnel, we find another checkpoint. Going down past that, we get to the third area. Keep swimming and watch out for sharks! After you see the first shark in the third area, the tunnel splits. I went to the right first. Upon doing so I discovered two crates and platforms above the water. So for now, let's surface. On the first platform, you will find another checkpoint. If we keep going, we will see a pumpkin door that seems to be holding the steel pellet that we need. Keep going to the right, and you will see more water, but before that, a yellow switch. Hit that so the helivator that you took to get here will stay so you can take it back. In the water, there are two sections, divided by scalding pipes and what I realize now is a robotic shark. Go on the top half past the shark and get the cherry. Surface and go on the platform to the right, and you will notice a cherry door. Open it to gain a steel pellet. Which you can use to get the pumpkin that is in the left crate(the right crate just has a health wedge) on the bottom of where you got the cherry. After that, you can open the pumpkin door and retrieve the extra life and the letter "a" in the crates below. Now go down to the tunnel below. Going through this tunnel (area 4), you will a similar scenario.You will pass a banana door, a pumpkin door, and a cherry door. First, go down into the water where the cherry door is. To the far right you will find the cherry. Open the door and break the two crates to the left in this water area to get an extra life and the banana. From there, open the banana door and use the pellet to get the pumpkin in the one crate on the right, as well as the letter "M" on the far left. Opening the pumpkin door give you a bell. Now let's head back to the area where Pac Jr. is being held. Now go to the right of that room and through the opening. Through the corridor and up the stairs, and there's the bell door! Head through and to the right. Continuing down the path, you will find the ghosts yet again. Hit the blue switch at the back of the room to get the key and power pellet. You know what to do with those ghosts! Now, to rescue Pac Jr. I don't think that I need to tell you how to exit the level again, since Pac Jr. did it for me! Se ya in the boss battle! Factory Boss Battle: Krome Kreeper Basically, you have to hit all the switches to hurt this boss, but all the switches are too hot to touch. You'll need to get the steel pellets and avoid the magnets to get them all. Hit the wooden crates to get health wedges and steel pellets, while avoiding the wooden crates. It takes a lot of work. If you do happen to get stuck on a magnet, you can wriggle free. His attacks do not seem to progress at all, but this battle does require a lot of patience, it is easy to get messed up because of not getting enough steel pellets or getting sucked up by cranes. If you watch their shadow, you should be able to stay out of their way easily enough. Be patient, perservere, and you will be victorious! |
Trusted Member
Affected by 'Laziness Syndrome'
Registered: 06-18-14
Location: Ohio
Last Post: 1520 days
Last Active: 1521 days
| I am the FaithFighter. I stand. I fight. I live. By the Grace of GOD, I live. |
Affected by 'Laziness Syndrome'
Registered: 06-18-14
Location: Ohio
Last Post: 1520 days
Last Active: 1521 days
(edited by FaithFighter on 07-30-16 02:45 PM)
07-29-16 11:20 AM
 Furret is Offline
| ID: 1291105 | 73 Words
Furret is Offline
| ID: 1291105 | 73 Words
 Furret is Offline
| ID: 1291105 | 73 Words
Furret
Davideo69
Davideo69
Level: 151

POSTS: 3465/7612
POST EXP: 479560
LVL EXP: 42906849
CP: 48855.2
VIZ: 3410164

POSTS: 3465/7612
POST EXP: 479560
LVL EXP: 42906849
CP: 48855.2
VIZ: 3410164
Likes: 0 Dislikes: 0
Just want to inform you of the Game Guides forum rules real quick. Splitting guides is now forbidden unless the guide is 20.000 words or longer. Since you started this project before the current rules were introduced I'm not going to take away the CP and Viz you earned from this but please edit the next parts into this guide. Also, please disable your layout the next time you write a Game Guide. Splitting guides is now forbidden unless the guide is 20.000 words or longer. Since you started this project before the current rules were introduced I'm not going to take away the CP and Viz you earned from this but please edit the next parts into this guide. Also, please disable your layout the next time you write a Game Guide. |
Site Staff
Former Admin
Affected by 'Laziness Syndrome'
Registered: 11-25-12
Location: Belgium
Last Post: 112 days
Last Active: 1 day
Former Admin
 #1 Ace Attorney fan #1 Ace Attorney fan |
Affected by 'Laziness Syndrome'
Registered: 11-25-12
Location: Belgium
Last Post: 112 days
Last Active: 1 day
07-29-16 12:15 PM
FaithFighter is Offline
| ID: 1291111 | 45 Words
FaithFighter is Offline
| ID: 1291111 | 45 Words
FaithFighter
Level: 67
POSTS: 1126/1208
POST EXP: 167129
LVL EXP: 2520469
CP: 10750.4
VIZ: 26175
POSTS: 1126/1208
POST EXP: 167129
LVL EXP: 2520469
CP: 10750.4
VIZ: 26175
Likes: 0 Dislikes: 0
Furret : So I guess I'm not going to get the points if I edit them in...Could I just finish the rest of the guide in one long post? Also, I am working on the rest of this now, soooo...And will do on the layout. |
Trusted Member
Affected by 'Laziness Syndrome'
Registered: 06-18-14
Location: Ohio
Last Post: 1520 days
Last Active: 1521 days
| I am the FaithFighter. I stand. I fight. I live. By the Grace of GOD, I live. |
Affected by 'Laziness Syndrome'
Registered: 06-18-14
Location: Ohio
Last Post: 1520 days
Last Active: 1521 days
(edited by FaithFighter on 07-29-16 12:33 PM)
07-29-16 01:10 PM
Furret is Offline
| ID: 1291119 | 49 Words
Furret is Offline
| ID: 1291119 | 49 Words
Furret
Davideo69
Davideo69
Level: 151
POSTS: 3466/7612
POST EXP: 479560
LVL EXP: 42906849
CP: 48855.2
VIZ: 3410164
POSTS: 3466/7612
POST EXP: 479560
LVL EXP: 42906849
CP: 48855.2
VIZ: 3410164
Likes: 0 Dislikes: 0
FaithFighter : No, you'll have to edit them in this part right here. That's why it's always better to finish a guide before submitting it. Also, during TdV all parts have to be posted in the same day anyway so you wouldn't be able to post a separate thread regardless. No, you'll have to edit them in this part right here. That's why it's always better to finish a guide before submitting it. Also, during TdV all parts have to be posted in the same day anyway so you wouldn't be able to post a separate thread regardless. |
Site Staff
Former Admin
Affected by 'Laziness Syndrome'
Registered: 11-25-12
Location: Belgium
Last Post: 112 days
Last Active: 1 day
Former Admin
| #1 Ace Attorney fan |
Affected by 'Laziness Syndrome'
Registered: 11-25-12
Location: Belgium
Last Post: 112 days
Last Active: 1 day
07-29-16 01:18 PM
FaithFighter is Offline
| ID: 1291120 | 14 Words
FaithFighter is Offline
| ID: 1291120 | 14 Words
FaithFighter
Level: 67
POSTS: 1127/1208
POST EXP: 167129
LVL EXP: 2520469
CP: 10750.4
VIZ: 26175
POSTS: 1127/1208
POST EXP: 167129
LVL EXP: 2520469
CP: 10750.4
VIZ: 26175
Likes: 0 Dislikes: 0
Trusted Member
Affected by 'Laziness Syndrome'
Registered: 06-18-14
Location: Ohio
Last Post: 1520 days
Last Active: 1521 days
| I am the FaithFighter. I stand. I fight. I live. By the Grace of GOD, I live. |
Affected by 'Laziness Syndrome'
Registered: 06-18-14
Location: Ohio
Last Post: 1520 days
Last Active: 1521 days
(edited by FaithFighter on 07-29-16 01:22 PM)
07-29-16 01:35 PM
Furret is Offline
| ID: 1291124 | 172 Words
Furret is Offline
| ID: 1291124 | 172 Words
Furret
Davideo69
Davideo69
Level: 151
POSTS: 3467/7612
POST EXP: 479560
LVL EXP: 42906849
CP: 48855.2
VIZ: 3410164
POSTS: 3467/7612
POST EXP: 479560
LVL EXP: 42906849
CP: 48855.2
VIZ: 3410164
Likes: 0 Dislikes: 0
FaithFighter : The logs don't go that far back so that wouldn't be possible. I don't see how it's ridiculous. Splitting a guide should only be done to prevent them from becoming too long (posts over 20.000+ words can cause some issues for the site) and to still give you almost all the CP that you would have otherwise lost. But, due to the CP limit having been increased to 9999.9 that last part isn't even necessary anymore. Be happy, there was a time when you couldn't split them at all. This way it encourages people to finish their work before submitting it, since often guides get forgotten after one part and the users who follow your guide will not be able to continue. That's still the reason you make guides, to help others. They're not something you make just for CP and Viz. I think that's where a lot of people are mistaken. If you want a reward for all of your guide then you have to be patient. Simple as that. I don't see how it's ridiculous. Splitting a guide should only be done to prevent them from becoming too long (posts over 20.000+ words can cause some issues for the site) and to still give you almost all the CP that you would have otherwise lost. But, due to the CP limit having been increased to 9999.9 that last part isn't even necessary anymore. Be happy, there was a time when you couldn't split them at all. This way it encourages people to finish their work before submitting it, since often guides get forgotten after one part and the users who follow your guide will not be able to continue. That's still the reason you make guides, to help others. They're not something you make just for CP and Viz. I think that's where a lot of people are mistaken. If you want a reward for all of your guide then you have to be patient. Simple as that. |
Site Staff
Former Admin
Affected by 'Laziness Syndrome'
Registered: 11-25-12
Location: Belgium
Last Post: 112 days
Last Active: 1 day
Former Admin
| #1 Ace Attorney fan |
Affected by 'Laziness Syndrome'
Registered: 11-25-12
Location: Belgium
Last Post: 112 days
Last Active: 1 day
07-30-16 12:04 PM
FaithFighter is Offline
| ID: 1291347 | 50 Words
FaithFighter is Offline
| ID: 1291347 | 50 Words
FaithFighter
Level: 67
POSTS: 1129/1208
POST EXP: 167129
LVL EXP: 2520469
CP: 10750.4
VIZ: 26175
POSTS: 1129/1208
POST EXP: 167129
LVL EXP: 2520469
CP: 10750.4
VIZ: 26175
Likes: 0 Dislikes: 0
Furret : Well, this is wonderful, I tried to edit the next piece of the guide in, and now I got this crazy formatting error that will not let me edit it out. Hence, the crazy look to the bottom half of my post. What can I do to fix that? |
Trusted Member
Affected by 'Laziness Syndrome'
Registered: 06-18-14
Location: Ohio
Last Post: 1520 days
Last Active: 1521 days
| I am the FaithFighter. I stand. I fight. I live. By the Grace of GOD, I live. |
Affected by 'Laziness Syndrome'
Registered: 06-18-14
Location: Ohio
Last Post: 1520 days
Last Active: 1521 days
