

 User Notice
 Forum Links


Thread Information
Views
944
Replies
0
Rating
0
Status
OPEN
Thread
Creator
Creator
supernerd117
05-25-15 05:10 PM
05-25-15 05:10 PM
Last
Post
Post
supernerd117
05-25-15 05:10 PM
05-25-15 05:10 PM
System
9.4
Views: 669
Today: 1
Users: 0 unique
Today: 1
Users: 0 unique
Thread Actions


Order
Kid Icarus Uprising Walkthrough - Part Four!
Game's Ratings
Overall
Graphics
Sound
Addictiveness
Depth
Story
Difficulty
Average User Score
9.4
9.3
9
9.8
10
8.8
5.8
05-25-15 05:10 PM
supernerd117 is Offline
| ID: 1170543 | 2407 Words
| ID: 1170543 | 2407 Words
supernerd117
Level: 145


POSTS: 4377/6187
POST EXP: 404633
LVL EXP: 37491526
CP: 17982.0
VIZ: 16125

POSTS: 4377/6187
POST EXP: 404633
LVL EXP: 37491526
CP: 17982.0
VIZ: 16125
Likes: 0 Dislikes: 0
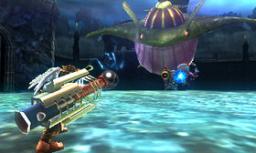
Welcome to part four in a series of nine! Today will cover Pit’s infiltration of the Reaper Fortress and fight against the Great Reaper! Due to the names and such of the bosses, this walkthrough is not entirely spoiler-free. However, I am trying my best to stick to gameplay and such, using only names and such when necessary. Links to the previous parts can be found here: Link to Part 1: https://www.vizzed.com/boards/thread.php?id=86441 Link to Part 2: https://www.vizzed.com/boards/thread.php?id=86442 Link to Part 3: https://www.vizzed.com/boards/thread.php?id=87384 Let’s begin! ______________________________________________________________________________ Chapter 4: The Reaper’s Line of Sight, on Intensity 5.0 Recommended weapon class: If attacking the Reapers: Palms, Orbitars, Cannons. If avoiding them: Claws, Blade. Reapers in the level may be best avoided, but provide a lot of hearts, and perhaps treasure if beaten. This walkthrough will cover the former option: I’ll be attacking Reapers head-on. ______________________________________________________________________________ Air Battle: Miks, Syrens, Daphnes and a Wave Angler greet you out of the gate. Take special care to destroy the Wave Angler quickly when it appears. Soon, Gyrazers and Octos appear, followed by Shrips and Miks right beside each other. Pit dives to the ground! Take a very short breather to get your bearing before Pit levels off. A Belunka appears, along with other enemies and a Treasurefish. Make sure you hit the Treasurefish first for the helpful treasure inside. Various enemies continue to assault Pit. Take special care with the Handoras on the wall to your left (you’ll turn towards it). It can be difficult to avoid their fire if you aren’t prepared. Before long, you’ll encounter them to your right as well as a Wave Angler. Be careful. You don’t have to worry too much about the Wave Angler, though; as it only gets off one shot before disappearing. Next, Reaper eyes take a glance at Pit. This causes Pit to turn around and dive into a canyon. Don’t worry too much about the Reapettes. They are easy to take care of. Focus more on dodging fire. In the canyon, take care. There are many protrusions that can damage Pit. You’ll have to worry about taking out and dodging enemy fire while dodging the protrusions, so be prepared. Soon, a windstorm will blow Pit down. Lots of Minos appear, as well as Wave Anglers and Gloomerangs. Handoras will appear on a nearby wall. Afterwards, Pit is hit by another wind storm, but makes it through. Pit then heads through a gap in a wall guarded by Minos. In this area, there is an opening to the side filled with a single Mega Mussel. Don’t forget that the pink circles are its weak points. As you exit, a Treasurefish and some Shrips appear, as well as some recovery orbs. Make sure to hit the Treasurefish while dodging the Shrips and grabbing the recovery orbs. Another wind storm hits Pit! It blows him to another canyon filled with protrusions. Take care not to hit the Shulms at too close range. Pit soon exits the canyon, looking for a way out while assaulted by Shrips, Monoeyes, and Gloomerangs. Take special care here to destroy enemies before they get to you. Watch out for the Reapers. If they notice you, something will happen (I’m not sure what). Their line of sight can be difficult to avoid. It’s probably best to try to take them out, although it is difficult to do so. Nextly, lasers spew from the fortress. A few enemies appear, but I’m not sure they attack Pit. Just focus on staying alive at this point, or take out enemies if you feel courageous. ______________________________________________________________________________ Land Battle: Pit made it in! In front of you are three urns and a guillotine. Avoid the guillotine or Pit will be beheaded. jk jk jk Before the next door is another guillotine. Dash through it, timing it so it doesn’t come down on you. Behind the door is a Reaper. Take care to stay to the side (I recommend not confronting this one unless you have a highly ranked weapon) while it passes, then when it has passed, run to the other side! Soon you’ll pass through a door. In the next section, there’s a spike trap in the middle and a number of enemies, including a Specknose, a Shulm, and a Skuttler Mage. Take the Specknose out first, while taking care to avoid the light circle of the magician and the spike trap. Once the way opens, proceed through. Watch out for the spiny spike thing. You can’t damage it. Stay to the sides, and make sure to grab what food you can. Near the end of the walkway is a Shelbo. It will try to suck you in. The mouth at the top is its weak point. Dash on one of the sides from before while it sucks, attacking the middle. Afterwards, attack the top. To the right is a hidden area. Destroy the boulder and enter the door. Inside are ghost things that appear as blue flames, called Zuree. Keep enough distance while giving them a reason to appear in their full form. Attack them when they appear quickly. There is a boulder of sorts in the middle. Melee it to cause it to drop down. It will help you gain a treasure later on. To the back is a cavern guarded by a pendulum scythe. Avoid it and proceed, if you dare. At the bottom are two Octos and an Orne (this will kill you instantly if you touch it!). But there is also a treasure chest. Don’t panic! Ornes aren’t difficult for most people to avoid if you don’t panic. Grab the treasure while destroying the Octos (the Orne can’t die). Destroy a boulder near the entrance to the cavern’s pit to find a jump pad. Jump back up, taking care not to rush too much because of the pendulum scythe. If you take care, you should come away unscythed. Proceed back through the door and towards the grind rail. Reapettes will appear. Make sure to take them out quickly or you’ll be stunned and take damage for a second. At the end of the grind rail is an arena. In the arena is a turtle spinner, a Skuttler Mage, a Skuttler Cannoneer, and a Belunka. I recommend taking down the turtle spinner, then the other enemies, followed by the Belunka. It’s OK to let the Belunka respawn enemies. They aren’t too hard to deal with. In the second round in the arena, there is a Shelbo and two Shulms. The Shulms will respawn, so don’t worry about them. Take down the Shelbo and the way will open. Take care not to hit the Shulms. They will poison you if hit with non-melee attacks. You then have two options: Head left or straight. Heading left will lead you into a room with several Zurees. Defeat them or avoid them. At the back of the room is an alcove blocked by a container. Destroy it and grab the treasure back there, then head out. Back on track now, head straight through the two big doors. If you’re fast, you can take down a Souffle, but if not, don’t worry about it. Around the corner is a Shemum Urn. Take it down using melee attacks, keeping in mind that if you let the Souffle pass the corner, it’s probably long gone by then. Through the next door is an Eggplant Wizard and a Handora. The latter will respawn if you destroy it. The former is a tricky, hardy enemy. If you get hit with an attack, you’ll turn into an eggplant with legs. Keep attacking and moving to break free. But keep your distance, and it becomes manageable to deal with this enemy. If you’re close, you might get hit as the Eggplant Wizard warps and leaves behind an Eggplant Bomb. In the next room, you’ll see two splitting paths and a drop below. You’ll want to drop below later to grab the Gemini weapon below. But first, before you do anything, start walking towards the left path (DON’T TAKE IT YET!). An obtrusion in the wall will pop out at regular intervals as you get close. As the obtrusion goes back in, dash towards the treasure chest at the end. It may take a few tries, and don’t worry about falling too much. Just do your best. After you’ve obtained the treasure (or if you fall), drop down. At the bottom are a number of spike pits as well as a Clubberskull and several blue ghosts. It is best to avoid the Clubberskull until you have a more powerful weapon. DO NOT ATTACK IT AT ALL. IT WILL BREAK FREE AND MIGHT KILL YOU. Poke around at the bottom to find a pit that is filled with a blue light. Drop down into it and enter the Gemini chamber. You will obtain the Taurus Arm. Then flip around and take the jump pad up. Proceed through the door and onto the nearby jump pad. As you take the right path at the top, a Shelbo will appear. Take care to keep your distance so it does not pull you into a pendulum scythe or off the platform. If you take your time, you will be fine. An alternate strategy might be to let it pull you in then dash past it to the left. This will afford you more room, and you won’t have to deal with the scythes. If you are unsuccessful, though; you will take a beating when it spins. Proceed through the two doors in front of you. In front of you should be a jump pad and a door. DO NOT TAKE THE JUMP PAD YET...unless you’re heading straight for the boss. Head through the door. Take the elevator up, and head through the intensity gate, if possible INTENSITY GATE 5.0: On your way through the gate, there is a grind rail. On the grind rail are several obstructions. Take care to clear them as you grind. At the end of the rail are several Gyrazers and a Shelbo. Dash backwards repeatedly or forwards through the blasts of the Gyrazers, depending on your strategy. You might want to deal with the Gyrazers first, it will make dealing with the Shelbo a cakewalk. Proceed forward and grab the food. Past the next room and at the end are two treasure chests, one containing food and hearts and the other containing a weapon or power. Turn back around to find...two Reapers patrolling the room. Follow one as it walks back and grab the item near the end of the room, making sure to not get caught in its line of sight. Hold onto this item until the next room, where you’ll run into a Boogity. Use the item now. It will grow a wall of vines that will block attacks and do damage. Shoot at the enemy while the wall is protecting you. Before long you should destroy it. Now, head onto the grind rail. A Shrip will appear behind you. Destroy it quickly! If you fail, you will likely take a bit of damage upon disembarking. Now take the elevator back downstairs and take the jump pad up. Proceed through the first door. Before proceeding through the next, let it open. You’ll notice two reapers doing their rounds on the floor. To your left is a jump pad. After a Reaper passes you, take the jump pad up and grab the food. You can use this area to attack the Reapers and avoid their attacks. They cannot get you up there...but the Reapettes can, keep in mind. If you do manage to destroy them; however, you will get a power or weapon from a chest. If you aren’t taking them out, use the jump pads as “rest areas”, to check out the Reapers’ movements and plan how to get to the door without them noticing. Keep in mind the obstructions in front of the door that need taken care of. If you take the door on your left, there is a Gyrazer. Take it out quickly, then take the jump pad. At the top is a treasure chest with a Cyclone. Save it for later. Then go back and drop into the pit with the large white light. Go through the door. In the area are three of the paratrooper enemies from before (I just looked them up. They’re called “Paramushes”) Let them gather together, then use the Cyclone to take them out. A Tortolunk and several Octos will appear. Take them out. Next, a Gloomerang and several Handoras will appear, circling the room. Pick up the “X-Bomb” by the Gloomerang and use it to clear the room of Handoras. Then take care of the Gloomerang. Another grind rail will appear. Hop on, making sure to hit the targets on your way up (this likely won’t be difficult). Once you are up, take the elevator down. Take the passage to the left to get your health restored at a hot spring (there is no drink of the gods at the end). Then head down the middle, taking care to avoid the guillotines. Watch out for the Reapettes that come out the big door. Then head in to face the Great Reaper. ______________________________________________________________________________ Boss: Great Reaper Heavily utilize the second floor. Aim for the head or toes, and you shouldn’t have too much trouble defeating it. After a while, the face will erupt in golden light. Aim for that light repeatedly to finish it. Attacks: Step Each step can do damage if it touches Pit. Moving to the second floor eliminates this concern largely. Giant Step A larger step that covers a wider range and does more damage. Scythe split Attacks the ground in front of Pit and sends out three shockwaves. Laser Eyes Uses laser beams from its eyes like Cyclops momentarily to attack Pit. Summon Reapettes If Pit gets hit, it will summon Reapettes to attack him. Scythe Swing Swings the scythe horizontally once to attack Pit. Best to drop to ground floor before it hits. Scythe Tornado Swings the scythe horizontally many times in a row. This can be avoided best on the ground floor, much like Scythe Swing. It only occurs after the Great Reaper is about to be defeated. Well, that's it for part four! Hope to see you for part five! Link to Part 1: https://www.vizzed.com/boards/thread.php?id=86441 Link to Part 2: https://www.vizzed.com/boards/thread.php?id=86442 Link to Part 3: https://www.vizzed.com/boards/thread.php?id=87384 Let’s begin! ______________________________________________________________________________ Chapter 4: The Reaper’s Line of Sight, on Intensity 5.0 Recommended weapon class: If attacking the Reapers: Palms, Orbitars, Cannons. If avoiding them: Claws, Blade. Reapers in the level may be best avoided, but provide a lot of hearts, and perhaps treasure if beaten. This walkthrough will cover the former option: I’ll be attacking Reapers head-on. ______________________________________________________________________________ Air Battle: Miks, Syrens, Daphnes and a Wave Angler greet you out of the gate. Take special care to destroy the Wave Angler quickly when it appears. Soon, Gyrazers and Octos appear, followed by Shrips and Miks right beside each other. Pit dives to the ground! Take a very short breather to get your bearing before Pit levels off. A Belunka appears, along with other enemies and a Treasurefish. Make sure you hit the Treasurefish first for the helpful treasure inside. Various enemies continue to assault Pit. Take special care with the Handoras on the wall to your left (you’ll turn towards it). It can be difficult to avoid their fire if you aren’t prepared. Before long, you’ll encounter them to your right as well as a Wave Angler. Be careful. You don’t have to worry too much about the Wave Angler, though; as it only gets off one shot before disappearing. Next, Reaper eyes take a glance at Pit. This causes Pit to turn around and dive into a canyon. Don’t worry too much about the Reapettes. They are easy to take care of. Focus more on dodging fire. In the canyon, take care. There are many protrusions that can damage Pit. You’ll have to worry about taking out and dodging enemy fire while dodging the protrusions, so be prepared. Soon, a windstorm will blow Pit down. Lots of Minos appear, as well as Wave Anglers and Gloomerangs. Handoras will appear on a nearby wall. Afterwards, Pit is hit by another wind storm, but makes it through. Pit then heads through a gap in a wall guarded by Minos. In this area, there is an opening to the side filled with a single Mega Mussel. Don’t forget that the pink circles are its weak points. As you exit, a Treasurefish and some Shrips appear, as well as some recovery orbs. Make sure to hit the Treasurefish while dodging the Shrips and grabbing the recovery orbs. Another wind storm hits Pit! It blows him to another canyon filled with protrusions. Take care not to hit the Shulms at too close range. Pit soon exits the canyon, looking for a way out while assaulted by Shrips, Monoeyes, and Gloomerangs. Take special care here to destroy enemies before they get to you. Watch out for the Reapers. If they notice you, something will happen (I’m not sure what). Their line of sight can be difficult to avoid. It’s probably best to try to take them out, although it is difficult to do so. Nextly, lasers spew from the fortress. A few enemies appear, but I’m not sure they attack Pit. Just focus on staying alive at this point, or take out enemies if you feel courageous. ______________________________________________________________________________ Land Battle: Pit made it in! In front of you are three urns and a guillotine. Avoid the guillotine or Pit will be beheaded. jk jk jk Before the next door is another guillotine. Dash through it, timing it so it doesn’t come down on you. Behind the door is a Reaper. Take care to stay to the side (I recommend not confronting this one unless you have a highly ranked weapon) while it passes, then when it has passed, run to the other side! Soon you’ll pass through a door. In the next section, there’s a spike trap in the middle and a number of enemies, including a Specknose, a Shulm, and a Skuttler Mage. Take the Specknose out first, while taking care to avoid the light circle of the magician and the spike trap. Once the way opens, proceed through. Watch out for the spiny spike thing. You can’t damage it. Stay to the sides, and make sure to grab what food you can. Near the end of the walkway is a Shelbo. It will try to suck you in. The mouth at the top is its weak point. Dash on one of the sides from before while it sucks, attacking the middle. Afterwards, attack the top. To the right is a hidden area. Destroy the boulder and enter the door. Inside are ghost things that appear as blue flames, called Zuree. Keep enough distance while giving them a reason to appear in their full form. Attack them when they appear quickly. There is a boulder of sorts in the middle. Melee it to cause it to drop down. It will help you gain a treasure later on. To the back is a cavern guarded by a pendulum scythe. Avoid it and proceed, if you dare. At the bottom are two Octos and an Orne (this will kill you instantly if you touch it!). But there is also a treasure chest. Don’t panic! Ornes aren’t difficult for most people to avoid if you don’t panic. Grab the treasure while destroying the Octos (the Orne can’t die). Destroy a boulder near the entrance to the cavern’s pit to find a jump pad. Jump back up, taking care not to rush too much because of the pendulum scythe. If you take care, you should come away unscythed. Proceed back through the door and towards the grind rail. Reapettes will appear. Make sure to take them out quickly or you’ll be stunned and take damage for a second. At the end of the grind rail is an arena. In the arena is a turtle spinner, a Skuttler Mage, a Skuttler Cannoneer, and a Belunka. I recommend taking down the turtle spinner, then the other enemies, followed by the Belunka. It’s OK to let the Belunka respawn enemies. They aren’t too hard to deal with. In the second round in the arena, there is a Shelbo and two Shulms. The Shulms will respawn, so don’t worry about them. Take down the Shelbo and the way will open. Take care not to hit the Shulms. They will poison you if hit with non-melee attacks. You then have two options: Head left or straight. Heading left will lead you into a room with several Zurees. Defeat them or avoid them. At the back of the room is an alcove blocked by a container. Destroy it and grab the treasure back there, then head out. Back on track now, head straight through the two big doors. If you’re fast, you can take down a Souffle, but if not, don’t worry about it. Around the corner is a Shemum Urn. Take it down using melee attacks, keeping in mind that if you let the Souffle pass the corner, it’s probably long gone by then. Through the next door is an Eggplant Wizard and a Handora. The latter will respawn if you destroy it. The former is a tricky, hardy enemy. If you get hit with an attack, you’ll turn into an eggplant with legs. Keep attacking and moving to break free. But keep your distance, and it becomes manageable to deal with this enemy. If you’re close, you might get hit as the Eggplant Wizard warps and leaves behind an Eggplant Bomb. In the next room, you’ll see two splitting paths and a drop below. You’ll want to drop below later to grab the Gemini weapon below. But first, before you do anything, start walking towards the left path (DON’T TAKE IT YET!). An obtrusion in the wall will pop out at regular intervals as you get close. As the obtrusion goes back in, dash towards the treasure chest at the end. It may take a few tries, and don’t worry about falling too much. Just do your best. After you’ve obtained the treasure (or if you fall), drop down. At the bottom are a number of spike pits as well as a Clubberskull and several blue ghosts. It is best to avoid the Clubberskull until you have a more powerful weapon. DO NOT ATTACK IT AT ALL. IT WILL BREAK FREE AND MIGHT KILL YOU. Poke around at the bottom to find a pit that is filled with a blue light. Drop down into it and enter the Gemini chamber. You will obtain the Taurus Arm. Then flip around and take the jump pad up. Proceed through the door and onto the nearby jump pad. As you take the right path at the top, a Shelbo will appear. Take care to keep your distance so it does not pull you into a pendulum scythe or off the platform. If you take your time, you will be fine. An alternate strategy might be to let it pull you in then dash past it to the left. This will afford you more room, and you won’t have to deal with the scythes. If you are unsuccessful, though; you will take a beating when it spins. Proceed through the two doors in front of you. In front of you should be a jump pad and a door. DO NOT TAKE THE JUMP PAD YET...unless you’re heading straight for the boss. Head through the door. Take the elevator up, and head through the intensity gate, if possible INTENSITY GATE 5.0: On your way through the gate, there is a grind rail. On the grind rail are several obstructions. Take care to clear them as you grind. At the end of the rail are several Gyrazers and a Shelbo. Dash backwards repeatedly or forwards through the blasts of the Gyrazers, depending on your strategy. You might want to deal with the Gyrazers first, it will make dealing with the Shelbo a cakewalk. Proceed forward and grab the food. Past the next room and at the end are two treasure chests, one containing food and hearts and the other containing a weapon or power. Turn back around to find...two Reapers patrolling the room. Follow one as it walks back and grab the item near the end of the room, making sure to not get caught in its line of sight. Hold onto this item until the next room, where you’ll run into a Boogity. Use the item now. It will grow a wall of vines that will block attacks and do damage. Shoot at the enemy while the wall is protecting you. Before long you should destroy it. Now, head onto the grind rail. A Shrip will appear behind you. Destroy it quickly! If you fail, you will likely take a bit of damage upon disembarking. Now take the elevator back downstairs and take the jump pad up. Proceed through the first door. Before proceeding through the next, let it open. You’ll notice two reapers doing their rounds on the floor. To your left is a jump pad. After a Reaper passes you, take the jump pad up and grab the food. You can use this area to attack the Reapers and avoid their attacks. They cannot get you up there...but the Reapettes can, keep in mind. If you do manage to destroy them; however, you will get a power or weapon from a chest. If you aren’t taking them out, use the jump pads as “rest areas”, to check out the Reapers’ movements and plan how to get to the door without them noticing. Keep in mind the obstructions in front of the door that need taken care of. If you take the door on your left, there is a Gyrazer. Take it out quickly, then take the jump pad. At the top is a treasure chest with a Cyclone. Save it for later. Then go back and drop into the pit with the large white light. Go through the door. In the area are three of the paratrooper enemies from before (I just looked them up. They’re called “Paramushes”) Let them gather together, then use the Cyclone to take them out. A Tortolunk and several Octos will appear. Take them out. Next, a Gloomerang and several Handoras will appear, circling the room. Pick up the “X-Bomb” by the Gloomerang and use it to clear the room of Handoras. Then take care of the Gloomerang. Another grind rail will appear. Hop on, making sure to hit the targets on your way up (this likely won’t be difficult). Once you are up, take the elevator down. Take the passage to the left to get your health restored at a hot spring (there is no drink of the gods at the end). Then head down the middle, taking care to avoid the guillotines. Watch out for the Reapettes that come out the big door. Then head in to face the Great Reaper. ______________________________________________________________________________ Boss: Great Reaper Heavily utilize the second floor. Aim for the head or toes, and you shouldn’t have too much trouble defeating it. After a while, the face will erupt in golden light. Aim for that light repeatedly to finish it. Attacks: Step Each step can do damage if it touches Pit. Moving to the second floor eliminates this concern largely. Giant Step A larger step that covers a wider range and does more damage. Scythe split Attacks the ground in front of Pit and sends out three shockwaves. Laser Eyes Uses laser beams from its eyes like Cyclops momentarily to attack Pit. Summon Reapettes If Pit gets hit, it will summon Reapettes to attack him. Scythe Swing Swings the scythe horizontally once to attack Pit. Best to drop to ground floor before it hits. Scythe Tornado Swings the scythe horizontally many times in a row. This can be avoided best on the ground floor, much like Scythe Swing. It only occurs after the Great Reaper is about to be defeated. Well, that's it for part four! Hope to see you for part five! -------------------- John 11:35 Jesus wept. |
Vizzed Elite
Affected by 'Laziness Syndrome'
Registered: 03-21-10
Location: Location
Last Post: 2394 days
Last Active: 873 days
| WOOOOOOOO |
Affected by 'Laziness Syndrome'
Registered: 03-21-10
Location: Location
Last Post: 2394 days
Last Active: 873 days
