

 User Notice
 Forum Links
Thread Information
Thread Actions


Walkthrough Castlevania: Bloodlines
06-25-14 12:35 PM
Laian is Offline
| ID: 1040500 | 4771 Words

POSTS: 1697/2232
POST EXP: 457173
LVL EXP: 7644852
CP: 23733.5
VIZ: 3570463

Hello everyone, yes it's your host Laian bla bla bla you know the score Today, well this month, we're going back to the Sega Genesis with another Castlevania game called "Castlevania Bloodlines", also known as "Castlevania: The New Generation". I will play the US version by the way, which means there might be some changes. In this game, you can choose between two characters: John Morris who has the Vampire Killer, the legendary whip of the Belmont family, and Eric Lecarde who has the Alcarde Spear. You are free to use any character you want but I'll go with Eric Lecarde for this walkthrough. Oh and I'm playing on normal mode. It's important to point that out because the easy mode removes some enemies mentioned in this walkthrough. So let's get into it and kick Count Dracula's butt for I don't know how many times (technically, it would be the second time, considering I already played a Castlevania game in the past, the very first episode for NES). Anyway, time to explore the castles and stop the resurrection of evil and darkness, one by one.
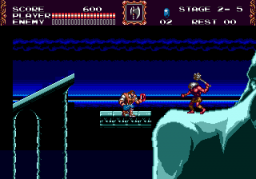
STAGE 1: RUINS OF THE CASTLE DRACULA, ROMANIA Where all the things begin, in the last castle explored by the ancestors. You start in the courtyard, a nice courtyard I'll say. Destroy all the torches on your way to get some goodies and reach the entrance of the castle. You'll face the first enemies of the game: the ghouls. They come from the ground and they are relatively easy to get rid of. Up the stairs, there's an orb that will give you a temporary invincibility. I'm not going to tell you all the items you will find, mostly the important ones or the ones that can become handy for a situation. Go up the next stairs and proceed to the next area.. Kill the will'o'wisp, blast the cracked wall beneath him to get the secret sub-weapon. It adds some nice grey flames to your weapon, which is cool, isn't it? Hey wait, there's another function. It increases your attack speed. However, you lose this bonus if you are hit by an enemy. Go down, make your way through the mermen and the ghost, go up, kill the skeleton up here and carry on. This part can be skipped if you use the special ability of Eric Lecarde exactly where you found the special sub-weapon. You will land on the platform, exactly where the will'o'wisp was taking a nap. After killing a few bats, you will face the varg. It's basically the mini-boss of this stage. Each castle in this game usually has a mini-boss and a final boss. That boss is not that hard. His first attack is the war cry. This shatters the windows only so move constantly to avoid the shards and use your weapon. Once he did redecorate the room, he's going to use a fire breath. He can also use this attack before all the windows are broken, it may happen especially you are too close to him. Either you wait until he's done with that and you use your weapon to hit him or you can use your sub-weapon (the boomerang is recommended for this fight). After a few hits, he will die and you will proceed to the next area.
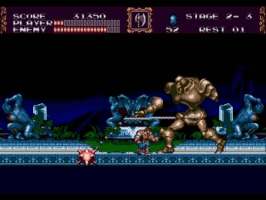
Kill the skeletons, blast the wall to the right to find a pot roast (that recovers half of your life) and go up. Kill the enemies here, go up, kill the skeleton soldiers, leap over the gaps to find a mirror and instantly kill the flail skeleton above your head and carry on. Kill more skeletons, hit the swinging guillotine a couple of times and jump over it, go up, blast the wall to find another pot roast (1) and carry on. Hurry up, the floor is crumbling as you walk on it. Reach the top as soon as possible, kill the enemy and enter the pinnacle (or the ex-throne room). Time to face the final boss of this stage: the armor battler. It takes two hits to remove one hit point to this boss, no matter what you use. Yes, this boss is tough. He has multiple attacks: a dash attack that you can easily dodge if you jump before he hits you, he also swings his weapons but that is not really frightening and finally, once his weapons are gone, he will use his mighty foot in a desperate attempt to beat you. This boss is not that hard actually, especially if you have the boomerang as a sub-weapon and you spam your attacks while you are standing on the first platform to the left. You might have a chance to take less damages with this method. Grab the orb at the end of the fight and get ready for the next stage.
STAGE 2: ATLANTIS SHRINE, GREECE Time to dive into the abyss of the sea and the wonders of Atlantis. There's lot of water and water is not the favorite element of our heroes in this game so do not dive into the abyss, literally said. The first enemies you will face are minotaurs and mermen. Watch out, their attacks might push you into the water. In the next part of the stage, you must go up since the water level is raising slowly but surely. Also, avoid these blue orbs patrolling around, you can't kill them (you can only stun them) and they can push you into the abyss of the sea as well. The only worth getting bonus in this part would be the extra life in this floating torch (2). Otherwise, the other goodies are just jewels for the sub-weapons, bags of gold for extra points and possibly upgrades for your weapon. Two mini-bosses await you in the next part of the stage. The first one is a sorcerer using an orb to raise the water level. Just go left and right, jump and attack him as soon as possible otherwise you will die horribly. A bit further, you'll face the second mini-boss: two golems. They come one by one, don't worry. The first one is easy to beat. Don't be scared by the flail, just stay close to him and attack him. From time to time, he will leap over you, trying to run away or smash you. Move to dodge this and keep doing this method until he dies. The second golem has a halberd. I suggest you to use the axe if you have this sub-weapon, it makes the fight easier. If you keep using the axe, his first attack shouldn't hit you. He just swings his halberd. However, the second attack needs to be avoided. He will go high in the sky and will try to land on your head with his weapon. Move and keep attacking him while he is trying so hard to remove his weapon from the floor. After beating these two golems, you can go down. That part is not really hard. You just have to go down, killing the medusa heads on your way. Don't be too hasty, you could die horribly in the water. The next part is just the beginning of the level, with some differences. The enemies here are different. Also, you will have to blast some parts of the background to make your progress, such as the head of the goddess statue. There's a secret to get halfway, before a column to break (3). It contains a pot roast. Break the column and carry on. Downstairs, you have to face some minotaurs. Use the axe you can find to your left to kill them and go down once the way is clear. And here we go, boss fight! His weak point is his head but, as you can tell, he's hiding it in the ceiling. Why? Don't you think he is adorable? The only way to make his head appear is to destroy the parts of his body or use the axe. This boss has three attacks: the swinging arm (which shouldn't be a problem actually), the falling rocks (that you must avoid at all cost) and the earthquake (same thing, jump this time to avoid it). Actually, he uses that last attack when his heads appears so you don't have to worry about that for the first part of the fight. This boss shouldn't be a big pain in the butt, just be careful and attack him until he faints. Grab the orb and go to the next stage.
STAGE 3: THE LEANING TOWER OF PISA, ITALY This stage... it's basically the ascent into madness. No, not the descent into madness, the ascent. Before entering the tower, you must face some harpies and some minotaurs. Nothing really hard there, although the harpies can become really annoying if you don't get rid of them. Inside the tower, it's exactly where it's getting tricky. You can see lot of bones tower waiting for you and two will'o'wisps including one right at the beginning of the area. Go up as soon as possible, ignore the bone towers and kill the two will'o'wisps. Now you can grab the orb in the torch beneath you, behind the first bone tower you saw and go all the way back up or proceed to the next part of the level. The return of the harpies. Remember you can attack in diagonals. There are two ways here: one for each character. If you play with John Morris, you can't reach the top of the screen so you are forced to go east. If you play with Eric Lecarde, you must go up using "down + jump button". Either way, you have to kill some harpies and make your way through this area. I'll make a bonus part in which I'll put all the alternate paths with John Morris and Eric Lecarde. The next screen will slightly change depending of the character you have chosen at the beginning of the game. Refer to the bonus part then for "stage 3-4". After this branching path, the tower is collapsing and you must go up as soon as possible. Oh no, medusa heads, lovely. Anyway, just go up and grab as many goodies as you can on your way to the top. Among the available bonuses, there are a mirror and an extra life. Go through the small opening to the left and carry on. Kill the enemies in the next room, go up and up again with the platforms. Kill the gargoyles, they might give you some troubles during your ascent. The next screen has no enemy, just bonuses to get. Oh, you know what's coming next. Yes, I'm pretty sure you know what's waiting for you at the top of the tower. If you answer "boss fight", you are correct. Let me introduce you one of the hardest battles in this game: the giant gargoyle. As you can see, you step on the top of the tower. It's a small platform and you can fall down and face your doom easily. Plus, your enemy will fly in the air for a good part of this fight. All the attacks he will do come from his nice tail. The first attack is the tail whip. He does this one after disappearing and reappearing. The most common attack will be the rocks he throws at you from his tails. He always use a dash attack at you after this attack so be prepared to move and dodge that attack right after the rocks. Now, how could this fight be more tense? Well, the platform is spinning (and believe me, I got Dead or Alive's famous song stuck in my mind for the entire fight, I couldn't really focus on the battle actually). Once he is near death, he's going to "bodyslam", trying to smash you. Move and dodge this attack. And obviously, you have to hit him with your best shot, well your best hit. This fight is quite hard but victory is not impossible to get. Grab the orb at the end of the boss fight to go to the next stage.
STAGE 4: THE MUNITIONS FACTORY, GERMANY Right at the beginning, you are harassed by troublesome skeletons soldiers throwing bones at you from the other side of the fence. If you want to kill them, you must wait until they did leap over it. Don't waste your time on them, go east and enter the factory. There's a few bonus to get outside if you want though. Once you are in the factory, you will encounter more skeletons but, if you play with Eric Lecarde, you can reach a secret spot (with the special ability) with four torches (4). One of these torches contains an extra life. Carry on, don't go down yet, go up and blast the cracked wall to get a pot roast. Kill the last skeleton of the area and proceed to the next one. Also there's an extra life to get in the stage 4-3 if you play with John Morris. It's a nice bonus indeed but it's tricky to get it. After killing the last skeleton, go down and use the special ability to grab the ceiling of the platform you were on a few seconds ago, land on the platform and blast the cracked wall to get the extra life. Only John Morris can get that bonus. You can go back up here if you use the special ability on the ceiling above your head then the conveyor belt to the left. In the next area, kill the skeletons, use the axe you found in one of the torches to take care of the flail skeleton guarding the way to the next area and go there once the way is clear. See these mechanisms, they are bad. The first one is not that frightening, however the next one can turn you into a pancake. Oh, that means instant death if you didn't get it. Go up carefully, then go to the next area and go up. Oh yes, that part should be familiar to you if you have played any Castlevania game, especially Castlevania 3. Any idea? If I say "clock tower", it should say something to you. Yes, it's the same gimmick as a clock tower area from any other Castlevania game. Gears, platforms and medusa heads flying around, let's not forget them since they are frequent in this part. In the next part, you have to use the platforms to reach the other side of the room. Two ghosts will try to murder you during your progress. Unlock the way by lowering the platform and go face the mini-boss of this stage. Yes, Frankenstein is back. This time, he's alone, no fleaman to help him. He has three attacks. The shockwave that can be easily avoided if you go on a platform (the left platform actually), the swinging whip that requires a certain distance and the whip attack that is not frightening unless you are on a platform. The pattern of his attacks is always the same: swinging attack, then whip attack and finally the shockwave twice in a row. He shouldn't be that hard to beat. Carry on after your victory, use the gaps carved in the sharp wheels to make your progress (watch your step with the last one, you'll need to crouch quite often since it's reversed), kill the enemies and proceed to the next area. Use the moving platforms to make your way through this part, killing the skeletons, then kill the deadly gears in the next room and prepare to face the boss of this level. Yes, it's a golem made of gears. His weak point is the ball, in other words his heart. Most of his attacks will deal with gears throwing. Avoid them at all cost then. Otherwise, he is not that hard to beat. He will go from left to right and vice versa via three ways: the big jump, really easy to dodge if you move to the opposite direction, the mid-air flight easy to dodge as well if you stay in the middle of the screen and you duck (like Donald... yes I like this joke, don't mind me) and the car style (also known as the dash), just jump to avoid that or go the platforms. You should notice that he will lose some weight and height everytime you will hit the heart. And obviously, he will get mad at you because you're mocking him, like the bad person you are. Oh wait, he's an evil entity so it's not bad at all. Once he's near death, he's going to use another attack: some kind of weird swimming dance on the ground. Just go on a platform and go the opposite way to avoid him. As always, once you're victorious, grab your reward to end the stage.
STAGE 5: VERSAILLES PALACE, FRANCE Welcome to Versailles Palace, where you can die right at the beginning, in this nice garden. Yes, the garden is the first obstacle of this stage. You just have to play through to see how obnoxious this part can be. I don't know what is worse between the roses spreading their spores that reversed your controls, the blood skeletons ambushing you in the fountain or these weirdos of the second half the garden and their swinging waltz of death. Be really prepared and walk carefully until you reach the next area. The chandeliers above your head are dangerous but also useful in order to kill the axe knights here. Use them to your advantage if needed. At the end of the corridor, a tough opponent is waiting for you. You are cornered by another axe knight so kill this enemy in priority and avoid the attack of the other enemy then attack him. Kill the bone tower in the next room, then the eyes. Ah, it's also where another branching path is. Refer to the bonus part for each character. You will face the mini-boss of this castle: another golem. He has no weak point and two attacks. Keep your distances with this boss and attack him when you can. It's the only way to avoid both of his attacks. He will always use his arm to hurt you. He has a ranged attack that he will do everytime after jumping to the other side of the room. Staying in one of the openings should let you survive otherwise you might get hurt... horribly. The other attack has a short range so, if you keep your distances, there shouldn't be any problem at all. Now go to the next part, kill the enemies and prepare to face another mini-boss. This boss is invincible when he prepares his attack. You must wait until the veil of darkness shows off to hit this boss. You can destroy the balls thrown at you, do not worry. Although, it might be quite tough. After a few hits, you could go to the next area. Grab the goodies and prepare this time to face the boss of this stage: the cursed princess. Yeah, she looks like a beauty queen or a dancing queen floating around. Really easy to fight... until she turns after a few hits (six hits) into a giant moth. The cocoon in the background should have warned you: big bug upcoming! The moth is not really challenging in my opinion. You can start beating her before she flies away, just a couple of hits. Then, you can either hit the spores to get rid of them or avoid them and keep attacking the bug. Then, she should summon her babies. They are not hard to kill either, you can even destroy the eggs before they have a chance to appear. And finally, the last attack is the grapple. Yes, apparently, you are tasty, a delicious treat for this moth. I think you are against that so I suggest you to move in order to avoid that attack. Now, you can step on a platform and attack her if she's close to one of the platforms. That should cancel the attack. Another thing to know about the platform: you can stuck the moth in a corner and completely own her if you keep jumping from the platform and attacking. She shouldn't attack you. Although, you need the moth to be in one of the corners before attempting this trick. At the end of the fight, grab the orb and go to the final stage.
STAGE 6: THE CASTLE PROSERPINA, ENGLAND This the last stage of the game. You start on the bridge. Go east, picking up all the goodies and enter the castle. No, don't worry, your system (or the emulator) is not screwing up. This room is just messed up. This is exactly where the things are getting serious. This room can instantly kill you if you are not careful. Your progress must be slow. Kill the medusas, jump from platform to platform, grad some goodies and reach the other room. There's an extra life in this messed up room by the way, right above a gap (ah, those sadistic game developers xD ). Next up, the upside down room, great. The first part of this room is challenging because most of the platforms are tiny and these balls are not helpful. Make your way through this mess, kill the axe knight at the end of the room and go to the next area. Hmmm, this hallway is quiet... too quiet, I should say. Keep moving until you hear footsteps. Stop your progress and kill the armor. Carry on and stop when you hear the footsteps to kill the armor and etc etc. Now, go up and prepare to face the mini-boss of this castle: Death. Death will use tarot cards during the first part of this fight, each card represents either a boss you already fought (the giant gargoyle, the golem of Atlantis Shrine and the gear golem), or an attack of Death or pot roasts. All the cards can be played once so use them wisely. After this card game, time to fight Death. The common attack will be the scythes, as always. Do not worry, it's not like in Castlevania for NES. Death will either throw two or four projectiles at you, that's it. I don't have to tell you that you must avoid these scythes like the black plague. The two other attacks are not that hard to dodge either. Death will try to tackle and hit you with his weapon (no, not tickle, tAckle!). Leap over your opponent and try to hit Death before he flies again. The last attack is the giant scythe throwing, like a boomerang. During this attack, Death will bring you back to him. Duck to avoid the scythe, use that ability to your advantage to hit Death one or twice and jump over the scythe (and maybe, if you're fast enough, you can hit your opponent once more). After a few hits, Death will die (I always found weird to kill Death considering it's an undead resurrected, oh well let's not question about that) and you can proceed to the next area. More stairs leading to you next fight: Carmella. She is a bit tougher than Death and she turns into an adorable creature. She has three attacks. Two of these attacks are fire breathes, although one of them is similar to the one that the varg from the first level used (the wave attack). The other breath can only be avoided if you stay close to her. The last attack is the tail whip. Just jump over the tail to dodge this attack. That was the first part of the battle, now you must defeat Carmella in her true form. How to beat her? She will summon orbs. These orbs are the number of times you must hit her once she is done with the orb summoning. Watch out, she throws fireballs while you're trying to hit her. Plus there's a time limit which is represented by the orbs getting closer and closer. If you fail during this part, you'll have to fight some fleamen, eat some daggers or a spinning wheel of fire. If you manage to successfully hit her, she will take some damages. Repeat this method until she dies. Now time to face the Count himself. Move on to the next area, go up and face the final boss. If you have played any other Castlevania game before Castlevania: Bloodlines, you should know that Dracula has multiple forms, most of the time two forms. The first form is not that hard actually. Hit the head when he appears after the halo of light and keep doing that until he turns into his second form. You shouldn't be hit during this first form if you keep the perfect timing.
The second form is not challenging either. You can only attack him when he is moving around. When he casts two fireballs, leap over the projectiles. The other attack can be avoided easily: just stay beneath the real Dracula, it's always the safe spot in order to dodge the halos summoned by the mimics. After a few hits, the last part of the battle begins. He is now a creature. And believe me or not, he is not that hard either. I've really seen worse (bad memories of Castlevania: Circle of the Moon, ugh). When the fight begins, hit him and go to the opposite way of Dracula to avoid his projectiles and keep doing that. That's it. Just do that over and over again, stuck him in a corner of the screen and one hit at the time. Then, leap over the flames and keep doing the same thing. Finally, when he is near death, just go underneath Dracula while he is the air, avoid the bones he's spitting and finish him up. Watch the final cutscene. Congratulations, you completed "Castlevania: Bloodlines". Now, play with the other character to see the other ending and the other ways at some points of the game. Oh and by the way, you just unlocked the expert mode. Try it if you dare, I'm done with this game
BONUS PART: ALTERNATE PATHS At some points, you noticed some branching paths. Depending of the character you chose at the beginning, you must take a path and leave the other one behind. You can only choose a specific path that I'm going to tell you in this bonus part. It also works with the extra life hidden in the munitions factory. Each character can get it in a different spot of the level but with their special ability. Let's start this bonus part without wasting anymore time, shall we?
STAGE 3-4 Eric Lecarde In stage 3-3, you must use, as mentioned in this walkthrough, the special ability (in other words "down + jump button" ) to go up. There's lot of bonus to grab here and you might miss some of them eventually if you take the wrong path. Yes, you can't go back down, which is stinky. So, pay attention to where you go if you want all the bonuses or most of them. The next part is just a mini-boss: your friend, the white dragon. He is not that hard if you picked up the special bonus in the last part. Just go underneath him and attack him repeatly in order to kill him. Now go to the next zone. John Morris In stage 3-3, go right and use the special ability of John Morris (jump then use the diagonal right direction with the attack button to cross the gap. Kill the mummies, grab some stuff and use the special ability one more time to reach the end of that part and go to the next one.
STAGE 5-3 Eric Lecarde Go all the way up with the special ability, killing the eyes and go to the right. Once you're on the rooftop, keep going east killing the fleamen and the harpies (there's a mirror halfway if needed) and, when you arrived to the moving staircases, go down then east to face the boss. John Morris Go right, use the special ability to make the gap and kill the enemies in this room. If you keep using the special ability, you can collect all the goodies in the floating torches. Carry on, go up and then east to face the mini-boss.
Hello everyone, yes it's your host Laian bla bla bla you know the score Today, well this month, we're going back to the Sega Genesis with another Castlevania game called "Castlevania Bloodlines", also known as "Castlevania: The New Generation". I will play the US version by the way, which means there might be some changes. In this game, you can choose between two characters: John Morris who has the Vampire Killer, the legendary whip of the Belmont family, and Eric Lecarde who has the Alcarde Spear. You are free to use any character you want but I'll go with Eric Lecarde for this walkthrough. Oh and I'm playing on normal mode. It's important to point that out because the easy mode removes some enemies mentioned in this walkthrough. So let's get into it and kick Count Dracula's butt for I don't know how many times (technically, it would be the second time, considering I already played a Castlevania game in the past, the very first episode for NES). Anyway, time to explore the castles and stop the resurrection of evil and darkness, one by one.
STAGE 1: RUINS OF THE CASTLE DRACULA, ROMANIA Where all the things begin, in the last castle explored by the ancestors. You start in the courtyard, a nice courtyard I'll say. Destroy all the torches on your way to get some goodies and reach the entrance of the castle. You'll face the first enemies of the game: the ghouls. They come from the ground and they are relatively easy to get rid of. Up the stairs, there's an orb that will give you a temporary invincibility. I'm not going to tell you all the items you will find, mostly the important ones or the ones that can become handy for a situation. Go up the next stairs and proceed to the next area.. Kill the will'o'wisp, blast the cracked wall beneath him to get the secret sub-weapon. It adds some nice grey flames to your weapon, which is cool, isn't it? Hey wait, there's another function. It increases your attack speed. However, you lose this bonus if you are hit by an enemy. Go down, make your way through the mermen and the ghost, go up, kill the skeleton up here and carry on. This part can be skipped if you use the special ability of Eric Lecarde exactly where you found the special sub-weapon. You will land on the platform, exactly where the will'o'wisp was taking a nap. After killing a few bats, you will face the varg. It's basically the mini-boss of this stage. Each castle in this game usually has a mini-boss and a final boss. That boss is not that hard. His first attack is the war cry. This shatters the windows only so move constantly to avoid the shards and use your weapon. Once he did redecorate the room, he's going to use a fire breath. He can also use this attack before all the windows are broken, it may happen especially you are too close to him. Either you wait until he's done with that and you use your weapon to hit him or you can use your sub-weapon (the boomerang is recommended for this fight). After a few hits, he will die and you will proceed to the next area.
Kill the skeletons, blast the wall to the right to find a pot roast (that recovers half of your life) and go up. Kill the enemies here, go up, kill the skeleton soldiers, leap over the gaps to find a mirror and instantly kill the flail skeleton above your head and carry on. Kill more skeletons, hit the swinging guillotine a couple of times and jump over it, go up, blast the wall to find another pot roast (1) and carry on. Hurry up, the floor is crumbling as you walk on it. Reach the top as soon as possible, kill the enemy and enter the pinnacle (or the ex-throne room). Time to face the final boss of this stage: the armor battler. It takes two hits to remove one hit point to this boss, no matter what you use. Yes, this boss is tough. He has multiple attacks: a dash attack that you can easily dodge if you jump before he hits you, he also swings his weapons but that is not really frightening and finally, once his weapons are gone, he will use his mighty foot in a desperate attempt to beat you. This boss is not that hard actually, especially if you have the boomerang as a sub-weapon and you spam your attacks while you are standing on the first platform to the left. You might have a chance to take less damages with this method. Grab the orb at the end of the fight and get ready for the next stage.
STAGE 2: ATLANTIS SHRINE, GREECE Time to dive into the abyss of the sea and the wonders of Atlantis. There's lot of water and water is not the favorite element of our heroes in this game so do not dive into the abyss, literally said. The first enemies you will face are minotaurs and mermen. Watch out, their attacks might push you into the water. In the next part of the stage, you must go up since the water level is raising slowly but surely. Also, avoid these blue orbs patrolling around, you can't kill them (you can only stun them) and they can push you into the abyss of the sea as well. The only worth getting bonus in this part would be the extra life in this floating torch (2). Otherwise, the other goodies are just jewels for the sub-weapons, bags of gold for extra points and possibly upgrades for your weapon. Two mini-bosses await you in the next part of the stage. The first one is a sorcerer using an orb to raise the water level. Just go left and right, jump and attack him as soon as possible otherwise you will die horribly. A bit further, you'll face the second mini-boss: two golems. They come one by one, don't worry. The first one is easy to beat. Don't be scared by the flail, just stay close to him and attack him. From time to time, he will leap over you, trying to run away or smash you. Move to dodge this and keep doing this method until he dies. The second golem has a halberd. I suggest you to use the axe if you have this sub-weapon, it makes the fight easier. If you keep using the axe, his first attack shouldn't hit you. He just swings his halberd. However, the second attack needs to be avoided. He will go high in the sky and will try to land on your head with his weapon. Move and keep attacking him while he is trying so hard to remove his weapon from the floor. After beating these two golems, you can go down. That part is not really hard. You just have to go down, killing the medusa heads on your way. Don't be too hasty, you could die horribly in the water. The next part is just the beginning of the level, with some differences. The enemies here are different. Also, you will have to blast some parts of the background to make your progress, such as the head of the goddess statue. There's a secret to get halfway, before a column to break (3). It contains a pot roast. Break the column and carry on. Downstairs, you have to face some minotaurs. Use the axe you can find to your left to kill them and go down once the way is clear. And here we go, boss fight! His weak point is his head but, as you can tell, he's hiding it in the ceiling. Why? Don't you think he is adorable? The only way to make his head appear is to destroy the parts of his body or use the axe. This boss has three attacks: the swinging arm (which shouldn't be a problem actually), the falling rocks (that you must avoid at all cost) and the earthquake (same thing, jump this time to avoid it). Actually, he uses that last attack when his heads appears so you don't have to worry about that for the first part of the fight. This boss shouldn't be a big pain in the butt, just be careful and attack him until he faints. Grab the orb and go to the next stage.
STAGE 3: THE LEANING TOWER OF PISA, ITALY This stage... it's basically the ascent into madness. No, not the descent into madness, the ascent. Before entering the tower, you must face some harpies and some minotaurs. Nothing really hard there, although the harpies can become really annoying if you don't get rid of them. Inside the tower, it's exactly where it's getting tricky. You can see lot of bones tower waiting for you and two will'o'wisps including one right at the beginning of the area. Go up as soon as possible, ignore the bone towers and kill the two will'o'wisps. Now you can grab the orb in the torch beneath you, behind the first bone tower you saw and go all the way back up or proceed to the next part of the level. The return of the harpies. Remember you can attack in diagonals. There are two ways here: one for each character. If you play with John Morris, you can't reach the top of the screen so you are forced to go east. If you play with Eric Lecarde, you must go up using "down + jump button". Either way, you have to kill some harpies and make your way through this area. I'll make a bonus part in which I'll put all the alternate paths with John Morris and Eric Lecarde. The next screen will slightly change depending of the character you have chosen at the beginning of the game. Refer to the bonus part then for "stage 3-4". After this branching path, the tower is collapsing and you must go up as soon as possible. Oh no, medusa heads, lovely. Anyway, just go up and grab as many goodies as you can on your way to the top. Among the available bonuses, there are a mirror and an extra life. Go through the small opening to the left and carry on. Kill the enemies in the next room, go up and up again with the platforms. Kill the gargoyles, they might give you some troubles during your ascent. The next screen has no enemy, just bonuses to get. Oh, you know what's coming next. Yes, I'm pretty sure you know what's waiting for you at the top of the tower. If you answer "boss fight", you are correct. Let me introduce you one of the hardest battles in this game: the giant gargoyle. As you can see, you step on the top of the tower. It's a small platform and you can fall down and face your doom easily. Plus, your enemy will fly in the air for a good part of this fight. All the attacks he will do come from his nice tail. The first attack is the tail whip. He does this one after disappearing and reappearing. The most common attack will be the rocks he throws at you from his tails. He always use a dash attack at you after this attack so be prepared to move and dodge that attack right after the rocks. Now, how could this fight be more tense? Well, the platform is spinning (and believe me, I got Dead or Alive's famous song stuck in my mind for the entire fight, I couldn't really focus on the battle actually). Once he is near death, he's going to "bodyslam", trying to smash you. Move and dodge this attack. And obviously, you have to hit him with your best shot, well your best hit. This fight is quite hard but victory is not impossible to get. Grab the orb at the end of the boss fight to go to the next stage.
STAGE 4: THE MUNITIONS FACTORY, GERMANY Right at the beginning, you are harassed by troublesome skeletons soldiers throwing bones at you from the other side of the fence. If you want to kill them, you must wait until they did leap over it. Don't waste your time on them, go east and enter the factory. There's a few bonus to get outside if you want though. Once you are in the factory, you will encounter more skeletons but, if you play with Eric Lecarde, you can reach a secret spot (with the special ability) with four torches (4). One of these torches contains an extra life. Carry on, don't go down yet, go up and blast the cracked wall to get a pot roast. Kill the last skeleton of the area and proceed to the next one. Also there's an extra life to get in the stage 4-3 if you play with John Morris. It's a nice bonus indeed but it's tricky to get it. After killing the last skeleton, go down and use the special ability to grab the ceiling of the platform you were on a few seconds ago, land on the platform and blast the cracked wall to get the extra life. Only John Morris can get that bonus. You can go back up here if you use the special ability on the ceiling above your head then the conveyor belt to the left. In the next area, kill the skeletons, use the axe you found in one of the torches to take care of the flail skeleton guarding the way to the next area and go there once the way is clear. See these mechanisms, they are bad. The first one is not that frightening, however the next one can turn you into a pancake. Oh, that means instant death if you didn't get it. Go up carefully, then go to the next area and go up. Oh yes, that part should be familiar to you if you have played any Castlevania game, especially Castlevania 3. Any idea? If I say "clock tower", it should say something to you. Yes, it's the same gimmick as a clock tower area from any other Castlevania game. Gears, platforms and medusa heads flying around, let's not forget them since they are frequent in this part. In the next part, you have to use the platforms to reach the other side of the room. Two ghosts will try to murder you during your progress. Unlock the way by lowering the platform and go face the mini-boss of this stage. Yes, Frankenstein is back. This time, he's alone, no fleaman to help him. He has three attacks. The shockwave that can be easily avoided if you go on a platform (the left platform actually), the swinging whip that requires a certain distance and the whip attack that is not frightening unless you are on a platform. The pattern of his attacks is always the same: swinging attack, then whip attack and finally the shockwave twice in a row. He shouldn't be that hard to beat. Carry on after your victory, use the gaps carved in the sharp wheels to make your progress (watch your step with the last one, you'll need to crouch quite often since it's reversed), kill the enemies and proceed to the next area. Use the moving platforms to make your way through this part, killing the skeletons, then kill the deadly gears in the next room and prepare to face the boss of this level. Yes, it's a golem made of gears. His weak point is the ball, in other words his heart. Most of his attacks will deal with gears throwing. Avoid them at all cost then. Otherwise, he is not that hard to beat. He will go from left to right and vice versa via three ways: the big jump, really easy to dodge if you move to the opposite direction, the mid-air flight easy to dodge as well if you stay in the middle of the screen and you duck (like Donald... yes I like this joke, don't mind me) and the car style (also known as the dash), just jump to avoid that or go the platforms. You should notice that he will lose some weight and height everytime you will hit the heart. And obviously, he will get mad at you because you're mocking him, like the bad person you are. Oh wait, he's an evil entity so it's not bad at all. Once he's near death, he's going to use another attack: some kind of weird swimming dance on the ground. Just go on a platform and go the opposite way to avoid him. As always, once you're victorious, grab your reward to end the stage.
STAGE 5: VERSAILLES PALACE, FRANCE Welcome to Versailles Palace, where you can die right at the beginning, in this nice garden. Yes, the garden is the first obstacle of this stage. You just have to play through to see how obnoxious this part can be. I don't know what is worse between the roses spreading their spores that reversed your controls, the blood skeletons ambushing you in the fountain or these weirdos of the second half the garden and their swinging waltz of death. Be really prepared and walk carefully until you reach the next area. The chandeliers above your head are dangerous but also useful in order to kill the axe knights here. Use them to your advantage if needed. At the end of the corridor, a tough opponent is waiting for you. You are cornered by another axe knight so kill this enemy in priority and avoid the attack of the other enemy then attack him. Kill the bone tower in the next room, then the eyes. Ah, it's also where another branching path is. Refer to the bonus part for each character. You will face the mini-boss of this castle: another golem. He has no weak point and two attacks. Keep your distances with this boss and attack him when you can. It's the only way to avoid both of his attacks. He will always use his arm to hurt you. He has a ranged attack that he will do everytime after jumping to the other side of the room. Staying in one of the openings should let you survive otherwise you might get hurt... horribly. The other attack has a short range so, if you keep your distances, there shouldn't be any problem at all. Now go to the next part, kill the enemies and prepare to face another mini-boss. This boss is invincible when he prepares his attack. You must wait until the veil of darkness shows off to hit this boss. You can destroy the balls thrown at you, do not worry. Although, it might be quite tough. After a few hits, you could go to the next area. Grab the goodies and prepare this time to face the boss of this stage: the cursed princess. Yeah, she looks like a beauty queen or a dancing queen floating around. Really easy to fight... until she turns after a few hits (six hits) into a giant moth. The cocoon in the background should have warned you: big bug upcoming! The moth is not really challenging in my opinion. You can start beating her before she flies away, just a couple of hits. Then, you can either hit the spores to get rid of them or avoid them and keep attacking the bug. Then, she should summon her babies. They are not hard to kill either, you can even destroy the eggs before they have a chance to appear. And finally, the last attack is the grapple. Yes, apparently, you are tasty, a delicious treat for this moth. I think you are against that so I suggest you to move in order to avoid that attack. Now, you can step on a platform and attack her if she's close to one of the platforms. That should cancel the attack. Another thing to know about the platform: you can stuck the moth in a corner and completely own her if you keep jumping from the platform and attacking. She shouldn't attack you. Although, you need the moth to be in one of the corners before attempting this trick. At the end of the fight, grab the orb and go to the final stage.
STAGE 6: THE CASTLE PROSERPINA, ENGLAND This the last stage of the game. You start on the bridge. Go east, picking up all the goodies and enter the castle. No, don't worry, your system (or the emulator) is not screwing up. This room is just messed up. This is exactly where the things are getting serious. This room can instantly kill you if you are not careful. Your progress must be slow. Kill the medusas, jump from platform to platform, grad some goodies and reach the other room. There's an extra life in this messed up room by the way, right above a gap (ah, those sadistic game developers xD ). Next up, the upside down room, great. The first part of this room is challenging because most of the platforms are tiny and these balls are not helpful. Make your way through this mess, kill the axe knight at the end of the room and go to the next area. Hmmm, this hallway is quiet... too quiet, I should say. Keep moving until you hear footsteps. Stop your progress and kill the armor. Carry on and stop when you hear the footsteps to kill the armor and etc etc. Now, go up and prepare to face the mini-boss of this castle: Death. Death will use tarot cards during the first part of this fight, each card represents either a boss you already fought (the giant gargoyle, the golem of Atlantis Shrine and the gear golem), or an attack of Death or pot roasts. All the cards can be played once so use them wisely. After this card game, time to fight Death. The common attack will be the scythes, as always. Do not worry, it's not like in Castlevania for NES. Death will either throw two or four projectiles at you, that's it. I don't have to tell you that you must avoid these scythes like the black plague. The two other attacks are not that hard to dodge either. Death will try to tackle and hit you with his weapon (no, not tickle, tAckle!). Leap over your opponent and try to hit Death before he flies again. The last attack is the giant scythe throwing, like a boomerang. During this attack, Death will bring you back to him. Duck to avoid the scythe, use that ability to your advantage to hit Death one or twice and jump over the scythe (and maybe, if you're fast enough, you can hit your opponent once more). After a few hits, Death will die (I always found weird to kill Death considering it's an undead resurrected, oh well let's not question about that) and you can proceed to the next area. More stairs leading to you next fight: Carmella. She is a bit tougher than Death and she turns into an adorable creature. She has three attacks. Two of these attacks are fire breathes, although one of them is similar to the one that the varg from the first level used (the wave attack). The other breath can only be avoided if you stay close to her. The last attack is the tail whip. Just jump over the tail to dodge this attack. That was the first part of the battle, now you must defeat Carmella in her true form. How to beat her? She will summon orbs. These orbs are the number of times you must hit her once she is done with the orb summoning. Watch out, she throws fireballs while you're trying to hit her. Plus there's a time limit which is represented by the orbs getting closer and closer. If you fail during this part, you'll have to fight some fleamen, eat some daggers or a spinning wheel of fire. If you manage to successfully hit her, she will take some damages. Repeat this method until she dies. Now time to face the Count himself. Move on to the next area, go up and face the final boss. If you have played any other Castlevania game before Castlevania: Bloodlines, you should know that Dracula has multiple forms, most of the time two forms. The first form is not that hard actually. Hit the head when he appears after the halo of light and keep doing that until he turns into his second form. You shouldn't be hit during this first form if you keep the perfect timing.
The second form is not challenging either. You can only attack him when he is moving around. When he casts two fireballs, leap over the projectiles. The other attack can be avoided easily: just stay beneath the real Dracula, it's always the safe spot in order to dodge the halos summoned by the mimics. After a few hits, the last part of the battle begins. He is now a creature. And believe me or not, he is not that hard either. I've really seen worse (bad memories of Castlevania: Circle of the Moon, ugh). When the fight begins, hit him and go to the opposite way of Dracula to avoid his projectiles and keep doing that. That's it. Just do that over and over again, stuck him in a corner of the screen and one hit at the time. Then, leap over the flames and keep doing the same thing. Finally, when he is near death, just go underneath Dracula while he is the air, avoid the bones he's spitting and finish him up. Watch the final cutscene. Congratulations, you completed "Castlevania: Bloodlines". Now, play with the other character to see the other ending and the other ways at some points of the game. Oh and by the way, you just unlocked the expert mode. Try it if you dare, I'm done with this game
BONUS PART: ALTERNATE PATHS At some points, you noticed some branching paths. Depending of the character you chose at the beginning, you must take a path and leave the other one behind. You can only choose a specific path that I'm going to tell you in this bonus part. It also works with the extra life hidden in the munitions factory. Each character can get it in a different spot of the level but with their special ability. Let's start this bonus part without wasting anymore time, shall we?
STAGE 3-4 Eric Lecarde In stage 3-3, you must use, as mentioned in this walkthrough, the special ability (in other words "down + jump button" ) to go up. There's lot of bonus to grab here and you might miss some of them eventually if you take the wrong path. Yes, you can't go back down, which is stinky. So, pay attention to where you go if you want all the bonuses or most of them. The next part is just a mini-boss: your friend, the white dragon. He is not that hard if you picked up the special bonus in the last part. Just go underneath him and attack him repeatly in order to kill him. Now go to the next zone. John Morris In stage 3-3, go right and use the special ability of John Morris (jump then use the diagonal right direction with the attack button to cross the gap. Kill the mummies, grab some stuff and use the special ability one more time to reach the end of that part and go to the next one.
STAGE 5-3 Eric Lecarde Go all the way up with the special ability, killing the eyes and go to the right. Once you're on the rooftop, keep going east killing the fleamen and the harpies (there's a mirror halfway if needed) and, when you arrived to the moving staircases, go down then east to face the boss. John Morris Go right, use the special ability to make the gap and kill the enemies in this room. If you keep using the special ability, you can collect all the goodies in the floating torches. Carry on, go up and then east to face the mini-boss.
|


| Games have secrets, I have my eagle gaze. |
Affected by 'Laziness Syndrome'
Registered: 10-21-11
Location: France
Last Post: 2527 days
Last Active: 1701 days
06-25-14 01:03 PM
 Eniitan is Offline
| ID: 1040511 | 21 Words
Eniitan is Offline
| ID: 1040511 | 21 Words
 Eniitan is Offline

POSTS: 2012/10522
POST EXP: 959649
LVL EXP: 75981646
CP: 55514.0
VIZ: 2642326
Wow big bro! Great walkthrough as always. I enjoyed reading this one, I look forward to more in the future. ^-^ |
  Number 1 Sailor Moon, Final Fantasy And Freedom Planet Fan On Vizzed! Number 1 Sailor Moon, Final Fantasy And Freedom Planet Fan On Vizzed! |
Affected by 'Laziness Syndrome'
Registered: 08-16-12
Last Post: 1257 days
Last Active: 360 days
06-27-14 04:53 AM
Laian is Offline
| ID: 1041141 | 24 Words
POSTS: 1700/2232
POST EXP: 457173
LVL EXP: 7644852
CP: 23733.5
VIZ: 3570463
| Games have secrets, I have my eagle gaze. |
Affected by 'Laziness Syndrome'
Registered: 10-21-11
Location: France
Last Post: 2527 days
Last Active: 1701 days
