

 User Notice
 Forum Links

Thread Information
Views
21,920
Replies
5
Rating
5
Status
OPEN
Thread
Creator
Creator
rcarter2
09-22-13 02:11 PM
09-22-13 02:11 PM
Last
Post
Post
linkrocks101
05-30-15 04:11 PM
05-30-15 04:11 PM
System
8.5
Views: 17,719
Today: 0
Users: 0 unique
Today: 0
Users: 0 unique
Thread Actions


Order
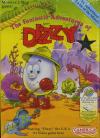
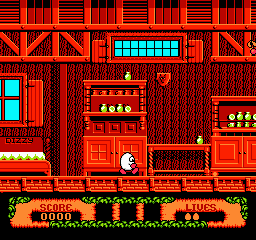
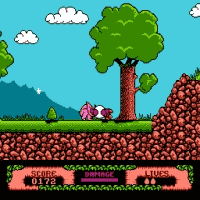
Fantastic Adventures of Dizzy Walkthroughb
Game's Ratings
Overall
Graphics
Sound
Addictiveness
Depth
Story
Difficulty
Average User Score
8.5
8
8
5
10
10
10
09-22-13 02:11 PM
rcarter2 is Offline
| ID: 888641 | 9584 Words
| ID: 888641 | 9584 Words
rcarter2
Level: 165


POSTS: 6905/8463
POST EXP: 758515
LVL EXP: 58074942
CP: 33759.9
VIZ: 1691075

POSTS: 6905/8463
POST EXP: 758515
LVL EXP: 58074942
CP: 33759.9
VIZ: 1691075
Likes: 5 Dislikes: 0
Alright everyone. This is my very first walkthrough ever. I decided to do one for one of the most difficult NES games out there. When my parents bought me this from a magazine for my birthday when I was in kindergarten (or around that age), it was advertised as "The Almost Unbeatable Game". This game took me a few years to beat. What better game to make my first walkthrough? I have also included a video that follows my walkthrough precisely. Before I get started, I'll give you a few explanations on this game. This game is difficult on two levels. First, it takes a lot of skill to complete. At first, it feels pretty easy. Though anything that moves will harm you (a lot), there is fruit all around this large world to replenish your health. But very quickly, you will realize that when you eat a fruit, it is gone forever. In a game that takes over an hour to complete, you are going to take a lot of damage and eat a lot of fruit. Quickly enough, fruit is harder and harder to find. Second, this game is one giant puzzle. This is one of those games where you have a LOT of items that have single purposes, and all but two are required to complete the game. You must figure out what every item is used for. Some are obvious, many are not. If you don't know exactly what to do with an item, you will be wondering around this HUGE world trying to find out. That means exploring areas with many dangers, damaging you more, meaning less fruit to keep you alive. Lastly, I will let you know a very valuable trick that I have NEVER seen on any other site or video. If you are having trouble keeping yourself alive, you will find this trick to be your Holy Grail for this game. As far as I know, this information will be exclusive to Vizzed. Though I won't claim to be the only one to know of this trick, I might be the first to share it like this. You can make yourself invincible to a lot of the enemies. You must take damage. Then grab a piece of fruit. While you are eating it, you must press the Birds, Bats, Instant kills like rope traps, character enemies, fire, volcano rocks, and the rats found in tunnels (rats not in tunnels can't harm you). If you take damage from any of them, your invincibility is gone, and you must repeat the process to get it back. Here we go! Game Controls A - Jump B - Pick up/Use items Directiona Pad - Move left or right Start - Pause Gameplay The gameplay is pretty simple to pick up. You can move Dizzy left and right, and make him jump over enemies or to different heights. You can carry a total of 3 items at a time. When you pick an item up, it will take the first item slot on the bottom of your screen. When you pick up another item, the items you are currently holding are moved to the 2nd and 3rd item slots. If you press B when holding an item in your 3rd slot, you will set the item down. If you set the item down where it is to be used in the game, then you will activate it's purpose (Duh You shouldn't have to worry about knowing what items look like, as they are always black & white. If the small item sprite isn't clear to you, you can press the Lastly, you will see many white spinning stars throughout this world. Every time you grab one, the amount of stars left in the world will appear in large star print on the top of your screen. There are a total of 100 stars. They are very important, as you cannot reach the final room until you have collected them all. Walkthrough? The game starts in the house of Dizzy (you!). You will notice an apple on the table, and a key near the ceiling. To get the key, simple jump on the shelves of the hutch to your right. Grab the key. Going to the item descr You are now in Yolkfolk Village. This is pretty much a giant tree house village, home of the other Yolkfolk people. Go left, and you will see your first star. Grab it. Only 99 left. Continue to the left, and grab the wooden plank and the key (you will see it is Denzil's Elevator Key). Continue to the left and fall off the ledge (falling does not damage you. You are surprisingly tough for an egg!). Grab the cooked turkey and the star. Only 98 left. Continue to the left. In this next area, you will see a parchment with a picture of Dizzy on it. Press B on it to enter the Extra Life Puzzle. Extra Life Puzzle These puzzles are rare and in various places around the game. If you complete it, you get an extra life. You will notice an hour glass on the right, and the parchment on the left. The parchment has a picture of a stork with an egg, and a poem saying Hocus pocus Busy wizzy Conjure up Another Dizzy The parchment will then begin to scramble. When it is done, your job is to unscramble it back to the way it was before. Use your directional pad to move your 'cursor' to various squares. When you hold the A or B button, you can switch that square with any of the 4 adjacent squares. Get the parchment back together before the sand in the hour glass falls to the bottom, and the Good Wizard will grant you an extra life. There is no fastest way to do this, as the order changes every time. But it is pretty simple. ? Forest Head down the rock hill, but don't go too far. An angry triceratops is waiting for you. Make sure your turkey is on the 3rd slot. Move slowly to the left. When the triceratops appears and is charging, press B to throw the turkey, and the triceratops will chase after it, never to be seen again. Go ahead and grab he star. Only 97 left. Make sure you have the plank and key in your item boxes, and go back up the rock hill and continue to the right. You will pass by an odd looking Prince. Ignore him for now. Keep on going to the right, picking up a star on the way (only 96 left) until you reach a pit with jagged rocks. Stand near the ledge and drop your wooden plank, picking up the elevator key at the same time. You can now walk across the chasm. You will find a bottle of weed killer on the other side. Grab it, and go left again. You will find an elevator. Stand in it, and use the elevator key that unlocks it. You will travel up. Head to the right, back up to Yolkfolk Village. Yolkfolk Village Keep going to the right, and you will see a giant killer weed. It will lower as you get closer, making you unable to go farther. Stand close enough to where he lowers but not touch you. Use your weed killer spray, and it will shrivel up and die. Jump up the platform right above you and walk left to the very top to grab the star. Only 95 left. Go back down. Going right, jump up the 2 upper bridges to keep traveling up the village. The moment you go up to the next screen, you will make the leap to the bridge to your right. This jump can be a little annoying at times. Head up the bridge to the next screen. Use your key on that elevator. Take the elevator back down, and go back down the direction you came from. Pick up the door key on your way down. Go down to the same screen as the weed. Keep walking right to pick up the star. Only 94 left. Keep walking to the right and fall off the edge. Pick up the door key that is right next to where you land. Go to the right and travel up the bridges to Daisy's house. You will pick up a star. Only 93 left. Use one of your keys to unlock the door and enter the house. Daisy's House As Daisy has been kidnapped by the Evil Wizard Zaak, Dizzy has a frown Yolkfolf Village Go back to the area where the weed is. Around this area, you will see a purple mouse looking creature. His name is Pogie. Use the empty cage to capture him. Go back up that elevator you unlocked a minute ago. Use your door key to unlock the door to Denzil's house. Go back down to the weed area. Grab the coil of rope. This rope will be the most used item in the game, as it is the only one that doesn't disappear after being used. Go back up the way you were going before, past Denzil's house. Grab the star. Only 91 left to go. Don't jump to the upper bridge just yet. Take the lower path. When you get to the ledge, you will see a hook above you. Press B to use the rope to swing across the gap. You must press A to release or you will keep on swinging. Grab the star. Only 90 left to go. Jump on that small ledge. Use the rope to cross the gap and travel back up. On the next screen, jump to the left to the upper bridge. Grab the star. Only 89 left to go. On the next screen, immediately jump to the bridge path on your right. Grab the star. Only 88 left to go. Keep walking to the right. You will see a white line from the bridge above you to the ground. DO NOT WALK INTO IT. It is a rope trap that will grab you by the foot, resulting in instant death. You must JUMP through it (jumping over the loop that grabs you. You will also grab a star. Only 87 left to go. Keep traveling up and you will reach a house and elevator. Use the elevator key to travel up. Go to the right. Grab the star. Only 86 left to go. Continue walking to the right and all off the ledge. You will land on a small bridge below. grab the star. Only 85 left to go. Grab that 1 ton weight below you (very strong for an egg). Go left and fall back down to the house from a few seconds ago. Go back up the elevator and go right again. Stand right under that hook, and use the 1 ton weight to pull the bridge down to a reachable height. Ignore that way for now. Go down the elevator and go left. You will find your next star. Only 84 left to go. Jump up the bridge platform and stand at the edge. Use your rope to swing across the gap. Avoid the butterfly. These butterflies are annoying. They don't damage you, but make you dizzy (haha. Dizzy). It makes Dizzy walk backwards, reversing the control. The only way to reverse the effect is to is to touch the butterfly again. After jumping the gap, grab the door key. Do NOT accidentally leave the rope here, as you will not be able to get it, meaning you must start the whole game over. Walk to the right. JUMP off the ledge (so you don't fall through the gap under the elevator, and use the door key on Dylan's house, and enter. Dylan's House Grab the star above his bed. Only 83 left to go. Give Dylan the caged Pogie. He will give you an Incredibly Small Pygmy Cow. This cow can be used to get a magic bean from the market, but so can another item. Whichever one you choose to use to get the bean is up to you. For convenience sake, I leave the cow. Exit the house. Yolkfolk Village Go left until you fall off the edge. You will land on the floor below right next to a door key. Grab that key. Go all the way back up to Dylan's house. Go up the elevator, and go left. This will bring you to Dora's house. Grab the star. Only 82 left to go. Dora's House Use the door key to open Dora's House. Enter. You will see a star to your right, but you have to grab the cherries to get to it. If you have used that invincibility glitch, this will disable it. I suggest going back outside and touching the flaming torch a few times to take damage. Go back in and grab the cherries and do the invincibility glitch again. Grab the star. Only 81 left to go. To the left, you will see a Frog. Pick it up, and you will find out that it is your sister, Dora, turned into a frog. Pick her up and leave the house. Yolkfold Village Go left and fall off the ledge. Go left and fall off the next ledge. You are now on the same floor as Dizzy's house. Go right and head up to the elevator that leads to Denzil's house. Instead of going up the elevator, go to the very edge of the bridge. Use the rope to latch onto the hook hangind off a tree branch. If you time your release right, you will land on a bridge with another Extra Life Puzzle. Enter it. It is the exact same puzzle ever time, just mixed up differently. Unscramble it to get your extra life. Jump off the ledge to your right.? Forest When you land, go to the right to the next screen. There is a star in the entrance of the cave below you to grab. Only 80 more to go. Jump back up on top of the cave and grab the bag of gold. Go left. You will find another star. Only 79 left to go. Right after that star is another rope trap to jump over, or you lose a life. You'll pass by a little star item, but you will leave it for now. Grab the star right after that. Only 78 more to go. You will cross paths with that odd Prince again. Give him Dora. He will kiss it, bringing her back to an egg. He will give you a crossbow. Take it with you and keep going left. You will pass by an empty bottle. Leave it for now. Grab the star. Only 77 left to go. You will find yourself at a waterfall. To cross it, you will see a barrel travel down in the background and disappear. You will then see it reappear in front of you. When it reappears, you must jump on it and jump to the other side before you and the barrel fall down the waterfall, which is instant death. Jump up the ledge and grab the star. Only 76 left to go. Go left and to the next area. Town Immediately grab the star. Only 75 left ( you are 1/4 the way there!). You will see an umbrella. Usually, this protects you from water drops that can hit you, which damages you (funny how the highest falls from the treetops don't phase you, but drops of water are a no no). But if you use the invincibility glitch, you are unharmed by the drops anyway. To enter tunnels, press B in front of them. Enter the first tunnel. Blocking your path to Bridge St. is an armored goblin. Give him the bag of gold, and he will leave. Grab the star. Only 74 left to go. Go to Bridge St. and grab the star to the left. Only 73 left to go. Keep going left. You will be unharmed by the mice and guillotine if you use the invincibility glitch. Grab the next star. Only 72 left to go. You will see a barrel of rum. Grab it. Go back to Castle St. Go left and enter the next tunnel. This is a long tunnel with mice. These mice CAN damage you even with the invincibility glitch. Avoid them. Grab the star (only 71 left to go) and ignore the door key for now. Exit the tunnel to get to Dock St. Grab the star to the left. Only 70 left to go. Then go to the right. You will see a pirate with his ship behind him. To enter his ship, give him the barrel of rum. Enter the ship. Pirate Ship Avoid the bird, as he can damage you. Grab the star. Only 69 left to go. Stay on the top deck of the ship. Grab the star. Only 68 left to go. You will have to jump on a pile of boxes. Above you are some sail masts you can jump up to. Jump up to the next screen. Jump on the small mast. Turn around and use your rope to swing from the hook on one of the upper masts. You will swing to the right. Jump to the higher mast. This can be tricky. Jump to the top mast, and jump across the gap to the mast on the other side. Grab the star. Only 67 left to go. Stand at the ledge and use your rope to clear the gap. Walk left and grab the star. Only 66 more to go. Jump on the higher mast, face left, and use your rope to jump across the gap. This is a big jump, so time your release well. Grab the portcullis wheel item, and leave the ship. Town Head back to Castle St. Go through that first tunnel again to go back to Bridge St. Go left to the next tunnel. Grab the star. Only 65 left to go, and continue through the tunnel. Go left and grab the next star. Only 64 left. You will quickly see another tunnel. Go through it. It is another long tunnel. Grab the star on the way. Only 63 left to go. When you exit the tunnel, go right. You will grab another star. Only 62 left to go. Now you will see a large portcullis gate. Place your portcullis wheel in the empty hole, opening the gate. Enter. Crossbow Minigame In this game, you will see a castle. Many trolls will pop out of windows and from behind bushes, and throw stones at you. Having the crossbow, you have an aim cursor. Press B to fire crossbow bolts. Your must hit the trolls. If you are about to be hit by a rock, press and hold A to duck to safety. Release A to emerge to continue your attack. Every time you get hit, you will lose a health bar under status. If you hit a troll, you will gain a health bar. The minigame is complete when you you fill up your entire health bar. You have a time limit. If time runs out, you lose a life. When you win, you will enter the castle. Troll Castle Grab the star that is right at the entrance. Only 61 left to go. You won't need the crossbow anymore, so you can leave it here. As you walk to the left, you will see stairs rich above you that you can jump on. Go ahead and jump up there. Go to the far right, and jump up the blocks to reach the star. Only 60 left to go. Grab fruit if you need to. Go back down to the ground floor and continue left till the very end. Jump up the blocks. On the next screen up, you will see an item in which you must make some precise jumps to reach. These jumps can be a little tricky, as Dizzy rolls once before stopping. These squares are small and easy to roll off of. Just takes patience. Grab that item, which is a Bridge Building Kit. Drop to the large platform at the bottom of the screen, and jump across the gaps to your right to reach the star that you can see on the screen. Only 59 left to go. Go left again and jump the first gap to the small square. Then move to the right and just drop. You will end up on an upper floor. Go right jump on that square, and jump up to the fi Town Go back through the tunnel you came from. On the other side, go left. You will reach another extra life puzzle. You know the picture, you know the pom, and you know the process. Get that extra life from the Good Wizard. Continue to the left. Pass by a tunnel and go up the stairs to grab a star. Only 57 left to go. Go back to the tunnel you just passed by and head on through. It is another long tunnel with mice. Avoid them and grab the star. Only 56 left to go. When you exit the tunnel, continue to the right. You will grab a star. Only 55 left to go. Keep going to the right, and you will reach another tunnel, and you will see the Marketer to the right. Ignore for him for now. Go through the tunnel and grab the star. Only 54 left to go. Go through the other end of the tunnel and walk left. Jump the gap to go up the stairs and grab the star. Only 53 left to go. Continue up the stairs to the Graveyard.? Graveyard Grab the star right in front of you .Only 52 left to go. Continue walking left. You will pass by a partially dug hole. Keep going left and grab the star. Only 51 left to go. Start jumping up the cliffs to the top. You will see a bridge that is out. Stand at the edge, and use your bridge building kit, and you will make a bridge to cross. Jump up the cliff, avoiding the rope trap. Stay on top of the cliffs and grab the axe. Drop back down to the bottom and continue going left. You will grab 2 stars before leaving the Graveyard. Only 49 left to go (Over halfway there!).? Under Zaak's Castle You won't be able to reach that puzzle unless you go through the mine carts. If you follow this walkthrough, you will not get this extra life, as it is not worth the risk of traveling back anyway. Keep going to the left and you will see a star in a small cavern. Grab it. Only 48 left to go. Go back up the hill, and you will see a leprechaun. You don't have the item you need for him yet. But you can leave your rope here, as you won't need it again until you go to Zaak's Castle, which is right above this spot. Leave the rope, and go back to the Graveyard. Graveyard Just go right and exit the Graveyard. Town Go as far to the right as you can and grab a star. Only 47 left to go. Go back left, and enter the first tunnel you reach. Go through the tunnel, grabbing the star. Only 46 left to go. On the other side of the tunnel, go all the way to the left and go through the tunnel to Dock St. Walk right and enter the 2nd tunnel you reach. It is the short one that takes you to Bridge St. Go to the right and cross the bridge. Enter the tunnel to go to Castle St. Go to the left and enter the tunnel. Grab the door key in the tunnel, and head back the way you came from. Go to the right, and go back through the first tunnel. This time, you will go right and off the screen to enter the Barrel Waterfall Minigame. Barrel Waterfall Minigame Remember that waterfall you jumped across using the barrel? You are now going to ride a barrel and travel down the fall. The A and B button serve no function here. The point here is to travel to the bottom as fast as you can. A green goblin will be following you in a barrel of his own. If he hits you, he takes away health. Bumping into land and rocks will slow you down, letting the goblin catch up to you. There are some parts that lead to a dead end. If you run into this, you can slowly travel back up, but the odds of getting passed the goblin who will relentlessly hit you is slim to none. So perfection is key. Throughout your ride, trolls will appear on the land and throw rocks at you. Avoid them as they take away health. Lets get started. At first, it is strait forward. Ride down the small waterfalls and go as strait as possible while avoiding rocks. You will see a short fork in the path. Go left. In this narrow path, avoid the walls and the gators. You will fall down another short waterfall. Immediately after are 2 rocks. Go between them. Same thing with the next 2 sets of rocks you see. You will see another small fork. Take the right, or be doomed to the goblin. Immediately, there is a giant rock making another fork in your path. Go the the left of the rocks. You will IMMEDIATELY see another gator as well as another fork. Go RIGHT. This path immediately splits into 2. Either is safe, but the waterfall rout on the left is best, as waterfalls slow the goblin down and don't affect your speed. Weave between the rocks and avoid the gator. You will see another split in the path. Either is fine, but take the one that lets you go as strait as possible to save time. Weave through the rocks and gators, and stay close to the middle of the screen, but slightly to the left so you take the left path on the next small trap. Keep traveling and stay on the left. You will reach an open area with 3 rocks and 2 gators. One of the gators stays between the 3 rocks, so go to the left. But the other gator can block you for a second, so press UP to let it pass by if needed. This will bring you to a spot where you must travel up. You travel slower while going upstream, so keep that in mind when avoiding the gator. Timing is key here. When you go around that little curve upstream, travel down avoiding the trolls. Just keep going strait and you will go down some more falls. You will see another split. Both are safe, but the right is faster and more strait. Avoid the gator and rocks thrown by the toll. It is pretty much strait on ward from here on. Stick closer to the left of the pack because one set of rocks will trap you if you stay on the right hand side. You will reach the big waterfall, in which Dizzy jumps out of the barrel to safety, and the minigame is over. Forest Floor You will find yourself on top of a cliff where you can grab the pickax. Don't leave anything there accidentally or you have to go through the minigame again to get it back. Go to the right and pick up the empty bottle on your way. You will leave the door key for now. Keep walking left until you reach that cave where you found that bag of gold a while back. Leave the pickax and ax there for now. Go into the cave and pick up the dry match. Go to the right and pick up the elevator key and the star. Only 45 left to go. Exit the cave, and go left to the elevator that takes you back to Yolkfolk Village. Yolkfolk Village Travel up to Denzil's house (you take the elevator to get there). Go inside and see Denzil frozen in a block of ice. Leave the dry match there and exit the house. Go down the elevator and go left. Keep going left and you will see an unlocked house. Enter it. Here ,grab the star (only 44 left) and the door key. Exit the house. Go back up the path to Denzil's house. Pass the house and keep going left. Jump up to the next floor and keep going left. Then take the upper path to the right. Right away, you will see an upper path that takes you left that you can go. Take it. You will reach another elevator. Use the elevator key. Use the door key to unlock Grand-Dizzy's House. Grand-Dizzy's House You will see that Grand-Dizzy is ill and needs medicine. Leave the empty bottle here for now. Grab the star. Only 43 left to go. Jump to the top of the hutch to grab the pile of hay. Leave the house. Yolkfolk Village Go to the right and grab the star. Only 42 left to go. Keep going right and fall down the ledge. Go right and jump over the rope trap. Fall off the ledge. Take the elevator to Denzil's house. Denzil's House Go to the right side of Denzil and drop the hay. Grab the match and use it on the hay to light a fire, melting Denzil. Go to the right side of the house to grab the star. Only 41 left to go. Leave the flippers for now and exit the house. Yolkfolk Village?Go to the right and stand at the ledge that you used the rope before to reach the puzzle. Jump off the ledge (jump to avoid accidentally grabbing the watermelon. If you want to grab it, just fall off the ledge). Forest Floor Go to the right. Pass the cave. You will walk past a volcano that fires molten rocks all over the place. Avoid them. You will find a mushroom. Grab it and head back to Yolkfolk Village. After you pass the rope trap, you will find a star plant. Grab that too. Head back up to Grand-Dizzy's House. Grand-Dizzy's House Pick up the empty bottle you left earlier. Go to the far right side of the house and stand in front of the cauldron. Put in your bottle, star, and mushroom, and a bottle of medicine will come out. Give the medicine to Grand-Dizzy, and he will you give you a Golden Dragon Egg. Leave the house. Yolkfolk Village Go back to Denzil's house to grab the flippers and leap off the edge to the right leading to the cave. Forest Floor Pick up the pickax and hatchet, leaving the Golden Dragon Egg behind. Go right. Avoid the volcano rocks. You will pass a bridge. Cross the bridge, and leave the hatchet on the ground (do not be standing on the bridge when you do this or you will fall in the water and die). Grab the star. Only 40 left to go. Keep going right and grab another star, only 39 left to go, and you will be at the beach. Beach With flippers, you can swim. Just press jump to swim around. If you don't press jump, you will sink. Grab the SCUBA tank before you head in the water, or you will drown. Sink into the ocean and grab the star. Only 38 ?left. Go right and grab the next star. Only 37 left to go. Don't fall to the bottom just yet. Just keep swimming to the right until you reach the end. Then fall to the bottom. Grab the star on the screen below you. Just 36 left. On the ground, you will see a bubble under the rock. Stand over it and use your pickax to break the floor, releasing the bubble. Don't go down yet. Head to the right to grab the star. Only 35 left to go. To your left is a sunken ship. Swim to it and grab the star near the top. Only 34 left to go. Grab the empty treasure chest too. Go to the right while swimming to the top. Grab a star. Only 33 left to go. You will surface on the other side of the beach. Head over to the far right wall and drop the empty treasure chest, grabbing the star (only 32 left). This next part is optional but will save you a lot of time and effort later. You passed by a rock earlier. There are 3 of these rocks around the beach. They have a use, but not required. Again, it saves you time in the long run. I will specify where to find them and what to do with them anyway. If you don't care, just skip the rocks, and take the long route later. Grab the rock and head back to where you placed the treasure chest. Jump up the platform to the next area. Under Zaak's Tower You will find another extra life puzzle. Go ahead and do that. head to the right. Make sure you land on that rock. Don't try to jump over it. You will hit the rock, and roll into the rope trap. Clear the rope trap and grab the star (only 31 left) and the 2nd rock. Keep going to the right and you will find yourself at the broken bridge with a log in the middle. Right now, you can't get across. Even with the flippers and air tank, it is instant death toe fall in the water. Stand at the edge and toss the salty rocks in the water to raise the water level. Leave this for now and head back to the beach (with the tank and flippers. Beach Go left and do NOT sink in the water. Just swim along the surface. You will pick up a star on the way. Only 30 left to go. You will reach a small island. On this island, you will find a crowbar and another star (only 29 left to go). Pick up the crowbar. Now sink to the bottom of the sea and go left to grab another star (only 28 left to go) and the 3rd rock. Leave the crowbar for now. Go to the right, but staying on the bottom of the sea. You will see another star that you must swim to. Only 27 left. Head over to the broken bridge and toss the rock in the water. Go back to the beach. Remember that hole you made with the pickax? Go down there. Grab the star at the bottom (only 26 left) and the golden coin. This is the other item that does the same thing as the Incredibly Small Pygmy Cow that you got from Dylan. Grab the crowbar where you left it and take it to the surface. Leave the crowbar on the beach and head back for the Gold Coin. Go back to the surface. Leave the flippers and Scuba Tank and take the crowbar and coin. You will head all the way back to the town, but not the long way. Go to the cave where you left the egg. Leave the egg, but go into the cave. Cave First, go right. You will see 4 boxes. This is a puzzle, but you only need to do one thing for now. If the diamond is flashing, that means that elevator is active. For now, you just need to make sure the first one is lit, since you are only using the first elevator. Go to the far left and head down the elevator. You will notice the cave has diamonds throughout. They do the same thing as fruits, so they are NOT items. When you go down the elevator, head to the right and go down the pit. From that fall, go left. Grab a star. Only 25 left to go (3/4 there!) You will see a mine cart. This is the mine cart minigame. Mine Cart Minigame Before I begin, it is important that you follow these directions precisely. There are total of 5 different exits. 3 of them will take you to other places in this world, and make you have to go back to the cave to do this again. One of them will take you back to that area of the beach where you put the treasure chest down to get to the broken bridge. If you fall here, you are completely stuck with no way out. You can take flippers or the oxygen tank with you on this ride in case this happens. But if you do that, you will have to leave an item in an unreachable place, and the only way to reach it is to go through the whole minigame again. This is the hardest minigame, in my opinion. The way this works is there are MANY paths of cart tracks. You press left or right to take the route you choose. Many of them lead to dead ends that make you crash and automatically die. There are goblins riding carts that block some paths. If you touch them, you crash and automatically die. Some parts have explosions that if they touch you, you automatically die. So the most important detail here is that if you screw up, you die. Here we go. If the walkthrough is confusing, watch the video. This starts at the 50:24 mark. It isn't the ONLY way to get to the end, but this is one way. Take the first right you see. Take the next right to avoid the goblin. You will approach a sign that says EXIT. Take the path to the right. Then take the first left. After you pass by the goblin, take the next right to avoid the purple goblin After this point, the cart starts going faster. Immediately take the next right to avoid the next red goblin. Next, the track forks into 2 paths. Take the right. Keep holding right to take the next right so you don't crash into the dead end. You must press up to go higher on your screen, as an explosion will go form the right side of the screen to the left. If it crosses your track before you pass by it, you will die. So you must pass that path before the explosion reaches your track. Immediately after that, take the next right. Then take the SECOND left. Stay above the halfway line of the screen to avoid the next explosion. You will see that the track goes diagonal now. Take the SECOND right. Then take the next available right path. After that, take the SECOND available left path and IMMEDIATELY take the next right. You must be quick with this turn. If you miss it, you will be doomed to that area on the beach, and you will be stuck unless you brought flippers or the Oxygen Tank. Move past the explosion coming from the left, and take the next available right. take the next left.Take the next right. Take the next left after the pink goblin. The cart will speed up more and the track will fork in two directions again. Take the path to the right. Take the next THREE lefts. Then take the next TWO rights and speed up to avoid the explosion. Do NOT take the next turn after the explosion. Stay to the left. Then take the next right, next left, and you will crash through the final exit, which is the end of the minigame. WHEW! Town You will find yourself right below the stairway to the Graveyard. You will find a Skeleton Key. Grab it. Hopefully you didn't take the flippers or tank, or you will find yourself having to come back here through the mine cart. Don't go to the Graveyard just yet. Go right, and go through the first tunnel. You will find the Marketer there. Give him the Gold Coin and he will give you a Magic Bean. Take it, and head to the Grave Yard. Grave Yard Just walk on through. Under Zaak's Tower Leave the Magic Bean and Skeleton Key in this area. Head back to the Pirate Ship on the other side of town. Pirate Ship You have already cleared the top deck. Go ahead and go right and drop to the lower deck. You will see a trapdoor with a cylinder shaped item underneath. Use your crowbar to open the door and grab the item (which is a Thick Persian Rug). ?Hop out of here and head to the right, jumping back up to the upper deck area. Go all the way to the right and drop down the ledge, grabbing a star. Only 24 left. Drop down to the very bottom deck of the ship. You will find a stick of Dynamite. Grab it. Hop out of this are and go left. Jump across the gap and grab the star to the left. Only 23 left. Go back and drop down to the bottom deck and go left. You will grab a star. Only 22 left. Keep going left and hop out of the bottom deck at the end. Hop on the platform and the ledge on the left to grab another star. Only 21 left. Go ahead and make your way up to the VERY top deck of the ship and head right. You will be heading back to the cave. You can take the long way that you are familiar with by exiting the ship and going across the woods, or you can take this minigame shortcut. Keep in mind, this game can be dangerous and easy to die even if you know what you are doing. Do this at your own risk. Head to the far right of the top deck,and you will reach THE PLANK. The Pirate will drop down and make you fall off the plank, plummeting to the bottom of the sea (JERK! And to think you gave him a whole barrel of Rum too!) Walk the Plank Minigame Your job is to escape the ocean before your oxygen runs out. Bubbles float from the sea floor and float to the top. You can hop on bubbles to travel up. If you stand on a bubble for too long, it will pop. The larger the bubble, the longer it lasts. The bubbles travel at random speeds. Your best hope is to get a large bubble that travels fast to cover a LOT of distance. Not much explanation here. Just become familiar with how long each side of bubble lasts so you know when you should try to hop to another bubble before it pops.? Beach? You will find yourself on the beach. Leave the rug on the beach. Just hop to the left and head over to he cave. Grab the golden egg, and leave the rug. Cave Now it is time to clear this cave. Go to the right side of the cave and activate all 4 elevators. Remember that if the diamond is flashing, it is active. To activate it, press B in front of it. If you flip the switch of one, you flip the switch of the 2 next to it. Pretty simple to work out. When you have all 4 active, head to the left and go down the first elevator. Head to the right and drop down the hole. You need to go right. This part is ANNOYING. The path is very narrow, and you have a bad flying wildly around you. There is pretty much no room to maneuver through it without getting hit. It can hit you even with the invincibility glitch. There have only been a few times I have managed to get through this without taking damage. It is easy to die here. Keep going to the right. Head down the second elevator and go left. Grab the star. Only 20 left to go. Continue to the left and fall down to the bottom of the cave. You will cross 2 bridges across lava that fires molten rocks that damage you. When you reach the end, go down the 3rd elevator. Grab the next star. Only 19 left to go. You will see an item as well. It has no function. It just shows you the recipe to make the medicine that you already made for Grand-Dizzy. Go up the 4th elevator. You will see a sign that says "DANGER! BLASTING AREA..." Go to the end of the wires, and place the dynamite there. Go to the handles and blast that rock away. Jump on the box and up to the last part of the cave. You will see a large green dragon. Don't worry. She will not attack you as long as you have her Dragon Egg. If you didn't, she would blast fire at you, keeping you from passing her. You will see a second Dragon Egg under her. DO NOT TAKE IT. You need to leave the other egg that you have there too. If you try to leave with it still in your possession (or both), she will attack you out of anger. If you leave the eggs, she will let you leave unharmed. At the end of this tunnel is a shamrock. Grab it and leave the cave.? Forest Floor Head over to the the beach. Beach Grab the flippers and oxygen tank. Leave the shamrock. Go back to the bridge where you left the hatchet. Forest Floor Pick up the hatchet, and go to the middle of the bridge. Use the hatchet on the bridge to break it, and you will fall through. Swim to the star on the surface of the water .Only 18 let to go. Head down in the water, and you will technically be in the cave. While underwater, go to the right and grab the star. Only 17 left to go. Keep going right, and pick up the par if Cymbals. Then grab the star above them. Only 16 left to go. Go to the far left and exit the water, grabbing the star. Only 15 left to go. Exit the cave. Leave the flippers and oxygen tank. go left until you reach the door key you left near the waterfall. Grab the key and head to Yolkfolk Village. Yolkfolk Village Head all the way up to Dylan's house (the one where you took Pogie). Go up the elevator and go right. Now you will jump up the platform you weighted down with the 1 ton weight. Head on up. Go to the left and jump up the platform to grab the star. Only 14 left to go. Go to the house and unlock it with the key. Dozy's House Dozy is a Yolkfolk Village Move to the right and grab the star. Only 12 left to go. Fall off the ledges until you fall all the way down to the Forest Floor. Forest Floor Go to the right. Grab the flippers and head to the beach (you can take the tank for safety, but not needed). Grab either the Persian Rug or the Shamrock and Persian Rug. If you want the tank as a safety, you will have to take the shamrock, rug, and winch handle across the ocean individually. If you don't have the tank, you can save one trip by carrying two of the items in one trip. You will HAVE to swim along the surface so you don't drown. Swim to the opposite end of the sea where the empty treasure chest was placed. Leave the two items you took over and go back for the third one. Bring it to the other side. Leave the flippers, and take the shamrock, rug, and winch handle to the area to the right. Under Zaak's Castle You will need to jump over the rope trap. Again, don't try to jump over the rock. Jump on top and then jump over the trap. Jump the gap of the broken bridge by jumping on the log, then the other side. Grab the star. Only 11 left to go. Stand near the leprechaun and give him the shamrock. He will move. You now have all the items you need to complete Zaak's castle in the same area. Go grab the magic bean and place it to the left of the sign where the leprechaun was standing. A giant beanstalk will grow. Grab the Rug, Winch Handle, and Skeleton Key. Jump up the beanstalk to reach the clouds. Clouds Go left, jumping from cloud to cloud. If you go without jumping too long, you will fall through the clouds, so keep jumping. Avoid the butterflies. On the far left cloud is a star. Grab it. Only 10 left. Head over to the right. When you are on the upper cloud with the cherry, jump to the left. Ignore the star below you for now. you will be at the next height of clouds. Jump strait up and grab the star above you. Only 9 stars left. Hop from cloud to cloud going LEFT. You will arrive on a large cloud where Zaak's Castle sits. Go to the left side of the castle and grab the star. Only 8 left. Go to the portcullis gate of the castle and use the winch handle. Enter the Castle. Zaak's Castle You are finally in Zaak's Castle, and saving Daisy is within your grasp. Go to the elevator and use the Skeleton Key. Hop on top of the chair closest to you and hop up to the next floor. You will see a bed of nails. Place the Persian Rug over the nails. Leave the Castle. Clouds Head to the right. Drop down to the large cloud above the star you skipped by earlier. Drop through the cloud to fall on the star. Only 7 cards left. Grab the rope and head back up to Zaak's Castle. Zaak's Castle Go up the elevator, and cross the bed of nails, and hop over the rope traps. Jump on the square platform and use the rope to swing to the area below you. You can try to jump on the square platforms if you wish. If you make your way up, you will find one more extra life puzzle. But it is slightly different. This time, instead of switching pieces, one piece is missing, and you can only move the squares adjacent to the empty square. It is more difficult. I skip it. When you land on the platform below, go to the left to snatch a star. Only 6 left. Don't fall of the ledge. Go back to the right. and JUMP from the ledge. On the far right, jump up to the next screen up. You will see a rusty spade (shovel). Grab it. Jump to the top platform and jump to grab the star. Only 5 left. head to the left and drop down. Exit the castle. Head over to the Graveyard. Graveyard Remember that half dug hole that is under the bridge you made? Use your shovel there to fall through the hole. Go to the left and grab the star. Only 4 left. Then jump up the rock ledges to grab that trampoline. That will be your ticket out of here. Go to the right and grab the star. Just 3 left. Now here is the tricky part. Place the trampoline just right where the water starts. Go up the rock hill to the left a little bit. Jump to the right to land on the trampoline and reach that rock ledge. From that rock ledge, jump off and land on the trampoline. It will send you shooting up high. Make sure when you land, you are pressing RIGHT to make it through the hole out of here. Once out of this annoying spot, head back to Zaak's Castle. Zaak's Castle Go up the elevator and up to that bed of nails. This time, you will travel up the square ledges to the top to grab a star. Only 2 left. Jump to the left on top of that long rectangular ledge, and fall to the right. Go all the way to the right and grab that star. ONE MORE LEFT! Drop down and cross the bed of nails and avoid the traps. Head to the right and make your way to the bottom right corner of the castle for that final star. NO MORE STARS! You will get a message telling you that having collected all the stars, you can now enter Zaak's Tower. Go up those stairs that are on your screen. Jump up the platforms and travel left. Make your way back up the elevator, and past the bed of nails. On that square platform, use the hook. You MUST land on one of those square platforms in the air. This can be another annoying part. Make your way up those square platforms to the next screen up. You will see that last extra life puzzle. But you need to jump on that square platform right under that spider. Use your rope on that hook to clear the gap. You are now in the final part of the game. Zaak's Tower After a long and tough adventure, you are now to do battle with Zaak. Dizzy will grab a mirror and throw it up to the top of the tower on the opposite end of where Zaak is (Really good arm for an egg). Now, the goal hear is to make it to the top by hopping from platform to platform. But Zaak isn't going to make this easy for you. He will be constantly sending magic white frowning balls that bounce around the tower. If they hit you, they take damage (of course). But they will also knock you off the platform you are standing on and you will land on the next platform right below you. You can't go in any left or right direction after being hit to try to catch a closer platform. It is a long way up. My advice is to find some safe spots where the balls don't go, and observe how they move so you can determine the best course of action for progressing. Not much strategy involved here. Just takes practice. When you reach the platform right below Zaak, he will stop firing these annoying balls at you. When you jump to the platform on the same level as him, he has one last trick. He will fire a magic fireball at you. You must jump over it. It will hit the mirror, reflecting it back. You MUST jump over it again as it rebounds. If you avoid getting hit, it will hit Zaak, defeating him. If you are hit, you will fall down a few platforms and must work your way up again. When Zaak is gone, Dizzy must hop up to Daisy, untie her, and bask in his glory. Congratulations. You have beaten a game that was advertised as "Almost unbeatable" when it was released. So there you have it. A complete guide for one of the most difficult NES games around. I will take a few moments to say thank you for reading this (for those who did). It was definitely not a short task. I hope that this guide helps anyone who has had trouble with this game, and I hope my included video helps out too. This is a Vizzed exclusive walkthrough by me. If you wish to display this on any other site, contact me through my profile here on Vizzed (rcarter2). I enjoyed making my very first walkthrough, and look forward to doing more. Before I get started, I'll give you a few explanations on this game. This game is difficult on two levels. First, it takes a lot of skill to complete. At first, it feels pretty easy. Though anything that moves will harm you (a lot), there is fruit all around this large world to replenish your health. But very quickly, you will realize that when you eat a fruit, it is gone forever. In a game that takes over an hour to complete, you are going to take a lot of damage and eat a lot of fruit. Quickly enough, fruit is harder and harder to find. Second, this game is one giant puzzle. This is one of those games where you have a LOT of items that have single purposes, and all but two are required to complete the game. You must figure out what every item is used for. Some are obvious, many are not. If you don't know exactly what to do with an item, you will be wondering around this HUGE world trying to find out. That means exploring areas with many dangers, damaging you more, meaning less fruit to keep you alive. Lastly, I will let you know a very valuable trick that I have NEVER seen on any other site or video. If you are having trouble keeping yourself alive, you will find this trick to be your Holy Grail for this game. As far as I know, this information will be exclusive to Vizzed. Though I won't claim to be the only one to know of this trick, I might be the first to share it like this. You can make yourself invincible to a lot of the enemies. You must take damage. Then grab a piece of fruit. While you are eating it, you must press the Birds, Bats, Instant kills like rope traps, character enemies, fire, volcano rocks, and the rats found in tunnels (rats not in tunnels can't harm you). If you take damage from any of them, your invincibility is gone, and you must repeat the process to get it back. Here we go! Game Controls A - Jump B - Pick up/Use items Directiona Pad - Move left or right Start - Pause Gameplay The gameplay is pretty simple to pick up. You can move Dizzy left and right, and make him jump over enemies or to different heights. You can carry a total of 3 items at a time. When you pick an item up, it will take the first item slot on the bottom of your screen. When you pick up another item, the items you are currently holding are moved to the 2nd and 3rd item slots. If you press B when holding an item in your 3rd slot, you will set the item down. If you set the item down where it is to be used in the game, then you will activate it's purpose (Duh You shouldn't have to worry about knowing what items look like, as they are always black & white. If the small item sprite isn't clear to you, you can press the Lastly, you will see many white spinning stars throughout this world. Every time you grab one, the amount of stars left in the world will appear in large star print on the top of your screen. There are a total of 100 stars. They are very important, as you cannot reach the final room until you have collected them all. Walkthrough? The game starts in the house of Dizzy (you!). You will notice an apple on the table, and a key near the ceiling. To get the key, simple jump on the shelves of the hutch to your right. Grab the key. Going to the item descr You are now in Yolkfolk Village. This is pretty much a giant tree house village, home of the other Yolkfolk people. Go left, and you will see your first star. Grab it. Only 99 left. Continue to the left, and grab the wooden plank and the key (you will see it is Denzil's Elevator Key). Continue to the left and fall off the ledge (falling does not damage you. You are surprisingly tough for an egg!). Grab the cooked turkey and the star. Only 98 left. Continue to the left. In this next area, you will see a parchment with a picture of Dizzy on it. Press B on it to enter the Extra Life Puzzle. Extra Life Puzzle These puzzles are rare and in various places around the game. If you complete it, you get an extra life. You will notice an hour glass on the right, and the parchment on the left. The parchment has a picture of a stork with an egg, and a poem saying Hocus pocus Busy wizzy Conjure up Another Dizzy The parchment will then begin to scramble. When it is done, your job is to unscramble it back to the way it was before. Use your directional pad to move your 'cursor' to various squares. When you hold the A or B button, you can switch that square with any of the 4 adjacent squares. Get the parchment back together before the sand in the hour glass falls to the bottom, and the Good Wizard will grant you an extra life. There is no fastest way to do this, as the order changes every time. But it is pretty simple. ? Forest Head down the rock hill, but don't go too far. An angry triceratops is waiting for you. Make sure your turkey is on the 3rd slot. Move slowly to the left. When the triceratops appears and is charging, press B to throw the turkey, and the triceratops will chase after it, never to be seen again. Go ahead and grab he star. Only 97 left. Make sure you have the plank and key in your item boxes, and go back up the rock hill and continue to the right. You will pass by an odd looking Prince. Ignore him for now. Keep on going to the right, picking up a star on the way (only 96 left) until you reach a pit with jagged rocks. Stand near the ledge and drop your wooden plank, picking up the elevator key at the same time. You can now walk across the chasm. You will find a bottle of weed killer on the other side. Grab it, and go left again. You will find an elevator. Stand in it, and use the elevator key that unlocks it. You will travel up. Head to the right, back up to Yolkfolk Village. Yolkfolk Village Keep going to the right, and you will see a giant killer weed. It will lower as you get closer, making you unable to go farther. Stand close enough to where he lowers but not touch you. Use your weed killer spray, and it will shrivel up and die. Jump up the platform right above you and walk left to the very top to grab the star. Only 95 left. Go back down. Going right, jump up the 2 upper bridges to keep traveling up the village. The moment you go up to the next screen, you will make the leap to the bridge to your right. This jump can be a little annoying at times. Head up the bridge to the next screen. Use your key on that elevator. Take the elevator back down, and go back down the direction you came from. Pick up the door key on your way down. Go down to the same screen as the weed. Keep walking right to pick up the star. Only 94 left. Keep walking to the right and fall off the edge. Pick up the door key that is right next to where you land. Go to the right and travel up the bridges to Daisy's house. You will pick up a star. Only 93 left. Use one of your keys to unlock the door and enter the house. Daisy's House As Daisy has been kidnapped by the Evil Wizard Zaak, Dizzy has a frown Yolkfolf Village Go back to the area where the weed is. Around this area, you will see a purple mouse looking creature. His name is Pogie. Use the empty cage to capture him. Go back up that elevator you unlocked a minute ago. Use your door key to unlock the door to Denzil's house. Go back down to the weed area. Grab the coil of rope. This rope will be the most used item in the game, as it is the only one that doesn't disappear after being used. Go back up the way you were going before, past Denzil's house. Grab the star. Only 91 left to go. Don't jump to the upper bridge just yet. Take the lower path. When you get to the ledge, you will see a hook above you. Press B to use the rope to swing across the gap. You must press A to release or you will keep on swinging. Grab the star. Only 90 left to go. Jump on that small ledge. Use the rope to cross the gap and travel back up. On the next screen, jump to the left to the upper bridge. Grab the star. Only 89 left to go. On the next screen, immediately jump to the bridge path on your right. Grab the star. Only 88 left to go. Keep walking to the right. You will see a white line from the bridge above you to the ground. DO NOT WALK INTO IT. It is a rope trap that will grab you by the foot, resulting in instant death. You must JUMP through it (jumping over the loop that grabs you. You will also grab a star. Only 87 left to go. Keep traveling up and you will reach a house and elevator. Use the elevator key to travel up. Go to the right. Grab the star. Only 86 left to go. Continue walking to the right and all off the ledge. You will land on a small bridge below. grab the star. Only 85 left to go. Grab that 1 ton weight below you (very strong for an egg). Go left and fall back down to the house from a few seconds ago. Go back up the elevator and go right again. Stand right under that hook, and use the 1 ton weight to pull the bridge down to a reachable height. Ignore that way for now. Go down the elevator and go left. You will find your next star. Only 84 left to go. Jump up the bridge platform and stand at the edge. Use your rope to swing across the gap. Avoid the butterfly. These butterflies are annoying. They don't damage you, but make you dizzy (haha. Dizzy). It makes Dizzy walk backwards, reversing the control. The only way to reverse the effect is to is to touch the butterfly again. After jumping the gap, grab the door key. Do NOT accidentally leave the rope here, as you will not be able to get it, meaning you must start the whole game over. Walk to the right. JUMP off the ledge (so you don't fall through the gap under the elevator, and use the door key on Dylan's house, and enter. Dylan's House Grab the star above his bed. Only 83 left to go. Give Dylan the caged Pogie. He will give you an Incredibly Small Pygmy Cow. This cow can be used to get a magic bean from the market, but so can another item. Whichever one you choose to use to get the bean is up to you. For convenience sake, I leave the cow. Exit the house. Yolkfolk Village Go left until you fall off the edge. You will land on the floor below right next to a door key. Grab that key. Go all the way back up to Dylan's house. Go up the elevator, and go left. This will bring you to Dora's house. Grab the star. Only 82 left to go. Dora's House Use the door key to open Dora's House. Enter. You will see a star to your right, but you have to grab the cherries to get to it. If you have used that invincibility glitch, this will disable it. I suggest going back outside and touching the flaming torch a few times to take damage. Go back in and grab the cherries and do the invincibility glitch again. Grab the star. Only 81 left to go. To the left, you will see a Frog. Pick it up, and you will find out that it is your sister, Dora, turned into a frog. Pick her up and leave the house. Yolkfold Village Go left and fall off the ledge. Go left and fall off the next ledge. You are now on the same floor as Dizzy's house. Go right and head up to the elevator that leads to Denzil's house. Instead of going up the elevator, go to the very edge of the bridge. Use the rope to latch onto the hook hangind off a tree branch. If you time your release right, you will land on a bridge with another Extra Life Puzzle. Enter it. It is the exact same puzzle ever time, just mixed up differently. Unscramble it to get your extra life. Jump off the ledge to your right.? Forest When you land, go to the right to the next screen. There is a star in the entrance of the cave below you to grab. Only 80 more to go. Jump back up on top of the cave and grab the bag of gold. Go left. You will find another star. Only 79 left to go. Right after that star is another rope trap to jump over, or you lose a life. You'll pass by a little star item, but you will leave it for now. Grab the star right after that. Only 78 more to go. You will cross paths with that odd Prince again. Give him Dora. He will kiss it, bringing her back to an egg. He will give you a crossbow. Take it with you and keep going left. You will pass by an empty bottle. Leave it for now. Grab the star. Only 77 left to go. You will find yourself at a waterfall. To cross it, you will see a barrel travel down in the background and disappear. You will then see it reappear in front of you. When it reappears, you must jump on it and jump to the other side before you and the barrel fall down the waterfall, which is instant death. Jump up the ledge and grab the star. Only 76 left to go. Go left and to the next area. Town Immediately grab the star. Only 75 left ( you are 1/4 the way there!). You will see an umbrella. Usually, this protects you from water drops that can hit you, which damages you (funny how the highest falls from the treetops don't phase you, but drops of water are a no no). But if you use the invincibility glitch, you are unharmed by the drops anyway. To enter tunnels, press B in front of them. Enter the first tunnel. Blocking your path to Bridge St. is an armored goblin. Give him the bag of gold, and he will leave. Grab the star. Only 74 left to go. Go to Bridge St. and grab the star to the left. Only 73 left to go. Keep going left. You will be unharmed by the mice and guillotine if you use the invincibility glitch. Grab the next star. Only 72 left to go. You will see a barrel of rum. Grab it. Go back to Castle St. Go left and enter the next tunnel. This is a long tunnel with mice. These mice CAN damage you even with the invincibility glitch. Avoid them. Grab the star (only 71 left to go) and ignore the door key for now. Exit the tunnel to get to Dock St. Grab the star to the left. Only 70 left to go. Then go to the right. You will see a pirate with his ship behind him. To enter his ship, give him the barrel of rum. Enter the ship. Pirate Ship Avoid the bird, as he can damage you. Grab the star. Only 69 left to go. Stay on the top deck of the ship. Grab the star. Only 68 left to go. You will have to jump on a pile of boxes. Above you are some sail masts you can jump up to. Jump up to the next screen. Jump on the small mast. Turn around and use your rope to swing from the hook on one of the upper masts. You will swing to the right. Jump to the higher mast. This can be tricky. Jump to the top mast, and jump across the gap to the mast on the other side. Grab the star. Only 67 left to go. Stand at the ledge and use your rope to clear the gap. Walk left and grab the star. Only 66 more to go. Jump on the higher mast, face left, and use your rope to jump across the gap. This is a big jump, so time your release well. Grab the portcullis wheel item, and leave the ship. Town Head back to Castle St. Go through that first tunnel again to go back to Bridge St. Go left to the next tunnel. Grab the star. Only 65 left to go, and continue through the tunnel. Go left and grab the next star. Only 64 left. You will quickly see another tunnel. Go through it. It is another long tunnel. Grab the star on the way. Only 63 left to go. When you exit the tunnel, go right. You will grab another star. Only 62 left to go. Now you will see a large portcullis gate. Place your portcullis wheel in the empty hole, opening the gate. Enter. Crossbow Minigame In this game, you will see a castle. Many trolls will pop out of windows and from behind bushes, and throw stones at you. Having the crossbow, you have an aim cursor. Press B to fire crossbow bolts. Your must hit the trolls. If you are about to be hit by a rock, press and hold A to duck to safety. Release A to emerge to continue your attack. Every time you get hit, you will lose a health bar under status. If you hit a troll, you will gain a health bar. The minigame is complete when you you fill up your entire health bar. You have a time limit. If time runs out, you lose a life. When you win, you will enter the castle. Troll Castle Grab the star that is right at the entrance. Only 61 left to go. You won't need the crossbow anymore, so you can leave it here. As you walk to the left, you will see stairs rich above you that you can jump on. Go ahead and jump up there. Go to the far right, and jump up the blocks to reach the star. Only 60 left to go. Grab fruit if you need to. Go back down to the ground floor and continue left till the very end. Jump up the blocks. On the next screen up, you will see an item in which you must make some precise jumps to reach. These jumps can be a little tricky, as Dizzy rolls once before stopping. These squares are small and easy to roll off of. Just takes patience. Grab that item, which is a Bridge Building Kit. Drop to the large platform at the bottom of the screen, and jump across the gaps to your right to reach the star that you can see on the screen. Only 59 left to go. Go left again and jump the first gap to the small square. Then move to the right and just drop. You will end up on an upper floor. Go right jump on that square, and jump up to the fi Town Go back through the tunnel you came from. On the other side, go left. You will reach another extra life puzzle. You know the picture, you know the pom, and you know the process. Get that extra life from the Good Wizard. Continue to the left. Pass by a tunnel and go up the stairs to grab a star. Only 57 left to go. Go back to the tunnel you just passed by and head on through. It is another long tunnel with mice. Avoid them and grab the star. Only 56 left to go. When you exit the tunnel, continue to the right. You will grab a star. Only 55 left to go. Keep going to the right, and you will reach another tunnel, and you will see the Marketer to the right. Ignore for him for now. Go through the tunnel and grab the star. Only 54 left to go. Go through the other end of the tunnel and walk left. Jump the gap to go up the stairs and grab the star. Only 53 left to go. Continue up the stairs to the Graveyard.? Graveyard Grab the star right in front of you .Only 52 left to go. Continue walking left. You will pass by a partially dug hole. Keep going left and grab the star. Only 51 left to go. Start jumping up the cliffs to the top. You will see a bridge that is out. Stand at the edge, and use your bridge building kit, and you will make a bridge to cross. Jump up the cliff, avoiding the rope trap. Stay on top of the cliffs and grab the axe. Drop back down to the bottom and continue going left. You will grab 2 stars before leaving the Graveyard. Only 49 left to go (Over halfway there!).? Under Zaak's Castle You won't be able to reach that puzzle unless you go through the mine carts. If you follow this walkthrough, you will not get this extra life, as it is not worth the risk of traveling back anyway. Keep going to the left and you will see a star in a small cavern. Grab it. Only 48 left to go. Go back up the hill, and you will see a leprechaun. You don't have the item you need for him yet. But you can leave your rope here, as you won't need it again until you go to Zaak's Castle, which is right above this spot. Leave the rope, and go back to the Graveyard. Graveyard Just go right and exit the Graveyard. Town Go as far to the right as you can and grab a star. Only 47 left to go. Go back left, and enter the first tunnel you reach. Go through the tunnel, grabbing the star. Only 46 left to go. On the other side of the tunnel, go all the way to the left and go through the tunnel to Dock St. Walk right and enter the 2nd tunnel you reach. It is the short one that takes you to Bridge St. Go to the right and cross the bridge. Enter the tunnel to go to Castle St. Go to the left and enter the tunnel. Grab the door key in the tunnel, and head back the way you came from. Go to the right, and go back through the first tunnel. This time, you will go right and off the screen to enter the Barrel Waterfall Minigame. Barrel Waterfall Minigame Remember that waterfall you jumped across using the barrel? You are now going to ride a barrel and travel down the fall. The A and B button serve no function here. The point here is to travel to the bottom as fast as you can. A green goblin will be following you in a barrel of his own. If he hits you, he takes away health. Bumping into land and rocks will slow you down, letting the goblin catch up to you. There are some parts that lead to a dead end. If you run into this, you can slowly travel back up, but the odds of getting passed the goblin who will relentlessly hit you is slim to none. So perfection is key. Throughout your ride, trolls will appear on the land and throw rocks at you. Avoid them as they take away health. Lets get started. At first, it is strait forward. Ride down the small waterfalls and go as strait as possible while avoiding rocks. You will see a short fork in the path. Go left. In this narrow path, avoid the walls and the gators. You will fall down another short waterfall. Immediately after are 2 rocks. Go between them. Same thing with the next 2 sets of rocks you see. You will see another small fork. Take the right, or be doomed to the goblin. Immediately, there is a giant rock making another fork in your path. Go the the left of the rocks. You will IMMEDIATELY see another gator as well as another fork. Go RIGHT. This path immediately splits into 2. Either is safe, but the waterfall rout on the left is best, as waterfalls slow the goblin down and don't affect your speed. Weave between the rocks and avoid the gator. You will see another split in the path. Either is fine, but take the one that lets you go as strait as possible to save time. Weave through the rocks and gators, and stay close to the middle of the screen, but slightly to the left so you take the left path on the next small trap. Keep traveling and stay on the left. You will reach an open area with 3 rocks and 2 gators. One of the gators stays between the 3 rocks, so go to the left. But the other gator can block you for a second, so press UP to let it pass by if needed. This will bring you to a spot where you must travel up. You travel slower while going upstream, so keep that in mind when avoiding the gator. Timing is key here. When you go around that little curve upstream, travel down avoiding the trolls. Just keep going strait and you will go down some more falls. You will see another split. Both are safe, but the right is faster and more strait. Avoid the gator and rocks thrown by the toll. It is pretty much strait on ward from here on. Stick closer to the left of the pack because one set of rocks will trap you if you stay on the right hand side. You will reach the big waterfall, in which Dizzy jumps out of the barrel to safety, and the minigame is over. Forest Floor You will find yourself on top of a cliff where you can grab the pickax. Don't leave anything there accidentally or you have to go through the minigame again to get it back. Go to the right and pick up the empty bottle on your way. You will leave the door key for now. Keep walking left until you reach that cave where you found that bag of gold a while back. Leave the pickax and ax there for now. Go into the cave and pick up the dry match. Go to the right and pick up the elevator key and the star. Only 45 left to go. Exit the cave, and go left to the elevator that takes you back to Yolkfolk Village. Yolkfolk Village Travel up to Denzil's house (you take the elevator to get there). Go inside and see Denzil frozen in a block of ice. Leave the dry match there and exit the house. Go down the elevator and go left. Keep going left and you will see an unlocked house. Enter it. Here ,grab the star (only 44 left) and the door key. Exit the house. Go back up the path to Denzil's house. Pass the house and keep going left. Jump up to the next floor and keep going left. Then take the upper path to the right. Right away, you will see an upper path that takes you left that you can go. Take it. You will reach another elevator. Use the elevator key. Use the door key to unlock Grand-Dizzy's House. Grand-Dizzy's House You will see that Grand-Dizzy is ill and needs medicine. Leave the empty bottle here for now. Grab the star. Only 43 left to go. Jump to the top of the hutch to grab the pile of hay. Leave the house. Yolkfolk Village Go to the right and grab the star. Only 42 left to go. Keep going right and fall down the ledge. Go right and jump over the rope trap. Fall off the ledge. Take the elevator to Denzil's house. Denzil's House Go to the right side of Denzil and drop the hay. Grab the match and use it on the hay to light a fire, melting Denzil. Go to the right side of the house to grab the star. Only 41 left to go. Leave the flippers for now and exit the house. Yolkfolk Village?Go to the right and stand at the ledge that you used the rope before to reach the puzzle. Jump off the ledge (jump to avoid accidentally grabbing the watermelon. If you want to grab it, just fall off the ledge). Forest Floor Go to the right. Pass the cave. You will walk past a volcano that fires molten rocks all over the place. Avoid them. You will find a mushroom. Grab it and head back to Yolkfolk Village. After you pass the rope trap, you will find a star plant. Grab that too. Head back up to Grand-Dizzy's House. Grand-Dizzy's House Pick up the empty bottle you left earlier. Go to the far right side of the house and stand in front of the cauldron. Put in your bottle, star, and mushroom, and a bottle of medicine will come out. Give the medicine to Grand-Dizzy, and he will you give you a Golden Dragon Egg. Leave the house. Yolkfolk Village Go back to Denzil's house to grab the flippers and leap off the edge to the right leading to the cave. Forest Floor Pick up the pickax and hatchet, leaving the Golden Dragon Egg behind. Go right. Avoid the volcano rocks. You will pass a bridge. Cross the bridge, and leave the hatchet on the ground (do not be standing on the bridge when you do this or you will fall in the water and die). Grab the star. Only 40 left to go. Keep going right and grab another star, only 39 left to go, and you will be at the beach. Beach With flippers, you can swim. Just press jump to swim around. If you don't press jump, you will sink. Grab the SCUBA tank before you head in the water, or you will drown. Sink into the ocean and grab the star. Only 38 ?left. Go right and grab the next star. Only 37 left to go. Don't fall to the bottom just yet. Just keep swimming to the right until you reach the end. Then fall to the bottom. Grab the star on the screen below you. Just 36 left. On the ground, you will see a bubble under the rock. Stand over it and use your pickax to break the floor, releasing the bubble. Don't go down yet. Head to the right to grab the star. Only 35 left to go. To your left is a sunken ship. Swim to it and grab the star near the top. Only 34 left to go. Grab the empty treasure chest too. Go to the right while swimming to the top. Grab a star. Only 33 left to go. You will surface on the other side of the beach. Head over to the far right wall and drop the empty treasure chest, grabbing the star (only 32 left). This next part is optional but will save you a lot of time and effort later. You passed by a rock earlier. There are 3 of these rocks around the beach. They have a use, but not required. Again, it saves you time in the long run. I will specify where to find them and what to do with them anyway. If you don't care, just skip the rocks, and take the long route later. Grab the rock and head back to where you placed the treasure chest. Jump up the platform to the next area. Under Zaak's Tower You will find another extra life puzzle. Go ahead and do that. head to the right. Make sure you land on that rock. Don't try to jump over it. You will hit the rock, and roll into the rope trap. Clear the rope trap and grab the star (only 31 left) and the 2nd rock. Keep going to the right and you will find yourself at the broken bridge with a log in the middle. Right now, you can't get across. Even with the flippers and air tank, it is instant death toe fall in the water. Stand at the edge and toss the salty rocks in the water to raise the water level. Leave this for now and head back to the beach (with the tank and flippers. Beach Go left and do NOT sink in the water. Just swim along the surface. You will pick up a star on the way. Only 30 left to go. You will reach a small island. On this island, you will find a crowbar and another star (only 29 left to go). Pick up the crowbar. Now sink to the bottom of the sea and go left to grab another star (only 28 left to go) and the 3rd rock. Leave the crowbar for now. Go to the right, but staying on the bottom of the sea. You will see another star that you must swim to. Only 27 left. Head over to the broken bridge and toss the rock in the water. Go back to the beach. Remember that hole you made with the pickax? Go down there. Grab the star at the bottom (only 26 left) and the golden coin. This is the other item that does the same thing as the Incredibly Small Pygmy Cow that you got from Dylan. Grab the crowbar where you left it and take it to the surface. Leave the crowbar on the beach and head back for the Gold Coin. Go back to the surface. Leave the flippers and Scuba Tank and take the crowbar and coin. You will head all the way back to the town, but not the long way. Go to the cave where you left the egg. Leave the egg, but go into the cave. Cave First, go right. You will see 4 boxes. This is a puzzle, but you only need to do one thing for now. If the diamond is flashing, that means that elevator is active. For now, you just need to make sure the first one is lit, since you are only using the first elevator. Go to the far left and head down the elevator. You will notice the cave has diamonds throughout. They do the same thing as fruits, so they are NOT items. When you go down the elevator, head to the right and go down the pit. From that fall, go left. Grab a star. Only 25 left to go (3/4 there!) You will see a mine cart. This is the mine cart minigame. Mine Cart Minigame Before I begin, it is important that you follow these directions precisely. There are total of 5 different exits. 3 of them will take you to other places in this world, and make you have to go back to the cave to do this again. One of them will take you back to that area of the beach where you put the treasure chest down to get to the broken bridge. If you fall here, you are completely stuck with no way out. You can take flippers or the oxygen tank with you on this ride in case this happens. But if you do that, you will have to leave an item in an unreachable place, and the only way to reach it is to go through the whole minigame again. This is the hardest minigame, in my opinion. The way this works is there are MANY paths of cart tracks. You press left or right to take the route you choose. Many of them lead to dead ends that make you crash and automatically die. There are goblins riding carts that block some paths. If you touch them, you crash and automatically die. Some parts have explosions that if they touch you, you automatically die. So the most important detail here is that if you screw up, you die. Here we go. If the walkthrough is confusing, watch the video. This starts at the 50:24 mark. It isn't the ONLY way to get to the end, but this is one way. Take the first right you see. Take the next right to avoid the goblin. You will approach a sign that says EXIT. Take the path to the right. Then take the first left. After you pass by the goblin, take the next right to avoid the purple goblin After this point, the cart starts going faster. Immediately take the next right to avoid the next red goblin. Next, the track forks into 2 paths. Take the right. Keep holding right to take the next right so you don't crash into the dead end. You must press up to go higher on your screen, as an explosion will go form the right side of the screen to the left. If it crosses your track before you pass by it, you will die. So you must pass that path before the explosion reaches your track. Immediately after that, take the next right. Then take the SECOND left. Stay above the halfway line of the screen to avoid the next explosion. You will see that the track goes diagonal now. Take the SECOND right. Then take the next available right path. After that, take the SECOND available left path and IMMEDIATELY take the next right. You must be quick with this turn. If you miss it, you will be doomed to that area on the beach, and you will be stuck unless you brought flippers or the Oxygen Tank. Move past the explosion coming from the left, and take the next available right. take the next left.Take the next right. Take the next left after the pink goblin. The cart will speed up more and the track will fork in two directions again. Take the path to the right. Take the next THREE lefts. Then take the next TWO rights and speed up to avoid the explosion. Do NOT take the next turn after the explosion. Stay to the left. Then take the next right, next left, and you will crash through the final exit, which is the end of the minigame. WHEW! Town You will find yourself right below the stairway to the Graveyard. You will find a Skeleton Key. Grab it. Hopefully you didn't take the flippers or tank, or you will find yourself having to come back here through the mine cart. Don't go to the Graveyard just yet. Go right, and go through the first tunnel. You will find the Marketer there. Give him the Gold Coin and he will give you a Magic Bean. Take it, and head to the Grave Yard. Grave Yard Just walk on through. Under Zaak's Tower Leave the Magic Bean and Skeleton Key in this area. Head back to the Pirate Ship on the other side of town. Pirate Ship You have already cleared the top deck. Go ahead and go right and drop to the lower deck. You will see a trapdoor with a cylinder shaped item underneath. Use your crowbar to open the door and grab the item (which is a Thick Persian Rug). ?Hop out of here and head to the right, jumping back up to the upper deck area. Go all the way to the right and drop down the ledge, grabbing a star. Only 24 left. Drop down to the very bottom deck of the ship. You will find a stick of Dynamite. Grab it. Hop out of this are and go left. Jump across the gap and grab the star to the left. Only 23 left. Go back and drop down to the bottom deck and go left. You will grab a star. Only 22 left. Keep going left and hop out of the bottom deck at the end. Hop on the platform and the ledge on the left to grab another star. Only 21 left. Go ahead and make your way up to the VERY top deck of the ship and head right. You will be heading back to the cave. You can take the long way that you are familiar with by exiting the ship and going across the woods, or you can take this minigame shortcut. Keep in mind, this game can be dangerous and easy to die even if you know what you are doing. Do this at your own risk. Head to the far right of the top deck,and you will reach THE PLANK. The Pirate will drop down and make you fall off the plank, plummeting to the bottom of the sea (JERK! And to think you gave him a whole barrel of Rum too!) Walk the Plank Minigame Your job is to escape the ocean before your oxygen runs out. Bubbles float from the sea floor and float to the top. You can hop on bubbles to travel up. If you stand on a bubble for too long, it will pop. The larger the bubble, the longer it lasts. The bubbles travel at random speeds. Your best hope is to get a large bubble that travels fast to cover a LOT of distance. Not much explanation here. Just become familiar with how long each side of bubble lasts so you know when you should try to hop to another bubble before it pops.? Beach? You will find yourself on the beach. Leave the rug on the beach. Just hop to the left and head over to he cave. Grab the golden egg, and leave the rug. Cave Now it is time to clear this cave. Go to the right side of the cave and activate all 4 elevators. Remember that if the diamond is flashing, it is active. To activate it, press B in front of it. If you flip the switch of one, you flip the switch of the 2 next to it. Pretty simple to work out. When you have all 4 active, head to the left and go down the first elevator. Head to the right and drop down the hole. You need to go right. This part is ANNOYING. The path is very narrow, and you have a bad flying wildly around you. There is pretty much no room to maneuver through it without getting hit. It can hit you even with the invincibility glitch. There have only been a few times I have managed to get through this without taking damage. It is easy to die here. Keep going to the right. Head down the second elevator and go left. Grab the star. Only 20 left to go. Continue to the left and fall down to the bottom of the cave. You will cross 2 bridges across lava that fires molten rocks that damage you. When you reach the end, go down the 3rd elevator. Grab the next star. Only 19 left to go. You will see an item as well. It has no function. It just shows you the recipe to make the medicine that you already made for Grand-Dizzy. Go up the 4th elevator. You will see a sign that says "DANGER! BLASTING AREA..." Go to the end of the wires, and place the dynamite there. Go to the handles and blast that rock away. Jump on the box and up to the last part of the cave. You will see a large green dragon. Don't worry. She will not attack you as long as you have her Dragon Egg. If you didn't, she would blast fire at you, keeping you from passing her. You will see a second Dragon Egg under her. DO NOT TAKE IT. You need to leave the other egg that you have there too. If you try to leave with it still in your possession (or both), she will attack you out of anger. If you leave the eggs, she will let you leave unharmed. At the end of this tunnel is a shamrock. Grab it and leave the cave.? Forest Floor Head over to the the beach. Beach Grab the flippers and oxygen tank. Leave the shamrock. Go back to the bridge where you left the hatchet. Forest Floor Pick up the hatchet, and go to the middle of the bridge. Use the hatchet on the bridge to break it, and you will fall through. Swim to the star on the surface of the water .Only 18 let to go. Head down in the water, and you will technically be in the cave. While underwater, go to the right and grab the star. Only 17 left to go. Keep going right, and pick up the par if Cymbals. Then grab the star above them. Only 16 left to go. Go to the far left and exit the water, grabbing the star. Only 15 left to go. Exit the cave. Leave the flippers and oxygen tank. go left until you reach the door key you left near the waterfall. Grab the key and head to Yolkfolk Village. Yolkfolk Village Head all the way up to Dylan's house (the one where you took Pogie). Go up the elevator and go right. Now you will jump up the platform you weighted down with the 1 ton weight. Head on up. Go to the left and jump up the platform to grab the star. Only 14 left to go. Go to the house and unlock it with the key. Dozy's House Dozy is a Yolkfolk Village Move to the right and grab the star. Only 12 left to go. Fall off the ledges until you fall all the way down to the Forest Floor. Forest Floor Go to the right. Grab the flippers and head to the beach (you can take the tank for safety, but not needed). Grab either the Persian Rug or the Shamrock and Persian Rug. If you want the tank as a safety, you will have to take the shamrock, rug, and winch handle across the ocean individually. If you don't have the tank, you can save one trip by carrying two of the items in one trip. You will HAVE to swim along the surface so you don't drown. Swim to the opposite end of the sea where the empty treasure chest was placed. Leave the two items you took over and go back for the third one. Bring it to the other side. Leave the flippers, and take the shamrock, rug, and winch handle to the area to the right. Under Zaak's Castle You will need to jump over the rope trap. Again, don't try to jump over the rock. Jump on top and then jump over the trap. Jump the gap of the broken bridge by jumping on the log, then the other side. Grab the star. Only 11 left to go. Stand near the leprechaun and give him the shamrock. He will move. You now have all the items you need to complete Zaak's castle in the same area. Go grab the magic bean and place it to the left of the sign where the leprechaun was standing. A giant beanstalk will grow. Grab the Rug, Winch Handle, and Skeleton Key. Jump up the beanstalk to reach the clouds. Clouds Go left, jumping from cloud to cloud. If you go without jumping too long, you will fall through the clouds, so keep jumping. Avoid the butterflies. On the far left cloud is a star. Grab it. Only 10 left. Head over to the right. When you are on the upper cloud with the cherry, jump to the left. Ignore the star below you for now. you will be at the next height of clouds. Jump strait up and grab the star above you. Only 9 stars left. Hop from cloud to cloud going LEFT. You will arrive on a large cloud where Zaak's Castle sits. Go to the left side of the castle and grab the star. Only 8 left. Go to the portcullis gate of the castle and use the winch handle. Enter the Castle. Zaak's Castle You are finally in Zaak's Castle, and saving Daisy is within your grasp. Go to the elevator and use the Skeleton Key. Hop on top of the chair closest to you and hop up to the next floor. You will see a bed of nails. Place the Persian Rug over the nails. Leave the Castle. Clouds Head to the right. Drop down to the large cloud above the star you skipped by earlier. Drop through the cloud to fall on the star. Only 7 cards left. Grab the rope and head back up to Zaak's Castle. Zaak's Castle Go up the elevator, and cross the bed of nails, and hop over the rope traps. Jump on the square platform and use the rope to swing to the area below you. You can try to jump on the square platforms if you wish. If you make your way up, you will find one more extra life puzzle. But it is slightly different. This time, instead of switching pieces, one piece is missing, and you can only move the squares adjacent to the empty square. It is more difficult. I skip it. When you land on the platform below, go to the left to snatch a star. Only 6 left. Don't fall of the ledge. Go back to the right. and JUMP from the ledge. On the far right, jump up to the next screen up. You will see a rusty spade (shovel). Grab it. Jump to the top platform and jump to grab the star. Only 5 left. head to the left and drop down. Exit the castle. Head over to the Graveyard. Graveyard Remember that half dug hole that is under the bridge you made? Use your shovel there to fall through the hole. Go to the left and grab the star. Only 4 left. Then jump up the rock ledges to grab that trampoline. That will be your ticket out of here. Go to the right and grab the star. Just 3 left. Now here is the tricky part. Place the trampoline just right where the water starts. Go up the rock hill to the left a little bit. Jump to the right to land on the trampoline and reach that rock ledge. From that rock ledge, jump off and land on the trampoline. It will send you shooting up high. Make sure when you land, you are pressing RIGHT to make it through the hole out of here. Once out of this annoying spot, head back to Zaak's Castle. Zaak's Castle Go up the elevator and up to that bed of nails. This time, you will travel up the square ledges to the top to grab a star. Only 2 left. Jump to the left on top of that long rectangular ledge, and fall to the right. Go all the way to the right and grab that star. ONE MORE LEFT! Drop down and cross the bed of nails and avoid the traps. Head to the right and make your way to the bottom right corner of the castle for that final star. NO MORE STARS! You will get a message telling you that having collected all the stars, you can now enter Zaak's Tower. Go up those stairs that are on your screen. Jump up the platforms and travel left. Make your way back up the elevator, and past the bed of nails. On that square platform, use the hook. You MUST land on one of those square platforms in the air. This can be another annoying part. Make your way up those square platforms to the next screen up. You will see that last extra life puzzle. But you need to jump on that square platform right under that spider. Use your rope on that hook to clear the gap. You are now in the final part of the game. Zaak's Tower After a long and tough adventure, you are now to do battle with Zaak. Dizzy will grab a mirror and throw it up to the top of the tower on the opposite end of where Zaak is (Really good arm for an egg). Now, the goal hear is to make it to the top by hopping from platform to platform. But Zaak isn't going to make this easy for you. He will be constantly sending magic white frowning balls that bounce around the tower. If they hit you, they take damage (of course). But they will also knock you off the platform you are standing on and you will land on the next platform right below you. You can't go in any left or right direction after being hit to try to catch a closer platform. It is a long way up. My advice is to find some safe spots where the balls don't go, and observe how they move so you can determine the best course of action for progressing. Not much strategy involved here. Just takes practice. When you reach the platform right below Zaak, he will stop firing these annoying balls at you. When you jump to the platform on the same level as him, he has one last trick. He will fire a magic fireball at you. You must jump over it. It will hit the mirror, reflecting it back. You MUST jump over it again as it rebounds. If you avoid getting hit, it will hit Zaak, defeating him. If you are hit, you will fall down a few platforms and must work your way up again. When Zaak is gone, Dizzy must hop up to Daisy, untie her, and bask in his glory. Congratulations. You have beaten a game that was advertised as "Almost unbeatable" when it was released. So there you have it. A complete guide for one of the most difficult NES games around. I will take a few moments to say thank you for reading this (for those who did). It was definitely not a short task. I hope that this guide helps anyone who has had trouble with this game, and I hope my included video helps out too. This is a Vizzed exclusive walkthrough by me. If you wish to display this on any other site, contact me through my profile here on Vizzed (rcarter2). I enjoyed making my very first walkthrough, and look forward to doing more. -------------------- Layouts by Pacman |
Vizzed Elite
Affected by 'Laziness Syndrome'
Registered: 05-01-11
Location: Kansas
Last Post: 3288 days
Last Active: 583 days
| Dominating RGR Competition Hall of Fame Table! |
Affected by 'Laziness Syndrome'
Registered: 05-01-11
Location: Kansas
Last Post: 3288 days
Last Active: 583 days
09-22-13 02:16 PM
 Singelli is Offline
| ID: 888648 | 100 Words
Singelli is Offline
| ID: 888648 | 100 Words
 Singelli is Offline
| ID: 888648 | 100 Words
Singelli
Level: 165

POSTS: 4923/8698
POST EXP: 1189395
LVL EXP: 57922696
CP: 67409.3
VIZ: 3154470

POSTS: 4923/8698
POST EXP: 1189395
LVL EXP: 57922696
CP: 67409.3
VIZ: 3154470
Likes: 0 Dislikes: 0
Wooooow.. I saw you playing this a lot over the past few days and thought it must just be a game you were enjoying. But rcarter, this is... astounding! I can't imagine the amount of work that went into this! And the format is totally awesome! I've always thought that writing a walkthrough would be much more enjoyable and satisfying than a review. I even started one but I simply don't have the time to finish it. This is incredible though, and great job! Major kudos! I wish I had the time for stuff like this. You're my idol!
|
Vizzed Elite
Affected by 'Laziness Syndrome'
Registered: 08-09-12
Location: Alabama
Last Post: 3348 days
Last Active: 3324 days
| Singelli |
Affected by 'Laziness Syndrome'
Registered: 08-09-12
Location: Alabama
Last Post: 3348 days
Last Active: 3324 days
09-22-13 02:20 PM
rcarter2 is Offline
| ID: 888654 | 106 Words
| ID: 888654 | 106 Words
rcarter2
Level: 165
POSTS: 6907/8463
POST EXP: 758515
LVL EXP: 58074942
CP: 33759.9
VIZ: 1691075
POSTS: 6907/8463
POST EXP: 758515
LVL EXP: 58074942
CP: 33759.9
VIZ: 1691075
Likes: 0 Dislikes: 0
Singelli :  Awww, thanks. But yeah, I was playing this a lot. Not so much for the walkthrough part, but the video. It took a while to get a clear video that had few mistakes. I went ahead and kept some of my deaths in the video just to show where some of the tricky parts can be (or just some of the annoying ones). I just kept playing this to make individual 10-20 minute videos that I edited together. Save states are very useful here, so I don't have to do the whole thing at once. Awww, thanks. But yeah, I was playing this a lot. Not so much for the walkthrough part, but the video. It took a while to get a clear video that had few mistakes. I went ahead and kept some of my deaths in the video just to show where some of the tricky parts can be (or just some of the annoying ones). I just kept playing this to make individual 10-20 minute videos that I edited together. Save states are very useful here, so I don't have to do the whole thing at once. What game were did you start making a walkthrough for? Awww, thanks. But yeah, I was playing this a lot. Not so much for the walkthrough part, but the video. It took a while to get a clear video that had few mistakes. I went ahead and kept some of my deaths in the video just to show where some of the tricky parts can be (or just some of the annoying ones). I just kept playing this to make individual 10-20 minute videos that I edited together. Save states are very useful here, so I don't have to do the whole thing at once. What game were did you start making a walkthrough for? -------------------- Layouts by Pacman |
Vizzed Elite
Affected by 'Laziness Syndrome'
Registered: 05-01-11
Location: Kansas
Last Post: 3288 days
Last Active: 583 days
| Dominating RGR Competition Hall of Fame Table! |
Affected by 'Laziness Syndrome'
Registered: 05-01-11
Location: Kansas
Last Post: 3288 days
Last Active: 583 days
09-22-13 02:23 PM
Singelli is Offline
| ID: 888656 | 94 Words
Singelli is Offline
| ID: 888656 | 94 Words
Singelli
Level: 165
POSTS: 4926/8698
POST EXP: 1189395
LVL EXP: 57922696
CP: 67409.3
VIZ: 3154470
POSTS: 4926/8698
POST EXP: 1189395
LVL EXP: 57922696
CP: 67409.3
VIZ: 3154470
Likes: 0 Dislikes: 0
rcarter2 : I started making a walk through of one of the older bomberman games that's black and white.. for the gameboy I believe. It should still be in my list of owned games. I only got about 5,000 words in and never got any further. I really wish I could finish it though. I DID enjoy it better than reviewing. I'm still impressed by this masterpiece. You always have so much time to say so much! And it's all great! Maybe some day I will be able to express myself like you do.
|
Vizzed Elite
Affected by 'Laziness Syndrome'
Registered: 08-09-12
Location: Alabama
Last Post: 3348 days
Last Active: 3324 days
| Singelli |
Affected by 'Laziness Syndrome'
Registered: 08-09-12
Location: Alabama
Last Post: 3348 days
Last Active: 3324 days
10-21-13 06:44 AM
Laian is Offline
| ID: 911571 | 52 Words
| ID: 911571 | 52 Words
Laian
Level: 92

POSTS: 1496/2232
POST EXP: 457173
LVL EXP: 7743021
CP: 23744.4
VIZ: 3571020

POSTS: 1496/2232
POST EXP: 457173
LVL EXP: 7743021
CP: 23744.4
VIZ: 3571020
Likes: 0 Dislikes: 0
Outstanding, well done, impressive. I'm really impressed to see another walkthrough clear like crystal besides mines. And this is your first one, a hard game. My first walkthrough was not so detailed, it was just *cough cough* the hidden remote controls in Gex 64: Enter the Gecko. Anyway, good job, rcarter -------------------- |
Vizzed Elite
Affected by 'Laziness Syndrome'
Registered: 10-21-11
Location: France
Last Post: 2663 days
Last Active: 1837 days
| Games have secrets, I have my eagle gaze. |
Affected by 'Laziness Syndrome'
Registered: 10-21-11
Location: France
Last Post: 2663 days
Last Active: 1837 days
(edited by laian on 10-21-13 06:45 AM)
05-30-15 04:11 PM
linkrocks101 is Offline
| ID: 1172182 | 22 Words
| ID: 1172182 | 22 Words
linkrocks101
Level: 9
POSTS: 1/11
POST EXP: 283
LVL EXP: 2349
CP: 58.3
VIZ: 4606

POSTS: 1/11
POST EXP: 283
LVL EXP: 2349
CP: 58.3
VIZ: 4606
Likes: 0 Dislikes: 0
This is a game I am planning on doing (you did refer me to it). I will definitely use this guide -------------------- |
Trusted Member
Affected by 'Laziness Syndrome'
Registered: 03-17-15
Last Post: 3983 days
Last Active: 3625 days
Affected by 'Laziness Syndrome'
Registered: 03-17-15
Last Post: 3983 days
Last Active: 3625 days
