

 User Notice
 Forum Links
Thread Information
Views
3,114
Replies
0
Rating
1
Status
OPEN
Thread
Creator
Creator
tornadocam
01-27-23 02:39 PM
01-27-23 02:39 PM
Last
Post
Post
tornadocam
01-27-23 02:39 PM
01-27-23 02:39 PM
System
9.4
Views: 3,035
Today: 5
Users: 3 unique
Today: 5
Users: 3 unique
Thread Actions


Order
Mega Man X3 Zero Project #4 Guide
Game's Ratings
Overall
Graphics
Sound
Addictiveness
Depth
Story
Difficulty
Average User Score
9.4
10
10
10
10
9
8
01-27-23 02:39 PM
tornadocam is Offline
| ID: 1401146 | 3982 Words
| ID: 1401146 | 3982 Words
tornadocam
Level: 112


POSTS: 2634/3531
POST EXP: 1015207
LVL EXP: 14944000
CP: 80796.0
VIZ: 6772888

POSTS: 2634/3531
POST EXP: 1015207
LVL EXP: 14944000
CP: 80796.0
VIZ: 6772888
Likes: 1 Dislikes: 0
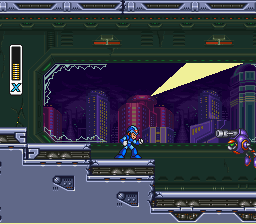
Mega Man X3 Zero Project Version #4 is a hack of Mega Man X3. The game plays similar to X3. However, this difference is you can play as Zero except for one session. I am going to be providing a walk through of this great game. Intro Stage First you get the story then you have control. This type you start off as Zero. Your job is to sweep the Maverick Hunters fortress out from enemies. It is pretty straight-forward just go down ladders and take out the enemies. You will encounter a hunter named Mac. Mac explains how he is now part of Doppler's army. He stuns Zero and takes him away. X comes in and now you can control X. You will climb a wall watch out for spike balls being dropped from up above. You will enter a room. Engage Mac. A few charged buster shots takes him down. After he is defeated use a Charge Shot to take out the device holding Zero. Then you have control of Zero. Climb up another war and engage in another Maverick. A few charged shots and he goes down easy. Just watch out for the mavericks spiked ball arms. Then you can choose among 8 stages. Whoever you want to start with is up to you. In this game there is no correct order. Blizzard Buffalo Stage This is often the first Stage I start with, but again who you start with is up to you. You begin the stage with ice around you. Ice physics apply here. Watch out its slippery and avoid the spikes. Jumping slows the Ice physics down. Just head right and take out the enemies. Zero's Charged Saber does wonders here. Continue going right and climb the latter. Once climbing head right and you will notice Ice Blocks. You will most likely need to revisit the stage to break the blocks in two ways. The first way is if you have found the spiked Mecha Suit head over to the platform with X on it to select it. The easier way is to use the drill weapon to smash the ice blocks. After breaking them head down and then dash to the right to get a tank that adds to your health bar. Climb up and continued to proceed right. While proceeding right you will need to avoid death spikes. You will come upon a session were you can take the ladder or take the bottom path. Then you will head downward. You will eventually come upon a gate this is the halfway mark. After exiting the gate head right and down avoiding death spikes. You will come upon a latter. Note- You can climb the wall downward and it leads to a secret room. This room you can use to fight Vile if you wish. He is only activated after defeating two mavericks. Climb back up the latter. You will notice an E-tank. You can get the E-tank using X or Zero. You will require the dash boots for X. Continue heading right. Eventually you will come on a platform covered with ice. Dash and try to get onto the over wall. This may take you several tries. The wall takes into a secret room were Dr. Light gives you the Dash Boots. If you missed the platform it takes you to a route were you can climb back up and try again. If you did not get the e-tank. Go all the way back to the left and get it with your new dash boots. Blizzard Buffalo Battle- Buffalo is powerful but he only has two attacks you need to worry about. His main attack is to pick you up with his horns and ram you into the wall. His other powerful attack is to use his ice wave like weapon that freezes you. The best way to deal with Buffalo is to fire a charged shot at him. Clime the Wall, Dash over him and climb the other wall repeating. You will need to watch out for Ice shields he throws at you. Rinse and repeat and he goes gown giving you Frost Shield. Toxic Seahorse Stage Head right and take out the big enemies. Charged shots does wonder on these guys. Head down and then right. Make sure you make the jump or you will land in the pit. Climb up the walls. Continue climbing you will see were your supposed to continue right. Instead climb up to get more health for your life bar. Then climb back down and head right. You will come to a Gate reaching the halfway mark. After passing the gate you can head right and get an armor carrier if you have picked one up. If not head down into the water. You can take two paths. The top path about midway charge the Frost Shield and ride it to the top. You should see an armor carrier. Pick it up and then head back down into the water. Eventually you will come to the mini boss. Charged shots takes the boss down quickly. Frost shield works well but save it for Toxic Seahorse. The water will drain and head up. Head right its straight-forward to Toxic Sea Horse. Toxic Seahorse Battle- You can lock this guy into a pattern by using Frost Shield. Frost Shield quickly shreds this guy. Watch out though for the Acid bubbles he likes to throw. As his health gets low he starts spamming them more. Eventually he will go down giving you Acid Burst. Then you will get a dialogue. Dr. Doppler sends Byte and Bite after Zero or X. He also summons Vile. You will fight these guys later. Tunnel Rhino Stage Head right and take out the enemies then you will head down into the mines. Clear out the enemies and head upward. You will see what looks like a path right. You may need to come back to this. This contains a health bar upgrade. Use the Thunder Weapon charge to break the boulder get across and collect the extra health. Head back out and continue going upward. Continue going right before heading back down. Go up and get a hidden etank that is in sight. Then head back down. You will come across a gate Bite is waiting for you. To save yourself trouble later on I recommend going ahead and killing Bite off. He is weak to Frost Shield. Watch out for his fireballs and dash attack. Hit him with Frost Shield and he will go down for good. If you don't use frost shield you will fight him again in a much stronger and faster form. Then he will combine with Byte. Therefore, save yourself trouble and use frost shield to kill him off for good. Head out of the battle gate and just clear out the enemies going right and then upward. However, watch out for falling rocks and death spikes. You will come across another large boulder blocking the path. This leads to Dr. Light Capsule this is the head gear upgrade. Go back down and continue to head right. Continue to head down watching out for boulders. You will meat the mid boss. I find the best strategy in dealing with this boss is to climb the wall halfway and blast away. Climbing the wall all the way will cause the boss to climb up and send the drill part into the wall knocking you down. Follow this strategy and it goes down quickly. Then head right climp up a few more ladders to Tunnel Rhino Tunnel Rhino Battle- If Rhino charges into the wall it will stun you and knock you down. Also he will fire drills at you. Use Acid Burst as that is his weakness. You will also have to dash across the other wall to avoid getting stunned. Hit him with Acid Burst a few more times and he should go down giving you the Tornado Drill Weapon. Volt Catfish Stage Head right you can step on the elevator platform. This leads to Vile. To save yourself a lot of trouble. Don't fight Vile yet wait to you defeat Volt Catfish First. Skip the elevator and head right. Watch out for the enemies and beam laser weapons. You will come across another elevator ride this one to the top don't get off on the left exit/path. Continue going up you will see another path. Take it as it holds the health bar increase for this stage. Carefull avoid the spikes and come out of the secret room. Fall all the way back down so the elevator catches you. Head back up then take the left path. head up you will notice a funny elevator. This one can only be powered by The Gravity Weapon. Use the Gravity Weapon fully charged to power this elevator. This leads to Dr. Light who will give you the armor upgrade. Head back down and continue right. You will come across electric currents on the walls climb the walls and avoid the balls of electricity and electric currents. You will notice one of the paths leads upwards. Take it and select an armor suit from the X platform. Let the Armor suit crash the floor beneath. This leads to goodies and an E-tank. Climb back up head left and continue the path to reach the boss's door. Volt Catfish Battle- This guy can be a pain. He likes to fire electricity he can also charge his attacks. These attacks do serious damage. Use the Tornado Drill Weapon on Catfish. The Drills do damage to the boss. But watchout even as he gets hit he will still fire electricity at you and he can still charge his attacks. Might be a good idea to have a full e-tank to take on this guy just in case. You will earn the Triad Thunder weapon. Crush Crawfish First you can head down to an X platform you can get a rider armor if you have picked one up. If not you can just head right. If you have picked up an armor one that can smash walls head right. You will come across a bridge a large enemy will fall breaking the floor. Head down use the armor to break the crack in the wall. This is the extra health increase for this stage. Then head down and fight the enemy that fell. Armor suits or charged shots takes it out quickly. Head right to the gate. Byte might be waiting for you. To save yourself a lot of trouble use the Drill weapon or Ray Splasher. Byte can be a pain to fight. He can slam the wall knocking you down. He can also throw you into the wall doing large amounts of damage. Hit him with the drill or ray weapon. Climb the wall dash over him and repeat. The Drill or Ray weapon kills him for good. Head right after the gate you will see a Star Wars like enemy and underneath an energy pick up. This is a fake floor that leads to Vile. I don't recommend fighting Vile just yet so skip that. Head right then down. You will come across a large pit. Dash across and clear out the enemies. Stay to the far right and head down again clearing out the enemies. You will come across a a funny looking device. Take out the device to proceed upward. Eventually you will reach Crush's Room. Crawfish Battle This guy's main attack is his claw. If you are not careful he will nail you with his claws. He also throws slasher weapons at you. He is weak to the Thunder Weapon. Use the Thunder Weapon for a quick victory. You get the Slasher or C cutter weapon as it is also known as. Neon Tiger Stage Head right it should be noted you can ride the dragonfly enemies. Continue going right and avoid the thorny spikes. You can ride the fly enemies to the top or you can head right and climb the wall. Head in the upright to get an e-tank. Then clear out the enemies and head left. Climb up and then head right while clearing out the enemies. You will notice a cracked wall. Use the Drill weapon to clear. Dash to the far right and its a Dr. Light Capsule this gives you a charge booster. Dash up then do a hard dash left to exit the room. Head down the ladder. You will come across a gate this is the stage's mini boss. The mini Boss is a centipede like boss. Use Triad-Thunder for a quick victory. Should be noted hit the head as that is the boss weak spot. Head right and continue to take out the enemies while avoiding the spikes. You will come across another Gate. AFter this gate head right then down. You will see a new enemy. This enemy digs the ground revealing thorns these thorns won't hurt you but they will do damage. Its best to take out the enemy or just dash over them. You will come across the fly. Ride the Fly to the top to get the stages health bar increase. Then head back down. To face Neon Tiger. Neon Tiger Battler Now for a real batter. This guy is one of the toughest bosses in the game. He is very fast and has so many attacks. Even with his weakness he can still do massive damage.I make sure I have e tanks fully filled when I fight this guy. He likes to use his tail to fire his ray splahser weapon at you. But that is not the most dangerous of his attacks. He loves to use his claws and they pack a punch. He also loves to just slash you. He climbs the wall a lot to slash you. His weakness. is the C-Slasher or C-cutter weapon. But even with his weakness he will continue to attack quickly. Continue to hit him with the slasher/cutter weapon he will eventualy go down. You will get the Ray Splasher Weapon. Now you can fight Vile Remember How I said the secret path down leads to Vile in Blizzard Buffalo's stage. Take than and enter a portal. You will be taken to a factory. Defeating Volt Catfish supplies powers to the elevator this saves you trouble as you do not have junk falling on you. Clear out the enemies take the elevators and engage in Vile. The Vile battle has two parts. The first part he is in his armor. Destroy the armor use regular charged shots or ray splasher. Its best to hit him climb the wall dash over him and rinse and repeat. His armor is destroyed. The second part use Ray Splasher as that is Vile's Weakness. Ray Splasher really does a number on him. It also kills him for good so you don't have to fight an enhanced version of him. He loves to shot bombs and throw fireballs at you. Dodge and hit him with Ray Splasher. As he dies he says he has set the factory to self destruct. Exit the gate and quickly clear out the ememies. Take another elevator again defeating Volt Catfhis provides power. The elevator takes you then head right to a portal. The portal allows you to exit the factory before the timeer goes to 0. Gravity Beetle Head right and you will come into a room with freight boxes. Clear out the enemies and you will see the stages health bar increase tank. This may cause you to have to revist the stage as defeating over bosses causes the freight boxes blocking the increase to go away. Head back across then head upward. You will come across the gate. After the gate climb the latter. Head upward and you will see a program for a carrier. Use the dash boots or switch to X with the dash upgrade to get it. This may take you a few tries. Then head down. Clear out the enemies and head right. Climp up and continue to head right then you will come to a ladder. Climb down the ladder to take a slow moving elevator. Ride the elevator upwards. Head right and you will see bullet shaped platforms. These work like the doughnut platforms in the Mario games. One step on these and they fall. Its best to not even fool with the enemies. Just dash quickly across. Make your way up the ladders and head right eventually you will reach the bosses gate. Gravity Beetle Battle This guy is slow and not much of a problem. His only threat is his gravity weapon that can pull you toward him allowing him to crash into you. Use Ray Splasher to quickly defeat him. Charged shots also takes him down as well. If he fires his gravity weapon get into a corner and just dash to avoid being pulled in. Your weapon you earn is Gravity Well. Blast Hornet. Head right and ride another slow moving elevator to the top. Continue heading right. The space above the ceiling allows you to get an armor if you would like. Other than that head right and get on the conveyor belts. But don't get pushed into the spikes. Head left, down, then right again using the belts. You will then come across the gate. The gate is the mini boss. You fight a laser type mini boss. For this mini boss I use the Acid weapon as it shreds the laser boss in a few hits. After beating the mini boss head right. climb the first storage shaped building. You will see two bomb boxes destroy them and it will blast open a path. Head down. You will see the storage building has a crack in it. Use the drill weapon. This will lead you to an armor suit giving you the program for that armor. You can head back up with the armor if you want. Climb the first storage building and head right. Continue right and clearing out the enemies. You may have to fight a carrier that brings fright boxes down. Just take these out. Before proceeding dash up to get the health bar increase for this stage. Then head back down and right. You will be on more conveyor belts just avoid the spikes. Head down go right. Shoot the bomb boxes and quickly dash to Hornets gate. Blast Hornet Battle- To save yourself a lot of pain, no pun intended, use Gravity Well as this stops Hornet in his tracks. He loves to send Hornets at you. These hornets do not just sting you but they serve as lock in devices for him to throw bombs at you. Gravity Well keeps him grounded and destroys the hornets. Use this for a quick victory you will earn Parasitic Bomb. You will then get a cutscene were it turns out that Sigma is the master mind behind this plot. YOu will then be able to go to the fortress stages. Doppler Stage 1 This stage is straight forward. Head right but avoid the falling spikes from the ceiling as that is instant death. Lay low and be careful were you dash. Head right then head up. Quickly head up by dashing as the walls will be caving in on you. Then head left and upward. You will come across a maverick and the ceiling is collapsing. X will come in to help. X will pull the switch to stop the ceiling. Quickly kill the maverick with charged shots and advance. Head right up then down. You will come across a room. The first pit head down it. There is a secret room that is either on the left or right. This leads to Dr. Light. Light will give Zero the black armor or X the golden Armor. Get that and head upward and right. Watch out for spike balls being dropped. Eventually you meet the boss. This boss is strange. The best strategy is to clime the wall and use the Acid weapon on him. This is the best way to deal with this strange thing. Doppler Stage 2 Head right and then upward while clearing out the enemies in the process. Head right and then down. The enemies will be near pits so take them out from a distance to get over the pits. Head right to the far wall. Then you will have to do some climbing and dashing. To enter the first gate. Before entering the first gate switch to X. If you continue as Zero the insect like enemy will crash into Zero wounding him. You won't be able to playthrough the game with him. Switch to X and proceed into the boss room. Using X take out the insect like enemy. Once the insect boss is defeated and you exit the gate then you can switch back to Zero. Head to the right after switching back to Zero Then head upward. You will come across snail enemies. Shoot the snail enemy and they will reveal a small platform. Jump on the platform to ride up without touching the death spikes. Shoot the other snail enemies to jump to their platforms eventually you will make your way upward. Ton another boss gate. If you have not defeated Byte, Bite or Vile this is were you would fight them. If you have you get a different boss. Just blast away and it will go down. Doppler Stage 3 Head right and down. Clear out the enemies. You will be taken to a room with capsules its rematch time with the bosses. Deal with them the same way you did before. Then continue to you reach Doppler. Doppler can be a little tricky. Dodge his rushing attack. When he has his green shield activated don't hit him with anything this will allow him to refill his health. The Acid Weapon works well on him or you can fire power charged saber shots. Again make sure he doesn't throw up his green shield. Eventually he is defeated. Dr. Doppler explains how Sigma is the main bad guy and his true from is a computer virus. Doppler tells Zero how to stop Sigma. Doppler Stage 4 This is mainly a straight forward stage. Defeat the enemies and climb up to face the true villain which is Sigma. Sigma form 1 Sigma is fast and can fire all kinds of weapons at you. When he fires the fire wave dash and blast him. For a quick defeat use the C-slasher/cutter weapon to take him down quickly. Sigma Form 2 Kaiser Sigma Now for a real batter. Sigma only weak spot here is his head. His Kaiser Body can fire homing missiles at you and lasers.Dodge all the attacks and used charged shots to hit his tiny head. You will probably need full e-tanks for this battle. Eventually he will go down. Sigma Form 3 his true form. After his battle body is defeated. Sigma reveals his true form a computer virus. He floods the floor with lava. Quickly climb up to avoid the lava. Eventually you will reach the top and head right. Sigma says he is going to corrupt and posses Zero. X comes in fires the anti virus software he picked up from Doppler to take out Sigma until next time. Sigma says his program is fading but one day he will return. X and Zero exit X and Zero are on a cliff watching Doppler's Lab burn to the ground. The threat is over for now. Sigma is defeated for now. The credits start to roll. This concludes my walkthrough of this great game. I hope this walkthrough helps you with this game. I really enjoy playing this game and I hope you do too. Blessings I am going to be providing a walk through of this great game. Intro Stage First you get the story then you have control. This type you start off as Zero. Your job is to sweep the Maverick Hunters fortress out from enemies. It is pretty straight-forward just go down ladders and take out the enemies. You will encounter a hunter named Mac. Mac explains how he is now part of Doppler's army. He stuns Zero and takes him away. X comes in and now you can control X. You will climb a wall watch out for spike balls being dropped from up above. You will enter a room. Engage Mac. A few charged buster shots takes him down. After he is defeated use a Charge Shot to take out the device holding Zero. Then you have control of Zero. Climb up another war and engage in another Maverick. A few charged shots and he goes down easy. Just watch out for the mavericks spiked ball arms. Then you can choose among 8 stages. Whoever you want to start with is up to you. In this game there is no correct order. Blizzard Buffalo Stage This is often the first Stage I start with, but again who you start with is up to you. You begin the stage with ice around you. Ice physics apply here. Watch out its slippery and avoid the spikes. Jumping slows the Ice physics down. Just head right and take out the enemies. Zero's Charged Saber does wonders here. Continue going right and climb the latter. Once climbing head right and you will notice Ice Blocks. You will most likely need to revisit the stage to break the blocks in two ways. The first way is if you have found the spiked Mecha Suit head over to the platform with X on it to select it. The easier way is to use the drill weapon to smash the ice blocks. After breaking them head down and then dash to the right to get a tank that adds to your health bar. Climb up and continued to proceed right. While proceeding right you will need to avoid death spikes. You will come upon a session were you can take the ladder or take the bottom path. Then you will head downward. You will eventually come upon a gate this is the halfway mark. After exiting the gate head right and down avoiding death spikes. You will come upon a latter. Note- You can climb the wall downward and it leads to a secret room. This room you can use to fight Vile if you wish. He is only activated after defeating two mavericks. Climb back up the latter. You will notice an E-tank. You can get the E-tank using X or Zero. You will require the dash boots for X. Continue heading right. Eventually you will come on a platform covered with ice. Dash and try to get onto the over wall. This may take you several tries. The wall takes into a secret room were Dr. Light gives you the Dash Boots. If you missed the platform it takes you to a route were you can climb back up and try again. If you did not get the e-tank. Go all the way back to the left and get it with your new dash boots. Blizzard Buffalo Battle- Buffalo is powerful but he only has two attacks you need to worry about. His main attack is to pick you up with his horns and ram you into the wall. His other powerful attack is to use his ice wave like weapon that freezes you. The best way to deal with Buffalo is to fire a charged shot at him. Clime the Wall, Dash over him and climb the other wall repeating. You will need to watch out for Ice shields he throws at you. Rinse and repeat and he goes gown giving you Frost Shield. Toxic Seahorse Stage Head right and take out the big enemies. Charged shots does wonder on these guys. Head down and then right. Make sure you make the jump or you will land in the pit. Climb up the walls. Continue climbing you will see were your supposed to continue right. Instead climb up to get more health for your life bar. Then climb back down and head right. You will come to a Gate reaching the halfway mark. After passing the gate you can head right and get an armor carrier if you have picked one up. If not head down into the water. You can take two paths. The top path about midway charge the Frost Shield and ride it to the top. You should see an armor carrier. Pick it up and then head back down into the water. Eventually you will come to the mini boss. Charged shots takes the boss down quickly. Frost shield works well but save it for Toxic Seahorse. The water will drain and head up. Head right its straight-forward to Toxic Sea Horse. Toxic Seahorse Battle- You can lock this guy into a pattern by using Frost Shield. Frost Shield quickly shreds this guy. Watch out though for the Acid bubbles he likes to throw. As his health gets low he starts spamming them more. Eventually he will go down giving you Acid Burst. Then you will get a dialogue. Dr. Doppler sends Byte and Bite after Zero or X. He also summons Vile. You will fight these guys later. Tunnel Rhino Stage Head right and take out the enemies then you will head down into the mines. Clear out the enemies and head upward. You will see what looks like a path right. You may need to come back to this. This contains a health bar upgrade. Use the Thunder Weapon charge to break the boulder get across and collect the extra health. Head back out and continue going upward. Continue going right before heading back down. Go up and get a hidden etank that is in sight. Then head back down. You will come across a gate Bite is waiting for you. To save yourself trouble later on I recommend going ahead and killing Bite off. He is weak to Frost Shield. Watch out for his fireballs and dash attack. Hit him with Frost Shield and he will go down for good. If you don't use frost shield you will fight him again in a much stronger and faster form. Then he will combine with Byte. Therefore, save yourself trouble and use frost shield to kill him off for good. Head out of the battle gate and just clear out the enemies going right and then upward. However, watch out for falling rocks and death spikes. You will come across another large boulder blocking the path. This leads to Dr. Light Capsule this is the head gear upgrade. Go back down and continue to head right. Continue to head down watching out for boulders. You will meat the mid boss. I find the best strategy in dealing with this boss is to climb the wall halfway and blast away. Climbing the wall all the way will cause the boss to climb up and send the drill part into the wall knocking you down. Follow this strategy and it goes down quickly. Then head right climp up a few more ladders to Tunnel Rhino Tunnel Rhino Battle- If Rhino charges into the wall it will stun you and knock you down. Also he will fire drills at you. Use Acid Burst as that is his weakness. You will also have to dash across the other wall to avoid getting stunned. Hit him with Acid Burst a few more times and he should go down giving you the Tornado Drill Weapon. Volt Catfish Stage Head right you can step on the elevator platform. This leads to Vile. To save yourself a lot of trouble. Don't fight Vile yet wait to you defeat Volt Catfish First. Skip the elevator and head right. Watch out for the enemies and beam laser weapons. You will come across another elevator ride this one to the top don't get off on the left exit/path. Continue going up you will see another path. Take it as it holds the health bar increase for this stage. Carefull avoid the spikes and come out of the secret room. Fall all the way back down so the elevator catches you. Head back up then take the left path. head up you will notice a funny elevator. This one can only be powered by The Gravity Weapon. Use the Gravity Weapon fully charged to power this elevator. This leads to Dr. Light who will give you the armor upgrade. Head back down and continue right. You will come across electric currents on the walls climb the walls and avoid the balls of electricity and electric currents. You will notice one of the paths leads upwards. Take it and select an armor suit from the X platform. Let the Armor suit crash the floor beneath. This leads to goodies and an E-tank. Climb back up head left and continue the path to reach the boss's door. Volt Catfish Battle- This guy can be a pain. He likes to fire electricity he can also charge his attacks. These attacks do serious damage. Use the Tornado Drill Weapon on Catfish. The Drills do damage to the boss. But watchout even as he gets hit he will still fire electricity at you and he can still charge his attacks. Might be a good idea to have a full e-tank to take on this guy just in case. You will earn the Triad Thunder weapon. Crush Crawfish First you can head down to an X platform you can get a rider armor if you have picked one up. If not you can just head right. If you have picked up an armor one that can smash walls head right. You will come across a bridge a large enemy will fall breaking the floor. Head down use the armor to break the crack in the wall. This is the extra health increase for this stage. Then head down and fight the enemy that fell. Armor suits or charged shots takes it out quickly. Head right to the gate. Byte might be waiting for you. To save yourself a lot of trouble use the Drill weapon or Ray Splasher. Byte can be a pain to fight. He can slam the wall knocking you down. He can also throw you into the wall doing large amounts of damage. Hit him with the drill or ray weapon. Climb the wall dash over him and repeat. The Drill or Ray weapon kills him for good. Head right after the gate you will see a Star Wars like enemy and underneath an energy pick up. This is a fake floor that leads to Vile. I don't recommend fighting Vile just yet so skip that. Head right then down. You will come across a large pit. Dash across and clear out the enemies. Stay to the far right and head down again clearing out the enemies. You will come across a a funny looking device. Take out the device to proceed upward. Eventually you will reach Crush's Room. Crawfish Battle This guy's main attack is his claw. If you are not careful he will nail you with his claws. He also throws slasher weapons at you. He is weak to the Thunder Weapon. Use the Thunder Weapon for a quick victory. You get the Slasher or C cutter weapon as it is also known as. Neon Tiger Stage Head right it should be noted you can ride the dragonfly enemies. Continue going right and avoid the thorny spikes. You can ride the fly enemies to the top or you can head right and climb the wall. Head in the upright to get an e-tank. Then clear out the enemies and head left. Climb up and then head right while clearing out the enemies. You will notice a cracked wall. Use the Drill weapon to clear. Dash to the far right and its a Dr. Light Capsule this gives you a charge booster. Dash up then do a hard dash left to exit the room. Head down the ladder. You will come across a gate this is the stage's mini boss. The mini Boss is a centipede like boss. Use Triad-Thunder for a quick victory. Should be noted hit the head as that is the boss weak spot. Head right and continue to take out the enemies while avoiding the spikes. You will come across another Gate. AFter this gate head right then down. You will see a new enemy. This enemy digs the ground revealing thorns these thorns won't hurt you but they will do damage. Its best to take out the enemy or just dash over them. You will come across the fly. Ride the Fly to the top to get the stages health bar increase. Then head back down. To face Neon Tiger. Neon Tiger Battler Now for a real batter. This guy is one of the toughest bosses in the game. He is very fast and has so many attacks. Even with his weakness he can still do massive damage.I make sure I have e tanks fully filled when I fight this guy. He likes to use his tail to fire his ray splahser weapon at you. But that is not the most dangerous of his attacks. He loves to use his claws and they pack a punch. He also loves to just slash you. He climbs the wall a lot to slash you. His weakness. is the C-Slasher or C-cutter weapon. But even with his weakness he will continue to attack quickly. Continue to hit him with the slasher/cutter weapon he will eventualy go down. You will get the Ray Splasher Weapon. Now you can fight Vile Remember How I said the secret path down leads to Vile in Blizzard Buffalo's stage. Take than and enter a portal. You will be taken to a factory. Defeating Volt Catfish supplies powers to the elevator this saves you trouble as you do not have junk falling on you. Clear out the enemies take the elevators and engage in Vile. The Vile battle has two parts. The first part he is in his armor. Destroy the armor use regular charged shots or ray splasher. Its best to hit him climb the wall dash over him and rinse and repeat. His armor is destroyed. The second part use Ray Splasher as that is Vile's Weakness. Ray Splasher really does a number on him. It also kills him for good so you don't have to fight an enhanced version of him. He loves to shot bombs and throw fireballs at you. Dodge and hit him with Ray Splasher. As he dies he says he has set the factory to self destruct. Exit the gate and quickly clear out the ememies. Take another elevator again defeating Volt Catfhis provides power. The elevator takes you then head right to a portal. The portal allows you to exit the factory before the timeer goes to 0. Gravity Beetle Head right and you will come into a room with freight boxes. Clear out the enemies and you will see the stages health bar increase tank. This may cause you to have to revist the stage as defeating over bosses causes the freight boxes blocking the increase to go away. Head back across then head upward. You will come across the gate. After the gate climb the latter. Head upward and you will see a program for a carrier. Use the dash boots or switch to X with the dash upgrade to get it. This may take you a few tries. Then head down. Clear out the enemies and head right. Climp up and continue to head right then you will come to a ladder. Climb down the ladder to take a slow moving elevator. Ride the elevator upwards. Head right and you will see bullet shaped platforms. These work like the doughnut platforms in the Mario games. One step on these and they fall. Its best to not even fool with the enemies. Just dash quickly across. Make your way up the ladders and head right eventually you will reach the bosses gate. Gravity Beetle Battle This guy is slow and not much of a problem. His only threat is his gravity weapon that can pull you toward him allowing him to crash into you. Use Ray Splasher to quickly defeat him. Charged shots also takes him down as well. If he fires his gravity weapon get into a corner and just dash to avoid being pulled in. Your weapon you earn is Gravity Well. Blast Hornet. Head right and ride another slow moving elevator to the top. Continue heading right. The space above the ceiling allows you to get an armor if you would like. Other than that head right and get on the conveyor belts. But don't get pushed into the spikes. Head left, down, then right again using the belts. You will then come across the gate. The gate is the mini boss. You fight a laser type mini boss. For this mini boss I use the Acid weapon as it shreds the laser boss in a few hits. After beating the mini boss head right. climb the first storage shaped building. You will see two bomb boxes destroy them and it will blast open a path. Head down. You will see the storage building has a crack in it. Use the drill weapon. This will lead you to an armor suit giving you the program for that armor. You can head back up with the armor if you want. Climb the first storage building and head right. Continue right and clearing out the enemies. You may have to fight a carrier that brings fright boxes down. Just take these out. Before proceeding dash up to get the health bar increase for this stage. Then head back down and right. You will be on more conveyor belts just avoid the spikes. Head down go right. Shoot the bomb boxes and quickly dash to Hornets gate. Blast Hornet Battle- To save yourself a lot of pain, no pun intended, use Gravity Well as this stops Hornet in his tracks. He loves to send Hornets at you. These hornets do not just sting you but they serve as lock in devices for him to throw bombs at you. Gravity Well keeps him grounded and destroys the hornets. Use this for a quick victory you will earn Parasitic Bomb. You will then get a cutscene were it turns out that Sigma is the master mind behind this plot. YOu will then be able to go to the fortress stages. Doppler Stage 1 This stage is straight forward. Head right but avoid the falling spikes from the ceiling as that is instant death. Lay low and be careful were you dash. Head right then head up. Quickly head up by dashing as the walls will be caving in on you. Then head left and upward. You will come across a maverick and the ceiling is collapsing. X will come in to help. X will pull the switch to stop the ceiling. Quickly kill the maverick with charged shots and advance. Head right up then down. You will come across a room. The first pit head down it. There is a secret room that is either on the left or right. This leads to Dr. Light. Light will give Zero the black armor or X the golden Armor. Get that and head upward and right. Watch out for spike balls being dropped. Eventually you meet the boss. This boss is strange. The best strategy is to clime the wall and use the Acid weapon on him. This is the best way to deal with this strange thing. Doppler Stage 2 Head right and then upward while clearing out the enemies in the process. Head right and then down. The enemies will be near pits so take them out from a distance to get over the pits. Head right to the far wall. Then you will have to do some climbing and dashing. To enter the first gate. Before entering the first gate switch to X. If you continue as Zero the insect like enemy will crash into Zero wounding him. You won't be able to playthrough the game with him. Switch to X and proceed into the boss room. Using X take out the insect like enemy. Once the insect boss is defeated and you exit the gate then you can switch back to Zero. Head to the right after switching back to Zero Then head upward. You will come across snail enemies. Shoot the snail enemy and they will reveal a small platform. Jump on the platform to ride up without touching the death spikes. Shoot the other snail enemies to jump to their platforms eventually you will make your way upward. Ton another boss gate. If you have not defeated Byte, Bite or Vile this is were you would fight them. If you have you get a different boss. Just blast away and it will go down. Doppler Stage 3 Head right and down. Clear out the enemies. You will be taken to a room with capsules its rematch time with the bosses. Deal with them the same way you did before. Then continue to you reach Doppler. Doppler can be a little tricky. Dodge his rushing attack. When he has his green shield activated don't hit him with anything this will allow him to refill his health. The Acid Weapon works well on him or you can fire power charged saber shots. Again make sure he doesn't throw up his green shield. Eventually he is defeated. Dr. Doppler explains how Sigma is the main bad guy and his true from is a computer virus. Doppler tells Zero how to stop Sigma. Doppler Stage 4 This is mainly a straight forward stage. Defeat the enemies and climb up to face the true villain which is Sigma. Sigma form 1 Sigma is fast and can fire all kinds of weapons at you. When he fires the fire wave dash and blast him. For a quick defeat use the C-slasher/cutter weapon to take him down quickly. Sigma Form 2 Kaiser Sigma Now for a real batter. Sigma only weak spot here is his head. His Kaiser Body can fire homing missiles at you and lasers.Dodge all the attacks and used charged shots to hit his tiny head. You will probably need full e-tanks for this battle. Eventually he will go down. Sigma Form 3 his true form. After his battle body is defeated. Sigma reveals his true form a computer virus. He floods the floor with lava. Quickly climb up to avoid the lava. Eventually you will reach the top and head right. Sigma says he is going to corrupt and posses Zero. X comes in fires the anti virus software he picked up from Doppler to take out Sigma until next time. Sigma says his program is fading but one day he will return. X and Zero exit X and Zero are on a cliff watching Doppler's Lab burn to the ground. The threat is over for now. Sigma is defeated for now. The credits start to roll. This concludes my walkthrough of this great game. I hope this walkthrough helps you with this game. I really enjoy playing this game and I hope you do too. Blessings -------------------- |
Vizzed Elite
Affected by 'Laziness Syndrome'
Registered: 08-18-12
Last Post: 7 days
Last Active: 7 days
Affected by 'Laziness Syndrome'
Registered: 08-18-12
Last Post: 7 days
Last Active: 7 days
Post Rating: 1 Liked By: Barathemos,
