

 User Notice
 2,232 Posts Found by Laian
04-10-19 08:16 AM
| ID: 1371363 | 88 Words
Eniitan :
EX Palen : Truthfully, I got troubles to post that guide and had to remove the screenshots considering I still haven't figured this out. Hopefully I finally manage to Anyway, I'm glad you enjoyed that new walkthrough. I was worried that, with my looooooooong hiatus, it would have gone down the bottomless pit. The sequel is planned, for reminder. Maybe the next one? EX Palen : Truthfully, I got troubles to post that guide and had to remove the screenshots considering I still haven't figured this out. Hopefully I finally manage to Anyway, I'm glad you enjoyed that new walkthrough. I was worried that, with my looooooooong hiatus, it would have gone down the bottomless pit. The sequel is planned, for reminder. Maybe the next one? -------------------- |
| Games have secrets, I have my eagle gaze. |
Affected by 'Laziness Syndrome'
Registered: 10-21-11
Location: France
Last Post: 2610 days
Last Active: 1784 days
04-04-19 11:34 AM
| ID: 1371004 | 214 Words
EX Palen :
Thank you, dear old friend. Truthfully, that hurt me to see that I'm still inspiring people... when the person who inspires these people is not a good example to follow at all. I am no longer a staff member and I am the only one to blame for this. I went through lot of stuff since September, going back and forth just to sort things out. I never found the time to write a single line of walkthrough and slowly lost motivation. It is a miracle that I managed to bring a new guide for that website. So, when you say that I'm "dedicated as ever to the passion of writing guides"... I want to say this was before. There was a time when I could write a guide per month, there was a time when I really enjoyed making them. That time might have ended before I rose from the shadows. I am not saying I did not enjoy making that one... I did not feel like back a few years ago. That doesn't mean I'll stop making guides. And maybe, someday, I'll get back to the staff. Maybe I'll be able to handle the pace and the pressure. For now, I'll do guides for Vizzed, at my own pace. Thank you, dear old friend. Truthfully, that hurt me to see that I'm still inspiring people... when the person who inspires these people is not a good example to follow at all. I am no longer a staff member and I am the only one to blame for this. I went through lot of stuff since September, going back and forth just to sort things out. I never found the time to write a single line of walkthrough and slowly lost motivation. It is a miracle that I managed to bring a new guide for that website. So, when you say that I'm "dedicated as ever to the passion of writing guides"... I want to say this was before. There was a time when I could write a guide per month, there was a time when I really enjoyed making them. That time might have ended before I rose from the shadows. I am not saying I did not enjoy making that one... I did not feel like back a few years ago. That doesn't mean I'll stop making guides. And maybe, someday, I'll get back to the staff. Maybe I'll be able to handle the pace and the pressure. For now, I'll do guides for Vizzed, at my own pace. -------------------- |
| Games have secrets, I have my eagle gaze. |
Affected by 'Laziness Syndrome'
Registered: 10-21-11
Location: France
Last Post: 2610 days
Last Active: 1784 days
04-04-19 10:03 AM
| ID: 1371001 | 4935 Words

POSTS: 2230/2232
POST EXP: 457173
LVL EXP: 7705015
CP: 23738.9
VIZ: 3570490

Hi folks! Laian here, back to the saddle with a brand new walkthrough. It's been a while but I had to take care of various stuff. Recently, I heard of a bundle regrouping two fantastic games that some of you might have heard of as well: the Evoland series. Called "Evoland: the Legendary Edition" and released for Switch and other systems, I decided to replay the first episode.
What is Evoland, by the way? For starters, that game was originally a free game made in 48 hours for a Ludum Dare by Shiro Games. It has been inspired by famous RPGs such as Dragon Quest, Final Fantasy, The Legend of Zelda... The idea is to play through the evolution of the RPG genre by unlocking features during the game. Years later, the developpers went ahead and remade the game for PC. The game has been a success and they made a sequel released for PC. And now, you can play both games in the new version available for Switch, XBOX One, PS4 and PC. Isn't that great? For someone like me who tried the free version and the reboot, it is. I could replay the Legenday Edition (since I bought it on Switch and finished Evoland once) but I felt like replaying the original Evoland on PC. So I hope you're ready for that trip because I am and I'll be your commander for the entire journey. Welcome to Evoland. Oh and that walkthrough also works with the Legendary Edition. STARTING THE QUEST First thing you might ask is: is there a plot, a goal? There is one actually but you'll get it in due time. Go right as the instruction says then go left. No need to press a button to open the chest, just bump into them. Move forward until you come to another chest to open. Head south, open the chest to the left and keep in mind the chest you cannot open. There is a lot of backtracking to do in this game if you want to get all the collectibles and achievements. Cross the bridge, go south and get the sword. Now, you can cut grass and kill enemies. Before going east, go back to the starting point and cut the grass to the bottom right hand corner to get to the chest you saw earlier and pick up your first collectible: the card "Octorac". There are twenty-three cards to collect in this game, necessary to play a mini-game later and get two achievements of the game. Also, cut the grass to the left in the second screen to get another collectible: a star. That is the second and last collectible you can collect to get three achievements (one for each milestone of ten stars collected), which means you have a total of thirty stars to find in the world of Evoland. Time to go east and carry on the quest. You'll find a strange symbol on the ground. Open the chest to activate the save points. Go west to find a star in the chest and the card "bat" after cutting some grass. Secret within secret, yeah. Go back, head south, open the chest to get the 16-bit colors and move to the next save point. There is a breakable rock to the right before the save point but you need another item so keep in mind that there is a rock here. Not that far from the new save point, there's a star to the north. Open the chest to the left to get the long-awaited (and so deep and rich) plot then the next ones. You'll come to a point where you will be blocked by a black stone known as dimensional stone. Go back to the first signboard and go between the rocks. Save your progress and face the statues. These can only be hit from the back or the sides. After this fight, note the breakable stone to the right guarding the chest and go north. Welcome to the overworld, folks! This is where you can start farming glis like you were in a turn based RPG. Why is that? Because there's the first village a bit further to the north. When you reached the meadow, do not touch the statues right now, save your progress before then crush one by one your foes. Open the chest to unlock Papunika Village. Open the chest to the right. You can talk to the NPCs but there's a problem: you're a kid and they are not sociable towards kids. Time to grow up so eat some vegetables and soup (and wait years and years). That is the realistic way of life. Although, it's a game and there is a faster way. Talk to a kid who is going to mention something about a seed lost in the well. Interesting... you might check this out then. Down in the well, the seed is easily noticeable to the left. Get it to grow taller and go south to find the card "Worm". Go back to the surface, then west, open the chests and check all the houses to find some stuff including the card "Tork". The locked house contains something interesting. Next to the well, there's a secret opening behind the house. Collect the card "Kobra Zero" and go get the star inside the house to the left by entering a hole in the wall. Now, in order to get to the north caves, you need better equipment. The storekeeper sells that (and the rare card "Emuk" for 500 glis). If you are short on money, leave the village and go farm some glis outside. It shouldn't take that long to buy the sword and the armor since the enemies drop 50 glis each time you kill one. Once you are well-equipped, go east and leave the village. THE CRYSTAL CAVES You will get into a forced battle a bit further. Get rid of the enemies and say "yes" to the ally (considering you cannot decline the request, sadly). Your new ally needs a name. You can keep Kaeris or give another name. For the sake of that walkthrough, I did not change it. She is basically the healer of the team and... the ONLY ally you will get during the game. Go west before entering the north caves to the north (that's what they are called "the north caves") to find a secret area. You can easily find it since one of the trees in the overworld have a few red pixels. Here is one of the secret areas of the game: the hidden meadow. Pick up the card "slime" in the chest then go in the hole. In the hidden cave, there are enemies and a few things to get. Go all the way south, check the crate to find a potion then open the chest to get a star and go through the secret passageway to the east close to the water to find the card "The seed". There's also a secret within secret if you go through the passageway to the right, leading to a crate and a funny joke for completionists like your host Laian. There's a pile of crates and barrel to the far south with a potion and that's it for the hidden cave. Time to go in the north caves or the crystal caves. And since your ally has a name, it's your turn to get a name. I did not change it either, I went with "Clink". Go north then east to find 50 glis and two potions in the crates and barrels. Keep going north, then go west to find a chest containing the experience points upgrade and go through the secret passageway to the left close to the water to get to the other side and find a star. There's another star in the chest blocked by the rocks, just go a bit to the east then south. Go east to unlock the fountain and go south to find a switch and the card "scaven". Go save your progress with the fountain and head north to find the crystal. Touch it to face the first boss of the game: Kefka's ghost. He is not that hard if you heal constantly with Kaeris. There's just a moment when you need to be patient: exactly when he turns blue. He becomes invisible for a short period of time; which means you can't touch your opponent. After this fight, step on the yellow mark to the north to leave the cave and come to the next area: Edel Vale. THE NORIA MINES The next destination is... well, as the title says, the Noria Mines. Grab the rewards in the chests, cut the grass to the south to get a star and the card "Zoomba". Carry on, cut some grass to the left and collect the card "Pakkun" in the chest. Head south, open the chest and pass the dimensional stone. Remember that place? It's the beginning of the game. Go south and pass another dimensional stone. Open the chest to the right then the one to the left and carry on. Cut the grass to the south to find the card "Wasp" after the bridges and open the chest to the east to pick up a star. Before going south and leaving the area, go east to open the chest and get another star. Now, time to go to the Noria Mines to the south. That dungeon is more like a "Legend of Zelda" dungeon compared to the last one that was more a "Final Fantasy" one. There are cracks in the walls and secret passageways so keep an eye on them. Open the chest and go north since you don't have much of a choice at this point. Open the chest and go east to open another chest. Press the pressure plates to unlock another path and go there. Kill the red wizard, go west, open the chest and kill the bats to make another chest appear. Grab the key inside, open the chest and kill the skeleton. Go south, kill the red wizard and press the button. Go back, ignore the chest at the other side of the water and go get the one next to the first gate you opened to find a star. Go back, open the chests to unlock the labyrinth then get the key and another star and open the locked door. Beat the skeletons and push the block in the next room. Kill the bats, push the blocks and carry on. Next to the pot, there's a secret passageway leading to a pressure plate. Step on it to unlock a gate. Now go south, kill the enemies and carry on. Kaeris will feel guilty for not helping you and will heal your wounds. Open the chest, push the enemy into the hole and go to the next room. Open the chest and the one to the left (that means you pressed the button in the little secret room earlier) to get the card "A'tuin". Press the pressure plates, kill the enemies and carry on. Pass the first two traps and jump into the third hole to get to the isolated chest you saw earlier. Inside, you'll find your card, well the card of your hero... you know what I mean. Head all the way back to the next room, kill the wizards and open the chest. Solve the puzzle, kill the bats and go right to get a key. Open the door, then the chest and save your progress. The next room needs to be crossed with patience. Find your way to the other side, keep in mind the crack in the wall and go to the next room. Go through the passageway to the left to find the card "Spider" and avoid the fireballs. Kill all the enemies in the room and open the chest to get the boss room key. Also, next to the chest, there's a secret path leading to a chest with a star inside. Time to face the boss of the dungeon. Oh and don't worry about the cracks in the wall: like I said, there's a lot of backtracking to do in this game if you want to get all the collectibles. That boss is a dark version of you and can only be hit when he is stunned. Get close to a wall, bait him and dodge his tackle to knock him out then strike. He will summon bats and shoot projectiles at you from time to time. Note that there's an achievement if you beat him without being hit once. That includes the bats, the fireballs and the tackles. None of these attacks. Kinda tense but it's possible. And no worries, you can kick his butt over and over again after this fight once you come back to the mines. Go get your reward and leave the mines. THE SACRED GROVE Go east and enter Aogai City. Talk to the people to the north to know the existence of the bombs and someone who can give you that item. There a chest in the next screen to the right. Now, head to the eastern part of the city and open the chests. You will unlock new NPCs such as a storekeeper selling some new stuff like another rare card for 10000 glis (named "the Undead King"), a Double Twin player and a guy who wants to see a complete collection of Double Twin cards. These two last NPCs will only unlock achievements if you managed to complete and show your card collection and beat the champion. I think you don't need to get all the cards to beat the four difficulty levels of the Double Twin mini-game but it's best if you get them all. But enough talk about that, let's get the bombs. You need to talk to almost all the NPCs of the village, from one to another until you get to talk to the kid running around the well like a dummy (after a butterfly). You will get the bombs. Up to you to go back now to the places you explored to get some stuff or go south to the sacred grove in order to get the first part of the amulet of Gorn. I'll make a whole part before the last part of the walkthrough for that. Leave the town and go south. Equip the bombs and blast the rocks then go east to find a blue crystal. Touch it to enable the time travel. Everytime you will beat a crystal like this one, you will go back and forth in time. That means when you're in 2D mode, you can pass the small trees but not the dimensional stones and vice versa in the 3D mode. Go north, read the sign (important clue for later), then go west. Touch the crystal, pass the dimensional stone and enter the dungeon. Move cautiously around the room to reach the chest in the center of the lava maze and get the bow. There's also a secret passageway to the right with a star inside the chest and a cracked wall to blast with another star inside a chest. Time to leave the mini-dungeon and carry on. Go back to the past, stand before the torch and shoot an arrow towards the small tree to get rid of it once and for all. Yeah, you will change the future as well, that's neat. Go back to the 3D world, carry on, equip the bombs, put on next to the crystal and pass the dimensional stone to the north before it explodes. Go get the card "Kefka's ghost" inside the chest and do the same exact thing with the other crystal next to the chest to cross the small tree and go back to the 3D world. Touch the crystal after the dimensional stone to go back to the 2D world, pass the small tree, blast the rock to the right and light the torch up with an arrow. Burn both of the small trees and go back to the 3D world to collect the star in the chest to the right and go south. Blast the rock blocking the way to the torch and go east then north. Blast the rock, get rid of the monsters and go get the star in the chest. Cross the bridge to the east, shoot the crystal with the bow and pass the small tree. Note the entrance to another dungeon to the right, blast the rock, then go back on the second bridge, face east and shoot an arrow. You will light one of the torches necessary to open the way to the dungeon. Go south, then all the way around the small lake with the crystal, don't touch the crystal right now, cut the grass then shoot the torch and the tree with an arrow and blast the rock. At this point, you partially unlocked the way to the dungeon. Partially, you just removed the statue but there's a dimensional stone blocking the way. Touch the crystal to go to the 3D world and enter the dungeon. Kill the bats, push the torches and go to the next room. Kill the enemies, pick up the first half of the amulet in the chest and blast the wall to get a star in the chest. Leave the dungeon, pass the dimensional stone to the west and touch the crystal. Stand before the torch, face north and shoot an arrow. Go back to the crystal, put a bomb and pass the stone. Go light the last torch and face south to burn the small tree. Head back over there, touch the crystal, then the other one and go north to get the card "Kaeris" inside the chest. Leave the sacred grove with the way to the south and go back to Aogai City. THE RUINS OF SARUDNAHK Talk to Kaeris' uncle then go north-east to leave the town and go to your next destination: the ruins of Sarudnahk. You'll see the Black Citadel to the right but you can't go in there right now. Enter the ruins, open the chest and choose between both of the characters. Time to get the second half of that amulet. This is where you can get lots of glis. And equipment stuff, yeah. Although, the equipment you will find is meaningless, just for the "hack'n'slash" touch. You can get an achievement if you get your inventory complete. Kill the spiders and open the chests you will see on your way. Go to the far east and get the card "Dopple" after the bats. That one can be easily missed since it's out of bounds and the mini-map, once gotten, barely show the the path. Go north now, then get the map upgrade nearby the the northern way and go west to find a star in the chest. Save your progress, head north then carry on. Go north, beat the wasps then get a star from the chest and go south. Before the boss fight, there's a save point to the left and your way out of the ruins to the right. Open the chest to summon the boss and face it. The undead king is not that hard. His melee attacks does nearly nothing to you and the only threat that might worry you a bit is the magic missiles he spreads around him quite often. Other than that, he is super easy to beat. Go get the second half of the amulet after that fight, open the other chest that just appeared from nowhere to make a portal appear. Go back to Aogai City, save your progress and go to the Black Citadel to face the bad guy. DEJA-VU! (AND THE POWER OF LOVE) You will understand why I named that part with such a title. You are greeted by the bad guy who's named... Zephyros. It's a scr COLLECTIBLES FETCHING Besides the collectibles, there are achievements to unlock to get the 100%. Yeah, you need to find all the stars, cards and get all the achievements possible; which I find quite stupid to be fair. You cannot check in-game the achievements you got from this point and some of them can be missed. Anyway, let's focus on the last collectibles. Nearby the meadow, there's a tent. It's a merchant and he needs food. A good cooked Choboko meat will do the trick. You can only find chobokos in the field a bit to the north. It might take a while before finding one. The choboko is a strong enemy. If you have Babamut ready, use it! You will get raw Choboko meat. Go to Aogai village and talk to the old woman next to the desperate man to get the cooked Choboko meat. Bring it back to the merchant to get the extra heart. That's the only extra heart you will get, by the way. You might have seen a cave nearby the tent: go there. Welcome to one of the three secret areas of the game: the Shrine of the Babamut. No boss fight like in the Noria Mines (we will go back there, do not worry), just some stuff to find. Go right, try to go south and kill the skeletons. The bow is really effective on them, one shot and one bites the dust. Press the button, go left, avoid the whirlwinds and press another button. Go back, go north, cross the lava maze, press the button to the north ang go east. Blast the wall next to the statue to find a star in the chest and carry on. You will find a light puzzle further. Blast the wall to the north to find a star, solve the puzzle and go in the next room. Kill the enmies, grab the card "Babamut" leave the dungeon. Let's go to the last secret area of the game. And from the Shrine of the Babamut, it's not that far. Go a bit to the east after one of Edel Vale entrances to find a group of trees isolated. Enter the Forbidden lake. This is one of these places where getting all the stuff is a bit tricky. It requires bombs and bow and knowledge of the basics of time travel. Light the torch to the east with an arrow and go to the small island on the lake by the bridge. Stand before the torch you just lit, face north and shoot. Now, go north, ignore the rock and the crystal, cut the grass and go get the star in the chest. Head back to the crystal, put a bomb and go back near the lake. Burn the tree, go east, blast the rock, face south behind the torch and shoot. Leave the Forbidden Lake and go back there now to go the eastern part of the area. Go north to get a star in the chest, then east and south east to get another star. Cross the bridge, touch the crystal, go back to the nearest torch, face south and south. Head back to the crystal, touch it then put a bomb near the crystal and pass the small tree. Blast the rocks, then light the torches up and burn the small tree to the left. Shoot the crystal, pick up the star in the chest behind the dimensional stone, carry on, travel to the 2D world, put a bomb and pass the tree. Grab the star then the card "Zephyros" in the chests. You can leave the area now. Let's go back to Edel Vale, also known as the first area of the game. We have some stuff to collect here, waiting for us for a long time. For example, the chest blocked by a rock, east of the sign. Blast the rock to get the "Red Wizard" card. Go south-east after the small sandy island, blast the rock and cut the grass to get the card "Skeleton". That should be the last card of the game to find so you can now go beat the guy at Aogai City and show your collection to the other guy. The last destination is the Noria Mines, indeed. That's where the last collectibles are. All these cracked walls ready to be blow up with bombs. Go north, to find one of them and get a star. There's a cracked wall in the lava maze with a star and the last star is behind the crack in the wall before the boss room. Now you can do some preparation, save your progress and go in the Mana Tree located to the north of Aogai City. THE LAST BATTLE Time to face Zephyros for the last time. He kinda changed since the last battle. That boss can be a pain in your bottom since his main attack is a laser beam and he can trap you in the area of effect with his hands. You need to damage the hands first of all until they change color. Then, you will have to strike the red jewel on his torso and go as fast as possible behind him to strike the red orb before it goes back to its owner. Do this four times to break the stone armor and face the real Zephyros. You need to avoid the red balls and send the blue ones back to him with your sword. Be careful, you need good accuracy and timing to really hurt him with that projectile. Do this four times and Zephyros will be defeated. Congratulations, you saved the world and beat the game. BONUS PART: THE ACHIEVEMENTS Here is the achievements you can get in this game. Getting all of them is required to fully complete the game at 100% and unlock the sound test. LEFT KEY – No need to explain this one. You get it automatically at the beginning of the game. 16 COLORS – Get this achievement when you unlocked the 16-bit colors. 3D – Unlock the 3D world. EXPERIENCE POINTS – Unlocked when you get the "experience points" feature. STORYLINE – Unlocked when you get the "storyline" feature (the scrolling text). DVD PLAYER – Buy the DVD player from the merchant in Aogai City. CARD CHAMPION – Beat the Double Twin player in Aogai City (all the difficulty levels). CARD MASTER – Find all the Double Twin cards. EXTERMINATOR – Kill a bat with a bomb (can be done anywhere). SNIPER – Kill a skeleton with an arrow (can only be done in the Shrine of the Babamut and the Noria Mines) TAKOYAKI – Kill an Octorac with a flaming arrow (the Forbidden Lake is, to my knowledge, the best place to get that achievement easily). CHOBOKO HUNTER – Find and kill a Choboko (easily unlocked if you do the travelling merchant quest for the extra heart). STAR OF EVOLAND – Collect 10 stars. SUPERSTAR OF EVOLAND – Collect 20 stars. MEGASTAR OF EVOLAND – Collect the 30 stars of the game. CARD PLAYER – Win the easy difficult level of the Double Twin mini-game. CARD COLLECTOR – Find 15 cards. UNDERTAKER – Kill 100 skeletons. TURTLE SOUP – Kill 10 A'Tuins. HEAVY PURSE – Get 20000 glis in one play. HOARDER – Get 50000 glis in one play. IT WAS AN ACCIDENT – Break 20 pots in one play. EXCAVATIONS – Break a wall with a bomb. TIME TRAVELLER – Travel through time 12 times with the crystals. DODGEBALL – Kill the Noria Mines boss without getting a single hit. TRUE EXPLORER – Find the Hidden Cave. DUNGEON CRAWLER – Find the Shrine of the Babamut. CARTOGRAPHER – Find the Forbidden Lake. HERO – Defeat Zephyros in the Mana Tree (in other words, beat the game). That's all, folks. This has been the walkthrough of Evoland and Ihope you enjoyed it. We will do the second episode, no worries. Although, I never played Evoland 2 but it should be ok. I like exploring uncharted territories when it comes to video games, ha ha. Until next time, take care! What is Evoland, by the way? For starters, that game was originally a free game made in 48 hours for a Ludum Dare by Shiro Games. It has been inspired by famous RPGs such as Dragon Quest, Final Fantasy, The Legend of Zelda... The idea is to play through the evolution of the RPG genre by unlocking features during the game. Years later, the developpers went ahead and remade the game for PC. The game has been a success and they made a sequel released for PC. And now, you can play both games in the new version available for Switch, XBOX One, PS4 and PC. Isn't that great? For someone like me who tried the free version and the reboot, it is. I could replay the Legenday Edition (since I bought it on Switch and finished Evoland once) but I felt like replaying the original Evoland on PC. So I hope you're ready for that trip because I am and I'll be your commander for the entire journey. Welcome to Evoland. Oh and that walkthrough also works with the Legendary Edition. STARTING THE QUEST First thing you might ask is: is there a plot, a goal? There is one actually but you'll get it in due time. Go right as the instruction says then go left. No need to press a button to open the chest, just bump into them. Move forward until you come to another chest to open. Head south, open the chest to the left and keep in mind the chest you cannot open. There is a lot of backtracking to do in this game if you want to get all the collectibles and achievements. Cross the bridge, go south and get the sword. Now, you can cut grass and kill enemies. Before going east, go back to the starting point and cut the grass to the bottom right hand corner to get to the chest you saw earlier and pick up your first collectible: the card "Octorac". There are twenty-three cards to collect in this game, necessary to play a mini-game later and get two achievements of the game. Also, cut the grass to the left in the second screen to get another collectible: a star. That is the second and last collectible you can collect to get three achievements (one for each milestone of ten stars collected), which means you have a total of thirty stars to find in the world of Evoland. Time to go east and carry on the quest. You'll find a strange symbol on the ground. Open the chest to activate the save points. Go west to find a star in the chest and the card "bat" after cutting some grass. Secret within secret, yeah. Go back, head south, open the chest to get the 16-bit colors and move to the next save point. There is a breakable rock to the right before the save point but you need another item so keep in mind that there is a rock here. Not that far from the new save point, there's a star to the north. Open the chest to the left to get the long-awaited (and so deep and rich) plot then the next ones. You'll come to a point where you will be blocked by a black stone known as dimensional stone. Go back to the first signboard and go between the rocks. Save your progress and face the statues. These can only be hit from the back or the sides. After this fight, note the breakable stone to the right guarding the chest and go north. Welcome to the overworld, folks! This is where you can start farming glis like you were in a turn based RPG. Why is that? Because there's the first village a bit further to the north. When you reached the meadow, do not touch the statues right now, save your progress before then crush one by one your foes. Open the chest to unlock Papunika Village. Open the chest to the right. You can talk to the NPCs but there's a problem: you're a kid and they are not sociable towards kids. Time to grow up so eat some vegetables and soup (and wait years and years). That is the realistic way of life. Although, it's a game and there is a faster way. Talk to a kid who is going to mention something about a seed lost in the well. Interesting... you might check this out then. Down in the well, the seed is easily noticeable to the left. Get it to grow taller and go south to find the card "Worm". Go back to the surface, then west, open the chests and check all the houses to find some stuff including the card "Tork". The locked house contains something interesting. Next to the well, there's a secret opening behind the house. Collect the card "Kobra Zero" and go get the star inside the house to the left by entering a hole in the wall. Now, in order to get to the north caves, you need better equipment. The storekeeper sells that (and the rare card "Emuk" for 500 glis). If you are short on money, leave the village and go farm some glis outside. It shouldn't take that long to buy the sword and the armor since the enemies drop 50 glis each time you kill one. Once you are well-equipped, go east and leave the village. THE CRYSTAL CAVES You will get into a forced battle a bit further. Get rid of the enemies and say "yes" to the ally (considering you cannot decline the request, sadly). Your new ally needs a name. You can keep Kaeris or give another name. For the sake of that walkthrough, I did not change it. She is basically the healer of the team and... the ONLY ally you will get during the game. Go west before entering the north caves to the north (that's what they are called "the north caves") to find a secret area. You can easily find it since one of the trees in the overworld have a few red pixels. Here is one of the secret areas of the game: the hidden meadow. Pick up the card "slime" in the chest then go in the hole. In the hidden cave, there are enemies and a few things to get. Go all the way south, check the crate to find a potion then open the chest to get a star and go through the secret passageway to the east close to the water to find the card "The seed". There's also a secret within secret if you go through the passageway to the right, leading to a crate and a funny joke for completionists like your host Laian. There's a pile of crates and barrel to the far south with a potion and that's it for the hidden cave. Time to go in the north caves or the crystal caves. And since your ally has a name, it's your turn to get a name. I did not change it either, I went with "Clink". Go north then east to find 50 glis and two potions in the crates and barrels. Keep going north, then go west to find a chest containing the experience points upgrade and go through the secret passageway to the left close to the water to get to the other side and find a star. There's another star in the chest blocked by the rocks, just go a bit to the east then south. Go east to unlock the fountain and go south to find a switch and the card "scaven". Go save your progress with the fountain and head north to find the crystal. Touch it to face the first boss of the game: Kefka's ghost. He is not that hard if you heal constantly with Kaeris. There's just a moment when you need to be patient: exactly when he turns blue. He becomes invisible for a short period of time; which means you can't touch your opponent. After this fight, step on the yellow mark to the north to leave the cave and come to the next area: Edel Vale. THE NORIA MINES The next destination is... well, as the title says, the Noria Mines. Grab the rewards in the chests, cut the grass to the south to get a star and the card "Zoomba". Carry on, cut some grass to the left and collect the card "Pakkun" in the chest. Head south, open the chest and pass the dimensional stone. Remember that place? It's the beginning of the game. Go south and pass another dimensional stone. Open the chest to the right then the one to the left and carry on. Cut the grass to the south to find the card "Wasp" after the bridges and open the chest to the east to pick up a star. Before going south and leaving the area, go east to open the chest and get another star. Now, time to go to the Noria Mines to the south. That dungeon is more like a "Legend of Zelda" dungeon compared to the last one that was more a "Final Fantasy" one. There are cracks in the walls and secret passageways so keep an eye on them. Open the chest and go north since you don't have much of a choice at this point. Open the chest and go east to open another chest. Press the pressure plates to unlock another path and go there. Kill the red wizard, go west, open the chest and kill the bats to make another chest appear. Grab the key inside, open the chest and kill the skeleton. Go south, kill the red wizard and press the button. Go back, ignore the chest at the other side of the water and go get the one next to the first gate you opened to find a star. Go back, open the chests to unlock the labyrinth then get the key and another star and open the locked door. Beat the skeletons and push the block in the next room. Kill the bats, push the blocks and carry on. Next to the pot, there's a secret passageway leading to a pressure plate. Step on it to unlock a gate. Now go south, kill the enemies and carry on. Kaeris will feel guilty for not helping you and will heal your wounds. Open the chest, push the enemy into the hole and go to the next room. Open the chest and the one to the left (that means you pressed the button in the little secret room earlier) to get the card "A'tuin". Press the pressure plates, kill the enemies and carry on. Pass the first two traps and jump into the third hole to get to the isolated chest you saw earlier. Inside, you'll find your card, well the card of your hero... you know what I mean. Head all the way back to the next room, kill the wizards and open the chest. Solve the puzzle, kill the bats and go right to get a key. Open the door, then the chest and save your progress. The next room needs to be crossed with patience. Find your way to the other side, keep in mind the crack in the wall and go to the next room. Go through the passageway to the left to find the card "Spider" and avoid the fireballs. Kill all the enemies in the room and open the chest to get the boss room key. Also, next to the chest, there's a secret path leading to a chest with a star inside. Time to face the boss of the dungeon. Oh and don't worry about the cracks in the wall: like I said, there's a lot of backtracking to do in this game if you want to get all the collectibles. That boss is a dark version of you and can only be hit when he is stunned. Get close to a wall, bait him and dodge his tackle to knock him out then strike. He will summon bats and shoot projectiles at you from time to time. Note that there's an achievement if you beat him without being hit once. That includes the bats, the fireballs and the tackles. None of these attacks. Kinda tense but it's possible. And no worries, you can kick his butt over and over again after this fight once you come back to the mines. Go get your reward and leave the mines. THE SACRED GROVE Go east and enter Aogai City. Talk to the people to the north to know the existence of the bombs and someone who can give you that item. There a chest in the next screen to the right. Now, head to the eastern part of the city and open the chests. You will unlock new NPCs such as a storekeeper selling some new stuff like another rare card for 10000 glis (named "the Undead King"), a Double Twin player and a guy who wants to see a complete collection of Double Twin cards. These two last NPCs will only unlock achievements if you managed to complete and show your card collection and beat the champion. I think you don't need to get all the cards to beat the four difficulty levels of the Double Twin mini-game but it's best if you get them all. But enough talk about that, let's get the bombs. You need to talk to almost all the NPCs of the village, from one to another until you get to talk to the kid running around the well like a dummy (after a butterfly). You will get the bombs. Up to you to go back now to the places you explored to get some stuff or go south to the sacred grove in order to get the first part of the amulet of Gorn. I'll make a whole part before the last part of the walkthrough for that. Leave the town and go south. Equip the bombs and blast the rocks then go east to find a blue crystal. Touch it to enable the time travel. Everytime you will beat a crystal like this one, you will go back and forth in time. That means when you're in 2D mode, you can pass the small trees but not the dimensional stones and vice versa in the 3D mode. Go north, read the sign (important clue for later), then go west. Touch the crystal, pass the dimensional stone and enter the dungeon. Move cautiously around the room to reach the chest in the center of the lava maze and get the bow. There's also a secret passageway to the right with a star inside the chest and a cracked wall to blast with another star inside a chest. Time to leave the mini-dungeon and carry on. Go back to the past, stand before the torch and shoot an arrow towards the small tree to get rid of it once and for all. Yeah, you will change the future as well, that's neat. Go back to the 3D world, carry on, equip the bombs, put on next to the crystal and pass the dimensional stone to the north before it explodes. Go get the card "Kefka's ghost" inside the chest and do the same exact thing with the other crystal next to the chest to cross the small tree and go back to the 3D world. Touch the crystal after the dimensional stone to go back to the 2D world, pass the small tree, blast the rock to the right and light the torch up with an arrow. Burn both of the small trees and go back to the 3D world to collect the star in the chest to the right and go south. Blast the rock blocking the way to the torch and go east then north. Blast the rock, get rid of the monsters and go get the star in the chest. Cross the bridge to the east, shoot the crystal with the bow and pass the small tree. Note the entrance to another dungeon to the right, blast the rock, then go back on the second bridge, face east and shoot an arrow. You will light one of the torches necessary to open the way to the dungeon. Go south, then all the way around the small lake with the crystal, don't touch the crystal right now, cut the grass then shoot the torch and the tree with an arrow and blast the rock. At this point, you partially unlocked the way to the dungeon. Partially, you just removed the statue but there's a dimensional stone blocking the way. Touch the crystal to go to the 3D world and enter the dungeon. Kill the bats, push the torches and go to the next room. Kill the enemies, pick up the first half of the amulet in the chest and blast the wall to get a star in the chest. Leave the dungeon, pass the dimensional stone to the west and touch the crystal. Stand before the torch, face north and shoot an arrow. Go back to the crystal, put a bomb and pass the stone. Go light the last torch and face south to burn the small tree. Head back over there, touch the crystal, then the other one and go north to get the card "Kaeris" inside the chest. Leave the sacred grove with the way to the south and go back to Aogai City. THE RUINS OF SARUDNAHK Talk to Kaeris' uncle then go north-east to leave the town and go to your next destination: the ruins of Sarudnahk. You'll see the Black Citadel to the right but you can't go in there right now. Enter the ruins, open the chest and choose between both of the characters. Time to get the second half of that amulet. This is where you can get lots of glis. And equipment stuff, yeah. Although, the equipment you will find is meaningless, just for the "hack'n'slash" touch. You can get an achievement if you get your inventory complete. Kill the spiders and open the chests you will see on your way. Go to the far east and get the card "Dopple" after the bats. That one can be easily missed since it's out of bounds and the mini-map, once gotten, barely show the the path. Go north now, then get the map upgrade nearby the the northern way and go west to find a star in the chest. Save your progress, head north then carry on. Go north, beat the wasps then get a star from the chest and go south. Before the boss fight, there's a save point to the left and your way out of the ruins to the right. Open the chest to summon the boss and face it. The undead king is not that hard. His melee attacks does nearly nothing to you and the only threat that might worry you a bit is the magic missiles he spreads around him quite often. Other than that, he is super easy to beat. Go get the second half of the amulet after that fight, open the other chest that just appeared from nowhere to make a portal appear. Go back to Aogai City, save your progress and go to the Black Citadel to face the bad guy. DEJA-VU! (AND THE POWER OF LOVE) You will understand why I named that part with such a title. You are greeted by the bad guy who's named... Zephyros. It's a scr COLLECTIBLES FETCHING Besides the collectibles, there are achievements to unlock to get the 100%. Yeah, you need to find all the stars, cards and get all the achievements possible; which I find quite stupid to be fair. You cannot check in-game the achievements you got from this point and some of them can be missed. Anyway, let's focus on the last collectibles. Nearby the meadow, there's a tent. It's a merchant and he needs food. A good cooked Choboko meat will do the trick. You can only find chobokos in the field a bit to the north. It might take a while before finding one. The choboko is a strong enemy. If you have Babamut ready, use it! You will get raw Choboko meat. Go to Aogai village and talk to the old woman next to the desperate man to get the cooked Choboko meat. Bring it back to the merchant to get the extra heart. That's the only extra heart you will get, by the way. You might have seen a cave nearby the tent: go there. Welcome to one of the three secret areas of the game: the Shrine of the Babamut. No boss fight like in the Noria Mines (we will go back there, do not worry), just some stuff to find. Go right, try to go south and kill the skeletons. The bow is really effective on them, one shot and one bites the dust. Press the button, go left, avoid the whirlwinds and press another button. Go back, go north, cross the lava maze, press the button to the north ang go east. Blast the wall next to the statue to find a star in the chest and carry on. You will find a light puzzle further. Blast the wall to the north to find a star, solve the puzzle and go in the next room. Kill the enmies, grab the card "Babamut" leave the dungeon. Let's go to the last secret area of the game. And from the Shrine of the Babamut, it's not that far. Go a bit to the east after one of Edel Vale entrances to find a group of trees isolated. Enter the Forbidden lake. This is one of these places where getting all the stuff is a bit tricky. It requires bombs and bow and knowledge of the basics of time travel. Light the torch to the east with an arrow and go to the small island on the lake by the bridge. Stand before the torch you just lit, face north and shoot. Now, go north, ignore the rock and the crystal, cut the grass and go get the star in the chest. Head back to the crystal, put a bomb and go back near the lake. Burn the tree, go east, blast the rock, face south behind the torch and shoot. Leave the Forbidden Lake and go back there now to go the eastern part of the area. Go north to get a star in the chest, then east and south east to get another star. Cross the bridge, touch the crystal, go back to the nearest torch, face south and south. Head back to the crystal, touch it then put a bomb near the crystal and pass the small tree. Blast the rocks, then light the torches up and burn the small tree to the left. Shoot the crystal, pick up the star in the chest behind the dimensional stone, carry on, travel to the 2D world, put a bomb and pass the tree. Grab the star then the card "Zephyros" in the chests. You can leave the area now. Let's go back to Edel Vale, also known as the first area of the game. We have some stuff to collect here, waiting for us for a long time. For example, the chest blocked by a rock, east of the sign. Blast the rock to get the "Red Wizard" card. Go south-east after the small sandy island, blast the rock and cut the grass to get the card "Skeleton". That should be the last card of the game to find so you can now go beat the guy at Aogai City and show your collection to the other guy. The last destination is the Noria Mines, indeed. That's where the last collectibles are. All these cracked walls ready to be blow up with bombs. Go north, to find one of them and get a star. There's a cracked wall in the lava maze with a star and the last star is behind the crack in the wall before the boss room. Now you can do some preparation, save your progress and go in the Mana Tree located to the north of Aogai City. THE LAST BATTLE Time to face Zephyros for the last time. He kinda changed since the last battle. That boss can be a pain in your bottom since his main attack is a laser beam and he can trap you in the area of effect with his hands. You need to damage the hands first of all until they change color. Then, you will have to strike the red jewel on his torso and go as fast as possible behind him to strike the red orb before it goes back to its owner. Do this four times to break the stone armor and face the real Zephyros. You need to avoid the red balls and send the blue ones back to him with your sword. Be careful, you need good accuracy and timing to really hurt him with that projectile. Do this four times and Zephyros will be defeated. Congratulations, you saved the world and beat the game. BONUS PART: THE ACHIEVEMENTS Here is the achievements you can get in this game. Getting all of them is required to fully complete the game at 100% and unlock the sound test. LEFT KEY – No need to explain this one. You get it automatically at the beginning of the game. 16 COLORS – Get this achievement when you unlocked the 16-bit colors. 3D – Unlock the 3D world. EXPERIENCE POINTS – Unlocked when you get the "experience points" feature. STORYLINE – Unlocked when you get the "storyline" feature (the scrolling text). DVD PLAYER – Buy the DVD player from the merchant in Aogai City. CARD CHAMPION – Beat the Double Twin player in Aogai City (all the difficulty levels). CARD MASTER – Find all the Double Twin cards. EXTERMINATOR – Kill a bat with a bomb (can be done anywhere). SNIPER – Kill a skeleton with an arrow (can only be done in the Shrine of the Babamut and the Noria Mines) TAKOYAKI – Kill an Octorac with a flaming arrow (the Forbidden Lake is, to my knowledge, the best place to get that achievement easily). CHOBOKO HUNTER – Find and kill a Choboko (easily unlocked if you do the travelling merchant quest for the extra heart). STAR OF EVOLAND – Collect 10 stars. SUPERSTAR OF EVOLAND – Collect 20 stars. MEGASTAR OF EVOLAND – Collect the 30 stars of the game. CARD PLAYER – Win the easy difficult level of the Double Twin mini-game. CARD COLLECTOR – Find 15 cards. UNDERTAKER – Kill 100 skeletons. TURTLE SOUP – Kill 10 A'Tuins. HEAVY PURSE – Get 20000 glis in one play. HOARDER – Get 50000 glis in one play. IT WAS AN ACCIDENT – Break 20 pots in one play. EXCAVATIONS – Break a wall with a bomb. TIME TRAVELLER – Travel through time 12 times with the crystals. DODGEBALL – Kill the Noria Mines boss without getting a single hit. TRUE EXPLORER – Find the Hidden Cave. DUNGEON CRAWLER – Find the Shrine of the Babamut. CARTOGRAPHER – Find the Forbidden Lake. HERO – Defeat Zephyros in the Mana Tree (in other words, beat the game). That's all, folks. This has been the walkthrough of Evoland and Ihope you enjoyed it. We will do the second episode, no worries. Although, I never played Evoland 2 but it should be ok. I like exploring uncharted territories when it comes to video games, ha ha. Until next time, take care! -------------------- |
| Games have secrets, I have my eagle gaze. |
Affected by 'Laziness Syndrome'
Registered: 10-21-11
Location: France
Last Post: 2610 days
Last Active: 1784 days
09-12-18 01:59 AM
(hidden thread)
| ID: 1356306 | 47 Words
| (you don't have access to view this post) |
| Games have secrets, I have my eagle gaze. |
Affected by 'Laziness Syndrome'
Registered: 10-21-11
Location: France
Last Post: 2610 days
Last Active: 1784 days
09-09-18 01:07 AM
(hidden thread)
| ID: 1356251 | 75 Words
| (you don't have access to view this post) |
| Games have secrets, I have my eagle gaze. |
Affected by 'Laziness Syndrome'
Registered: 10-21-11
Location: France
Last Post: 2610 days
Last Active: 1784 days
09-05-18 12:31 AM
(hidden thread)
| ID: 1356199 | 190 Words
| (you don't have access to view this post) |
| Games have secrets, I have my eagle gaze. |
Affected by 'Laziness Syndrome'
Registered: 10-21-11
Location: France
Last Post: 2610 days
Last Active: 1784 days
04-06-18 05:19 AM
| ID: 1353062 | 77 Words
Even though I would say "Super Smash Bros Melee", I'll go with "Eternal Darkness: Sanity's Requiem". One of the best survival-horror experience you'll ever have in a videogame. How to describe that game? 1) Lovecraftian story style 2) Several characters with different abilities and story, although they have a common point that I cannot spoil 3) A game mechanic that involves weapons, spells and a sanity gauge 4) It's a game that LOVES playing tricks to you! How to describe that game? 1) Lovecraftian story style 2) Several characters with different abilities and story, although they have a common point that I cannot spoil 3) A game mechanic that involves weapons, spells and a sanity gauge 4) It's a game that LOVES playing tricks to you! -------------------- |
| Games have secrets, I have my eagle gaze. |
Affected by 'Laziness Syndrome'
Registered: 10-21-11
Location: France
Last Post: 2610 days
Last Active: 1784 days
02-28-18 10:56 AM
(hidden thread)
| ID: 1352258 | 19 Words
| (you don't have access to view this post) |
| Games have secrets, I have my eagle gaze. |
Affected by 'Laziness Syndrome'
Registered: 10-21-11
Location: France
Last Post: 2610 days
Last Active: 1784 days
02-28-18 10:53 AM
| ID: 1352257 | 776 Words
Hello everyone, this is Laian and I welcome you to another game guide. It's been a while, yeah. Things took a turn in my life so I had a bit of trouble to publish a fresh new walkthrough. Here we are with a game guide for beginners for the sequel to Mario's Picross: Mario's Picross 2. A game that never saw the occidental lands, sadly. - HOW TO START - Directional pad - control the cursor and Mario A button - B button - cancel / place X in a square Start - pause You have three categories: "How to play", "Easy Picross" and "Mario's Picross". 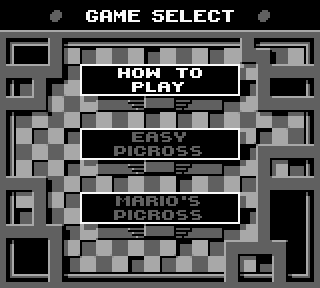 The first one stands for the tutorial part if you are not used to that kind of game. Pretty cool from Nintendo. The second one and the last one are two differents series of puzzles to solve. Start with the easy ones if you wish to get used to this. There's just a few of them to solve so it should be really quick. You control Mario with the directional pad. All you need to do is move him to a puzzle and he will look at it. Press the A button afterwards to start the puzzle. As for the the last category, it's basically the adventure mode. You have to go through nine worlds by solving each of the puzzles in every area. The only difference between the "easy picross" mode and "Mario's picross" mode is the fact that, in the adventure mode, it's not a one-shot. By that, I mean you need to solve the four parts of the puzzle to create the picture and fully complete it. Once you are done with one part, the games asks you which one you'd like to take care of. Use the directional pad to move the square in the big one at the top left hand corner then press the A button to confirm. The total of time spent will be shown when the puzzle is complete. Other than that, there's no specific order: you're free to try any puzzle you want, as long as every single of these are done. You will proceed to the next area afterwards. - JUST A FEW TIPS - NOTE: Some tips are the same as the ones I wrote in "Mario's Picross" game guide. I decided to re-write them and add new tips related to that game because there's no link between the first and the second game. You can start with either Mario's Picross or Mario's Picross 2, there's no big deal. 1) Always start with big numbers. 2) When you see "15" written in a column or a row, hold the A button and go from one side to the other. It's guaranteed that the line will be filled. The same goes to "0" except you need to hold the B button and go all the way to the other side. 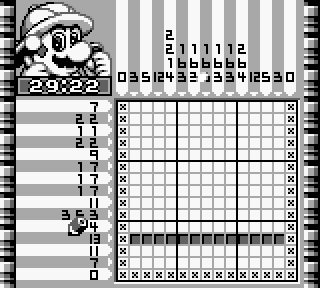 3) From "10" to "15", you can fill in the five squares of the middle block. 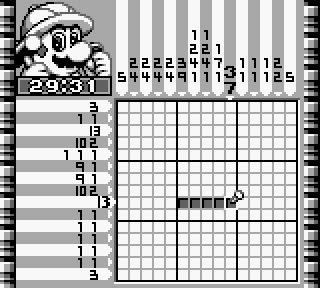 4) I don't recall that feature in the first game but you can erase (sort of) the numbers written in the rows and columns. Move the pen on the specific number and press the A button to do it. It will appear in light grey. You can undo this by pressing the A button once more. 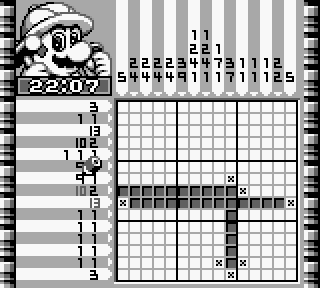 5) Even you have 30 minutes to complete each part of the puzzle (or puzzle if you play the "easy picross" mode), don't be so hasty. The penalty becomes a serious problem if you make lot of mistakes. 6) Learn from your mistakes, try to memorize what you managed to do correctly and what you did not for your next try. 7) You can switch to another part of the puzzle if it's getting tough for you and carry on later, since it keeps the progress you made. It may help in various situations. 8) Have fun! (ok, that's not a tip but it kinda helps to have positive mental attitude. That's the best way to overcome any difficulty in any game). The last thing I can tell you is about that shadow on the title screen the first time you play the game. It may be obvious but you can unlock and play with Wario in this game. You have to finish all the levels with Mario to be able to play with Wario and solve new puzzles. That's it for this short game guide. I see you next time for another walkthrough. Take care, bye bye. Hello everyone, this is Laian and I welcome you to another game guide. It's been a while, yeah. Things took a turn in my life so I had a bit of trouble to publish a fresh new walkthrough. Here we are with a game guide for beginners for the sequel to Mario's Picross: Mario's Picross 2. A game that never saw the occidental lands, sadly. - HOW TO START - Directional pad - control the cursor and Mario A button - B button - cancel / place X in a square Start - pause You have three categories: "How to play", "Easy Picross" and "Mario's Picross". The first one stands for the tutorial part if you are not used to that kind of game. Pretty cool from Nintendo. The second one and the last one are two differents series of puzzles to solve. Start with the easy ones if you wish to get used to this. There's just a few of them to solve so it should be really quick. You control Mario with the directional pad. All you need to do is move him to a puzzle and he will look at it. Press the A button afterwards to start the puzzle. As for the the last category, it's basically the adventure mode. You have to go through nine worlds by solving each of the puzzles in every area. The only difference between the "easy picross" mode and "Mario's picross" mode is the fact that, in the adventure mode, it's not a one-shot. By that, I mean you need to solve the four parts of the puzzle to create the picture and fully complete it. Once you are done with one part, the games asks you which one you'd like to take care of. Use the directional pad to move the square in the big one at the top left hand corner then press the A button to confirm. The total of time spent will be shown when the puzzle is complete. Other than that, there's no specific order: you're free to try any puzzle you want, as long as every single of these are done. You will proceed to the next area afterwards. - JUST A FEW TIPS - NOTE: Some tips are the same as the ones I wrote in "Mario's Picross" game guide. I decided to re-write them and add new tips related to that game because there's no link between the first and the second game. You can start with either Mario's Picross or Mario's Picross 2, there's no big deal. 1) Always start with big numbers. 2) When you see "15" written in a column or a row, hold the A button and go from one side to the other. It's guaranteed that the line will be filled. The same goes to "0" except you need to hold the B button and go all the way to the other side. 3) From "10" to "15", you can fill in the five squares of the middle block. 4) I don't recall that feature in the first game but you can erase (sort of) the numbers written in the rows and columns. Move the pen on the specific number and press the A button to do it. It will appear in light grey. You can undo this by pressing the A button once more. 5) Even you have 30 minutes to complete each part of the puzzle (or puzzle if you play the "easy picross" mode), don't be so hasty. The penalty becomes a serious problem if you make lot of mistakes. 6) Learn from your mistakes, try to memorize what you managed to do correctly and what you did not for your next try. 7) You can switch to another part of the puzzle if it's getting tough for you and carry on later, since it keeps the progress you made. It may help in various situations. 8) Have fun! (ok, that's not a tip but it kinda helps to have positive mental attitude. That's the best way to overcome any difficulty in any game). The last thing I can tell you is about that shadow on the title screen the first time you play the game. It may be obvious but you can unlock and play with Wario in this game. You have to finish all the levels with Mario to be able to play with Wario and solve new puzzles. That's it for this short game guide. I see you next time for another walkthrough. Take care, bye bye. -------------------- |
| Games have secrets, I have my eagle gaze. |
Affected by 'Laziness Syndrome'
Registered: 10-21-11
Location: France
Last Post: 2610 days
Last Active: 1784 days
12-07-17 08:19 AM
| ID: 1350323 | 113 Words
I could be known for anything else but I guess I'll always be known as the King of game guides. I'm not even surprised anymore. Although, I ask myself a question: do I really stand for that name? Do I deserve to be called like that even now? I'm sad I've been too busy these past days to vote for the Vizzed awards. Also sad that a few people voted. And most of all, sad that I can barely respect that one mission assigned to me for the 6 past years and barely keep the promises I've done in the past. Thanks to all the people who still support my work. Thank you. Although, I ask myself a question: do I really stand for that name? Do I deserve to be called like that even now? I'm sad I've been too busy these past days to vote for the Vizzed awards. Also sad that a few people voted. And most of all, sad that I can barely respect that one mission assigned to me for the 6 past years and barely keep the promises I've done in the past. Thanks to all the people who still support my work. Thank you. -------------------- |
| Games have secrets, I have my eagle gaze. |
Affected by 'Laziness Syndrome'
Registered: 10-21-11
Location: France
Last Post: 2610 days
Last Active: 1784 days
11-29-17 09:57 AM
(hidden thread)
| ID: 1350093 | 50 Words
| (you don't have access to view this post) |
| Games have secrets, I have my eagle gaze. |
Affected by 'Laziness Syndrome'
Registered: 10-21-11
Location: France
Last Post: 2610 days
Last Active: 1784 days
10-31-17 12:10 PM
(hidden thread)
| ID: 1349708 | 23 Words
| (you don't have access to view this post) |
| Games have secrets, I have my eagle gaze. |
Affected by 'Laziness Syndrome'
Registered: 10-21-11
Location: France
Last Post: 2610 days
Last Active: 1784 days
10-31-17 12:04 PM
| ID: 1349707 | 3179 Words
POSTS: 2220/2232
POST EXP: 457173
LVL EXP: 7705015
CP: 23738.9
VIZ: 3570490
Hello everybody, this is Laian and I welcome you to a brand new walkthrough. This month, no horror game. Maybe I'll bring one next month, I have a few of them in store for you. No, this time, it's about a game you might not know called "Toonstruck". What's that "Toonstruck", Laian? It's a gem of the game history. A great point'n'click game released for PC in 1995 starring a lot of guests like Christopher Lloyd, Tim Curry... I'm not kidding, this game is amazing. It's kinda like the movie "Who framed Roger Rabbit?" with lot of humor. Oh and I had to apologize for the disappearance of screenshots for this walkthrough. I knew how to take screen capture around the end of the game so it was too late. Oh well, at least it keeps the surprise if you ever want to play this game. So let's jump into it, shall we?
ROYAL PALACE First of all, go to the trophy room and talk to the footman. You will notice that he's really pleasant to discuss with. You have two items to take in this room but, with the footman here, it won't be possible at the moment. Go to the laboratory next to the locked cabinet to meet the engineer. He's lost his glasses so he won't talk to you at the moment. Go talk to the footman once more about the glasses and go back to the laboratory. Talk to the engineer now to get your mission. You'll get the plan for the Malevolator and the bottomless bag. The room to the right leads to the Cutifier. Go outside to see two guards. Talk to them. You'll see that the guard to the left drops a key when he does with his partner the little greeting dance. You need that key. You can talk to them about the king and other stuff but ask them to re-do that little dance and grab the key. Return to the castle and open the door downstairs to the left to access the king's bedroom. Ask Flux to get on the bed (right click to get the face of Flux and click on the bed) in order to find a rental coupon. Take the music box on the furniture and interact with the drawers until the top drawer and the bottom one are open (there's a note next to the mirror). You will unlock a secret passageway below the bed. Remove the rag to notice a trapdoor underneath, go in the secret room, ask Flux to step on the loose floorboard and press it. Flux will unlock the trapdoor. Go back to the room. Put the rag back and call the footman with the calling cord. He will go downstairs. Now go get the herring in the trophy room. You will have to come here later so leave the castle and go to town.
TOWN CENTER You can see four places: the pub, the bakery, the costume shop and the arcade. Go to the bakery first to meet two frogs. Actually, they are bakers and they are three but you will learn during the conversation that one is missing (well, kidnapped by Nefarious). Also, keep in mind the backdoor next to the piano and don't forget to interact with the piano to get two white keys of the piano. Now head back to the path and go to the pub. Try the organ to see that the troublesome mouse is a pro dancer. Might as well keep that in mind. Go talk to the bartender. The mouse will go next to the organ. Lovely... play the organ and ask Flux to activate the trap while the mouse is dancing to stun it. Go get it and talk to the bartender so he can know about this. You'll get an old mug. Also, notice the telephone on the counter. You'll need that for later. Go to the costume shop and talk to the lady. There's nothing to do but keep in mind that, with a coupon, you can rent a costume for free. And you have a rental coupon for this shop. However, keep it until you really know what to do with that (you also need to stamp it with the royal crest). Keep in mind the the place at the back of the room. Last stop, the arcade. Talk to the cashier and try the mini-game next to the pink Cutopian. The key to victory is to defeat your opponent by killing him or simply hitting the target a few times to smash your opponent with the spike ball. There are three stances: "up", "middle" and "low" that you can control with the two arrows. You have a tiny round shield to parry the projectiles thrown at you and a button to throw some at your opponent. You'll get the golden chain if you manage to beat the cashier. You can try the other mini-game but the mallet is tricked so you won't be able to win it for now. Now, leave the arcade and go back to the castle. Take the watering can in the trophy and place the old mug on the stand arm to re-open the door. Leave the castle and go south.
MEADOW Oh oh, looks like something happened here. Go talk to the rabbit. She has a cotton candy but she doesn't like that. She's willing to give it to you in exchange of popcorn. Carry on, since there's nothing else to do here.
COUNTRYSIDE Talk to the scarecrow. I'm not kidding, you can talk to the scarecrow since it's a living and adorable scarecrow. Keep in mind what he's gonna say about the new outfit, it'll be really important at some point. Go to the barn now.
BARN Use the watering can to take some fertilizer from the barrel, notice the haystack next to the machine and the gap on the machine. Then talk to the animals and leave the barn. Take the other road once you get to the corn field outside.
FOREST Besides the nuts, the squirrel and the pepper trapped behind the briar patch, two ways are brought to you. Go west to meet Big Bad Wolf. He needs a bottle of wine for a dinner. Now go back and go north. The device leads to Zanydu but it's out of order. Use the stunned mouse on the right hand, use the fertilizer to awaken the mouse and go in to activate the shuttle.
ZANYDU Go to lower Zanydu and go in the building by the door with the lit dot above. Go check the portraits and keep in mind the outfit of the guard and his badge (zoom in to see a color code) It's important for later. Talk to the sellers, ask for a demonstration of the glove, grab the stars then leave the shop. Go to upper Zanydu, read the advertisement on the wall of the "Jim's" and enter the building. Talk to the body builder and leave the gym club. Talk to the guard outside and head back to the pub in the town center.
TOWN CENTER Use the phone to call the guard since you know his number. There's a short period of time in which you can mix two colors to get one (and hopefully you did not forget your arts lessons otheriwse I suggest you to get a quick memo about primary and secondary color cause you'll need that). Memorize the hour. While you're here, try the quiz made by Wacme corp. Answer the five questions correctly by using the right colors to get your free prize. Go outside and take the package to get the Wacme juming beans. Go back to Zanydu now.
ZANYDU Go back to the Wacme shop, show the Wacme jumping beans in order to be able to use the gift-o-matic and get all the gifts availables. Head back to the barn.
BARN Use the magnet on the haystack and use the part you just found on the gap to get two sticks of butter. Head back to the bakery and give one of the two sticks of butter to the frogs to make a fresh raw dough made by Dough. Head back to Zanydu.
ZANYDU Go to Jim's in Upper Zanydu and use the last stick of butter on the vaulting horse and ask Jim to perform his fabulous performance. Now you can test the Pump-O-Tron. Time to head back to the town center.
TOWN CENTER On your way to the town center, you'll see that the barn has been turned into a malevolant barn. Yikes! Hopefully our three friends are alright. Go check inside. Yeah, it's now a masoshism club... that's lovely. Talk to them and grab some bad-looking gunk with the watering can. You need to come back later once you will have something to give to them. Go back to the arcade, use your Wacme mallet on the strength minigame to get the wine. Don't forget to take the broken bells on the floor before leaving and go to the forest.
FOREST Use the gunk on the briar patch and take the pepper. Go give the wine to B.B. Wolf. That was a bad idea unfortunately but here's the bright side: you progressed in your quest.
WOLF DEN Captured by the wolves, you are now in a stewpot for their dinner. Move the stewpot from left to right with perfect timing to break free. Put the dough on the roasting spit to bake a roll. Take back the spit then grab the book and leave the den. From now on, the henchmen sometimes will appear. You must hide in order to not be caught. If you're caught, you'll be sent to the prison in the malevolands nearby the wolf den. You can show your bread to Dough and Me but it does nothing to the story. Go to the malevolands.
THE MALEVOLANDS Talk to the bouncer and note the guys leaving the building. They wear the attire you need to get to enter. Take the hunk of meat in the bottom right hand corner of the screen (it can be easily missed), go in the prison, take the ink pad and remove to picture on the wall to find a safe. Solve the puzzle to find a portable hole. You can use it to fast travel to town centers easily. Go in the shop and talk to the seller (who looks and speaks strangely like a Dalek from the show Dr. Who). He knows everything apparently. Might as well come back here later with something really hard for him to answer.
BARN Go to the barn, use the watering can on the gunk and poison the chunk of meat with that. Use the music box with the stamp ink and use the music box on the coupon.
CENTER TOWN Go back to the costume shop, give the coupon to the girl and get the fly suit. Choose the Harlequin costume then and go back to the corn field.
COUNTRYSIDE Give the costume to the scarecrow to get the cloak and grab the corncob lying on the ground after the cinematic. Go back to the wolf den.
WOLF DEN Use the corncob on the fire to get some popcorn. Go back to the meadow.
MEADOW Give the popcorn to Fluffy Fluffy Bun Bun to get the cotton candy. Head to the royal palace.
ROYAL PALACE Use the spit on the hole to open the cabinet and pick up the stuffed cat. Go to Zanydu now.
ZANYDU Take the middle path and give the poisoned meat to the vulture. Pick up the arrow afterwards and the loose feather. Go fix the clock outside to 6:00 PM (since he makes thirty minutes to go back to his home sweet home in order to start his relaxation). That puzzle is a bit tricky since one lever activates the hour hand (relied on the position of the minutes hand, which means that if the minutes hand is set on 6 for example, the hour hand will move six times from where it was previously set) and the other lever activates both of the hands and let them move once differently (the minutes hand will move forth once and the hour hand will move back once). The guard will go away, leaving the toilets open. Go back to the barn.
BARN Give the feather and grab the glue. That's all you have to do here. Use the glue on the piano tiles and the cotton candy then use them on the stuffed cat. Finally, put the jumping beans into the stuffed cat and go to the forest.
FOREST Put the stuffed cat on the doorstep to watch a beatiful romance between a squirrel and a stuffed cat (still a better story than Twilight). Tell Flux to get the nuts and head to the town center.
TOWN CENTER Enter the costume shop and give the book to the lady to get the riddle book. Head to the Malevolands.
THE MALEVOLANDS Use the cloak to get in the club, go hide in the room to the right and talk to the owner of the club. You cannot do anything until the bear is playing bowling... unless you "glue" the ball while he doesn't notice it. Do it to get rid of him and use Flux to perform a strike and get the pins trophy. Now, go to the robot shop and use the riddle book to get rid of the shopkeeper. Take the plunger and go back to Zanydu.
ZANYDU Go to the toilets, use the red herring and flush when you see the sole (the green fish). This puzzle is really hard and you'll be lucky if you manage to get one in your first try. Time to fix the Cutifier at the Royal Palace.
ROYAL PALACE Go to the laboratory and put the items in this order clockwise: cloak, stars, sole, bells, spit, pins trophy, nuts, golden chain, arrow, pepper and roll. After the cutscene, you'll be trapped in Nefarious' castle.
NEFARIOUS' CASTLE Talk to the guard and take the yellow crystal and the mat when he doesn't see you. Use it on the bars to knock the guard out, pick up the key, use it on the keyhole, take your stuff and talk to the bird. Remember all the things it's going to say, it'll be important for a puzzle. Go in the room next to the jail, press the button, go in the vent and use the fly costume to go up. Take the chloroform wipes in the cabinet and go back down in the dungeon. Go upstairs, interact with the clown face and repeat the sequences like during a game of "Simon says". Enter the clown's room and talk to him. Wait until he puts his nose on the table to use the wipes on it. Grab the pin and the balloon and use the ballon with the tank. Go down in the dungeon, then to the Climatron room, go back to the bathroom, use the sink plug then the saps to spread some water on the floor and go back to the Climatron. Use the pin and switch to "cold". Go back to the bathroom and open the door. The guards will be blasted away. Leave the room, go downstairs and check the gargoyle head to the left to get a blue crystal and go in the room to the right. Check the bookshelf and solve the puzzle by pulling the books in this order (B for blue book and R for red book): B1, R1, R3, B2, B3, R4, R2 and B4. Go downstairs and use the music box to make the guard Use the key on the locked door and go in the new room. Be prepared for one heck of a mess while a nice waltz music is played in the background! It's my favorite part of the game. See these glasses on the bookshelf? Go get them. Unfortunately they went from the top of a bookshelf to a jack-in-a-box and finally a fan. Use the lever to make it faster, then move the desk chair and try to grab the glasses. Now, the plant has what you need. Use the fly costume to distract the plant and break the vase with the mallet. Grab the glasses and leave the room. Go back to the bathroom, fill the watering can with water and go to the kitchen. Use the water on the robotchef, take a turkey from the pile. Go back to the gargoyles sculptures, interact with the horn, go back to the bathroom, go down, take the pin back and head back to the gargoyles sculptures. Move the right gargoyle scultpure to get a green crystal. Now head to the room up the stairs after the gate you opened earlier, use the pin on the hopping crate to free Ray, the kidnapped frog. You'll get a red crystal. Now, go in the box and move slowly to the TNT located to the right. You must be careful because the henchmen will keep an eye from time to time and that can be troublesome if they spot you. Grab the TNT and head back to the kitchen. Open the stove, use a dynamite stick on the turkey, then use it on the embers and send the turkey to the gators upstairs. Now that the way is clear, go to the rec room, grab the pool cue and go all the way up until you stand before a gate. Use the gauntlet with the pool cue and use your new toy to activate the device. Use the balloon on you and stand before the intercom. Say that you're Lugnut since he has a high pitched voice and enter the room. Use the glasses and go face Ms. Fortune. Now that she's hypnotized, go back outside with her and stand before Nefarious' room. With her help, you can unlock the door. Go to the control panel, put the crystals in this order clockwise: blue, red, yellow and green. Pull down the lever, take the warp device and interact with the panel next to the door. Flip the switches until the lighting is on, the launching pad entrance and the ceiling bay door open and the force field deactivated. Jump into the Malevolator and watch the ending sequence. You finished Toonstruck, congratulations!
That's all for this walkthrough. I see you next time. Take care folks.
Hello everybody, this is Laian and I welcome you to a brand new walkthrough. This month, no horror game. Maybe I'll bring one next month, I have a few of them in store for you. No, this time, it's about a game you might not know called "Toonstruck". What's that "Toonstruck", Laian? It's a gem of the game history. A great point'n'click game released for PC in 1995 starring a lot of guests like Christopher Lloyd, Tim Curry... I'm not kidding, this game is amazing. It's kinda like the movie "Who framed Roger Rabbit?" with lot of humor. Oh and I had to apologize for the disappearance of screenshots for this walkthrough. I knew how to take screen capture around the end of the game so it was too late. Oh well, at least it keeps the surprise if you ever want to play this game. So let's jump into it, shall we?
ROYAL PALACE First of all, go to the trophy room and talk to the footman. You will notice that he's really pleasant to discuss with. You have two items to take in this room but, with the footman here, it won't be possible at the moment. Go to the laboratory next to the locked cabinet to meet the engineer. He's lost his glasses so he won't talk to you at the moment. Go talk to the footman once more about the glasses and go back to the laboratory. Talk to the engineer now to get your mission. You'll get the plan for the Malevolator and the bottomless bag. The room to the right leads to the Cutifier. Go outside to see two guards. Talk to them. You'll see that the guard to the left drops a key when he does with his partner the little greeting dance. You need that key. You can talk to them about the king and other stuff but ask them to re-do that little dance and grab the key. Return to the castle and open the door downstairs to the left to access the king's bedroom. Ask Flux to get on the bed (right click to get the face of Flux and click on the bed) in order to find a rental coupon. Take the music box on the furniture and interact with the drawers until the top drawer and the bottom one are open (there's a note next to the mirror). You will unlock a secret passageway below the bed. Remove the rag to notice a trapdoor underneath, go in the secret room, ask Flux to step on the loose floorboard and press it. Flux will unlock the trapdoor. Go back to the room. Put the rag back and call the footman with the calling cord. He will go downstairs. Now go get the herring in the trophy room. You will have to come here later so leave the castle and go to town.
TOWN CENTER You can see four places: the pub, the bakery, the costume shop and the arcade. Go to the bakery first to meet two frogs. Actually, they are bakers and they are three but you will learn during the conversation that one is missing (well, kidnapped by Nefarious). Also, keep in mind the backdoor next to the piano and don't forget to interact with the piano to get two white keys of the piano. Now head back to the path and go to the pub. Try the organ to see that the troublesome mouse is a pro dancer. Might as well keep that in mind. Go talk to the bartender. The mouse will go next to the organ. Lovely... play the organ and ask Flux to activate the trap while the mouse is dancing to stun it. Go get it and talk to the bartender so he can know about this. You'll get an old mug. Also, notice the telephone on the counter. You'll need that for later. Go to the costume shop and talk to the lady. There's nothing to do but keep in mind that, with a coupon, you can rent a costume for free. And you have a rental coupon for this shop. However, keep it until you really know what to do with that (you also need to stamp it with the royal crest). Keep in mind the the place at the back of the room. Last stop, the arcade. Talk to the cashier and try the mini-game next to the pink Cutopian. The key to victory is to defeat your opponent by killing him or simply hitting the target a few times to smash your opponent with the spike ball. There are three stances: "up", "middle" and "low" that you can control with the two arrows. You have a tiny round shield to parry the projectiles thrown at you and a button to throw some at your opponent. You'll get the golden chain if you manage to beat the cashier. You can try the other mini-game but the mallet is tricked so you won't be able to win it for now. Now, leave the arcade and go back to the castle. Take the watering can in the trophy and place the old mug on the stand arm to re-open the door. Leave the castle and go south.
MEADOW Oh oh, looks like something happened here. Go talk to the rabbit. She has a cotton candy but she doesn't like that. She's willing to give it to you in exchange of popcorn. Carry on, since there's nothing else to do here.
COUNTRYSIDE Talk to the scarecrow. I'm not kidding, you can talk to the scarecrow since it's a living and adorable scarecrow. Keep in mind what he's gonna say about the new outfit, it'll be really important at some point. Go to the barn now.
BARN Use the watering can to take some fertilizer from the barrel, notice the haystack next to the machine and the gap on the machine. Then talk to the animals and leave the barn. Take the other road once you get to the corn field outside.
FOREST Besides the nuts, the squirrel and the pepper trapped behind the briar patch, two ways are brought to you. Go west to meet Big Bad Wolf. He needs a bottle of wine for a dinner. Now go back and go north. The device leads to Zanydu but it's out of order. Use the stunned mouse on the right hand, use the fertilizer to awaken the mouse and go in to activate the shuttle.
ZANYDU Go to lower Zanydu and go in the building by the door with the lit dot above. Go check the portraits and keep in mind the outfit of the guard and his badge (zoom in to see a color code) It's important for later. Talk to the sellers, ask for a demonstration of the glove, grab the stars then leave the shop. Go to upper Zanydu, read the advertisement on the wall of the "Jim's" and enter the building. Talk to the body builder and leave the gym club. Talk to the guard outside and head back to the pub in the town center.
TOWN CENTER Use the phone to call the guard since you know his number. There's a short period of time in which you can mix two colors to get one (and hopefully you did not forget your arts lessons otheriwse I suggest you to get a quick memo about primary and secondary color cause you'll need that). Memorize the hour. While you're here, try the quiz made by Wacme corp. Answer the five questions correctly by using the right colors to get your free prize. Go outside and take the package to get the Wacme juming beans. Go back to Zanydu now.
ZANYDU Go back to the Wacme shop, show the Wacme jumping beans in order to be able to use the gift-o-matic and get all the gifts availables. Head back to the barn.
BARN Use the magnet on the haystack and use the part you just found on the gap to get two sticks of butter. Head back to the bakery and give one of the two sticks of butter to the frogs to make a fresh raw dough made by Dough. Head back to Zanydu.
ZANYDU Go to Jim's in Upper Zanydu and use the last stick of butter on the vaulting horse and ask Jim to perform his fabulous performance. Now you can test the Pump-O-Tron. Time to head back to the town center.
TOWN CENTER On your way to the town center, you'll see that the barn has been turned into a malevolant barn. Yikes! Hopefully our three friends are alright. Go check inside. Yeah, it's now a masoshism club... that's lovely. Talk to them and grab some bad-looking gunk with the watering can. You need to come back later once you will have something to give to them. Go back to the arcade, use your Wacme mallet on the strength minigame to get the wine. Don't forget to take the broken bells on the floor before leaving and go to the forest.
FOREST Use the gunk on the briar patch and take the pepper. Go give the wine to B.B. Wolf. That was a bad idea unfortunately but here's the bright side: you progressed in your quest.
WOLF DEN Captured by the wolves, you are now in a stewpot for their dinner. Move the stewpot from left to right with perfect timing to break free. Put the dough on the roasting spit to bake a roll. Take back the spit then grab the book and leave the den. From now on, the henchmen sometimes will appear. You must hide in order to not be caught. If you're caught, you'll be sent to the prison in the malevolands nearby the wolf den. You can show your bread to Dough and Me but it does nothing to the story. Go to the malevolands.
THE MALEVOLANDS Talk to the bouncer and note the guys leaving the building. They wear the attire you need to get to enter. Take the hunk of meat in the bottom right hand corner of the screen (it can be easily missed), go in the prison, take the ink pad and remove to picture on the wall to find a safe. Solve the puzzle to find a portable hole. You can use it to fast travel to town centers easily. Go in the shop and talk to the seller (who looks and speaks strangely like a Dalek from the show Dr. Who). He knows everything apparently. Might as well come back here later with something really hard for him to answer.
BARN Go to the barn, use the watering can on the gunk and poison the chunk of meat with that. Use the music box with the stamp ink and use the music box on the coupon.
CENTER TOWN Go back to the costume shop, give the coupon to the girl and get the fly suit. Choose the Harlequin costume then and go back to the corn field.
COUNTRYSIDE Give the costume to the scarecrow to get the cloak and grab the corncob lying on the ground after the cinematic. Go back to the wolf den.
WOLF DEN Use the corncob on the fire to get some popcorn. Go back to the meadow.
MEADOW Give the popcorn to Fluffy Fluffy Bun Bun to get the cotton candy. Head to the royal palace.
ROYAL PALACE Use the spit on the hole to open the cabinet and pick up the stuffed cat. Go to Zanydu now.
ZANYDU Take the middle path and give the poisoned meat to the vulture. Pick up the arrow afterwards and the loose feather. Go fix the clock outside to 6:00 PM (since he makes thirty minutes to go back to his home sweet home in order to start his relaxation). That puzzle is a bit tricky since one lever activates the hour hand (relied on the position of the minutes hand, which means that if the minutes hand is set on 6 for example, the hour hand will move six times from where it was previously set) and the other lever activates both of the hands and let them move once differently (the minutes hand will move forth once and the hour hand will move back once). The guard will go away, leaving the toilets open. Go back to the barn.
BARN Give the feather and grab the glue. That's all you have to do here. Use the glue on the piano tiles and the cotton candy then use them on the stuffed cat. Finally, put the jumping beans into the stuffed cat and go to the forest.
FOREST Put the stuffed cat on the doorstep to watch a beatiful romance between a squirrel and a stuffed cat (still a better story than Twilight). Tell Flux to get the nuts and head to the town center.
TOWN CENTER Enter the costume shop and give the book to the lady to get the riddle book. Head to the Malevolands.
THE MALEVOLANDS Use the cloak to get in the club, go hide in the room to the right and talk to the owner of the club. You cannot do anything until the bear is playing bowling... unless you "glue" the ball while he doesn't notice it. Do it to get rid of him and use Flux to perform a strike and get the pins trophy. Now, go to the robot shop and use the riddle book to get rid of the shopkeeper. Take the plunger and go back to Zanydu.
ZANYDU Go to the toilets, use the red herring and flush when you see the sole (the green fish). This puzzle is really hard and you'll be lucky if you manage to get one in your first try. Time to fix the Cutifier at the Royal Palace.
ROYAL PALACE Go to the laboratory and put the items in this order clockwise: cloak, stars, sole, bells, spit, pins trophy, nuts, golden chain, arrow, pepper and roll. After the cutscene, you'll be trapped in Nefarious' castle.
NEFARIOUS' CASTLE Talk to the guard and take the yellow crystal and the mat when he doesn't see you. Use it on the bars to knock the guard out, pick up the key, use it on the keyhole, take your stuff and talk to the bird. Remember all the things it's going to say, it'll be important for a puzzle. Go in the room next to the jail, press the button, go in the vent and use the fly costume to go up. Take the chloroform wipes in the cabinet and go back down in the dungeon. Go upstairs, interact with the clown face and repeat the sequences like during a game of "Simon says". Enter the clown's room and talk to him. Wait until he puts his nose on the table to use the wipes on it. Grab the pin and the balloon and use the ballon with the tank. Go down in the dungeon, then to the Climatron room, go back to the bathroom, use the sink plug then the saps to spread some water on the floor and go back to the Climatron. Use the pin and switch to "cold". Go back to the bathroom and open the door. The guards will be blasted away. Leave the room, go downstairs and check the gargoyle head to the left to get a blue crystal and go in the room to the right. Check the bookshelf and solve the puzzle by pulling the books in this order (B for blue book and R for red book): B1, R1, R3, B2, B3, R4, R2 and B4. Go downstairs and use the music box to make the guard Use the key on the locked door and go in the new room. Be prepared for one heck of a mess while a nice waltz music is played in the background! It's my favorite part of the game. See these glasses on the bookshelf? Go get them. Unfortunately they went from the top of a bookshelf to a jack-in-a-box and finally a fan. Use the lever to make it faster, then move the desk chair and try to grab the glasses. Now, the plant has what you need. Use the fly costume to distract the plant and break the vase with the mallet. Grab the glasses and leave the room. Go back to the bathroom, fill the watering can with water and go to the kitchen. Use the water on the robotchef, take a turkey from the pile. Go back to the gargoyles sculptures, interact with the horn, go back to the bathroom, go down, take the pin back and head back to the gargoyles sculptures. Move the right gargoyle scultpure to get a green crystal. Now head to the room up the stairs after the gate you opened earlier, use the pin on the hopping crate to free Ray, the kidnapped frog. You'll get a red crystal. Now, go in the box and move slowly to the TNT located to the right. You must be careful because the henchmen will keep an eye from time to time and that can be troublesome if they spot you. Grab the TNT and head back to the kitchen. Open the stove, use a dynamite stick on the turkey, then use it on the embers and send the turkey to the gators upstairs. Now that the way is clear, go to the rec room, grab the pool cue and go all the way up until you stand before a gate. Use the gauntlet with the pool cue and use your new toy to activate the device. Use the balloon on you and stand before the intercom. Say that you're Lugnut since he has a high pitched voice and enter the room. Use the glasses and go face Ms. Fortune. Now that she's hypnotized, go back outside with her and stand before Nefarious' room. With her help, you can unlock the door. Go to the control panel, put the crystals in this order clockwise: blue, red, yellow and green. Pull down the lever, take the warp device and interact with the panel next to the door. Flip the switches until the lighting is on, the launching pad entrance and the ceiling bay door open and the force field deactivated. Jump into the Malevolator and watch the ending sequence. You finished Toonstruck, congratulations!
That's all for this walkthrough. I see you next time. Take care folks. -------------------- |

| Games have secrets, I have my eagle gaze. |
Affected by 'Laziness Syndrome'
Registered: 10-21-11
Location: France
Last Post: 2610 days
Last Active: 1784 days
10-16-17 09:28 AM
| ID: 1349004 | 316 Words
POSTS: 2219/2232
POST EXP: 457173
LVL EXP: 7705015
CP: 23738.9
VIZ: 3570490
I know my reply is kinda late since my birthday has been celebrated for three days but I've been quite busy. I just want to thank all the people who wished me a happy birthday, either in this thread or in my profile page. Even though I'm not really active due to things changing in my everyday life, I don't forget I have you, my friends, and a position to take care. Like EX Palen said, it's something I partially co-created and it's something I cherish. I want to keep it shine as long as I can, even if the current turns in my real life make this quite hard to do so. I don't forget some people were and are still on my side in this quest. Being 29 is something good, although I feel a bit uncomfortable with that. It's not because I'm getting close to 30, it's something else. Something a bit long to explain but, to make it short, I spent so much time going back and forth, not really doing what's best for me and my life and so I've lost parts of my life in the oblivion, besides what some "stole" from me. It's now quite hard for me to fix the errors of the past, to fix what's really missing in my life. I'm still realizing that, if I had made the wise choices, I would not have wandered around so long and some stuff would have been done so far. There's one more thing that I always keep in my mind for my 29th birthday. My dad was working during the night of the 12th and the 13th. He sent me a message at midnight for my birthday, before I Being 29 is something good, although I feel a bit uncomfortable with that. It's not because I'm getting close to 30, it's something else. Something a bit long to explain but, to make it short, I spent so much time going back and forth, not really doing what's best for me and my life and so I've lost parts of my life in the oblivion, besides what some "stole" from me. It's now quite hard for me to fix the errors of the past, to fix what's really missing in my life. I'm still realizing that, if I had made the wise choices, I would not have wandered around so long and some stuff would have been done so far. There's one more thing that I always keep in my mind for my 29th birthday. My dad was working during the night of the 12th and the 13th. He sent me a message at midnight for my birthday, before I -------------------- |
| Games have secrets, I have my eagle gaze. |
Affected by 'Laziness Syndrome'
Registered: 10-21-11
Location: France
Last Post: 2610 days
Last Active: 1784 days
09-02-17 05:10 AM
| ID: 1347192 | 33 Words
"One of the best RPG got a remake? Oooooh yeah, take my cash!" I had to pre-order the game on Steam, really. And if you guys can afford it, just go for it I had to pre-order the game on Steam, really. And if you guys can afford it, just go for it -------------------- |
| Games have secrets, I have my eagle gaze. |
Affected by 'Laziness Syndrome'
Registered: 10-21-11
Location: France
Last Post: 2610 days
Last Active: 1784 days
09-01-17 05:56 AM
(hidden thread)
| ID: 1347165 | 57 Words
| (you don't have access to view this post) |
| Games have secrets, I have my eagle gaze. |
Affected by 'Laziness Syndrome'
Registered: 10-21-11
Location: France
Last Post: 2610 days
Last Active: 1784 days
09-01-17 05:51 AM
| ID: 1347164 | 730 Words
POSTS: 2216/2232
POST EXP: 457173
LVL EXP: 7705015
CP: 23738.9
VIZ: 3570490
Hello everyone, Laian here with another game guide. Well, in a rush because of technical issues I won't explain, I made a short one this time. Welcome to my game guide of "Mario's Picross", a game released for Game Boy in 1995. Fun fact: I saw the commercial when I was a kid and I really wanted this game. Never got it (sadness...). It's a puzzle game, I know. Let me go straight to the point. I won't spoil anything, I won't show the solutions to the puzzles. It would totally ruin the fun out of this game. See this guide as a guide for beginners, like the one I made for Fatal Labyrinth, with useful tips and all. So let's get started right now!
PART 1: MARIO'S PICROSS, WHAT'S THIS? As I said in the introduction, it's a puzzle game. A picture puzzle game, to be fair. Which means the solution of the puzzle will represent a picture. There are over 200 puzzles, waiting for you to be solved. First of all, you choose one of the three files available. Then, you can see three categories. "How to play" is the tutorial (or how to play the game... without playing it, since everything will be automatic an you'll just have to press the "A" button to proceed to the next tip). So why is this game guide useful? There is stuff the game does not tell you, so I'll tell the hidden stuff. It's just a few tips and that's all. Then, "Easy picross" is a first series of puzzles you can solve. Easy stuff, starting with these puzzles is highly recommended. You can choose any puzzle you want to solve, there's no order. And finally we have the last category "Picross". More puzzles to solve in two other categories named "Kinoko" and "Star". When you start the game, you can only access the "Kinoko" section. The other category is locked and you have to complete the other puzzles in order to be able to solve the last puzzles of the game.
PART 2: CONTROLS AND TIPS (AND ADVICES) Directional cross: move the cursor A button: B button: cancel/ mark an empty square with a "X" Start button:
Basic controls indeed. Note that you can hold the A button and a direction to chisel a series of squares. The same goes to the B button and a direction. Needless to press the A button once, then move to another square and press the A button once more. Now, it's time for a few tips and advices. It doesn't hurt to know a few things in order to make puzzle solving way easier. 1) Always start with what's easy. A row and a column is a set of fifthteen little squares. If you see a row or a column with the number "15", chisel all the squares. If you see "0", well... just mark all the squares with a X. 2) Always keep track of each row and column. By that, I mean that when you're done with filling the correct squares, just mark the others with a X. It will make puzzle solving a bit easier. 3) You get a time penalty if you make a mistake. One is ok, two... well, you better be careful. More than two? Awww. Try to take your time and see what you can do easily and then what you have a bit of trouble with. And don't worry: if you fail, don't give up and learn from your mistakes. 4) Always chisel the fives middle square of a row or a column if the number is 10 or above. Now, you know everything to solve these puzzles. Time to take on the challenge, if you dare.
An that concludes this short game guide. Again, no spoilers so you can solve the puzzles by yourself. If you were expecting mister Laian to give the solutions to all the puzzles, sorry to burst your bubble but it would ruin the fun. And for the last time, I had to do a short guide in a rush because of a technical issue (my bad luck, yay...). Next month, I should be able to make a better guide for you folks, the one I actually wanted to make this month. Hopefully nothing bad happens. Until next time, take care.
-------------------- |

| Games have secrets, I have my eagle gaze. |
Affected by 'Laziness Syndrome'
Registered: 10-21-11
Location: France
Last Post: 2610 days
Last Active: 1784 days
08-31-17 02:31 PM
(hidden thread)
| ID: 1347136 | 116 Words
| (you don't have access to view this post) |
| Games have secrets, I have my eagle gaze. |
Affected by 'Laziness Syndrome'
Registered: 10-21-11
Location: France
Last Post: 2610 days
Last Active: 1784 days
08-30-17 07:32 AM
(hidden thread)
| ID: 1347086 | 190 Words
| (you don't have access to view this post) |
| Games have secrets, I have my eagle gaze. |
Affected by 'Laziness Syndrome'
Registered: 10-21-11
Location: France
Last Post: 2610 days
Last Active: 1784 days
08-17-17 04:20 AM
| ID: 1346585 | 44 Words
POSTS: 2213/2232
POST EXP: 457173
LVL EXP: 7705015
CP: 23738.9
VIZ: 3570490
I've been waiting so long to say this to you: congrats and welcome to the veteran club, sis' I rarely post on Vizzed these past days, weeks, months... But I wouldn't have missed the chance to greet you in the circle of Vizzed veterans. I rarely post on Vizzed these past days, weeks, months... But I wouldn't have missed the chance to greet you in the circle of Vizzed veterans. -------------------- |
| Games have secrets, I have my eagle gaze. |
Affected by 'Laziness Syndrome'
Registered: 10-21-11
Location: France
Last Post: 2610 days
Last Active: 1784 days
