

 User Notice
 2,232 Posts Found by Laian
06-30-17 07:01 AM
(hidden thread)
| ID: 1342038 | 333 Words
| (you don't have access to view this post) |
| Games have secrets, I have my eagle gaze. |
Affected by 'Laziness Syndrome'
Registered: 10-21-11
Location: France
Last Post: 1854 days
Last Active: 1027 days
05-04-17 11:48 AM
(hidden thread)
| ID: 1337305 | 37 Words
| (you don't have access to view this post) |
| Games have secrets, I have my eagle gaze. |
Affected by 'Laziness Syndrome'
Registered: 10-21-11
Location: France
Last Post: 1854 days
Last Active: 1027 days
04-29-17 09:54 AM
(hidden thread)
| ID: 1336779 | 36 Words
| (you don't have access to view this post) |
| Games have secrets, I have my eagle gaze. |
Affected by 'Laziness Syndrome'
Registered: 10-21-11
Location: France
Last Post: 1854 days
Last Active: 1027 days
04-29-17 09:50 AM
| ID: 1336778 | 1819 Words

POSTS: 2209/2232
POST EXP: 457173
LVL EXP: 7137975
CP: 23726.2
VIZ: 3569925

Hey folks, Laian here and today we're going to play another game I used to play when I was a kid called "Wizards and Warriors X: The Fortress of Fear". I used to play this game on my uncle's Gameboy at that time since he only had this game and Tetris. I couldn't beat it when I was an innocent but, thanks to the magic of save states, it's now buried once and for all. I've always wanted to beat it, to see the final boss and all. Let me tell you, this game is quite challenging to beat. Not impossible but really hard so be prepared. Time to jump into the world of "Wizards and Warriors X: The Fortress of Fear".
STAGE 1,0 This stage has a problem you may find irritating: there are two rows of platforms, which make the progress quite tedious. Remember you have three lives and sudden death is your prize if you fall down. Jump on the first platform to find a locked chest and a gem. Grab the key, go open the chest to get three gems or keep it for later. Yeah, you have to manage your stock of keys. I suggest you to keep it for later, there's a better loot in another chest later in this level. Keep going east, collect the chalice, step on the clouds to cross the gap and open the locked chest if you kept the key you found earlier to get a bonus life. Otherwise, say goodbye to that loot and carry on. Pick up the piece of meat and enter the castle.
STAGE 1,1 Just keep moving forward and make those gaps until you find a key. You can go open the chest you found a few steps earlier to find a life potion (which fully restores your life and it's instantly consumed) or you can go up and open the other chest that contains a shield. The door down below leads to a room with some goodies and the other door leads to the next level. You're back here, on the upper part of the ramparts this time. Slow progress is strongly recommended as you will encounter a new type of enemy with two patterns. There's also a chest to unlock that contains a resistance spell. It grants you a temporary invincibility, which might be useful for this part of the level. Keep going west, go up and get ready to face the boss.
STAGE 1,3 Your opponent is a giant bat. As you can tell, you only have four platforms on which you can land. His pattern is the same and there's a safe platform you can step on in order to not be hit by the enemy and hit the boss a few times when he divebombs (with the up arrow and A button) then go to the left when he disappears from the screen and repeat the operation. Hit him a few times until he dies and go through the door.
STAGE 2,0 A level full of dripping acid, fireballs, spiders and bats. A real corridor of death if you don't pay attention to your surroundings. Things are getting seriously serious now so slow progress is the key. Grab all the goodies including the key and open one of the chests with this (or both if you still have a spare key). The one above your head has some jumping boots and the other one contains a life potion. I really recommend taking the jumping boots or else the gap a bit farther will be difficult to get through. Collect the keys, open the door and proceed to the next level.
STAGE 2,1 Tired of fireballs? If you said "yes", I'll be pleased to tell you that there's more. A locked chest contains a bonus life after a series of platforms. Carry on, grab the key, fall down to get a bonus life and go back up. Use the platforms to get to the locked door, unlock it with the key and proceed to the next stage.
STAGE 2,2 Go east until you see a locked chest above your head. Go up, then left to get the key, open the chest to find some jumping boots and carry on. There's a shortcut leading to the next stage if you jump on the ledge to the left of the key and fall down. Collect the key kept by a creature after the giant gap, reach the chest containing some jumping boots and carry on. You have three ways now: one past the skull charging towards you, another one to the left leading to the bonus room with some goodies and the last one locked. The upper right path is safe and will let you avoid most of the obstacles in the next part. Up to you to choose which one seems wise for you.
STAGE 2,3 If you start from the bottom road, you will have a bad time with a series of fireballs, enemies and blazing torches spitting fireballs. If you start from the platform up above, you will avoid all of this. The gap leading to the bonus life is nearly impossible to do. Too bad, especially when you see at the end of the line another path you can go through, sadness. Anyway, go through the passageway to proceed to the next part.
STAGE 2,4 Just make your way to the giant skull by killing the flying skulls and jump inside his mouth to get to the next level. There's no bonus to get, no secrets to find.
STAGE 3,0 Go left, jump from platform to platform to find a secret part with a bonus life and a key. Go back east and keep going east. Kill the enemies, dodge the throwing axes and grab the piece of meat standing before the fi
STAGE 3,1 Go forward until you reach a locked chest. Inside, there's some boots of jumping. There's a key a bit farther after the two floating platforms. Go back and open the chest with that, as you won't be able to make the next gap leading to the end of the level without these boots. Stand right in front of the door, press up arrow and go to the next level.
STAGE 3,2 Nothing really challenging except for the three spinning axes after the first opening. Make your way to the end of the level. You can get past the axes but it requires a perfect timing. The other passageway leads to the bonus room. Up to you to choose if you want all the goodies or just go face the boss.
STAGE 3,3 Your opponent is a giant skull floating around. Leap down and stay on the edge of the ledge. Wait until the skull comes at you to hit him twice or three times with the combination of the up arrow and the attack button and leap over him. Duck afterwards and head back to the last spot and repeat the operation until he dies.
STAGE 4,0 I call this level "the long corridor of doom", simply because there's a ton of enemies and a few traps. Make your way to the end of the corridor slowly and carefully, grab the goblet and the gems and it will be alright. Just step on the elevator and go left to go to the next level. Now, there is a secret part. Step on the elevator and leap over the wall. You'll find a chalice, two chests containing a shield of protection and some gems. The door is useless and leads nowhere since there's no transition to another level, nor a bonus level. I guess it was supposed to leads somewhere but the developers didn't remove it or it's just there to trick you.
STAGE 4,1 Welcome to the top of the castle. A few more stages and you will face the final boss. In this stage, a few items are tricky to get and requires good skills to get without getting hit by the foes. Other than that, two chests await you halfway containing some gems and a potion of healing. Keep going west, use the cloud to make the gap and prepare yourself for the upcoming boss fight.
STAGE 4,2 And your next opponent is a giant bird. I found a good safe spot for this fight. Step where the character is, as shown on this screenshot.
When he comes at you, duck. He will come back but he will stop before you, which lets you an opportunity to strike. Press the up arrow and the attack button a few times and repeat the operation.
STAGE 5,0 That last part of the game is an amazing maze (it's been a while since I didn't say that). Right at the beginning, you can see the door to the next part of the level. You can go there directly but you will miss a lot of goodies hidden past the wall to the left, such as a fair amount of gems, a bonus life, a key and a locked chest. Teasing, isn't it? Well, all you have to do is step on the elevator and jump on the top of the wall to get all these items. Go through the door, jump from platform to platform and reach the upper part of the room. In the next room, reach the elevator, go get the piece of meat and go back up. Take the key, go up the stairs, grab the gems, carry on and go right. Kill the skulls, then go right in the next room, ignore the door and go get the potion of life in the chest and the goblet. Go open the door, stay at the lower part of the screen, grab the key and carry on. Kill the skulls, grab the goblet and go back on the elevator. Go through the door at the top right hand corner, make your way through that room, ignore the door and go right to face Malkil. This boss is not that hard when you know his pattern well. You have to jump between both of the columns and avoid his shock powers. Give him the best you have in store for him and, after a good amount of hits and a decent timing, all your efforts will be rewarded by a nice endgame screen. I know, it's just a screen with a message, what did you expect to have after all this? Fireworks all over the screen? Could be worse. Oh well, congratulations! You just beat "Wizards and Warriors X: The Fortress of Fear".
Well that's all folks. Quite a short game guide I know but the next one will be a gem of the videogame history. Stay tuned next month and take care!
|


| Games have secrets, I have my eagle gaze. |
Affected by 'Laziness Syndrome'
Registered: 10-21-11
Location: France
Last Post: 1854 days
Last Active: 1027 days
03-07-17 03:05 PM
| ID: 1331894 | 77 Words
Something as simple as minus with minus and plus with plus and some people find a way to screw this up, even with a damn instruction book included with the system in the box Personally, I did not encounter any problems and I pre-ordered the system with The Legend of Zelda: Breath of the Wild. I must have like, 10 hours of playtime, and no issues in-game. I might as well knock on woods, who knows. Personally, I did not encounter any problems and I pre-ordered the system with The Legend of Zelda: Breath of the Wild. I must have like, 10 hours of playtime, and no issues in-game. I might as well knock on woods, who knows. |
| Games have secrets, I have my eagle gaze. |
Affected by 'Laziness Syndrome'
Registered: 10-21-11
Location: France
Last Post: 1854 days
Last Active: 1027 days
03-05-17 09:26 AM
| ID: 1331710 | 177 Words
I pre-ordered it on the very first days of January with The Legend of Zelda: Breath of the Wild. I claimed it yesterday, then played the game for five hours to celebrate that moment before going to bed. I have to say that I kept my own opinion on that system in spite of what some said on the internet. I really wanted to get a Nintendo Switch and that new Legend of Zelda game and God knows how obstinate I am. The system costs around 300 euros (I'm using my currency: convert if you dare, I'm too lazy), depending on where you bought it. I preferred buying it at a store, they guaranteed to get one for me in exchange of a payment on account of 30 euros that they removed from the initial price when I went to the shop to get the Nintendo Switch. The game costs 70 euros. And I got for pre-ordering all that stuff a free nice key chain in its black velvet bag. Disappointed by all this? Not at all. The system costs around 300 euros (I'm using my currency: convert if you dare, I'm too lazy), depending on where you bought it. I preferred buying it at a store, they guaranteed to get one for me in exchange of a payment on account of 30 euros that they removed from the initial price when I went to the shop to get the Nintendo Switch. The game costs 70 euros. And I got for pre-ordering all that stuff a free nice key chain in its black velvet bag. Disappointed by all this? Not at all. |
| Games have secrets, I have my eagle gaze. |
Affected by 'Laziness Syndrome'
Registered: 10-21-11
Location: France
Last Post: 1854 days
Last Active: 1027 days
02-27-17 09:36 AM
(hidden thread)
| ID: 1331140 | 6 Words
| (you don't have access to view this post) |
| Games have secrets, I have my eagle gaze. |
Affected by 'Laziness Syndrome'
Registered: 10-21-11
Location: France
Last Post: 1854 days
Last Active: 1027 days
02-27-17 09:33 AM
| ID: 1331139 | 2699 Words
POSTS: 2205/2232
POST EXP: 457173
LVL EXP: 7137975
CP: 23726.2
VIZ: 3569925
Hello folks, Laian here with a new game guide. Today, it's a DS game I played a lot called «Trace Memory» (a.k.a «Another Code» in the European version). It feels good to replay this game and make a game guide for you, frankly. Besides Ghost Trick: Phantom Detective, Phoenix Wright and other games of that kind, I really like this game. So, if you're ready for a memory lane (or not, if you're new to this series then you're welcome aboard), I suggest we start that game guide without wasting any more time. Let's just jump into it, shall we?
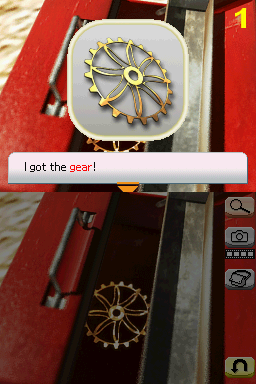
CHAPTER 1 First things first, talk to the lady. She's your father's little sister, Jessica. Talk about all the topics available to learn more about the story. The red text will always open new topics to talk about. Click on the «back» icon below to end the conversation and carry on. Once you landed on Blood Edward Island, talk to the captain. Once more, talk about all the available topics then click on the «back» button. You'll get some candies from the captain. Go search Jessica. You'll hear a scream right when you will reach the drawbridge. Unfortunately, you can't get to the other part of the island if the drawbridge is raised. Check the panel to your right, turn the wheel twice and carry on. Check the stone then move on until you get to a gate and a signboard. The gate is locked, sadly. However, there's a puzzle to solve. Just check the signboard. Remember the symbol to its right once you fixed it (or take a picture so you will get it memorized), it will come to an use later in the game. Go right now, skip the road blocked by big rocks and go right. You will get to a cemetery. Check the tombstones then the stone slab that blocks another way. Move it to unlock the path and see a letter carved on the back of the stone. Talk to the ghost kid afterwards. Carry on after the discussion to get past the obstacle you saw earlier and go forth. Check the grinder and try to clean the plate. Alas, you can't without the proper tool. Check the red toolbox next to the minecart and grab the gear (1). Check the other toolbox nearby the water tower to find a metal brush. Now you can scrape the rust off the plate. Remember the symbol, go back to the gate, check it to find a panel and
CHAPTER 2 Head to the front door of the mansion, talk to D then go inside. Look around and discuss once more with D. Take a photo of both of the paintings and merge the two photos to get a code. Use this code to open the door to the north with this code and proceed to the next area. Go check the painting, then go in the room to the left to enter the music room. Pick up the part of an essay on the ground, then the display case to find a DTS card. Check the book shelf to find another puzzle to solve. Unfortunately, you need to find more books in order to solve it. Leave that room and go to the butler's room to the right. Check the wardrobes to find some information about the Edward family and a puzzle to solve. You'll get the silver medal as a token of your success. Check the notepad on the desk and try to reveal what was written. The pencil lead breaks so you need another way to do that. Check the fi
CHAPTER 3 Go in the art studio to the right, check the drawing of Frannie and the desk to find a DTS card and another drawing. Check the chest, note all the stuff inside and leave the room. Go in the next room, check the dresser to find a DTS card, then the bottle on the table. You'll have to come back later since Ashley cannot open it with her bare hands. Examine the dolls between the beds, go back to the golden bird room and pick up the doll holding a drum. Head back to the art studio room, grab the hammer in the chest and go back to Mary and Henry's room. With the hammer, break the bottle and collect the gold bird key and a letter. Put the doll where it belongs to. You'll learn from D that device is a music box and needs a key to work. Go in the second room to the right, which is Frannie's room. Examine the teddy bear on the shelf to your right, then the desk to find a DTS card in the drawer and the sketchbook. Looks like you'll have to complete what has been unfinished. Check the ribbon on the bed then the wooden box on the shelf to find two stamps. You can complete the sketchbook by closing your system twice (without turning it off). Now explore the second room to the left. Check the framed picture on the table (you need to do some kind of reflection by slowly closing your system until you get a message), then the painting above the fi
CHAPTER 4 Check the newspaper on the table and the fi
CHAPTER 5 Go in the room to the right, check the book shelf next to the fi
CHAPTER 6 Go down the stairs to get to the cave. Walk in the cave until you find D's other shoe and carry on. You will meet Bill. Talk to him. After the conversation, you have to answer Bill's questions as he's pointing the gun towards Richard. Answer «Someone came in», «She hid me in the closet», «I heard Mom's voice», «You can't have Trace!», «I heard a gunshot», «Bill». After the discussion, Bill will die, falling into the endless pit. Cross the bridge after the conversation with your dad and head to the bay.
EPILOGUE This is a series of conversations. Talk to the captain, then to your dad and finally to D. If he remembered enough things about his story, he will ask you to touch the mark on the chest. Otherwise, he will stay on the island for the rest of his ghostly life. Yep, there are two endings as you can tell. Talk to your dad and watch the credits after the discussion. And blow the candles on your birthday cake. Save your progress and beat the game twice to get another surprise at the end.
BONUS PART: D's Memory Recovery Since a good part of the game is based on D's story, you need to find stuff that will help him recover his memory. Doing so will grant you the good ending at the end of the game. Here's the complete list of what you must do to get that ending, chapter by chapter and in order of appearance. Some of them are easy to get but some others are missable. Note that I mentioned some of them in the first part of the game guide and, most important, the ones you need to do during chapter 1 cannot be done in the next chapters since you can't leave the mansion.
CHAPTER 1 -Check the stone slab saying «Edward Mansion» to the left of the road. -Check Thomas and Henry's tombstones in the cemetery. -Check the metal slab on the machine at the mine entrance. -Find Sayoko's picture in the porter's lodge. -Find the Trace file in the lodge.
CHAPTER 2 -Check the paintings in the foyer twice. -Check the portrait at the end of the hallway. -Play the piano -Check the portrait nearby the piano -Read the letter in the left wardrobe, in the butler's room. -Look at the photo album in the middle wardrobe, in the butler's room. -Check the scroll in the right wardrobe and click on the underlined names. -Read the butler's diary in the right wardrobe. -Use the piece of charcoal on the notepad to reveal the message. -Check the gun case. -Examine the fallen birdcage. -Read the diary and remake the page.
CHAPTER 3 -Check Ashley's sketch made by Richard on the table in the art studio. -Check Frannie's sketch. -Check the teddy bear in Frannie's room. -Check the ribbon on the bed, in Frannie's room. -Solve the sketchbook puzzle with the stamps. -Solve the bottle puzzle in Henry's room. -Check the family photo next to the bottle. -Check the stereo system in the office. -Find D's shoe in the suitcase.
CHAPTER 4 -Check the newspaper. -Check the painting of the two boys in the dining room and click on both of the children. -Check the handkerchief covered with blood.
CHAPTER 5 -Check the painting in Lawrence's room and click on each of the characters. -Use the gold bird key to open the drawer and read the diary. -Check the envelope in the nightstand. -Give a candy to Richard. -Read the letter on the typewriter. -Read the letter next to the safe. -Check the book in the safe. -Examine the photo next to the computer. -Read all the messages on the computer. -Take the teddy bear.
CHAPTER 6 AND EPILOGUE -Find D's other shoe. -Talk to D at the bay.
That's all folks. I hope you enjoyed that game guide as always. I might do the sequel released for Wii once I find a way to configure a decent Wii emulator. Anyway, I see you in the next walkthrough. Take care!
Hello folks, Laian here with a new game guide. Today, it's a DS game I played a lot called «Trace Memory» (a.k.a «Another Code» in the European version). It feels good to replay this game and make a game guide for you, frankly. Besides Ghost Trick: Phantom Detective, Phoenix Wright and other games of that kind, I really like this game. So, if you're ready for a memory lane (or not, if you're new to this series then you're welcome aboard), I suggest we start that game guide without wasting any more time. Let's just jump into it, shall we?
CHAPTER 1 First things first, talk to the lady. She's your father's little sister, Jessica. Talk about all the topics available to learn more about the story. The red text will always open new topics to talk about. Click on the «back» icon below to end the conversation and carry on. Once you landed on Blood Edward Island, talk to the captain. Once more, talk about all the available topics then click on the «back» button. You'll get some candies from the captain. Go search Jessica. You'll hear a scream right when you will reach the drawbridge. Unfortunately, you can't get to the other part of the island if the drawbridge is raised. Check the panel to your right, turn the wheel twice and carry on. Check the stone then move on until you get to a gate and a signboard. The gate is locked, sadly. However, there's a puzzle to solve. Just check the signboard. Remember the symbol to its right once you fixed it (or take a picture so you will get it memorized), it will come to an use later in the game. Go right now, skip the road blocked by big rocks and go right. You will get to a cemetery. Check the tombstones then the stone slab that blocks another way. Move it to unlock the path and see a letter carved on the back of the stone. Talk to the ghost kid afterwards. Carry on after the discussion to get past the obstacle you saw earlier and go forth. Check the grinder and try to clean the plate. Alas, you can't without the proper tool. Check the red toolbox next to the minecart and grab the gear (1). Check the other toolbox nearby the water tower to find a metal brush. Now you can scrape the rust off the plate. Remember the symbol, go back to the gate, check it to find a panel and
CHAPTER 2 Head to the front door of the mansion, talk to D then go inside. Look around and discuss once more with D. Take a photo of both of the paintings and merge the two photos to get a code. Use this code to open the door to the north with this code and proceed to the next area. Go check the painting, then go in the room to the left to enter the music room. Pick up the part of an essay on the ground, then the display case to find a DTS card. Check the book shelf to find another puzzle to solve. Unfortunately, you need to find more books in order to solve it. Leave that room and go to the butler's room to the right. Check the wardrobes to find some information about the Edward family and a puzzle to solve. You'll get the silver medal as a token of your success. Check the notepad on the desk and try to reveal what was written. The pencil lead breaks so you need another way to do that. Check the fi
CHAPTER 3 Go in the art studio to the right, check the drawing of Frannie and the desk to find a DTS card and another drawing. Check the chest, note all the stuff inside and leave the room. Go in the next room, check the dresser to find a DTS card, then the bottle on the table. You'll have to come back later since Ashley cannot open it with her bare hands. Examine the dolls between the beds, go back to the golden bird room and pick up the doll holding a drum. Head back to the art studio room, grab the hammer in the chest and go back to Mary and Henry's room. With the hammer, break the bottle and collect the gold bird key and a letter. Put the doll where it belongs to. You'll learn from D that device is a music box and needs a key to work. Go in the second room to the right, which is Frannie's room. Examine the teddy bear on the shelf to your right, then the desk to find a DTS card in the drawer and the sketchbook. Looks like you'll have to complete what has been unfinished. Check the ribbon on the bed then the wooden box on the shelf to find two stamps. You can complete the sketchbook by closing your system twice (without turning it off). Now explore the second room to the left. Check the framed picture on the table (you need to do some kind of reflection by slowly closing your system until you get a message), then the painting above the fi
CHAPTER 4 Check the newspaper on the table and the fi
CHAPTER 5 Go in the room to the right, check the book shelf next to the fi
CHAPTER 6 Go down the stairs to get to the cave. Walk in the cave until you find D's other shoe and carry on. You will meet Bill. Talk to him. After the conversation, you have to answer Bill's questions as he's pointing the gun towards Richard. Answer «Someone came in», «She hid me in the closet», «I heard Mom's voice», «You can't have Trace!», «I heard a gunshot», «Bill». After the discussion, Bill will die, falling into the endless pit. Cross the bridge after the conversation with your dad and head to the bay.
EPILOGUE This is a series of conversations. Talk to the captain, then to your dad and finally to D. If he remembered enough things about his story, he will ask you to touch the mark on the chest. Otherwise, he will stay on the island for the rest of his ghostly life. Yep, there are two endings as you can tell. Talk to your dad and watch the credits after the discussion. And blow the candles on your birthday cake. Save your progress and beat the game twice to get another surprise at the end.
BONUS PART: D's Memory Recovery Since a good part of the game is based on D's story, you need to find stuff that will help him recover his memory. Doing so will grant you the good ending at the end of the game. Here's the complete list of what you must do to get that ending, chapter by chapter and in order of appearance. Some of them are easy to get but some others are missable. Note that I mentioned some of them in the first part of the game guide and, most important, the ones you need to do during chapter 1 cannot be done in the next chapters since you can't leave the mansion.
CHAPTER 1 -Check the stone slab saying «Edward Mansion» to the left of the road. -Check Thomas and Henry's tombstones in the cemetery. -Check the metal slab on the machine at the mine entrance. -Find Sayoko's picture in the porter's lodge. -Find the Trace file in the lodge.
CHAPTER 2 -Check the paintings in the foyer twice. -Check the portrait at the end of the hallway. -Play the piano -Check the portrait nearby the piano -Read the letter in the left wardrobe, in the butler's room. -Look at the photo album in the middle wardrobe, in the butler's room. -Check the scroll in the right wardrobe and click on the underlined names. -Read the butler's diary in the right wardrobe. -Use the piece of charcoal on the notepad to reveal the message. -Check the gun case. -Examine the fallen birdcage. -Read the diary and remake the page.
CHAPTER 3 -Check Ashley's sketch made by Richard on the table in the art studio. -Check Frannie's sketch. -Check the teddy bear in Frannie's room. -Check the ribbon on the bed, in Frannie's room. -Solve the sketchbook puzzle with the stamps. -Solve the bottle puzzle in Henry's room. -Check the family photo next to the bottle. -Check the stereo system in the office. -Find D's shoe in the suitcase.
CHAPTER 4 -Check the newspaper. -Check the painting of the two boys in the dining room and click on both of the children. -Check the handkerchief covered with blood.
CHAPTER 5 -Check the painting in Lawrence's room and click on each of the characters. -Use the gold bird key to open the drawer and read the diary. -Check the envelope in the nightstand. -Give a candy to Richard. -Read the letter on the typewriter. -Read the letter next to the safe. -Check the book in the safe. -Examine the photo next to the computer. -Read all the messages on the computer. -Take the teddy bear.
CHAPTER 6 AND EPILOGUE -Find D's other shoe. -Talk to D at the bay.
That's all folks. I hope you enjoyed that game guide as always. I might do the sequel released for Wii once I find a way to configure a decent Wii emulator. Anyway, I see you in the next walkthrough. Take care!
|


| Games have secrets, I have my eagle gaze. |
Affected by 'Laziness Syndrome'
Registered: 10-21-11
Location: France
Last Post: 1854 days
Last Active: 1027 days
02-03-17 01:39 PM
| ID: 1328552 | 31 Words
Congratulation and welcome to the veteran club. You've been greeted by one of them actually. Let's just say a few people know about this, or they figured it out by themselves. |
| Games have secrets, I have my eagle gaze. |
Affected by 'Laziness Syndrome'
Registered: 10-21-11
Location: France
Last Post: 1854 days
Last Active: 1027 days
01-15-17 05:31 AM
(hidden thread)
| ID: 1324819 | 27 Words
| (you don't have access to view this post) |
| Games have secrets, I have my eagle gaze. |
Affected by 'Laziness Syndrome'
Registered: 10-21-11
Location: France
Last Post: 1854 days
Last Active: 1027 days
01-12-17 01:10 PM
(hidden thread)
| ID: 1324272 | 66 Words
| (you don't have access to view this post) |
| Games have secrets, I have my eagle gaze. |
Affected by 'Laziness Syndrome'
Registered: 10-21-11
Location: France
Last Post: 1854 days
Last Active: 1027 days
12-29-16 07:38 AM
(hidden thread)
| ID: 1321329 | 11 Words
| (you don't have access to view this post) |
| Games have secrets, I have my eagle gaze. |
Affected by 'Laziness Syndrome'
Registered: 10-21-11
Location: France
Last Post: 1854 days
Last Active: 1027 days
12-29-16 07:27 AM
| ID: 1321328 | 5313 Words
POSTS: 2200/2232
POST EXP: 457173
LVL EXP: 7137975
CP: 23726.2
VIZ: 3569925
Hello everyone! Laian here and welcome to another game guide. Get your wand ready, this time we go see Harry Potter in his wonderful world called Hogwarts. Today's menu is "Harry Potter and the Sorcerer's Stone". This is the game guide for the Playstation version, do not use it if you play the PC version of that game. So let's get into it without wasting time!
WELCOME TO HOGWARTS, HARRY! The great journey of witchcraft and wizardry begins here, in the great hall of Hogwarts. Albus Dumblebore greets you and gives you the words of wisdom. I really like the part of his speech when he talks about dangerous secrets. When your name is "Laian", no secret is dangerous and hard to find. I might as well take that advice seriously, coming from the headmaster of the school, oh well. There's nothing you can really do at the moment except opening the portrait room to the right (which leads to... a portrait in search of the password, woo side quest!) and the Gryffindor's tower upstairs then to the left. It's where you must go but keep in mind the portrait room is here, just in case you get the code in the future from, say, a student or anyone else. Go to Gryffindor's tower, then go downstairs, push the bookshelf and get the card "Merlin" (refer to the bonus part of the game guide to have a reminder of the cards mentioned during the first part of the walkthrough and the one that won't be mentioned). There are 17 cards to find in the game. Don't know if you are the kind of player who likes to "try hard" a game to its completion like me but I wanted to let you know about this. Talk to Fred and Georges next to the portrait of the Fat Lady. In exchange of yellow beans (50 to be exact), you'll get the one for the portrait of the baron in the portrait room. Once you got the yellow beans required, talk to the Fat Lady to go to the room and talk to Fred and Georges to get the password. Go upstairs to meet Ron Weasley. He will tell you that a bad boy entered the room before you with your owl. Let's go after him and get your pet back.
HEDWIG'S RESCUE The person responsible for that "pet-napping" is no one else but Drago Malfoy. You can't slap his face from where you are actually (even though he really deserves that after that taunting speech) so move forward. This is the tutorial sequence of the game and Ron will be your teacher for that part. For that room and the next one only then he goes watch the entrance. Don't ask me why, please. Follow the path, grab the feathers on your way to Hedwig. You'll meet Nearly Headless Nick, the ghost of Gryffindor's house. Go all the way up, open the door and use your first spell to kill the enemies. There's a hint book. Getting rid of enemies will grant you points for your house. Carry on, use your spell to move the block and go up. Smack the rat with a Flipendo Knockback Jinx for the heck of it (and for some points) and go in the next room. Don't even bother with the cobweb and the door. The only theory is the developers intended to put something behind the door but they either forgot to remove the door or they intentionally put the cobweb to block the door. A padlock would have been nice as well, anyway. Oh looky here, there's a monk from "Eternal Darkness: Sanity's Requiem" lost in Hogwarts! Nah, just joking but you're been spied by a strange man. Anyway, push the block with a charged Flipendo Knowckback Jinx and carry on. You meet Neville Longbottom. Ok, by the look of his face, he may look like the kid from The Grudge but it's really him. Get rid of the books and move on to the next room. Hey Hedwig, I'm here! Yes, that white owl is Hedwig... Well, go get it. Charge a Flipendo Knockback Jinx and cast it on the bars to release your pet. Now, leave the tutorial room and go to the flying lesson after getting your broomstick.
THE FIRST LESSONS First of all, the flying lesson. It's the first door on the left. That lesson is divided in three parts, from the easiest one to the hardest one. You need to cross the magic rings before the time runs out. There's one of these yellow beans at the top of the fountain, might as well get it now to get the password for the portrait of the Fat lady. The first part is easy, you only have 10 rings to cross and it's just a loop around the courtyard. Then, you have 20 rings to cross and finally 40 rings to cross. I can tell that the last two parts are really tough. Fortunately, if you fail once you can retry one more time to get a better score. You'll get five points if you cross at least half of the rings required. I'm not sure how much you can get if you cross all the rings (good luck with that), maybe 10 points. The flying class is over afterwards and you can't go in here for a while. Time to go to the next lesson: the charms lesson. Grab the yellow beans on the bookshelf and around the save book and open the door to the charms class New mini-game, wheeee! Get to the classroom before the time runs out. Start the timer by picking up the clock and get to the finish line. That one is easy and you can get all the yellow beans, though the others will be a bit tough. The lesson will begin with a Dance Dance Revolution type of mini-game in order to master the Wingardium Leviosa spell. Press the buttons in time three times in a row to proceed to the next part. Now that you mastered the spell, use it to place the hourglasses on the pedestal. Even if you are with your two friends, they won't do anything but watching a wall or train on a little one (that's cool folks, I can take care of this alone). Do it to get some points for Gryffindor and end the lesson. You will receive a letter from Hagrid. Time to go see him.
DRAGO AND HIS BROS You can go back to the flying practice area for a special task. Collect the flying bugs before the time runs out to get some points for your house. It's optional but it brings some extra points so let's not spit at that. You can also put the candle on the desk to get five extra points. You can go to the great foyer of Gryffindor as well and get some good stuff such as yellow beans and cards. Back to the great hall, Drago will block the main entrance of the castle, which stops you from going outside. Put the hourglasses back on the pedestals to make him mad at you. In order to beat that guy, you need to throw his little wizards crackers at him before they explode. Grab one, wait until he's ready to throw another one at you and send him back the one you're holding. After a few hits, Crabbe is coming and Drago will throw the big wizards crackers at you while his buddy will throw the little ones. You have to avoid the big crackers and throw the little ones at Drago. Then, Goyle will come and join the party. Repeat the same thing until you defeat Drago.
THE HERBOLOGY CLASS You see Hagrid outside and then... you go directly to the herbology class, with no exception. Get to the finish line before the time runs out. Same thing as the charms class: press the buttons to master the spell and try it on an obstacle. You can now burn some obstacles. Also you can go to the Quidditch training area. It's an optional area with a brand new mini-game close to the flying lesson. First part, you cross the rings before the time runs out. Then, you cross the rings and you grab the snatch. And finally you compete against a student. Depending on your performance, you can get bronze, silver or gold wings out of these lessons. You can try as long as you want to get the best rank. Go back to the castle and enter the great hall to the right for some extra beans. You should have enough to get the password for the baron. Get it from Fred and Georges (they are in the room behind the portrait of the Fat Lady) and go back to the portrait room next to the great hall. Talk to the portrait and get the Nimbus 2000 in the secret area. This is a good broomstick for the flying lessons and Quitdditch matches.
FIRE SEEDS, REMEMBERBALL, FIRST QUIDDITCH MATCH AND SLOTH BRAIN Yay for long title! Time to see how Hagrid is doing. Go through the hallway before you after leaving the herbology lesson. There's Fred and Georges waiting for you with a new task. They want 70 blue beans this time. A student lost his kitten in the well so you might have to save him later. For now, carry on. Use the creature to get rid of the bushes and collect some blue beans for your quest. Meet Hagrid in the next area and move on to the next area. Time to collect the fire seeds for him. Shoot the creatures, note the portrait to the left and carry on. Shoot the gargoyle three times with a charged Flipendo knockback jinx when he charges towards you and use the Wingardium Leviosa spell to put it back on the pedestal. The door will open, allowing you to go to the next part of the task. Use the
THE POTIONS CLASS Before going there, you can see Fred and Georges in the Grounds to get the code for the portrait, in exchange of 70 blue Bertie Bott's beans. Head to Hagrid's house and go right then left. Say the password and get the card "Albus Dumbledore". Now, go to the dungeon for your next class. Don't shoot at the boxes above the ledge, keep going forward. Fred and Georges will look after a new flavor of beans. The deal is the following: collect 80 green Bertie Bott's beans and you'll get the password for the portrait nearby them. Go to the potions classroom and complete the mini-game. You'll be asked by Snape to retrieve an ingredient afterwards. After the cutscene, use a pufferpod to make the troll sneeze but wait until he steps on the grate to trap him, get some points and a bean. Do this with the other troll to proceed to the next area. This is where the kitten is, might as well retrieve it and give it back to the student. Go left, break the crates until you find the cat. Then walk slowly to the ray of light and use the Wingardium Leviosa spell on the cat to bring it back to the student. You'll get the card "Edgar Stroulger" for your effort. Open the door, activate the switch and go west. Use the moving cauldrons to reach the lever (you can use your Flipendo knockback jinx on them to stop them for a short moment) and head back to the previous room by the ledge to the left. Now go east, activate the switch to your left, use the Wingardium Leviosa spell on the cage and put it on the pile of straw delicately. Grab the key, go back to the previous room and go unlock the door up there. Get rid of the trolls and go get the fireflies in the next room (3). Time to head back to the potions class and head to your next lesson: the defense against dark arts class.
THE DEFENSE AGAINST DARK ARTS CLASS The defense against dark arts room is in front of the potions classroom. Go up the stairs and open the door. That time trial is a bit tough since the books move and stop. You have plenty of time though and it's possible to get the beans scattered around the rooms. Master the spell and cast it to reveal the platforms then step on them to make the gap. With that spell, you can now get some goodies in another room of the dungeon. Go downstairs after the class then to the right. Make the platforms appear in the next room with the new spell and open the door to the left. Move the bookshelf to the right to start a mini-game. You need to put the cauldrons on the grills to complete it. If a cauldron is stuck in the corner, go back to Nick. Unfortunately, this will reset the entire puzzle/mini-game. You'll get the card "Bowman Wright". You can get another card if you push the other bookshelf. That puzzle is quite tough since there's a cauldron that needs to be pushed in the top right hand corner. Just push it one square near the grill, then stand behind it and push it on the grill. The others are easy to place. Ah, they move slowly, I almost forgot that detail. You'll get the card "Cassandra Vablatsky". Open the door, go up and push the bookshelf. Another puzzle to solve within the time limit. You'll get the card "Godric Gryffindor" if you succeed. Now, head back to the room with the invisible platforms and go open the next door.
THE CURSED DOOR The only way to leave the dungeon is the cursed door nearby Nick. Go open the door to the left instead. Mix the potion in the cauldron and drink the potion to recover your health if needed then carry on. You will meet Peeves. Grab the beans, go up then open the door and go in the opening to the left. The first eye to get rid of is located to your left. Use a charged Flipendo and -tada!- that's one gone. Go down, collect the beans, push the block and carry on. Skip the door, avoid the flamethrowing creatures and carry on until you find another eye to get rid of. Go back to the door you skipped, open it this time, go upstairs then open the door and use the cauldrons to get to the next part. Make the gap, go left, get rid of the living armor and collect the beans before entering the next room. Get rid of the eye, head back to the room then go down. Make the gap with the tables, kill the living armor and go through the passageway. Get rid of the last eye to dispel the door. Before heading back to the door to your freedom, you might wanna check down below in the previous room for some goodies. Go back to the (no longer) cursed door, open it, grab the beans in the boxes and go talk to Fred and Georges to get the password (only if you have 80 green beans). Now talk to the portrait to get the Quidditch armor (4). Now, go to the upper castle to go to the transfiguration class.
THE TRANSFIGURATION CLASS AND THE RACE FOR THE PACKAGE Fred and Georges are waiting for you and, this time, they want 100 red beans in exchange of the password. Open the door to the right and complete the time trial. This is the last one and it's a hard one, seriously. You really have to step on the platforms, you can't grab them. And they fall, which is excellent. Master the spell, then use it on the statue and leave the class. After the cutscene, use your new spell to get to the second floor and open the door to the left. Hedwig will give you a package. Unfortunately, Peeves comes at you and steals the package. You must go after him and be the first to win the race. Don't worry if you fail, you can retry over and over again until you manage to beat Peeves. You'll get the invisibility cloak. Open the door, go down, save your progress and open the door behind you.
METAL GEAR POTTER Well, the Forbidden Corridor. You're not supposed to be here but you have the invisibility cloak so it shouldn't be a problem, right? You need tokens to activate the invisibility cloak (they have the shape of Harry Potter). Be careful though, you can't be noticed by humans but Mrs. Norris is a cat and she can smell your presence even when you're invisible. Grab the token, then go to the right, scale the bookshelf and grab the key on the other bookshelf. Unlock the door, watch the cutscene and carry on. Now, this is where it's going to be... slightly tough. Mrs. Norris is on the wooden platform, going back and forth. On the same platform, the token you need. Wait until she turns back, collect the token and jump on the bookshelf to get the key. Go back as soon as possible to the token and go down to unlock the door. In the next room, grab the key down below when Mrs. Norris doesn't see you then head back up. Grab the ledge, collect the token and unlock the door. In the next room, go on the bookshelf, grab the token, find the key and open the door. Open the door before you to find the Mirror of Erised.
HARRY AND RON, RESCUE RANGERS Go through the crack in the wall, save your progress and get ready for the giant troll. Well, not really. First , you need to run for your life (or distract the troll, whichever you wanna choose). Like in the level "Boulder Dash" from "Crash Bandicoot", except this time the boulder is a troll. Gaps, narrow paths and torches are there just to make that task a bit harder yet enjoyable for you. If you collected all the red beans until that part, you will get the 100 beans necessary to get the password for the last painting (that, obviously, if you don't miss a good part of the beans scattered on your way to the next part of the rescue). After that, you must get rid of the furnitures the troll will throw at you and Ron while Ron is doing a Wingardium Leviosa on the club to stun the troll. Use a Flipendo to destroy the furniture. You saved Hermione and got 25 points for Gryffindor. Time to head to the next Quidditch match against Ravenclaw.
DAMN MINECARTS! People who played this game know what I'm talking about, oh yes. If you're not part of that community of people, get ready to be so salty. But first, win the Quidditch match against Ravenclaw. That is easy task, you're used to this now. Then, you need to go with Hagrid to Diagon Alley to find ingredients for a Dragon Tonic because Norbert is sick. You need money first and, since Hagrid prefers drinking butterbeers instead of doing his best to save his money for the medicine, you must go to Gringotts bank. Hopefully your level of saltiness is not that high at this point of the game because this is going to be one heck of a trip to mental suffering. Enter the bank. See the big deal here? Yes? No? Walk a bit, just to see what I mean. The floor is slippery, exactly. But that is just one part of the trial you're going through. Open the double door and go talk to the goblin to the left. Collect the scrolls and get ready for the salty part of this. Think the last mini-game was hard? Well, don't worry: that part is something more difficult. You must collect the coins by switching to the left and right and hold the X button to stop the minecart. Now, it's really cringy as you can tell and you might get salty because of that. Also, avoid the obstacles otherwise you will lose coins. Also, collect the bonus gems when they appear to get a card at the end of the ride. There's one for each ride to claim. These are the hardest cards to get in the game (refer to the bonus part to find more information about these cards). Get enough coins to get to the next part. You can redo the mini-game if you want to. Complete the two other mini-games then leave the bank. Go to the magical menagerie now. New mini-game, yay. Just in case you haven't figured it out yet, Diagon Alley level is a sequence of mini-games more or less hard to make through. That one, however, is easy like ABC. Just look for a shaking crate and use a Flipendo to destroy it then follow the purple toad until he surrenders. Hit him with a Flipendo to collect a wart. Do this two more times and you will complete the mini-game. Go now to Ollivanders. You need to collect three peacock feathers from the peacock in the storage room. Do not use a flipendo or you'll have to restart. Memorize the patterns and get close to the peacock then try to stay close to its tail until the feather meter at the top left hand corner is fully filled. Do this two more times and leave the shop when you collected the feathers. Last stop: eeylops owl emporium. That mini-game is not that hard. You must feed the owl in the back room three times with some food on the table with a Wingardium Leviosa. Watch out for the other owls, ready to steal the sweet. The owl once fed will drop a feather. Cast a Wingardium Leviosa to collect the feather. Now that you have all the ingredients, you can go see Hagrid. Back to Hagrid's home, you cure Norbert before he leaves Hagrid once and for all. Unfortunately, you will be caught by McGonagall and get a detention in the forbidden forest.
THE FORBIDDEN FOREST AND THE UNICORN Follow the silver blood, cast the Incendio spell to get rid of the vines and trap the trolls in the next area. Collect the red beans, burn the obstacles with an Incendio spell and kill the enemy with the same spell in the next area. The northern part leads to a cauldron and some beans. Go left, hit the fire turtle in the butt with a flipendo three times and carry on. You'll see Drago, still upset. Kill the fire turtle, meet Hagrid and carry on. Ignore the ledges to the left, go right, kill the turtle and grab the goodies (shoot the card above your head and collect it). Go back to the ledges, burn the obstacles and go up to end the chapter.
THE TRIALS If you have 100 red beans, go back to Fred and Georges to get the password of the last painting. The painting is located underneath the opening to the attic, where you faced Peeves. You'll get the Flipendo Jinx Duo (5), an upgraded version of the Flipendo Jinx (you don't say, Laian!). Now, head to the Forbidden Corridor. You must make Fluffy's heads fall a
In the next corridor, push the fake wall to find a save book and recovery items then carry on. Remove all the obstacles with a Wingardium Leviosa in order to lead the groggy troll to the hole and open the door. Memorize where the blue knight is in the next room and use the Flipendo Jinx on the correct bell. Fight the knight and drink the potion to get past the fire. Time to face your last opponent... or his legion of knights, rather. The first four ones are easy. The giant one can deal some heavy damages if you don't learn the pattern. Lock on the knight, let him get close to you and avoid the shockwave then strike back with a charged Flipendo Jinx. When he's half dead, he will do an attack with two shockwaves and finally, when he's nearly dead, an attack with three shockwaves. Beat him, drink the potion if necessary and go through the door to face the Professor Quirrel. The only way to kill him is to break the pillars when he is close to them. Avoid the projectiles he throws at you and break from the green ropes when you're entangled. Stay close to a pillar and he will get close to one automatically. A charged Flipendo Jinx and "poof!" the pillar falls on his head. Do this a few times to proceed to the next round. Now, you must use the mirror of Erised against him. Charge it with a charged Flipendo Jinx in order to make some sparkles appear on the mirror, avoid the magic shots and wait until he face the mirror to cast a charged Flipendo Jinx and unleash a power ball right in his face. A few hits and you'll proceed to the last round. Smash the square button to regain energy and press the X button when the notification appears on the screen to hurt Quirrel. The last time is really dangerous so don't screw up. Watch the final cutscene. Congratulations, you beat "Harry Potter and the Sorcerer's Stone". NOTE: There's another ending if you collected all the cards. Ron will give you the last card "Harry potter" and you will face Slytherin in a Quidditch match.
THE QUEST FOR THE CARDS What wouldn't that game guide be if the cards don't have a special part? Not complete, like some of my previous walkthroughs, I know! So yeah, here's the part where all the cards are and where you can find them, if you want to complete that quest.
That card is hidden behind the bookshelf to the left of the portrait of the Fat Lady. Stand in front of the bookshelf and press the square button to get to a secret room where the cards is hiding.
That card is the reward of a mini-game you can play when you can access to the great foyer's path. Go downstairs then to the right and push the bookshelf. Shoot the targets asked down below the screen before the time runs out to get the card.
On your way to Hagrid's house, after the well, you can see a fake wall nearby a bunch of dead bushes (6). Push it to find a mini-game. Complete it to get that card.
After getting the fire seeds and meeting Ron, check the wall next to the save book. Complete the mini-game and you'll get that card.
After Hagrid's house, on your way to find the fire seeds, there's a portrait that needs a password to be opened. Close to that portrait, there's a fake wall to push. Complete the mini-game and you'll get the card.
After getting the Verdimillion spell, go downstairs then to the right. Use the spell to make the platforms appear and open the door. Move the bookshelf to the right to start a mini-game. Complete it to get that card.
Complete the second cauldron mini-game to get that card.
Complete the third cauldron mini-game to get that card.
Complete the kitten quest in the bottom of the well to get that card.
That card can be obtained after the completing the charms lesson. Head to Gryffindor's great foyer, push the bookshelf and get the cards and the sweets.
Finish the kitten mini-game in the second floor of the upper castle, in the room before the attic. Push the bookshelf to the left to start that mini-game.
Before the gargoyle's gate, there are two fake walls. Both of them lead to the same secret area with some blue sweets and... that card. When you arrive at the flying bugs, check above your head to see it. Shoot the card to make it go down and take it.
That card can only be obtained once you got the password for the portrait in the Grounds from Fred and Georges, in exchange of 70 blue Bertie Bott's Beans. Head to the portrait and get your reward.
Before heading to the unicorn, go right and kill the fire turtle. Go through the passageway and shoot the card down with a Flipendo Jinx to claim it.
Collect all the gems during the Knuts' mini-game at Gringotts bank.
Collect all the gems during the Galleon's mini-game at Gringotts bank.
Collect all the gems during the Sickle's mini-game at Gringotts bank.
That card can only be obtained if you collected the 17 regulars cards. It's given by Ron Weasley during the alternate ending before you face Slytherin in a Quidditch match.
That's all for this walkthrough, folks. I see you, as always, next time for another game guide. Take care. Laian out.
Hello everyone! Laian here and welcome to another game guide. Get your wand ready, this time we go see Harry Potter in his wonderful world called Hogwarts. Today's menu is "Harry Potter and the Sorcerer's Stone". This is the game guide for the Playstation version, do not use it if you play the PC version of that game. So let's get into it without wasting time!
WELCOME TO HOGWARTS, HARRY! The great journey of witchcraft and wizardry begins here, in the great hall of Hogwarts. Albus Dumblebore greets you and gives you the words of wisdom. I really like the part of his speech when he talks about dangerous secrets. When your name is "Laian", no secret is dangerous and hard to find. I might as well take that advice seriously, coming from the headmaster of the school, oh well. There's nothing you can really do at the moment except opening the portrait room to the right (which leads to... a portrait in search of the password, woo side quest!) and the Gryffindor's tower upstairs then to the left. It's where you must go but keep in mind the portrait room is here, just in case you get the code in the future from, say, a student or anyone else. Go to Gryffindor's tower, then go downstairs, push the bookshelf and get the card "Merlin" (refer to the bonus part of the game guide to have a reminder of the cards mentioned during the first part of the walkthrough and the one that won't be mentioned). There are 17 cards to find in the game. Don't know if you are the kind of player who likes to "try hard" a game to its completion like me but I wanted to let you know about this. Talk to Fred and Georges next to the portrait of the Fat Lady. In exchange of yellow beans (50 to be exact), you'll get the one for the portrait of the baron in the portrait room. Once you got the yellow beans required, talk to the Fat Lady to go to the room and talk to Fred and Georges to get the password. Go upstairs to meet Ron Weasley. He will tell you that a bad boy entered the room before you with your owl. Let's go after him and get your pet back.
HEDWIG'S RESCUE The person responsible for that "pet-napping" is no one else but Drago Malfoy. You can't slap his face from where you are actually (even though he really deserves that after that taunting speech) so move forward. This is the tutorial sequence of the game and Ron will be your teacher for that part. For that room and the next one only then he goes watch the entrance. Don't ask me why, please. Follow the path, grab the feathers on your way to Hedwig. You'll meet Nearly Headless Nick, the ghost of Gryffindor's house. Go all the way up, open the door and use your first spell to kill the enemies. There's a hint book. Getting rid of enemies will grant you points for your house. Carry on, use your spell to move the block and go up. Smack the rat with a Flipendo Knockback Jinx for the heck of it (and for some points) and go in the next room. Don't even bother with the cobweb and the door. The only theory is the developers intended to put something behind the door but they either forgot to remove the door or they intentionally put the cobweb to block the door. A padlock would have been nice as well, anyway. Oh looky here, there's a monk from "Eternal Darkness: Sanity's Requiem" lost in Hogwarts! Nah, just joking but you're been spied by a strange man. Anyway, push the block with a charged Flipendo Knowckback Jinx and carry on. You meet Neville Longbottom. Ok, by the look of his face, he may look like the kid from The Grudge but it's really him. Get rid of the books and move on to the next room. Hey Hedwig, I'm here! Yes, that white owl is Hedwig... Well, go get it. Charge a Flipendo Knockback Jinx and cast it on the bars to release your pet. Now, leave the tutorial room and go to the flying lesson after getting your broomstick.
THE FIRST LESSONS First of all, the flying lesson. It's the first door on the left. That lesson is divided in three parts, from the easiest one to the hardest one. You need to cross the magic rings before the time runs out. There's one of these yellow beans at the top of the fountain, might as well get it now to get the password for the portrait of the Fat lady. The first part is easy, you only have 10 rings to cross and it's just a loop around the courtyard. Then, you have 20 rings to cross and finally 40 rings to cross. I can tell that the last two parts are really tough. Fortunately, if you fail once you can retry one more time to get a better score. You'll get five points if you cross at least half of the rings required. I'm not sure how much you can get if you cross all the rings (good luck with that), maybe 10 points. The flying class is over afterwards and you can't go in here for a while. Time to go to the next lesson: the charms lesson. Grab the yellow beans on the bookshelf and around the save book and open the door to the charms class New mini-game, wheeee! Get to the classroom before the time runs out. Start the timer by picking up the clock and get to the finish line. That one is easy and you can get all the yellow beans, though the others will be a bit tough. The lesson will begin with a Dance Dance Revolution type of mini-game in order to master the Wingardium Leviosa spell. Press the buttons in time three times in a row to proceed to the next part. Now that you mastered the spell, use it to place the hourglasses on the pedestal. Even if you are with your two friends, they won't do anything but watching a wall or train on a little one (that's cool folks, I can take care of this alone). Do it to get some points for Gryffindor and end the lesson. You will receive a letter from Hagrid. Time to go see him.
DRAGO AND HIS BROS You can go back to the flying practice area for a special task. Collect the flying bugs before the time runs out to get some points for your house. It's optional but it brings some extra points so let's not spit at that. You can also put the candle on the desk to get five extra points. You can go to the great foyer of Gryffindor as well and get some good stuff such as yellow beans and cards. Back to the great hall, Drago will block the main entrance of the castle, which stops you from going outside. Put the hourglasses back on the pedestals to make him mad at you. In order to beat that guy, you need to throw his little wizards crackers at him before they explode. Grab one, wait until he's ready to throw another one at you and send him back the one you're holding. After a few hits, Crabbe is coming and Drago will throw the big wizards crackers at you while his buddy will throw the little ones. You have to avoid the big crackers and throw the little ones at Drago. Then, Goyle will come and join the party. Repeat the same thing until you defeat Drago.
THE HERBOLOGY CLASS You see Hagrid outside and then... you go directly to the herbology class, with no exception. Get to the finish line before the time runs out. Same thing as the charms class: press the buttons to master the spell and try it on an obstacle. You can now burn some obstacles. Also you can go to the Quidditch training area. It's an optional area with a brand new mini-game close to the flying lesson. First part, you cross the rings before the time runs out. Then, you cross the rings and you grab the snatch. And finally you compete against a student. Depending on your performance, you can get bronze, silver or gold wings out of these lessons. You can try as long as you want to get the best rank. Go back to the castle and enter the great hall to the right for some extra beans. You should have enough to get the password for the baron. Get it from Fred and Georges (they are in the room behind the portrait of the Fat Lady) and go back to the portrait room next to the great hall. Talk to the portrait and get the Nimbus 2000 in the secret area. This is a good broomstick for the flying lessons and Quitdditch matches.
FIRE SEEDS, REMEMBERBALL, FIRST QUIDDITCH MATCH AND SLOTH BRAIN Yay for long title! Time to see how Hagrid is doing. Go through the hallway before you after leaving the herbology lesson. There's Fred and Georges waiting for you with a new task. They want 70 blue beans this time. A student lost his kitten in the well so you might have to save him later. For now, carry on. Use the creature to get rid of the bushes and collect some blue beans for your quest. Meet Hagrid in the next area and move on to the next area. Time to collect the fire seeds for him. Shoot the creatures, note the portrait to the left and carry on. Shoot the gargoyle three times with a charged Flipendo knockback jinx when he charges towards you and use the Wingardium Leviosa spell to put it back on the pedestal. The door will open, allowing you to go to the next part of the task. Use the
THE POTIONS CLASS Before going there, you can see Fred and Georges in the Grounds to get the code for the portrait, in exchange of 70 blue Bertie Bott's beans. Head to Hagrid's house and go right then left. Say the password and get the card "Albus Dumbledore". Now, go to the dungeon for your next class. Don't shoot at the boxes above the ledge, keep going forward. Fred and Georges will look after a new flavor of beans. The deal is the following: collect 80 green Bertie Bott's beans and you'll get the password for the portrait nearby them. Go to the potions classroom and complete the mini-game. You'll be asked by Snape to retrieve an ingredient afterwards. After the cutscene, use a pufferpod to make the troll sneeze but wait until he steps on the grate to trap him, get some points and a bean. Do this with the other troll to proceed to the next area. This is where the kitten is, might as well retrieve it and give it back to the student. Go left, break the crates until you find the cat. Then walk slowly to the ray of light and use the Wingardium Leviosa spell on the cat to bring it back to the student. You'll get the card "Edgar Stroulger" for your effort. Open the door, activate the switch and go west. Use the moving cauldrons to reach the lever (you can use your Flipendo knockback jinx on them to stop them for a short moment) and head back to the previous room by the ledge to the left. Now go east, activate the switch to your left, use the Wingardium Leviosa spell on the cage and put it on the pile of straw delicately. Grab the key, go back to the previous room and go unlock the door up there. Get rid of the trolls and go get the fireflies in the next room (3). Time to head back to the potions class and head to your next lesson: the defense against dark arts class.
THE DEFENSE AGAINST DARK ARTS CLASS The defense against dark arts room is in front of the potions classroom. Go up the stairs and open the door. That time trial is a bit tough since the books move and stop. You have plenty of time though and it's possible to get the beans scattered around the rooms. Master the spell and cast it to reveal the platforms then step on them to make the gap. With that spell, you can now get some goodies in another room of the dungeon. Go downstairs after the class then to the right. Make the platforms appear in the next room with the new spell and open the door to the left. Move the bookshelf to the right to start a mini-game. You need to put the cauldrons on the grills to complete it. If a cauldron is stuck in the corner, go back to Nick. Unfortunately, this will reset the entire puzzle/mini-game. You'll get the card "Bowman Wright". You can get another card if you push the other bookshelf. That puzzle is quite tough since there's a cauldron that needs to be pushed in the top right hand corner. Just push it one square near the grill, then stand behind it and push it on the grill. The others are easy to place. Ah, they move slowly, I almost forgot that detail. You'll get the card "Cassandra Vablatsky". Open the door, go up and push the bookshelf. Another puzzle to solve within the time limit. You'll get the card "Godric Gryffindor" if you succeed. Now, head back to the room with the invisible platforms and go open the next door.
THE CURSED DOOR The only way to leave the dungeon is the cursed door nearby Nick. Go open the door to the left instead. Mix the potion in the cauldron and drink the potion to recover your health if needed then carry on. You will meet Peeves. Grab the beans, go up then open the door and go in the opening to the left. The first eye to get rid of is located to your left. Use a charged Flipendo and -tada!- that's one gone. Go down, collect the beans, push the block and carry on. Skip the door, avoid the flamethrowing creatures and carry on until you find another eye to get rid of. Go back to the door you skipped, open it this time, go upstairs then open the door and use the cauldrons to get to the next part. Make the gap, go left, get rid of the living armor and collect the beans before entering the next room. Get rid of the eye, head back to the room then go down. Make the gap with the tables, kill the living armor and go through the passageway. Get rid of the last eye to dispel the door. Before heading back to the door to your freedom, you might wanna check down below in the previous room for some goodies. Go back to the (no longer) cursed door, open it, grab the beans in the boxes and go talk to Fred and Georges to get the password (only if you have 80 green beans). Now talk to the portrait to get the Quidditch armor (4). Now, go to the upper castle to go to the transfiguration class.
THE TRANSFIGURATION CLASS AND THE RACE FOR THE PACKAGE Fred and Georges are waiting for you and, this time, they want 100 red beans in exchange of the password. Open the door to the right and complete the time trial. This is the last one and it's a hard one, seriously. You really have to step on the platforms, you can't grab them. And they fall, which is excellent. Master the spell, then use it on the statue and leave the class. After the cutscene, use your new spell to get to the second floor and open the door to the left. Hedwig will give you a package. Unfortunately, Peeves comes at you and steals the package. You must go after him and be the first to win the race. Don't worry if you fail, you can retry over and over again until you manage to beat Peeves. You'll get the invisibility cloak. Open the door, go down, save your progress and open the door behind you.
METAL GEAR POTTER Well, the Forbidden Corridor. You're not supposed to be here but you have the invisibility cloak so it shouldn't be a problem, right? You need tokens to activate the invisibility cloak (they have the shape of Harry Potter). Be careful though, you can't be noticed by humans but Mrs. Norris is a cat and she can smell your presence even when you're invisible. Grab the token, then go to the right, scale the bookshelf and grab the key on the other bookshelf. Unlock the door, watch the cutscene and carry on. Now, this is where it's going to be... slightly tough. Mrs. Norris is on the wooden platform, going back and forth. On the same platform, the token you need. Wait until she turns back, collect the token and jump on the bookshelf to get the key. Go back as soon as possible to the token and go down to unlock the door. In the next room, grab the key down below when Mrs. Norris doesn't see you then head back up. Grab the ledge, collect the token and unlock the door. In the next room, go on the bookshelf, grab the token, find the key and open the door. Open the door before you to find the Mirror of Erised.
HARRY AND RON, RESCUE RANGERS Go through the crack in the wall, save your progress and get ready for the giant troll. Well, not really. First , you need to run for your life (or distract the troll, whichever you wanna choose). Like in the level "Boulder Dash" from "Crash Bandicoot", except this time the boulder is a troll. Gaps, narrow paths and torches are there just to make that task a bit harder yet enjoyable for you. If you collected all the red beans until that part, you will get the 100 beans necessary to get the password for the last painting (that, obviously, if you don't miss a good part of the beans scattered on your way to the next part of the rescue). After that, you must get rid of the furnitures the troll will throw at you and Ron while Ron is doing a Wingardium Leviosa on the club to stun the troll. Use a Flipendo to destroy the furniture. You saved Hermione and got 25 points for Gryffindor. Time to head to the next Quidditch match against Ravenclaw.
DAMN MINECARTS! People who played this game know what I'm talking about, oh yes. If you're not part of that community of people, get ready to be so salty. But first, win the Quidditch match against Ravenclaw. That is easy task, you're used to this now. Then, you need to go with Hagrid to Diagon Alley to find ingredients for a Dragon Tonic because Norbert is sick. You need money first and, since Hagrid prefers drinking butterbeers instead of doing his best to save his money for the medicine, you must go to Gringotts bank. Hopefully your level of saltiness is not that high at this point of the game because this is going to be one heck of a trip to mental suffering. Enter the bank. See the big deal here? Yes? No? Walk a bit, just to see what I mean. The floor is slippery, exactly. But that is just one part of the trial you're going through. Open the double door and go talk to the goblin to the left. Collect the scrolls and get ready for the salty part of this. Think the last mini-game was hard? Well, don't worry: that part is something more difficult. You must collect the coins by switching to the left and right and hold the X button to stop the minecart. Now, it's really cringy as you can tell and you might get salty because of that. Also, avoid the obstacles otherwise you will lose coins. Also, collect the bonus gems when they appear to get a card at the end of the ride. There's one for each ride to claim. These are the hardest cards to get in the game (refer to the bonus part to find more information about these cards). Get enough coins to get to the next part. You can redo the mini-game if you want to. Complete the two other mini-games then leave the bank. Go to the magical menagerie now. New mini-game, yay. Just in case you haven't figured it out yet, Diagon Alley level is a sequence of mini-games more or less hard to make through. That one, however, is easy like ABC. Just look for a shaking crate and use a Flipendo to destroy it then follow the purple toad until he surrenders. Hit him with a Flipendo to collect a wart. Do this two more times and you will complete the mini-game. Go now to Ollivanders. You need to collect three peacock feathers from the peacock in the storage room. Do not use a flipendo or you'll have to restart. Memorize the patterns and get close to the peacock then try to stay close to its tail until the feather meter at the top left hand corner is fully filled. Do this two more times and leave the shop when you collected the feathers. Last stop: eeylops owl emporium. That mini-game is not that hard. You must feed the owl in the back room three times with some food on the table with a Wingardium Leviosa. Watch out for the other owls, ready to steal the sweet. The owl once fed will drop a feather. Cast a Wingardium Leviosa to collect the feather. Now that you have all the ingredients, you can go see Hagrid. Back to Hagrid's home, you cure Norbert before he leaves Hagrid once and for all. Unfortunately, you will be caught by McGonagall and get a detention in the forbidden forest.
THE FORBIDDEN FOREST AND THE UNICORN Follow the silver blood, cast the Incendio spell to get rid of the vines and trap the trolls in the next area. Collect the red beans, burn the obstacles with an Incendio spell and kill the enemy with the same spell in the next area. The northern part leads to a cauldron and some beans. Go left, hit the fire turtle in the butt with a flipendo three times and carry on. You'll see Drago, still upset. Kill the fire turtle, meet Hagrid and carry on. Ignore the ledges to the left, go right, kill the turtle and grab the goodies (shoot the card above your head and collect it). Go back to the ledges, burn the obstacles and go up to end the chapter.
THE TRIALS If you have 100 red beans, go back to Fred and Georges to get the password of the last painting. The painting is located underneath the opening to the attic, where you faced Peeves. You'll get the Flipendo Jinx Duo (5), an upgraded version of the Flipendo Jinx (you don't say, Laian!). Now, head to the Forbidden Corridor. You must make Fluffy's heads fall a
In the next corridor, push the fake wall to find a save book and recovery items then carry on. Remove all the obstacles with a Wingardium Leviosa in order to lead the groggy troll to the hole and open the door. Memorize where the blue knight is in the next room and use the Flipendo Jinx on the correct bell. Fight the knight and drink the potion to get past the fire. Time to face your last opponent... or his legion of knights, rather. The first four ones are easy. The giant one can deal some heavy damages if you don't learn the pattern. Lock on the knight, let him get close to you and avoid the shockwave then strike back with a charged Flipendo Jinx. When he's half dead, he will do an attack with two shockwaves and finally, when he's nearly dead, an attack with three shockwaves. Beat him, drink the potion if necessary and go through the door to face the Professor Quirrel. The only way to kill him is to break the pillars when he is close to them. Avoid the projectiles he throws at you and break from the green ropes when you're entangled. Stay close to a pillar and he will get close to one automatically. A charged Flipendo Jinx and "poof!" the pillar falls on his head. Do this a few times to proceed to the next round. Now, you must use the mirror of Erised against him. Charge it with a charged Flipendo Jinx in order to make some sparkles appear on the mirror, avoid the magic shots and wait until he face the mirror to cast a charged Flipendo Jinx and unleash a power ball right in his face. A few hits and you'll proceed to the last round. Smash the square button to regain energy and press the X button when the notification appears on the screen to hurt Quirrel. The last time is really dangerous so don't screw up. Watch the final cutscene. Congratulations, you beat "Harry Potter and the Sorcerer's Stone". NOTE: There's another ending if you collected all the cards. Ron will give you the last card "Harry potter" and you will face Slytherin in a Quidditch match.
THE QUEST FOR THE CARDS What wouldn't that game guide be if the cards don't have a special part? Not complete, like some of my previous walkthroughs, I know! So yeah, here's the part where all the cards are and where you can find them, if you want to complete that quest.
That card is hidden behind the bookshelf to the left of the portrait of the Fat Lady. Stand in front of the bookshelf and press the square button to get to a secret room where the cards is hiding.
That card is the reward of a mini-game you can play when you can access to the great foyer's path. Go downstairs then to the right and push the bookshelf. Shoot the targets asked down below the screen before the time runs out to get the card.
On your way to Hagrid's house, after the well, you can see a fake wall nearby a bunch of dead bushes (6). Push it to find a mini-game. Complete it to get that card.
After getting the fire seeds and meeting Ron, check the wall next to the save book. Complete the mini-game and you'll get that card.
After Hagrid's house, on your way to find the fire seeds, there's a portrait that needs a password to be opened. Close to that portrait, there's a fake wall to push. Complete the mini-game and you'll get the card.
After getting the Verdimillion spell, go downstairs then to the right. Use the spell to make the platforms appear and open the door. Move the bookshelf to the right to start a mini-game. Complete it to get that card.
Complete the second cauldron mini-game to get that card.
Complete the third cauldron mini-game to get that card.
Complete the kitten quest in the bottom of the well to get that card.
That card can be obtained after the completing the charms lesson. Head to Gryffindor's great foyer, push the bookshelf and get the cards and the sweets.
Finish the kitten mini-game in the second floor of the upper castle, in the room before the attic. Push the bookshelf to the left to start that mini-game.
Before the gargoyle's gate, there are two fake walls. Both of them lead to the same secret area with some blue sweets and... that card. When you arrive at the flying bugs, check above your head to see it. Shoot the card to make it go down and take it.
That card can only be obtained once you got the password for the portrait in the Grounds from Fred and Georges, in exchange of 70 blue Bertie Bott's Beans. Head to the portrait and get your reward.
Before heading to the unicorn, go right and kill the fire turtle. Go through the passageway and shoot the card down with a Flipendo Jinx to claim it.
Collect all the gems during the Knuts' mini-game at Gringotts bank.
Collect all the gems during the Galleon's mini-game at Gringotts bank.
Collect all the gems during the Sickle's mini-game at Gringotts bank.
That card can only be obtained if you collected the 17 regulars cards. It's given by Ron Weasley during the alternate ending before you face Slytherin in a Quidditch match.
That's all for this walkthrough, folks. I see you, as always, next time for another game guide. Take care. Laian out. |


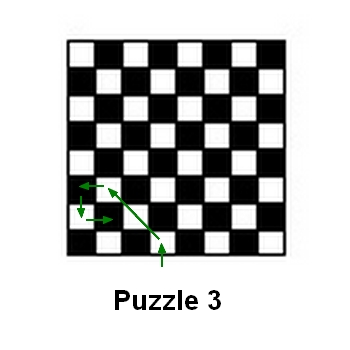

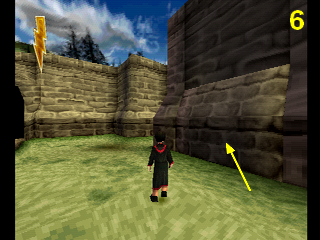
| Games have secrets, I have my eagle gaze. |
Affected by 'Laziness Syndrome'
Registered: 10-21-11
Location: France
Last Post: 1854 days
Last Active: 1027 days
12-28-16 07:09 AM
| ID: 1321231 | 194 Words
I got 5. Not born to be a certified A-hole. Interesting quiz, I'll say. I recently got with a co-worker a situation said in this quiz actually. Well, I wouldn't get all the credits if something has been done properly and efficiently and if I've been working with someone else. That's not how I would react. However, I worked with a A-hole who felt like taking all the credits in front of my boss and left me for "good-for-nothing", literally. We used to be cold towards each other afterwards and I had hard time to forget what he said to the boss. Actually, if I let you know about this, that means it's still stuck somewhere in my mind and it won't go so easily. It might be really stuck in my mind, unable to go away. Fortunately, he quit the job. Also, I don't give trust to people so easily. I used to be a nice person until I had enough to be taken as a foolish and innocent person. I become somewhat dull, cold and I don't give my trust so easily. I now go with "trust me and I'll trust you". Also, I don't give trust to people so easily. I used to be a nice person until I had enough to be taken as a foolish and innocent person. I become somewhat dull, cold and I don't give my trust so easily. I now go with "trust me and I'll trust you". |
| Games have secrets, I have my eagle gaze. |
Affected by 'Laziness Syndrome'
Registered: 10-21-11
Location: France
Last Post: 1854 days
Last Active: 1027 days
12-07-16 06:28 AM
| ID: 1318683 | 104 Words
POSTS: 2198/2232
POST EXP: 457173
LVL EXP: 7137975
CP: 23726.2
VIZ: 3569925
EX Palen : Remember this: it is not a matter of popularity but a matter of quality and dedication. ------ I'm not that surprised about the results for game guide writing to be frank. This year has been really difficult for me. I did quit my Minecraft admin position cause I lacked of motivation. That affected the game guide writing as well. There's a lot of things I'm questioning about myself and how I feel now on Vizzed, considering I have a job as market gardening and I usually go back home exhausted, unable to do anything. Anyway, enough ramble. Happy 12th anniversary Vizzed. Remember this: it is not a matter of popularity but a matter of quality and dedication. ------ I'm not that surprised about the results for game guide writing to be frank. This year has been really difficult for me. I did quit my Minecraft admin position cause I lacked of motivation. That affected the game guide writing as well. There's a lot of things I'm questioning about myself and how I feel now on Vizzed, considering I have a job as market gardening and I usually go back home exhausted, unable to do anything. Anyway, enough ramble. Happy 12th anniversary Vizzed. |
| Games have secrets, I have my eagle gaze. |
Affected by 'Laziness Syndrome'
Registered: 10-21-11
Location: France
Last Post: 1854 days
Last Active: 1027 days
(Boy, it's been a while since I tried this little game.) Fyredove : Hmm, that's a tough one so here goes nothing: I'll say fact 1 is the lie. Here, new facts from me! Good luck folks! Fact 1: There's Len Kagamine from Vocaloids on my phone case. Fact 2: I'm working on an adventure/puzzle game. Fact 3: I won a cosplay contest. Fyredove : Hmm, that's a tough one so here goes nothing: I'll say fact 1 is the lie. Here, new facts from me! Good luck folks! Fact 1: There's Len Kagamine from Vocaloids on my phone case. Fact 2: I'm working on an adventure/puzzle game. Fact 3: I won a cosplay contest. |
| Games have secrets, I have my eagle gaze. |
Affected by 'Laziness Syndrome'
Registered: 10-21-11
Location: France
Last Post: 1854 days
Last Active: 1027 days
12-01-16 02:22 PM
| ID: 1317905 | 122 Words
Most famous: Davideo7 Most creative: Most helpful: Most controversial: Most mature: Best veteran: Best new member: Jygin Best Non-active member: EideticMemory (wish you could come back, EM...) Best Staff Member: tRIUNE Best female member: Eniitan Wisest: Nicest: Eniitan Craziest: Insomniac: Meanest: Best username: Best userpic: Best layout: Best posts: Best threads: Netplayer: Jordanv78 Game streamer: Davideo7 Reviewer: Guide writer: Article writer: Greatest thread: Here's where my vote goes. It's been experimental yet memorable for me: Getting out alive Greatest post: The very first post of that thread. I nearly cried when I read it, no kidding: The Round Table of Guide Writers Funniest thread: Greatest old thread: Craziest thread: Best review: Best game guide: More votes to come, eventually. I don't know. Most creative: Most helpful: Most controversial: Most mature: Best veteran: Best new member: Jygin Best Non-active member: EideticMemory (wish you could come back, EM...) Best Staff Member: tRIUNE Best female member: Eniitan Wisest: Nicest: Eniitan Craziest: Insomniac: Meanest: Best username: Best userpic: Best layout: Best posts: Best threads: Netplayer: Jordanv78 Game streamer: Davideo7 Reviewer: Guide writer: Article writer: Greatest thread: Here's where my vote goes. It's been experimental yet memorable for me: Getting out alive Greatest post: The very first post of that thread. I nearly cried when I read it, no kidding: The Round Table of Guide Writers Funniest thread: Greatest old thread: Craziest thread: Best review: Best game guide: More votes to come, eventually. I don't know. |
| Games have secrets, I have my eagle gaze. |
Affected by 'Laziness Syndrome'
Registered: 10-21-11
Location: France
Last Post: 1854 days
Last Active: 1027 days
12-01-16 01:16 PM
(hidden thread)
| ID: 1317896 | 21 Words
| (you don't have access to view this post) |
| Games have secrets, I have my eagle gaze. |
Affected by 'Laziness Syndrome'
Registered: 10-21-11
Location: France
Last Post: 1854 days
Last Active: 1027 days
11-30-16 03:03 PM
| ID: 1317698 | 5261 Words
Hello everyone, Laian here with a brand new walkthrough (oh boy!). Yeah, it's been a while since I published one. Work kept me busy but I'm ready to publish that one. Are you ready for a great adventure? Well then, welcome to «Eternal Darkness: Sanity's Requiem», a game released for Gamecube. Here's a fun fact: that game was supposed to be released for Nintendo 64 but they cancelled the project and brought it back to the surface a few years later, as it was diving down into the abyss of darkness (get it?). I really like this game, a lot to be honest. I'm not going to say a lot about this game, play it for yourself. That's all I can suggest to you in all honesty. With or without that game guide, it doesn't really matter to me. Just play it when you have time, you'll see what a good survival-horror game needs to get the player's attention. It has its own recipe that you must find out by yourself. Anyway, let's jump into this... abyssal journey, shall we?
ALEXANDRA'S PATH You start in a small room, controlling Edward's ganddaughter armed a shotgun. Shoot the undeads coming at you until the cutscene triggers. This was all a bad dream, though the police calls Alexandra because an accident happened at the Roivas Family Estate. After the next cutscene, you're inside the mansion, two weeks later. Check the clock behind you to find the dresser key (1). Also, keep in mind the hour shown on the clock. Now go open the door to the right to get to the library and go to the clock at the far east of the map. Set it to the same hour as the clock in the foyer to open a secret passageway. Go there, open the door and grab the gladius on the wall next to the fi
THE CHOSEN ONE (PIOUS AUGUSTUS' PATH) After the cutscene, climb down the ladder and face three skeletons then pick up the granite block. Open the door, kill the foes and grab another granite block. Open the next door, kill the enemies, get the granite block and go down. Kill the enemy, go right and kill the enemies in the next room. Grab the granite block and use the granite blocks you collected on the respectives alcoves. The locked door in the last room will be unlocked. Go there and dismember the statue to open the door. In the next room, slay the undeads, push the button in the corner and step on the portal. Choose one of the three artefacts (it will have its role for the entire game) to end the chapter and return to Alexandra's path.
ALEXANDRA'S PATH You get the Tome of Eternal Darkness after the cutscene. Read the piece of paper behind to get the chapter called «The Binding of the Corpse God». Read it to start a new chapter.
THE BINDING OF THE CORPSE GOD (ELLIA'S PATH) Don't touch the necklace on the statue, go east instead, check the pedestal and go to the next room. Avoid the traps, slay the creature and extinguish both of the candles. Go back to the first room and go west. Slowly walk to avoid the traps and kill the creature in the next room. Grab the bronze necklace and extinguish the candle to the right. Go back to the first room, take the strange necklace and
ALEXANDRA'S PATH Go interact with the shrine of candles, extinguish the middle and the right candles and grab the message tube. Check it to get the chapter «Suspicions of Conspiracy». This will trigger a cutscene. Read the page to start a new chapter.
SUSPICIONS OF CONSPIRACY (ANTHONY'S PATH) Talk to the monks and go to the door to the left. This is where Charlemagne is. It's unfortunately locked. Go up the stairs to be teleported to a strange room. You can see the statue of Pious Augustus and Ellia. Go get the Tome of Eternal Darkness to go back to the chapel. Go up the stairs, grab the blue urn on the shelf and use it. You'll get a magical rune and the broken blue urn. Go downstairs, open the casket and get the Scramasax (2). All the monks are gone so go back upstairs and check the medallion to get the Circle of Power. Check the book shelf to find a suspicious book and move it. This will reveal a secret passageway. Go down, kill the enemeis to get a new rune and carry on. Save the monk, grab the torch and talk to him to get the two-edged sword. Use the torch to collect the parts of the broken green urn in the corner and mix them together to make the broken green urn. Open the door, collect the magickal codex and kill the enemy. Open the door, kill the foes, grab the filled red urn and the magickal codex and carry on. Kill the creature, open the door and collect the scroll and the magickal codex. You can now cast the «enchant item» spell. Use it to repair the two broken urns and go fill them with water at the fountain. Now go back to the room where you met the bishop and put the urns on the pressure plate to open the path. Murder the bishop and the creatures awaken and grab the bishop's key. Now go all the way back to the chapel avoiding the trappers. You'll face a giant creature. Sneak behind him and backstab him a few times to be victorious. Go downstairs, use the key on the door and watch the cutscene.
ALEXANDRA'S PATH Leave the office, go back to the foyer and go upstairs. Use the key to the second floor on the door. Unfortunately, it will break. Not a problem, use the spell to repair it and use it once more on the door. It's now open. Go east to go to the bedroom. Grab the revolver ammos on the table, note the dresser and go to the bathroom. Check the bathtub, then grab the page of the diary and go back to the hallway. Go west now to see your ancestor, check the wall in which he phased through and check the stained glass window at the end of the hallway. You can see a rune but you can't reach it. Open the second door next to the fake wall, collect the revolver ammos on the dresser and the chapter page hidden behind the portrait. Read it to start a new chapter.
THE GIFT OF FOREVER (KARIM'S PATH) Try to climb down the ladder, collect the Tome of Eternal Darkness and fight the foes. Go down, kill the enemies, take the statuette and collect the magickal rune inside the body of the creature nearby the ladder. Go up, get to the barrier, go down, grab the statuette and the magickal codex, kill the creatures and go back up. Put the statuettes on two of the three pressures plates and step on the last one to activate the device. Avoid the trappers and use the device to descend. Grab the Tulwar to get a new weapon in the other hand. Indeed, Karim can wield two weapons at the same time. Open the door, kill the creatures, grab the scroll, then open the door to the left, kill the foes and go open the door next to the barrier. Kill the enemy, claim his rune and get the magickal codex on the stone table. Go back, then go down the ladder, grab the magickal codex and go east. In the next room, take the Ram Dao and kill all the creatures to escape from the room. Go back to the sealed door, enchant the Ram Dao sword using the sigil shown on the door and use the weapon to break the seal. Kill the creature behind the door, go up the ladder, sneak past the trappers, grab the red effigy and go bak down. Cross the rumble at the end of the curved corridor, kill the enemy and climb down the ladder. Use the Tome of Eternal Darkness on the hand to unlock the gate and carry on. Now you need to get rid of the waves of enemies. Use the recover spell (starting with the green sigil) to recover your sanity because these guys drain it so fast. After that tough battle, grab the artefact to end the chapter.
ALEXANDRA'S PATH The only thing you can do now is go to the kitchen, enchant the gladius with the enchant item spell and use the weapon on the door. You'll find a spied jar with a scrap of paper. Check the jar to find a new chapter called «The Lurking Horror». After the cutscene, read the page to start the chapter.
THE LURKING HORROR (DR. MAXIMILLIAN ROIVAS) Grab the flintlock pistol ammos on the desk and leave the room. Open the door nearby, collect the ammos and leave the room. The other door is locked so go east now, take the ammos on the table, open the door, take the magickal codex and open the door to the bathroom. Pick up the ammos and go to the first floor. Go to the kitchen, grab the pump handle in the closet, the magickal codex and the ammos and leave the room. Go east, check the painting and the symbol then go to the room next to the kitchen. Check the fi
ALEXANDRA'S PATH Go back to the room with the dresser, use the reveal invisible spell starting with the red sigil to reveal a keyhole and use the key to open it now. You'll find a revolver and a page called «A Journey into the Darkness». After the cutscene, use the page to start the new chapter.
A JOURNEY INTO THE DARKNESS (DR. EDWIN LINDSEY'S PATH) Kill the enemy after the cutscene (you have to let him come close to you and shoot him when his wings are wide open), step in the centre of the room and use the brush to find a bronze bracelet. Use it on the statue and go west. Take the Tome of Eternal Darkness, carry on and kill the creatures. After the corridor of deathtraps (don't forget the metal bracelet where the blowgun was), use the brush on the cobweb to find a magickal codex, ignore the creature and take the bronze necklace. Go back to the statue and use the bronze necklace on the statue to unlock the way to the east. Go there, take the silver bracelet and
ALEXANDRA'S PATH First things first, find the secret cache to get the essence of Mantorok. Then, go back to the stained glass window and remove the force field to find a page called «Heresy». Read it after the cutscene to start a new chapter.
HERESY! (PAUL LUTHER'S PATH) Go towards the giant door and check the place to find some crossbow bolts. Open the door to the left, open the chest to find a crossbow and check the coats to find the podium key. Go back to the previous room and use the key on the podium to open the drawer and find a diary page. Head back towards the giant door to trigger a cutscene. Grab the emerald on the painting and try to leave the room after the cutscene. Get the Tome of Eternal Darkness and leave the room. Now go up the stairs in front of you, open the door, kill the creature and open the door. Ring the bell to call the brother and talk to him. You'll get the old tower key. Go back to the giant room, then behind the altar and go downstairs. Go in the room to the left to find some crossbow bolts and the book of Reliquaries. Leave the room, carry on, note the device, take the steel mace and open the door. Watch out for the trappers here and locate the empty barrel. Interact with it to open a secret passageway. Fight the creature, collect the sapphire and go back up. Unlock the door to the right, ignore the guy, go grab the spell on the pedestal and go through the door. Face Anthony (yep, that Anthony you controlled a while ago, now in a zombified shape) and get a ruby and the two-edged sword at the end of the fight. Now go up the stairs, kill the creature and collect the sheet of music and the diary page. Go back to the giant room and play the melody on the organ to open the furniture and find a new circle of power (4). Head back where you found the sapphire and use the three gems on the altar. Go down, open the door, kill the creatures, grab the magickal rune and carry on. Descend, kill the creatures, grab the crossbow bolts and go west. Kill the foes, open the door, kill the two creatures, take the crossbow bolts and push the shelf. Grab the diary page and the magickal codex then head back to the monk. He will give you the sacrifical knife. Put it on the tomb in the undergrounds to open the door. Dispel the barrier with the improved dispel barrier spell (use the circle of power 5 points and the runes chattur'gha, nethlek, redgormor and pargon twice), go to the altar, save your progress and examine the corpse. After the cutscene, kill both of the creatures and open the door with the symbol in the previous room. Head to the sanctuary to end the chapter.
ALEXANDRA'S PATH You'll get a note from Edward. Read it and go to the room with the piano. Play the melody you found in the last chapter to find a new chapter. Read it to start the chapter called «The Forbidden City».
THE FORBIDDEN CITY (ROBERTO BIANCHI'S PATH) You should remember this place. This time you need to survey the place. Skip the first room since there nothing interesting, avoid the creature and survey the second room. Take the saif and the crossbow bolts then go down. Pull the levers down and kill the creatures to make your way to the next room and survey it. Take the crossbow (5) and the crossbow bolts then carry on. Use the crossbow to clear the path, examine the wall and go up. Get rid of the enemies, take the summon zombie spell scroll and carry on. Collect the crossbow bolts, fight the golem and open the door. Oh, there's a crusher. Better not step on that pressure plate then. Summon a zombie and sacrifice him with the crusher to disable the trap and go down. Kill the creatures, carry on, grab the artefact and the ruby effigy and go back to the room with the trap, open the other door, fight the creatures and open the door to the right. Survey the area and kill the possessed slaves then go back to the previous room. Go down, equip the crossbow and kill the trappers then go in the next room and kill the creatures. Note the key on the pedestal, cast the improved reveal invisible spell starting with the red rune and get it. Go back, unlock the door, cast the improved shield spell starting with the red rune and run to the other side of the trapped hallway. Cut the rope, kick the butt of the worms, pull down the lever to raise the gate and survey the area. Head back to the first room to end the chapter.
ALEXANDRA'S PATH All you need to do here is check the rumble nearby the painting to get a new chapter page called «A war to end all wars» and read it afterwards.
A WAR TO END ALL WARS (PETER JACOB'S PATH) Take the soldier letter and the sealed enveloppe in this room, note the symbol to the left and go to the hall of the cathedral. Go upstairs to find another letter, head back to the hall, unseal the enveloppe and give the orders to the bored guard. Enter the room he kept all this time, take the revolver and try to open the door. Pick up the Tome of Eternal Darkness, open the door and head to the very first room. Collect the rifle on the altar, go right, then up the stairs, collect the two-edged sword and the revolver ammos and go back downstairs. Kill the creatures, open the door underneath the stairs, kill the creatures and grab the rifle ammos and go back to the giant room. Kill the creatures, take the sheet, locate the stairs, go down, check the rooms to find some ammos and carry on. Kill the trappers in the cellar, enter the room to the left and turn the wheel. Go in the room in front of you, use the lucky penny on the fuse box and activate the switch to power the whole cathedral. Go back to the organ in the giant room and play the melody. Collect the door handle, kill the creatures and head back to the room in which you turned the wheel. You will notice a door that can't be moved. Next to it, a small hole. Summon a trapper and go in the hole. You see on a pile of crates the circle of power. And a corpse, yeah. Lock on the body, get close to it and press A. Now you can open the door and grab the circle of power. Head back to the strange symbol, cast the reveal invisible spell using the red rune and the new circle of power (which means you need to use the rune pargon 4 times to increase the power of the spell) and use the door handle on the door. Open it, collect the ammos, go down and carry on. In the next room, kill the creatures, go through the door to the left, kill the trappers and kill the creature in the next room. Pick up the letter, push the shelf and carry on. Kill the creatures, pick up the binding hall key and return to the door with the symbol carved on it. Don't go through that one, go through the other one leading to the altar. Get rid of the trappers, take the magickal elixir and go to the door with the symbol. Use the key to unlock it, carry on, grab the magickal attack spell on the wall and move on to the next room. You will face the keeper. Try to shoot him. Unfortunately, the shots don't do anything on him. However you have a new spell to try and he's a perfect target for this. Note the symbol above his head. It's the one referred to the artefact he keeps, which is the one you chose with Pious Augustus at the beginning. Start with a small magickal attack with the opposite rune (by that, I mean, if you chose the green artefact at the beginning then you need to start with the blue rune, or the red rune if you chose the blue artefact...) to weaken him a few times when he concentrates his energy and dodge his attacks. Round two: he summons zombies. Use the minor damage field spell to create a barrier around you and use the magickal attack when he recovers. Avoid his attacks and do this a few times. Last part of the fight: avoid his attacks by running around and use the minor magickal attack a few times to kill him. Go claim the artefact to end the chapter.
ALEXANDRA'S PATH Go back to the library to meet a ghost. Talk to her to get the basement key (6). Go back to the foyer and open the locked door. Grab the shotgun, the ammos and open the fusebox. Use the lucky penny to restore the power and head to the second floor. Go to the bathroom, take the journal page and open the cabinet to find the chapter page called «A legacy of Darkness». Read it to start a new chapter.
A LEGACY OF DARKNESS (DR. EDWARD M. ROIVAS) Take the book put on the fi
ALEXANDRA'S PATH You get a note from Edward. Read it, go back to the basement and check the pile of barrels to the left. You'll find a pickaxe. Head back to the second floor, use it on the fake wall, then remove the field to grab the note and the stethoscope. Go back to the basement, use the stethoscope to break the safe and collect its content. Read the chapter page to start the last chapter of the game.
ASHES TO ASHES (MICHAEL EDWARDS' PATH) Grab the weapons and the ammos nearby the corpse after getting the ruby effigy and the essence kept by Roberto and open the door. Go down the ladder, kill the enemies and climb up the third ladder you'll see. Kill the enemies, take the staff and go back down. Climb up the second ladder in the underground, grab the gold amulet and go back down. Go to the end of the underground gallery, climb up the ladder and combine the gold amulet and the staff. Use the staff on the pressure plate, touch the half-spheres with the ray of light and then use the ray of light to touch the spike and the hidden half-spheres you just revealed. Go down to get the Tome of Eternal Darkness and head back where you found the gold amulet. Climb down the other ladder, kill the enemies, go up and climb down the other ladder. Use the dispel magick to remove the field and get the emerald effigy. Kill the worms and climb up the next ladder, kill the creatures, climb down the ladder in the centre of the room, kill the next creatures and open the door. Kill the trappers, open the door, slay the zombies, summon a trapper and get rid of the obelisk by locking on it and pressing the A button. Go down now, kill the trappers, go down once more and take the last spell of the game: the bind spell. Use it on the two golems creating the force fields behind you with the circle of power 7 and challenge the winner with your assault rifle while he's celebrating his victory. Go claim your trophy (which is the C4), go back to the suspicious wall and use the reveal invisible spell to reveal the door. Open it, grab the detonator and use the shield spell to cross the trap. Combine the detonator and the C4, enchant it with the enchant item spell power 7 and use it. Get the heck out of here to end the chapter.
ALEXANDRA'S PATH The final part of the game. Leave the office, ignore the creatures and go to the foyer to get the package. Open it to find the last essence. Now, go back to the library and go to the obervatory. Move the mirrors so the ray of light reaches the world map on the floor. Go to the basement, open the door and go down. Before carrying on, prepare the dispel magick spell force 7 and the shield spell force 7. Use that spell to cross the trap and the other one to remove the barrier. Recover your health, save your progress, collect the parts of the pedestal and combine it. Cast the enchant item spell to repair the item and put it on the pedestal. Place the essences on the pedestals and use the runes like in the Dr. Edward M. Poivas' chapter. Except this time, you'll have to solve the puzzles instead of flipping some levers and use your shield to cross the trap every single time. You need to use the rune assigned to the demon enemy of the one chose by Pious Augustus and the runes «summon» and «creature». Assign the enchant item spell in you quick spell list, save your progress before stepping on the portal leading to the final showdown. You're going to face Pious Augustus. First things first, cast the enchant spell on any of your weapons and hit it a few times until the artefact he kept all this time appears. Quickly, go towards it and hit it. Repeat that operation until you control a familiar face in its ghostly form. Touch the tome of Eternal Darkness and fight Pious to reveal the artefact once more then go hit the artefact. Now, chase the artefact until you break it once and for all. After the cutscene, hit a few times Pious with an enchanted weapon to destroy his shield and hit him with your best shot. A good way to get rid of him is to stand where you are, let him come at you and strike before he gets a chance to slap you with his staff. After a few hits, he will be defeated. You now have to bind the creature summoned. Use the circle rune to do this and watch the final cutscene. Save your progress.
Congratulations, you completed the game. You can try to beat the game with the other essences in order to get a new game mode: the Eternal mode. I let you find out what that mode is and I see you in the next walkthrough. Take care folks!
Hello everyone, Laian here with a brand new walkthrough (oh boy!). Yeah, it's been a while since I published one. Work kept me busy but I'm ready to publish that one. Are you ready for a great adventure? Well then, welcome to «Eternal Darkness: Sanity's Requiem», a game released for Gamecube. Here's a fun fact: that game was supposed to be released for Nintendo 64 but they cancelled the project and brought it back to the surface a few years later, as it was diving down into the abyss of darkness (get it?). I really like this game, a lot to be honest. I'm not going to say a lot about this game, play it for yourself. That's all I can suggest to you in all honesty. With or without that game guide, it doesn't really matter to me. Just play it when you have time, you'll see what a good survival-horror game needs to get the player's attention. It has its own recipe that you must find out by yourself. Anyway, let's jump into this... abyssal journey, shall we?
ALEXANDRA'S PATH You start in a small room, controlling Edward's ganddaughter armed a shotgun. Shoot the undeads coming at you until the cutscene triggers. This was all a bad dream, though the police calls Alexandra because an accident happened at the Roivas Family Estate. After the next cutscene, you're inside the mansion, two weeks later. Check the clock behind you to find the dresser key (1). Also, keep in mind the hour shown on the clock. Now go open the door to the right to get to the library and go to the clock at the far east of the map. Set it to the same hour as the clock in the foyer to open a secret passageway. Go there, open the door and grab the gladius on the wall next to the fi
THE CHOSEN ONE (PIOUS AUGUSTUS' PATH) After the cutscene, climb down the ladder and face three skeletons then pick up the granite block. Open the door, kill the foes and grab another granite block. Open the next door, kill the enemies, get the granite block and go down. Kill the enemy, go right and kill the enemies in the next room. Grab the granite block and use the granite blocks you collected on the respectives alcoves. The locked door in the last room will be unlocked. Go there and dismember the statue to open the door. In the next room, slay the undeads, push the button in the corner and step on the portal. Choose one of the three artefacts (it will have its role for the entire game) to end the chapter and return to Alexandra's path.
ALEXANDRA'S PATH You get the Tome of Eternal Darkness after the cutscene. Read the piece of paper behind to get the chapter called «The Binding of the Corpse God». Read it to start a new chapter.
THE BINDING OF THE CORPSE GOD (ELLIA'S PATH) Don't touch the necklace on the statue, go east instead, check the pedestal and go to the next room. Avoid the traps, slay the creature and extinguish both of the candles. Go back to the first room and go west. Slowly walk to avoid the traps and kill the creature in the next room. Grab the bronze necklace and extinguish the candle to the right. Go back to the first room, take the strange necklace and
ALEXANDRA'S PATH Go interact with the shrine of candles, extinguish the middle and the right candles and grab the message tube. Check it to get the chapter «Suspicions of Conspiracy». This will trigger a cutscene. Read the page to start a new chapter.
SUSPICIONS OF CONSPIRACY (ANTHONY'S PATH) Talk to the monks and go to the door to the left. This is where Charlemagne is. It's unfortunately locked. Go up the stairs to be teleported to a strange room. You can see the statue of Pious Augustus and Ellia. Go get the Tome of Eternal Darkness to go back to the chapel. Go up the stairs, grab the blue urn on the shelf and use it. You'll get a magical rune and the broken blue urn. Go downstairs, open the casket and get the Scramasax (2). All the monks are gone so go back upstairs and check the medallion to get the Circle of Power. Check the book shelf to find a suspicious book and move it. This will reveal a secret passageway. Go down, kill the enemeis to get a new rune and carry on. Save the monk, grab the torch and talk to him to get the two-edged sword. Use the torch to collect the parts of the broken green urn in the corner and mix them together to make the broken green urn. Open the door, collect the magickal codex and kill the enemy. Open the door, kill the foes, grab the filled red urn and the magickal codex and carry on. Kill the creature, open the door and collect the scroll and the magickal codex. You can now cast the «enchant item» spell. Use it to repair the two broken urns and go fill them with water at the fountain. Now go back to the room where you met the bishop and put the urns on the pressure plate to open the path. Murder the bishop and the creatures awaken and grab the bishop's key. Now go all the way back to the chapel avoiding the trappers. You'll face a giant creature. Sneak behind him and backstab him a few times to be victorious. Go downstairs, use the key on the door and watch the cutscene.
ALEXANDRA'S PATH Leave the office, go back to the foyer and go upstairs. Use the key to the second floor on the door. Unfortunately, it will break. Not a problem, use the spell to repair it and use it once more on the door. It's now open. Go east to go to the bedroom. Grab the revolver ammos on the table, note the dresser and go to the bathroom. Check the bathtub, then grab the page of the diary and go back to the hallway. Go west now to see your ancestor, check the wall in which he phased through and check the stained glass window at the end of the hallway. You can see a rune but you can't reach it. Open the second door next to the fake wall, collect the revolver ammos on the dresser and the chapter page hidden behind the portrait. Read it to start a new chapter.
THE GIFT OF FOREVER (KARIM'S PATH) Try to climb down the ladder, collect the Tome of Eternal Darkness and fight the foes. Go down, kill the enemies, take the statuette and collect the magickal rune inside the body of the creature nearby the ladder. Go up, get to the barrier, go down, grab the statuette and the magickal codex, kill the creatures and go back up. Put the statuettes on two of the three pressures plates and step on the last one to activate the device. Avoid the trappers and use the device to descend. Grab the Tulwar to get a new weapon in the other hand. Indeed, Karim can wield two weapons at the same time. Open the door, kill the creatures, grab the scroll, then open the door to the left, kill the foes and go open the door next to the barrier. Kill the enemy, claim his rune and get the magickal codex on the stone table. Go back, then go down the ladder, grab the magickal codex and go east. In the next room, take the Ram Dao and kill all the creatures to escape from the room. Go back to the sealed door, enchant the Ram Dao sword using the sigil shown on the door and use the weapon to break the seal. Kill the creature behind the door, go up the ladder, sneak past the trappers, grab the red effigy and go bak down. Cross the rumble at the end of the curved corridor, kill the enemy and climb down the ladder. Use the Tome of Eternal Darkness on the hand to unlock the gate and carry on. Now you need to get rid of the waves of enemies. Use the recover spell (starting with the green sigil) to recover your sanity because these guys drain it so fast. After that tough battle, grab the artefact to end the chapter.
ALEXANDRA'S PATH The only thing you can do now is go to the kitchen, enchant the gladius with the enchant item spell and use the weapon on the door. You'll find a spied jar with a scrap of paper. Check the jar to find a new chapter called «The Lurking Horror». After the cutscene, read the page to start the chapter.
THE LURKING HORROR (DR. MAXIMILLIAN ROIVAS) Grab the flintlock pistol ammos on the desk and leave the room. Open the door nearby, collect the ammos and leave the room. The other door is locked so go east now, take the ammos on the table, open the door, take the magickal codex and open the door to the bathroom. Pick up the ammos and go to the first floor. Go to the kitchen, grab the pump handle in the closet, the magickal codex and the ammos and leave the room. Go east, check the painting and the symbol then go to the room next to the kitchen. Check the fi
ALEXANDRA'S PATH Go back to the room with the dresser, use the reveal invisible spell starting with the red sigil to reveal a keyhole and use the key to open it now. You'll find a revolver and a page called «A Journey into the Darkness». After the cutscene, use the page to start the new chapter.
A JOURNEY INTO THE DARKNESS (DR. EDWIN LINDSEY'S PATH) Kill the enemy after the cutscene (you have to let him come close to you and shoot him when his wings are wide open), step in the centre of the room and use the brush to find a bronze bracelet. Use it on the statue and go west. Take the Tome of Eternal Darkness, carry on and kill the creatures. After the corridor of deathtraps (don't forget the metal bracelet where the blowgun was), use the brush on the cobweb to find a magickal codex, ignore the creature and take the bronze necklace. Go back to the statue and use the bronze necklace on the statue to unlock the way to the east. Go there, take the silver bracelet and
ALEXANDRA'S PATH First things first, find the secret cache to get the essence of Mantorok. Then, go back to the stained glass window and remove the force field to find a page called «Heresy». Read it after the cutscene to start a new chapter.
HERESY! (PAUL LUTHER'S PATH) Go towards the giant door and check the place to find some crossbow bolts. Open the door to the left, open the chest to find a crossbow and check the coats to find the podium key. Go back to the previous room and use the key on the podium to open the drawer and find a diary page. Head back towards the giant door to trigger a cutscene. Grab the emerald on the painting and try to leave the room after the cutscene. Get the Tome of Eternal Darkness and leave the room. Now go up the stairs in front of you, open the door, kill the creature and open the door. Ring the bell to call the brother and talk to him. You'll get the old tower key. Go back to the giant room, then behind the altar and go downstairs. Go in the room to the left to find some crossbow bolts and the book of Reliquaries. Leave the room, carry on, note the device, take the steel mace and open the door. Watch out for the trappers here and locate the empty barrel. Interact with it to open a secret passageway. Fight the creature, collect the sapphire and go back up. Unlock the door to the right, ignore the guy, go grab the spell on the pedestal and go through the door. Face Anthony (yep, that Anthony you controlled a while ago, now in a zombified shape) and get a ruby and the two-edged sword at the end of the fight. Now go up the stairs, kill the creature and collect the sheet of music and the diary page. Go back to the giant room and play the melody on the organ to open the furniture and find a new circle of power (4). Head back where you found the sapphire and use the three gems on the altar. Go down, open the door, kill the creatures, grab the magickal rune and carry on. Descend, kill the creatures, grab the crossbow bolts and go west. Kill the foes, open the door, kill the two creatures, take the crossbow bolts and push the shelf. Grab the diary page and the magickal codex then head back to the monk. He will give you the sacrifical knife. Put it on the tomb in the undergrounds to open the door. Dispel the barrier with the improved dispel barrier spell (use the circle of power 5 points and the runes chattur'gha, nethlek, redgormor and pargon twice), go to the altar, save your progress and examine the corpse. After the cutscene, kill both of the creatures and open the door with the symbol in the previous room. Head to the sanctuary to end the chapter.
ALEXANDRA'S PATH You'll get a note from Edward. Read it and go to the room with the piano. Play the melody you found in the last chapter to find a new chapter. Read it to start the chapter called «The Forbidden City».
THE FORBIDDEN CITY (ROBERTO BIANCHI'S PATH) You should remember this place. This time you need to survey the place. Skip the first room since there nothing interesting, avoid the creature and survey the second room. Take the saif and the crossbow bolts then go down. Pull the levers down and kill the creatures to make your way to the next room and survey it. Take the crossbow (5) and the crossbow bolts then carry on. Use the crossbow to clear the path, examine the wall and go up. Get rid of the enemies, take the summon zombie spell scroll and carry on. Collect the crossbow bolts, fight the golem and open the door. Oh, there's a crusher. Better not step on that pressure plate then. Summon a zombie and sacrifice him with the crusher to disable the trap and go down. Kill the creatures, carry on, grab the artefact and the ruby effigy and go back to the room with the trap, open the other door, fight the creatures and open the door to the right. Survey the area and kill the possessed slaves then go back to the previous room. Go down, equip the crossbow and kill the trappers then go in the next room and kill the creatures. Note the key on the pedestal, cast the improved reveal invisible spell starting with the red rune and get it. Go back, unlock the door, cast the improved shield spell starting with the red rune and run to the other side of the trapped hallway. Cut the rope, kick the butt of the worms, pull down the lever to raise the gate and survey the area. Head back to the first room to end the chapter.
ALEXANDRA'S PATH All you need to do here is check the rumble nearby the painting to get a new chapter page called «A war to end all wars» and read it afterwards.
A WAR TO END ALL WARS (PETER JACOB'S PATH) Take the soldier letter and the sealed enveloppe in this room, note the symbol to the left and go to the hall of the cathedral. Go upstairs to find another letter, head back to the hall, unseal the enveloppe and give the orders to the bored guard. Enter the room he kept all this time, take the revolver and try to open the door. Pick up the Tome of Eternal Darkness, open the door and head to the very first room. Collect the rifle on the altar, go right, then up the stairs, collect the two-edged sword and the revolver ammos and go back downstairs. Kill the creatures, open the door underneath the stairs, kill the creatures and grab the rifle ammos and go back to the giant room. Kill the creatures, take the sheet, locate the stairs, go down, check the rooms to find some ammos and carry on. Kill the trappers in the cellar, enter the room to the left and turn the wheel. Go in the room in front of you, use the lucky penny on the fuse box and activate the switch to power the whole cathedral. Go back to the organ in the giant room and play the melody. Collect the door handle, kill the creatures and head back to the room in which you turned the wheel. You will notice a door that can't be moved. Next to it, a small hole. Summon a trapper and go in the hole. You see on a pile of crates the circle of power. And a corpse, yeah. Lock on the body, get close to it and press A. Now you can open the door and grab the circle of power. Head back to the strange symbol, cast the reveal invisible spell using the red rune and the new circle of power (which means you need to use the rune pargon 4 times to increase the power of the spell) and use the door handle on the door. Open it, collect the ammos, go down and carry on. In the next room, kill the creatures, go through the door to the left, kill the trappers and kill the creature in the next room. Pick up the letter, push the shelf and carry on. Kill the creatures, pick up the binding hall key and return to the door with the symbol carved on it. Don't go through that one, go through the other one leading to the altar. Get rid of the trappers, take the magickal elixir and go to the door with the symbol. Use the key to unlock it, carry on, grab the magickal attack spell on the wall and move on to the next room. You will face the keeper. Try to shoot him. Unfortunately, the shots don't do anything on him. However you have a new spell to try and he's a perfect target for this. Note the symbol above his head. It's the one referred to the artefact he keeps, which is the one you chose with Pious Augustus at the beginning. Start with a small magickal attack with the opposite rune (by that, I mean, if you chose the green artefact at the beginning then you need to start with the blue rune, or the red rune if you chose the blue artefact...) to weaken him a few times when he concentrates his energy and dodge his attacks. Round two: he summons zombies. Use the minor damage field spell to create a barrier around you and use the magickal attack when he recovers. Avoid his attacks and do this a few times. Last part of the fight: avoid his attacks by running around and use the minor magickal attack a few times to kill him. Go claim the artefact to end the chapter.
ALEXANDRA'S PATH Go back to the library to meet a ghost. Talk to her to get the basement key (6). Go back to the foyer and open the locked door. Grab the shotgun, the ammos and open the fusebox. Use the lucky penny to restore the power and head to the second floor. Go to the bathroom, take the journal page and open the cabinet to find the chapter page called «A legacy of Darkness». Read it to start a new chapter.
A LEGACY OF DARKNESS (DR. EDWARD M. ROIVAS) Take the book put on the fi
ALEXANDRA'S PATH You get a note from Edward. Read it, go back to the basement and check the pile of barrels to the left. You'll find a pickaxe. Head back to the second floor, use it on the fake wall, then remove the field to grab the note and the stethoscope. Go back to the basement, use the stethoscope to break the safe and collect its content. Read the chapter page to start the last chapter of the game.
ASHES TO ASHES (MICHAEL EDWARDS' PATH) Grab the weapons and the ammos nearby the corpse after getting the ruby effigy and the essence kept by Roberto and open the door. Go down the ladder, kill the enemies and climb up the third ladder you'll see. Kill the enemies, take the staff and go back down. Climb up the second ladder in the underground, grab the gold amulet and go back down. Go to the end of the underground gallery, climb up the ladder and combine the gold amulet and the staff. Use the staff on the pressure plate, touch the half-spheres with the ray of light and then use the ray of light to touch the spike and the hidden half-spheres you just revealed. Go down to get the Tome of Eternal Darkness and head back where you found the gold amulet. Climb down the other ladder, kill the enemies, go up and climb down the other ladder. Use the dispel magick to remove the field and get the emerald effigy. Kill the worms and climb up the next ladder, kill the creatures, climb down the ladder in the centre of the room, kill the next creatures and open the door. Kill the trappers, open the door, slay the zombies, summon a trapper and get rid of the obelisk by locking on it and pressing the A button. Go down now, kill the trappers, go down once more and take the last spell of the game: the bind spell. Use it on the two golems creating the force fields behind you with the circle of power 7 and challenge the winner with your assault rifle while he's celebrating his victory. Go claim your trophy (which is the C4), go back to the suspicious wall and use the reveal invisible spell to reveal the door. Open it, grab the detonator and use the shield spell to cross the trap. Combine the detonator and the C4, enchant it with the enchant item spell power 7 and use it. Get the heck out of here to end the chapter.
ALEXANDRA'S PATH The final part of the game. Leave the office, ignore the creatures and go to the foyer to get the package. Open it to find the last essence. Now, go back to the library and go to the obervatory. Move the mirrors so the ray of light reaches the world map on the floor. Go to the basement, open the door and go down. Before carrying on, prepare the dispel magick spell force 7 and the shield spell force 7. Use that spell to cross the trap and the other one to remove the barrier. Recover your health, save your progress, collect the parts of the pedestal and combine it. Cast the enchant item spell to repair the item and put it on the pedestal. Place the essences on the pedestals and use the runes like in the Dr. Edward M. Poivas' chapter. Except this time, you'll have to solve the puzzles instead of flipping some levers and use your shield to cross the trap every single time. You need to use the rune assigned to the demon enemy of the one chose by Pious Augustus and the runes «summon» and «creature». Assign the enchant item spell in you quick spell list, save your progress before stepping on the portal leading to the final showdown. You're going to face Pious Augustus. First things first, cast the enchant spell on any of your weapons and hit it a few times until the artefact he kept all this time appears. Quickly, go towards it and hit it. Repeat that operation until you control a familiar face in its ghostly form. Touch the tome of Eternal Darkness and fight Pious to reveal the artefact once more then go hit the artefact. Now, chase the artefact until you break it once and for all. After the cutscene, hit a few times Pious with an enchanted weapon to destroy his shield and hit him with your best shot. A good way to get rid of him is to stand where you are, let him come at you and strike before he gets a chance to slap you with his staff. After a few hits, he will be defeated. You now have to bind the creature summoned. Use the circle rune to do this and watch the final cutscene. Save your progress.
Congratulations, you completed the game. You can try to beat the game with the other essences in order to get a new game mode: the Eternal mode. I let you find out what that mode is and I see you in the next walkthrough. Take care folks! |
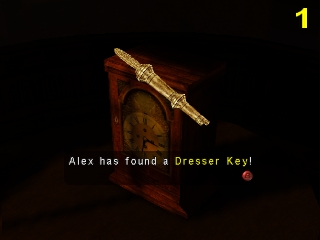


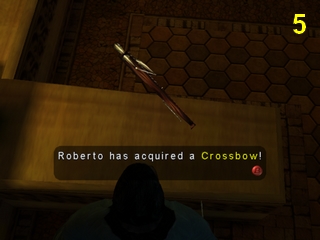

| Games have secrets, I have my eagle gaze. |
Affected by 'Laziness Syndrome'
Registered: 10-21-11
Location: France
Last Post: 1854 days
Last Active: 1027 days
11-18-16 08:04 AM
| ID: 1315261 | 35 Words
Why the heck not, let's just go for it. You can count me in as well man. I give you the authorization to either keep the name Laian or change it for your story |
| Games have secrets, I have my eagle gaze. |
Affected by 'Laziness Syndrome'
Registered: 10-21-11
Location: France
Last Post: 1854 days
Last Active: 1027 days

Page Comments
This page has no comments