

 User Notice
 Forum Links
Guide: It's your world...Eat it! Pt. 4
Pac man world walk through area 4 100%
Pac man world walk through area 4 100%
Play Pac-Man World 20th Anniversary Online

Thread Information
Views
1,089
Replies
5
Rating
1
Status
OPEN
Thread
Creator
Creator
FaithFighter
02-28-15 04:28 PM
02-28-15 04:28 PM
Last
Post
Post
ZeroTails
02-28-15 08:27 PM
02-28-15 08:27 PM
System
9.5
Views: 559
Today: 0
Users: 0 unique
Today: 0
Users: 0 unique
Thread Actions


Order
It's your world...Eat it! Pt. 4
Game's Ratings
Overall
Graphics
Sound
Addictiveness
Depth
Story
Difficulty
Average User Score
9.5
9
9
10
10
8
9
02-28-15 04:28 PM
 FaithFighter is Offline
| ID: 1142369 | 3901 Words
FaithFighter is Offline
| ID: 1142369 | 3901 Words
 FaithFighter is Offline
| ID: 1142369 | 3901 Words
FaithFighter
Level: 69


POSTS: 991/1208
POST EXP: 167129
LVL EXP: 2777606
CP: 10755.7
VIZ: 26210

POSTS: 991/1208
POST EXP: 167129
LVL EXP: 2777606
CP: 10755.7
VIZ: 26210
Likes: 0 Dislikes: 0
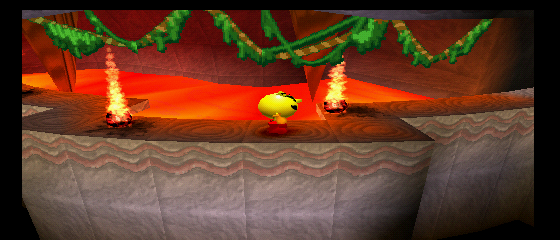
All right, I can't stay away from a project for long, so it's time for the world 4! The Funhouse! Level 1 Clowning Around! Look out, we are going to face a lot of these kinds of platforms, the spin-wheel platforms. You will cross a yellow, blue, and pink one. On the solid platform, you should see a pressed button. Continue across the moving platforms. On the other side, you should see the other blue button, press it, and the stairs will raise so you can go to the top. Watch out for those weird clown things in the planes!. If you collect the items in those crates, and you do not bounce along the way, you should be able to get them both. You will see a cherry door at the top. Go past it a little ways, and you should see a crate close to a checkpoint. That crate has the cherry that you need to open the cherry door and get the letter "P". But what about that other switch? Well, you can jump around the wall at the top of the stairs and back down to the other button. If you hit it, you can grab an extra life, but that's about it. All right, back where you found the checkpoint and the cherry, you should see a whole roomful of spinning platforms. These ones have green switches on them. My recommendation? Go with the flow, hit the switches, try not to fall! The last blue spin-wheel platform has the melon so you can open the door that you just passed and grab the letter "A". You will walk past some mirrors, then come to a "tumbler". I like to bounce inside it a lot so that you do not risk tumbling with it! Once you manage to traverse that, you will see another cherry door. If you head to the right, watch out for that robotic mouse thing. It can only be defeated by a power pellet blast. (Charged Pac Dot Shot!) At the end of this platform, you will cross two spinners before landing on a solid platform with the cherry. Now we can get that door. Inside it is a green switch that activates a pac dot chain that will carry you on top of the tumbler where you can find extra lives. Carefully, grab those and get out of there, not the safest place to hang out in this game! Head back towards the right. Once you get to the platform where the cherry was, head towards the back. Hit that clown thing with a pac dot and proceed to the blue switch. (or vice versa, depending on the game's timing) That blue switch will activate a new platform for you to take. Take it towards the front of your screen and to the right; you will find a crate that holds the letter "C". Now head back to the center platform and hang a right.You'll go past two spinning platforms before making it back to solid ground. Hit that yellow switch and make your way to the top. Follow the arrows. You should be seeing a green switch about now If you hit it, two pac dot chains will appear, one on the left and one on the right. The will both give you an extra life, so i say take them! But watch out for that mouse thing! Once you take care of things here, move on to the right. You should come to a room with a bunch of steps. Hit the green switch and ghosts will appear, along with the pac dots. Gobble those guys and make your way to the top of the stairs where you should find another green switch. Take a ride on the chain that appears, and you will also collect the letter "M" and an orange. After this room, you will find a room with three spinners that have green switches on them. Hit the switches to collect the fruits that appear. Remember, with these kinds of platforms, it is best not to go against the grain, if you know what I mean. After that, you should find another one of those tumblers. Bounce your way across that, then scale what appears to be a pile of presents. Too bad we cannot just try to open them! Proceeding past that point, you will find the spinner platforms as well as clowns sticking their tongues out at you...well, not really but the way they set it up, it looks like it. Make your way across, gathering the fruit from the switches along the way. At the end, you should be looking over a wide open space. You can just jump down into it, or take the stairs to the front. There are 4 of those stinking mice that want to knock you off the platform. Give them a good blast, and they will not be bothering you anymore! There are three blue switches that you will need to hit in this area. The first one you should see as soon as you get down into the area, and the other two are farther to the right. Hit them all, and a large set of stairs will come crashing down. (I would advise saving the blue switch towards the front for last!) Then, take the banana that you found just before this, and use it to open the door that you see. Grab the letter "A" and climb the stairs. At the top, you should see a galaxian door. Continue on to the right to get the key! Share some pac dots with those flying clowns, and grab the galaxian on the right platform. Hold on to your dots! Caution is advised on this maze. Some of the end cap walls close! This could be a problem if you are being followed by a ghost! Once you finish the maze, we can go back to where we found the galaxian. Head up the stairs. Yikes! It seems that even in the funhouse, we are not safe from the shooting gallery! Think quick and nimble! At the end of the row, you will see a blue switch, hit it and we can collect all those items, then head up to the next level to do the same thing. Once we get everything we can go up the stairs to the next level. WHAT!?! Another one! Well, I think that might be a little overkill there, but you know the drill. After that, we can go up the stairs and head to the right. You should see a melon door, and you should be able to open it, with all the melons in this level. Grab the letter "N" and we should be out of this level in no time at all! Yep, straight to the right is the end of level. Let the games begin! Okay, this one is way trickier than some of the ones that we have faced so far. Bounc on that b-boing pad and you will be launched into a whole slew of balloons with fruit on them. Of course, the balloons pop almost as soon as you land on them. Okay, I was wrong, they last longer than that. Some fast moves should allow you to get them all! All right, see you back at the mainland. Hopefully, you got a bunch of lives, we may need those towards the end! Anyways, time for level 2 Barrel Blast (Sounds like donkey kong!) Watch the steam between the platforms, but your bounce should be high enough to avoid it altogether. All right, it looks as though we have some climbing to do! We have a bunch of rotating platforms that lead up to something...We also have a strawberry door. And try not to hit those flashing blockers. Those things are quite painful! As always, bounce is probably your best bet for climbing the thing. Grab the strawberry at the top and open the door to grab the first letter in the level. Then, we shall go back up to the top and proceed past the checkpoint. Watch the steam and hop on the crane platform. Dismount on the other side and move on. It looks like we have another set of tumblers. I would not recommend using bounce on this one, as it is quite narrow. Slow and steady is going to win this race! Once across, head past the checkpoint. You'll pass more steam and come to a green switch. Hit it, and a platform will move into the correct position for you. Head back to the platform right before and take the new bridge all the way. At the end of it, you will find the banana that you need to open the banana door. Inside it is a chrome pellet that will help you up the stairs, as they all have steam blowing on them. Once at the top, you will cross More tumblers, but this time, you need to also watch out for steam, as the chrome wears off, and are completely at the mercy of the game and your skills. Once across, there is a crate with the letter "A" in it. You will board another crane platform with more steam. Grab the chrome pellet and the lemon along the way.Once you hit the other side, you will want to continue to the right until you reach the lemon door. Hit the switch inside to activate the platform just before the conveyor belts and the steam. Now we can ride that to the top. I think it helps if you bounce on the conveyor belts, it seems to lower the effect on your speed. Once you get across the top, you will come to another fruit door. You will also see a very dangerous tumbler. This one has burn tiles all over it. As always, the bounce will help you to hit the right tiles and lessen the effect the tumbler has on your movement. Once on the other side, we can grab the strawberry that we need to open the door and get the letter "C". Then, cautiously make your way back. Take the helivator to the top, careful of the steam. That crate has an extra health wedge, so you might be interested in that. At the top, there is a rev ramp. So charge up and roll out! You should land right at the next checkpoint. Proceed across the conveyor belt. You should be able to see a green switch. Hitting it will bring up another platform. Let's see where it goes! All right! We got the letter "M" on that platform! Well, head across the belts to the next checkpoint, where you shall see a galaxian door and another rotating tower to climb. Bounce on! At the top, you will want to take the right side. There you will find the galaxian, as well as a blue switch. It activates some stairs so that we can get out of here! Now on to the maze. It looks as though we have more of those closers in this maze, so watch your back. If you want to change views, you can do so here with the R2 button. The ghost hideout is located in the left back corner, so be careful there! After that is complete, bounce back up the tower and towards the left side so we can get out of this nightmare house...eventually! You will have to climb another tower and head to the right. There is a crate with the letter "A" in it and a checkpoint at that top right platform. Once you have got those, head over to the right, the yellow switch that you see, will reverse the direction of the helivator, as will the one at the top. Be sure to grab the stuff in the crates, and watch that steam! At the top, we have another burner tile tumbler. The thing with this one is that it changes direction frequently, so be prepared for that. Once you get to the other side, take the helivator up. And cross over on the topside. All right, you should see two doors. One has the final letter. You should already have the banana to open it. The other is the bell door and has the key to free the character in the next level. Hit that blue switch, and you will see that a pac dot chain will appear, giving you access to the previously unreachable bell there. Okay, if you head to the right after grabbing the key, you should come to a spot with a bunch of stairs with steam traps. Watch, because there is steam on the level above you as well, and you can get hit with it if you use the b-bounce. Once you manage to get to the top of the stairs you should see more tumblers. But now, there is a spot on them that is completely open. So time it right. As soon as the first one comes around start the trek across. I do recommend using bounce here for speed. Apparently, the game creators think that we can do anything by now, so they decided to have us rev roll onto the open ended tumblers! The timing is just like the previous one, just make sure you have something to land on, and you should be fine. And I guess they wanted to test your nerve, so they made us do it again! Get across and go up the stairs...and we won! Time for the minigames! Okay, I accidentally hit the button too fast on the slot machine and got the galaxian instead of the lemon...I tried to get the other two and succeeded! Once you see the pumpkin, one more fruit goes by, then the galaxian. Just something to keep in mind! All right, on to level three! Spin Dizzy! Okay, you will want to watch for the falling platforms in this level! They seem to be everywhere! You will pass a lemon door, then come to some stairs. Hit that green switch so that you can gobble the ghosts! Watch out, because they come back! At the bottom of the stairs, you should find a lemon. Now we can unlock that door! Cool! Extra life! I do not know if you will want to try this or not, but you can actually rev roll off the top of the stairs and go directly to where you found the lemon. Just be sure to charge it the full way! After you get down there, go to the right and get that b-boing. It will take you to a platform in the middle, where you will see a green switch. Hit it, and you should see two platforms orbiting the one you are on. Jump on one of them and use it to get to all the hidden spots around it. First, at the top left, you will bounce off two red balloons to get to a platform with an extra life. Next, down below, to the right is a platform with a full restore health wedge. You may want that. All right, now that you have those things, just go to the right past the cherry door. You should see a set of stairs.Hit the yellow switch that you see and take the helivator across. On the other side, the yellow button activates the spinning platforms at the top. You will get a free ride down, but be careful on the way back! Climb that and take the spinning platforms all the way to the end, where you should find the cherry that you need. Go back and open the door. You will now get the letter "P". After you go back to where you found the cherry, you will see a platform with a green button. Hit it and you will see pac dots leading up the set of stairs behind you. Take the stairs and head across. As long as you do not die after hitting the switch before collecting everything. Once you cross the balloons, you should find two platfoms. One with the letter "A" and one with a health wedge. Go down the other set of stairs and blast that flying thing with a pac dot. After this point, you will begin traversing some spinners. Be careful, this will go on for a bit. In the second room of spinners, you will have to be extra careful. Go towards the spinner on the back. Go with the flow and bounce to the back where you will see a crate, that has a pumpkin in it. Bounce off that platform and onto the spinner, then bounce around to the other side where you will find the pumpkin door. Hit the switch inside. A pac dot chain will appear that will take you to a platform with a crate on it. This crate has the letter "C". All right, bounce the balloons to get to the next platform, and watch the flying clown. After that, you should find yourself in the next room, watch the steam as you try to move across this room. Remember to b-bounce for a little extra height. Once you get across that room, you will find a little bridge and enter a shooting gallery. Think fast! If you just run the whole way across, you should be fine. Now, at the end of the gallery, you should see a merry-go-round kind of platform. This one has dangerous burner tiles on it, so be careful! About halfway across this treacherous ride, you should see a green switch on a separate platform. This switch will reverse the direction of the platform's spin. On the other side, there is a platform that will take you up. To the right, you can move on, to the left, there are balloons that lead to ghosts that you can gobble! It does not seem to have anything else though, unless you are in the need for an extra life or health wedge (i think the game alternates between the two. I had to replay the level, because I missed the first "a" Yeah, that's how I knew about the dying glitch!) Anyways, moving on to the right. You will go down a couple stairs, and you will see a galaxian door as well as one of those pushy mouse bots. Go all the way to the right, and you should see a crate. This has a super stomp pellet that you can use to beat the next mouse bot. Towards the back you should see a b-boing. Take it to the next b-boing. All the way to the top. You will reach a platform with a blue switch that activates the machinery in the room. Unfortunately, this also means the hammer traps in the room. Go back up the steps. Once the hammer lifts, you have about 4 seconds till it slams down again. Bounce on the conveyor belts to counteract the directional effect. Jump onto the platform in the middle, then to the next belt. Be careful on the third one. The hammer will strike down in one of two spots...at the beginning and end of the platform. It alternates between the two, so it's pretty predictable. Continue until you see the platform with the galaxian. Now you can open the door! Continue on past until you come to the shooting gallery. Run through that quickly, and watch out for the falling platforms. After that, you will pass another checkpoint. Hit the yellow switch that you see and you will see a helivator come your way. Let's see where it takes us. All right, to the right you will see another yellow switch and a b-boing. You'll hit several of these. Behind you, you will probably notice that none of the platforms that are typically moving are doing anything. Continue on till you reach some ghosts. Hit the green switch to make the pac dots appear. The Power Pellet is in a crate a little farther over...close to a blue switch. After dealing with those ghosts, you will need to hit that switch. Looks like all the platforms started moving. You will need to now take the b-boings back to the beginning. The helivator should still be at that platform ready to take you back. If not hit the yellow switch. Then go back to the other side and take the platforms all the way over. In the secon room, you will notice a lemon door. Go a little farther, and you will find a crate, with the needed lemon. The door holds the letter "M". Then head on back till you see a platform with a green switch on it, be sure to hit that switch and grab the pumpkin. Then you can move to the next room, where you should jump onto an elevator type platform. Ride it to the blue pac shaped spinner and cross over. Rev up the ramp and land on the other side. The pumpkin door that you see holds the letter "A" At the front of the platform you will see the spinner on the right has a green switch. Hitting that will activate a platform that will take you out of the area. after that, you will come to some multi-layered spinners. As if one was not enough, these platforms have two different layers spinning different directions. Caution is advised on these, as you also have the steam to deal with. Continuing on past that you will pass a checkpoint into a shooting gallery. Dash through to the checkpoint. Here you will see a melon door. To the right is another merry-go-round type of platform. Again, green switch in the middle activates platform to get you up top. There you have a merry go around platform. This one has gaps, so you will really have to be nimble. As if fighting the direction is not bad enough, you also have the flying clowns to deal with, but once you get to the platform bounce on the switch to grab that melon. A pac dot chain appears. Taking it will get you to the platform so that you can get to the lower level, and then get the last letter in the melon door. Then go back to where you got the melon. Wait until you see the platform come down, then get on it and ride back up. You'll have one more round of these crazy spinners. Hit the green switch then get up to the last platform where you will be able to free Baby Pac. And beyond her is the end of the level! Now we can go on to the boss level for this level. The level where...You get to race a bunch of clowns? Yep, the Clown Prix! You will need to accelerate by pushing up on your control stick (or the up arrow) Collect power pellets and press the circle button to boost. Watch the bombs that the clowns keep putting on the track, and try not to fall off. Also, you can collect fruit to get you a higher score. Also, use the "X" Button to brake around the corners so you don't fall over the edge! Try to boost on straightways, and try not to knock the clowns ahead of you. Have fun! That is all for world 4! Caution is advised on this maze. Some of the end cap walls close! This could be a problem if you are being followed by a ghost! Once you finish the maze, we can go back to where we found the galaxian. Head up the stairs. Yikes! It seems that even in the funhouse, we are not safe from the shooting gallery! Think quick and nimble! At the end of the row, you will see a blue switch, hit it and we can collect all those items, then head up to the next level to do the same thing. Once we get everything we can go up the stairs to the next level. WHAT!?! Another one! Well, I think that might be a little overkill there, but you know the drill. After that, we can go up the stairs and head to the right. You should see a melon door, and you should be able to open it, with all the melons in this level. Grab the letter "N" and we should be out of this level in no time at all! Yep, straight to the right is the end of level. Let the games begin! Okay, this one is way trickier than some of the ones that we have faced so far. Bounc on that b-boing pad and you will be launched into a whole slew of balloons with fruit on them. Of course, the balloons pop almost as soon as you land on them. Okay, I was wrong, they last longer than that. Some fast moves should allow you to get them all! All right, see you back at the mainland. Hopefully, you got a bunch of lives, we may need those towards the end! Anyways, time for level 2 Barrel Blast (Sounds like donkey kong!) Watch the steam between the platforms, but your bounce should be high enough to avoid it altogether. All right, it looks as though we have some climbing to do! We have a bunch of rotating platforms that lead up to something...We also have a strawberry door. And try not to hit those flashing blockers. Those things are quite painful! As always, bounce is probably your best bet for climbing the thing. Grab the strawberry at the top and open the door to grab the first letter in the level. Then, we shall go back up to the top and proceed past the checkpoint. Watch the steam and hop on the crane platform. Dismount on the other side and move on. It looks like we have another set of tumblers. I would not recommend using bounce on this one, as it is quite narrow. Slow and steady is going to win this race! Once across, head past the checkpoint. You'll pass more steam and come to a green switch. Hit it, and a platform will move into the correct position for you. Head back to the platform right before and take the new bridge all the way. At the end of it, you will find the banana that you need to open the banana door. Inside it is a chrome pellet that will help you up the stairs, as they all have steam blowing on them. Once at the top, you will cross More tumblers, but this time, you need to also watch out for steam, as the chrome wears off, and are completely at the mercy of the game and your skills. Once across, there is a crate with the letter "A" in it. You will board another crane platform with more steam. Grab the chrome pellet and the lemon along the way.Once you hit the other side, you will want to continue to the right until you reach the lemon door. Hit the switch inside to activate the platform just before the conveyor belts and the steam. Now we can ride that to the top. I think it helps if you bounce on the conveyor belts, it seems to lower the effect on your speed. Once you get across the top, you will come to another fruit door. You will also see a very dangerous tumbler. This one has burn tiles all over it. As always, the bounce will help you to hit the right tiles and lessen the effect the tumbler has on your movement. Once on the other side, we can grab the strawberry that we need to open the door and get the letter "C". Then, cautiously make your way back. Take the helivator to the top, careful of the steam. That crate has an extra health wedge, so you might be interested in that. At the top, there is a rev ramp. So charge up and roll out! You should land right at the next checkpoint. Proceed across the conveyor belt. You should be able to see a green switch. Hitting it will bring up another platform. Let's see where it goes! All right! We got the letter "M" on that platform! Well, head across the belts to the next checkpoint, where you shall see a galaxian door and another rotating tower to climb. Bounce on! At the top, you will want to take the right side. There you will find the galaxian, as well as a blue switch. It activates some stairs so that we can get out of here! Now on to the maze. It looks as though we have more of those closers in this maze, so watch your back. If you want to change views, you can do so here with the R2 button. The ghost hideout is located in the left back corner, so be careful there! After that is complete, bounce back up the tower and towards the left side so we can get out of this nightmare house...eventually! You will have to climb another tower and head to the right. There is a crate with the letter "A" in it and a checkpoint at that top right platform. Once you have got those, head over to the right, the yellow switch that you see, will reverse the direction of the helivator, as will the one at the top. Be sure to grab the stuff in the crates, and watch that steam! At the top, we have another burner tile tumbler. The thing with this one is that it changes direction frequently, so be prepared for that. Once you get to the other side, take the helivator up. And cross over on the topside. All right, you should see two doors. One has the final letter. You should already have the banana to open it. The other is the bell door and has the key to free the character in the next level. Hit that blue switch, and you will see that a pac dot chain will appear, giving you access to the previously unreachable bell there. Okay, if you head to the right after grabbing the key, you should come to a spot with a bunch of stairs with steam traps. Watch, because there is steam on the level above you as well, and you can get hit with it if you use the b-bounce. Once you manage to get to the top of the stairs you should see more tumblers. But now, there is a spot on them that is completely open. So time it right. As soon as the first one comes around start the trek across. I do recommend using bounce here for speed. Apparently, the game creators think that we can do anything by now, so they decided to have us rev roll onto the open ended tumblers! The timing is just like the previous one, just make sure you have something to land on, and you should be fine. And I guess they wanted to test your nerve, so they made us do it again! Get across and go up the stairs...and we won! Time for the minigames! Okay, I accidentally hit the button too fast on the slot machine and got the galaxian instead of the lemon...I tried to get the other two and succeeded! Once you see the pumpkin, one more fruit goes by, then the galaxian. Just something to keep in mind! All right, on to level three! Spin Dizzy! Okay, you will want to watch for the falling platforms in this level! They seem to be everywhere! You will pass a lemon door, then come to some stairs. Hit that green switch so that you can gobble the ghosts! Watch out, because they come back! At the bottom of the stairs, you should find a lemon. Now we can unlock that door! Cool! Extra life! I do not know if you will want to try this or not, but you can actually rev roll off the top of the stairs and go directly to where you found the lemon. Just be sure to charge it the full way! After you get down there, go to the right and get that b-boing. It will take you to a platform in the middle, where you will see a green switch. Hit it, and you should see two platforms orbiting the one you are on. Jump on one of them and use it to get to all the hidden spots around it. First, at the top left, you will bounce off two red balloons to get to a platform with an extra life. Next, down below, to the right is a platform with a full restore health wedge. You may want that. All right, now that you have those things, just go to the right past the cherry door. You should see a set of stairs.Hit the yellow switch that you see and take the helivator across. On the other side, the yellow button activates the spinning platforms at the top. You will get a free ride down, but be careful on the way back! Climb that and take the spinning platforms all the way to the end, where you should find the cherry that you need. Go back and open the door. You will now get the letter "P". After you go back to where you found the cherry, you will see a platform with a green button. Hit it and you will see pac dots leading up the set of stairs behind you. Take the stairs and head across. As long as you do not die after hitting the switch before collecting everything. Once you cross the balloons, you should find two platfoms. One with the letter "A" and one with a health wedge. Go down the other set of stairs and blast that flying thing with a pac dot. After this point, you will begin traversing some spinners. Be careful, this will go on for a bit. In the second room of spinners, you will have to be extra careful. Go towards the spinner on the back. Go with the flow and bounce to the back where you will see a crate, that has a pumpkin in it. Bounce off that platform and onto the spinner, then bounce around to the other side where you will find the pumpkin door. Hit the switch inside. A pac dot chain will appear that will take you to a platform with a crate on it. This crate has the letter "C". All right, bounce the balloons to get to the next platform, and watch the flying clown. After that, you should find yourself in the next room, watch the steam as you try to move across this room. Remember to b-bounce for a little extra height. Once you get across that room, you will find a little bridge and enter a shooting gallery. Think fast! If you just run the whole way across, you should be fine. Now, at the end of the gallery, you should see a merry-go-round kind of platform. This one has dangerous burner tiles on it, so be careful! About halfway across this treacherous ride, you should see a green switch on a separate platform. This switch will reverse the direction of the platform's spin. On the other side, there is a platform that will take you up. To the right, you can move on, to the left, there are balloons that lead to ghosts that you can gobble! It does not seem to have anything else though, unless you are in the need for an extra life or health wedge (i think the game alternates between the two. I had to replay the level, because I missed the first "a" Yeah, that's how I knew about the dying glitch!) Anyways, moving on to the right. You will go down a couple stairs, and you will see a galaxian door as well as one of those pushy mouse bots. Go all the way to the right, and you should see a crate. This has a super stomp pellet that you can use to beat the next mouse bot. Towards the back you should see a b-boing. Take it to the next b-boing. All the way to the top. You will reach a platform with a blue switch that activates the machinery in the room. Unfortunately, this also means the hammer traps in the room. Go back up the steps. Once the hammer lifts, you have about 4 seconds till it slams down again. Bounce on the conveyor belts to counteract the directional effect. Jump onto the platform in the middle, then to the next belt. Be careful on the third one. The hammer will strike down in one of two spots...at the beginning and end of the platform. It alternates between the two, so it's pretty predictable. Continue until you see the platform with the galaxian. Now you can open the door! Continue on past until you come to the shooting gallery. Run through that quickly, and watch out for the falling platforms. After that, you will pass another checkpoint. Hit the yellow switch that you see and you will see a helivator come your way. Let's see where it takes us. All right, to the right you will see another yellow switch and a b-boing. You'll hit several of these. Behind you, you will probably notice that none of the platforms that are typically moving are doing anything. Continue on till you reach some ghosts. Hit the green switch to make the pac dots appear. The Power Pellet is in a crate a little farther over...close to a blue switch. After dealing with those ghosts, you will need to hit that switch. Looks like all the platforms started moving. You will need to now take the b-boings back to the beginning. The helivator should still be at that platform ready to take you back. If not hit the yellow switch. Then go back to the other side and take the platforms all the way over. In the secon room, you will notice a lemon door. Go a little farther, and you will find a crate, with the needed lemon. The door holds the letter "M". Then head on back till you see a platform with a green switch on it, be sure to hit that switch and grab the pumpkin. Then you can move to the next room, where you should jump onto an elevator type platform. Ride it to the blue pac shaped spinner and cross over. Rev up the ramp and land on the other side. The pumpkin door that you see holds the letter "A" At the front of the platform you will see the spinner on the right has a green switch. Hitting that will activate a platform that will take you out of the area. after that, you will come to some multi-layered spinners. As if one was not enough, these platforms have two different layers spinning different directions. Caution is advised on these, as you also have the steam to deal with. Continuing on past that you will pass a checkpoint into a shooting gallery. Dash through to the checkpoint. Here you will see a melon door. To the right is another merry-go-round type of platform. Again, green switch in the middle activates platform to get you up top. There you have a merry go around platform. This one has gaps, so you will really have to be nimble. As if fighting the direction is not bad enough, you also have the flying clowns to deal with, but once you get to the platform bounce on the switch to grab that melon. A pac dot chain appears. Taking it will get you to the platform so that you can get to the lower level, and then get the last letter in the melon door. Then go back to where you got the melon. Wait until you see the platform come down, then get on it and ride back up. You'll have one more round of these crazy spinners. Hit the green switch then get up to the last platform where you will be able to free Baby Pac. And beyond her is the end of the level! Now we can go on to the boss level for this level. The level where...You get to race a bunch of clowns? Yep, the Clown Prix! You will need to accelerate by pushing up on your control stick (or the up arrow) Collect power pellets and press the circle button to boost. Watch the bombs that the clowns keep putting on the track, and try not to fall off. Also, you can collect fruit to get you a higher score. Also, use the "X" Button to brake around the corners so you don't fall over the edge! Try to boost on straightways, and try not to knock the clowns ahead of you. Have fun! That is all for world 4! |
Trusted Member
Affected by 'Laziness Syndrome'
Registered: 06-18-14
Location: Ohio
Last Post: 2293 days
Last Active: 2293 days
| I am the FaithFighter. I stand. I fight. I live. By the Grace of GOD, I live. |
Affected by 'Laziness Syndrome'
Registered: 06-18-14
Location: Ohio
Last Post: 2293 days
Last Active: 2293 days
(edited by FaithFighter on 02-28-15 04:34 PM)
02-28-15 04:31 PM
FaithFighter is Offline
| ID: 1142370 | 32 Words
FaithFighter is Offline
| ID: 1142370 | 32 Words
FaithFighter
Level: 69
POSTS: 992/1208
POST EXP: 167129
LVL EXP: 2777606
CP: 10755.7
VIZ: 26210
POSTS: 992/1208
POST EXP: 167129
LVL EXP: 2777606
CP: 10755.7
VIZ: 26210
Likes: 0 Dislikes: 0
Eirinn : Someone! Help! Why is my thread like this! Why is it all white at the top? Local Mods : Need some advice. What did I do to make it look like this? Local Mods : Need some advice. What did I do to make it look like this? |
Trusted Member
Affected by 'Laziness Syndrome'
Registered: 06-18-14
Location: Ohio
Last Post: 2293 days
Last Active: 2293 days
| I am the FaithFighter. I stand. I fight. I live. By the Grace of GOD, I live. |
Affected by 'Laziness Syndrome'
Registered: 06-18-14
Location: Ohio
Last Post: 2293 days
Last Active: 2293 days
02-28-15 04:35 PM
FaithFighter is Offline
| ID: 1142371 | 14 Words
FaithFighter is Offline
| ID: 1142371 | 14 Words
FaithFighter
Level: 69
POSTS: 993/1208
POST EXP: 167129
LVL EXP: 2777606
CP: 10755.7
VIZ: 26210
POSTS: 993/1208
POST EXP: 167129
LVL EXP: 2777606
CP: 10755.7
VIZ: 26210
Likes: 0 Dislikes: 0
Sorry guys I finally figured it out. Somehow there was a highlight on there. |
Trusted Member
Affected by 'Laziness Syndrome'
Registered: 06-18-14
Location: Ohio
Last Post: 2293 days
Last Active: 2293 days
| I am the FaithFighter. I stand. I fight. I live. By the Grace of GOD, I live. |
Affected by 'Laziness Syndrome'
Registered: 06-18-14
Location: Ohio
Last Post: 2293 days
Last Active: 2293 days
02-28-15 06:42 PM
 ZeroTails is Offline
| ID: 1142401 | 18 Words
ZeroTails is Offline
| ID: 1142401 | 18 Words
 ZeroTails is Offline
| ID: 1142401 | 18 Words
ZeroTails
Cool Davideo7
Cool Davideo7
Level: 93

POSTS: 253/2465
POST EXP: 215125
LVL EXP: 7942579
CP: 18975.9
VIZ: 401024

POSTS: 253/2465
POST EXP: 215125
LVL EXP: 7942579
CP: 18975.9
VIZ: 401024
Likes: 0 Dislikes: 0
Still a nice guide. However... I would like some spacing in the guide. Probably just a formatting problem. -------------------- |
Vizzed Elite
Affected by 'Laziness Syndrome'
Registered: 11-30-14
Location: depression land
Last Post: 2323 days
Last Active: 1193 days
| Zt is dead |
Affected by 'Laziness Syndrome'
Registered: 11-30-14
Location: depression land
Last Post: 2323 days
Last Active: 1193 days
02-28-15 08:24 PM
FaithFighter is Offline
| ID: 1142426 | 18 Words
FaithFighter is Offline
| ID: 1142426 | 18 Words
FaithFighter
Level: 69
POSTS: 994/1208
POST EXP: 167129
LVL EXP: 2777606
CP: 10755.7
VIZ: 26210
POSTS: 994/1208
POST EXP: 167129
LVL EXP: 2777606
CP: 10755.7
VIZ: 26210
Likes: 0 Dislikes: 0
Trusted Member
Affected by 'Laziness Syndrome'
Registered: 06-18-14
Location: Ohio
Last Post: 2293 days
Last Active: 2293 days
| I am the FaithFighter. I stand. I fight. I live. By the Grace of GOD, I live. |
Affected by 'Laziness Syndrome'
Registered: 06-18-14
Location: Ohio
Last Post: 2293 days
Last Active: 2293 days
02-28-15 08:27 PM
ZeroTails is Offline
| ID: 1142430 | 15 Words
ZeroTails is Offline
| ID: 1142430 | 15 Words
ZeroTails
Cool Davideo7
Cool Davideo7
Level: 93
POSTS: 254/2465
POST EXP: 215125
LVL EXP: 7942579
CP: 18975.9
VIZ: 401024
POSTS: 254/2465
POST EXP: 215125
LVL EXP: 7942579
CP: 18975.9
VIZ: 401024
Likes: 1 Dislikes: 0
FaithFighter : I doubt you're going crazy. It's probably just technology being stubborn, like always. -------------------- |
Vizzed Elite
Affected by 'Laziness Syndrome'
Registered: 11-30-14
Location: depression land
Last Post: 2323 days
Last Active: 1193 days
| Zt is dead |
Affected by 'Laziness Syndrome'
Registered: 11-30-14
Location: depression land
Last Post: 2323 days
Last Active: 1193 days
(edited by ZeroTails on 02-28-15 08:29 PM) Post Rating: 1 Liked By: FaithFighter,
