

 User Notice
 Forum Links
Me and some guests going on an epic adventure ^^
Thread Information
Thread Actions


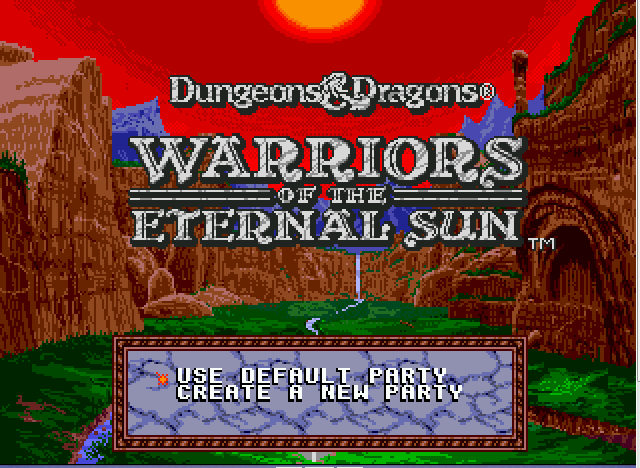
Walkthrough - Dungeons & Dragons: Warriors of Eternal Sun
04-30-14 08:29 AM
Laian is Offline
| ID: 1015331 | 6646 Words

POSTS: 1625/2232
POST EXP: 457173
LVL EXP: 7737858
CP: 23744.4
VIZ: 3571020

Greetings everyone. Welcome to another adventure with your host Laian. For this walkthrough, I decided to go ahead and do something slightly different. I'm going to play a Dungeons & Dragons game called "Dungeons & Dragons: Warriors of the Eternal Sun". It doesn't look really different, it's a game like many others, you might say and I agree. So, how will it be special? Well, I asked a few Vizzed members to take part to this adventure with me. Yes, there will be some guests. Actually, there will be three guests. I'm going to name them in the first chapter of this walkthrough and I thank them from the bottom of my heart for their cooperation. I'll do that from time to time in the future with other members, don't worry. I honestly couldn't ask everyone to be a part of this amazing adventure. So let's get into it, shall we?
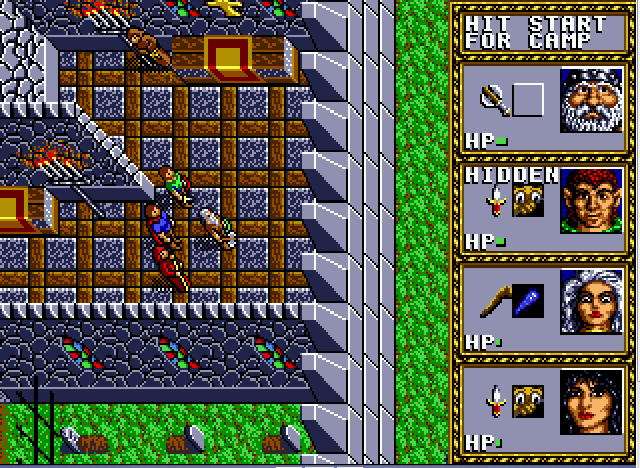
CHAPTER 1: THE QUEST BEGINS For starters, let me introduce my partners who joined me for this quest. First, we have Megamanmaniac the fighter. He starts the adventure with a shield and a sword. He'll be my main character for close combat and heavy damages. Then, we have Mohammedroxx the cleric. Starting with a mace and the power called "turn undeads". That power makes the undeads run away and may come in handy if you are facing a horde of undeads. I think the undeads shouldn't show off their face, just saying. Also, he learns spells with levels, not scrolls. Then, we have Singelli the thief. She starts the adventure with a dagger with the ability "hide" which might stand for "sneak attack". A very good ability for thieves, rogues and assassins in the universe of Dungeons and Dragons. And finally, I'm the wizard of the party. Ok, I'm the weakest character of the party, however with my magic powers and my staff, I'll help my friends during this adventure. Compared to Mohammedroxx the cleric, the only ways to get my magic powers are the magic shop and the scrolls. I can either scribe my spells from scrolls if I'm allowed to do that (yes, it works with the spell levels) or I can buy these at the magic shop. Also, magic missile... Wait, where's my fireball?! Oh well, I guess it'll work. I'll eventually name the members of the party from time to time, especially for the equipment and some techniques. It'll make things clear like crystal. Ok, after the introductions, let's get into the game. After the discussion, let's find some items. The first one is in the dungeon of the castle. Go west, open the door to your left, then the next one and go through the wall to the west. You'll find the gauntlet of ogre power, really handy for characters with a good strenght such as the fighter or the dwarf. This item adds 1 to the character who does wear this gauntlet. The second item to get is in the crypt. You see that tower in the graveyard? It's the crypt. Go in, go to the left, then go through the wall to your right to find a secret room with a chainmail +1. It's an improved chainmail. In Dungeons & Dragons, you can find this type of item. It increases (or in this game "reduces") your armor class, also known as "AC". Give it to a character who can equip a heavy armor. Now, go behind the church to find a cellar. Inside, there's a wand of healing behind a fake wall and two potions of healing. The staff of healing might let you think it's something for a magic user. In fact, you're wrong. However, the cleric can use it. Now, go in the inn, check inside the tower to find an axe +1 behind a fake wall. Go in the guard tower to the north-east to find a sword +1 behind a fake wall. Finally, go in the magic shop, find the laboratory next to the shelf and grab the scroll of
Here is where the fun begins. And by "fun", I mean troubles. Yes, you are level 1 and you have to face the wilderness. I can tell you that you will go to the church quite often if you don't pay attention. You can rest anywhere you want and anytime you want to recover your health and prepare some spells though but you might be interrupted by some creatures. Friendly tip: you see that campfire to the north, nearby the castle? Unless you feel like killing all your party members by a bunch of beastmen and getting a game over, I suggest you to stay away from this campfire at the moment. They hurt a lot and you might need the scroll of shield on sale at the magic shop. Also, don't cross the bridge to the west. Just walk around the castle and kill all the enemies you will encounter. You might face some small beastmen. Those are the only enemies that drop gold when they die. Otherwise, the other creatures will just give some experience. In any case, you'll have to beat tons of creatures to gain a level for each character. Ah, and if you encounter a dragon (they usually appear nearby the swamps to the east): run away! You won't stand a chance. I suggest you to level up your characters to 2 or 3 before heading to the campfire to the north (1). You'll have to face seven hairy beastmen. I have to tell you that this fight is quite tough. You might need better stuff such as the shield spell on sale at the magic shop for your magic user (this spell can only be cast on the caster though) and probably many tries to get rid of them. So save before stepping into the campfire. At the end of this fight, you'll get 755 gold coins, which is really nice. When I faced these guys, all my characters were level 2 and I forgot to take all the stuff in the town I mentioned earlier. When I came back to town, I realized that I missed lot of things which could make that fight eaiser such as the wand of lightning, silly me. Oh well, without these items, two party members survived at the end of this fight. Which ones? Singelli the thief and Mohammedroxx the cleric. Quite tough, I tell you. That's why I suggested you to level up your characters, because the cleric learns his first spells at level 2 and a nice spell which will come in handy during the adventure is called "cure light wounds". A nice spell for clerics, it recovers a few hit points. After this fight, go back to town and purchase some items at the stores such as the chainmail for your characters if they can wear it (keep in mind that the chainmail +1 you found earlier is slightly better though) and sell your junk. Now, go leave the town and cross the bridge to the west. Two of your characters should be worried about crossing that bridge. They are right: beyond that point, death might await you with open arms.
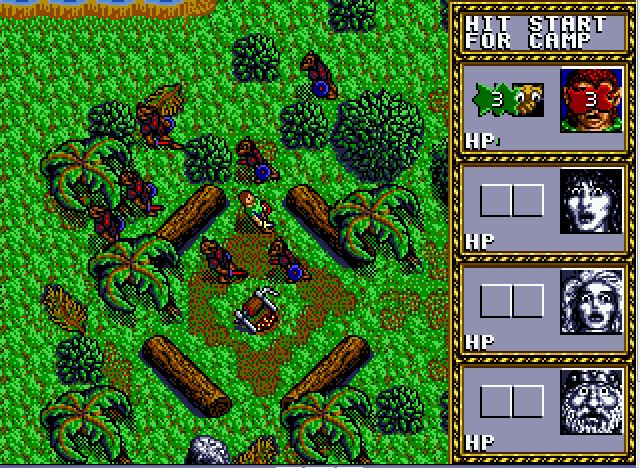
CHAPTER 2: DINOSAURS? BETTER SAY LIZARD MEN! This area is quite dangerous expecially with the giants and the grizzli bears. Head to the north as soon as possible. Fortunately, they are not stingy, they drop lot of gold coins. Dont climb up the ladder, head to the east until you find two caves entrances. This is actually the first dungeon: the beastmen cave. Go through the second entrance, kill the enemy and explore the room to find some leather charts that might interest Marmillian, the guy in the tower next to the throne (2) and a scroll of shield next to your position. Go in the first entrance, kill the enemies and carry on. Go in the next entrance, kill more enemies and grab the scroll of darkness. Go outside, climb the ladder up, go in the first entrance, go east, then south, beware of the trap and pick up the dagger. Go west, kill the amazon and grab her treasure. Go in the second entrance, get rid of all the lieutenants and notice a part of the wall with vines. You have to go back here once you have talked with Marmillian. There's also a tough beastman to kill. I don't remember his name, he didn't stand a chance in front of me and my allies. However, he should drop a spear +1 when he dies. Go check the small alcove next to where he was to get a scroll of light, a scroll of entangle (which is a level 2 spell), a scroll of detect magic and two spears +1. Now leave, this part of the cave and go in the third entrance. Kill the rats to the right then Gurlapp to the left. Gurlapp is kinda tough but beatable if you have a good startegy. Now, check that room to find some rocks to move. The person who has the gauntlets of ogre power should be able to move the rocks, allowing you to go in a secret cave with a scroll of protection from evil and a sword +1. Now, you can go back to the town, buy and sell some stuff and give the learther charts to Marmillian and talk about that wall of vines in this cave as well. You'll get the withered vine, the only item that can get rid of these vines in the cave and can be used once (3). Also, if you talk to the duke, he'll tell you that he doesn't trust anyone anymore, including Marmillian. Hmm, really fishy. Anyway, go back to the beastmen caves. There are two options to go there. First option: you walk to the caves, killing or skipping all the enemies on your way. Second option: you go in this shop next to the weapon shop and you pay the trip to the beastmen caves for a thousand of gold. Either way, clim up the ladders outside, go in the second cave, use the withered vine and carry on. This part of the cave has new enemies: the carrion crawler and its annoying entangle ability, the tuahara, a creature using powerful bites that can kill your characters if you don't pay attention to their life, the spider and its poison and the troglodytes. Sonething to know about this part of the dungeon: besides the fact you can rest inside at some points, all the enemies respawn if you leave the cave then go back inside. It could be a good thing but it also could be really tedious especially with these goshdarn carrion crawlers. Go west when you reach the branching paths, kill the spider and go through some vines. You'll find some gold and two potions of cure poison, really useful if you have been poisoned by the spider earlier, otherwise keep these: you'll certaily need these potions in the (near) future. Go back to the spiderweb, go to the left, kill the owlbear and move the rock to its left to reveal a secret room with a scroll of dispel magic, 80 gold and two potions of healing. Now go east, then west, carry on until you reach a giant room with a dozen of troglodytes and two tuaharas to kill. There's also a scroll of haste in this room. This was just a preview of what's next, don't worry. The next enemy you'll meet after all these enemies is extremely dangerous. It's a crocodile, also known as "phoboscus". Kill him and carry on. The next room has nothing, no enemies, just the exit. Welcome to the swamps. The enemies here are not really frightening if you have a good level and a decent equipment. However, this place is an amazing maze. I had to make a map to figure out where to go. In fact, it's simple: take the second path to the east, keep going east until you reach a village of lizard men. There's a dozen of these creatures to kill. As I said earlier, the creatures of the swamp are not frightening so it shouldn't be a problem. Once they are all dead, examine the village to find, a some golden idols with gems, some artifacts for Marmillian and a map of the swamp (4). Check the map: you can see a tree and a pool besides the village of lizard men. The tree will recover your health if you touch it, the pool revives the fainted characters. Use these spots to fully recover your party and go back to the town... by the cave. Yes, you are forced to do all the way back to the town by feet. And yes, the creatures are back, which is totally awesome!
CHAPTER 3: WELCOME TO THE JUNGLE! The duke is not really pleased to learn about what happened at the village of lizard men. Well, we didn't have any choice. Anyway, bring the artifacts to Marmillian. He will ask you to find more artifacts, more clues. Go buy some stuff as well and, once you're ready, leave the town.Time to explore the next dungeon located to the north-east. In this dungeon, the first enemy you will encounter is a rock statue. It can be a tough fight if you are not well-prepared. Otherwise, the other enemies are cave bears, tiger beetles, trolls, ginat ants, saber tooth tigers and minotaurs. Go through the wall at the end of the hallway (that's why you had to go to the beastmen caves first otherwise you can't access to the next part of this dungeon), go east first, kill a rock statue further, then take the loot on the ground: four potions of healing and some gold. Keep going this way, fight some giant ants and some trolls and a scroll of protection from evil, a scroll of fireball (I'm in Heaven
Welcome to the jungle, we got fun and games. Well, it's my least favorite part of the game because it's really confusing. You must find a gigantic azcan temple and go in. I can only tell you it's located to the north, from where you start that part. You'll face lot of Azcan people (it looks like it's the tribe living in this jungle and they are not happy to see you, like the lizardmen). If you have some scrolls of cure disease or a cleric who did learn that spell,
CHAPTER 4: THE FIRE AREA If you talk to the duke, he won't be pleased and you will be forced to leave the town forever. Yes, you'll be banished, it's great, isn't it? Don't talk to him, buy what you need and go to to the next area, which is the fire area. Now that you have the rings of fire resistance, you can handle the heat there, it won't hurt you. There's the entrance of a side dungeon nearby but your objective is located to the north. I suggest you to buy some scrolls of entangle, confuse and/or continual light before entering the next dungeon. Why? Because a nice big red dragon is waiting for you right at the beginning. Isn't that lovely? Once you killed this enemy, grab the scroll of anti-magic shell (5) and carry on. Kill the giant ants in the room to the left, leave the room, move forward, then go to the the right. Go in the room, kill the fire giant, look for a secret room and grab the sword +1, the scroll of lightning bolt, the scroll of ice storm and the scroll of cloudkill. Leave the room, move forward, kill the hellbounds, kill the giant ants to the left then the zombies and the gargoyles to the right. There's also two potions of cure poison to pick up. Now, go back to the very first door, then go east, kill the hellbounds to your left, then the giant ants in the secret room, Open the door, go north, then west, kill the troll and enter the next room to get the displacer cloak (which adds 2 to the AC of the character who wears it) and two scrolls of cure serious wounds. You mush have seen another path to the right while going here: go there. To the left, you'll face some fire beetles, The door to the right leads to a room with two rock statues to beat and it's also the way leading to the next part of the dungeon. Do you like doors? There's a lot of doors in this part of the dungeon, trust me. First of all, go east, then south, then east and kill the ogres in the room. There's a secret room with four potion of healing inside. Now, leave the room, go to the left, open another door, kill more ogres and grab the scroll of death, some gold and two potions of healing (why so many potions of healing, game?!). Leave the room, continue exploring this hallway, open the door, kill some trolls, go to the left, open the door to the right, kill the trolls in the next room and find a secret room with a sword +2, three scrolls of cure light wounds and two scrolls of bless. Go to the west part of the dungeon, there's a room with some giant scorpions and two potions of cure poison. Go to the northern part, then check the room to the right, you'll find more scorpions to beat and two other potions of cure poison. There's a secret shortcut to the east, leading to the door you must go through in order to go to the next part of the dungeon. This part has lot of undeads. They should be ridiculously easy to get rid of without using any kind of spell, not the turn undead ability (sorry, my dear Mohammedroxx but you can still use your mace and whack them all to death
CHAPTER 5: THE BURROWER When you go back to the town, you realize that it's destroyed and no one is here, except Marmillian. Talk to him. Poor guy, he has been beaten by the duke and has to die here in this ghost town. Fortunately, he managed to translate the runes you brought from the Azcan temple and, apparently, a creature is responsible for this madness. You must head to the cave located to the south-east and put an end to this. You can't buy anything, nor sell anything. You can't even use the caravanes system to go to this cave. There's a side dungeon that can lead you nearby this cave if you are well-prepared of course (refer to the bonus chapter). Inside the cave, move forward, don't take the way to the east yet, go west, then find a secret wall to the west. There are four scrolls of cure serious wounds and some gold. Now, go east (the way I mentioned earlier), then to the left, kill the dragon and grab the two scrolls of cure all. Now, to the next part of the dungeon, we go. Except some creatures, there's no more loot to pick up here. Go west, then go through the fake wall to the left, go east, then west, kill the elves and go through the passageway to proceed to the next part of the dungeon.
You'll find lot of elves here. And empty rooms. But, sometimes you'll find some items. From where you start, take the second path to the east then the one to the west, open the second door to the left, kill the elf and grab the scroll of stone to flesh. You know that power that the basilisks do, the one who hold your characters? Well, here is the only way to fix that problem. Leave the room, go to the left, then to the left once more, go east, then east, move forward and take the second path to your right. Open the door, grab the scroll of flesh to stone and leave the room. The other rooms have nothing to pick up, either they are empty or you encounter one or two enemies. There are three staircases leading to the next part of the dungeon. The first staircase is nearby the second scroll you found, the second one is located to the opposite and the last one is to the east, in a giant room of columns and elves. That room can be found if you go west then east, once you got the first scroll mentioned during this part. Now go up, killing the last enemies, open the door and proceed to the next part of the dungeon. This is the last part of the dungeon and probably the hardest part. The enemies here are really tough and you can't rest. Yes, you have to make your progress while surviving. Trust me, it's not that easy. I have a tip though: when you face an enemy, hit it once then move backward just a bit (one square) and attack the enemy once more. Repeat this operation until the enemy dies and make sure not to be accidentally stuck. There's no loot to grab here so go forth and meet the burrower. Yes, that giant green octopus is the burrower. You're not gonna fight him, you're just going to watch an epic battle between Godzilla and the octopus. No, actually it's Ka the immortal. After this fight, you come back to the town rebuilt, everyone is happy, everything is back to normal and the king is pleased. Watch the final cutscene. Congratualtions you beat "Dungeons & Dragons: Warrior of Eternal Sun".
BONUS CHAPTER: MORE DUNGEONS TO EXPLORE! Why wouldn't a Dungeons and Dragons game be without sides dungeons? To tell the truth, when I played this game, I accidentally found one while going back to the town right after the first dungeon, also known as the beastmen caves. It was a nice but painful discovery. Nice because I said to myself "Yes, more dungeons to clean up so more loot to grab!" and painful because... I found -oh lucky me- a dungeon with plenty of dangerous creatures which hurt a lot. So I decided to make a bonus chapter for all the side dungeons. I also made a map, fear not brave adventurers. Some of these dungeons are relatively easy to find if you check behind the waterfalls or the cliffs closely, the others are kind of hard. You might discover those "hard to find" dungeons by accident, like I did. Now, if you don't feel like wasting your time and making some progress slowly, here is the map I mentioned earlier:
All the red crosses are the locations of the side dungeons. It's not really accurate for some dungeons, it could be nearby. Those dungeons are really good for loot, gold and experience. You can explore all the sides dungeons except one: the elven undergrounds. This one is special and can only be explored once you can go to the volcano area to the north-west and once the town is completely destroyed. Yes, what's the point of exploring a dungeon with creatures and loot if you can't sell and buy anything with all the goodies you'll find in this cave, considering the townfolks went berserk and destroy the whole town? That doesn't make any sense at all! Anyway, feel free to explore those dungeons. Ah one more thing: you must be really prepared before entering any side dungeon. As I said earlier, you might face nasty creatures which want to taste your flesh so be careful. I'm not going to tell you all the dungeons, I let you... Oh no, don't make that sad panda's face, it won't work... I said it won't work! Ok fine, I'll tell you what you can find and face in each of those dungeons. Get ready, it'll be a long chapter. DUNGEON 1: THE CATACOMBS OF DOOM - The entrance is behind the waterfall. This dungeon has no treasure, it's just for experience. It a nasty dungeon split into two parts. During the first part of this dungeon, you'll face flying vipers, tiger beetles, giant toads and owlbears. The owlbears are kind of frightening. There's also a gelatinous cube in a hidden room. The second part is quite tricky. There are several rooms you can go in. You'll face zombies, trolls, gargoyles and some giant scorpions. The giant scorpions are a huge threat in this part of the dungeon, considering they may poison your party members. The only way to get rid of the poison is either the cure poison spell or a potion of cure potion if you have some in your inventory. Otherwise, you'll have to go back to town or let the teammate(s) die from poison. There's a tip in order to kill them easily but you need a magic-user and a perfect timing. Equip the magic missile spell, put the green arrow on your magic-user, go in the room, turn to the left immediately and cast the spell once then leave the room immediately. You should be able to do that without being hit by the scorpions. If you have another magic missile, go back in the room and cast it on the enemies then leave the room. Go rest at the beginning of this part and repeat this method until you killed the six giant scorpions of the room. You can also let the other teammates attack if you choose so but it's kind of risky when there's lot of these in the same room. The trolls are really dangerous and, like their friends the giant scorpions, if there's more than one, you better watch out. There's a secret room with lot of ghouls. And ghouls paralyse your teammates just in ase you want to know about that creature. The door at the end of the hallway leads to the plateau above the waterfall. There's no point of going there unless you want to fight some creatures or get the hell out of the catacombs. DUNGEON 2: THE HIDDEN FOREST HALLS - This one is hard to find. The entrance is behind a tree. Yes, there's a lot of tree, I agree but I can't describe, nor tell you which one is. Even a sreenshot wouldn't be enough to show you the exact location. Just try to check behind all the trees nearby the mark on the map. Once you found the entrance, a minotaur will greet you. Actually, it's the only enemy here and it's a short and easy dungeon if you have a decent level and good equipment. In this dungeon, you can pick up a sword, a +1 chain mail, a +1 sword and a +2 chain mail. DUNGEON 3: PASSAGEWAY CAVERN - This dungeon has two entrances: one nearby the beastmen caves, the other entrance is located nearby the fire bridge. Yes, that area you can't go unless you have the specific item. In this dungeon, you'll find lot of gold kept by hellhounds, a powerful fire giant (use the entagle spell if you have it and beat it to death), some saber tooth tigers and a red dragon. The fire giant is powerful, the red dragon is obviously extremely powerful. The room to the middle has a few hellhounds to get rid of. Once you did clean up the room, go through the vines to find a secret room with 1504 gold (6). You want more? Geez, you're so greedy. Well, actually me and my teammates, we wanted more loot, I'm not going to lie to you. All the adventurers like riches. You have to face the dragon first so prepare yourself! If you have the entangle spell (which I had and, to tell the truth, it's a spell you will abuse the hell out of it since it's amazing and handy for tough creatures), it shouldn't be a problem. Cast it and slay the dragon! Now, you can raid his lair and get a pile of gems, a +1 plate mail, a +1 bow, a +2 sword, a +2 shield, mounds of jewelry and stacks of gold. Yes, you hit the jackpot. Sorry, there's no more loot in this cave so you can leave this dungon. DUNGEON 4: THE WARRENS - This cave has three entrances. Inside, you'll find nothing valuable, just some saber tooth tigers and cave bears. According to the legends, the Azcans fear that cave. I don't think they'll be grateful to you if you get rid of these creatures, oh well. At least, it's free experience. DUNGEON 5: THE WEB PALACE - Another cave with nothing valuable inside. There's just a few black widows waiting for you. That means free experience only. Also, bring some potions of cure poison if you dare to explore that little cave because they might poison your teammates. You have been warned. DUNGEON 6: THE BEAR CAVE - This cave is just one tiny room with four cave bears. I can tell you that I've been quite surprised by this dungeon when I noticed it's just one room with no treasure, just a few cave bears to murder. There's nothing else, just some free experience after getting rid of the cave bears. DUNGEON 7: THE WINDING CAVERN - Another short dungeons with 752 gold coins as a reward (7). Just get rid of the owl bears, go through the vines and grab the valuables. You'll get your money and you could leave the cave once and for all, considering there's nothing else to do and to find in this cave. DUNGEON 8: THE ANT NEST - If you like gold coins, this cave is for you. You'll find 2512 gold coins symbolized by some nuggets in this cave guarded by some ants. Yes, more experience as well, woohoo! DUNGEON 9: THE PITS - This cave is full of giant rats. It's really easy. I'll say it's the easiest dungeon of the game. When I faced the first rats of this cave, me and my teammates were too strong that we killed them instantly. I didn't even have to cast my spells. Ah and I was playing the Pinkie Pie's Parasprite Polka because I was kind of tired of the music in this dungeon and it was so amusing that I felt like playing this song instead. There's no treasure to pick up, just some free experience. DUNGEON 10: ELVEN UNDERGROUND - This dungeon can be explored once you have the medallion. There are two entrances: one located to the graveyard of the town (just check one of the open graves) and the other is in the log of the southern swamps. There's some loot but, at this point of the game, it's completely useless considering the town has been destroyed and you can't sell and buy any more stuff. The only purpose might be free experience. Kill the enemies on your way until you reach a branching path. Go to the left, kill the ogres and grab the gold in a secret room. Now, carry on, make your way through the room of columns and destroy the few dragons you'll encounter. After going through some fake walls, you'll face a special red ragon. Kill him and go through the door to leave this dungeon. You will be nearby the last dungeon of the game. Yes, despite the pointless gold you can grab, it's a cool shortcut.
And that concludes the walkthrough, folks. I'd like to thank once more Megamanmaniac, Singelli andMohammedroxx3 for taking part to this adventure (just in case you forgot, they were my teammates). As always, I will see you in the next walkthrough. Bye and take care
Greetings everyone. Welcome to another adventure with your host Laian. For this walkthrough, I decided to go ahead and do something slightly different. I'm going to play a Dungeons & Dragons game called "Dungeons & Dragons: Warriors of the Eternal Sun". It doesn't look really different, it's a game like many others, you might say and I agree. So, how will it be special? Well, I asked a few Vizzed members to take part to this adventure with me. Yes, there will be some guests. Actually, there will be three guests. I'm going to name them in the first chapter of this walkthrough and I thank them from the bottom of my heart for their cooperation. I'll do that from time to time in the future with other members, don't worry. I honestly couldn't ask everyone to be a part of this amazing adventure. So let's get into it, shall we?
CHAPTER 1: THE QUEST BEGINS For starters, let me introduce my partners who joined me for this quest. First, we have Megamanmaniac the fighter. He starts the adventure with a shield and a sword. He'll be my main character for close combat and heavy damages. Then, we have Mohammedroxx the cleric. Starting with a mace and the power called "turn undeads". That power makes the undeads run away and may come in handy if you are facing a horde of undeads. I think the undeads shouldn't show off their face, just saying. Also, he learns spells with levels, not scrolls. Then, we have Singelli the thief. She starts the adventure with a dagger with the ability "hide" which might stand for "sneak attack". A very good ability for thieves, rogues and assassins in the universe of Dungeons and Dragons. And finally, I'm the wizard of the party. Ok, I'm the weakest character of the party, however with my magic powers and my staff, I'll help my friends during this adventure. Compared to Mohammedroxx the cleric, the only ways to get my magic powers are the magic shop and the scrolls. I can either scribe my spells from scrolls if I'm allowed to do that (yes, it works with the spell levels) or I can buy these at the magic shop. Also, magic missile... Wait, where's my fireball?! Oh well, I guess it'll work. I'll eventually name the members of the party from time to time, especially for the equipment and some techniques. It'll make things clear like crystal. Ok, after the introductions, let's get into the game. After the discussion, let's find some items. The first one is in the dungeon of the castle. Go west, open the door to your left, then the next one and go through the wall to the west. You'll find the gauntlet of ogre power, really handy for characters with a good strenght such as the fighter or the dwarf. This item adds 1 to the character who does wear this gauntlet. The second item to get is in the crypt. You see that tower in the graveyard? It's the crypt. Go in, go to the left, then go through the wall to your right to find a secret room with a chainmail +1. It's an improved chainmail. In Dungeons & Dragons, you can find this type of item. It increases (or in this game "reduces") your armor class, also known as "AC". Give it to a character who can equip a heavy armor. Now, go behind the church to find a cellar. Inside, there's a wand of healing behind a fake wall and two potions of healing. The staff of healing might let you think it's something for a magic user. In fact, you're wrong. However, the cleric can use it. Now, go in the inn, check inside the tower to find an axe +1 behind a fake wall. Go in the guard tower to the north-east to find a sword +1 behind a fake wall. Finally, go in the magic shop, find the laboratory next to the shelf and grab the scroll of
Here is where the fun begins. And by "fun", I mean troubles. Yes, you are level 1 and you have to face the wilderness. I can tell you that you will go to the church quite often if you don't pay attention. You can rest anywhere you want and anytime you want to recover your health and prepare some spells though but you might be interrupted by some creatures. Friendly tip: you see that campfire to the north, nearby the castle? Unless you feel like killing all your party members by a bunch of beastmen and getting a game over, I suggest you to stay away from this campfire at the moment. They hurt a lot and you might need the scroll of shield on sale at the magic shop. Also, don't cross the bridge to the west. Just walk around the castle and kill all the enemies you will encounter. You might face some small beastmen. Those are the only enemies that drop gold when they die. Otherwise, the other creatures will just give some experience. In any case, you'll have to beat tons of creatures to gain a level for each character. Ah, and if you encounter a dragon (they usually appear nearby the swamps to the east): run away! You won't stand a chance. I suggest you to level up your characters to 2 or 3 before heading to the campfire to the north (1). You'll have to face seven hairy beastmen. I have to tell you that this fight is quite tough. You might need better stuff such as the shield spell on sale at the magic shop for your magic user (this spell can only be cast on the caster though) and probably many tries to get rid of them. So save before stepping into the campfire. At the end of this fight, you'll get 755 gold coins, which is really nice. When I faced these guys, all my characters were level 2 and I forgot to take all the stuff in the town I mentioned earlier. When I came back to town, I realized that I missed lot of things which could make that fight eaiser such as the wand of lightning, silly me. Oh well, without these items, two party members survived at the end of this fight. Which ones? Singelli the thief and Mohammedroxx the cleric. Quite tough, I tell you. That's why I suggested you to level up your characters, because the cleric learns his first spells at level 2 and a nice spell which will come in handy during the adventure is called "cure light wounds". A nice spell for clerics, it recovers a few hit points. After this fight, go back to town and purchase some items at the stores such as the chainmail for your characters if they can wear it (keep in mind that the chainmail +1 you found earlier is slightly better though) and sell your junk. Now, go leave the town and cross the bridge to the west. Two of your characters should be worried about crossing that bridge. They are right: beyond that point, death might await you with open arms.
CHAPTER 2: DINOSAURS? BETTER SAY LIZARD MEN! This area is quite dangerous expecially with the giants and the grizzli bears. Head to the north as soon as possible. Fortunately, they are not stingy, they drop lot of gold coins. Dont climb up the ladder, head to the east until you find two caves entrances. This is actually the first dungeon: the beastmen cave. Go through the second entrance, kill the enemy and explore the room to find some leather charts that might interest Marmillian, the guy in the tower next to the throne (2) and a scroll of shield next to your position. Go in the first entrance, kill the enemies and carry on. Go in the next entrance, kill more enemies and grab the scroll of darkness. Go outside, climb the ladder up, go in the first entrance, go east, then south, beware of the trap and pick up the dagger. Go west, kill the amazon and grab her treasure. Go in the second entrance, get rid of all the lieutenants and notice a part of the wall with vines. You have to go back here once you have talked with Marmillian. There's also a tough beastman to kill. I don't remember his name, he didn't stand a chance in front of me and my allies. However, he should drop a spear +1 when he dies. Go check the small alcove next to where he was to get a scroll of light, a scroll of entangle (which is a level 2 spell), a scroll of detect magic and two spears +1. Now leave, this part of the cave and go in the third entrance. Kill the rats to the right then Gurlapp to the left. Gurlapp is kinda tough but beatable if you have a good startegy. Now, check that room to find some rocks to move. The person who has the gauntlets of ogre power should be able to move the rocks, allowing you to go in a secret cave with a scroll of protection from evil and a sword +1. Now, you can go back to the town, buy and sell some stuff and give the learther charts to Marmillian and talk about that wall of vines in this cave as well. You'll get the withered vine, the only item that can get rid of these vines in the cave and can be used once (3). Also, if you talk to the duke, he'll tell you that he doesn't trust anyone anymore, including Marmillian. Hmm, really fishy. Anyway, go back to the beastmen caves. There are two options to go there. First option: you walk to the caves, killing or skipping all the enemies on your way. Second option: you go in this shop next to the weapon shop and you pay the trip to the beastmen caves for a thousand of gold. Either way, clim up the ladders outside, go in the second cave, use the withered vine and carry on. This part of the cave has new enemies: the carrion crawler and its annoying entangle ability, the tuahara, a creature using powerful bites that can kill your characters if you don't pay attention to their life, the spider and its poison and the troglodytes. Sonething to know about this part of the dungeon: besides the fact you can rest inside at some points, all the enemies respawn if you leave the cave then go back inside. It could be a good thing but it also could be really tedious especially with these goshdarn carrion crawlers. Go west when you reach the branching paths, kill the spider and go through some vines. You'll find some gold and two potions of cure poison, really useful if you have been poisoned by the spider earlier, otherwise keep these: you'll certaily need these potions in the (near) future. Go back to the spiderweb, go to the left, kill the owlbear and move the rock to its left to reveal a secret room with a scroll of dispel magic, 80 gold and two potions of healing. Now go east, then west, carry on until you reach a giant room with a dozen of troglodytes and two tuaharas to kill. There's also a scroll of haste in this room. This was just a preview of what's next, don't worry. The next enemy you'll meet after all these enemies is extremely dangerous. It's a crocodile, also known as "phoboscus". Kill him and carry on. The next room has nothing, no enemies, just the exit. Welcome to the swamps. The enemies here are not really frightening if you have a good level and a decent equipment. However, this place is an amazing maze. I had to make a map to figure out where to go. In fact, it's simple: take the second path to the east, keep going east until you reach a village of lizard men. There's a dozen of these creatures to kill. As I said earlier, the creatures of the swamp are not frightening so it shouldn't be a problem. Once they are all dead, examine the village to find, a some golden idols with gems, some artifacts for Marmillian and a map of the swamp (4). Check the map: you can see a tree and a pool besides the village of lizard men. The tree will recover your health if you touch it, the pool revives the fainted characters. Use these spots to fully recover your party and go back to the town... by the cave. Yes, you are forced to do all the way back to the town by feet. And yes, the creatures are back, which is totally awesome!
CHAPTER 3: WELCOME TO THE JUNGLE! The duke is not really pleased to learn about what happened at the village of lizard men. Well, we didn't have any choice. Anyway, bring the artifacts to Marmillian. He will ask you to find more artifacts, more clues. Go buy some stuff as well and, once you're ready, leave the town.Time to explore the next dungeon located to the north-east. In this dungeon, the first enemy you will encounter is a rock statue. It can be a tough fight if you are not well-prepared. Otherwise, the other enemies are cave bears, tiger beetles, trolls, ginat ants, saber tooth tigers and minotaurs. Go through the wall at the end of the hallway (that's why you had to go to the beastmen caves first otherwise you can't access to the next part of this dungeon), go east first, kill a rock statue further, then take the loot on the ground: four potions of healing and some gold. Keep going this way, fight some giant ants and some trolls and a scroll of protection from evil, a scroll of fireball (I'm in Heaven
Welcome to the jungle, we got fun and games. Well, it's my least favorite part of the game because it's really confusing. You must find a gigantic azcan temple and go in. I can only tell you it's located to the north, from where you start that part. You'll face lot of Azcan people (it looks like it's the tribe living in this jungle and they are not happy to see you, like the lizardmen). If you have some scrolls of cure disease or a cleric who did learn that spell,
CHAPTER 4: THE FIRE AREA If you talk to the duke, he won't be pleased and you will be forced to leave the town forever. Yes, you'll be banished, it's great, isn't it? Don't talk to him, buy what you need and go to to the next area, which is the fire area. Now that you have the rings of fire resistance, you can handle the heat there, it won't hurt you. There's the entrance of a side dungeon nearby but your objective is located to the north. I suggest you to buy some scrolls of entangle, confuse and/or continual light before entering the next dungeon. Why? Because a nice big red dragon is waiting for you right at the beginning. Isn't that lovely? Once you killed this enemy, grab the scroll of anti-magic shell (5) and carry on. Kill the giant ants in the room to the left, leave the room, move forward, then go to the the right. Go in the room, kill the fire giant, look for a secret room and grab the sword +1, the scroll of lightning bolt, the scroll of ice storm and the scroll of cloudkill. Leave the room, move forward, kill the hellbounds, kill the giant ants to the left then the zombies and the gargoyles to the right. There's also two potions of cure poison to pick up. Now, go back to the very first door, then go east, kill the hellbounds to your left, then the giant ants in the secret room, Open the door, go north, then west, kill the troll and enter the next room to get the displacer cloak (which adds 2 to the AC of the character who wears it) and two scrolls of cure serious wounds. You mush have seen another path to the right while going here: go there. To the left, you'll face some fire beetles, The door to the right leads to a room with two rock statues to beat and it's also the way leading to the next part of the dungeon. Do you like doors? There's a lot of doors in this part of the dungeon, trust me. First of all, go east, then south, then east and kill the ogres in the room. There's a secret room with four potion of healing inside. Now, leave the room, go to the left, open another door, kill more ogres and grab the scroll of death, some gold and two potions of healing (why so many potions of healing, game?!). Leave the room, continue exploring this hallway, open the door, kill some trolls, go to the left, open the door to the right, kill the trolls in the next room and find a secret room with a sword +2, three scrolls of cure light wounds and two scrolls of bless. Go to the west part of the dungeon, there's a room with some giant scorpions and two potions of cure poison. Go to the northern part, then check the room to the right, you'll find more scorpions to beat and two other potions of cure poison. There's a secret shortcut to the east, leading to the door you must go through in order to go to the next part of the dungeon. This part has lot of undeads. They should be ridiculously easy to get rid of without using any kind of spell, not the turn undead ability (sorry, my dear Mohammedroxx but you can still use your mace and whack them all to death
CHAPTER 5: THE BURROWER When you go back to the town, you realize that it's destroyed and no one is here, except Marmillian. Talk to him. Poor guy, he has been beaten by the duke and has to die here in this ghost town. Fortunately, he managed to translate the runes you brought from the Azcan temple and, apparently, a creature is responsible for this madness. You must head to the cave located to the south-east and put an end to this. You can't buy anything, nor sell anything. You can't even use the caravanes system to go to this cave. There's a side dungeon that can lead you nearby this cave if you are well-prepared of course (refer to the bonus chapter). Inside the cave, move forward, don't take the way to the east yet, go west, then find a secret wall to the west. There are four scrolls of cure serious wounds and some gold. Now, go east (the way I mentioned earlier), then to the left, kill the dragon and grab the two scrolls of cure all. Now, to the next part of the dungeon, we go. Except some creatures, there's no more loot to pick up here. Go west, then go through the fake wall to the left, go east, then west, kill the elves and go through the passageway to proceed to the next part of the dungeon.
You'll find lot of elves here. And empty rooms. But, sometimes you'll find some items. From where you start, take the second path to the east then the one to the west, open the second door to the left, kill the elf and grab the scroll of stone to flesh. You know that power that the basilisks do, the one who hold your characters? Well, here is the only way to fix that problem. Leave the room, go to the left, then to the left once more, go east, then east, move forward and take the second path to your right. Open the door, grab the scroll of flesh to stone and leave the room. The other rooms have nothing to pick up, either they are empty or you encounter one or two enemies. There are three staircases leading to the next part of the dungeon. The first staircase is nearby the second scroll you found, the second one is located to the opposite and the last one is to the east, in a giant room of columns and elves. That room can be found if you go west then east, once you got the first scroll mentioned during this part. Now go up, killing the last enemies, open the door and proceed to the next part of the dungeon. This is the last part of the dungeon and probably the hardest part. The enemies here are really tough and you can't rest. Yes, you have to make your progress while surviving. Trust me, it's not that easy. I have a tip though: when you face an enemy, hit it once then move backward just a bit (one square) and attack the enemy once more. Repeat this operation until the enemy dies and make sure not to be accidentally stuck. There's no loot to grab here so go forth and meet the burrower. Yes, that giant green octopus is the burrower. You're not gonna fight him, you're just going to watch an epic battle between Godzilla and the octopus. No, actually it's Ka the immortal. After this fight, you come back to the town rebuilt, everyone is happy, everything is back to normal and the king is pleased. Watch the final cutscene. Congratualtions you beat "Dungeons & Dragons: Warrior of Eternal Sun".
BONUS CHAPTER: MORE DUNGEONS TO EXPLORE! Why wouldn't a Dungeons and Dragons game be without sides dungeons? To tell the truth, when I played this game, I accidentally found one while going back to the town right after the first dungeon, also known as the beastmen caves. It was a nice but painful discovery. Nice because I said to myself "Yes, more dungeons to clean up so more loot to grab!" and painful because... I found -oh lucky me- a dungeon with plenty of dangerous creatures which hurt a lot. So I decided to make a bonus chapter for all the side dungeons. I also made a map, fear not brave adventurers. Some of these dungeons are relatively easy to find if you check behind the waterfalls or the cliffs closely, the others are kind of hard. You might discover those "hard to find" dungeons by accident, like I did. Now, if you don't feel like wasting your time and making some progress slowly, here is the map I mentioned earlier:
All the red crosses are the locations of the side dungeons. It's not really accurate for some dungeons, it could be nearby. Those dungeons are really good for loot, gold and experience. You can explore all the sides dungeons except one: the elven undergrounds. This one is special and can only be explored once you can go to the volcano area to the north-west and once the town is completely destroyed. Yes, what's the point of exploring a dungeon with creatures and loot if you can't sell and buy anything with all the goodies you'll find in this cave, considering the townfolks went berserk and destroy the whole town? That doesn't make any sense at all! Anyway, feel free to explore those dungeons. Ah one more thing: you must be really prepared before entering any side dungeon. As I said earlier, you might face nasty creatures which want to taste your flesh so be careful. I'm not going to tell you all the dungeons, I let you... Oh no, don't make that sad panda's face, it won't work... I said it won't work! Ok fine, I'll tell you what you can find and face in each of those dungeons. Get ready, it'll be a long chapter. DUNGEON 1: THE CATACOMBS OF DOOM - The entrance is behind the waterfall. This dungeon has no treasure, it's just for experience. It a nasty dungeon split into two parts. During the first part of this dungeon, you'll face flying vipers, tiger beetles, giant toads and owlbears. The owlbears are kind of frightening. There's also a gelatinous cube in a hidden room. The second part is quite tricky. There are several rooms you can go in. You'll face zombies, trolls, gargoyles and some giant scorpions. The giant scorpions are a huge threat in this part of the dungeon, considering they may poison your party members. The only way to get rid of the poison is either the cure poison spell or a potion of cure potion if you have some in your inventory. Otherwise, you'll have to go back to town or let the teammate(s) die from poison. There's a tip in order to kill them easily but you need a magic-user and a perfect timing. Equip the magic missile spell, put the green arrow on your magic-user, go in the room, turn to the left immediately and cast the spell once then leave the room immediately. You should be able to do that without being hit by the scorpions. If you have another magic missile, go back in the room and cast it on the enemies then leave the room. Go rest at the beginning of this part and repeat this method until you killed the six giant scorpions of the room. You can also let the other teammates attack if you choose so but it's kind of risky when there's lot of these in the same room. The trolls are really dangerous and, like their friends the giant scorpions, if there's more than one, you better watch out. There's a secret room with lot of ghouls. And ghouls paralyse your teammates just in ase you want to know about that creature. The door at the end of the hallway leads to the plateau above the waterfall. There's no point of going there unless you want to fight some creatures or get the hell out of the catacombs. DUNGEON 2: THE HIDDEN FOREST HALLS - This one is hard to find. The entrance is behind a tree. Yes, there's a lot of tree, I agree but I can't describe, nor tell you which one is. Even a sreenshot wouldn't be enough to show you the exact location. Just try to check behind all the trees nearby the mark on the map. Once you found the entrance, a minotaur will greet you. Actually, it's the only enemy here and it's a short and easy dungeon if you have a decent level and good equipment. In this dungeon, you can pick up a sword, a +1 chain mail, a +1 sword and a +2 chain mail. DUNGEON 3: PASSAGEWAY CAVERN - This dungeon has two entrances: one nearby the beastmen caves, the other entrance is located nearby the fire bridge. Yes, that area you can't go unless you have the specific item. In this dungeon, you'll find lot of gold kept by hellhounds, a powerful fire giant (use the entagle spell if you have it and beat it to death), some saber tooth tigers and a red dragon. The fire giant is powerful, the red dragon is obviously extremely powerful. The room to the middle has a few hellhounds to get rid of. Once you did clean up the room, go through the vines to find a secret room with 1504 gold (6). You want more? Geez, you're so greedy. Well, actually me and my teammates, we wanted more loot, I'm not going to lie to you. All the adventurers like riches. You have to face the dragon first so prepare yourself! If you have the entangle spell (which I had and, to tell the truth, it's a spell you will abuse the hell out of it since it's amazing and handy for tough creatures), it shouldn't be a problem. Cast it and slay the dragon! Now, you can raid his lair and get a pile of gems, a +1 plate mail, a +1 bow, a +2 sword, a +2 shield, mounds of jewelry and stacks of gold. Yes, you hit the jackpot. Sorry, there's no more loot in this cave so you can leave this dungon. DUNGEON 4: THE WARRENS - This cave has three entrances. Inside, you'll find nothing valuable, just some saber tooth tigers and cave bears. According to the legends, the Azcans fear that cave. I don't think they'll be grateful to you if you get rid of these creatures, oh well. At least, it's free experience. DUNGEON 5: THE WEB PALACE - Another cave with nothing valuable inside. There's just a few black widows waiting for you. That means free experience only. Also, bring some potions of cure poison if you dare to explore that little cave because they might poison your teammates. You have been warned. DUNGEON 6: THE BEAR CAVE - This cave is just one tiny room with four cave bears. I can tell you that I've been quite surprised by this dungeon when I noticed it's just one room with no treasure, just a few cave bears to murder. There's nothing else, just some free experience after getting rid of the cave bears. DUNGEON 7: THE WINDING CAVERN - Another short dungeons with 752 gold coins as a reward (7). Just get rid of the owl bears, go through the vines and grab the valuables. You'll get your money and you could leave the cave once and for all, considering there's nothing else to do and to find in this cave. DUNGEON 8: THE ANT NEST - If you like gold coins, this cave is for you. You'll find 2512 gold coins symbolized by some nuggets in this cave guarded by some ants. Yes, more experience as well, woohoo! DUNGEON 9: THE PITS - This cave is full of giant rats. It's really easy. I'll say it's the easiest dungeon of the game. When I faced the first rats of this cave, me and my teammates were too strong that we killed them instantly. I didn't even have to cast my spells. Ah and I was playing the Pinkie Pie's Parasprite Polka because I was kind of tired of the music in this dungeon and it was so amusing that I felt like playing this song instead. There's no treasure to pick up, just some free experience. DUNGEON 10: ELVEN UNDERGROUND - This dungeon can be explored once you have the medallion. There are two entrances: one located to the graveyard of the town (just check one of the open graves) and the other is in the log of the southern swamps. There's some loot but, at this point of the game, it's completely useless considering the town has been destroyed and you can't sell and buy any more stuff. The only purpose might be free experience. Kill the enemies on your way until you reach a branching path. Go to the left, kill the ogres and grab the gold in a secret room. Now, carry on, make your way through the room of columns and destroy the few dragons you'll encounter. After going through some fake walls, you'll face a special red ragon. Kill him and go through the door to leave this dungeon. You will be nearby the last dungeon of the game. Yes, despite the pointless gold you can grab, it's a cool shortcut.
And that concludes the walkthrough, folks. I'd like to thank once more Megamanmaniac, Singelli andMohammedroxx3 for taking part to this adventure (just in case you forgot, they were my teammates). As always, I will see you in the next walkthrough. Bye and take care -------------------- |


| Games have secrets, I have my eagle gaze. |
Affected by 'Laziness Syndrome'
Registered: 10-21-11
Location: France
Last Post: 2656 days
Last Active: 1830 days
04-30-14 01:40 PM
 Eniitan is Offline
| ID: 1015386 | 58 Words
Eniitan is Offline
| ID: 1015386 | 58 Words
 Eniitan is Offline

POSTS: 1665/10522
POST EXP: 959649
LVL EXP: 76961646
CP: 55531.6
VIZ: 2643586
*Eyes widens and sparkles* I read this from top to bottom you really are the walkthrough master! I enjoyed reading this. Thank you so much for giving more motivation. I hope to see more as I am like an apprentice to making walkthroughs. As I said I look up to you now, a promise is a promise. ^-^ -------------------- |
  Number 1 Sailor Moon, Final Fantasy And Freedom Planet Fan On Vizzed! Number 1 Sailor Moon, Final Fantasy And Freedom Planet Fan On Vizzed! |
Affected by 'Laziness Syndrome'
Registered: 08-16-12
Last Post: 1386 days
Last Active: 489 days
05-02-14 11:39 AM
Laian is Offline
| ID: 1016198 | 39 Words
POSTS: 1633/2232
POST EXP: 457173
LVL EXP: 7737858
CP: 23744.4
VIZ: 3571020
Eniitan : You're welcome and thank you so much Enii, from the bottom of my heart. I'm still glad to see that I'm the inspiration of some people, despite the fact that I'm like a shadow in the night You're welcome and thank you so much Enii, from the bottom of my heart. I'm still glad to see that I'm the inspiration of some people, despite the fact that I'm like a shadow in the night -------------------- |
| Games have secrets, I have my eagle gaze. |
Affected by 'Laziness Syndrome'
Registered: 10-21-11
Location: France
Last Post: 2656 days
Last Active: 1830 days
