

 User Notice
 Forum Links

Thread Information
Creator
07-31-13 05:31 AM
Post
11-23-14 12:57 AM
8.2
Today: 1
Users: 1 unique
Thread Actions


Walkthrough Metal Gear Solid - Ghost Babel
07-31-13 05:31 AM
Laian is Offline
| ID: 858713 | 3883 Words

POSTS: 1483/2232
POST EXP: 457173
LVL EXP: 7718594
CP: 23738.9
VIZ: 3570490

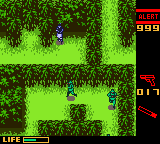
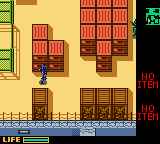
Hello everyone, this is your host Laian with a new walkthrough. This time, I chose Metal Gear Solid. No not the episode released on PSX, that would have been great but I can't play any PS1 games until I have a controller pad that works correctly. Yeah, my current controller pad has a broken button and sometimes it does unplug for no reason... you can imagine how awesome it is. Anyway, I'm forced to keep in a closet lot of PSX games and N64 I wanna play and make a walkthrough (ok, I admit the last walkthrough was a N64 game, I won't lie to you and I can't, however it was terrible to play that game with the keyboard). So I will make the walkthrough of the episode released on GBC for a change. I have to tell you, I'm not really good at inflitration games. I wouldn't be a spy, nor a secret agent unless I have the license to kill like James Bond ha ha Alright, time to start this walkthrough, I did ramble too much. You know the score as always or not. But seriously, who cares? Ok, time to start this walkthrough. Oh and one more last thing: I play with the highest difficulty level as always, the "very hard" mode, because I'm so crazy and we all know that CHAPTER 1: WELCOME TO THE JUNGLE After the discussion, go to the north, then get the Five-Seven to the north (1), go to the east and to the north in order to go to the next screen. Use the herbs and the swamps to avoid the next guards (don't forget to crawl by pressing "start" button), sneak behind the two guards and reach the bridge. Use the swanp to the right as a cover and go to the north to end the first chapter. CHAPTER 2: INSIDE THE FORTRESS Use the crates to avoid the first camera, then wait until the second camera goes to the right and carry on. Avoid the guards, go to the east, ignore the opened door and go to the east. Open the door, after the cutscene take the Suppressor in front of the locker and go through the door to go in the fortress.
Once you are in the courtyard of the fortress, you have to go to the north. There are two ways in order to go there: the short and hard way or the long and easy way. The short way is hard because there's lot of guards patrolling and it might become tricky especially when you are close to your goal. The other way is safer, that's why we're going to take this way instead of the other. However if you want to go the other way, just open the door to the north from the start, avoid the surveillance camera, go to the north, then to the west. In order to go to the north with the safe way, go to the west, cross the corridor of boxes, open the door at the end, go to the east, enter the bulding to collect the ration, go outside, crawl underneath the fence and carry on. Once you reach the northern part of the courtyard, yo'll get a call from the codec. It looks like there's one survivor from the Delta Force. Hurray, there's hope! Ok, let's calm down, shall we? Go to the northwest, avoid the cameras and the guard, go in the truck and get the key card 1 (2). Do all the way back, after the corridor of boxes, open the locked door with the key card, enter de building, go down and take the ration. Go back to the east wing, open another locked door, enter the building and go down to proceed to the draining system and end the chapter. CHAPTER 3: MEETING WITH CHRIS You get a call from Chris. After the discussion, avoid the guards, take the ration behind the Time to find Chris. Use the codec to recognize her. Remember that you'll get no response?if she's not alone so that means you will have to wander around and try over and over again (well, when you see a guard with a red cap and patrolling alone, like the descr
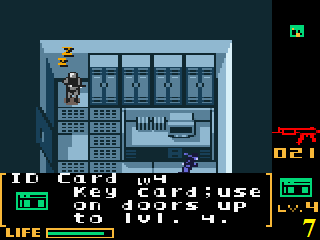
Go to the next floor, go to the next room, then go to the west, take the ammos and go to the next room. Avoid the guards, go to the east, go get the ammos and open the door to the southwest in the previous room. Avoid the two guards, go to the next room and, in the room with the laser beams, go north, then west and, in this room, notice the guard with the blond hair tied and the red cap located to the southwest. It's Chris. Go talk to her and end the chapter. CHAPTER 4: SLASHER HAWK After the discussion, follow Chris. In the third room, take the chaff grenades (4). Outside, go to the east, avoid all the security and activate the switches in order to open the doors.?Don't ask me the order, I don't even remember how I made it, I was flabbergasted that I could make this puzzle ha ha.Anyway, carry on, don't be intimidated by the boomerang crawl in order to cross the next area, then avoid the dogs and use the swamp and the herbs to avoid the next guards. Go to the east, take the grenades and the ration in the trucks, avoid the dogs in the next area, take the grenades and go to the west. Activate the switch, do all the way back, take the ration to the west and go in the building. Grab the grenades, open the door and prepare yourself for the first boss of the game: Slasher Hawk. This boss will always throw the boomerang at you during all the fight and will stay on this platform. Equip the grenades and the rations, just in case of. Avoid the boomerangs and throw the grenades at him. At one point, he will send his hawk to the battle. This bird will be annoying because it won't stop flying around the place and attack you, which means that you will have to move constantly and hit Slasher Hawk with the grenades. After a dozen of grenades thrown, Slasher Hawk will die and you will end the chapter. CHAPTER 5: CONVEYOR OF BOXES You'll see why I gave that name to the chapter. Go to the west, go in the first room, sneak behind the guard, get the R5 in the next room (5). Now go back to the elevator, call it, go to the second floor and use the cardboard box Y to go on the conveyor belt. You will get at the end of the line the cardboard box R. Do you see the gimmick of this puzzle? You will have to use a specific cardboard box to make your progress. Go back to the second floor, use the cardboard box Y, go on the conveyor belt, after the fourth intersection, switch to the cardboard box R, go down, put your gas mask, take the key card 3 and open the door to the south with the key card. Go back to the second floor, use the cardboard box Y, after the third intersection, switch to the cardboard box R, then the cardboard box Y and finally the cardboard box R. Open the door with the key card, take the ration and the stun grenades and carry on. Grab the cardboard box B, go back to the elevator, go to the west, open the door with the key card, get the chaff grenades and go back to the second floor. Use the cardboard box Y, then the cardboard box B, then the cardboard box Y, then the cardboard box B and the cardboard box Y. Take the ammos to the north in this maze of boxes, then go on the conveyor belt to the east, use the cardboard box B, then the cardboard box R, grab the thermal goggles (6), go back to the maze of boxes, open the door to the east, equip?the thermal goggles, avoid the laser beams, go downstairs, avoid the cameras and carry on. Go to the east, open the locked door with the key card, take the C4, go back and open the other locked door. Make your progress and meet Jimmy Harks. Now you need to blow that thin wall mentioned by the hostage. Actually, it's exactly where you found the thermal goggles. Knock on the western wall until you hear a different sound, as if the wall is thin. Blow this part of the wall up with some C4 (press B, stay away and press A to detonate). You saved the scientist. His reaction is really, how to say, boring. Ok, he IS really boring. Anyway, this ends the chapter. CHAPTER 6: THE WALTZ OF DARKNESS Ok, time to stop Metal Gear. The problem is... there's no more power to run the lights and the electronic devices of the barracks. There's more: your radar is out. Isn't that lovely? Anyway, equip your thermal goggles, open the door, then south, fall down and go back to the elevator. Go west, climb up the ladder, go east, cross the poisonous room, then crawl to the maze of boxes, after the discussion with Chris go west, then south and fall down. Go west, avoid the laser beams, open both of the doors and get the ammos and the nightvision goggles. Go back upstairs, go east, take the ration, go southwest, go up, then go south, then east and fall down. A guard is CHAPTER 7: RETREAT! You start this chapter with a special puzzle. Yes, I don't know how it works exactly, since they won't open all the doors. I think you have to unlock all the doors once and then carry on. Don't push the first button at the top, it restarts the puzzle from the beginning. The second shuffles the doors and the two others open some doors. Once you solved this puzzle, go in the truck, grab the mine detector, then carry on. It's so quiet, that doesn't sound good. Equip the mine detector: oooooooh, a field of mines, sweet. Avoid all the mines, go to the north and meet Viper and his toy: the helicopter. Don't worry, it's not?time to fight him. It's time to run away through the field of mines, avoiding the shots from the artillery. A tricky part, I should say but if you stay focused on your radar, it should be ok. The chapter ends once you did cross the field of mines. CHAPTER 8: PYRO WHAT? PYRO MAN?! Yeah, we're going to destroy the power plant in order to stop Metal Gear. Go to the west, enter the building, go north, keep in mind the ammos for the Nikita and get a call from Chris. Call the elevator, go to the basement, listen to the discussion, get the ammos and the ration and go in the air vent. Go west, open the door to the east, then the other one to the east, crawl and take the key card 4 (7). Go back to the elevator, go to the second floor, go south, open the door to the south with the key card 4, go to the west, crawl on the mettalic tiles, then go east, go in the vent to the east, open the door and get some C4. Go back, to the previous room, go north, make your progress through the maze, grab the chaff?grenades, carry on and open the door to the northwest. Take the Nikita, go east and use your new toy. Guide the missile to the panel, wait until the way is clear and go back to the first floor. This panel is tricky: your missile can be destroyed by some of the cameras and will be destroyed if it hits any enemy or any obstacle. Two missiles should be enough to get rid of that panel: one for distraction and the other for the panel. Don't forget that you have some ammos nearby if you are running out.
Now use a chaff grenade to stun the cameras, go south, go in the air duct, go south and use a missile (or a grenade if you have some) to get rid of the panel. Go back to the duct, go up, then west and go to the next room. Open the door to the southwest, use a missile to destroy the panel to the west, go back to the previous room, open the door to the southeast, use the chaff grenades, take some C4 and go through the door to the southeast. Open the door to the north, get the grenades to the northwest and open the door to the north. Time to face the third member of the Black Chamber: Pyro Bison. He looks tough with his flamethrower but, in fact, he is kind of easy to beat. Equip your R5, sneak behind him and shoot the fuel containers: it's the weak point. He has four attacks: the regular one and the straight one, easy to dodge, the one when he flies and lands, stay to the north of his shadow and greet him with a bullet and the last one is the shower of flames, easy to dodge too. You can use the grenades as you wish, there's some in the bottom right hand corner if you are running out. After this fight, the chapter will end. CHAPTER 9: FIREWORK! Take the ration next to you, call the elevator and go to the basement. Go in the air duct to skip the poisonous room to the south, kill the guards and go east. After the discussion, go north, take the C4 and go back to the elevator. The first column is located to the bottom right hand corner. Go back to the room where you fought Pyro Bison and place a charge on both of the columns to the left and to the right. Now, go back the entrance of the power plant, place the last charge in the long corridor and prepare to leave the power plant. Where is the exit? Well, it's the entrance. Just avoid the debris and the flames and go through the door to end the chapter. CHAPTER 10: FACING THE HELICOPTER Cross the field of mines, then go up, take all the grenades during your ascent and get ready to face the helicopter. The way to kill it is easy: avoid its attacks (the missiles and the machine gun) and throw some grenades at the helicopter. Use the stone columns to protect yourself from the shots and seize the opportunity to strike when the helicopter has finished its shots. Same hing when it throws the missiles. After a few grenades, the helicopter will be destroyed and you will end the chapter. CHAPTER 11: THE SNAKE AGAINST THE VIPER Open the door to the north, go through the next door, take the ammos and leave the room. Carry on, go west, go downstairs, take the C4 (8), use a missile to get rid of the panel, go back to the entrance, go west, go downstairs and usea missile to destroy the next panel. Yeah, that's going to be backtracking over and over again to the final boss fight, I hope you enjoy that. Go back to the previous room, go east now, notice the thin wall in the dead end, place a charge and destroy the wall. Take the key card 5, destroy the panel with a grenade and go back to the entrance room. Go west, then downstairs, then east, use the new key card to open the locked door and call the elevator. Hmm, this guard is patrolling like... there must be a reason why. Use the mine detector to see the cause. Carry on, cross the room of laser beams, make your progress, go to the room to the northeast, use the nightvisison goggles, then the key card on the door and the thermal googles to avoid the laser beams. A dead end... not sure. Place a charge and blow the wall up. Open the door, crawl underneath the desk to take the C4, carry on, place one charge on the wall next to the panel, then another one on the other wall and go through the door. Go south, then through the door, place a charge on the wall to the left, blow it up and and another one on the wall to the south. Carry on, go south, open the door to the left, get the ammos, go back and open the locked door in the locked door. Quickly, shoot a missile to destroy the panel, go get the key card 6 and run away. Go back, open the other locked door, then go west to the locked door, use the new key card and call the elevator. There is Metal Gear. Check the rooms to the left and to the right to get some ammos and some grenades before calling the other elevator. In the next room, you'll find some ammos. Call the elevator, get the ammos and the rations and go through the door. Time to meet Viper. It's the master of traps so he will use traps to kill you. Chase him, use your grenades or your 5-7 or your R5 to hurt him. Watch out, the traps are deadly and the beams are deadly. Memorize the pattern of the beams and walk carefully. You can cross the beams before they blink, that's a good thing to hear for your progress. After a few shots, Viper will die and the chapter will end. NOTE: There's an item behind the pile of crate when you come to B99. I completely missed that item during this walkthrough but I bet my biscuit that it's a ration. Wait until confirmation or go get it by yourself if you want to make sure CHAPTER 12: GOODBYE METAL GEAR Take the C4 and the grenades, go north, take the landmines halfway and prepare yourself for the final showdown: you versus Metal Gear and the General. First, use the landmines or the C4 to destroy the legs of this death machine. Place the explosive when the shadow of the foot stops, stay away and watch this explosion. Beware of the machine gun and the flame thrower if you are too close to the top of the screen, it does lot of damages. Once the legs are destroyed, the second round will start.
Use your missiles and your grenades to hit the weak points. It will take a while, I have to admit. Beware of the machine gun, the trishots and the drones sent by Metal Gear. Once you weaken 1/3 of its life bar, Metal Gear will throw deadly missiles: avoid them at all cost and keep hitting with your best shot. You won’t ever run out of grenades, you’ll find some in the bottom left hand corner of the arena. 4, ok but that’s better than nothing. Once it’s about to die, he will try to roast you with a fire breath. Hit the mouth and avoid the flames coming from its mouth until Metal Gear dies. FINAL CHAPTER: YOU AGAIN?! Yeah, Viper for a final showdown. This time, no traps. However, he will become invisible and run all around the arena. Sometimes, if you stay close to him, he will use some shockwaves. Equip the 5-7 and the thermal goggles, find him and shoot. That’s it. He will always teleport himself to the other side of the arena so don’t waste your time spinning around like a record (I can’t get enough of this reference Well, that’s all for this walkthrough, everyone. I see you in the next one. Take care of yourself until then Hello everyone, this is your host Laian with a new walkthrough. This time, I chose Metal Gear Solid. No not the episode released on PSX, that would have been great but I can't play any PS1 games until I have a controller pad that works correctly. Yeah, my current controller pad has a broken button and sometimes it does unplug for no reason... you can imagine how awesome it is. Anyway, I'm forced to keep in a closet lot of PSX games and N64 I wanna play and make a walkthrough (ok, I admit the last walkthrough was a N64 game, I won't lie to you and I can't, however it was terrible to play that game with the keyboard). So I will make the walkthrough of the episode released on GBC for a change. I have to tell you, I'm not really good at inflitration games. I wouldn't be a spy, nor a secret agent unless I have the license to kill like James Bond ha ha Alright, time to start this walkthrough, I did ramble too much. You know the score as always or not. But seriously, who cares? Ok, time to start this walkthrough. Oh and one more last thing: I play with the highest difficulty level as always, the "very hard" mode, because I'm so crazy and we all know that CHAPTER 1: WELCOME TO THE JUNGLE After the discussion, go to the north, then get the Five-Seven to the north (1), go to the east and to the north in order to go to the next screen. Use the herbs and the swamps to avoid the next guards (don't forget to crawl by pressing "start" button), sneak behind the two guards and reach the bridge. Use the swanp to the right as a cover and go to the north to end the first chapter. CHAPTER 2: INSIDE THE FORTRESS Use the crates to avoid the first camera, then wait until the second camera goes to the right and carry on. Avoid the guards, go to the east, ignore the opened door and go to the east. Open the door, after the cutscene take the Suppressor in front of the locker and go through the door to go in the fortress.
Once you are in the courtyard of the fortress, you have to go to the north. There are two ways in order to go there: the short and hard way or the long and easy way. The short way is hard because there's lot of guards patrolling and it might become tricky especially when you are close to your goal. The other way is safer, that's why we're going to take this way instead of the other. However if you want to go the other way, just open the door to the north from the start, avoid the surveillance camera, go to the north, then to the west. In order to go to the north with the safe way, go to the west, cross the corridor of boxes, open the door at the end, go to the east, enter the bulding to collect the ration, go outside, crawl underneath the fence and carry on. Once you reach the northern part of the courtyard, yo'll get a call from the codec. It looks like there's one survivor from the Delta Force. Hurray, there's hope! Ok, let's calm down, shall we? Go to the northwest, avoid the cameras and the guard, go in the truck and get the key card 1 (2). Do all the way back, after the corridor of boxes, open the locked door with the key card, enter de building, go down and take the ration. Go back to the east wing, open another locked door, enter the building and go down to proceed to the draining system and end the chapter. CHAPTER 3: MEETING WITH CHRIS You get a call from Chris. After the discussion, avoid the guards, take the ration behind the Time to find Chris. Use the codec to recognize her. Remember that you'll get no response?if she's not alone so that means you will have to wander around and try over and over again (well, when you see a guard with a red cap and patrolling alone, like the descr
Go to the next floor, go to the next room, then go to the west, take the ammos and go to the next room. Avoid the guards, go to the east, go get the ammos and open the door to the southwest in the previous room. Avoid the two guards, go to the next room and, in the room with the laser beams, go north, then west and, in this room, notice the guard with the blond hair tied and the red cap located to the southwest. It's Chris. Go talk to her and end the chapter. CHAPTER 4: SLASHER HAWK After the discussion, follow Chris. In the third room, take the chaff grenades (4). Outside, go to the east, avoid all the security and activate the switches in order to open the doors.?Don't ask me the order, I don't even remember how I made it, I was flabbergasted that I could make this puzzle ha ha.Anyway, carry on, don't be intimidated by the boomerang crawl in order to cross the next area, then avoid the dogs and use the swamp and the herbs to avoid the next guards. Go to the east, take the grenades and the ration in the trucks, avoid the dogs in the next area, take the grenades and go to the west. Activate the switch, do all the way back, take the ration to the west and go in the building. Grab the grenades, open the door and prepare yourself for the first boss of the game: Slasher Hawk. This boss will always throw the boomerang at you during all the fight and will stay on this platform. Equip the grenades and the rations, just in case of. Avoid the boomerangs and throw the grenades at him. At one point, he will send his hawk to the battle. This bird will be annoying because it won't stop flying around the place and attack you, which means that you will have to move constantly and hit Slasher Hawk with the grenades. After a dozen of grenades thrown, Slasher Hawk will die and you will end the chapter. CHAPTER 5: CONVEYOR OF BOXES You'll see why I gave that name to the chapter. Go to the west, go in the first room, sneak behind the guard, get the R5 in the next room (5). Now go back to the elevator, call it, go to the second floor and use the cardboard box Y to go on the conveyor belt. You will get at the end of the line the cardboard box R. Do you see the gimmick of this puzzle? You will have to use a specific cardboard box to make your progress. Go back to the second floor, use the cardboard box Y, go on the conveyor belt, after the fourth intersection, switch to the cardboard box R, go down, put your gas mask, take the key card 3 and open the door to the south with the key card. Go back to the second floor, use the cardboard box Y, after the third intersection, switch to the cardboard box R, then the cardboard box Y and finally the cardboard box R. Open the door with the key card, take the ration and the stun grenades and carry on. Grab the cardboard box B, go back to the elevator, go to the west, open the door with the key card, get the chaff grenades and go back to the second floor. Use the cardboard box Y, then the cardboard box B, then the cardboard box Y, then the cardboard box B and the cardboard box Y. Take the ammos to the north in this maze of boxes, then go on the conveyor belt to the east, use the cardboard box B, then the cardboard box R, grab the thermal goggles (6), go back to the maze of boxes, open the door to the east, equip?the thermal goggles, avoid the laser beams, go downstairs, avoid the cameras and carry on. Go to the east, open the locked door with the key card, take the C4, go back and open the other locked door. Make your progress and meet Jimmy Harks. Now you need to blow that thin wall mentioned by the hostage. Actually, it's exactly where you found the thermal goggles. Knock on the western wall until you hear a different sound, as if the wall is thin. Blow this part of the wall up with some C4 (press B, stay away and press A to detonate). You saved the scientist. His reaction is really, how to say, boring. Ok, he IS really boring. Anyway, this ends the chapter. CHAPTER 6: THE WALTZ OF DARKNESS Ok, time to stop Metal Gear. The problem is... there's no more power to run the lights and the electronic devices of the barracks. There's more: your radar is out. Isn't that lovely? Anyway, equip your thermal goggles, open the door, then south, fall down and go back to the elevator. Go west, climb up the ladder, go east, cross the poisonous room, then crawl to the maze of boxes, after the discussion with Chris go west, then south and fall down. Go west, avoid the laser beams, open both of the doors and get the ammos and the nightvision goggles. Go back upstairs, go east, take the ration, go southwest, go up, then go south, then east and fall down. A guard is CHAPTER 7: RETREAT! You start this chapter with a special puzzle. Yes, I don't know how it works exactly, since they won't open all the doors. I think you have to unlock all the doors once and then carry on. Don't push the first button at the top, it restarts the puzzle from the beginning. The second shuffles the doors and the two others open some doors. Once you solved this puzzle, go in the truck, grab the mine detector, then carry on. It's so quiet, that doesn't sound good. Equip the mine detector: oooooooh, a field of mines, sweet. Avoid all the mines, go to the north and meet Viper and his toy: the helicopter. Don't worry, it's not?time to fight him. It's time to run away through the field of mines, avoiding the shots from the artillery. A tricky part, I should say but if you stay focused on your radar, it should be ok. The chapter ends once you did cross the field of mines. CHAPTER 8: PYRO WHAT? PYRO MAN?! Yeah, we're going to destroy the power plant in order to stop Metal Gear. Go to the west, enter the building, go north, keep in mind the ammos for the Nikita and get a call from Chris. Call the elevator, go to the basement, listen to the discussion, get the ammos and the ration and go in the air vent. Go west, open the door to the east, then the other one to the east, crawl and take the key card 4 (7). Go back to the elevator, go to the second floor, go south, open the door to the south with the key card 4, go to the west, crawl on the mettalic tiles, then go east, go in the vent to the east, open the door and get some C4. Go back, to the previous room, go north, make your progress through the maze, grab the chaff?grenades, carry on and open the door to the northwest. Take the Nikita, go east and use your new toy. Guide the missile to the panel, wait until the way is clear and go back to the first floor. This panel is tricky: your missile can be destroyed by some of the cameras and will be destroyed if it hits any enemy or any obstacle. Two missiles should be enough to get rid of that panel: one for distraction and the other for the panel. Don't forget that you have some ammos nearby if you are running out.
Now use a chaff grenade to stun the cameras, go south, go in the air duct, go south and use a missile (or a grenade if you have some) to get rid of the panel. Go back to the duct, go up, then west and go to the next room. Open the door to the southwest, use a missile to destroy the panel to the west, go back to the previous room, open the door to the southeast, use the chaff grenades, take some C4 and go through the door to the southeast. Open the door to the north, get the grenades to the northwest and open the door to the north. Time to face the third member of the Black Chamber: Pyro Bison. He looks tough with his flamethrower but, in fact, he is kind of easy to beat. Equip your R5, sneak behind him and shoot the fuel containers: it's the weak point. He has four attacks: the regular one and the straight one, easy to dodge, the one when he flies and lands, stay to the north of his shadow and greet him with a bullet and the last one is the shower of flames, easy to dodge too. You can use the grenades as you wish, there's some in the bottom right hand corner if you are running out. After this fight, the chapter will end. CHAPTER 9: FIREWORK! Take the ration next to you, call the elevator and go to the basement. Go in the air duct to skip the poisonous room to the south, kill the guards and go east. After the discussion, go north, take the C4 and go back to the elevator. The first column is located to the bottom right hand corner. Go back to the room where you fought Pyro Bison and place a charge on both of the columns to the left and to the right. Now, go back the entrance of the power plant, place the last charge in the long corridor and prepare to leave the power plant. Where is the exit? Well, it's the entrance. Just avoid the debris and the flames and go through the door to end the chapter. CHAPTER 10: FACING THE HELICOPTER Cross the field of mines, then go up, take all the grenades during your ascent and get ready to face the helicopter. The way to kill it is easy: avoid its attacks (the missiles and the machine gun) and throw some grenades at the helicopter. Use the stone columns to protect yourself from the shots and seize the opportunity to strike when the helicopter has finished its shots. Same hing when it throws the missiles. After a few grenades, the helicopter will be destroyed and you will end the chapter. CHAPTER 11: THE SNAKE AGAINST THE VIPER Open the door to the north, go through the next door, take the ammos and leave the room. Carry on, go west, go downstairs, take the C4 (8), use a missile to get rid of the panel, go back to the entrance, go west, go downstairs and usea missile to destroy the next panel. Yeah, that's going to be backtracking over and over again to the final boss fight, I hope you enjoy that. Go back to the previous room, go east now, notice the thin wall in the dead end, place a charge and destroy the wall. Take the key card 5, destroy the panel with a grenade and go back to the entrance room. Go west, then downstairs, then east, use the new key card to open the locked door and call the elevator. Hmm, this guard is patrolling like... there must be a reason why. Use the mine detector to see the cause. Carry on, cross the room of laser beams, make your progress, go to the room to the northeast, use the nightvisison goggles, then the key card on the door and the thermal googles to avoid the laser beams. A dead end... not sure. Place a charge and blow the wall up. Open the door, crawl underneath the desk to take the C4, carry on, place one charge on the wall next to the panel, then another one on the other wall and go through the door. Go south, then through the door, place a charge on the wall to the left, blow it up and and another one on the wall to the south. Carry on, go south, open the door to the left, get the ammos, go back and open the locked door in the locked door. Quickly, shoot a missile to destroy the panel, go get the key card 6 and run away. Go back, open the other locked door, then go west to the locked door, use the new key card and call the elevator. There is Metal Gear. Check the rooms to the left and to the right to get some ammos and some grenades before calling the other elevator. In the next room, you'll find some ammos. Call the elevator, get the ammos and the rations and go through the door. Time to meet Viper. It's the master of traps so he will use traps to kill you. Chase him, use your grenades or your 5-7 or your R5 to hurt him. Watch out, the traps are deadly and the beams are deadly. Memorize the pattern of the beams and walk carefully. You can cross the beams before they blink, that's a good thing to hear for your progress. After a few shots, Viper will die and the chapter will end. NOTE: There's an item behind the pile of crate when you come to B99. I completely missed that item during this walkthrough but I bet my biscuit that it's a ration. Wait until confirmation or go get it by yourself if you want to make sure CHAPTER 12: GOODBYE METAL GEAR Take the C4 and the grenades, go north, take the landmines halfway and prepare yourself for the final showdown: you versus Metal Gear and the General. First, use the landmines or the C4 to destroy the legs of this death machine. Place the explosive when the shadow of the foot stops, stay away and watch this explosion. Beware of the machine gun and the flame thrower if you are too close to the top of the screen, it does lot of damages. Once the legs are destroyed, the second round will start.
Use your missiles and your grenades to hit the weak points. It will take a while, I have to admit. Beware of the machine gun, the trishots and the drones sent by Metal Gear. Once you weaken 1/3 of its life bar, Metal Gear will throw deadly missiles: avoid them at all cost and keep hitting with your best shot. You won’t ever run out of grenades, you’ll find some in the bottom left hand corner of the arena. 4, ok but that’s better than nothing. Once it’s about to die, he will try to roast you with a fire breath. Hit the mouth and avoid the flames coming from its mouth until Metal Gear dies. FINAL CHAPTER: YOU AGAIN?! Yeah, Viper for a final showdown. This time, no traps. However, he will become invisible and run all around the arena. Sometimes, if you stay close to him, he will use some shockwaves. Equip the 5-7 and the thermal goggles, find him and shoot. That’s it. He will always teleport himself to the other side of the arena so don’t waste your time spinning around like a record (I can’t get enough of this reference Well, that’s all for this walkthrough, everyone. I see you in the next one. Take care of yourself until then -------------------- |
 ?
?


| Games have secrets, I have my eagle gaze. |
Affected by 'Laziness Syndrome'
Registered: 10-21-11
Location: France
Last Post: 2629 days
Last Active: 1803 days
11-23-14 12:57 AM
MysteryMan007 is Offline
| ID: 1107113 | 32 Words
POSTS: 146/205
POST EXP: 8714
LVL EXP: 193078
CP: 3337.7
VIZ: 38786
Laian : It is very thrilling to see that the Metal Gear Solid series even reached Game Boy color. This is a very good thing, even if I had no idea at all. -------------------- |
Affected by 'Laziness Syndrome'
Registered: 08-16-14
Last Post: 4184 days
Last Active: 390 days
