Forum Links
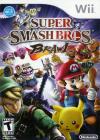
Guide: Super Smash Bros Brawl strategy guide: PRO tips. ;)
Pro tips for when playing competitive. (no items, obviously)
Pro tips for when playing competitive. (no items, obviously)
Wii,
Play Super Smash Bros. Brawl Online
Thread Information
Views
4,281
Replies
7
Rating
0
Status
OPEN
Thread
Creator
Creator
Stevie 764
07-01-13 09:39 AM
07-01-13 09:39 AM
Last
Post
Post
SacredShadow
07-16-13 11:12 PM
07-16-13 11:12 PM
System
9.3
Views: 1,326
Today: 0
Users: 1 unique
Today: 0
Users: 1 unique
Thread Actions
Order
Super Smash Bros Brawl strategy guide: PRO tips. ;)
Game's Ratings
Overall
Graphics
Sound
Addictiveness
Depth
Story
Difficulty
Average User Score
9.3
9.2
9.9
9.3
9.4
7.5
7
07-01-13 09:39 AM
 Stevie 764 is Offline
| ID: 829944 | 1828 Words
 Stevie 764 is Offline
| ID: 829944 | 1828 Words
Stevie 764
Level: 104


POSTS: 2613/2840
POST EXP: 272741
LVL EXP: 11544874
CP: 4700.4
VIZ: 394017

POSTS: 2613/2840
POST EXP: 272741
LVL EXP: 11544874
CP: 4700.4
VIZ: 394017

Likes: 0 Dislikes: 0
Super Smash Bros Brawl pro tip guide.
Update on brawl: New brawl name online if you want to play me: 51F (Seriously) Caps are there to stand out, not for spamming. If you want to be a brawl pro, you need to know skill and strategies on what to do and when. Here are tips on how to become a brawl pro player. (Not using Meta Knight, because any person who says Meta Knight is the best character ever, will get 0-death by Melee Marth, no joke) Tip #1: ChainGrab The term means when you successfully grab someone and throw them where you can easily grab them again 3+ times in a row. There are characters who can CG, but Pikachu, Falco, and Marth are my favorite CG characters. To do a chaingrab, do a throw that you can easily grab again, either DI'd or not. Falco can do 5 Dthrow grabs in a row and then do a Usmash which when fresh, nets ~65%. Remember how in melee, Marth mains like Mew2King do Uthrow chaingrabs to what is pretty much 0-death or so? In brawl, you can also CG with Marth, but sadly, the Uthrow sends people way too high to get grabbed. For Marth, you now have to use Fthrows (Foward Throws) to CG, but it isn't good now as in it can easily get DI'd away from, and it can only do a 0-25 combo, then a Fsmash (Foward Smash) to get a ~42% combo. Pikachu is Fox's "WORST" MU (MatchUp), as in Pikachu can do pretty much 0-90 and then followed up with an Usmash which can potentionally do 0-death. Tip #2a: Momentum Cancelling part 1 (MOST IMPORTANT FOR ANYONE WHO COMPETITIVELY PLAYS!) To Momentum Cancel, when you get hit far, push the controller stick (The white stick on your controller) opposite of where you got hit towards and hold it there. Then, while holding the stick, use your fastest aerial attack with the C-stick. (The yellow stick on your controller) The only time when the C-stick really comes in handy. (Not only, but most useful time for the C-stick) Keep using your fastest aerial (Which for example is Marth's Foward Aerial) and you will be able to survive at higher %'s, but combine DI (Explained in next tip) and Momentum Cancelling and you can survive at max %'s of the character you're using. (Except Snake, there's no confirmed faster aerial than his air dodge) Tip #2b: Momentum Cancelling part 2 There are 3 characters that can ENTIRELY cancel momentum from damage. Mr. Game And Watch has a "Bucket Braking" canceller that allows him to pull his non-filled bucket and cancel ALL momentum. Do your Neutral Aerial ONCE, and then pull the bucket out right after. You can survive high %'s with the bucket braking trick. Yoshi has a momentum stopper too, called by me, the "Egg Drop" because when you do your fastest aerial and then do the egg roll to stop momentum, you can't really move, so once you do the egg roll, quickly try to get out of it, and move towards the edge. Sonic also has a momentum stopper, by doing the fastest aerial and then Side B, overriding ALL momentum instantly and lets you have your Side B momentum overwrite the knockback momentum. Tip #3: Directional Influence/Tap/Smash DI (ALSO very IMPORTANT!) You also have to know DI which stands for Directional Influence. There are 3 kinds, Regular DI, Tap DI, and Smash DI. When getting hit by an attack with lots of hitlag frames like Ganondorf's Wizard Foot, or Zelda's Bair (20 frames) Quickly tap in a direction to avoid death at low % or avoid deadly star KO attacks at moderately high %. Tip #4: "Before picking a fight, better know how you're up against!" ~ Vector The Crocodile in Sonic Heroes Alternate title: Know your matchups (MUs) When fighting competitively, know what character you are fighting, and try to counter that character with a character who can easily beat the other person. MUs like Pikachu > Fox, Ganondorf literally < Every other character in the game. Like mentioned before, Pikachu can 0-90 CG Fox and then a fresh Usmash followup kill. Also, make sure you know who the other person mains, if it is Meta Knight, you will be crying because Meta Knight has the most insane recovery ever, the best spot on the tier list (SS), but high priority, fastest aerial attack speed overall, so fast that you can't tell which aerial is his fastest for momentum cancel. Tip #5: Advanced recoveries and learn them. LONGEST TIP, you have been warned. A couple of characters have better recoveries than normal that have been found overtime, ever since melee tournaments. Falco has a better BUT more "proper" recovery by using Phantasm to the ledge if you are even with the ledge. (Final Destination specific) Marth's recovery in brawl is even better. When you are knocked back far enough that you have to use your second jump and recovery, instead, go towards the nearest stage ledge and when you are low enough that you are almost about to die, use your second jump AND during it, use your Side B only ONCE, then recover with Up B. With Diddy Kong, use your second jump when you are low enough that you can't recover just by not using a jump or Side B, when low enough that your second jump can't reach, recover towards the ledge, and hold it as long as needed. If your so low that even your second jump and recovery can barely reach the ledge, when using your second jump, know what height you used the second jump on. If it is above the ledge, at the height of when you used your second jump, use your Side B. If THAT can't reach the ledge, use Up B and hold it as long as needed. If even THAT can't reach the ledge, you got knocked too far away or too low, or you angled wrong or held the recovery too long and stage spiked yourself. Ness has the hardest recovery tip ever that's so hard that you HAVE to use a Gamecube controller. You need to do your second jump and PK Fire attack at pretty much the exact same millasecond, not sure how accurate you have to be, but you have to do both the jump and PK Fire at the same time. It is the most riskiest recovery ever, but if done right, you will propel high, and it should be able to go high enough that you can recover. If you fail, you will fall downward and you will die. It's so hard that it actually isn't preferred ever. Lucas has a PK Fire recovery. When he uses PK Fire, he goes backwards a little. When knocked back, use your fastest aerial about maybe twice, use your second jump a do PK Fire away from the ledge. It will send you towards the ledge. Only usuable if high enough, if you do PK Manget RIGHT after you do PK Fire, you will go flying towards the ledge at a fast speed. Then you can use PK Thunder to recover. Lucas' PK Thunder has a wider and more accurate axis of where the thunder can send you. It also lasts longer as a body recover than Ness, too. Be careful when using PK Thunder, because during the PK Thunder setup, your opponent can attack you because you are wide open when you are trying to recover. Jigglypuff has vertical recovery. When using a jump if you are below the ledge, use pound just as your jump ends, then keep repeating if you are far under the ledge. Jigglypuff has no freefall, but he is open when the pound is opposite from you. If towards you, you can't really get near. Tip #6: You must tech! If you get spiked towards the floor or a platform, do an air dodge (L, R, or Z if the character has no tether recovery set to Z button on gamecube controller) right when you are about to hit the ground. If done right you will see yourself tech the floor and you can move right after. If "you're too slow", you will end up lying on the floor, leaving you open to jab locks from Pikachu, Squirtle, and Jigglypuff, laser locks from Falco, and a very-hard-to-do banana lock from Diddy Kong. Tip #7: Small, but mostly important tip in competitive play. Grab pummels. When you are grabbing someone, the number of pummels you can do on someone depends on the % and how fast the person can get out. At 25-50% use 2-3 fast pummels. Characters with fast pummels are Kirby, Pikachu, Marth, and a few others. At higher %'s, you have to use maybe 1 or 2 more pummels, then throw. Not a expert pummel calculation person, you know. Tip #8: Have a good playstyle, spammers are NEVER allowed! You can get owned or end up winning just by spamming attacks. Moves like Pikachu's thunderbolt is the most deadliest attack to spam, and sadly the worst character to get killed by. Main some characters like Mario, Jigglypuff, Marth, Pikachu, Falco, Diddy, or anyone that fits your good playstyles. Bad playstyles, stay away from that. Use characters that you are good with, don't use characters that leave you clueless to use like Snake. (I am one of them Those are important tips any person should learn if they want to become a great player like me, but sadly, I am bad at competitive play, because I lose against anyone, no matter who I pick, or who I am up against. Meta Knight is sadly my only hopes of winning more competitively, so bottom of the line, I do not want to fight anyone who can literally beat me. If you want to fight me, add my friend code located in my R.I.P Wii thread. I am on my Wii U, so I have a new friend code which is in that thread. Mains: Marth, Jigglypuff, Squirtle (No FD for Squirtle, please.) Brawl nickname: 51F Sadly, I have extremely bad win loss records according to my AllisBrawl experience, only 2 wins because of my high frame delay. Watch out for my frame delay amount though. It's probably going to suck, I know. Anti-Pikachu person: Update on brawl: New brawl name online if you want to play me: 51F (Seriously) Caps are there to stand out, not for spamming. If you want to be a brawl pro, you need to know skill and strategies on what to do and when. Here are tips on how to become a brawl pro player. (Not using Meta Knight, because any person who says Meta Knight is the best character ever, will get 0-death by Melee Marth, no joke) Tip #1: ChainGrab The term means when you successfully grab someone and throw them where you can easily grab them again 3+ times in a row. There are characters who can CG, but Pikachu, Falco, and Marth are my favorite CG characters. To do a chaingrab, do a throw that you can easily grab again, either DI'd or not. Falco can do 5 Dthrow grabs in a row and then do a Usmash which when fresh, nets ~65%. Remember how in melee, Marth mains like Mew2King do Uthrow chaingrabs to what is pretty much 0-death or so? In brawl, you can also CG with Marth, but sadly, the Uthrow sends people way too high to get grabbed. For Marth, you now have to use Fthrows (Foward Throws) to CG, but it isn't good now as in it can easily get DI'd away from, and it can only do a 0-25 combo, then a Fsmash (Foward Smash) to get a ~42% combo. Pikachu is Fox's "WORST" MU (MatchUp), as in Pikachu can do pretty much 0-90 and then followed up with an Usmash which can potentionally do 0-death. Tip #2a: Momentum Cancelling part 1 (MOST IMPORTANT FOR ANYONE WHO COMPETITIVELY PLAYS!) To Momentum Cancel, when you get hit far, push the controller stick (The white stick on your controller) opposite of where you got hit towards and hold it there. Then, while holding the stick, use your fastest aerial attack with the C-stick. (The yellow stick on your controller) The only time when the C-stick really comes in handy. (Not only, but most useful time for the C-stick) Keep using your fastest aerial (Which for example is Marth's Foward Aerial) and you will be able to survive at higher %'s, but combine DI (Explained in next tip) and Momentum Cancelling and you can survive at max %'s of the character you're using. (Except Snake, there's no confirmed faster aerial than his air dodge) Tip #2b: Momentum Cancelling part 2 There are 3 characters that can ENTIRELY cancel momentum from damage. Mr. Game And Watch has a "Bucket Braking" canceller that allows him to pull his non-filled bucket and cancel ALL momentum. Do your Neutral Aerial ONCE, and then pull the bucket out right after. You can survive high %'s with the bucket braking trick. Yoshi has a momentum stopper too, called by me, the "Egg Drop" because when you do your fastest aerial and then do the egg roll to stop momentum, you can't really move, so once you do the egg roll, quickly try to get out of it, and move towards the edge. Sonic also has a momentum stopper, by doing the fastest aerial and then Side B, overriding ALL momentum instantly and lets you have your Side B momentum overwrite the knockback momentum. Tip #3: Directional Influence/Tap/Smash DI (ALSO very IMPORTANT!) You also have to know DI which stands for Directional Influence. There are 3 kinds, Regular DI, Tap DI, and Smash DI. When getting hit by an attack with lots of hitlag frames like Ganondorf's Wizard Foot, or Zelda's Bair (20 frames) Quickly tap in a direction to avoid death at low % or avoid deadly star KO attacks at moderately high %. Tip #4: "Before picking a fight, better know how you're up against!" ~ Vector The Crocodile in Sonic Heroes Alternate title: Know your matchups (MUs) When fighting competitively, know what character you are fighting, and try to counter that character with a character who can easily beat the other person. MUs like Pikachu > Fox, Ganondorf literally < Every other character in the game. Like mentioned before, Pikachu can 0-90 CG Fox and then a fresh Usmash followup kill. Also, make sure you know who the other person mains, if it is Meta Knight, you will be crying because Meta Knight has the most insane recovery ever, the best spot on the tier list (SS), but high priority, fastest aerial attack speed overall, so fast that you can't tell which aerial is his fastest for momentum cancel. Tip #5: Advanced recoveries and learn them. LONGEST TIP, you have been warned. A couple of characters have better recoveries than normal that have been found overtime, ever since melee tournaments. Falco has a better BUT more "proper" recovery by using Phantasm to the ledge if you are even with the ledge. (Final Destination specific) Marth's recovery in brawl is even better. When you are knocked back far enough that you have to use your second jump and recovery, instead, go towards the nearest stage ledge and when you are low enough that you are almost about to die, use your second jump AND during it, use your Side B only ONCE, then recover with Up B. With Diddy Kong, use your second jump when you are low enough that you can't recover just by not using a jump or Side B, when low enough that your second jump can't reach, recover towards the ledge, and hold it as long as needed. If your so low that even your second jump and recovery can barely reach the ledge, when using your second jump, know what height you used the second jump on. If it is above the ledge, at the height of when you used your second jump, use your Side B. If THAT can't reach the ledge, use Up B and hold it as long as needed. If even THAT can't reach the ledge, you got knocked too far away or too low, or you angled wrong or held the recovery too long and stage spiked yourself. Ness has the hardest recovery tip ever that's so hard that you HAVE to use a Gamecube controller. You need to do your second jump and PK Fire attack at pretty much the exact same millasecond, not sure how accurate you have to be, but you have to do both the jump and PK Fire at the same time. It is the most riskiest recovery ever, but if done right, you will propel high, and it should be able to go high enough that you can recover. If you fail, you will fall downward and you will die. It's so hard that it actually isn't preferred ever. Lucas has a PK Fire recovery. When he uses PK Fire, he goes backwards a little. When knocked back, use your fastest aerial about maybe twice, use your second jump a do PK Fire away from the ledge. It will send you towards the ledge. Only usuable if high enough, if you do PK Manget RIGHT after you do PK Fire, you will go flying towards the ledge at a fast speed. Then you can use PK Thunder to recover. Lucas' PK Thunder has a wider and more accurate axis of where the thunder can send you. It also lasts longer as a body recover than Ness, too. Be careful when using PK Thunder, because during the PK Thunder setup, your opponent can attack you because you are wide open when you are trying to recover. Jigglypuff has vertical recovery. When using a jump if you are below the ledge, use pound just as your jump ends, then keep repeating if you are far under the ledge. Jigglypuff has no freefall, but he is open when the pound is opposite from you. If towards you, you can't really get near. Tip #6: You must tech! If you get spiked towards the floor or a platform, do an air dodge (L, R, or Z if the character has no tether recovery set to Z button on gamecube controller) right when you are about to hit the ground. If done right you will see yourself tech the floor and you can move right after. If "you're too slow", you will end up lying on the floor, leaving you open to jab locks from Pikachu, Squirtle, and Jigglypuff, laser locks from Falco, and a very-hard-to-do banana lock from Diddy Kong. Tip #7: Small, but mostly important tip in competitive play. Grab pummels. When you are grabbing someone, the number of pummels you can do on someone depends on the % and how fast the person can get out. At 25-50% use 2-3 fast pummels. Characters with fast pummels are Kirby, Pikachu, Marth, and a few others. At higher %'s, you have to use maybe 1 or 2 more pummels, then throw. Not a expert pummel calculation person, you know. Tip #8: Have a good playstyle, spammers are NEVER allowed! You can get owned or end up winning just by spamming attacks. Moves like Pikachu's thunderbolt is the most deadliest attack to spam, and sadly the worst character to get killed by. Main some characters like Mario, Jigglypuff, Marth, Pikachu, Falco, Diddy, or anyone that fits your good playstyles. Bad playstyles, stay away from that. Use characters that you are good with, don't use characters that leave you clueless to use like Snake. (I am one of them Those are important tips any person should learn if they want to become a great player like me, but sadly, I am bad at competitive play, because I lose against anyone, no matter who I pick, or who I am up against. Meta Knight is sadly my only hopes of winning more competitively, so bottom of the line, I do not want to fight anyone who can literally beat me. If you want to fight me, add my friend code located in my R.I.P Wii thread. I am on my Wii U, so I have a new friend code which is in that thread. Mains: Marth, Jigglypuff, Squirtle (No FD for Squirtle, please.) Brawl nickname: 51F Sadly, I have extremely bad win loss records according to my AllisBrawl experience, only 2 wins because of my high frame delay. Watch out for my frame delay amount though. It's probably going to suck, I know.  Layout by, Matthew2321 Posts: &numposts& Post rank: &postrank& Gain EXP idle time: &expgaintime& seconds Level: &level& |
Vizzed Elite
Affected by 'Laziness Syndrome'
Registered: 05-28-10
Location: Enfield, CT
Last Post: 3604 days
Last Active: 3598 days
| Vizzed's former Osu! player and TASer |
Affected by 'Laziness Syndrome'
Registered: 05-28-10
Location: Enfield, CT
Last Post: 3604 days
Last Active: 3598 days
(edited by Stevie 764 on 07-01-13 09:41 AM)
07-01-13 09:52 AM
 Dean2k13 is Offline
| ID: 829961 | 99 Words
 Dean2k13 is Offline
| ID: 829961 | 99 Words
Dean2k13
Level: 66


POSTS: 652/1051
POST EXP: 105515
LVL EXP: 2342090
CP: 6320.1
VIZ: 71550

POSTS: 652/1051
POST EXP: 105515
LVL EXP: 2342090
CP: 6320.1
VIZ: 71550

Likes: 0 Dislikes: 0
Stevie 764 : Hello! How are you today? .. I'm super! .. I was actually just hovering over your profile while you were writing this review! & then I noticed on the Tour de Vizzed boards that you posted this walkthrough! Anyways, just by looking at the WT I can tell you put a lot of effort into it! Nice work! Although I don't really play games of that nature, I think this deserves credit! Me personally, I wouldn't benefit from this WT but someone who plays these types of games would! Nice work man & thanks for writing this! I was actually just hovering over your profile while you were writing this review! & then I noticed on the Tour de Vizzed boards that you posted this walkthrough! Anyways, just by looking at the WT I can tell you put a lot of effort into it! Nice work! Although I don't really play games of that nature, I think this deserves credit! Me personally, I wouldn't benefit from this WT but someone who plays these types of games would! Nice work man & thanks for writing this! .. Sega Seal of Quality, GUARANTEED! Custom Layout by Dean2k13 |
Trusted Member
Affected by 'Laziness Syndrome'
Registered: 05-26-13
Last Post: 3590 days
Last Active: 516 days
Affected by 'Laziness Syndrome'
Registered: 05-26-13
Last Post: 3590 days
Last Active: 516 days
07-02-13 07:40 AM
 Barathemos is Offline
| ID: 831598 | 28 Words
 Barathemos is Offline
| ID: 831598 | 28 Words
Barathemos
Level: 212


POSTS: 2774/15979
POST EXP: 688805
LVL EXP: 140267006
CP: 48618.3
VIZ: 1883320

POSTS: 2774/15979
POST EXP: 688805
LVL EXP: 140267006
CP: 48618.3
VIZ: 1883320

Likes: 0 Dislikes: 0
I cna tell that you put a lot of time and effort into this walk through! It was very descr |
Local Moderator
Minecraft Admin
Affected by 'Laziness Syndrome'
Registered: 02-17-13
Location: Atlanta, Georgia
Last Post: 95 days
Last Active: 1 day
Minecraft Admin
Affected by 'Laziness Syndrome'
Registered: 02-17-13
Location: Atlanta, Georgia
Last Post: 95 days
Last Active: 1 day
07-02-13 08:44 AM
 Pacman+Mariofan is Offline
| ID: 831675 | 28 Words
 Pacman+Mariofan is Offline
| ID: 831675 | 28 Words
PacmanandMariofan
Level: 169



POSTS: 691/9337
POST EXP: 662200
LVL EXP: 63416498
CP: 38587.2
VIZ: 1569979

POSTS: 691/9337
POST EXP: 662200
LVL EXP: 63416498
CP: 38587.2
VIZ: 1569979

Likes: 0 Dislikes: 0
Great strategy guide! It was very descr ____________________ Ghosts ain't got nothing on this guy! Custom Layout by Dean2k13 |
Vizzed Elite
2-Time VCS Winner
Affected by 'Laziness Syndrome'
Registered: 10-22-12
Location: The Milky Way (not the candy)
Last Post: 1693 days
Last Active: 1693 days
2-Time VCS Winner
| Philippians 4:6-7 |
Affected by 'Laziness Syndrome'
Registered: 10-22-12
Location: The Milky Way (not the candy)
Last Post: 1693 days
Last Active: 1693 days
07-06-13 09:18 PM
 IgorBird122 is Offline
| ID: 838456 | 31 Words
 IgorBird122 is Offline
| ID: 838456 | 31 Words
IgorBird122
The_IB122
The_IB122
Level: 143



POSTS: 1077/6414
POST EXP: 526201
LVL EXP: 35822777
CP: 40965.2
VIZ: 782376

POSTS: 1077/6414
POST EXP: 526201
LVL EXP: 35822777
CP: 40965.2
VIZ: 782376

Likes: 0 Dislikes: 0
This is a pretty nice guide you posted on here, very well done ans well worded and this is what we like in the game guides, nice job on creating this. ~This post below is a message from a Flock~ --------------------  |
Vizzed Elite
Affected by 'Laziness Syndrome'
Registered: 01-07-13
Location: The Big Easy
Last Post: 2216 days
Last Active: 2201 days
| The Shadow King |
Affected by 'Laziness Syndrome'
Registered: 01-07-13
Location: The Big Easy
Last Post: 2216 days
Last Active: 2201 days
07-06-13 10:07 PM
 PixelBrick is Offline
| ID: 838522 | 27 Words
 PixelBrick is Offline
| ID: 838522 | 27 Words
PixelBrick
Level: 97


POSTS: 76/2625
POST EXP: 172950
LVL EXP: 9205084
CP: 7070.0
VIZ: 50099

POSTS: 76/2625
POST EXP: 172950
LVL EXP: 9205084
CP: 7070.0
VIZ: 50099

Likes: 0 Dislikes: 0
Not a bad review. I personally liked the original Super Smash Bros for the Nintendo 64. Then I tried this game 3 years back, and LOVED IT. |
Trusted Member
Affected by 'Laziness Syndrome'
Registered: 07-05-13
Location: MGM Vault
Last Post: 2821 days
Last Active: 2676 days
| Here's looking at you, kid |
Affected by 'Laziness Syndrome'
Registered: 07-05-13
Location: MGM Vault
Last Post: 2821 days
Last Active: 2676 days
07-15-13 06:34 PM
 Stevie 764 is Offline
| ID: 847246 | 59 Words
 Stevie 764 is Offline
| ID: 847246 | 59 Words
Stevie 764
Level: 104


POSTS: 2614/2840
POST EXP: 272741
LVL EXP: 11544874
CP: 4700.4
VIZ: 394017

POSTS: 2614/2840
POST EXP: 272741
LVL EXP: 11544874
CP: 4700.4
VIZ: 394017

Likes: 0 Dislikes: 0
Thanks for the feedback guys. I actually forgot to put this in the pro tip guide but in competitive play, if there's a sudden death, it's a tie. The tie-breaker is this: • Same exact character/palette swap • 1 stock • Same stage played on • 2 minutes The person who survives at the end wins the round. Anti-Pikachu person: I actually forgot to put this in the pro tip guide but in competitive play, if there's a sudden death, it's a tie. The tie-breaker is this: • Same exact character/palette swap • 1 stock • Same stage played on • 2 minutes The person who survives at the end wins the round.  Layout by, Matthew2321 Posts: &numposts& Post rank: &postrank& Gain EXP idle time: &expgaintime& seconds Level: &level& |
Vizzed Elite
Affected by 'Laziness Syndrome'
Registered: 05-28-10
Location: Enfield, CT
Last Post: 3604 days
Last Active: 3598 days
| Vizzed's former Osu! player and TASer |
Affected by 'Laziness Syndrome'
Registered: 05-28-10
Location: Enfield, CT
Last Post: 3604 days
Last Active: 3598 days
07-16-13 11:12 PM
 SacredShadow is Offline
| ID: 848606 | 85 Words
 SacredShadow is Offline
| ID: 848606 | 85 Words
SacredShadow
Razor-987
Razor-987
Level: 164


POSTS: 1891/8800
POST EXP: 1056377
LVL EXP: 57530483
CP: 42226.6
VIZ: 1684121

POSTS: 1891/8800
POST EXP: 1056377
LVL EXP: 57530483
CP: 42226.6
VIZ: 1684121

Likes: 0 Dislikes: 0
Great work on this guide man! You were very throughout and clear with the way you display your information which is great. I think you did a great job making this guide. It will come in very handy. Especially for someone like me who plays this game all of the time. Great work, keep it up and keep making more awesome guides. I will put this to good use the next time I play this game. Your awes tips will definitely improve my performance! Thanks! -------------------- |
Vizzed Elite
Affected by 'Laziness Syndrome'
Registered: 01-14-13
Last Post: 2 days
Last Active: 7 hours
Affected by 'Laziness Syndrome'
Registered: 01-14-13
Last Post: 2 days
Last Active: 7 hours


 User Notice