

 User Notice
 Forum Links


Thread Information
Creator
08-27-16 08:13 PM
Post
11-19-16 06:49 PM
7.2
Today: 0
Users: 12 unique
Thread Actions


Pokemon Snap Guide
08-27-16 08:13 PM
 EX Palen is Offline
| ID: 1298045 | 4669 Words
EX Palen is Offline
| ID: 1298045 | 4669 Words
 EX Palen is Offline
Spanish Davideo7

POSTS: 3101/6587
POST EXP: 1210682
LVL EXP: 36871143
CP: 196385.3
VIZ: 11486642

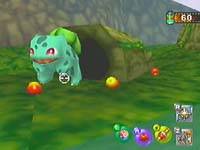
Seventeen years before the release of Pokémon Go, the only way we had to watch Pokémon in a wild environment from behind a camera lens was this game. It was a nice twist to the core games, since now Pokémon weren’t captured and used for battle but freely roamed an island and interacted with each other as the player took pictures of them, and one could think it eventually set the grounds for a better and much improved game which ended up being Pokémon Go. In this game, the player is a photographer who travels through Pokémon Island to take pictures of the Pokémon inhabiting it and show them to Professor Oak to help in his research while he judges and gives scores to each picture. To travel around the different scenarios you count with the ZERO-ONE, an all-purpose vehicle that will guide you like if it was a safari while you take pictures of everything surrounding you. As you keep showing pictures to Oak, he will give you special items to help you on your quest. Now that you know the basis, it’s time we get into detail. ITEMS Let me start with the items. They are obtained as you keep progressing through the game and beat the courses. Despite what you may think, they are incredibly useful and necessary to snap all Pokémon. Here are the items and how to use them wisely. Apple The apple works best as a bait for Pokémon: you can throw them away and see them chase it. You can also use it as an “offensive weapon” to knock Pokémon over (this is sometimes very needed). It will surely be your most used item throughout the game. Pester Ball Throw this ball into holes, grassy areas or rivers/lakes to lure the hidden Pokémon out. Very useful to discover hidden Pokémon or have extra chances of snapping Pokémon you may have missed. Like the Apple, it can be used “offensively” to knock Pokémon over. Poke Flute This flute can play up to three tunes, each of which lasts for a while, roughly 20 seconds. It doesn’t have much effect in the majority of Pokémon, but sometimes it comes in very handy. Note that if you throw an Apple or Pester Ball while playing the flute the tune will cease immediately. Dash Engine This item allows to speed up the ZERO-ONE. It serves a purpose when needing to clear a zone quickly if you’re looking for a specific Pokémon or want to get to the end soon, and also allows you to “overtake” Pokémon to have a better sight of them. SCORING SYSTEM When you’re done with the course, you can (Special) + Size + Pose + Technique + (Same PKMN Bonus) Special is a determined score given to very unique pictures. Only a few Pokémon have this bonus available, so I’ll list it whenever you can obtain it in each course. Size determines how big the Pokémon is in the picture. If it’s too small or doesn’t fully appear, you will get a low score and Oak won’t proceed to judge the next factors, so don’t take pictures of Pokémon too far away and try to catch their full body within the picture. Pose basically determines if the Pokémon is facing the camera or is looking away. In the case of the latter, you will get a low score and Oak won’t proceed to judge the next factors. Always try to have the Pokémon looking at you when snapping them, using Apples when necessary. Apples will allow for happy expressions if used as bait, and angry expressions when used offensively in some cases. Other Pokémon might have other aspects regarding a bigger score in Pose, so I’ll leave that for later. Technique essentially judges if the Pokémon is in the center of the frame. If it is, Oak will double the accumulated score, but if it isn’t, Oak won’t award any points and call it your final score. It’s crucial to have the Pokémon in the center of the frame for decent scores. If you manage to snap two or more of the same Pokémon in a single picture, Oak will give you bonus points (if you manage to pass the three previous factors, that is). The bonus points will differ depending on the number of Pokémon, their size and their pose. It’s recommendable to save shots for when you manage to see several of the same Pokémon for higher scores. COURSES The game features a total of seven courses, in which up to 63 Pokémon may be snapped. You have no control over your vehicle (except for the Dash Engine mentioned above), so you will always follow the same path. You can look everywhere around you but you don’t have zoom, so up-close pictures must be taken actually up-close. Besides Pokémon, you also need to snap Pokémon Signs. These signs unlock the very last course, but you won’t be able to show them to Oak until he tells you to do so. More about this explained in the Valley course below. I’ll describe each course with two sub-sections. The first will cover all Pokémon and/or Sign that are visible to the eye, needing nothing more than small interaction with Apples/Pester Balls/Flute tunes to snap properly. The second, under the HIDDEN banner, will dig deep into the course, where skill and wise use of your items is needed to snap those Pokémon hiding around the course. Beach The starting course, passing through a paradisiacal beach and, in later stages, through the rocky uphill behind it, all the while our vehicle moves through a railway. It doesn’t have many kinds of Pokémon to be seen, so it serves as a training course to test your skills and the new items you unlock through the game. Right in the start, a small flock of Pidgey flies at low altitude in front of us. A bit ahead a Doduo will storm out of a passage and cross the railway on to the beach (you can get a frontal shot of it with the Dash Engine). To the right, we find a Pikachu calmly enjoying the sun. As the railway turns right, on the left we can see the Kingler Rock, one of the Pokémon Signs we need to snap. To the right, there’s a surfboard. Try to lure the Pikachu here by creating a path of Apples so it ends up hopping onto it for a chance to snap the special Surfing Pikachu, worth 1000 points. Continuing ahead, a Butterfree is flying near the railway, and as we keep advancing we see two more Butterfree flying a bit higher. They fly over a We head into a grassy section, from which a Pidgey will appear flying towards the sea pursued by a Meowth. There’s another couple of Butterfree at our right as we head downhill to cross a river through a wooden tunnel. In the next grassy section, a Doduo will pop out of it, and later another Pidgey pursued by a Meowth. We approach a plain rocky section, with an Eevee pursuing a mysterious ball to our left. Hit the ball with an Apple and it will show as a Chansey. To our right, a Kangaskhan is watching over the sea, so hit it with an Apple or Pester Ball so it switches its focus onto its attacker (play the Flute if you want it to show a relaxed face, or else you will get an angry expression of it). Finally, a couple of Pidgey pop out of the rocks, and fly over the railway up to their nest, which has been invaded by a Meowth. The Pidgey will repel the intruder, which gives us room to snap the special Gust-using Pidgey, worth 500 points. After such an image, we reach the goal gate to present Oak our pictures. HIDDEN Throughout the course, keep an eye out on the sea, as several Lapras will show their face. Manage to snap any Lapras you see, no matter how far, so they eventually appear closer to the coast. It won’t be until the rocky section with the Kangaskhan where a Lapras will appear very close, which is the best chance to fully snap it. You may have noticed leaves flying above the grassy sections. Throw Pester Balls into the grass until you eventually manage to uncover its secrets: a Scyther! The first section needs an extra amount of Pester Balls, because with enough luck two Pikachu will pop out and go to the tree stumps besides the grass and start striking poses there, which is a nice chance to snap the special Pikachu on a Stump, worth 1300 points. Tunnel A dark and obscure course, going through an abandoned power plant. It houses many unique Pokémon, including one of the Legendaries, but it also has certain secrets to uncover, between them the access to a new course. This time, our vehicle travels on its wheels through the tunnel in a preset path. To our right, we see a Pikachu calmly staying besides a strange device. Snap it and it will go slightly away. Snap it again and it will go further away, until an Electrode that comes from our left appears. Pikachu will jump on it, enabling a chance to snap the special Pikachu on a Ball, worth 600 points. Heading to the tunnel, another Electrode will come out rolling by, pursued by an Electabuzz. Once outside, they will retreat back inside, heading to the right of our path. There, the Electrode will explode, blasting the poor Electabuzz. Inside the tunnel, there are three more Electrode, and if you hit them with an Apple or a Pester Ball, they will explode. This explosion will startle the several Kakuna hiding in the ceiling, which will fall down and stay for a few seconds. We reach a gate, which will release a Zubat when opening. We enter the abandoned power plant, with a Pikachu on our left, and ahead of it a strange and giant yellow egg. We pass by the power plant and we notice a strange ball floating around randomly to our left. Manage to snap it, because it’s a Hunter in disguise. To our right, a Magikarp will splash out of a small lake before we reach the second gate. Another Zubat will fly away after opening it, as we head into the outer part of the tunnel. To our left, another Hunter in disguise is floating about, this time doing circles so it can be snapped easily by predicting its trajectory. To our left, we see a Pikachu welcoming a Diglett, while to the right a couple of Electabuzz are punching a screen which is not functioning. We head downhill, out of the tunnel, and see three Magnemite outside. They can’t be snapped, however, they emit a force field whenever you focus on them. Ahead of them is the goal gate, but to our right lies another Electrode. Hit it with an Apple or Pester Ball so it explodes, opening up the path for the Volcano course (which becomes a pseudo-goal since the level finishes as soon as the path is freed). HIDDEN After the first gate, lure the Pikachu near the egg by making a path of Apples. When it’s near enough, play the Flute. This will make Pikachu use its Thunder attack, cracking the egg to reveal a Zapdos! After hatching, Zapdos will fly towards the power plant and use its electricity to power it up, which in turn lights up the screens the Electabuzz were punching, which show interesting hints. The first one shows a hint towards the Diglet on our left. Just like the Pikachu at the start, it will appear farther away with each snap. After the third, however, a Dugtrio will come out instead. If you snap it, then two Dugtrios will appear ahead, and if you snap them, you end up getting three Dugtrios up close. The second one shows a hint towards Magnemite. They won’t emit their force field if they are spellbound with an Apple, so throw one near them and snap them. Even better, throw the Apples strategically so the three Magnemites merge together to form Magneton! Since it doesn’t emit a force field, Magneton can be freely snapped before we finish the level. Oh, and before reaching the exit of the tunnel, you may have seen some scrap on the right. After freeing Zapdos and powering up the station, a device will emit light upon the scrap, which ends up forming the Pinsir Shadow, one of the Pokémon Signs. Volcano Through the scorching heat and flows of lava, this stage is home to all Fire Pokémon in the game. Our vehicle moves through a path made of rocks leading us through this extreme environment, where we’re not free of obstacles or beautiful hidden gems. Right after starting, a Rapidash dashes besides us. If you don’t manage to snap it, there are two more Rapidash quietly standing on a lower level to the left. We head right, where we see a Vulpix roaming around, and slightly ahead there are two more Vulpix, usually roaming close to each other which enables a good snap of both. We keep advancing, and we see a Magmar and a Charmander on an isle to the left. After facing an uphill, we encounter two more Charmander to the left, this time much closer to the vehicle. Our path is blocked by a giant egg, so hit it with an Apple or a Pester Ball to throw it into the lava. From it will hatch a Moltres, and it will fly high above your head so snapping it for a high score can be rather difficult. Continuing uphill, we see two Magmar to the left. Throw an Apple between them, and while one eats it, the other will attack it, enabling you to snap the special Fighting Magmar, worth 800 points. After them, we enter the final section with a Charmeleon on the left, orbiting a lava pit. After you snap it, hit it with an Apple or Pester Ball so it falls down to the lava pit. This will make it evolve into Charizard. Be careful, Charizard is huge and will be up close, so be sure you manage to snap its full size or your score will be low. HIDDEN Right after the start, throw a Pester Ball into the volcano on the left. It will produce some strange smoke, which is meant to be Koffing Smoke, one of the Pokémon Signs. If you throw Apples for the couple of Charmander to eat, a total of four more can appear from behind the rocks, giving you a massive boost for Same PKMN Bonus. Since you will be blocked by the egg containing Moltres, you have plenty of time to get a good snap of the swarm. In the final section, instead of focusing on Charmeleon, focus on the right side. You will see three mini volcanoes a certain distance away. Manage to sink a Pester Ball in any of them, and with enough tries and luck, a Growlithe will emerge and stand close to the vehicle. If you’re very lucky, you can get an Arcanine instead! River Aboard our all-purpose vehicle, we float in the river, letting the current guide us through the amazing sights it offers. Many Water Pokémon are here, but we also see a few exceptions. You will need to be precise at snapping, because Pokémon here almost never stay put. Right after starting, we can see some Poliwag hidden within the grass on the right. Throw Pester Balls at them so they eventually come out and sink into the water to jump out of it at random times. On the opposite shore, two Bulbasaur are encased within tree stumps, so hit them with an Apple or Pester Ball to knock them off and leave them open for a good snap. Continuing down the river, we see a Slowpoke near the left shore, loafing around like always. In the opposite shore, a Vileplume is in a deep slumber, so play the Flute to wake it up. Progressing through the river, some Shellder randomly pop out of the water, as we approach another Slowpoke near the left shore. We now enter an enclosed section, with several Metapod above our head. Hit them with an Apple or Pester Ball so they lower themselves to your level to snap them better, and throw an item again so they “retreat”. To the left, we see a Psyduck going up and down. Hit it with an Apple or Pester Ball, and it will randomly jump out of the water doing impressive jumps. Nearing the end of the course, more Shellder will randomly jump out of the water. This time, however, you can be lucky enough to see even more than one Cloyster jumping out! Right before the goal gate, there’s a Pikachu over a group of trees. Manage to knock it out with an Apple or Pester Ball and it will travel through the shore at blinding speed, and if you manage to snap it you can get the special Speed Pikachu, worth 800 points. HIDDEN Being a river, water Pokémon hide below the surface. Throwing Apples and/or Pester Balls randomly into the water can make those Pokémon pop out. They normally are Magikarp, but it can also be those Poliwag you “freed” at the start. Both perform different jumps, and the bigger the jump the higher the score (and also harder to snap). The Slowpokes aren’t far from a Shellder sign. Lure them there with Apples, and they will eventually use their tail to fish. After a short while, they will evolve into Slowbro! The Vileplume in front of the first Slowpoke lets out an obscure gas while After the Metapod zone, you will see to the left two mysterious floating objects. Throw a Pester Ball to them, and they will reveal their true form as Porygon! The second one activates a switch when popping out, which leads into the next course and serves as a pseudo-goal. Cave A dark cave, where almost no sunlight enters. Home to very special and sometimes nasty Pokémon, this cave holds more than one secret. Our all-purpose vehicle will use retro rockets to safely explore this zone where sometimes Pokémon are far away from us to ensure a good snap, so you will need to refine your technique before coming here. We start falling deep into the cave, with some Zubat flying by. To the left, we can see a couple Grimer, and to the right, a Bulbasaur. Continuing straight, we see three more Bulbasaur to the right and closer to the vehicle, so it’s a good chance for a group picture. Going further into the cave, we see a Koffing propelling a Jigglypuff (seemingly in a non gentle way) all over the place. Ahead of them, a Weepinbell is circling a small pond, in a similar fashion to the Charmeleon of the Volcano course. Like back then, knock Weepinbell out with an Apple or Pester Ball into the pond, and it will sink in it to evolve and emerge as a Victreebel, which will inexplicably float above the pond as our vehicle circles it to enter the next “chamber” of the cave. Upon crossing a curtain of water, we see a Zubat flying around holding a Pikachu. Manage to knock out the Zubat with an Apple or Pester Ball so it frees the Pikachu. To avoid falling down, the Pikachu is seemingly equipped with balloons to land safely, which gives us the chance to snap the special Balloon Pikachu, worth 1600 points. Getting closer to ground level, we see two Jynx seemingly HIDDEN Snap the two Grimer at the start. This will make two more Grimer appear ahead, one below our vehicle and one to the left, in front of the three Bulbasaur. Hit three times with a Pester Ball any of these new Grimer and they will evolve into a Muk. Speaking of Bulbasaur, you may have noticed their face is a bit odd, even though Oak recognizes them as Bulbasaur. Hitting them with a Pester Ball reveals their true form: Ditto! Try to hit the Koffing propelling a Jigglypuff with an Apple or Pester Ball. This will freed the Jigglypuff, and make a second Koffing appear from an opening to the right, propelling another Jigglypuff. Free this one too and a third Koffing and Jigglypuff will appear to your left. They’re the last to appear, but free the Jigglypuff again if they’re still in your range. Stopping the two Pokémon gives a perfect chance for a good snap. The last Koffing mentioned above appears from below some shiny stones. Manage to snap the center one, and when After the Jynx and Articuno, you may have seen a strange location to the right before the goal gate. Well, here is where the freed Jigglypuff end up gathering for a “private” performance. If you free up to the first two, you will be able to snap the special Jigglypuff on Stage, worth 500 points. However, freeing all three enables the special Jigglypuff Trio on Stage, worth 1200 points. Valley We are back again in the water, but this time at the starting point of the river, crossing the valley enclosed by sharp mountains. Several rapids are here, where snapping Pokémon turns even harder due to the higher speed. More than one surprise awaits here, including a key one that affects the progress of the game itself. As we approach the first turn, we see some shells protruding from the water. Hit them with a Pester Ball so they’re propelled into the shore, and you will be able to snap Squirtle. On the right shore, you can see a Mankey throwing tantrums a bit away from the river. Still looking to the right shore, we see some Geodude “anchored” to the mountain. Hit them with an Apple or Pester Ball so they fall down and can be properly snapped. Doing this can also make an underground Pokémon to pop out: Sandshrew! Moving ahead, we see a couple more Geodude on the left shore. Manage to knock them both down, and if they’re down at the same time a Graveler will fall from a higher altitude. The resulting hit with the ground startles a Pokémon hiding underground, which will then pop out: Sandslash! We see another Mankey throwing tantrums to our left before facing the first set of rapids. We end up in a calm zone with a waterfall on the right. You will see a Staryu floating around up ahead, and to the left there are three Graveler “anchored” to the mountain. Play the Flute so they detach themselves and fall to the ground to perform a dance, which is the chance to snap the special Graveler’s Group Dance, worth 500 points. Going down through the second set of rapids, we face two more Staryu on our way, floating above the river flow. Back into calm, we see a Dratini happily splashing besides a massive whirlpool to our right. A bit ahead we see a few Squirtle, one of which stays put inside its shell. Hit it with a Pester Ball to propel it forward, and with good aim, it will knock out a Mankey at the peak of the mountain. The Mankey will appear at the other side, and it will be up close enough to take a snap of it. Also, it has behind a switch, so hit it with an Apple to activate the switch and enter a special zone, where Oak awaits and informs you of the Pokémon Signs. After you show them the pictures of this trip, he will add the Signs to the report, and only from now on you’ll manage to snap them. HIDDEN Remember what we said in the River course about Pokémon hiding under the water? Well, here we have more Pokémon hiding underneath us. Throwing Apples and Pester Balls into the water can make Magikarp, Goldeen and even Dratini to pop out at any random time. They perform different splashes, so each awards different points for pose. Right after the start, in the horizon, we see a Magikarp splashing. When we get near the zone where we saw it, throw Pester Balls into that area. Eventually, the Magikarp will jump out towards the Mankey, who will send it far away through the mountain. It will appear after the first set of rapids, on the same shore as the group of Graveler. Hit it again with a Pester Ball and it will “retreat” into the waterfall, where it will evolve into Gyarados! Oh, and speaking of the initial corner, I’m sure you’ve seen the mountains in the horizon shaped like a Dugtrio. This is the first clear reference towards Pokémon Signs, for this is the last one, Mt Dugtrio. Snapping the red core of the Staryu in the second set of rapids will make them orbit you. Its hard to snap them while doing this because they travel fast, but once you reach the massive whirlpool, the Staryu will enter it and emerge as Starmie! They will float around for a bit before going out of sight, so be quick to snap them. Speaking of the whirlpool, it hides one more and bigger secret. Throw a Pester Ball inside it, and you will see it flashes. After a few tries, a Dragonite will emerge from it, striking a pose before flying away. Rainbow Cloud A mysterious location above the island, nearly in outer space. Our vehicle flies around this area where we only encounter one Pokémon, the rarest of them all. It’s not an easy trip, so prepare yourself for the upcoming challenge. This is the purpose of the Pokémon Signs: snapping them all unlocks this secret course, which is reflected in the constellations seen in the “sky”. Mew will appear in front of you encased in an energy shield that projects a force field, making it impossible to snap it. It will float around randomly, giving you the chance to hit it with an Apple or Pester Ball. After it is hit, Mew will retreat, but will come back. After the third hit, Mew will appear in another shield, this time making sporadic passings. Hit it again two more times and the shield will fade. After that, Mew will appear by one of your sides chasing the shield, which is the only chance we have to snap it. Snapping it automatically gives the special The Rare Pokémon Mew, worth 2500 points. And this is it! You have snapped all 63 Pokémon available in the game. Now aim to get the maximum possible score so you have the best album ever! Seventeen years before the release of Pokémon Go, the only way we had to watch Pokémon in a wild environment from behind a camera lens was this game. It was a nice twist to the core games, since now Pokémon weren’t captured and used for battle but freely roamed an island and interacted with each other as the player took pictures of them, and one could think it eventually set the grounds for a better and much improved game which ended up being Pokémon Go. In this game, the player is a photographer who travels through Pokémon Island to take pictures of the Pokémon inhabiting it and show them to Professor Oak to help in his research while he judges and gives scores to each picture. To travel around the different scenarios you count with the ZERO-ONE, an all-purpose vehicle that will guide you like if it was a safari while you take pictures of everything surrounding you. As you keep showing pictures to Oak, he will give you special items to help you on your quest. Now that you know the basis, it’s time we get into detail. ITEMS Let me start with the items. They are obtained as you keep progressing through the game and beat the courses. Despite what you may think, they are incredibly useful and necessary to snap all Pokémon. Here are the items and how to use them wisely. Apple The apple works best as a bait for Pokémon: you can throw them away and see them chase it. You can also use it as an “offensive weapon” to knock Pokémon over (this is sometimes very needed). It will surely be your most used item throughout the game. Pester Ball Throw this ball into holes, grassy areas or rivers/lakes to lure the hidden Pokémon out. Very useful to discover hidden Pokémon or have extra chances of snapping Pokémon you may have missed. Like the Apple, it can be used “offensively” to knock Pokémon over. Poke Flute This flute can play up to three tunes, each of which lasts for a while, roughly 20 seconds. It doesn’t have much effect in the majority of Pokémon, but sometimes it comes in very handy. Note that if you throw an Apple or Pester Ball while playing the flute the tune will cease immediately. Dash Engine This item allows to speed up the ZERO-ONE. It serves a purpose when needing to clear a zone quickly if you’re looking for a specific Pokémon or want to get to the end soon, and also allows you to “overtake” Pokémon to have a better sight of them. SCORING SYSTEM When you’re done with the course, you can (Special) + Size + Pose + Technique + (Same PKMN Bonus) Special is a determined score given to very unique pictures. Only a few Pokémon have this bonus available, so I’ll list it whenever you can obtain it in each course. Size determines how big the Pokémon is in the picture. If it’s too small or doesn’t fully appear, you will get a low score and Oak won’t proceed to judge the next factors, so don’t take pictures of Pokémon too far away and try to catch their full body within the picture. Pose basically determines if the Pokémon is facing the camera or is looking away. In the case of the latter, you will get a low score and Oak won’t proceed to judge the next factors. Always try to have the Pokémon looking at you when snapping them, using Apples when necessary. Apples will allow for happy expressions if used as bait, and angry expressions when used offensively in some cases. Other Pokémon might have other aspects regarding a bigger score in Pose, so I’ll leave that for later. Technique essentially judges if the Pokémon is in the center of the frame. If it is, Oak will double the accumulated score, but if it isn’t, Oak won’t award any points and call it your final score. It’s crucial to have the Pokémon in the center of the frame for decent scores. If you manage to snap two or more of the same Pokémon in a single picture, Oak will give you bonus points (if you manage to pass the three previous factors, that is). The bonus points will differ depending on the number of Pokémon, their size and their pose. It’s recommendable to save shots for when you manage to see several of the same Pokémon for higher scores. COURSES The game features a total of seven courses, in which up to 63 Pokémon may be snapped. You have no control over your vehicle (except for the Dash Engine mentioned above), so you will always follow the same path. You can look everywhere around you but you don’t have zoom, so up-close pictures must be taken actually up-close. Besides Pokémon, you also need to snap Pokémon Signs. These signs unlock the very last course, but you won’t be able to show them to Oak until he tells you to do so. More about this explained in the Valley course below. I’ll describe each course with two sub-sections. The first will cover all Pokémon and/or Sign that are visible to the eye, needing nothing more than small interaction with Apples/Pester Balls/Flute tunes to snap properly. The second, under the HIDDEN banner, will dig deep into the course, where skill and wise use of your items is needed to snap those Pokémon hiding around the course. Beach The starting course, passing through a paradisiacal beach and, in later stages, through the rocky uphill behind it, all the while our vehicle moves through a railway. It doesn’t have many kinds of Pokémon to be seen, so it serves as a training course to test your skills and the new items you unlock through the game. Right in the start, a small flock of Pidgey flies at low altitude in front of us. A bit ahead a Doduo will storm out of a passage and cross the railway on to the beach (you can get a frontal shot of it with the Dash Engine). To the right, we find a Pikachu calmly enjoying the sun. As the railway turns right, on the left we can see the Kingler Rock, one of the Pokémon Signs we need to snap. To the right, there’s a surfboard. Try to lure the Pikachu here by creating a path of Apples so it ends up hopping onto it for a chance to snap the special Surfing Pikachu, worth 1000 points. Continuing ahead, a Butterfree is flying near the railway, and as we keep advancing we see two more Butterfree flying a bit higher. They fly over a We head into a grassy section, from which a Pidgey will appear flying towards the sea pursued by a Meowth. There’s another couple of Butterfree at our right as we head downhill to cross a river through a wooden tunnel. In the next grassy section, a Doduo will pop out of it, and later another Pidgey pursued by a Meowth. We approach a plain rocky section, with an Eevee pursuing a mysterious ball to our left. Hit the ball with an Apple and it will show as a Chansey. To our right, a Kangaskhan is watching over the sea, so hit it with an Apple or Pester Ball so it switches its focus onto its attacker (play the Flute if you want it to show a relaxed face, or else you will get an angry expression of it). Finally, a couple of Pidgey pop out of the rocks, and fly over the railway up to their nest, which has been invaded by a Meowth. The Pidgey will repel the intruder, which gives us room to snap the special Gust-using Pidgey, worth 500 points. After such an image, we reach the goal gate to present Oak our pictures. HIDDEN Throughout the course, keep an eye out on the sea, as several Lapras will show their face. Manage to snap any Lapras you see, no matter how far, so they eventually appear closer to the coast. It won’t be until the rocky section with the Kangaskhan where a Lapras will appear very close, which is the best chance to fully snap it. You may have noticed leaves flying above the grassy sections. Throw Pester Balls into the grass until you eventually manage to uncover its secrets: a Scyther! The first section needs an extra amount of Pester Balls, because with enough luck two Pikachu will pop out and go to the tree stumps besides the grass and start striking poses there, which is a nice chance to snap the special Pikachu on a Stump, worth 1300 points. Tunnel A dark and obscure course, going through an abandoned power plant. It houses many unique Pokémon, including one of the Legendaries, but it also has certain secrets to uncover, between them the access to a new course. This time, our vehicle travels on its wheels through the tunnel in a preset path. To our right, we see a Pikachu calmly staying besides a strange device. Snap it and it will go slightly away. Snap it again and it will go further away, until an Electrode that comes from our left appears. Pikachu will jump on it, enabling a chance to snap the special Pikachu on a Ball, worth 600 points. Heading to the tunnel, another Electrode will come out rolling by, pursued by an Electabuzz. Once outside, they will retreat back inside, heading to the right of our path. There, the Electrode will explode, blasting the poor Electabuzz. Inside the tunnel, there are three more Electrode, and if you hit them with an Apple or a Pester Ball, they will explode. This explosion will startle the several Kakuna hiding in the ceiling, which will fall down and stay for a few seconds. We reach a gate, which will release a Zubat when opening. We enter the abandoned power plant, with a Pikachu on our left, and ahead of it a strange and giant yellow egg. We pass by the power plant and we notice a strange ball floating around randomly to our left. Manage to snap it, because it’s a Hunter in disguise. To our right, a Magikarp will splash out of a small lake before we reach the second gate. Another Zubat will fly away after opening it, as we head into the outer part of the tunnel. To our left, another Hunter in disguise is floating about, this time doing circles so it can be snapped easily by predicting its trajectory. To our left, we see a Pikachu welcoming a Diglett, while to the right a couple of Electabuzz are punching a screen which is not functioning. We head downhill, out of the tunnel, and see three Magnemite outside. They can’t be snapped, however, they emit a force field whenever you focus on them. Ahead of them is the goal gate, but to our right lies another Electrode. Hit it with an Apple or Pester Ball so it explodes, opening up the path for the Volcano course (which becomes a pseudo-goal since the level finishes as soon as the path is freed). HIDDEN After the first gate, lure the Pikachu near the egg by making a path of Apples. When it’s near enough, play the Flute. This will make Pikachu use its Thunder attack, cracking the egg to reveal a Zapdos! After hatching, Zapdos will fly towards the power plant and use its electricity to power it up, which in turn lights up the screens the Electabuzz were punching, which show interesting hints. The first one shows a hint towards the Diglet on our left. Just like the Pikachu at the start, it will appear farther away with each snap. After the third, however, a Dugtrio will come out instead. If you snap it, then two Dugtrios will appear ahead, and if you snap them, you end up getting three Dugtrios up close. The second one shows a hint towards Magnemite. They won’t emit their force field if they are spellbound with an Apple, so throw one near them and snap them. Even better, throw the Apples strategically so the three Magnemites merge together to form Magneton! Since it doesn’t emit a force field, Magneton can be freely snapped before we finish the level. Oh, and before reaching the exit of the tunnel, you may have seen some scrap on the right. After freeing Zapdos and powering up the station, a device will emit light upon the scrap, which ends up forming the Pinsir Shadow, one of the Pokémon Signs. Volcano Through the scorching heat and flows of lava, this stage is home to all Fire Pokémon in the game. Our vehicle moves through a path made of rocks leading us through this extreme environment, where we’re not free of obstacles or beautiful hidden gems. Right after starting, a Rapidash dashes besides us. If you don’t manage to snap it, there are two more Rapidash quietly standing on a lower level to the left. We head right, where we see a Vulpix roaming around, and slightly ahead there are two more Vulpix, usually roaming close to each other which enables a good snap of both. We keep advancing, and we see a Magmar and a Charmander on an isle to the left. After facing an uphill, we encounter two more Charmander to the left, this time much closer to the vehicle. Our path is blocked by a giant egg, so hit it with an Apple or a Pester Ball to throw it into the lava. From it will hatch a Moltres, and it will fly high above your head so snapping it for a high score can be rather difficult. Continuing uphill, we see two Magmar to the left. Throw an Apple between them, and while one eats it, the other will attack it, enabling you to snap the special Fighting Magmar, worth 800 points. After them, we enter the final section with a Charmeleon on the left, orbiting a lava pit. After you snap it, hit it with an Apple or Pester Ball so it falls down to the lava pit. This will make it evolve into Charizard. Be careful, Charizard is huge and will be up close, so be sure you manage to snap its full size or your score will be low. HIDDEN Right after the start, throw a Pester Ball into the volcano on the left. It will produce some strange smoke, which is meant to be Koffing Smoke, one of the Pokémon Signs. If you throw Apples for the couple of Charmander to eat, a total of four more can appear from behind the rocks, giving you a massive boost for Same PKMN Bonus. Since you will be blocked by the egg containing Moltres, you have plenty of time to get a good snap of the swarm. In the final section, instead of focusing on Charmeleon, focus on the right side. You will see three mini volcanoes a certain distance away. Manage to sink a Pester Ball in any of them, and with enough tries and luck, a Growlithe will emerge and stand close to the vehicle. If you’re very lucky, you can get an Arcanine instead! River Aboard our all-purpose vehicle, we float in the river, letting the current guide us through the amazing sights it offers. Many Water Pokémon are here, but we also see a few exceptions. You will need to be precise at snapping, because Pokémon here almost never stay put. Right after starting, we can see some Poliwag hidden within the grass on the right. Throw Pester Balls at them so they eventually come out and sink into the water to jump out of it at random times. On the opposite shore, two Bulbasaur are encased within tree stumps, so hit them with an Apple or Pester Ball to knock them off and leave them open for a good snap. Continuing down the river, we see a Slowpoke near the left shore, loafing around like always. In the opposite shore, a Vileplume is in a deep slumber, so play the Flute to wake it up. Progressing through the river, some Shellder randomly pop out of the water, as we approach another Slowpoke near the left shore. We now enter an enclosed section, with several Metapod above our head. Hit them with an Apple or Pester Ball so they lower themselves to your level to snap them better, and throw an item again so they “retreat”. To the left, we see a Psyduck going up and down. Hit it with an Apple or Pester Ball, and it will randomly jump out of the water doing impressive jumps. Nearing the end of the course, more Shellder will randomly jump out of the water. This time, however, you can be lucky enough to see even more than one Cloyster jumping out! Right before the goal gate, there’s a Pikachu over a group of trees. Manage to knock it out with an Apple or Pester Ball and it will travel through the shore at blinding speed, and if you manage to snap it you can get the special Speed Pikachu, worth 800 points. HIDDEN Being a river, water Pokémon hide below the surface. Throwing Apples and/or Pester Balls randomly into the water can make those Pokémon pop out. They normally are Magikarp, but it can also be those Poliwag you “freed” at the start. Both perform different jumps, and the bigger the jump the higher the score (and also harder to snap). The Slowpokes aren’t far from a Shellder sign. Lure them there with Apples, and they will eventually use their tail to fish. After a short while, they will evolve into Slowbro! The Vileplume in front of the first Slowpoke lets out an obscure gas while After the Metapod zone, you will see to the left two mysterious floating objects. Throw a Pester Ball to them, and they will reveal their true form as Porygon! The second one activates a switch when popping out, which leads into the next course and serves as a pseudo-goal. Cave A dark cave, where almost no sunlight enters. Home to very special and sometimes nasty Pokémon, this cave holds more than one secret. Our all-purpose vehicle will use retro rockets to safely explore this zone where sometimes Pokémon are far away from us to ensure a good snap, so you will need to refine your technique before coming here. We start falling deep into the cave, with some Zubat flying by. To the left, we can see a couple Grimer, and to the right, a Bulbasaur. Continuing straight, we see three more Bulbasaur to the right and closer to the vehicle, so it’s a good chance for a group picture. Going further into the cave, we see a Koffing propelling a Jigglypuff (seemingly in a non gentle way) all over the place. Ahead of them, a Weepinbell is circling a small pond, in a similar fashion to the Charmeleon of the Volcano course. Like back then, knock Weepinbell out with an Apple or Pester Ball into the pond, and it will sink in it to evolve and emerge as a Victreebel, which will inexplicably float above the pond as our vehicle circles it to enter the next “chamber” of the cave. Upon crossing a curtain of water, we see a Zubat flying around holding a Pikachu. Manage to knock out the Zubat with an Apple or Pester Ball so it frees the Pikachu. To avoid falling down, the Pikachu is seemingly equipped with balloons to land safely, which gives us the chance to snap the special Balloon Pikachu, worth 1600 points. Getting closer to ground level, we see two Jynx seemingly HIDDEN Snap the two Grimer at the start. This will make two more Grimer appear ahead, one below our vehicle and one to the left, in front of the three Bulbasaur. Hit three times with a Pester Ball any of these new Grimer and they will evolve into a Muk. Speaking of Bulbasaur, you may have noticed their face is a bit odd, even though Oak recognizes them as Bulbasaur. Hitting them with a Pester Ball reveals their true form: Ditto! Try to hit the Koffing propelling a Jigglypuff with an Apple or Pester Ball. This will freed the Jigglypuff, and make a second Koffing appear from an opening to the right, propelling another Jigglypuff. Free this one too and a third Koffing and Jigglypuff will appear to your left. They’re the last to appear, but free the Jigglypuff again if they’re still in your range. Stopping the two Pokémon gives a perfect chance for a good snap. The last Koffing mentioned above appears from below some shiny stones. Manage to snap the center one, and when After the Jynx and Articuno, you may have seen a strange location to the right before the goal gate. Well, here is where the freed Jigglypuff end up gathering for a “private” performance. If you free up to the first two, you will be able to snap the special Jigglypuff on Stage, worth 500 points. However, freeing all three enables the special Jigglypuff Trio on Stage, worth 1200 points. Valley We are back again in the water, but this time at the starting point of the river, crossing the valley enclosed by sharp mountains. Several rapids are here, where snapping Pokémon turns even harder due to the higher speed. More than one surprise awaits here, including a key one that affects the progress of the game itself. As we approach the first turn, we see some shells protruding from the water. Hit them with a Pester Ball so they’re propelled into the shore, and you will be able to snap Squirtle. On the right shore, you can see a Mankey throwing tantrums a bit away from the river. Still looking to the right shore, we see some Geodude “anchored” to the mountain. Hit them with an Apple or Pester Ball so they fall down and can be properly snapped. Doing this can also make an underground Pokémon to pop out: Sandshrew! Moving ahead, we see a couple more Geodude on the left shore. Manage to knock them both down, and if they’re down at the same time a Graveler will fall from a higher altitude. The resulting hit with the ground startles a Pokémon hiding underground, which will then pop out: Sandslash! We see another Mankey throwing tantrums to our left before facing the first set of rapids. We end up in a calm zone with a waterfall on the right. You will see a Staryu floating around up ahead, and to the left there are three Graveler “anchored” to the mountain. Play the Flute so they detach themselves and fall to the ground to perform a dance, which is the chance to snap the special Graveler’s Group Dance, worth 500 points. Going down through the second set of rapids, we face two more Staryu on our way, floating above the river flow. Back into calm, we see a Dratini happily splashing besides a massive whirlpool to our right. A bit ahead we see a few Squirtle, one of which stays put inside its shell. Hit it with a Pester Ball to propel it forward, and with good aim, it will knock out a Mankey at the peak of the mountain. The Mankey will appear at the other side, and it will be up close enough to take a snap of it. Also, it has behind a switch, so hit it with an Apple to activate the switch and enter a special zone, where Oak awaits and informs you of the Pokémon Signs. After you show them the pictures of this trip, he will add the Signs to the report, and only from now on you’ll manage to snap them. HIDDEN Remember what we said in the River course about Pokémon hiding under the water? Well, here we have more Pokémon hiding underneath us. Throwing Apples and Pester Balls into the water can make Magikarp, Goldeen and even Dratini to pop out at any random time. They perform different splashes, so each awards different points for pose. Right after the start, in the horizon, we see a Magikarp splashing. When we get near the zone where we saw it, throw Pester Balls into that area. Eventually, the Magikarp will jump out towards the Mankey, who will send it far away through the mountain. It will appear after the first set of rapids, on the same shore as the group of Graveler. Hit it again with a Pester Ball and it will “retreat” into the waterfall, where it will evolve into Gyarados! Oh, and speaking of the initial corner, I’m sure you’ve seen the mountains in the horizon shaped like a Dugtrio. This is the first clear reference towards Pokémon Signs, for this is the last one, Mt Dugtrio. Snapping the red core of the Staryu in the second set of rapids will make them orbit you. Its hard to snap them while doing this because they travel fast, but once you reach the massive whirlpool, the Staryu will enter it and emerge as Starmie! They will float around for a bit before going out of sight, so be quick to snap them. Speaking of the whirlpool, it hides one more and bigger secret. Throw a Pester Ball inside it, and you will see it flashes. After a few tries, a Dragonite will emerge from it, striking a pose before flying away. Rainbow Cloud A mysterious location above the island, nearly in outer space. Our vehicle flies around this area where we only encounter one Pokémon, the rarest of them all. It’s not an easy trip, so prepare yourself for the upcoming challenge. This is the purpose of the Pokémon Signs: snapping them all unlocks this secret course, which is reflected in the constellations seen in the “sky”. Mew will appear in front of you encased in an energy shield that projects a force field, making it impossible to snap it. It will float around randomly, giving you the chance to hit it with an Apple or Pester Ball. After it is hit, Mew will retreat, but will come back. After the third hit, Mew will appear in another shield, this time making sporadic passings. Hit it again two more times and the shield will fade. After that, Mew will appear by one of your sides chasing the shield, which is the only chance we have to snap it. Snapping it automatically gives the special The Rare Pokémon Mew, worth 2500 points. And this is it! You have snapped all 63 Pokémon available in the game. Now aim to get the maximum possible score so you have the best album ever! -------------------- |
Site Staff Manager, Content Writer, Console Manager
| Vizzed #1 Hardstyle fan |
Affected by 'Carpal Tunnel Syndrome'
Registered: 07-03-13
Location: Barcelona, Spain
Last Post: 18 hours
Last Active: 2 hours
11-19-16 06:49 PM
Pokemonfan1000 is Offline
| ID: 1315635 | 14 Words

POSTS: 386/957
POST EXP: 48442
LVL EXP: 1764404
CP: 2101.6
VIZ: 2550
Pokémon Snap was a terrible game in my opinion. The walkthrough was good though. And the Hy-Vee Heros game goes to wait for it, wait for it! -------------------- THE IOWA HAWKEYES!!!! |
| The only user so far in the 309 and 563 area codes currently active on any acmlm based board (save for smwcentral.net and Lespna1) If you want to dispute this claim, feel free to PM me. |
Affected by 'Laziness Syndrome'
Registered: 10-20-16
Location: Quad Cities
Last Post: 3302 days
Last Active: 3302 days
