

 User Notice
 Forum Links

Thread Information
Creator
02-21-16 07:42 AM
Post
04-30-16 06:29 AM
6.5
Today: 1
Users: 1 unique
Thread Actions


Conquer the Space Tracks!
02-21-16 07:42 AM
 EX Palen is Offline
| ID: 1246865 | 4330 Words
EX Palen is Offline
| ID: 1246865 | 4330 Words
 EX Palen is Offline
Spanish Davideo7

POSTS: 2059/6506
POST EXP: 1194292
LVL EXP: 35765640
CP: 195694.3
VIZ: 11420481

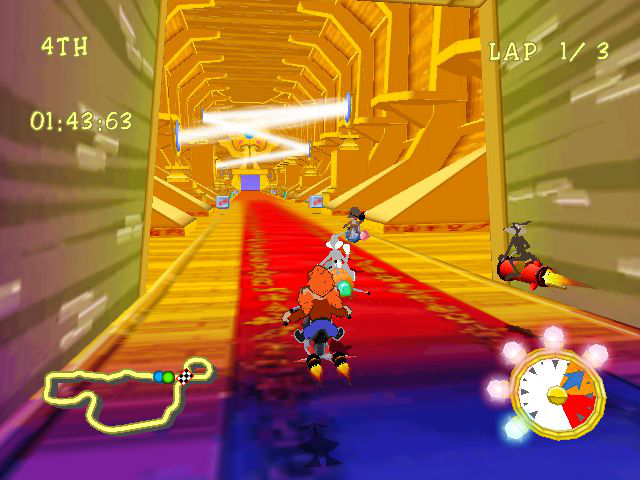
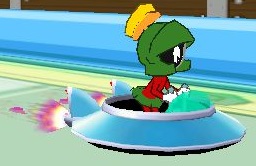
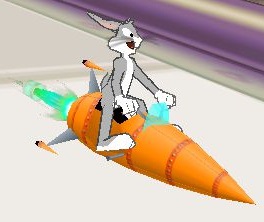
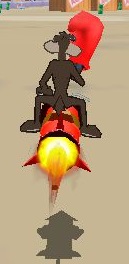
Looney Tunes: Space Race lets you pick 8 of the franchise’s most popular characters and race in 12 circuits all over the outer space. As any wacky racing videogame, it includes several pick-ups, named gags, and a few tricks to make the races as crazy as possible. The few tricks are road hazards, like jumps, bumps, wall-less sections and so on, mainly everything that can make lapping the circuits harder. Falling over the circuit limits means your character will re-spawn on the track, making you lose some valuable seconds. Other than that, the racers are free to run while collecting gags from ACME crates all over the circuit. You can only hold one gag at a time, but you can discard an unwanted gag so as to get another one. Also, unlike other racing games, there’s no item roulette deciding which gag you get, instead you get a random one instantly after breaking an ACME crate. A side note is needed for the turbo boost. You can see five light bulbs above your speedometer, which serve as the meter for the turbo boost. These bulbs light up whenever you pick up one of the green canisters that populate the circuit, and when all five are lit, you can unleash the turbo boost. Be careful, as you won’t be able to use gags on that brief period. One more thing to note that can be useful is the directional pad. Aside from steering the ship with the left and right buttons, the up and down buttons let you control the aerodynamic shape of the ship. The up button inclines the ship nose of the ship, giving a slight but noticeable boost in top speed but reducing the effectiveness at turning. The down button elevates the nose of the ship, slowing it down a bit for better turning skills. A useful tip when dealing with sharp turns and tight sections. Some (sharp) turns may also have a widened exit, meaning the track is wider during the turn only at the opposite side (left turns will widen the track on the right side and vice versa), which further helps you take said turns safely and enabling different trajectories and speeds. After this little intro, time to get to the core. First off will go the characters, each with its own stats (not much variation, but still noticeable); then will go the gags and their effects, and finally the circuits, with a full lap around them detailed. Characters
Gags Bomb Boxing Glove Clover Heavy Object Depending on the color of the remote control, the heavy object varies. Green - Anvil Blue - Piano (with a statue falling over it a second later, don’t know why) Purple - 1-Tone Weight Yellow - Safe Pink with satellite dish - Elephant (the satellite dish tracks the character going first, regardless of it being the closest opponent to you). Laser Pistol Portable Hole Storm Generator Twin Rockets Circuits Planet ACME 1 An easy track to start with. Fast, wide and with long straights to exploit the boost. Starting the lap, there’s a smooth left turn heading into the first of many tunnels this track has. Said tunnel has a tight right turn, heading into the first straight of the track, and then another tight right turn, again inside a tunnel. This second turn is longer, and at the exit starts a downhill, heading to a blind left turn outside of the tunnel and on to the second straight. At the end of the straight, there’s a high gap, leading into a two way route. Both of them are exactly the same, so choose whichever you want. When the track becomes a single path again there’s a great uphill before the track becomes open again. We enter now a twisty section, first with a smooth right turn, followed by a slightly tight left turn and a wide right turn, in which the track seems to go smoothly uphill again. After, we enter another straight, inside a tight tunnel, then we exit the tunnel briefly to enter another one as we take the banked left hairpin. This tunnel also lasts a bit, and we have another one ahead. After the hairpin, another long straight ahead, again inside a tight tunnel. The exit becomes a heavy downhill, with a banked right turn on open track, that leads into the start/finish straight to close the lap. Planet ACME 2 Much like the previous, it’s not a track that presents many difficulties. Boosts aren’t that exploitable here, though, and has a couple of complicated turns. A while after the start/finish line, the straight is packed with obstacles which not only eliminate the straight, they also tighten the track. The first obstacle is easy to avoid by both sides, the next couple require a right-left chicane and the last one is also avoidable by both sides. After this last obstacle, there’s a wide right hander with one more obstacle amplifying the effect of the two way route just ahead. Then we enter the tunnel, with a blind right hander, leading to a steep but short downhill, which racers jump off, and we exit the tunnel. Once again in open environment, and with a desert motif, we face a left hander, and after a short straight, a tighter left hander bringing us to a tight right hairpin. A soft left hander brings us to another tunnel (with a weird poster saying Testing Area) that contains a soft right hander. Another two way route is ahead, and this time I feel like the right side is favored over the left side. One last tunnel containing a tight and blind right hander leads us to the “highway”, with an uphill and a blind left hander that lead us to the start/finish straight. The Pyramids of Mars 1 Another rather easy track, but with some complicated turns and jumps that can make you fall off. Right after the start, we enter a massive downhill which contains a blind right turn, leading to a smooth left turn and then to a tight right turn. After it, we face an uphill, which leads to a big drop jump, so it’s a perfect point for the boost, but be careful to follow the track path or you will fall off. After landing, we head into a very long right turn, which steadily goes uphill, and then enters the pyramid to describe a tight left hairpin. Exiting the pyramid, we encounter a smooth and long right turn that leads us into a very tight right turn. After it, a smooth left turn, another tight right turn, and a downhill leading to a canyon. The canyon has two ways to go, even if they are branded with danger or caution signs. They are equally fast, but not equally easy, so avoid the signs if you’re starting. The first double way has boost cans on the right and item boxes on the left. After it, we head into a jump to enter another double way, which recommends using the right way as the left one has a massive hole, but the left way can be safely taken without much trouble. One more double way, this time with caution signs on the right, as there are pillars obstructing your way, but this time the right way is faster, as the left one drifts a bit away from the track. Done with the canyon, we enter what appears to be ruins. The entrance and subsequent hallway are very tight, so be careful. The hallway also includes a tight left-right combination heading to a long straight, perfect for a big boost. The straight ends in a massive uphill, leading to a small but treacherous jump, returning us to the open track. One last turn, which is a very long left hairpin of 270 degrees and with a small uphill at the end, with a blind right bend that takes us to the start/finish line. The Pyramids of Mars 2 Longer and more complicated than the previous, it requires precise turning, so refrain from using characters with poor control. We start on a walled track. After the short start/finish straight, a tight right hander is ahead, the very first trial of turning skills. A soft left hander brings us to an even tighter right turn, immediately followed by a tight left hander. A soft right hander leads us into some stairs that allow us to enter the pyramid. Right after entering the pyramid there’s a tight right hander, followed by a long left hairpin of 300 degrees that ends downwards. We exit the pyramid facing a blind hump-like left turn, followed by a long right hander going uphill. At the peak, a blind left-right-left combination is ahead, which can almost be taken straight, leading to a rounded 90 degrees right hander. After it, a semi-straight that enters another pyramid, with a very narrow pass, and the track becomes a tad tighter. After entering, a downhill starts, with a blind right hander and a long and sweeping left hander following after, which leads to the long straight, where the track opens up for a brief section before tightening up again. A blind left hander starts the uphill, with a short straight leading to a soft right hander and a final left hander to exit the pyramid, still uphill. The exit is a small jump, nearly unseeable due to the uphill. After the exit, another hump-like right hander leading to a downhill straight that ends in a somewhat sharp left hander, leading us uphill again for a last jump, noticeably bigger than the one before. One last left hander and the start/finish line is ahead. The Asteroid Belt A tricky and twisty track, which will need some ability to properly master. Be extremely careful if you choose a character with bad control. After the start, we head into a double way. One way is a right turn, bordering a “trap” that could make the track go straight. Said trap is the jaws of an unknown creature. They are open most of the time, but close every few seconds, blocking your way into a fall or crunching you. Continuing straight through the jaws saves a ton of time, so attempt it whenever you can, and add a boost to ensure you pass through. After this, we head into a tight right turn, leading to an equally tight left-right combination with some ups and downs in between. One more left-right combination, this time clearly uphill, leads us into the first straight. After it, two left turns, the first rather smooth and the second being a lot tighter with a slight uphill. Ahead lies a left bend, leading to a jump, and then into a 90 degree left turn. A small straight leads us into another 90 degree left turn, and after it, a long 270 degrees right hairpin with a slight downhill. After it, a tight 90 degrees right turn takes us into a mine of sorts, which is a very tight straight on closed environment. One more 90 degrees right turn, and we’re back again on the start/finish line. Other World Frontier 1 A pretty easy and straightforward track, where boost is easily exploited. Greatly favors top speed. At the end of a short straight after starting the lap, we face the first turn, a rounded 90 degrees left hander. It leads to another rounded left hander, this time only 45 degrees, and after a brief straight we come across a sharp right turn to enter the longest straight. Entering some kind of park where the track is wider and you cannot fall off, we face a long and smooth left hairpin. In the final part of said hairpin we enter an enclosed portion of the track, and also we start a downhill. After it, a right turn leads us again into another park, with a very smooth left turn leading us again into the “normal path” and yet another straight. After it, we enter a left-right combination, with a short straight in between. The right turn starts a steep downhill, so you can cut the corner by going a bit over the edge. After the downhill, one last straight stretch and a last rounded 90 degrees left hander leads us into the start/finish straight. Other World Frontier 2 Very similar to the track above, but the path is a bit tighter, and also has some sharp corners that will test your turning skills. Still, an easy track to master. After the starting straight stretch, we encounter a hump-like 45 degrees right turn, which leads us to a short straight before facing the first complicated turn, a sharp left hairpin. Make sure to use the whole width of the track to not lose too much speed when attempting the hairpin. After it, another semi-straight stretch which goes through a rainbow-like spiral tunnel leads us to a longer and smoother left hairpin. Also, this one is banked, so it’s easy to take flat out. A smooth right hander leads us to the last straight stretch, going through some kind of building, where we face a left hander in uphill. The track widens at this point, so it’s rare to fall off the edge and also makes the turn easier to take. One more blind right hander leads us into the last corner, a rounded 90 degrees left hander, where the track widens once again (although this time isn’t that necessary), and on to the start/finish straight. Wild West Quadrant 1 Yet another straightforward track, with only a couple of difficult turns and several top speed sections. High speed is the key to prevail here. A while after starting awaits the first turn, a smooth left hander. Using the full width of the track can make it almost straight. We then face a steep uphill, leading to the first complicated corner, a very sharp left hander. The track widens at this point to make it harder to fall off the edge, which seems to have become a staple in the unlockable tracks. We then face another uphill with a long and smooth right hander that leads us into a mine of sorts. For some strange reason, the track widens while the right turn is inside the mine. After it, the second complicated turn, which is a left hairpin, once again with a widened track. We then exit the mine and enter a steep downhill, facing a smooth right hander after it to go uphill once again. While still uphill, we face a blind and rounded 90 degrees left hander. Once again, the track widens, and this time it’s actually useful due to the nature of the turn. We then enter inside a house for a short straight stretch, with a slightly tighter track path, and facing a blind left hander in downhill after exiting, yet again with the track widened. One more smooth right hander leads us into the start/finish straight. Wild West Quadrant 2 Finally, a somewhat twisty track to actually test your skills. It’s also a relatively long track for the game’s standards. After the start, we face an uphill leading us into the mine. Entering it, we face a smooth right turn that leads into a sharp left turn with the track widened, and we exit the mine to face a smooth left-right combination leading us to a sharp double-apex left hander. The track widens after taking the first one, so you can either take both in a round trajectory or in a V trajectory. We briefly enter the mine again to face a blind smooth right hander that ends in a downhill, leading us to the back straight. A smooth right hander is after it, and then a left hander while in uphill. We then enter a smooth right hander that leads into a sharp left-right combination with the track widened, a very complicated spot. Then we face a long and smooth left hander that starts in a downhill, leading to a short straight before a sharp blind left turn with the track widened, another complicated spot. After it, we face yet another complicated turn, a sharp blind right hander in uphill. Ahead of it, one last downhill with a smooth left hander takes us to the start/finish straight. Nebula A long track that poses a great challenge to master. It has both a fast and flowing sector and a twisty and complicated sector, essentially having all aspects a track could have. The start/finish straight soon starts a downhill that leads us to the first turn, a right hairpin. After it comes a steep uphill in two phases, essentially putting up a jump in the middle. The second phase of the uphill makes the left corner coming after it completely blind, but luckily it isn’t very sharp and has walled edges. After a short straight, we face probably the most complicated turn in the whole game, a very sharp right corner. It’s really hard to take it without falling over the edges. A longer straight leads us into a similar corner, this time a left hander, but it’s somewhat easier to take. After it comes a long and flowing right hander, which starts in downhill, eliminates the track to make racers pass above some big boxes in the middle and starts an uphill at the end. Then we enter a wavy straight, which makes it easy to jump at high speeds and therefore lose a bit of control. We now take a right hander in uphill leading us to the twisty sector of the track. First comes a sharp right hairpin still in uphill, with walled edges to make it easier, then a quick left-right combination that can be taken almost straight and a last left hairpin while in downhill, this time longer and smoother. After it ends, we face another uphill, and at the peak we see a right-left combination. The right turn is in downhill and can almost be taken straight, while the left turn is a bit longer. After them, the start/finish line is ahead. Galactorama Park 1 Another very long track for the game’s standards. It has several complicated turns and only a couple of straights, so it requires extreme skills. Right after the start, we already face a complicated and sharp left hander, leading to an even sharper right hander which has a bump at the apex. A smooth left hander is ahead, leading to another sharp right turn in downhill with the track widened. A short stretch leads us into a double-apex right hander. First comes a 90 degrees turn with the track widened, and the second one is a sharper turn taken in uphill with the track at its normal width. A smooth left hander leads us into a blind right hander in downhill, with the track widened once again. We then go through a narrow pass to enter a house, and within it comes a very sharp right hander. Thankfully it’s an enclosed area, so you cannot fall off. An uphill leads us to the exit, and another right turn still in uphill leads us into a blind left-right combination. The left turn is smooth, but the right one is sharper, and immediately after it comes a long left hander, with the track widening half through the turn. After it we face another downhill, and we can see the track widening again for the upcoming right turn. It’s very smooth, so no need for the extra width. Then we head into the back straight, which is very wavy, but long enough so as to not lose control if you boost through it. After it, a right hairpin while in uphill and with the track widened leads us to a short stretch before a 90 degrees left hander, again with the track widened. A short downhill after it takes us into the start/finish line. Galactorama Park 2 The last track couldn’t be more twisty. Very long and with almost no straights, it requires extreme skills, even more than the one above. Right after the start/finish line we face a short downhill. A smooth left hander leads us into one of the circus’ tents. A steep uphill hides a blind and sharp right turn, with the upcoming left turn in downhill. One more right hander, followed by a left corner, takes us outside the tent and on to the main track again. One of the very few straights takes us into three complicated left handers. All of them are sharp 90 degrees turns, and the last two are banked and have walled edges. They also seem able to be taken as a single long left hander. After it, a semi-straight with pronounced waves lies ahead, and a smooth right hander takes us into the second tent of the circus. After entering, we face a set of three right handers, all of them 90 degrees, resembling a mirrored version of a previous sector. This time, all seem sharper, the first two are simple turns with the exit walled, and the third one also has the exit walled but is taken in downhill. The downhill continues after exiting the tent and returning to the main track once again. Up ahead, a slightly banked right turn takes us into an uphill, with a combination of three flowing right-left-right turns coming after it. The left turn is made in downhill, which becomes more steep while taking the last right turn. A smooth left hander takes us into a two way route. Both have the same pattern: a smooth combination of turns, the first to the same direction you chose, a short stretch going through a narrow pass and one last combination of turns, this time the last one to the same direction you chose, and back again to the main track. A very narrow straight stretch is ahead, so be careful when exiting the previous turn. After it comes a double-apex right turn in uphill, the first is smooth and flowing but the second one is very sharp. A long straight with a final smooth right hander takes us back to the start/finish line. Looney Tunes: Space Race lets you pick 8 of the franchise’s most popular characters and race in 12 circuits all over the outer space. As any wacky racing videogame, it includes several pick-ups, named gags, and a few tricks to make the races as crazy as possible. The few tricks are road hazards, like jumps, bumps, wall-less sections and so on, mainly everything that can make lapping the circuits harder. Falling over the circuit limits means your character will re-spawn on the track, making you lose some valuable seconds. Other than that, the racers are free to run while collecting gags from ACME crates all over the circuit. You can only hold one gag at a time, but you can discard an unwanted gag so as to get another one. Also, unlike other racing games, there’s no item roulette deciding which gag you get, instead you get a random one instantly after breaking an ACME crate. A side note is needed for the turbo boost. You can see five light bulbs above your speedometer, which serve as the meter for the turbo boost. These bulbs light up whenever you pick up one of the green canisters that populate the circuit, and when all five are lit, you can unleash the turbo boost. Be careful, as you won’t be able to use gags on that brief period. One more thing to note that can be useful is the directional pad. Aside from steering the ship with the left and right buttons, the up and down buttons let you control the aerodynamic shape of the ship. The up button inclines the ship nose of the ship, giving a slight but noticeable boost in top speed but reducing the effectiveness at turning. The down button elevates the nose of the ship, slowing it down a bit for better turning skills. A useful tip when dealing with sharp turns and tight sections. Some (sharp) turns may also have a widened exit, meaning the track is wider during the turn only at the opposite side (left turns will widen the track on the right side and vice versa), which further helps you take said turns safely and enabling different trajectories and speeds. After this little intro, time to get to the core. First off will go the characters, each with its own stats (not much variation, but still noticeable); then will go the gags and their effects, and finally the circuits, with a full lap around them detailed. Characters
Gags Bomb Boxing Glove Clover Heavy Object Depending on the color of the remote control, the heavy object varies. Green - Anvil Blue - Piano (with a statue falling over it a second later, don’t know why) Purple - 1-Tone Weight Yellow - Safe Pink with satellite dish - Elephant (the satellite dish tracks the character going first, regardless of it being the closest opponent to you). Laser Pistol Portable Hole Storm Generator Twin Rockets Circuits Planet ACME 1 An easy track to start with. Fast, wide and with long straights to exploit the boost. Starting the lap, there’s a smooth left turn heading into the first of many tunnels this track has. Said tunnel has a tight right turn, heading into the first straight of the track, and then another tight right turn, again inside a tunnel. This second turn is longer, and at the exit starts a downhill, heading to a blind left turn outside of the tunnel and on to the second straight. At the end of the straight, there’s a high gap, leading into a two way route. Both of them are exactly the same, so choose whichever you want. When the track becomes a single path again there’s a great uphill before the track becomes open again. We enter now a twisty section, first with a smooth right turn, followed by a slightly tight left turn and a wide right turn, in which the track seems to go smoothly uphill again. After, we enter another straight, inside a tight tunnel, then we exit the tunnel briefly to enter another one as we take the banked left hairpin. This tunnel also lasts a bit, and we have another one ahead. After the hairpin, another long straight ahead, again inside a tight tunnel. The exit becomes a heavy downhill, with a banked right turn on open track, that leads into the start/finish straight to close the lap. Planet ACME 2 Much like the previous, it’s not a track that presents many difficulties. Boosts aren’t that exploitable here, though, and has a couple of complicated turns. A while after the start/finish line, the straight is packed with obstacles which not only eliminate the straight, they also tighten the track. The first obstacle is easy to avoid by both sides, the next couple require a right-left chicane and the last one is also avoidable by both sides. After this last obstacle, there’s a wide right hander with one more obstacle amplifying the effect of the two way route just ahead. Then we enter the tunnel, with a blind right hander, leading to a steep but short downhill, which racers jump off, and we exit the tunnel. Once again in open environment, and with a desert motif, we face a left hander, and after a short straight, a tighter left hander bringing us to a tight right hairpin. A soft left hander brings us to another tunnel (with a weird poster saying Testing Area) that contains a soft right hander. Another two way route is ahead, and this time I feel like the right side is favored over the left side. One last tunnel containing a tight and blind right hander leads us to the “highway”, with an uphill and a blind left hander that lead us to the start/finish straight. The Pyramids of Mars 1 Another rather easy track, but with some complicated turns and jumps that can make you fall off. Right after the start, we enter a massive downhill which contains a blind right turn, leading to a smooth left turn and then to a tight right turn. After it, we face an uphill, which leads to a big drop jump, so it’s a perfect point for the boost, but be careful to follow the track path or you will fall off. After landing, we head into a very long right turn, which steadily goes uphill, and then enters the pyramid to describe a tight left hairpin. Exiting the pyramid, we encounter a smooth and long right turn that leads us into a very tight right turn. After it, a smooth left turn, another tight right turn, and a downhill leading to a canyon. The canyon has two ways to go, even if they are branded with danger or caution signs. They are equally fast, but not equally easy, so avoid the signs if you’re starting. The first double way has boost cans on the right and item boxes on the left. After it, we head into a jump to enter another double way, which recommends using the right way as the left one has a massive hole, but the left way can be safely taken without much trouble. One more double way, this time with caution signs on the right, as there are pillars obstructing your way, but this time the right way is faster, as the left one drifts a bit away from the track. Done with the canyon, we enter what appears to be ruins. The entrance and subsequent hallway are very tight, so be careful. The hallway also includes a tight left-right combination heading to a long straight, perfect for a big boost. The straight ends in a massive uphill, leading to a small but treacherous jump, returning us to the open track. One last turn, which is a very long left hairpin of 270 degrees and with a small uphill at the end, with a blind right bend that takes us to the start/finish line. The Pyramids of Mars 2 Longer and more complicated than the previous, it requires precise turning, so refrain from using characters with poor control. We start on a walled track. After the short start/finish straight, a tight right hander is ahead, the very first trial of turning skills. A soft left hander brings us to an even tighter right turn, immediately followed by a tight left hander. A soft right hander leads us into some stairs that allow us to enter the pyramid. Right after entering the pyramid there’s a tight right hander, followed by a long left hairpin of 300 degrees that ends downwards. We exit the pyramid facing a blind hump-like left turn, followed by a long right hander going uphill. At the peak, a blind left-right-left combination is ahead, which can almost be taken straight, leading to a rounded 90 degrees right hander. After it, a semi-straight that enters another pyramid, with a very narrow pass, and the track becomes a tad tighter. After entering, a downhill starts, with a blind right hander and a long and sweeping left hander following after, which leads to the long straight, where the track opens up for a brief section before tightening up again. A blind left hander starts the uphill, with a short straight leading to a soft right hander and a final left hander to exit the pyramid, still uphill. The exit is a small jump, nearly unseeable due to the uphill. After the exit, another hump-like right hander leading to a downhill straight that ends in a somewhat sharp left hander, leading us uphill again for a last jump, noticeably bigger than the one before. One last left hander and the start/finish line is ahead. The Asteroid Belt A tricky and twisty track, which will need some ability to properly master. Be extremely careful if you choose a character with bad control. After the start, we head into a double way. One way is a right turn, bordering a “trap” that could make the track go straight. Said trap is the jaws of an unknown creature. They are open most of the time, but close every few seconds, blocking your way into a fall or crunching you. Continuing straight through the jaws saves a ton of time, so attempt it whenever you can, and add a boost to ensure you pass through. After this, we head into a tight right turn, leading to an equally tight left-right combination with some ups and downs in between. One more left-right combination, this time clearly uphill, leads us into the first straight. After it, two left turns, the first rather smooth and the second being a lot tighter with a slight uphill. Ahead lies a left bend, leading to a jump, and then into a 90 degree left turn. A small straight leads us into another 90 degree left turn, and after it, a long 270 degrees right hairpin with a slight downhill. After it, a tight 90 degrees right turn takes us into a mine of sorts, which is a very tight straight on closed environment. One more 90 degrees right turn, and we’re back again on the start/finish line. Other World Frontier 1 A pretty easy and straightforward track, where boost is easily exploited. Greatly favors top speed. At the end of a short straight after starting the lap, we face the first turn, a rounded 90 degrees left hander. It leads to another rounded left hander, this time only 45 degrees, and after a brief straight we come across a sharp right turn to enter the longest straight. Entering some kind of park where the track is wider and you cannot fall off, we face a long and smooth left hairpin. In the final part of said hairpin we enter an enclosed portion of the track, and also we start a downhill. After it, a right turn leads us again into another park, with a very smooth left turn leading us again into the “normal path” and yet another straight. After it, we enter a left-right combination, with a short straight in between. The right turn starts a steep downhill, so you can cut the corner by going a bit over the edge. After the downhill, one last straight stretch and a last rounded 90 degrees left hander leads us into the start/finish straight. Other World Frontier 2 Very similar to the track above, but the path is a bit tighter, and also has some sharp corners that will test your turning skills. Still, an easy track to master. After the starting straight stretch, we encounter a hump-like 45 degrees right turn, which leads us to a short straight before facing the first complicated turn, a sharp left hairpin. Make sure to use the whole width of the track to not lose too much speed when attempting the hairpin. After it, another semi-straight stretch which goes through a rainbow-like spiral tunnel leads us to a longer and smoother left hairpin. Also, this one is banked, so it’s easy to take flat out. A smooth right hander leads us to the last straight stretch, going through some kind of building, where we face a left hander in uphill. The track widens at this point, so it’s rare to fall off the edge and also makes the turn easier to take. One more blind right hander leads us into the last corner, a rounded 90 degrees left hander, where the track widens once again (although this time isn’t that necessary), and on to the start/finish straight. Wild West Quadrant 1 Yet another straightforward track, with only a couple of difficult turns and several top speed sections. High speed is the key to prevail here. A while after starting awaits the first turn, a smooth left hander. Using the full width of the track can make it almost straight. We then face a steep uphill, leading to the first complicated corner, a very sharp left hander. The track widens at this point to make it harder to fall off the edge, which seems to have become a staple in the unlockable tracks. We then face another uphill with a long and smooth right hander that leads us into a mine of sorts. For some strange reason, the track widens while the right turn is inside the mine. After it, the second complicated turn, which is a left hairpin, once again with a widened track. We then exit the mine and enter a steep downhill, facing a smooth right hander after it to go uphill once again. While still uphill, we face a blind and rounded 90 degrees left hander. Once again, the track widens, and this time it’s actually useful due to the nature of the turn. We then enter inside a house for a short straight stretch, with a slightly tighter track path, and facing a blind left hander in downhill after exiting, yet again with the track widened. One more smooth right hander leads us into the start/finish straight. Wild West Quadrant 2 Finally, a somewhat twisty track to actually test your skills. It’s also a relatively long track for the game’s standards. After the start, we face an uphill leading us into the mine. Entering it, we face a smooth right turn that leads into a sharp left turn with the track widened, and we exit the mine to face a smooth left-right combination leading us to a sharp double-apex left hander. The track widens after taking the first one, so you can either take both in a round trajectory or in a V trajectory. We briefly enter the mine again to face a blind smooth right hander that ends in a downhill, leading us to the back straight. A smooth right hander is after it, and then a left hander while in uphill. We then enter a smooth right hander that leads into a sharp left-right combination with the track widened, a very complicated spot. Then we face a long and smooth left hander that starts in a downhill, leading to a short straight before a sharp blind left turn with the track widened, another complicated spot. After it, we face yet another complicated turn, a sharp blind right hander in uphill. Ahead of it, one last downhill with a smooth left hander takes us to the start/finish straight. Nebula A long track that poses a great challenge to master. It has both a fast and flowing sector and a twisty and complicated sector, essentially having all aspects a track could have. The start/finish straight soon starts a downhill that leads us to the first turn, a right hairpin. After it comes a steep uphill in two phases, essentially putting up a jump in the middle. The second phase of the uphill makes the left corner coming after it completely blind, but luckily it isn’t very sharp and has walled edges. After a short straight, we face probably the most complicated turn in the whole game, a very sharp right corner. It’s really hard to take it without falling over the edges. A longer straight leads us into a similar corner, this time a left hander, but it’s somewhat easier to take. After it comes a long and flowing right hander, which starts in downhill, eliminates the track to make racers pass above some big boxes in the middle and starts an uphill at the end. Then we enter a wavy straight, which makes it easy to jump at high speeds and therefore lose a bit of control. We now take a right hander in uphill leading us to the twisty sector of the track. First comes a sharp right hairpin still in uphill, with walled edges to make it easier, then a quick left-right combination that can be taken almost straight and a last left hairpin while in downhill, this time longer and smoother. After it ends, we face another uphill, and at the peak we see a right-left combination. The right turn is in downhill and can almost be taken straight, while the left turn is a bit longer. After them, the start/finish line is ahead. Galactorama Park 1 Another very long track for the game’s standards. It has several complicated turns and only a couple of straights, so it requires extreme skills. Right after the start, we already face a complicated and sharp left hander, leading to an even sharper right hander which has a bump at the apex. A smooth left hander is ahead, leading to another sharp right turn in downhill with the track widened. A short stretch leads us into a double-apex right hander. First comes a 90 degrees turn with the track widened, and the second one is a sharper turn taken in uphill with the track at its normal width. A smooth left hander leads us into a blind right hander in downhill, with the track widened once again. We then go through a narrow pass to enter a house, and within it comes a very sharp right hander. Thankfully it’s an enclosed area, so you cannot fall off. An uphill leads us to the exit, and another right turn still in uphill leads us into a blind left-right combination. The left turn is smooth, but the right one is sharper, and immediately after it comes a long left hander, with the track widening half through the turn. After it we face another downhill, and we can see the track widening again for the upcoming right turn. It’s very smooth, so no need for the extra width. Then we head into the back straight, which is very wavy, but long enough so as to not lose control if you boost through it. After it, a right hairpin while in uphill and with the track widened leads us to a short stretch before a 90 degrees left hander, again with the track widened. A short downhill after it takes us into the start/finish line. Galactorama Park 2 The last track couldn’t be more twisty. Very long and with almost no straights, it requires extreme skills, even more than the one above. Right after the start/finish line we face a short downhill. A smooth left hander leads us into one of the circus’ tents. A steep uphill hides a blind and sharp right turn, with the upcoming left turn in downhill. One more right hander, followed by a left corner, takes us outside the tent and on to the main track again. One of the very few straights takes us into three complicated left handers. All of them are sharp 90 degrees turns, and the last two are banked and have walled edges. They also seem able to be taken as a single long left hander. After it, a semi-straight with pronounced waves lies ahead, and a smooth right hander takes us into the second tent of the circus. After entering, we face a set of three right handers, all of them 90 degrees, resembling a mirrored version of a previous sector. This time, all seem sharper, the first two are simple turns with the exit walled, and the third one also has the exit walled but is taken in downhill. The downhill continues after exiting the tent and returning to the main track once again. Up ahead, a slightly banked right turn takes us into an uphill, with a combination of three flowing right-left-right turns coming after it. The left turn is made in downhill, which becomes more steep while taking the last right turn. A smooth left hander takes us into a two way route. Both have the same pattern: a smooth combination of turns, the first to the same direction you chose, a short stretch going through a narrow pass and one last combination of turns, this time the last one to the same direction you chose, and back again to the main track. A very narrow straight stretch is ahead, so be careful when exiting the previous turn. After it comes a double-apex right turn in uphill, the first is smooth and flowing but the second one is very sharp. A long straight with a final smooth right hander takes us back to the start/finish line. |


Site Staff Manager, Content Writer, Console Manager
| Vizzed #1 Hardstyle fan |
Affected by 'Carpal Tunnel Syndrome'
Registered: 07-03-13
Location: Barcelona, Spain
Last Post: 10 hours
Last Active: 10 hours
04-30-16 06:29 AM
 Mynamescox44 is Offline
| ID: 1266895 | 14 Words
Mynamescox44 is Offline
| ID: 1266895 | 14 Words
 Mynamescox44 is Offline

POSTS: 658/2608
POST EXP: 337383
LVL EXP: 9286633
CP: 48536.7
VIZ: 574226
This game was so much fun, and this guide is fantastic. Awesome work man. |
| Universe Breaker |
Affected by 'Laziness Syndrome'
Registered: 11-28-12
Location: Ohio
Last Post: 2355 days
Last Active: 662 days
