

 User Notice
 Forum Links


Thread Information
Thread Actions


Lufia I Game Guide
11-27-15 05:55 PM
janus is Offline
| ID: 1221736 | 11867 Words
SecureYourCodeDavid
POSTS: 2895/4824
POST EXP: 567678
LVL EXP: 23385287
CP: 64302.7
VIZ: 624661

Hello gamers and welcome to another of my guides. As always my goal is to make you progress through the game as quickly as possible while completing all the sidequests. And there are quite a few of them in the game: the Old Cave, the dragon eggs and getting ALL the treasures – there are quite a few of them, and I even missed a few (they can be hidden ANYWHERE, from flower beds to book shelves). There are also a few instances where “running around in circles” to gain experience will be worth it. So never thrown Foul Water away; they will make you fight every step you take (every move you make… oh, forget it!) and with savestates you can control what the enemies are, making sure the profitable enemies show up. Finally, you will visit the Fortress of Doom 3 times during the game, and the layout is exactly the same. The only difference is when you visit it underwater; there will be no treasure chest to obtain. Final dungeon: Fortress of Doom Walk left to get power potion, go downstairs, enter the middle corridor to mind option, great potion and speed potion. Walk right and upstairs, take spell potion and go back to the main hall to go upstairs. Take the right corridor to power potion, go back to the main hall, follow the path up, take the left corridor to spell potion and go back to go upstairs. Go around the promontory to get miracle *2 (the stairs going down lead to healing panels); come back where you came from and go straight up between statues of the Sinistrals. Circle the room before crossing the glass bridge to get miracle *3. Cross the glass bridge for dialogues. Go on the portal, cross the glass bridge and be ready for your boss fights (note that you will have a “break” between each of them, so heal if necessary). Boss fight: Gades A purely physical Sinistral so no need to cast mirror. Just have Guy and Maxim attack and have Selan and Artea cast their strongest spells (don’t forget dread to lower physical defense), healing as needed. He will quickly become history. After the fight, walk one step for your next fight. Boss fight: Amon He does use magic so cast mirror on everyone, starting with Guy and Maxim (whose magic defense is lower). Use the same strategy as with Gades and he’s also quickly history. Walk one step to face a more dangerous boss. Boss fight: Erim She is almost purely magical, so use physical attacks. Be sure to cast mirror, and watch out when she casts mirror on herself. But considering your overleveling, you should dispose of her quickly. Walk one step to face the final boss Boss fight: Daos Cast mirror and pummel him as hard as you can. After the fight watch a long scene that goes into the present with Maxim’s descendant. PART 1: THE RETURN OF THE SINISTRALS Village: Alekia Once you gain control, walk up straight into the castle. Walk straight to the middle backroom and look at the book shelves to get a swing wing and escape. The left room has an arrow in a chest. Go back towards the entrance, go upstairs and go towards the back. The middle back room has a potion while the one of the left also has a potion. Go back towards the stairs and go up again. Talk with the princess to get 100 gold. Follow the right-hand wall and go downstairs to eventually get sweet water (fewer enemies), antidote and revive. Go back up, talk with the King and go to the left-hand room to get a bracelet and stuffed bear. Exit the castle. Go upstairs in Roman’s inn to get dress. The dresser inside the weapon shop has potion. Now go outside. If you want to minimize your going to the inn (for end-of-game stats), enter the shrine southwest of Alekia to heal. Otherwise, walk straight up north and enter a village. Village: Chatam The house above the item shop has a smoke ball (instant escape except from bosses). Exit the village, walk up straight and enter the cave you see on your left. Dungeon: cave to Sheran Just walk left, go up the rope ladder and follow the path up to exit. After that, enter straight into Sheran. Village: Sheran Be sure to talk to all the people lying on the ground. Enter the castle. The left room has chests with potion*4. Go up one floor; the room on the right has arrow*2, mid arrow and revive while the room on the left has foul water and sweet water. Exit the village and walk/warp back to Alekia. Go back to your captain’s room (first floor, left-had back room). Go to Roman’s inn, talk to him and go upstairs to Lufia. Exit the village for a scene where Lufia joins your party. Go back to the cave. Dungeon: deeper exploration of the cave to Sheran First, take the second entrance, northeast of the regular entrance. Follow the straightforward path to get 200 gold and a potion. Go back to the regular entrance and talk to the person lying on the ground. Enter Sheran again. Go back into the throne room. Enter the left-hand room to lower a switch and the right-hand one to get 100 gold. Exit the room, follow the left-hand wall and enter the room to go downstairs. Always walk so you go downstairs, and you will eventually free the King. The bookshelf in his room has a great potion. Exit the castle and enter an unwinnable fight against Gades (kill yourself to accelerate the process). After the fight and a scene, you will automatically be in Alekia. Walk up straight for a dialogue. Go to the castle (2nd floor) and go to the back room to get Lilah back. Now go to Chatam and walk straight right. PART 2: GUY IS STILL ALIVE!! From Sheran, walk west to cross a bridge. Follow the coastline south to another bridge and follow that path to Treck. Village: Treck The first house on your left has a hairband and a dress. The weapon shop has a power gourd. Walk left until you see a tavern, and then walk south to enter the port. Walk left to enter a place in the ground and walk left to get smoke ball and arrows. Go back outside and walk right, following the shore, to talk to an old man. After a dialogue, exit the village and walk east (along the shore) and cross two bridges. Enter the cave. Dungeon: East Cave Follow the straightforward path, taking the cloth shoes on the first floor. Follow the path through a door; enter it and take the swing wing on your left. Keep walking up to exit the cave. Village: Guy’s House The house is right by the cave. Enter it, go towards the house for a scene. Explore Guy’s tomb to get a short sword. The bookshelf inside the house has a great option. Go back to Treck and enter the port. Walk left and talk to the guy with green hair (Aguro). After a dialogue he will join you to fight. Being around level 7-8 should do. Boss fight: Demon Lord *4 They can cast mirror, so watch out. They can also cast dew, so make sure Aguro stays healthy. Use all the mid arrows you have to dispose of the monsters quickly. PART 3: FINDING ARTEA After the fight exit Treck and follow the shoreline west to enter a cave. Dungeon: cave north of Treck Walk east, up a rope ladder and left across a bridge. Take the potion and go downstairs. Walk south to get potion and power potion. Go back up, all the way under the bridge to go downstairs. Walk south around the marshes and enter the room to get a daze ring. Keep walking left to go upstairs, and eventually outside. Walk south towards the ship and enter your next fight. Being around level 9 should do. Boss fight: Goblin *3 Again, mid arrows will be very useful. After the fight you will sail back to Treck. Once in control go back to the tavern (2nd floor) and talk to the sailor. Once back in the port, talk to him to sail to Lobernia. Village: Lobernia Once in control go to the dress shop (left of the closed item shop). There is a mind potion behind the weapon sign on the left. There is sweet water on the second floor, right of the stairs leading to the third floor. Once on the third floor talk to the woman between the two rooms for a scene. The weapon shop has a mid arrow. Go to the inn (20 gold) and rest. As you exit Aguro will come to you. After the short dialogue exit the city. Walk southwest (below the mountain range), and keep walking west until you reach Grenoble. Village: Grenoble The weapon shop is hiding potion. Walk up to the second building on your left. Talk to the blond guy blocking the way (give him 50 gold). The bookshelf by the stairs has a speed potion. Go downstairs, follow the corridor and walk east down the stairs in the middle of the flowers. Talk to the old man to get your mission; you can also talk to the man behind the counter to get your first mission inside the Old Cave (everyone must at least be level 5). Exit Grenoble and go to the Old Cave (right outside, across a bridge). Dungeon: Old Cave, level 2 Enter the cave towards the elevator and Have Lufia enter the door alone. The treasures contain dress, hair band, heeled shoes, fairy kiss and earring. Go back outside and exit the cave back to Grenoble. Go talk to the old man; also get the money back from the secret map (note that you always have to pay 50 gold to get there). If someone has reached level 10, you can get the 3rd-level mission. If so, go back to the Old Cave after talking with the man behind the counter. Dungeon: Old Cave, level 3 Walk down to get hi potion, bomb, nothing and sour cider. The chest in the marsh contains magic guard. Enter the next room, and the chests contain nothing and escape. Enter the room to get nothing and revive. Keep walking east to get nothing (twice). In the room you will get nothing, smoke ball (above the marsh), miracle inside the marsh (right there) When ready walk to your next dungeon; go west of Grenoble. Cross a bridge, follow the shoreline and walk straight up when a path open on your right. Keep walking straight up to your next dungeon. Dungeon: tower northwest of Grenoble (Note that you can’t escape from towers. However there are usually “holes in the walls” that get you outside). Walk right and enter the room; walk right and enter another room to get hi potion and hi magic. Go back to the entrance, go left and go inside the first room you seem on your right. Follow the path to a room with a sonic ring. Go back to the main corridor and walk straight up to go upstairs. Enter the first room you see, follow the path and walk down. Walk right when you can and down to get smoke ball. Walk back left in order to go upstairs. Walk down the first entrance to get a power gourd and mind gourd. The second room has a hi potion. Keep walking right to enter a room with revive. Go all the way back where you first went upstairs from the main corridor; enter the second room this time. Follow the path and walk straight down to the wall. The first room has mind potion while the second one has a great potion. Go back to the room you missed and go upstairs. Circle that room around (omitting the stairs) and enter the room to eventually get spell potion and power potion. Take the stairs you missed, walk up straight and enter the room. Talk to the man, say yes and be ready to fight alone. Being around level 11 should do. Boss battle: Apprentice Make sure you have a few hi potions at hand – he will cast fake to be quicker and can even attack twice per round. Use a power gourd to increase your attack – hi arrows should deal about the same amount of damage as your increased attack. His Jolt is very strong; he may even use potions. Just keep hitting him until he goes down. After the fight, go behind the room where you were to the right to get mid arrow *2. Leap outside the tower 3.1 HOPE RUBY Once outside follow the shoreline west (you will walk left of the mountain range you first encountered when going towards the tower). Cross two bridges; after the second one walk straight up to get to the “restoring” temple if need be. Walk straight down across another bridge and walks southeast to enter a village. Village: Kirof Enter the inn to get (behind the counter) mid arrow, hi arrows and bomb. The house with the old lady (above the inn) has plum cider. The second entrance of the item shop has hi potion and sweet water. Enter the back room for a dialogue. The bookshelves had stuffed dog and stuffed pig. Exit the village and walk straight east to go to Medan. Village: Medan The house right of the item shop has escape and swing wing. Enter the castle. Walk straight as much as you can to enter the ruby room. Make a wish if you want, exit the room and walk right to go downstairs. Follow the path for a dialogue and go back up. Exit the castle and Medan. Go back to Kirof. After a dialogue exit town and walk up straight to a dungeon. Dungeon: Ghost Cave Walk southeast to get a hi potion. Walk northeast to a room to get escape. Follow the upper wall right to go downstairs. Follow the path to go downstairs some more and walk left to get a speed potion. Walk down to go upstairs a few times, and walk up straight to go downstairs. Follow the path to get a dragon egg. Go back to where you were, getting the hi magic from the chest. Take the next set of stairs down and follow that path. You will have restoring circles (coat hanger = magic, diamond = hp). The chest has a revive. Take the stair up, go up the rope ladder and immediately down a narrow corridor. Enter the room for a revive and go downstairs. Walk straight south to a hi potion. Walk straight right to a hi potion and northeast to another hi potion. Go down the rope ladder below the second hi potion, walk right to go upstairs, exit the room and walk right to get 500 gold. Walk up to a room with miracle. Go back to the room where you first came and walk left to a room with ghost ring (higher attack against undead). Walk left to another room with monster ring (higher encounter rate). Go back to the first room to go downstairs, and this time keep walking right. In the next room, go right to go downstairs to a room with spell potion and power potion. The room to the right has a great potion and the one on the left has a mind potion. Go back upstairs and take the left-hand stairs down. Walk down, take the stairs to your right and get the smoke ball. Go southwest to get escape and go back upstairs. Take the middle corridor downstairs and walk straight up (yes, you will float). Take the revive, walk straight up and go up the ladder (talk to the girl) for a fight. Being around level 12 should do. Boss battle: Phantasm The ghost ring will increase the damage you deal. Be sure to cast drain to decrease its defense. It might cast shield to increase its magic defense and spells like spark. Just hit it to take it down. After the dialogue talk to the shop owner to get a power potion. Go back to Medan, talk to the princess and exit. Walk east to a cave. 3.2: RESCUING JERIN Dungeon: Cave to Bergen Follow the path to a toxic marsh; cast float to avoid damage and walk to chests containing revive and hi potion. Go back, walk up and follow the path outside. Just walk straight south to enter Bergen. Village: Bergen Walk up straight up some stairs to a large house. Get the revive and hi magic from the shelves. Go downstairs and immediately right to a hole in the ground. Take the float and hi potion, keep walking right and talk to the young woman at the back. The shelves contain mind gourd and power gourd. Exit the village, walk southwest, cross a bridge and enter a cave. Dungeon: Cave of Dais key Go downstairs, down the corridor and enter the room to your left to get hi potion. Take the first staircase down, and follow the path to get smoke ball and float. Go back up and keep walking right to go downstairs. Go up to get escape, follow the path left, get power potion and spell potion and explore the toxic marsh for a miracle. Go back to the entrance; walk left from the stairs to enter e room. Follow the straightforward path to here Dungeon: Dais Cave Walk straight to the left to enter a room with great potion, mind potion and speed potion. Go back to the closed door; open it. Follow the path, go down one rope ladder and enter the room on that floor. Get the float and exit the room on the same level. Follow the path to get hi magic and revive. Go back to the main route, go down the rope ladder and right of the water pond to get power gourd and mind gourd. Cross the bridge, walk left and up to go under a bridge to get spell potion and power potion. Go back up to cross the bridge you just walked under and follow the path on your left to exit the cave. Walk straight to the left, cross a bridge and enter a small temple. Walk to the right towards a pot for a dialogue. Right = magic, left = hp. Exit the temple for a scene, and exit again to walk north to the North Tower. Dungeon: North Tower Step of the warp pad and walk up straight to go upstairs. Go upstairs some more, take one step left and walk up to get revive. Walk up straight to the wall to get awaken, left and down to get antidote, left of the treasure chest and to the right of the next chest containing hi potion, straight down for a shriek, down and right one step (each) for mystery pin and straight down from the shriek chest for a stone cure. Go back down two floors and enter the first room to your right; step on the warping pad. Go upstairs, do down and enter the first room for a flash ring (stronger lightning spells). Keep walking right and up to go upstairs. After a few floors you will get in a room with many warping pads. From the stairs go northwest past four columns taking a pad between 2 more columns. Take the miracle and warp back. Walk left of the pedestal when Jerin is and take the warp. Walk up (*2) and take the miracle. Go back and take the warp between two columns of the right-hand side. Go up twice and get ready to fight. Being around level 15 should do. Boss fight: Follower As always be sure to cast drain. It can cast frost, drowsy, drain, bolt and stronger. It can also confuse with grin. Just hit it hard and it will go down – it seems to be weak towards lightning. 3.3 GETTING TO ELFRA Exit Belgen and walk east, crossing to bridges and a huge desert. Keep walking east into the next village. Village: Surinagal The weapon shop has a hi potion. The house to the right of it has hi magic and miracle. When you’re done walk south, follow the coastline west and cross a bridge. Follow the path without trees to get to a house. Village: Forest Station The shelves contain revive, sweet water and swing wing. Talk to the old man for a scene. Exit the station and walk south, going between the mountains. Just follow Jerin’s instructions and you will be out in no time. If you don’t you will enter infinity loops. Enter the warping temple to your right. Once back outside walk up to the next village. Village: Jenoba The item shop has a hi potion. The house above the church (with a “soldier) has bomb and hi arrows. Go on the house on the promontory (up some stairs) and go downstairs to talk to the old lady by the bar. By her some cider and she will talk to you. Exit the village and go southeast to your next dungeon. Dungeon: Blue Tower As you enter go to the left and enter the room to get blue ring. Go back outside the room, walk up and go upstairs. Go south towards the edge of the screen to get sweet water. Leap outside and go to the right this time to get magic guard. Go upstairs (*2) and walk left to get high potion. Go back down one floor and walk down, following the path to go upstairs. Take the left-hand stairs, follow the path and pass the stairs to get hi magic. Go upstairs, look at the pedestal, go back down and take the right-hand stairs this time. Follow the path, go down the hole, take the revive, jump down, take the green jade, jump down and go outside. If you have someone at level 15, it’s time to explore the Old Cave again! Dungeon: Old Cave, level 4 Get the smoke ball, hi potion and nothing. Go southeast to get nothing, hi magic, escape, long nail and float. Float to get crown and broad rod (cursed). Walk back west, hugging the lower wall to get 520 gold; keep walking to get nothing. Enter the room south to get nothing, brone helm, long sword, light robe, nothing, flame ring, buckler, wind heels and light armor. Walk out the room, walking straight up to get magic guard, nothing (*2). Enter the room to get nothing (*3), miracle and go outside to get your money from the crown. Warp back to Jenoba and walk straight south, across a bridge. Follow the coastline to your right to get to your next dungeon. Dungeon: Green Tower Enter the left room to get green ring. The right room has an inn (150 gold). Enter the center room, walk and take the left staircase. Take the magic guard and lower the switch. Go back down and take the right staircase. Take the first staircase up you see and take the broken red sapphire, ex potion and revive. Leap down and take the next staircase going up. Get revive, hi magic and ex potion. Leap back down, take the swing wing and go back to the switch and turn it up. Go back up and take either staircase. Go down to go upstairs for a couple of floors to look at the pedestal. Leap outside. Follow the coastline east, crossing a bridge and always following the coastline. You will get to the next village. Village: Ruan The inn has a hi potion, the house above it with the old lady has a small knife, the church has sweet water and revive, an empty bottle here (right of the church) Dungeon: Red Tower Take the second door from the left and go downstairs. Float around to get spell potion and power potion. Go back up and take the first room from the left. Follow the path to get hi potion and red ring. Go back down, go up and enter the first room you see to get float. Exit the room, walk straight left pass the stairs and enter a room with power gourd and magic guard. Go back to the stairs, and down and turn right, follow the path to get hi magic and hi potion. Walk back up to take the stairs and walk up to get smoke ball. Walk down to get magic guard and go back downstairs. Walk left, down and enter the room. Follow the path, go upstairs to get hi potion, go back down and follow the path without leaping down. You will eventually reach the summit for your next fight. Being around level 17 should do. Boss fight: Dark Ghost As always, be sure to drain its defense. It can cast water, ectoplasm (absorbs magic). Hit it hard and it will go down. After the fight look at the pedestal, leap down and go back under the tower to get blue jade, dragon egg and miracle. Exit the tower. Warp back to Medan. Walk straight north and enter the cave. Dungeon: Ruby Cave Follow the path, go down the rope ladder to get foul water, go down one level to get sweet water and enter the next room to your right (be sure to get bomb before). Talk to the old man and go to the room behind him to get 500 gold, diamond ring, opal and emerald. Exit the cave. You now have to place the gems on their pedestals. You need to go to the blue, green and red towers in that order. After placing the red gem, you will be warped next to Elfra. Enter it. Village: Elfra Go to the back of the village, enter the house and get mind potion and speed potion. Go upstairs to chat with Artea. After that, go downstairs and follow the path to a shrine. Exit it. There is another healing shrine if you walk straight west. PART 4: DIGGING THE FORTRESS OF DOOM PART 4.1: FINDING RAILE SHAIA Go back to where you came from, follow the shoreline east, going south between mountains when you can Village: Ranqs Power up as needed and exit the village. Walk north across the bridge, walk east and follow the path to a cave. Dungeon: Cave You can get an escape. Exit the cave, go back to Ranqs and cross the desert south to get to another cave. Dungeon: Cave to Odel Once the hero is one step towards the 4 rocks, walk this way: 2 right, up, 2 right, up as far as you can, 3 left, 1 down, 2 left, 1 down, 2 left, up as far as you can and then hug the wall up to exit. Walk southwest to the next village. Village: Odel Walk up straight and turn left before entering the castle. Get ex potion from the chest and go downstairs to get miracle and ex magic. Talk with the old man and enter the castle. Go to the back room to get hi magic*2, power potion and spell potion. GO back to the entrance and go upstairs directly in the throne room. Talk to Piron (next to the Princess) and exit the castle. The flower beds east of the castle have (in the middle of the flower beds) speed potion, mind potion and great potion. Exit the village. Walk south until you reach the water (watch for toxic marsh) and go east to cross a bridge. Then just move southeast, always staying on that “island”, to reach the next village. Village: Linze The inn has a swing wing. Keep walking down on the right side of town and go up some stairs into a large house. You will find grilled newt, stone cure; go downstairs to get small knife, chop block, miracle and fry pan. Go back outside, on the left side of the village. Go to the house above the church and talk to the man at the table. Go back to Odel. Talk to Piron and exit. Walk straight west, cross a bridge and enter the second opening you see. Dungeon: Cave to Arus, part 2 This cave, especially around part 3, is perfect for “running in circles.” If you manipulate enough you will get Mimickers. They are scary cats, but if you manage to defeat them they fetch 3000 XP each. Rise up to level 25. Follow the right-hand wall up, turning left when you see a rope ladder. Go down when you can to get glass robe (it’s a rod, really), go back to the rope ladder and follow that path to get half mail. Come back up and go down at the first intersection you met (instead of up, hugging the wall). Go down the rope ladder, go northwest up another ladder and walk left, following the path to a stone cure. Go back next to the first rope ladder you went down from; walk south. Follow the path to get to a glass cap. Keep following the path to get wind shoes and iron helm. Exit the cave and go south to the first entrance. Dungeon: Cave to Arus, part 1 Get the yellow ring and stone cure (the warp will bring you back to Shaia Lab in Odel Castle’s basement). Exit, go east across the bridge leading to Odel, south following the coastline, across a bridge and back into the cave. Dungeon: Cave to Arus, part 3 Go down two sets of rope ladder, go right and follow the path to dragon egg and ex potion. Now go left and walk on the ruined bridge, making sure people talk. Exit, go back to Odel and talk to Piron. Exit the village and go back to part 3. Talk with Piron and walk back to part 2. Go towards the chests and walk until Piron talks. Now walk again to part 3 and cross the bridge. Once across walk right, go between two walls and follow the path to escape and hi arrow. Go back to the two walls and follow the right-hand one down. Follow the path to go downstairs, follow that path and cross a toxic marsh to get miracle. Go towards the door, go through it and follow the path to go back upstairs. Go up the rope ladder, take the revive and go up the rope ladder to get another revive. Go up the rope ladder and exit the cave. Just walk up to enter the next village. But meanwhile, you can get to the next level in the Old Cave if someone is at level 20. Dungeon: Old Cave, Level 5 Walk down left of a toxic marsh to get smoke ball and nothing. Enter the room to get luck blade (cursed), opal, nothing, ex potion and nothing. Exit the room and cross the toxic marsh. Get the kite shield and go to the room below you. You will get float, 500 gold and nothing (*2). Cross the toxic marsh to nothing and power potion. Enter the next room for battle axe and nothing (*2). Enter the room to get hi bomb. Cross the toxic marsh to get miracle, golden paw, frost ring and nothing (*2). Exit the room and go to the next one up to get nothing, hi potion and hi bomb. Go down in the middle room to get nothing, spell potion and revive. Exit the cave and get your reward. Village: Arus The house on the left (with the old couple) has hi magic. Go up the stairs for a scene. Go talk to the old man inside the house and exit the village. Walk west and enter a dungeon. Dungeon: Cave to Tower of Grief Just walk west and avoid the poison marsh. It’s that simple. Exit the cave and go to the tower. Dungeon: Tower of Grief As you enter, walk up straight, go upstairs and get revive, dragon egg and stone cure. Go back to the entrance and walk right to get purple ring. Now walk left to go upstairs, follow the path upstairs and take the first stairs up you see. Get revive and stone cure, go back down and take the stairs southwest of those you just took. Get ex potion and hi magic, go back down and take the stairs straight up. Follow the path, use the healing panels if needed and go upstairs. Get the miracle and talk with the old man. Leap outside and return to Odel. Enter the Castle, and as soon as you are inside turn left, following the path to enter Shaia Lab. Once inside, simply follow the path to go downstairs; you can’t get lost. Once the path divides up here Village: Carbis (Shaia Lab 3) Go straight into the basement to talk with Shaia (the woman will let you If you have enough energy, you can explore the tower north of Bakku to get a special treasure you wouldn't’t get at any other time. Dungeon: Tower of Light Enter the left room, go upstairs and hug the wall to fall down. Get the undead ring and go northeast to fall down some more. In this room, get stone cure, power potion, spell potion, hi bomb and ex potion (*2). Walk upstairs, right, down and enter the room. Hug the wall to fall into a trap, get the sea ring and go to the back to fall some more. Go back upstairs, walk up and left and go upstairs. Go straight down, enter the room, take the stone cure and go upstairs. Go straight down to get revive. Go right and up to enter a room and go towards the chest of the left (there is a trap below the one on the right) to get ex magic and ex potion. Exit the room, go back towards the stairs and enter the room above to get revive. Exit the room, go right to go upstairs and follow the path until you can go upstairs (there is a room right above it). Go upstairs, go right and follow the path to ex potion. Leap down, move up and upstairs, go south past some stairs and enter a room to go upstairs. Move two steps right, down and get the power gourd. Fall into a trap above the chest, fall into another trap and get large shield, great axe, plate cap and silver robe. Leap down, go back up and take the stairs. Walk one step up and get gloom voice. Go up to go upstairs and get your special treasure: might helm, the best one for anyone. Go back downstairs, leap down the hole, walk down and go upstairs. Walk right, enter the room and follow the path. When you see a chest, walk down from the stairs to get miracle. Go above the chest to fall in a trap, leap down, walk down, walk right into the room and follow the path until there’s a room above you. Enter it, walk right into a trap and go downstairs. Simply walk down and exit the tower. NOW go into Bakku Village: Bakku Talk with the sailor you first see. Enter the house above him to get ex potion, ex magic and revive. Talk to the old man and go back outside. The priest’s hut is in the port. Talk with the priest and warp to Grenoble to go to the Old Cave, 5th level. So even if you didn’t reach it, the man assigning the missions will let you go. Walk across the toxic marsh, enter the room, walk to the far right, enter that room and cross the poison field to get Cooper. Warp outside and get back to Carbis. Go talk to Shaia for a dialogue. PART 4.2: THE QUEST FOR ALUMINA Before going on with your mission, surely someone is at least at level 25. Go back to the Old Cave. Dungeon: Old Cave, level 6 Open the chest for nothing, hi bomb (*2), nothing and hi bomb. Enter the room to get nothing, gladius, plate cloth, plate mail, power potion, speed potion and spell potion. Go back, get nothing and enter the next room. Get escape, go down the ladder and get ex magic and ex potion in the poison field. Don’t forget the miracle here Dungeon: Tower of Light redux Since you already have all the treasures, follow this path: follow the right-hand wall up, go upstairs, follow the right-hand wall down, enter the room to go upstairs, go northeast upstairs, go down, follow the path and enter the room above the stairs, follow the path upstairs for a couple of floors (on the red carpet, go up) and get ready for a fight on the top floor. Being at level 26 should do. Boss fight: Guardian Drain his defense as always. He can cast dread, blizzard, absorb and flame. He’s fairly easy if you can withstand his magic. After the fight get the light key from the chest. Leap down, go back inside and go to the back to use the light key. Just follow the path to get to the next village. Village: Linze The weapon shop (upstairs) has escape. Enter the house to the far right of the shop, go downstairs and down the red corridor to get swing wing, dragon egg and sweet water. Go back to the main corridor and you will eventually be outside. Just walk east to enter a cave. Dungeon: Gayas Cave Go up to the chests to get escape and stone cure. Hug the left-hand wall down to get ex bomb and ex potion. Hug the wall back up, go around a hole with a chest in it and walk down to get ex bomb and revive. Walk to steps up, go right and walk up to get hi magic and ex potion. Go down the rope ladder, go up the next one and follow the path to get escape and magic guard. Go back down, go to the right of the “promontory” and take the first door. Get ex potion and ex magic; go back down and enter the second room to lower a switch. Enter the first room to get ex potion; warp back to exit this room. Go downstairs and walk left to get ex arrows. Walk back right, up between poison marsh and get revive. Walk back down, hugging the wall to the right. Before going into that room walk up to get opal. Now enter the room to get ex potion and warp to eventually get silver sword. Warp back and walk up straight to the next room. Follow the path and when you can, walk down to go downstairs. Follow that path, going down two ladders. Walk right to get power gourd, walk southeast to get mind gourd and walk back down the next rope ladders. Just walk east, getting the revive before the bridge and restoring your hp southeast of the bridge afterwards. Walk to the back and talk to the man there; ask him about Brant. Escape the cave to go back to the entrance. Go immediately downstairs, walk left to an ex bomb, walk right to a dragon egg, southwest to a hi magic and go down the rope ladder close to the stairs. You will get your first piece of alumina. Exit the cave and warp back to Bakku. Enter your boat and navigate east following the coastline. Go north of the healing shrine, going between two mountains, and follow the coastline west, not taking the small river you see for now and enter the next village. Village: Marse Go downstairs and go towards the “weapon” shop to talk to the woman in the church. Power up as needed and exit the city. Jump in your boat, follow the coastline west and enter the small river you will see. Follow it and you will eventually see a castle. Village: Herat The first house (NE of the man calling you strangers) has rod and apron. The inn (south) has plum cider and hi potion. Enter the castle, go directly upstairs and enter the NW back room to get ex bomb. Go upstairs again and enter the first room to get power potion. Exit the city, navigate north of the mountains and land on the west shore right after the mountains. Walk west, following the mountains. Walk around the lake you see, walk south to cross a bridge, walk NE to cross another bridge and go around the mountain to the right to go into a cave. Dungeon: Purple Newt Cave Take the revive right when you enter. Go down the rope ladder and walk right to get gloom arrow. Go down the rope ladder, walk right and go up when you can to get engage ring (cheaper merchandise when worn). Go back down and enter the next room to your right to lower the switch. Go back to the entrance, staying on the same level as the first chest. Walk down to a bridge, cross it and get chain mail. Cross back the bridge, take the first corridor on your right, go down two rope ladders and get swing wing, ex potion and hi bomb. Go back up one ladder, go south to go down another one and walk to the far left to get stone cure. Enter the first room to get revive. Go in the poison marsh Go back in the very bottom of the house on the promontory and talk to the man in red. Exit town and warp back to Herat. Enter the castle kitchen (second floor, back-right) and talk with the cook. After go in the throne room (up two floors) and talk with the king. After that go back to the entrance and walk right; follow the path to go into the treasure room. You will get gloom voice, ex potion, plum cider, royal statue, fry pan, pot, miracle (*2), alumina, mach heels, carbo helm, tower shield, silver robe and carbo sword. Exit town, warp back to Marse and jump in your boat. Navigate straight up, go right of the island with a cave (Elba) and go south of the tiny island you see (there is a boat next to it) to start your quest for alumina. Dungeon: Loire Island This is the perfect place to “run in circles.” There are many red cores in here, and if you manage to defeat them they are worth over 13,000 XP each. Anyway, as you enter walk right until you get miracle. Keep walking right to go down a rope ladder to get hi magic. Go NW up a rope ladder to get mach ring; go back down, take revive and walk right to a rope ladder. Take gloom arrow on the right and walk left to get power potion from behind the rope ladder. Go up that ladder and walk right; go down a ladder to get hi bomb. Enter the room to the NE to get alumina. Escape outside and enter right back. Walk up, go down the ladder and walk right to get mind potion here Escape again and walk to the right. Go down the long rope ladder you see and follow the left-hand wall under the bridge and downstairs. Walk down into a room for ex potion. Walk NE around the “grid” for revive. Enter the next room you see, follow the path and hug the wall to the right to get hi bomb. Walk up into a trap, get ex magic here Village: Forfeit Island The item shop had hi magic and hi potion. If you walk around the building, go downstairs and down (on a green carpet), you will get mind ring. THE forfeit shop is left of the stairs on the second floor. If you need something you sold, that’s where you get it. Enter the tavern to get gown and ribbon; you will also need to buy something in order to get out. When you’re done, warp back to Marse and navigate to Elba Island. Dungeon: Elba and Ulupp Islands As you heard, both islands and linked by warp zones so I put them together. Walk right to enter a room with mind potion. Take the warp, go down the ladder and walk NE to get hipower ring. Keep walking left, follow the path and go under a bridge to ex potion and speed potion. Walk SE to lower a switch, keep walking right to dragon egg and walk back to the warp. Walk down the ladder, get the smoke ball and walk down the other ladder to get hi daze ring. Enter the room to the right, lower the switch on the right, cross the bridge on your left and walk down to get ex potion. Keep walking left to exit the room. Enter the next room to your right and follow the path to get spell potion. Exit the room and enter the one on the far left. Go down the ladder, walk up for miracle and ex magic, go under the bridge to get hi bomb and enter the room on the far right to warp to alumina. Exit this section and go down the ladder to get mind potion. Walk right (the room has an inn, 100 gold) to get silver rod; keep walking right to enter a room with silver armor and ex potion. Exit the room, go up the long ladder, get the spell potion and walk up to warp. Walk right to a silver wrist. Keep walking right to alumina and walk down the bridge to get miracle and silver plate. Warp back, lower the switch this time and warp again. Walk right to ex potion, SW into a room with alumina and (finally!) outside. Warp to Carbis, enter the building and warp back to Marse. Navigate north to Elba, and then west until you see an island with a boat. Enter the tower Dungeon: Ainsen Tower Get the sour cider when you enter. Enter the room on your left, get 750 gold, enter the next room, get hi potion and enter the next room to go upstairs. Follow the right-hand wall, going down as far as you can to get ex potion. Go back up, enter the left room and get big arrow. Come back, enter the middle room and go upstairs. Go up to swing wing, left to smoke ball and around the room to the left to go upstairs. Walk left and you will see switches 5 1 2 3 4 The correct order is 1-4-3-2-5 (any other order will make enemies appear). Enter through the door and follow the path to your next fight. I overleveled at Loire, so Level 37 for Jerin should do. Boss battle: Bosun and Pirates Focus your energy on Bosun first since he can cure Pirates and increase his defense. Pirates can cast foul (put to After the fight get silver tarot and pirate key. Go back down to the 2nd floor, go to the stairs leading to the 1st floor and walk left. Get power gourd and keep walking left until you reach Raile’s cell. Open the one of the right for heavy ring and the next rooms for speed potion and hi bomb. Get a revive at the bottom of the room and walk right to a trap. Get ex potion, walk right into a trap and you will be back on the first floor. Go back to Raile’s cell, open it and you will warp outside. Warp to Carbis and go to the basement to have your boat fitted. When back in control navigate north to an island surrounded by “eddies”. Go northeast to go in the next village. Village: Soshette Enter the hole in the ground left of the stairs leading to the church to get miracle, straw doll and gloom arrow. With that doll, you can go back to Forfeit, to the underground passage on the opposite side of the entrance. Walk up (instead on towards the green floor) and talk with the man behind the counter. He will make you a Voice of gloom (not sure if it counts as a treasure), which casts death to enemies. Warp back to Soshette, get in your boat and navigate west to enter the first eddy you see. Dungeon: Underwater caves I will put them all together. Note that currents are so strong that once on it, you can’t control your submarine until you reach the end of it. Go east and enter the first cave you see. Go straight east, take the empty bottle and take the eddy. Go straight south, left of a current going down; keep going down to get magic guard. Take the current directly under the chest, then navigate NE to get opal. Take the current to your left to get miracle. Navigate down to the wall and take the current to your right. Navigate W, take the current against the wall and come a short way back to get hi potion. Take the eddy and navigate SW into another cave. Follow the path, take potion and keep hugging the right-hand wall down. Do it and take the current you see between two walls. Take the ex potion and spell potion and take the current below. Once back in control hug the upper wall up to arrows. Keep hugging the lower wall east and get power potion. Go back to the previous chest and navigate straight W (take the current going W if you want) to get hi potion. Navigate back to the start of the current (going west) and take it when it goes north; you will get to mystery pin. Hug the upper wall to go back near the Fortress of Doom. Navigate east to explore the last cave. Avoid the current and follow the upper wall north to get 800 gold. Navigate straight east, take the current and come back to its source to get hi magic. Take that current back, hug the wall to your left down and follow it. When it ends take the first current above you and go slightly NE at its end to get gloom arrow and foul water. Navigate SE to the wall and hug it to the left to get zircon wrist. Navigate back, still hugging the wall, and go down a small passage you see to enter an eddy. Hug the wall in that room below the currents, enter the small room to get hi potion and miracle. If you keep going up you will go outside the vicinity of the Fortress. So go back to the eddy, hug the lower wall to the left, take the current going west, take the eddy and go to the Fortress. Dungeon: Sunken Fortress Since there are no treasure chests, just take the straight route: walk straight upstairs, walk up straight to another room, walk through the room, walk straight down up more stairs and walk straight some more for a long scene. When it’s done go upstairs and exit Soshette to warp back to Carbis. PART 5: RESTORING PEACE PART 5.1: THE FLYING FALCON Talk with Shaia and exit town. Navigate due south of town and you will eventually reach the next town. Village: Frederia (Shaia Lab 4) The flower bed has grilled newt in the middle to your left. The one on the right has miracle. Go in the lab (upper-right corner of the village) to get revive and stone cure from the lockers. After powering up exit the village. Navigate due west, following the path of the rocks. Once you see an opening between two mountains navigate south around a peninsula. Keep navigating west and you will eventually reach the next village. Village: Epro The first house to the right has ex bomb. There is power potion in the flower bed above the regular item shop (on the promontory, NW of town). The old man’s house right next to it has ex magic. Now go to the “other” item shop (NE of the entrance) and talk with the owner. Exit town. Navigate west of Epro, following the coastline. When you see a bridge, land and walk east to a man standing there. Talk to him, warp back to Epro and navigate east along the coastline. Go between the mountains and up when you can to enter the eddy. Dungeon: Submarine cave to Oil Cave Navigate east to enter the cave “proper” (there is nothing to explore). Go all the way up when you first can to get big arrow and power potion. Come back and go up the second corridor. Follow the path to mystery pin, keep going up and enter the room above for miracle. Take the current, follow the path for hi magic and take the current. Enter the next room for ex bomb and ex potion and go back east. Go up the second corridor, stay above the current and go under the next current you see. Follow it and get magic guard; now take it to get power gourd. Go back up the current, go up the corridor and follow it to get grand blade and the eddy out. Just navigate west to get back outside. Land west and follow the upper mountain range up until a poison marsh. Cross it and go down to the cave. Dungeon: Oil Cave Walk east to open the door and follow the path; get 850 gold and dragon arrow. Go down the rope ladder and cross the marsh to hi bomb, and go down the next one to get dragon tooth. Go down the next ladder and go NE to get big arrow before going up a long ladder. Get miracle and go back down to a poison marsh. Get the hi magic here Boss fight: Oil Dragon As always, drain its defense. It will cast oily air to slow you down and fire air (can be reflected by Mirror). Just hit it hard to finish it, and get the power oil behind it when you’re done. Exit the cave and warp back to Frederia. Go talk to Shaia, and once you’re done you will be able to fly! Why not take advantage of it to finish you quest in the Old Cave? Surely someone is at level 30! Dungeon: Old Cave, level 7 You will face the same enemies Maxim did in the Fortress. Anyway, get nothing, sweet water and gloom pick and nothing in the marsh. Cross the marsh to get ex potion and nothing and enter the room just above. Cross the marsh, get gloom voice in the NE corner of it and go downstairs. Follow the path down (always down) to get nothing; go back up for hi magic. Keep walking up and go right for power potion, ex magic and nothing. Keep walking left for spell potion and nothing; go upstairs. Take buster sword and nothing and enter the room. Get nothing, climb the rope and take crown jewels and miracle *2. Go back here PART 5.1.1: TREASURE HUNTING 1 Now take the advantage of your flight capacity to hunt for some dragon eggs. Warp to Herat and fly SW. Enter the small temple you see and talk with the dragon. I recommend getting a Might shield. Now hunt for the next 8 eggs. They are in: Alekia Castle (treasure room, accessible from the NE corner of the top floor), Belgen (in the cave next to the church), Cave of Dais Key (go downstairs twice), the cave NW of Linze (across a marsh), Elba Island (at the bottom of the rope ladders), southern underwater cave near Soshette (here PART 5.2: LUFIA OUT, ERIM IN From Epro, fly north until you reach Glasdar Tower (you will start moving uncontrollably). From there fly east to reach the last village. Village: Aurubus The inn has spell potion. Make sure you buy all the zirco gear you can afford (even a sword for the hero). Enter the hole in the ground above the weapon shop to get pear cider and plum cider. When you’re done fly north, avoiding going too near Glasdar Tower and enter the cave north (surrounded by sand). Dungeon: Cave to Glasdar Key Follow the path, take hi potion, cross the next bridge and skip the stairs going down. Take the ladder, walk left to hi bomb, SE from there to gloom arrow and down a ladder to smoke ball. Walk SW to magic guard and back up to the rope ladder. Walk NW up a ladder and NW some more for great potion. Go to the stairs you missed and take them. Take the very first room you see, follow the path, take mind potion and go back to enter the 2nd room. Follow the path, go left after the 2nd ladder and take miracle. Keep going down to another miracle and come back east to go down another ladder. Enter the room to lower the switch, exit it and walk west to get miracle and come back to the first room. Go to the warp, take spell potion, go downstairs and take the Glasdar Key, power potion and gloom guard. Warp outside and fly south (remaining between the mountains where you are) to get to your next cave. Dungeon: Cave to Glasdar Tower Follow the path, take the ex bomb right of a small lake and the black ring in the room on the left. Come back out, take the ex arrows above the poison field, which contains spell potion here Dungeon: Glasdar Tower (Note that you have until the top of the tower to level up Lufia. After that you will only have her for the very last battle). The left room when you enter has hi potion and the right one has ex bomb. Go back down the red carpet, go upstairs and enter the first room you see for big arrow. Go back out, go to the room straight above you and walk left (it’s an infinite corridor). Follow the path right to ex arrows, come back and walk down the path on your left to go upstairs. The room on your right has power gourd and mind gourd, the one on your left has revive and the one above goes into another infinite corridor (walk left). Go SE for revive, go SW from there into a room to go upstairs, follow the path to ex bomb and go into the room down for gloom arrow. Go into the next room down, follow the path to gloom ring and miracle and come back to the room you missed (where you got out of the second infinity corridor). Follow the path, go SW to antidote and follow the path down to go upstairs. Enter the room to the NW, follow the path, enter the room in the SE and warp to a MP restoring pad on your right. Warp back, enter the left room and walk up. Go directly beyond the “buttons” to warp to miracle. Leap down, always walk up, walk left in the infinity corridor, follow the path SW, walk up, left in the infinity corridor, enter the room due south, follow the path, enter the room NE, follow the path, walk SW, NW, follow the path, enter the room due south and walk straight up. Press the switch on the far right to warp to stun arrow. Follow the previous text in italics, press the reset switch and press switch 2 and 3. Warp to miracle, go straight up, follow the path and loot the room: spell potion, mind potion, miracle*4, revive, speed potion, great potion and power potion. Leap in the hole you encountered, walk up, enter the room NE and follow the rest of the italics. Press reset, press the second switch and warp. Follow the path around the hole, walk up straight and be ready to fight. Jerin was at level 45. Boss fight: Nazeby As always, drain its defense and cast Mirror. It can cast bolt, spark, frost, flame, mirror, succumb and Vulcan. He shouldn't’t be much of a hassle. After a scene leap down from the tower and warp to Arubus to empty your inventory. PART 5.2.1: TREASURE HUNT Go back to the dragon temple to get another might shield. The next (and last) set of eggs are in: Sheran castle (throne room), East Cave (by left entrance), Old Cave (level 7, take the rope ladder NE of the entrance, walk to the far right, go down a rope ladder, go downstairs in the poison field), purple newt cave (down 2 rope ladders towards SE and SE a little more until you see it), cave to Glasdar key (downstairs, in the second room, flick the switch and enter the first room), cave to Glasdar Tower (enter the room SW next to the poison field, up two consecutive ladders, up the long ladder and follow the path), Glasdar Tower (switch room, press 2 and 3) and Linze (first basement of house on promontory). Go back to the dragon temple and get your last wish granted (get a Might Bow if you want Jerin to be an attacker). PART 5.3: THE END Warp to Arus on you boat, fly NW and enter Doom Island. Fly right, land on the yellow spot and walk towards the “temple”… where the old man is. Heal up (and save), exit by the back and make you way to the top. Final Dungeon: Fortress of Doom (Refer to Maxim’s run of the dungeon for all the treasures). After Dual Blade is restored, you will have the opportunity to heal if necessary. Walk up to start your fighting. Jerin at level 46 should do Boss fight: Gades Have Jerin boost your attacker’s strength. Watch out for undead (increases his attack). Stay healthy and you will get rid of him in no time. Walk up some more for the next fight. Boss fight: Amon When Jerin isn’t casting Mirror she should cast Trick. Amon can cast sunder, dread, flood and chaos (confuses). After disposing of him heal and walk up. Boss fight: Daos Same strategy as against Amon. Daos can cast thunder, glacier, vulcan, amnesia (forget spells?), stronger and dread. After the fight (without a pause), get ready for the final battle. Final Boss: Guard Daos Having Mirror is vital for this fight to avoid figual (confusion; shriek can cure that or attacking yourself). He can cast flood. As always, drain his defense; when it’s low enough have Lufia cast thunder. It’s going to be long – don’t be afraid to use all those miracles – but you can do it. Enjoy the final scene. Afterwards you can do a “new game +” game where you earn 4x as much experience per battle. Hello gamers and welcome to another of my guides. As always my goal is to make you progress through the game as quickly as possible while completing all the sidequests. And there are quite a few of them in the game: the Old Cave, the dragon eggs and getting ALL the treasures – there are quite a few of them, and I even missed a few (they can be hidden ANYWHERE, from flower beds to book shelves). There are also a few instances where “running around in circles” to gain experience will be worth it. So never thrown Foul Water away; they will make you fight every step you take (every move you make… oh, forget it!) and with savestates you can control what the enemies are, making sure the profitable enemies show up. Finally, you will visit the Fortress of Doom 3 times during the game, and the layout is exactly the same. The only difference is when you visit it underwater; there will be no treasure chest to obtain. Final dungeon: Fortress of Doom Walk left to get power potion, go downstairs, enter the middle corridor to mind option, great potion and speed potion. Walk right and upstairs, take spell potion and go back to the main hall to go upstairs. Take the right corridor to power potion, go back to the main hall, follow the path up, take the left corridor to spell potion and go back to go upstairs. Go around the promontory to get miracle *2 (the stairs going down lead to healing panels); come back where you came from and go straight up between statues of the Sinistrals. Circle the room before crossing the glass bridge to get miracle *3. Cross the glass bridge for dialogues. Go on the portal, cross the glass bridge and be ready for your boss fights (note that you will have a “break” between each of them, so heal if necessary). Boss fight: Gades A purely physical Sinistral so no need to cast mirror. Just have Guy and Maxim attack and have Selan and Artea cast their strongest spells (don’t forget dread to lower physical defense), healing as needed. He will quickly become history. After the fight, walk one step for your next fight. Boss fight: Amon He does use magic so cast mirror on everyone, starting with Guy and Maxim (whose magic defense is lower). Use the same strategy as with Gades and he’s also quickly history. Walk one step to face a more dangerous boss. Boss fight: Erim She is almost purely magical, so use physical attacks. Be sure to cast mirror, and watch out when she casts mirror on herself. But considering your overleveling, you should dispose of her quickly. Walk one step to face the final boss Boss fight: Daos Cast mirror and pummel him as hard as you can. After the fight watch a long scene that goes into the present with Maxim’s descendant. PART 1: THE RETURN OF THE SINISTRALS Village: Alekia Once you gain control, walk up straight into the castle. Walk straight to the middle backroom and look at the book shelves to get a swing wing and escape. The left room has an arrow in a chest. Go back towards the entrance, go upstairs and go towards the back. The middle back room has a potion while the one of the left also has a potion. Go back towards the stairs and go up again. Talk with the princess to get 100 gold. Follow the right-hand wall and go downstairs to eventually get sweet water (fewer enemies), antidote and revive. Go back up, talk with the King and go to the left-hand room to get a bracelet and stuffed bear. Exit the castle. Go upstairs in Roman’s inn to get dress. The dresser inside the weapon shop has potion. Now go outside. If you want to minimize your going to the inn (for end-of-game stats), enter the shrine southwest of Alekia to heal. Otherwise, walk straight up north and enter a village. Village: Chatam The house above the item shop has a smoke ball (instant escape except from bosses). Exit the village, walk up straight and enter the cave you see on your left. Dungeon: cave to Sheran Just walk left, go up the rope ladder and follow the path up to exit. After that, enter straight into Sheran. Village: Sheran Be sure to talk to all the people lying on the ground. Enter the castle. The left room has chests with potion*4. Go up one floor; the room on the right has arrow*2, mid arrow and revive while the room on the left has foul water and sweet water. Exit the village and walk/warp back to Alekia. Go back to your captain’s room (first floor, left-had back room). Go to Roman’s inn, talk to him and go upstairs to Lufia. Exit the village for a scene where Lufia joins your party. Go back to the cave. Dungeon: deeper exploration of the cave to Sheran First, take the second entrance, northeast of the regular entrance. Follow the straightforward path to get 200 gold and a potion. Go back to the regular entrance and talk to the person lying on the ground. Enter Sheran again. Go back into the throne room. Enter the left-hand room to lower a switch and the right-hand one to get 100 gold. Exit the room, follow the left-hand wall and enter the room to go downstairs. Always walk so you go downstairs, and you will eventually free the King. The bookshelf in his room has a great potion. Exit the castle and enter an unwinnable fight against Gades (kill yourself to accelerate the process). After the fight and a scene, you will automatically be in Alekia. Walk up straight for a dialogue. Go to the castle (2nd floor) and go to the back room to get Lilah back. Now go to Chatam and walk straight right. PART 2: GUY IS STILL ALIVE!! From Sheran, walk west to cross a bridge. Follow the coastline south to another bridge and follow that path to Treck. Village: Treck The first house on your left has a hairband and a dress. The weapon shop has a power gourd. Walk left until you see a tavern, and then walk south to enter the port. Walk left to enter a place in the ground and walk left to get smoke ball and arrows. Go back outside and walk right, following the shore, to talk to an old man. After a dialogue, exit the village and walk east (along the shore) and cross two bridges. Enter the cave. Dungeon: East Cave Follow the straightforward path, taking the cloth shoes on the first floor. Follow the path through a door; enter it and take the swing wing on your left. Keep walking up to exit the cave. Village: Guy’s House The house is right by the cave. Enter it, go towards the house for a scene. Explore Guy’s tomb to get a short sword. The bookshelf inside the house has a great option. Go back to Treck and enter the port. Walk left and talk to the guy with green hair (Aguro). After a dialogue he will join you to fight. Being around level 7-8 should do. Boss fight: Demon Lord *4 They can cast mirror, so watch out. They can also cast dew, so make sure Aguro stays healthy. Use all the mid arrows you have to dispose of the monsters quickly. PART 3: FINDING ARTEA After the fight exit Treck and follow the shoreline west to enter a cave. Dungeon: cave north of Treck Walk east, up a rope ladder and left across a bridge. Take the potion and go downstairs. Walk south to get potion and power potion. Go back up, all the way under the bridge to go downstairs. Walk south around the marshes and enter the room to get a daze ring. Keep walking left to go upstairs, and eventually outside. Walk south towards the ship and enter your next fight. Being around level 9 should do. Boss fight: Goblin *3 Again, mid arrows will be very useful. After the fight you will sail back to Treck. Once in control go back to the tavern (2nd floor) and talk to the sailor. Once back in the port, talk to him to sail to Lobernia. Village: Lobernia Once in control go to the dress shop (left of the closed item shop). There is a mind potion behind the weapon sign on the left. There is sweet water on the second floor, right of the stairs leading to the third floor. Once on the third floor talk to the woman between the two rooms for a scene. The weapon shop has a mid arrow. Go to the inn (20 gold) and rest. As you exit Aguro will come to you. After the short dialogue exit the city. Walk southwest (below the mountain range), and keep walking west until you reach Grenoble. Village: Grenoble The weapon shop is hiding potion. Walk up to the second building on your left. Talk to the blond guy blocking the way (give him 50 gold). The bookshelf by the stairs has a speed potion. Go downstairs, follow the corridor and walk east down the stairs in the middle of the flowers. Talk to the old man to get your mission; you can also talk to the man behind the counter to get your first mission inside the Old Cave (everyone must at least be level 5). Exit Grenoble and go to the Old Cave (right outside, across a bridge). Dungeon: Old Cave, level 2 Enter the cave towards the elevator and Have Lufia enter the door alone. The treasures contain dress, hair band, heeled shoes, fairy kiss and earring. Go back outside and exit the cave back to Grenoble. Go talk to the old man; also get the money back from the secret map (note that you always have to pay 50 gold to get there). If someone has reached level 10, you can get the 3rd-level mission. If so, go back to the Old Cave after talking with the man behind the counter. Dungeon: Old Cave, level 3 Walk down to get hi potion, bomb, nothing and sour cider. The chest in the marsh contains magic guard. Enter the next room, and the chests contain nothing and escape. Enter the room to get nothing and revive. Keep walking east to get nothing (twice). In the room you will get nothing, smoke ball (above the marsh), miracle inside the marsh (right there) When ready walk to your next dungeon; go west of Grenoble. Cross a bridge, follow the shoreline and walk straight up when a path open on your right. Keep walking straight up to your next dungeon. Dungeon: tower northwest of Grenoble (Note that you can’t escape from towers. However there are usually “holes in the walls” that get you outside). Walk right and enter the room; walk right and enter another room to get hi potion and hi magic. Go back to the entrance, go left and go inside the first room you seem on your right. Follow the path to a room with a sonic ring. Go back to the main corridor and walk straight up to go upstairs. Enter the first room you see, follow the path and walk down. Walk right when you can and down to get smoke ball. Walk back left in order to go upstairs. Walk down the first entrance to get a power gourd and mind gourd. The second room has a hi potion. Keep walking right to enter a room with revive. Go all the way back where you first went upstairs from the main corridor; enter the second room this time. Follow the path and walk straight down to the wall. The first room has mind potion while the second one has a great potion. Go back to the room you missed and go upstairs. Circle that room around (omitting the stairs) and enter the room to eventually get spell potion and power potion. Take the stairs you missed, walk up straight and enter the room. Talk to the man, say yes and be ready to fight alone. Being around level 11 should do. Boss battle: Apprentice Make sure you have a few hi potions at hand – he will cast fake to be quicker and can even attack twice per round. Use a power gourd to increase your attack – hi arrows should deal about the same amount of damage as your increased attack. His Jolt is very strong; he may even use potions. Just keep hitting him until he goes down. After the fight, go behind the room where you were to the right to get mid arrow *2. Leap outside the tower 3.1 HOPE RUBY Once outside follow the shoreline west (you will walk left of the mountain range you first encountered when going towards the tower). Cross two bridges; after the second one walk straight up to get to the “restoring” temple if need be. Walk straight down across another bridge and walks southeast to enter a village. Village: Kirof Enter the inn to get (behind the counter) mid arrow, hi arrows and bomb. The house with the old lady (above the inn) has plum cider. The second entrance of the item shop has hi potion and sweet water. Enter the back room for a dialogue. The bookshelves had stuffed dog and stuffed pig. Exit the village and walk straight east to go to Medan. Village: Medan The house right of the item shop has escape and swing wing. Enter the castle. Walk straight as much as you can to enter the ruby room. Make a wish if you want, exit the room and walk right to go downstairs. Follow the path for a dialogue and go back up. Exit the castle and Medan. Go back to Kirof. After a dialogue exit town and walk up straight to a dungeon. Dungeon: Ghost Cave Walk southeast to get a hi potion. Walk northeast to a room to get escape. Follow the upper wall right to go downstairs. Follow the path to go downstairs some more and walk left to get a speed potion. Walk down to go upstairs a few times, and walk up straight to go downstairs. Follow the path to get a dragon egg. Go back to where you were, getting the hi magic from the chest. Take the next set of stairs down and follow that path. You will have restoring circles (coat hanger = magic, diamond = hp). The chest has a revive. Take the stair up, go up the rope ladder and immediately down a narrow corridor. Enter the room for a revive and go downstairs. Walk straight south to a hi potion. Walk straight right to a hi potion and northeast to another hi potion. Go down the rope ladder below the second hi potion, walk right to go upstairs, exit the room and walk right to get 500 gold. Walk up to a room with miracle. Go back to the room where you first came and walk left to a room with ghost ring (higher attack against undead). Walk left to another room with monster ring (higher encounter rate). Go back to the first room to go downstairs, and this time keep walking right. In the next room, go right to go downstairs to a room with spell potion and power potion. The room to the right has a great potion and the one on the left has a mind potion. Go back upstairs and take the left-hand stairs down. Walk down, take the stairs to your right and get the smoke ball. Go southwest to get escape and go back upstairs. Take the middle corridor downstairs and walk straight up (yes, you will float). Take the revive, walk straight up and go up the ladder (talk to the girl) for a fight. Being around level 12 should do. Boss battle: Phantasm The ghost ring will increase the damage you deal. Be sure to cast drain to decrease its defense. It might cast shield to increase its magic defense and spells like spark. Just hit it to take it down. After the dialogue talk to the shop owner to get a power potion. Go back to Medan, talk to the princess and exit. Walk east to a cave. 3.2: RESCUING JERIN Dungeon: Cave to Bergen Follow the path to a toxic marsh; cast float to avoid damage and walk to chests containing revive and hi potion. Go back, walk up and follow the path outside. Just walk straight south to enter Bergen. Village: Bergen Walk up straight up some stairs to a large house. Get the revive and hi magic from the shelves. Go downstairs and immediately right to a hole in the ground. Take the float and hi potion, keep walking right and talk to the young woman at the back. The shelves contain mind gourd and power gourd. Exit the village, walk southwest, cross a bridge and enter a cave. Dungeon: Cave of Dais key Go downstairs, down the corridor and enter the room to your left to get hi potion. Take the first staircase down, and follow the path to get smoke ball and float. Go back up and keep walking right to go downstairs. Go up to get escape, follow the path left, get power potion and spell potion and explore the toxic marsh for a miracle. Go back to the entrance; walk left from the stairs to enter e room. Follow the straightforward path to here Dungeon: Dais Cave Walk straight to the left to enter a room with great potion, mind potion and speed potion. Go back to the closed door; open it. Follow the path, go down one rope ladder and enter the room on that floor. Get the float and exit the room on the same level. Follow the path to get hi magic and revive. Go back to the main route, go down the rope ladder and right of the water pond to get power gourd and mind gourd. Cross the bridge, walk left and up to go under a bridge to get spell potion and power potion. Go back up to cross the bridge you just walked under and follow the path on your left to exit the cave. Walk straight to the left, cross a bridge and enter a small temple. Walk to the right towards a pot for a dialogue. Right = magic, left = hp. Exit the temple for a scene, and exit again to walk north to the North Tower. Dungeon: North Tower Step of the warp pad and walk up straight to go upstairs. Go upstairs some more, take one step left and walk up to get revive. Walk up straight to the wall to get awaken, left and down to get antidote, left of the treasure chest and to the right of the next chest containing hi potion, straight down for a shriek, down and right one step (each) for mystery pin and straight down from the shriek chest for a stone cure. Go back down two floors and enter the first room to your right; step on the warping pad. Go upstairs, do down and enter the first room for a flash ring (stronger lightning spells). Keep walking right and up to go upstairs. After a few floors you will get in a room with many warping pads. From the stairs go northwest past four columns taking a pad between 2 more columns. Take the miracle and warp back. Walk left of the pedestal when Jerin is and take the warp. Walk up (*2) and take the miracle. Go back and take the warp between two columns of the right-hand side. Go up twice and get ready to fight. Being around level 15 should do. Boss fight: Follower As always be sure to cast drain. It can cast frost, drowsy, drain, bolt and stronger. It can also confuse with grin. Just hit it hard and it will go down – it seems to be weak towards lightning. 3.3 GETTING TO ELFRA Exit Belgen and walk east, crossing to bridges and a huge desert. Keep walking east into the next village. Village: Surinagal The weapon shop has a hi potion. The house to the right of it has hi magic and miracle. When you’re done walk south, follow the coastline west and cross a bridge. Follow the path without trees to get to a house. Village: Forest Station The shelves contain revive, sweet water and swing wing. Talk to the old man for a scene. Exit the station and walk south, going between the mountains. Just follow Jerin’s instructions and you will be out in no time. If you don’t you will enter infinity loops. Enter the warping temple to your right. Once back outside walk up to the next village. Village: Jenoba The item shop has a hi potion. The house above the church (with a “soldier) has bomb and hi arrows. Go on the house on the promontory (up some stairs) and go downstairs to talk to the old lady by the bar. By her some cider and she will talk to you. Exit the village and go southeast to your next dungeon. Dungeon: Blue Tower As you enter go to the left and enter the room to get blue ring. Go back outside the room, walk up and go upstairs. Go south towards the edge of the screen to get sweet water. Leap outside and go to the right this time to get magic guard. Go upstairs (*2) and walk left to get high potion. Go back down one floor and walk down, following the path to go upstairs. Take the left-hand stairs, follow the path and pass the stairs to get hi magic. Go upstairs, look at the pedestal, go back down and take the right-hand stairs this time. Follow the path, go down the hole, take the revive, jump down, take the green jade, jump down and go outside. If you have someone at level 15, it’s time to explore the Old Cave again! Dungeon: Old Cave, level 4 Get the smoke ball, hi potion and nothing. Go southeast to get nothing, hi magic, escape, long nail and float. Float to get crown and broad rod (cursed). Walk back west, hugging the lower wall to get 520 gold; keep walking to get nothing. Enter the room south to get nothing, brone helm, long sword, light robe, nothing, flame ring, buckler, wind heels and light armor. Walk out the room, walking straight up to get magic guard, nothing (*2). Enter the room to get nothing (*3), miracle and go outside to get your money from the crown. Warp back to Jenoba and walk straight south, across a bridge. Follow the coastline to your right to get to your next dungeon. Dungeon: Green Tower Enter the left room to get green ring. The right room has an inn (150 gold). Enter the center room, walk and take the left staircase. Take the magic guard and lower the switch. Go back down and take the right staircase. Take the first staircase up you see and take the broken red sapphire, ex potion and revive. Leap down and take the next staircase going up. Get revive, hi magic and ex potion. Leap back down, take the swing wing and go back to the switch and turn it up. Go back up and take either staircase. Go down to go upstairs for a couple of floors to look at the pedestal. Leap outside. Follow the coastline east, crossing a bridge and always following the coastline. You will get to the next village. Village: Ruan The inn has a hi potion, the house above it with the old lady has a small knife, the church has sweet water and revive, an empty bottle here (right of the church) Dungeon: Red Tower Take the second door from the left and go downstairs. Float around to get spell potion and power potion. Go back up and take the first room from the left. Follow the path to get hi potion and red ring. Go back down, go up and enter the first room you see to get float. Exit the room, walk straight left pass the stairs and enter a room with power gourd and magic guard. Go back to the stairs, and down and turn right, follow the path to get hi magic and hi potion. Walk back up to take the stairs and walk up to get smoke ball. Walk down to get magic guard and go back downstairs. Walk left, down and enter the room. Follow the path, go upstairs to get hi potion, go back down and follow the path without leaping down. You will eventually reach the summit for your next fight. Being around level 17 should do. Boss fight: Dark Ghost As always, be sure to drain its defense. It can cast water, ectoplasm (absorbs magic). Hit it hard and it will go down. After the fight look at the pedestal, leap down and go back under the tower to get blue jade, dragon egg and miracle. Exit the tower. Warp back to Medan. Walk straight north and enter the cave. Dungeon: Ruby Cave Follow the path, go down the rope ladder to get foul water, go down one level to get sweet water and enter the next room to your right (be sure to get bomb before). Talk to the old man and go to the room behind him to get 500 gold, diamond ring, opal and emerald. Exit the cave. You now have to place the gems on their pedestals. You need to go to the blue, green and red towers in that order. After placing the red gem, you will be warped next to Elfra. Enter it. Village: Elfra Go to the back of the village, enter the house and get mind potion and speed potion. Go upstairs to chat with Artea. After that, go downstairs and follow the path to a shrine. Exit it. There is another healing shrine if you walk straight west. PART 4: DIGGING THE FORTRESS OF DOOM PART 4.1: FINDING RAILE SHAIA Go back to where you came from, follow the shoreline east, going south between mountains when you can Village: Ranqs Power up as needed and exit the village. Walk north across the bridge, walk east and follow the path to a cave. Dungeon: Cave You can get an escape. Exit the cave, go back to Ranqs and cross the desert south to get to another cave. Dungeon: Cave to Odel Once the hero is one step towards the 4 rocks, walk this way: 2 right, up, 2 right, up as far as you can, 3 left, 1 down, 2 left, 1 down, 2 left, up as far as you can and then hug the wall up to exit. Walk southwest to the next village. Village: Odel Walk up straight and turn left before entering the castle. Get ex potion from the chest and go downstairs to get miracle and ex magic. Talk with the old man and enter the castle. Go to the back room to get hi magic*2, power potion and spell potion. GO back to the entrance and go upstairs directly in the throne room. Talk to Piron (next to the Princess) and exit the castle. The flower beds east of the castle have (in the middle of the flower beds) speed potion, mind potion and great potion. Exit the village. Walk south until you reach the water (watch for toxic marsh) and go east to cross a bridge. Then just move southeast, always staying on that “island”, to reach the next village. Village: Linze The inn has a swing wing. Keep walking down on the right side of town and go up some stairs into a large house. You will find grilled newt, stone cure; go downstairs to get small knife, chop block, miracle and fry pan. Go back outside, on the left side of the village. Go to the house above the church and talk to the man at the table. Go back to Odel. Talk to Piron and exit. Walk straight west, cross a bridge and enter the second opening you see. Dungeon: Cave to Arus, part 2 This cave, especially around part 3, is perfect for “running in circles.” If you manipulate enough you will get Mimickers. They are scary cats, but if you manage to defeat them they fetch 3000 XP each. Rise up to level 25. Follow the right-hand wall up, turning left when you see a rope ladder. Go down when you can to get glass robe (it’s a rod, really), go back to the rope ladder and follow that path to get half mail. Come back up and go down at the first intersection you met (instead of up, hugging the wall). Go down the rope ladder, go northwest up another ladder and walk left, following the path to a stone cure. Go back next to the first rope ladder you went down from; walk south. Follow the path to get to a glass cap. Keep following the path to get wind shoes and iron helm. Exit the cave and go south to the first entrance. Dungeon: Cave to Arus, part 1 Get the yellow ring and stone cure (the warp will bring you back to Shaia Lab in Odel Castle’s basement). Exit, go east across the bridge leading to Odel, south following the coastline, across a bridge and back into the cave. Dungeon: Cave to Arus, part 3 Go down two sets of rope ladder, go right and follow the path to dragon egg and ex potion. Now go left and walk on the ruined bridge, making sure people talk. Exit, go back to Odel and talk to Piron. Exit the village and go back to part 3. Talk with Piron and walk back to part 2. Go towards the chests and walk until Piron talks. Now walk again to part 3 and cross the bridge. Once across walk right, go between two walls and follow the path to escape and hi arrow. Go back to the two walls and follow the right-hand one down. Follow the path to go downstairs, follow that path and cross a toxic marsh to get miracle. Go towards the door, go through it and follow the path to go back upstairs. Go up the rope ladder, take the revive and go up the rope ladder to get another revive. Go up the rope ladder and exit the cave. Just walk up to enter the next village. But meanwhile, you can get to the next level in the Old Cave if someone is at level 20. Dungeon: Old Cave, Level 5 Walk down left of a toxic marsh to get smoke ball and nothing. Enter the room to get luck blade (cursed), opal, nothing, ex potion and nothing. Exit the room and cross the toxic marsh. Get the kite shield and go to the room below you. You will get float, 500 gold and nothing (*2). Cross the toxic marsh to nothing and power potion. Enter the next room for battle axe and nothing (*2). Enter the room to get hi bomb. Cross the toxic marsh to get miracle, golden paw, frost ring and nothing (*2). Exit the room and go to the next one up to get nothing, hi potion and hi bomb. Go down in the middle room to get nothing, spell potion and revive. Exit the cave and get your reward. Village: Arus The house on the left (with the old couple) has hi magic. Go up the stairs for a scene. Go talk to the old man inside the house and exit the village. Walk west and enter a dungeon. Dungeon: Cave to Tower of Grief Just walk west and avoid the poison marsh. It’s that simple. Exit the cave and go to the tower. Dungeon: Tower of Grief As you enter, walk up straight, go upstairs and get revive, dragon egg and stone cure. Go back to the entrance and walk right to get purple ring. Now walk left to go upstairs, follow the path upstairs and take the first stairs up you see. Get revive and stone cure, go back down and take the stairs southwest of those you just took. Get ex potion and hi magic, go back down and take the stairs straight up. Follow the path, use the healing panels if needed and go upstairs. Get the miracle and talk with the old man. Leap outside and return to Odel. Enter the Castle, and as soon as you are inside turn left, following the path to enter Shaia Lab. Once inside, simply follow the path to go downstairs; you can’t get lost. Once the path divides up here Village: Carbis (Shaia Lab 3) Go straight into the basement to talk with Shaia (the woman will let you If you have enough energy, you can explore the tower north of Bakku to get a special treasure you wouldn't’t get at any other time. Dungeon: Tower of Light Enter the left room, go upstairs and hug the wall to fall down. Get the undead ring and go northeast to fall down some more. In this room, get stone cure, power potion, spell potion, hi bomb and ex potion (*2). Walk upstairs, right, down and enter the room. Hug the wall to fall into a trap, get the sea ring and go to the back to fall some more. Go back upstairs, walk up and left and go upstairs. Go straight down, enter the room, take the stone cure and go upstairs. Go straight down to get revive. Go right and up to enter a room and go towards the chest of the left (there is a trap below the one on the right) to get ex magic and ex potion. Exit the room, go back towards the stairs and enter the room above to get revive. Exit the room, go right to go upstairs and follow the path until you can go upstairs (there is a room right above it). Go upstairs, go right and follow the path to ex potion. Leap down, move up and upstairs, go south past some stairs and enter a room to go upstairs. Move two steps right, down and get the power gourd. Fall into a trap above the chest, fall into another trap and get large shield, great axe, plate cap and silver robe. Leap down, go back up and take the stairs. Walk one step up and get gloom voice. Go up to go upstairs and get your special treasure: might helm, the best one for anyone. Go back downstairs, leap down the hole, walk down and go upstairs. Walk right, enter the room and follow the path. When you see a chest, walk down from the stairs to get miracle. Go above the chest to fall in a trap, leap down, walk down, walk right into the room and follow the path until there’s a room above you. Enter it, walk right into a trap and go downstairs. Simply walk down and exit the tower. NOW go into Bakku Village: Bakku Talk with the sailor you first see. Enter the house above him to get ex potion, ex magic and revive. Talk to the old man and go back outside. The priest’s hut is in the port. Talk with the priest and warp to Grenoble to go to the Old Cave, 5th level. So even if you didn’t reach it, the man assigning the missions will let you go. Walk across the toxic marsh, enter the room, walk to the far right, enter that room and cross the poison field to get Cooper. Warp outside and get back to Carbis. Go talk to Shaia for a dialogue. PART 4.2: THE QUEST FOR ALUMINA Before going on with your mission, surely someone is at least at level 25. Go back to the Old Cave. Dungeon: Old Cave, level 6 Open the chest for nothing, hi bomb (*2), nothing and hi bomb. Enter the room to get nothing, gladius, plate cloth, plate mail, power potion, speed potion and spell potion. Go back, get nothing and enter the next room. Get escape, go down the ladder and get ex magic and ex potion in the poison field. Don’t forget the miracle here Dungeon: Tower of Light redux Since you already have all the treasures, follow this path: follow the right-hand wall up, go upstairs, follow the right-hand wall down, enter the room to go upstairs, go northeast upstairs, go down, follow the path and enter the room above the stairs, follow the path upstairs for a couple of floors (on the red carpet, go up) and get ready for a fight on the top floor. Being at level 26 should do. Boss fight: Guardian Drain his defense as always. He can cast dread, blizzard, absorb and flame. He’s fairly easy if you can withstand his magic. After the fight get the light key from the chest. Leap down, go back inside and go to the back to use the light key. Just follow the path to get to the next village. Village: Linze The weapon shop (upstairs) has escape. Enter the house to the far right of the shop, go downstairs and down the red corridor to get swing wing, dragon egg and sweet water. Go back to the main corridor and you will eventually be outside. Just walk east to enter a cave. Dungeon: Gayas Cave Go up to the chests to get escape and stone cure. Hug the left-hand wall down to get ex bomb and ex potion. Hug the wall back up, go around a hole with a chest in it and walk down to get ex bomb and revive. Walk to steps up, go right and walk up to get hi magic and ex potion. Go down the rope ladder, go up the next one and follow the path to get escape and magic guard. Go back down, go to the right of the “promontory” and take the first door. Get ex potion and ex magic; go back down and enter the second room to lower a switch. Enter the first room to get ex potion; warp back to exit this room. Go downstairs and walk left to get ex arrows. Walk back right, up between poison marsh and get revive. Walk back down, hugging the wall to the right. Before going into that room walk up to get opal. Now enter the room to get ex potion and warp to eventually get silver sword. Warp back and walk up straight to the next room. Follow the path and when you can, walk down to go downstairs. Follow that path, going down two ladders. Walk right to get power gourd, walk southeast to get mind gourd and walk back down the next rope ladders. Just walk east, getting the revive before the bridge and restoring your hp southeast of the bridge afterwards. Walk to the back and talk to the man there; ask him about Brant. Escape the cave to go back to the entrance. Go immediately downstairs, walk left to an ex bomb, walk right to a dragon egg, southwest to a hi magic and go down the rope ladder close to the stairs. You will get your first piece of alumina. Exit the cave and warp back to Bakku. Enter your boat and navigate east following the coastline. Go north of the healing shrine, going between two mountains, and follow the coastline west, not taking the small river you see for now and enter the next village. Village: Marse Go downstairs and go towards the “weapon” shop to talk to the woman in the church. Power up as needed and exit the city. Jump in your boat, follow the coastline west and enter the small river you will see. Follow it and you will eventually see a castle. Village: Herat The first house (NE of the man calling you strangers) has rod and apron. The inn (south) has plum cider and hi potion. Enter the castle, go directly upstairs and enter the NW back room to get ex bomb. Go upstairs again and enter the first room to get power potion. Exit the city, navigate north of the mountains and land on the west shore right after the mountains. Walk west, following the mountains. Walk around the lake you see, walk south to cross a bridge, walk NE to cross another bridge and go around the mountain to the right to go into a cave. Dungeon: Purple Newt Cave Take the revive right when you enter. Go down the rope ladder and walk right to get gloom arrow. Go down the rope ladder, walk right and go up when you can to get engage ring (cheaper merchandise when worn). Go back down and enter the next room to your right to lower the switch. Go back to the entrance, staying on the same level as the first chest. Walk down to a bridge, cross it and get chain mail. Cross back the bridge, take the first corridor on your right, go down two rope ladders and get swing wing, ex potion and hi bomb. Go back up one ladder, go south to go down another one and walk to the far left to get stone cure. Enter the first room to get revive. Go in the poison marsh Go back in the very bottom of the house on the promontory and talk to the man in red. Exit town and warp back to Herat. Enter the castle kitchen (second floor, back-right) and talk with the cook. After go in the throne room (up two floors) and talk with the king. After that go back to the entrance and walk right; follow the path to go into the treasure room. You will get gloom voice, ex potion, plum cider, royal statue, fry pan, pot, miracle (*2), alumina, mach heels, carbo helm, tower shield, silver robe and carbo sword. Exit town, warp back to Marse and jump in your boat. Navigate straight up, go right of the island with a cave (Elba) and go south of the tiny island you see (there is a boat next to it) to start your quest for alumina. Dungeon: Loire Island This is the perfect place to “run in circles.” There are many red cores in here, and if you manage to defeat them they are worth over 13,000 XP each. Anyway, as you enter walk right until you get miracle. Keep walking right to go down a rope ladder to get hi magic. Go NW up a rope ladder to get mach ring; go back down, take revive and walk right to a rope ladder. Take gloom arrow on the right and walk left to get power potion from behind the rope ladder. Go up that ladder and walk right; go down a ladder to get hi bomb. Enter the room to the NE to get alumina. Escape outside and enter right back. Walk up, go down the ladder and walk right to get mind potion here Escape again and walk to the right. Go down the long rope ladder you see and follow the left-hand wall under the bridge and downstairs. Walk down into a room for ex potion. Walk NE around the “grid” for revive. Enter the next room you see, follow the path and hug the wall to the right to get hi bomb. Walk up into a trap, get ex magic here Village: Forfeit Island The item shop had hi magic and hi potion. If you walk around the building, go downstairs and down (on a green carpet), you will get mind ring. THE forfeit shop is left of the stairs on the second floor. If you need something you sold, that’s where you get it. Enter the tavern to get gown and ribbon; you will also need to buy something in order to get out. When you’re done, warp back to Marse and navigate to Elba Island. Dungeon: Elba and Ulupp Islands As you heard, both islands and linked by warp zones so I put them together. Walk right to enter a room with mind potion. Take the warp, go down the ladder and walk NE to get hipower ring. Keep walking left, follow the path and go under a bridge to ex potion and speed potion. Walk SE to lower a switch, keep walking right to dragon egg and walk back to the warp. Walk down the ladder, get the smoke ball and walk down the other ladder to get hi daze ring. Enter the room to the right, lower the switch on the right, cross the bridge on your left and walk down to get ex potion. Keep walking left to exit the room. Enter the next room to your right and follow the path to get spell potion. Exit the room and enter the one on the far left. Go down the ladder, walk up for miracle and ex magic, go under the bridge to get hi bomb and enter the room on the far right to warp to alumina. Exit this section and go down the ladder to get mind potion. Walk right (the room has an inn, 100 gold) to get silver rod; keep walking right to enter a room with silver armor and ex potion. Exit the room, go up the long ladder, get the spell potion and walk up to warp. Walk right to a silver wrist. Keep walking right to alumina and walk down the bridge to get miracle and silver plate. Warp back, lower the switch this time and warp again. Walk right to ex potion, SW into a room with alumina and (finally!) outside. Warp to Carbis, enter the building and warp back to Marse. Navigate north to Elba, and then west until you see an island with a boat. Enter the tower Dungeon: Ainsen Tower Get the sour cider when you enter. Enter the room on your left, get 750 gold, enter the next room, get hi potion and enter the next room to go upstairs. Follow the right-hand wall, going down as far as you can to get ex potion. Go back up, enter the left room and get big arrow. Come back, enter the middle room and go upstairs. Go up to swing wing, left to smoke ball and around the room to the left to go upstairs. Walk left and you will see switches 5 1 2 3 4 The correct order is 1-4-3-2-5 (any other order will make enemies appear). Enter through the door and follow the path to your next fight. I overleveled at Loire, so Level 37 for Jerin should do. Boss battle: Bosun and Pirates Focus your energy on Bosun first since he can cure Pirates and increase his defense. Pirates can cast foul (put to After the fight get silver tarot and pirate key. Go back down to the 2nd floor, go to the stairs leading to the 1st floor and walk left. Get power gourd and keep walking left until you reach Raile’s cell. Open the one of the right for heavy ring and the next rooms for speed potion and hi bomb. Get a revive at the bottom of the room and walk right to a trap. Get ex potion, walk right into a trap and you will be back on the first floor. Go back to Raile’s cell, open it and you will warp outside. Warp to Carbis and go to the basement to have your boat fitted. When back in control navigate north to an island surrounded by “eddies”. Go northeast to go in the next village. Village: Soshette Enter the hole in the ground left of the stairs leading to the church to get miracle, straw doll and gloom arrow. With that doll, you can go back to Forfeit, to the underground passage on the opposite side of the entrance. Walk up (instead on towards the green floor) and talk with the man behind the counter. He will make you a Voice of gloom (not sure if it counts as a treasure), which casts death to enemies. Warp back to Soshette, get in your boat and navigate west to enter the first eddy you see. Dungeon: Underwater caves I will put them all together. Note that currents are so strong that once on it, you can’t control your submarine until you reach the end of it. Go east and enter the first cave you see. Go straight east, take the empty bottle and take the eddy. Go straight south, left of a current going down; keep going down to get magic guard. Take the current directly under the chest, then navigate NE to get opal. Take the current to your left to get miracle. Navigate down to the wall and take the current to your right. Navigate W, take the current against the wall and come a short way back to get hi potion. Take the eddy and navigate SW into another cave. Follow the path, take potion and keep hugging the right-hand wall down. Do it and take the current you see between two walls. Take the ex potion and spell potion and take the current below. Once back in control hug the upper wall up to arrows. Keep hugging the lower wall east and get power potion. Go back to the previous chest and navigate straight W (take the current going W if you want) to get hi potion. Navigate back to the start of the current (going west) and take it when it goes north; you will get to mystery pin. Hug the upper wall to go back near the Fortress of Doom. Navigate east to explore the last cave. Avoid the current and follow the upper wall north to get 800 gold. Navigate straight east, take the current and come back to its source to get hi magic. Take that current back, hug the wall to your left down and follow it. When it ends take the first current above you and go slightly NE at its end to get gloom arrow and foul water. Navigate SE to the wall and hug it to the left to get zircon wrist. Navigate back, still hugging the wall, and go down a small passage you see to enter an eddy. Hug the wall in that room below the currents, enter the small room to get hi potion and miracle. If you keep going up you will go outside the vicinity of the Fortress. So go back to the eddy, hug the lower wall to the left, take the current going west, take the eddy and go to the Fortress. Dungeon: Sunken Fortress Since there are no treasure chests, just take the straight route: walk straight upstairs, walk up straight to another room, walk through the room, walk straight down up more stairs and walk straight some more for a long scene. When it’s done go upstairs and exit Soshette to warp back to Carbis. PART 5: RESTORING PEACE PART 5.1: THE FLYING FALCON Talk with Shaia and exit town. Navigate due south of town and you will eventually reach the next town. Village: Frederia (Shaia Lab 4) The flower bed has grilled newt in the middle to your left. The one on the right has miracle. Go in the lab (upper-right corner of the village) to get revive and stone cure from the lockers. After powering up exit the village. Navigate due west, following the path of the rocks. Once you see an opening between two mountains navigate south around a peninsula. Keep navigating west and you will eventually reach the next village. Village: Epro The first house to the right has ex bomb. There is power potion in the flower bed above the regular item shop (on the promontory, NW of town). The old man’s house right next to it has ex magic. Now go to the “other” item shop (NE of the entrance) and talk with the owner. Exit town. Navigate west of Epro, following the coastline. When you see a bridge, land and walk east to a man standing there. Talk to him, warp back to Epro and navigate east along the coastline. Go between the mountains and up when you can to enter the eddy. Dungeon: Submarine cave to Oil Cave Navigate east to enter the cave “proper” (there is nothing to explore). Go all the way up when you first can to get big arrow and power potion. Come back and go up the second corridor. Follow the path to mystery pin, keep going up and enter the room above for miracle. Take the current, follow the path for hi magic and take the current. Enter the next room for ex bomb and ex potion and go back east. Go up the second corridor, stay above the current and go under the next current you see. Follow it and get magic guard; now take it to get power gourd. Go back up the current, go up the corridor and follow it to get grand blade and the eddy out. Just navigate west to get back outside. Land west and follow the upper mountain range up until a poison marsh. Cross it and go down to the cave. Dungeon: Oil Cave Walk east to open the door and follow the path; get 850 gold and dragon arrow. Go down the rope ladder and cross the marsh to hi bomb, and go down the next one to get dragon tooth. Go down the next ladder and go NE to get big arrow before going up a long ladder. Get miracle and go back down to a poison marsh. Get the hi magic here Boss fight: Oil Dragon As always, drain its defense. It will cast oily air to slow you down and fire air (can be reflected by Mirror). Just hit it hard to finish it, and get the power oil behind it when you’re done. Exit the cave and warp back to Frederia. Go talk to Shaia, and once you’re done you will be able to fly! Why not take advantage of it to finish you quest in the Old Cave? Surely someone is at level 30! Dungeon: Old Cave, level 7 You will face the same enemies Maxim did in the Fortress. Anyway, get nothing, sweet water and gloom pick and nothing in the marsh. Cross the marsh to get ex potion and nothing and enter the room just above. Cross the marsh, get gloom voice in the NE corner of it and go downstairs. Follow the path down (always down) to get nothing; go back up for hi magic. Keep walking up and go right for power potion, ex magic and nothing. Keep walking left for spell potion and nothing; go upstairs. Take buster sword and nothing and enter the room. Get nothing, climb the rope and take crown jewels and miracle *2. Go back here PART 5.1.1: TREASURE HUNTING 1 Now take the advantage of your flight capacity to hunt for some dragon eggs. Warp to Herat and fly SW. Enter the small temple you see and talk with the dragon. I recommend getting a Might shield. Now hunt for the next 8 eggs. They are in: Alekia Castle (treasure room, accessible from the NE corner of the top floor), Belgen (in the cave next to the church), Cave of Dais Key (go downstairs twice), the cave NW of Linze (across a marsh), Elba Island (at the bottom of the rope ladders), southern underwater cave near Soshette (here PART 5.2: LUFIA OUT, ERIM IN From Epro, fly north until you reach Glasdar Tower (you will start moving uncontrollably). From there fly east to reach the last village. Village: Aurubus The inn has spell potion. Make sure you buy all the zirco gear you can afford (even a sword for the hero). Enter the hole in the ground above the weapon shop to get pear cider and plum cider. When you’re done fly north, avoiding going too near Glasdar Tower and enter the cave north (surrounded by sand). Dungeon: Cave to Glasdar Key Follow the path, take hi potion, cross the next bridge and skip the stairs going down. Take the ladder, walk left to hi bomb, SE from there to gloom arrow and down a ladder to smoke ball. Walk SW to magic guard and back up to the rope ladder. Walk NW up a ladder and NW some more for great potion. Go to the stairs you missed and take them. Take the very first room you see, follow the path, take mind potion and go back to enter the 2nd room. Follow the path, go left after the 2nd ladder and take miracle. Keep going down to another miracle and come back east to go down another ladder. Enter the room to lower the switch, exit it and walk west to get miracle and come back to the first room. Go to the warp, take spell potion, go downstairs and take the Glasdar Key, power potion and gloom guard. Warp outside and fly south (remaining between the mountains where you are) to get to your next cave. Dungeon: Cave to Glasdar Tower Follow the path, take the ex bomb right of a small lake and the black ring in the room on the left. Come back out, take the ex arrows above the poison field, which contains spell potion here Dungeon: Glasdar Tower (Note that you have until the top of the tower to level up Lufia. After that you will only have her for the very last battle). The left room when you enter has hi potion and the right one has ex bomb. Go back down the red carpet, go upstairs and enter the first room you see for big arrow. Go back out, go to the room straight above you and walk left (it’s an infinite corridor). Follow the path right to ex arrows, come back and walk down the path on your left to go upstairs. The room on your right has power gourd and mind gourd, the one on your left has revive and the one above goes into another infinite corridor (walk left). Go SE for revive, go SW from there into a room to go upstairs, follow the path to ex bomb and go into the room down for gloom arrow. Go into the next room down, follow the path to gloom ring and miracle and come back to the room you missed (where you got out of the second infinity corridor). Follow the path, go SW to antidote and follow the path down to go upstairs. Enter the room to the NW, follow the path, enter the room in the SE and warp to a MP restoring pad on your right. Warp back, enter the left room and walk up. Go directly beyond the “buttons” to warp to miracle. Leap down, always walk up, walk left in the infinity corridor, follow the path SW, walk up, left in the infinity corridor, enter the room due south, follow the path, enter the room NE, follow the path, walk SW, NW, follow the path, enter the room due south and walk straight up. Press the switch on the far right to warp to stun arrow. Follow the previous text in italics, press the reset switch and press switch 2 and 3. Warp to miracle, go straight up, follow the path and loot the room: spell potion, mind potion, miracle*4, revive, speed potion, great potion and power potion. Leap in the hole you encountered, walk up, enter the room NE and follow the rest of the italics. Press reset, press the second switch and warp. Follow the path around the hole, walk up straight and be ready to fight. Jerin was at level 45. Boss fight: Nazeby As always, drain its defense and cast Mirror. It can cast bolt, spark, frost, flame, mirror, succumb and Vulcan. He shouldn't’t be much of a hassle. After a scene leap down from the tower and warp to Arubus to empty your inventory. PART 5.2.1: TREASURE HUNT Go back to the dragon temple to get another might shield. The next (and last) set of eggs are in: Sheran castle (throne room), East Cave (by left entrance), Old Cave (level 7, take the rope ladder NE of the entrance, walk to the far right, go down a rope ladder, go downstairs in the poison field), purple newt cave (down 2 rope ladders towards SE and SE a little more until you see it), cave to Glasdar key (downstairs, in the second room, flick the switch and enter the first room), cave to Glasdar Tower (enter the room SW next to the poison field, up two consecutive ladders, up the long ladder and follow the path), Glasdar Tower (switch room, press 2 and 3) and Linze (first basement of house on promontory). Go back to the dragon temple and get your last wish granted (get a Might Bow if you want Jerin to be an attacker). PART 5.3: THE END Warp to Arus on you boat, fly NW and enter Doom Island. Fly right, land on the yellow spot and walk towards the “temple”… where the old man is. Heal up (and save), exit by the back and make you way to the top. Final Dungeon: Fortress of Doom (Refer to Maxim’s run of the dungeon for all the treasures). After Dual Blade is restored, you will have the opportunity to heal if necessary. Walk up to start your fighting. Jerin at level 46 should do Boss fight: Gades Have Jerin boost your attacker’s strength. Watch out for undead (increases his attack). Stay healthy and you will get rid of him in no time. Walk up some more for the next fight. Boss fight: Amon When Jerin isn’t casting Mirror she should cast Trick. Amon can cast sunder, dread, flood and chaos (confuses). After disposing of him heal and walk up. Boss fight: Daos Same strategy as against Amon. Daos can cast thunder, glacier, vulcan, amnesia (forget spells?), stronger and dread. After the fight (without a pause), get ready for the final battle. Final Boss: Guard Daos Having Mirror is vital for this fight to avoid figual (confusion; shriek can cure that or attacking yourself). He can cast flood. As always, drain his defense; when it’s low enough have Lufia cast thunder. It’s going to be long – don’t be afraid to use all those miracles – but you can do it. Enjoy the final scene. Afterwards you can do a “new game +” game where you earn 4x as much experience per battle. -------------------- |
 ,
,  .
.  ,
, 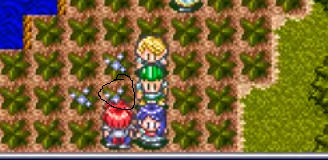 and an emerald in the jewel shop (make sure you talk to the clerk). Exit the village and enter the next dungeon.
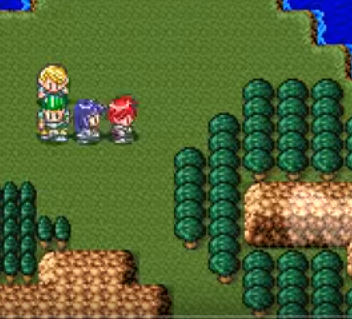
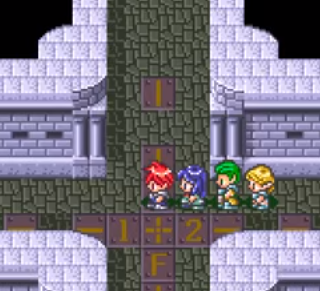 , walk west towards 1 (Platina). Once outside, get out of the small building and walk left to enter a larger one. Go upstairs (on your right when you enter) to talk with Shaia. You can also look at the lockers to get gloom arrow, hi bomb, hi magic and ex arrow. After the long scene you will finally have a boat! As Shaia said, his lab is due west of where you are, so navigate in that direction. The island where it stands has toxic marshes, in case you don’t see it.
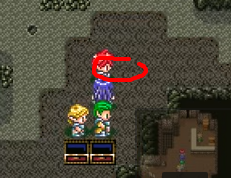
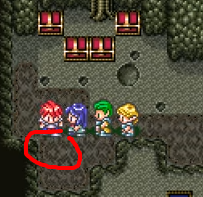 , blast ring, nothing, miracle gem and nothing. Warp back outside to get your reward. Now go back to Bakku and navigate back to the Tower of Light.
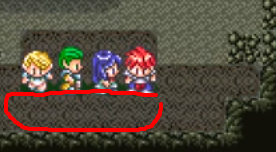


 . Come back to the main cave, go down 2 ladder towards the SW and get ex bomb on the far left. Go down the ladder for dragon arrow, go up the ladder towards a room and walk up (either room) to big arrow and ex potion. Go down two levels, walk right to get mind gourd and go back to the chest against the wall. Go up the ladder, up another ladder into a room and follow the path to exit the cave. Just walk up straight to reach the tower.
YouTube Video Editor
| the unknown |
Affected by 'Laziness Syndrome'
Registered: 12-14-12
Location: Murica
Last Post: 76 days
Last Active: 2 hours
11-27-15 06:16 PM
 EX Palen is Offline
| ID: 1221740 | 124 Words
EX Palen is Offline
| ID: 1221740 | 124 Words
 EX Palen is Offline
Spanish Davideo7

POSTS: 1532/6516
POST EXP: 1196018
LVL EXP: 35946390
CP: 195796.1
VIZ: 11430357
Wow, what an amazing guide! Very detailed, covering every aspect... Nearly perfect. Why isn't it absolutely perfect? Well, the screenshots somehow mess it up. I don't know if you intended placing them there, but I don't like how they display. They not only distort the text, it makes it harder to follow. Whether or not you intended it, I would suggest changing their location. You can place them at the end of the paragraph, centered and with a small descr Keep up the good work! |
Site Staff Manager, Content Writer, Console Manager
| Vizzed #1 Hardstyle fan |
Affected by 'Carpal Tunnel Syndrome'
Registered: 07-03-13
Location: Barcelona, Spain
Last Post: 13 hours
Last Active: 13 hours
11-27-15 08:53 PM
janus is Offline
| ID: 1221756 | 63 Words
SecureYourCodeDavid
POSTS: 2896/4824
POST EXP: 567678
LVL EXP: 23385287
CP: 64302.7
VIZ: 624661
Point taken. I guess that next time I will simply do as I did in the past: make the image a "paragraph" so the text isn't distorted. However their location is, I believe, necessary where it is since it's a little hard to describe with words. Maybe I will get better at it, though. As for the words: play larger games/with more content! As for the words: play larger games/with more content! -------------------- |
YouTube Video Editor
| the unknown |
Affected by 'Laziness Syndrome'
Registered: 12-14-12
Location: Murica
Last Post: 76 days
Last Active: 2 hours
