

 User Notice
 Forum Links


Thread Information
Thread Actions
Walkthrough Shadowgate 64: Trials of the Four Towers
06-30-13 04:22 PM
Laian is Offline
| ID: 829230 | 2781 Words

POSTS: 1482/2232
POST EXP: 457173
LVL EXP: 7716929
CP: 23738.9
VIZ: 3570490

Hello everyone and welcome to another walkthrough. Ok, so I played “Shadowgate” on NES a while ago and I really wanted to play the one released on N64. It’s been so long since I’ve made a walkthrough of a N64 game (the last one was the hidden remote controls of Gex 64: Enter the Gecko… which was the only one by the way since I started that honorable position) so I decide to go back to this system and give a try to that game called “Shadowgate 64: Trials of the Four Towers”. I don’t know where (since “Shadowgate” gave me some bloody troubles to beat it) I’m going to get myself into but anyway. Let’s go back to Castle Shadowgate, shall we? Well, actually, we don’t have a choice… Oh, by the way, I should mention before starting this walkthrough that I was playing it with the keyboard since my gamepad didn’t want to work perfectly for some odd reasons (and no, my gamepad is ok, I know it, otherwise I couldn’t make my Let’s Plays
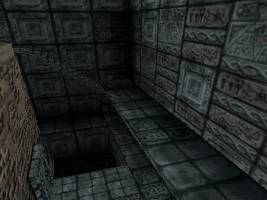
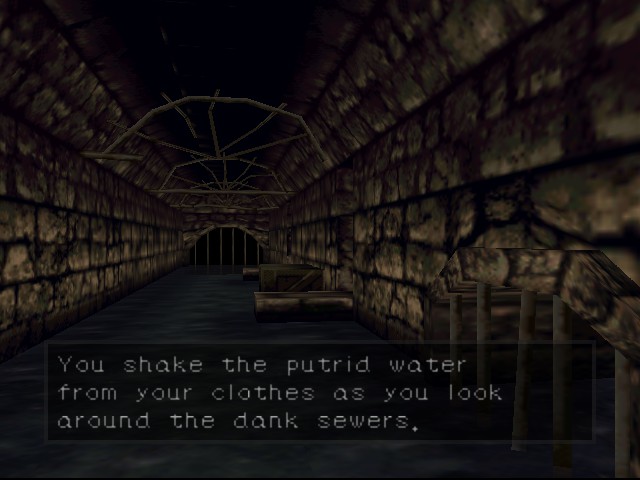
CHAPTER 1: NOT A PRISONER, I’M A FREE MAN! Ok, you get the reference in the title? Fine. You start in that cold jail. The door is obviously locked so it’s not how you will escape from this place. Look around, check the nice pile of straw and move it to discover a trapdoor. Hmmm… that’s quite interesting. Try to open it. Unfortunately, you can’t. That wouldn’t be so funny, heh? Ok, now talk to the man in the jail next to yours in order to activate a cutscene. Eat your meal after the discussion, get the bone and use it on the lid. You can now escape, however that’s just the beginning of the troubles. Oh cool, the sewers, how convenient! We need a bath, that’s right. No time to lose, let’s carry on. The path to the east leads nowhere else but some deepwater. Get the iron bar between the two paths and go through the last door. You’ll see a wall that you can climb up if you have the specific item. Go back to the sewers and go through the second door. Go to the east, use the iron bar to make the stone column fall and make a bridge to cross the deepwater (and see a ghost). Be careful, you can still fall off in too deep so watch your step. Take the note, read it, then carry on, grab the pickaxe next to the bricks (1) and go back to the climbable wall. Use the pickaxe once for this gap and one more time to get rid of the tones in the ceiling. Now go up and reach the next area.
CHAPTER 2: THE FIRST TOWER Open the door next to you, then the one to the left, get the rope next to the pile of lumbers, go back and open the one in front of you. Take the fairy sculpture on the shelf, note the slipper on the table to the right, go back to the corridor and go up the stairs. What a nice entrance! There’s a chandelier, some banners and a giant door. Unfortunately, that won’t budge (it wouldn’t be funny at all    The first room to the right has a magical flute and a book. Take those items, go back and open the next door to the right. Take the note on the bed and the books then go back to the first part of the library. To the left, there’s a window. Interact with it once, then use the rope and the pixie flute. Go down, use the pixie flute one more time and open the door. Get rid of the boards to the left to see a suspicious tombstone, then enter the chapel, take the dragon tears next to the statue and go down. Take the golden key, the ornate key and the crowbar, go back downstairs, open the door to the right, use the golden key to unlock the coffin to the right and try to take the diary. You can’t, sadly. Now go back to the main room of the cathedral, go up the ladder, use the crowbar on the nail and take it. Go on the roof, avoid the holes and open the window to enter the next building. Open the door, check the door to the south-east to find a bottle of oil. Open the lid of the barrel and use the dragon tears to clean the water. Go down, meet the elder and carry on.
CHAPTER 3: THE SECOND TOWER Open the door to the left, take the diary, the hair of giant and the receipt on the desk. If you read it, you can see that you actually have one of the ingredients in your inventory and you need to find the others. Open the other door now, take the mug, the book on the desk, the note on the floor next to the desk and the rusty key behind the column (3) and go down. Actually, the key is really sneaky and gave me lot of troubles to find it, I did figure it out after reading the note. Anyway, use the oil on the rusty door and carry on. Take the crest, go back to the kitchen (and make me a sandwich
CHAPTER 4: EXTRA STUFF TIME! Go back to the room with the slipper, listen to the story of the grandfather, get a key, take the slipper and proceed to the entrance of the first tower. Remove the ring of the dead, open the giant door, collect a coin to the right and meet the guard. He doesn’t want to catch you anymore. Read the signboards and go to alleyway. You’ll see… an inn? Perfectly normal, let’s go in it. The bartender says he has no more rooms. Ok, we’ll come back later. Let’s check the barn next to the inn. Ok, that’s a shop. Talk to the store keeper, go back outside, open the locked giant door with the cemetery key then open the other giant door to your left, then the one to the left, meet the elder and check behind the rubble of blocks to grab a coin. Leave this place, grab the poisonous herb and the coin in the alleyway and go to the left. Open the door to the right, go in the house, talk to the old man, then go upstairs and grab the book and the picture. Open the door to the left, go down using the ladder to the right, take the coin and go back. Go down, talk to the man, give the ancient coin to him and check the pile of junk to find the other slipper. Now, go back where the guard is and open the door you haven’t opened yet. Check the first room to the left, get the broken sword and the broken spear Go up, open the door to the left, take the book, listen to each song of the troubadour and you will get a flower and information. It looks like the dungeon keeper lost something. We should find it and give it back to him. Open the other door, take the dish, the gem and the bracelet then go back to the place where you met the elder, then go to the right, equip the ring of the dead and check the skeleton underwater. You found the dead girl. Now go back to the cemetery, use the flower on the grave of the wealthy man to get an information from him and go see the grandfather. You’ll get the Stone of Thirst. Now go back to the excavation zone, go through one of the passageways to the left, use the Stone of Thirst to make the water disappear and go up. You’ll see a mechanism. You can’t do anything right now, something is missing, so go back to the inn, equip the pendant of the old woman and enter the inn. When the inn keeper asks you if you are a grave robber, say “No”. Of course, he won’t trust you and ask you some questions about the old woman’s son. Answer “High Winter”, “Dwarf” and “Black Death”. The inn keeper does trust you now. Talk to the woman, she will ask you to save her brother and you will get a magical orb. Go upstairs, take the note (5) and check the second room to get another note. Go back to the sewers, find the skeleton of the servant and get the treasure. Go back to the shop, give the treasure to the store keeper and choose the chipped violin.   Now go back in the building where the troubadour is (called the Thieves’ Room), you’ll see a room to the right. Put the chipped violin exactly where the music sheet is, go hide behind the wall to your left and sneak behind the dungeon keeper. Grab the key, go down, use the key on the first locked door to the right. Talk to the man, then use the magical orb to escape from the dungeon. Lock the door with the key and go back to the inn. After the discussion, leave the inn, open the giant door in front of you, carry on and find the shelter here. You’ll find the flint, a fang, a notebook and a lever (6). Go back to the device, use the lever and meet the elder. After the discussion with the elder, turn the first valve to the right then the two others to the left. Activate the switch and the way to the Tower of Trials will be unlocked. After the discussion with the elder, go back where the dead girl was and enter the Tower of Trials.
CHAPTER 5: THE TOWER OF TRIALS Read the plaque and open the door after the discussion with the elder. Get the book on the shelf, then go in the next room and take three other books. Go up, read the next plaque, stand in front of the last painting to the left, crouch and activate the switch to proceed to the next trial. Take the pieces of the puzzle, then complete the puzzle using the following pieces: first, fourth, second and first. In the next trial, answer “Lakmir”, then “Westland”, then “Bolhalor”, then “It taints the soul” and “Nathor Dreslin”. The next trial is tricky. You have to avoid all the traps with the inverted controls. Touch all the statues except the third one in order to reach the end of that trial. The next trial will be homage to the first Shadowgate. Light the candle, take it and open the door. Now, you must find the exit of that maze before the candle runs out. You’ll see some knights on your way to the exit. Touch them if you think you can’t make it and retry. Go to the left and go upstairs. Carry on, press a button, then go back to the stairs, press another button to the left and carry on. Open the door, climb up the ladder, press a button the left and climb down a ladder. Open the second door, press the button, go back, climb up the ladder, press the button, go down, then to the right and press the button. Now, go up, press the button, go down, open the second door and go up. Put the candle on the candlestick, open the door, read the plaque and stand in front of the mirror to the right. Turn around, move backward and get the ring. Equip it, step on the white square and meet the elder. After the discussion, go back to the first tower and open the door with a dragon carved on it. Get the dragon flute on the table (7) and go back to the the excavation zone, the one where you found the coin. Stand in front of the door between the two dragon statues, use the dragon flute and enter the next tower.   CHAPTER 6: THE LAST TOWER Go through the door, take the book and go down. Take the eye on the desk, go back to the main room and use the fang on the sculpture. Go up, take the book, use the hair of giant on the instrument, equip the ring of the dead and listen to the music. Go in the next room and use the statues to remake the song and lower the stairs. Move the right wing of the statue of the north-west, then the left wing of the one of the north-east, then the left wing of the statue of the west and finally the right wing of the statue of the east. Go up, meet the elder, equip the ring of the Kingdom and take the legendary Staff of Ages. The dragon wakes up and you go back to the stable. Go in the stable, use the flint on the straw to start a fire, open the door, give the pendant of the old woman to the man and go through the giant door. Use the dragon eye on the altar and, after the cutscene, go through the passageway. Open the door, use the Staff of Ages then the ring of the Kingdom on the statue and watch the final cutscene. Congratulations, you beat “Shadowgate 64: Trials of the Four Towers”.
Well, that’s all for this walkthrough. I hope this helped you to beat the game and I see you in the next walkthrough. Bye Hello everyone and welcome to another walkthrough. Ok, so I played “Shadowgate” on NES a while ago and I really wanted to play the one released on N64. It’s been so long since I’ve made a walkthrough of a N64 game (the last one was the hidden remote controls of Gex 64: Enter the Gecko… which was the only one by the way since I started that honorable position) so I decide to go back to this system and give a try to that game called “Shadowgate 64: Trials of the Four Towers”. I don’t know where (since “Shadowgate” gave me some bloody troubles to beat it) I’m going to get myself into but anyway. Let’s go back to Castle Shadowgate, shall we? Well, actually, we don’t have a choice… Oh, by the way, I should mention before starting this walkthrough that I was playing it with the keyboard since my gamepad didn’t want to work perfectly for some odd reasons (and no, my gamepad is ok, I know it, otherwise I couldn’t make my Let’s Plays
CHAPTER 1: NOT A PRISONER, I’M A FREE MAN! Ok, you get the reference in the title? Fine. You start in that cold jail. The door is obviously locked so it’s not how you will escape from this place. Look around, check the nice pile of straw and move it to discover a trapdoor. Hmmm… that’s quite interesting. Try to open it. Unfortunately, you can’t. That wouldn’t be so funny, heh? Ok, now talk to the man in the jail next to yours in order to activate a cutscene. Eat your meal after the discussion, get the bone and use it on the lid. You can now escape, however that’s just the beginning of the troubles. Oh cool, the sewers, how convenient! We need a bath, that’s right. No time to lose, let’s carry on. The path to the east leads nowhere else but some deepwater. Get the iron bar between the two paths and go through the last door. You’ll see a wall that you can climb up if you have the specific item. Go back to the sewers and go through the second door. Go to the east, use the iron bar to make the stone column fall and make a bridge to cross the deepwater (and see a ghost). Be careful, you can still fall off in too deep so watch your step. Take the note, read it, then carry on, grab the pickaxe next to the bricks (1) and go back to the climbable wall. Use the pickaxe once for this gap and one more time to get rid of the tones in the ceiling. Now go up and reach the next area.
CHAPTER 2: THE FIRST TOWER Open the door next to you, then the one to the left, get the rope next to the pile of lumbers, go back and open the one in front of you. Take the fairy sculpture on the shelf, note the slipper on the table to the right, go back to the corridor and go up the stairs. What a nice entrance! There’s a chandelier, some banners and a giant door. Unfortunately, that won’t budge (it wouldn’t be funny at all The first room to the right has a magical flute and a book. Take those items, go back and open the next door to the right. Take the note on the bed and the books then go back to the first part of the library. To the left, there’s a window. Interact with it once, then use the rope and the pixie flute. Go down, use the pixie flute one more time and open the door. Get rid of the boards to the left to see a suspicious tombstone, then enter the chapel, take the dragon tears next to the statue and go down. Take the golden key, the ornate key and the crowbar, go back downstairs, open the door to the right, use the golden key to unlock the coffin to the right and try to take the diary. You can’t, sadly. Now go back to the main room of the cathedral, go up the ladder, use the crowbar on the nail and take it. Go on the roof, avoid the holes and open the window to enter the next building. Open the door, check the door to the south-east to find a bottle of oil. Open the lid of the barrel and use the dragon tears to clean the water. Go down, meet the elder and carry on.
CHAPTER 3: THE SECOND TOWER Open the door to the left, take the diary, the hair of giant and the receipt on the desk. If you read it, you can see that you actually have one of the ingredients in your inventory and you need to find the others. Open the other door now, take the mug, the book on the desk, the note on the floor next to the desk and the rusty key behind the column (3) and go down. Actually, the key is really sneaky and gave me lot of troubles to find it, I did figure it out after reading the note. Anyway, use the oil on the rusty door and carry on. Take the crest, go back to the kitchen (and make me a sandwich
CHAPTER 4: EXTRA STUFF TIME! Go back to the room with the slipper, listen to the story of the grandfather, get a key, take the slipper and proceed to the entrance of the first tower. Remove the ring of the dead, open the giant door, collect a coin to the right and meet the guard. He doesn’t want to catch you anymore. Read the signboards and go to alleyway. You’ll see… an inn? Perfectly normal, let’s go in it. The bartender says he has no more rooms. Ok, we’ll come back later. Let’s check the barn next to the inn. Ok, that’s a shop. Talk to the store keeper, go back outside, open the locked giant door with the cemetery key then open the other giant door to your left, then the one to the left, meet the elder and check behind the rubble of blocks to grab a coin. Leave this place, grab the poisonous herb and the coin in the alleyway and go to the left. Open the door to the right, go in the house, talk to the old man, then go upstairs and grab the book and the picture. Open the door to the left, go down using the ladder to the right, take the coin and go back. Go down, talk to the man, give the ancient coin to him and check the pile of junk to find the other slipper. Now, go back where the guard is and open the door you haven’t opened yet. Check the first room to the left, get the broken sword and the broken spear Go up, open the door to the left, take the book, listen to each song of the troubadour and you will get a flower and information. It looks like the dungeon keeper lost something. We should find it and give it back to him. Open the other door, take the dish, the gem and the bracelet then go back to the place where you met the elder, then go to the right, equip the ring of the dead and check the skeleton underwater. You found the dead girl. Now go back to the cemetery, use the flower on the grave of the wealthy man to get an information from him and go see the grandfather. You’ll get the Stone of Thirst. Now go back to the excavation zone, go through one of the passageways to the left, use the Stone of Thirst to make the water disappear and go up. You’ll see a mechanism. You can’t do anything right now, something is missing, so go back to the inn, equip the pendant of the old woman and enter the inn. When the inn keeper asks you if you are a grave robber, say “No”. Of course, he won’t trust you and ask you some questions about the old woman’s son. Answer “High Winter”, “Dwarf” and “Black Death”. The inn keeper does trust you now. Talk to the woman, she will ask you to save her brother and you will get a magical orb. Go upstairs, take the note (5) and check the second room to get another note. Go back to the sewers, find the skeleton of the servant and get the treasure. Go back to the shop, give the treasure to the store keeper and choose the chipped violin. Now go back in the building where the troubadour is (called the Thieves’ Room), you’ll see a room to the right. Put the chipped violin exactly where the music sheet is, go hide behind the wall to your left and sneak behind the dungeon keeper. Grab the key, go down, use the key on the first locked door to the right. Talk to the man, then use the magical orb to escape from the dungeon. Lock the door with the key and go back to the inn. After the discussion, leave the inn, open the giant door in front of you, carry on and find the shelter here. You’ll find the flint, a fang, a notebook and a lever (6). Go back to the device, use the lever and meet the elder. After the discussion with the elder, turn the first valve to the right then the two others to the left. Activate the switch and the way to the Tower of Trials will be unlocked. After the discussion with the elder, go back where the dead girl was and enter the Tower of Trials.
CHAPTER 5: THE TOWER OF TRIALS Read the plaque and open the door after the discussion with the elder. Get the book on the shelf, then go in the next room and take three other books. Go up, read the next plaque, stand in front of the last painting to the left, crouch and activate the switch to proceed to the next trial. Take the pieces of the puzzle, then complete the puzzle using the following pieces: first, fourth, second and first. In the next trial, answer “Lakmir”, then “Westland”, then “Bolhalor”, then “It taints the soul” and “Nathor Dreslin”. The next trial is tricky. You have to avoid all the traps with the inverted controls. Touch all the statues except the third one in order to reach the end of that trial. The next trial will be homage to the first Shadowgate. Light the candle, take it and open the door. Now, you must find the exit of that maze before the candle runs out. You’ll see some knights on your way to the exit. Touch them if you think you can’t make it and retry. Go to the left and go upstairs. Carry on, press a button, then go back to the stairs, press another button to the left and carry on. Open the door, climb up the ladder, press a button the left and climb down a ladder. Open the second door, press the button, go back, climb up the ladder, press the button, go down, then to the right and press the button. Now, go up, press the button, go down, open the second door and go up. Put the candle on the candlestick, open the door, read the plaque and stand in front of the mirror to the right. Turn around, move backward and get the ring. Equip it, step on the white square and meet the elder. After the discussion, go back to the first tower and open the door with a dragon carved on it. Get the dragon flute on the table (7) and go back to the the excavation zone, the one where you found the coin. Stand in front of the door between the two dragon statues, use the dragon flute and enter the next tower. CHAPTER 6: THE LAST TOWER Go through the door, take the book and go down. Take the eye on the desk, go back to the main room and use the fang on the sculpture. Go up, take the book, use the hair of giant on the instrument, equip the ring of the dead and listen to the music. Go in the next room and use the statues to remake the song and lower the stairs. Move the right wing of the statue of the north-west, then the left wing of the one of the north-east, then the left wing of the statue of the west and finally the right wing of the statue of the east. Go up, meet the elder, equip the ring of the Kingdom and take the legendary Staff of Ages. The dragon wakes up and you go back to the stable. Go in the stable, use the flint on the straw to start a fire, open the door, give the pendant of the old woman to the man and go through the giant door. Use the dragon eye on the altar and, after the cutscene, go through the passageway. Open the door, use the Staff of Ages then the ring of the Kingdom on the statue and watch the final cutscene. Congratulations, you beat “Shadowgate 64: Trials of the Four Towers”.
Well, that’s all for this walkthrough. I hope this helped you to beat the game and I see you in the next walkthrough. Bye -------------------- |
| Games have secrets, I have my eagle gaze. |
Affected by 'Laziness Syndrome'
Registered: 10-21-11
Location: France
Last Post: 2627 days
Last Active: 1801 days
06-30-13 04:35 PM
 Dean2k13 is Offline
| ID: 829236 | 58 Words
Dean2k13 is Offline
| ID: 829236 | 58 Words
 Dean2k13 is Offline

POSTS: 612/1051
POST EXP: 105515
LVL EXP: 2353842
CP: 6320.1
VIZ: 71550
laian : Hello there! How are you? This is the duplicated thread that I referred to.*** As I said, this is a very detailed review. It's very thorough and descr Very good walkthrough! This is the duplicated thread that I referred to.*** As I said, this is a very detailed review. It's very thorough and descr Very good walkthrough! .. Sega Seal of Quality, GUARANTEED! Custom Layout by Dean2k13 |
Affected by 'Laziness Syndrome'
Registered: 05-26-13
Last Post: 3638 days
Last Active: 563 days
06-30-13 04:51 PM
 patar4097 is Offline
| ID: 829243 | 41 Words
patar4097 is Offline
| ID: 829243 | 41 Words
 patar4097 is Offline

POSTS: 2680/5166
POST EXP: 330330
LVL EXP: 28064729
CP: 22404.4
VIZ: 415551
Dean2k13 : Please don't reply to both threads like that, and at LEAST make sure you summon the mods to one.
Local Mods : Dupe thread. Close one please. I haven't actually played this game or anything, but good walkthrough! Looks very detailed. Local Mods : Dupe thread. Close one please. I haven't actually played this game or anything, but good walkthrough! Looks very detailed. -------------------- ~Christian users of Vizzed~ |
Affected by 'Laziness Syndrome'
Registered: 10-28-10
Last Post: 2741 days
Last Active: 1555 days
06-30-13 05:20 PM
 Singelli is Offline
| ID: 829258 | 45 Words
Singelli is Offline
| ID: 829258 | 45 Words
 Singelli is Offline

POSTS: 4578/8698
POST EXP: 1189395
LVL EXP: 57716264
CP: 67403.2
VIZ: 3154377
laian, I can't get over how amazing your walkthroughs are. I wish I had enough time to finish my own, but I don't think that's going to happen, which makes me very sad. Well, closing for dupe-ness, but I know you'll understand. God bless! Well, closing for dupe-ness, but I know you'll understand. God bless! ~Galatians 2:20 I am crucified with Christ: nevertheless I live; yet not I, but Christ liveth in me: and the life which I now live in the flesh I live by the faith of the Son of God, who loved me, and gave himself for me.~ |
| Singelli |
Affected by 'Laziness Syndrome'
Registered: 08-09-12
Location: Alabama
Last Post: 3312 days
Last Active: 3287 days
Links
