

 User Notice
 Forum Links
The walkthrough plus a bonus at the end, because I'm nice ha ha :)

Thread Information
Thread Actions


Walkthrough The Sword of Hope
11-16-12 09:09 AM
Laian is Offline
| ID: 689140 | 4460 Words

POSTS: 1448/2232
POST EXP: 457173
LVL EXP: 7716723
CP: 23738.9
VIZ: 3570490

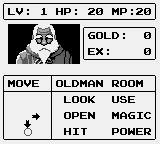
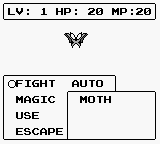
Hello everyone, this is your host Laian the walkthrough writer with a new walkthrough. I haven't made any walkthrough of a Gameboy game since I started this job. How can I ignore this system, the first one I really owned during my childhood. Ok, the first game I've played was released on Sega Master System and I was playing it with my grand brother. But enough talk about my childhood, more of that specific and first game in due time, I promised. Let's focus on the game I chose for this walkthrough. So, as I previously said, I haven't made any walkthrough of a Gameboy game so I decided to go ahead and fix that. And then, I chose "The Sword of Hope". This game is good but I found it really hard. That's why this walkthrough took so long because you die quite often and you may be stuck quite often for some reasons. One of those reasons is the puzzles: they are not obvious. You remember Shadowgate Classic? You have the same thing in this game. You have to try everything you can do until you find the solution. And most of the time, it's not obvious like ABC or 1+1= 11. I don't really want to discuss more about that, you'll see that if you read this walkthrough (in case of emergency, please This is your first mission: collect the key which will open Martel’s Gate located to the west. You start in the old man’s house. After the briefing of your quest, you’ll get the copper armor, the probite sword, a white wheat, a herb and a magic book (named by the way “magic text” in the inventory). Don’t go east yet, go south and leave the house. Then, go east in order to activate an event. Apparently, it looks like the trees can talk to you and vice versa. Yes, you can talk to the trees and if you listen to them, you may get some useful information. Look those trees and let them tell you a story. Those trees are in fact human beings turned into trees. To the east, you’ll go to the shaman’s house, which is pointless since you just started the game. However, if you are in trouble, this person can recover all your HP and MP (of course, that will cost you some gold coins and the price will increase depending of your level). You can get a password if you look at the crystal ball, really handy if you want to carry on your progress later. Now, go to the south, then to the east and check the grass to get a herb. Look at the tree, you’ll get an information about a key. Hmmm, that’s interesting, thank you mister tree. Go to the east, look at the tree to get another information (useful later in the adventure), then to the north, look at the tree in order to hear the legend of Poliniac the legendary swordsman, go to the west and enter the forest shop. If you can afford for the silver armor, go buy it. Otherwise, kill some creatures outside until you have 50 gold coins and buy it. Come back one more time to the shop and talk to the store keeper. She’ll tell you she has a scroll in a chest located in a hidden room. Go to the north and get it. You’ll learn the grace spell, really useful later (1). Buy some stuff (the wheat and the barley recover some health and the herb recovers some mana) and leave the shop. About the shop, one interesting thing to know: the price of those items will also increase depending of your level. Hey, that wouldn’t be funny after all, right? Also, the maximum amount for each of these items is 7. You’ll find some herbs on your way unless you can’t carry more herbs, so this item will become a barley or a wheat. Now, go to the north-east, then to the east, talk to the tree in order to get a hint and go to the north. Make sure to be set because you’ll face the first boss of this game. Go buy some stuff and reach at least the level 4 to learn the spell of fireball 2. Look at the tree when you are ready. Use the spell of fireball 2 on the treant. Two hits should be enough to burn this moving tree. You’ll get Martel’s Key at the end of the discussion. Now, time to head to Martel’s gate located to the west.
Time to meet the first wizard. Unlock the gate to the west with the key, go to the north-west, then to the west and enter Martel’s House. Talk to Martel and notice how nice he is seriously. He doesn’t think you are the chosen one. Alright, talk to him one more time and he will test you. He will open the worship site for you. Leave the house, go to the east, then to the north and enter the worship site. Look at the chair to get a herb (remember that, if you are full of herbs, this item will become another recovery item). Go to the north until you find an altar. Cast the spell of grace to summon a familiar spirit. You’ll get a charm (2). Go to the west, hit the pipe organ. Oh, it sounds strange? Well, use the charm and collect the ruby. Go back to Martel’s house and talk to him. He will upgrade your sword in order to forgive his rudeness against you. Hit his pigeon to get the W egg.
Now, go back to the altar and go to the east this time. Talk to the tree. Sweet, he told you where to find Shabow’s key. A slug has the key. Notice that if you don’t get the W egg, this tree will not tell you this information. Carry on until you reach the graveyard. Go to the west twice, then to the south-west and find the well. Check it, open the lid and go in the well. The well is a short dungeon but you’ll need to come back here later. As you can’t go to the west because of the slippery path, go down. Don’t go to the east, there’s a mimic in the room. A mimic is a creature which looks like a treasure chest. It’s actually somewhat tough to beat so it’s better to ignore this creature right now. Go down instead, ignore the western path, you’ll find a chest. Be ready before open this chest because you will have to face the slug which has Shabow’s key. I suggest you to reach the level 7 and learn the lightning spell if you want to make this fight really short. Watch out its strong acid attack and cast the lightning spell at least twice and the slug will perish. You’ll get Shabow’s key. Go up and go to the west this time. Don’t go in the room to the west, there’s another mimic. Go to the north, then to the west, open the chest to reveal some inscr Hit the wall to make an ivy fall. Climb it up, carry on and check the grave. Poliniac, the legendary swordman will appear in front of you and will ask you to find his sapphire crystal kept by a yeti in a cave. This is the only side quest of this game and the reward is really nice. Now look at the tree and go to the east to go back to the graveyard. Use the teleport spell to go to the old man’s house, make your report and leave the house. Now, go to the east and unlock Shabow’s gate with this new key.
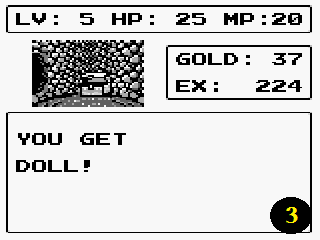
Go to the east, then to the north, then to the north-east and to the north. Check the grass to find a herb (4). Go back to the previous screen, check the surround to reveal another path, go this way and reach Shabow’s house. You should be set before talking to Shabow, the next trial is somewhat tough. Go back to the forest shop, buy some stuff and go back to Shabow. After talking to him, you will be instantly in a cave. Let’s find the moon fragment. You can’t go to the west so there are two options left: north or south-west. Don’t take the second option, we’ll see that later. Go to the north and enter the tricky cave. The chest is a mimic, don’t open it and don’t go to the east because there’s another one. Go to the west instead then to the south, open the chest to get an optional information. Go back where the first mimic is, go to the north, open the chest to get another optional information and go to the west. Touch the chest to make a shopkeeper come. Buy the golden armor if you can afford it and some stuff then go to the north. Open the right pot to eat a fruit (which will recover some health), go to the west, then go to the south, then to the west and go to the south . Don’t open the chest, it’s a mimic. Go to the south to find another chest. There’s the moon fragment inside. However, you will have to beat a shadow. Use the spell of “bagefire” if you did learn it (you learn this spell when you reach level 8) in order to beat this shadow quite easily. Now, time to leave this place. Needless to find a way out, use the teleport spell in order to go to Shabow’s house. Talk to him. Sadly, he doesn’t know where the Sword of Hope is (awesome… ). However, he will enhance your sword (5). Talk to the pigeon to get the B egg. Now, it’s time to make your report to the old man and look for Camu, the last wizard who probably knows about the location of the Sword of Hope.
Somewhere around Shabow’s house, a lizard has the key of Camu’s domain. Actually, I should say “go talk to the trees until you have an information about a lizard with a key” but as I’m nice, I’ll tell you how to get it. From Shabow’s gate, just keep going to the east and go to the north-east. You’ll come to the bridge. If you are at least level 9, check the river and face the lizard. Use the spell of lightning 2 on this enemy and it should be ok after a couple of hits. You’ll get Camu’s key (6). Now, time to go to Camu’s domain. From the forest shop, go to the east, then to the north-east and go to the north. Use the key on the gate and carry on. Go to the north, check the small stone to get a herb and go to the north. Go to the north-east twice, check the ledge to find a herb and go to the south. Carry on, enter a cave and check the rock. Oh, there’s something shining up on the top. Hit the rock and check it one more time. You’ll face the yeti. This enemy can be a pain in the butt because he often does a ton of damages with his physical attack. Plus, his blizzard attack is quite painful. However, if you have reached level 10 and learned “bagefire2”, if you are lucky and if you heal quite often, you shouldn’t get any troubles to beat this enemy. Use the power of the doll if you want to be immune to the blizzard attack but murder him with the spell of “bagefire2”. Three hits should be enough to burn this gem stealer. Yes, this shining thing is a gem. And guess what? It’s Poliniac’s sapphire crystal. Go back to his grave (if you don’t remember how to go to Poliniac’s grave, refer to the chapter 2, third paragraph), use the sapphire on him and he will give you the platinum armor, which is the best armor of the game. Go back to Camu’s domain after finishing up this side quest. From Camu’s gate, go to the north and enter the cave to the east. Check the rock to fight the imp. Another annoying enemy, immune to magic powers and really tough. Just use the ruby on him, heal when you are in trouble and protect yourself with the power of the doll. This enemy may steal some of your coins, which can be a bad thing but also a good thing since his attacks are terrible sometimes. Once you teach him a lesson that he will remember, you’ll read a letter. Go back to Shabow’s house, keep going to the south until you reach the cave, go to the south-west, check the pond and face the mudman. This enemy is not really hard to beat if you have learned the spell “lightning 2”. Two hits should send this creature back where it came. However, you should use the doll and heal yourself if you are hurt because the mudman will use a spell called “xplosion”. This spell is “OUCH!” for you, however it hurts the caster a bit. Once you beat this creature, you’ll get the ring. Go back to Camu’s domain and find the right spring. There’s a spring where you can get an optional item: the fairy lamp. However, you must answer some questions correctly otherwise you won’t get it and, worst thing, you’ll probably face a lamia. If you want this item, from Camu’s gate, go to the west when you can and reach the spring. Use the ring, talk to the woman and answer: Question 1: Yes You’ll get the fairy lamp (7). This item will help you later. Now, let’s go to the right spring. From Camu’s gate, go to the north, then keep going to the north-east, go to the south-east and carry on until you find the spring. Check the spring, use the ring and go back to the graveyard. You must talk to her twice before going there. Check one of the graves and face the vampire. This creature is really annoying. He’s immune to your physical attacks and magic powers. Plus, his bite decreases your agility, which is really a big deal. Oh, I should not forget this detail: he always gets the first strike woohoo. Well, “how can I beat it if I can’t hit him with my best shot?”. That’s what you’ll probably say. It’s obvious: use the ruby! Not really obvious though when you don’t know about the trick. Don’t forget to heal, abuse the power of the ruby and the unicorn’s horn will be yours. Go back to Camu’s domain and head to the pagoda, where Camu the last wizard lies in wait. From Camu’s gate, keep going to the north, then go to the north-east, go to the north-west and go to the north. Don’t go to the north, it’s the fake spring (unless you want to fight a lamia after using the precious ring), go to the east, check the hole to get a herb (8), go to the north, use the horn to open the door of the pagoda and enter the building. This place is really short but the creatures inside are quite tough to beat. The chest of the first floor has a hint. Go to the second floor. Don’t open the chest, it’s a mimic. Go to the third floor, open the chest to get the spore (this is the other “all or nothing” item, this one can make the enemies fall asleep if it works) and go to the east to meet Camu. Talk to her, she will tell you that she doesn’t have the Sword of Hope (where could it be then?!). However, she will upgrade your sword. Talk to the pigeon: he doesn’t want to give the egg. Hit the pigeon: it’s futile. Ok, time to express your hunger… err your anger (got it? No? I know that was a stupid joke
Get ready to face in this last part of the game a recycled enemy (the myconid) and new enemies: the hag, the centipede and the druid. The last enemy is really the trouble here. Alone, it’s ok, however when you face a group of druids, pray in order to survive because they can kill you as soon as possible. They reflect most of your magic powers (except the spell of “arctic” and “xplosion”), they have some destructive powers… well they will make you go through Hell until you reach the final boss. Isn’t that lovely, hmm? Don’t worry it’s the only threat here; the other creatures are not really tough compared to the druid.
If you go to the south, you’ll find a herb in the chest (or something else if you are full of herbs). Go back to the previous room if you took the item and go to the east. Carry on until you reach three closed doors. Use the ring and the doors will open. Keep in mind that you’ll have to use the ring everytime the ring in order to open those doors when you’ll go back to this room (like the gates and the keys). If you go to the east, you’ll find a Y fruit. Actually, this fruit has a specific power: it decreases your mana points (awesome…). However, there’s a merchant if you want to buy some stuff. Keep going to the east then go to the north, took the chest if you want to call the merchant (or go to the south and open the chest if you want the fruit). The door to the west will lead you to a chest with a hint, really useful later. If you want to make some progress, choose the northern path. Keep going north, then go to the west and open one of the ivies to get an ivy seed (9). Now, you can reach the castle gate if you climb either the left ivy or the right ivy. However, make sure you have the fairy lamp if you want to climb up the right ivy. Otherwise, except a recovery item to collect, this way is completely pointless. I will explain how to go to the castle’s gate using both of the ways. If you decide to climb up the right ivy: go north, then go to the west twice and go south twice. Open the chest to get a herb (or another recovery item). Now, keep going north, then go to the east and use the fairy lamp in this room. The spring sprite will make a secret path appear (10). Go through this new path, go to the west then to the north and go to the east. You can now push or pull a door. Your decision will make the way to the castle gate interesting or not. Let’s stop this part here since the other path leads to this door. However, it’s longer than this way. Now if you decide to climb up the left ivy: go to the north and open the middle dwarf. Answer “girl” to gain 20 HP or “boy” to lose 20 HP. The left dwarf is a liar, don’t trust him: there’s a hidden path to the left but it will bring you back where the three doors are. Talk to the right dwarf and go to the right. Go down to reach the abyss, go the right and go to the north. Check the surround and use the boat to cross the river. You’ll lose 5 HP for your effort but you’ll reach the other side. Now carry on to the north then go to the east. You’ll find the door.
We can carry on from this door now. As I previously said, depending on how you will interact with this door, the way will be interesting or not. If you push the door, you’ll find nothing else but a trapped chest. If you pull the door, you’ll be able to find an item. So I suggest you to pull the door since you can get a prize during your progress or, I should say, your exploration. But you can choose the other option if you wish, it’s up to you. Just do not open the chest otherwise you’ll face a grimlock. And, believe me or not, this creature might be a pain in the butt. Besides the fact that it can steal your coins, it can use the spell “recmax” (spell that you can learn if you reach the level 20 which is really annoying when it abuses this spell after each of your hits). If you pushed the door, go to the east, then to the north and open the door to the left. Go to the north, go to the west then north if you want to buy some stuff (touch the chest) or go to the north to reach the castle’s gate. Now, if you did pull the door, the item lies in wait in a chest located to the south then to the east. Ignore the pile of rocks in the previous room, go to the north then to the east, open the door and go to the north. Go to the west then to the north if you want to buy some stuff (it’s the last merchant you’ll see in this game so feel free to buy all you need), then head to the castle’s gate located to the north. Try to open the gate, it’s closed. Unfortunately, you didn’t have any key in order to unlock it. Try to climb the ivy seed: you can’t. Nothing to do… unless you remember the hint somewhere in the undergrounds: you can reach the interior of the castle if you have an ivy seed. Hey, you have one, right? Use it and climb up the new ivy seed to reach the balcony. Go to the east to enter the throne room, hit the throne and take the scroll of secret (11). Now go to the south then to the east, use the spell of secret to reveal a secret path leading to the mirror world. If you need some heal, go to the south and open the faucet to recover some health. Otherwise, go through the new path. As you can see, it’s the inverted castle or mirror world. Go to the east, then to the south twice, then go to the east and take the recovery item in the chest, in the kitchen located to the north. Go to the south to reach the garden. Go to the south one more time, talk to the roses. Nothing here, they say? Don’t trust them and check the rose. Yes, they did lie to you! There’s a secret path leading to a cave. Enter the cave, keep going to the west, then keep going to the south and to the east twice. Hit the rock to reveal another secret path. Climb down the ladder, try to open the door to your right and use the ruby to unlock it. Now I hope you are ready to face the final boss because this is the last trial. Hit the wall to reveal a painting and prepare to face King Hennesy. A real pain! He is immune to all the offensive spells, he hits really hard and he is really tough to beat. I hope your lucky star shines above your head because you’ll need it in order to use the spore quite often and make him fall asleep (and pray that he will sleep for a while and probably the entire battle otherwise you might be screwed). Use the spore then, attack while he is sleeping and don’t forget to heal yourself. Wait, it’s not over. There’s a second form. This time, King Hennesy is a dragon. Compared to the first form, there’s nothing really difficult. Attack your opponent with physical attacks only. The first strike of the dragon will hurt you, however it will increase the chances of critical hits in order to send this dragon back where it came. Same thing, use the spore (don’t forget to pray when you use this item Well, it's the end of this walkthrough. I hope you enjoyed it and I see you next time for another adventure. And I think it's time to go back in time, when my passion for videogames started...  Hello everyone, this is your host Laian the walkthrough writer with a new walkthrough. I haven't made any walkthrough of a Gameboy game since I started this job. How can I ignore this system, the first one I really owned during my childhood. Ok, the first game I've played was released on Sega Master System and I was playing it with my grand brother. But enough talk about my childhood, more of that specific and first game in due time, I promised. Let's focus on the game I chose for this walkthrough. So, as I previously said, I haven't made any walkthrough of a Gameboy game so I decided to go ahead and fix that. And then, I chose "The Sword of Hope". This game is good but I found it really hard. That's why this walkthrough took so long because you die quite often and you may be stuck quite often for some reasons. One of those reasons is the puzzles: they are not obvious. You remember Shadowgate Classic? You have the same thing in this game. You have to try everything you can do until you find the solution. And most of the time, it's not obvious like ABC or 1+1= 11. I don't really want to discuss more about that, you'll see that if you read this walkthrough (in case of emergency, please This is your first mission: collect the key which will open Martel’s Gate located to the west. You start in the old man’s house. After the briefing of your quest, you’ll get the copper armor, the probite sword, a white wheat, a herb and a magic book (named by the way “magic text” in the inventory). Don’t go east yet, go south and leave the house. Then, go east in order to activate an event. Apparently, it looks like the trees can talk to you and vice versa. Yes, you can talk to the trees and if you listen to them, you may get some useful information. Look those trees and let them tell you a story. Those trees are in fact human beings turned into trees. To the east, you’ll go to the shaman’s house, which is pointless since you just started the game. However, if you are in trouble, this person can recover all your HP and MP (of course, that will cost you some gold coins and the price will increase depending of your level). You can get a password if you look at the crystal ball, really handy if you want to carry on your progress later. Now, go to the south, then to the east and check the grass to get a herb. Look at the tree, you’ll get an information about a key. Hmmm, that’s interesting, thank you mister tree. Go to the east, look at the tree to get another information (useful later in the adventure), then to the north, look at the tree in order to hear the legend of Poliniac the legendary swordsman, go to the west and enter the forest shop. If you can afford for the silver armor, go buy it. Otherwise, kill some creatures outside until you have 50 gold coins and buy it. Come back one more time to the shop and talk to the store keeper. She’ll tell you she has a scroll in a chest located in a hidden room. Go to the north and get it. You’ll learn the grace spell, really useful later (1). Buy some stuff (the wheat and the barley recover some health and the herb recovers some mana) and leave the shop. About the shop, one interesting thing to know: the price of those items will also increase depending of your level. Hey, that wouldn’t be funny after all, right? Also, the maximum amount for each of these items is 7. You’ll find some herbs on your way unless you can’t carry more herbs, so this item will become a barley or a wheat. Now, go to the north-east, then to the east, talk to the tree in order to get a hint and go to the north. Make sure to be set because you’ll face the first boss of this game. Go buy some stuff and reach at least the level 4 to learn the spell of fireball 2. Look at the tree when you are ready. Use the spell of fireball 2 on the treant. Two hits should be enough to burn this moving tree. You’ll get Martel’s Key at the end of the discussion. Now, time to head to Martel’s gate located to the west.
Time to meet the first wizard. Unlock the gate to the west with the key, go to the north-west, then to the west and enter Martel’s House. Talk to Martel and notice how nice he is seriously. He doesn’t think you are the chosen one. Alright, talk to him one more time and he will test you. He will open the worship site for you. Leave the house, go to the east, then to the north and enter the worship site. Look at the chair to get a herb (remember that, if you are full of herbs, this item will become another recovery item). Go to the north until you find an altar. Cast the spell of grace to summon a familiar spirit. You’ll get a charm (2). Go to the west, hit the pipe organ. Oh, it sounds strange? Well, use the charm and collect the ruby. Go back to Martel’s house and talk to him. He will upgrade your sword in order to forgive his rudeness against you. Hit his pigeon to get the W egg.
Now, go back to the altar and go to the east this time. Talk to the tree. Sweet, he told you where to find Shabow’s key. A slug has the key. Notice that if you don’t get the W egg, this tree will not tell you this information. Carry on until you reach the graveyard. Go to the west twice, then to the south-west and find the well. Check it, open the lid and go in the well. The well is a short dungeon but you’ll need to come back here later. As you can’t go to the west because of the slippery path, go down. Don’t go to the east, there’s a mimic in the room. A mimic is a creature which looks like a treasure chest. It’s actually somewhat tough to beat so it’s better to ignore this creature right now. Go down instead, ignore the western path, you’ll find a chest. Be ready before open this chest because you will have to face the slug which has Shabow’s key. I suggest you to reach the level 7 and learn the lightning spell if you want to make this fight really short. Watch out its strong acid attack and cast the lightning spell at least twice and the slug will perish. You’ll get Shabow’s key. Go up and go to the west this time. Don’t go in the room to the west, there’s another mimic. Go to the north, then to the west, open the chest to reveal some inscr Hit the wall to make an ivy fall. Climb it up, carry on and check the grave. Poliniac, the legendary swordman will appear in front of you and will ask you to find his sapphire crystal kept by a yeti in a cave. This is the only side quest of this game and the reward is really nice. Now look at the tree and go to the east to go back to the graveyard. Use the teleport spell to go to the old man’s house, make your report and leave the house. Now, go to the east and unlock Shabow’s gate with this new key.
Go to the east, then to the north, then to the north-east and to the north. Check the grass to find a herb (4). Go back to the previous screen, check the surround to reveal another path, go this way and reach Shabow’s house. You should be set before talking to Shabow, the next trial is somewhat tough. Go back to the forest shop, buy some stuff and go back to Shabow. After talking to him, you will be instantly in a cave. Let’s find the moon fragment. You can’t go to the west so there are two options left: north or south-west. Don’t take the second option, we’ll see that later. Go to the north and enter the tricky cave. The chest is a mimic, don’t open it and don’t go to the east because there’s another one. Go to the west instead then to the south, open the chest to get an optional information. Go back where the first mimic is, go to the north, open the chest to get another optional information and go to the west. Touch the chest to make a shopkeeper come. Buy the golden armor if you can afford it and some stuff then go to the north. Open the right pot to eat a fruit (which will recover some health), go to the west, then go to the south, then to the west and go to the south . Don’t open the chest, it’s a mimic. Go to the south to find another chest. There’s the moon fragment inside. However, you will have to beat a shadow. Use the spell of “bagefire” if you did learn it (you learn this spell when you reach level 8) in order to beat this shadow quite easily. Now, time to leave this place. Needless to find a way out, use the teleport spell in order to go to Shabow’s house. Talk to him. Sadly, he doesn’t know where the Sword of Hope is (awesome… ). However, he will enhance your sword (5). Talk to the pigeon to get the B egg. Now, it’s time to make your report to the old man and look for Camu, the last wizard who probably knows about the location of the Sword of Hope.
Somewhere around Shabow’s house, a lizard has the key of Camu’s domain. Actually, I should say “go talk to the trees until you have an information about a lizard with a key” but as I’m nice, I’ll tell you how to get it. From Shabow’s gate, just keep going to the east and go to the north-east. You’ll come to the bridge. If you are at least level 9, check the river and face the lizard. Use the spell of lightning 2 on this enemy and it should be ok after a couple of hits. You’ll get Camu’s key (6). Now, time to go to Camu’s domain. From the forest shop, go to the east, then to the north-east and go to the north. Use the key on the gate and carry on. Go to the north, check the small stone to get a herb and go to the north. Go to the north-east twice, check the ledge to find a herb and go to the south. Carry on, enter a cave and check the rock. Oh, there’s something shining up on the top. Hit the rock and check it one more time. You’ll face the yeti. This enemy can be a pain in the butt because he often does a ton of damages with his physical attack. Plus, his blizzard attack is quite painful. However, if you have reached level 10 and learned “bagefire2”, if you are lucky and if you heal quite often, you shouldn’t get any troubles to beat this enemy. Use the power of the doll if you want to be immune to the blizzard attack but murder him with the spell of “bagefire2”. Three hits should be enough to burn this gem stealer. Yes, this shining thing is a gem. And guess what? It’s Poliniac’s sapphire crystal. Go back to his grave (if you don’t remember how to go to Poliniac’s grave, refer to the chapter 2, third paragraph), use the sapphire on him and he will give you the platinum armor, which is the best armor of the game. Go back to Camu’s domain after finishing up this side quest. From Camu’s gate, go to the north and enter the cave to the east. Check the rock to fight the imp. Another annoying enemy, immune to magic powers and really tough. Just use the ruby on him, heal when you are in trouble and protect yourself with the power of the doll. This enemy may steal some of your coins, which can be a bad thing but also a good thing since his attacks are terrible sometimes. Once you teach him a lesson that he will remember, you’ll read a letter. Go back to Shabow’s house, keep going to the south until you reach the cave, go to the south-west, check the pond and face the mudman. This enemy is not really hard to beat if you have learned the spell “lightning 2”. Two hits should send this creature back where it came. However, you should use the doll and heal yourself if you are hurt because the mudman will use a spell called “xplosion”. This spell is “OUCH!” for you, however it hurts the caster a bit. Once you beat this creature, you’ll get the ring. Go back to Camu’s domain and find the right spring. There’s a spring where you can get an optional item: the fairy lamp. However, you must answer some questions correctly otherwise you won’t get it and, worst thing, you’ll probably face a lamia. If you want this item, from Camu’s gate, go to the west when you can and reach the spring. Use the ring, talk to the woman and answer: Question 1: Yes You’ll get the fairy lamp (7). This item will help you later. Now, let’s go to the right spring. From Camu’s gate, go to the north, then keep going to the north-east, go to the south-east and carry on until you find the spring. Check the spring, use the ring and go back to the graveyard. You must talk to her twice before going there. Check one of the graves and face the vampire. This creature is really annoying. He’s immune to your physical attacks and magic powers. Plus, his bite decreases your agility, which is really a big deal. Oh, I should not forget this detail: he always gets the first strike woohoo. Well, “how can I beat it if I can’t hit him with my best shot?”. That’s what you’ll probably say. It’s obvious: use the ruby! Not really obvious though when you don’t know about the trick. Don’t forget to heal, abuse the power of the ruby and the unicorn’s horn will be yours. Go back to Camu’s domain and head to the pagoda, where Camu the last wizard lies in wait. From Camu’s gate, keep going to the north, then go to the north-east, go to the north-west and go to the north. Don’t go to the north, it’s the fake spring (unless you want to fight a lamia after using the precious ring), go to the east, check the hole to get a herb (8), go to the north, use the horn to open the door of the pagoda and enter the building. This place is really short but the creatures inside are quite tough to beat. The chest of the first floor has a hint. Go to the second floor. Don’t open the chest, it’s a mimic. Go to the third floor, open the chest to get the spore (this is the other “all or nothing” item, this one can make the enemies fall asleep if it works) and go to the east to meet Camu. Talk to her, she will tell you that she doesn’t have the Sword of Hope (where could it be then?!). However, she will upgrade your sword. Talk to the pigeon: he doesn’t want to give the egg. Hit the pigeon: it’s futile. Ok, time to express your hunger… err your anger (got it? No? I know that was a stupid joke
Get ready to face in this last part of the game a recycled enemy (the myconid) and new enemies: the hag, the centipede and the druid. The last enemy is really the trouble here. Alone, it’s ok, however when you face a group of druids, pray in order to survive because they can kill you as soon as possible. They reflect most of your magic powers (except the spell of “arctic” and “xplosion”), they have some destructive powers… well they will make you go through Hell until you reach the final boss. Isn’t that lovely, hmm? Don’t worry it’s the only threat here; the other creatures are not really tough compared to the druid.
If you go to the south, you’ll find a herb in the chest (or something else if you are full of herbs). Go back to the previous room if you took the item and go to the east. Carry on until you reach three closed doors. Use the ring and the doors will open. Keep in mind that you’ll have to use the ring everytime the ring in order to open those doors when you’ll go back to this room (like the gates and the keys). If you go to the east, you’ll find a Y fruit. Actually, this fruit has a specific power: it decreases your mana points (awesome…). However, there’s a merchant if you want to buy some stuff. Keep going to the east then go to the north, took the chest if you want to call the merchant (or go to the south and open the chest if you want the fruit). The door to the west will lead you to a chest with a hint, really useful later. If you want to make some progress, choose the northern path. Keep going north, then go to the west and open one of the ivies to get an ivy seed (9). Now, you can reach the castle gate if you climb either the left ivy or the right ivy. However, make sure you have the fairy lamp if you want to climb up the right ivy. Otherwise, except a recovery item to collect, this way is completely pointless. I will explain how to go to the castle’s gate using both of the ways. If you decide to climb up the right ivy: go north, then go to the west twice and go south twice. Open the chest to get a herb (or another recovery item). Now, keep going north, then go to the east and use the fairy lamp in this room. The spring sprite will make a secret path appear (10). Go through this new path, go to the west then to the north and go to the east. You can now push or pull a door. Your decision will make the way to the castle gate interesting or not. Let’s stop this part here since the other path leads to this door. However, it’s longer than this way. Now if you decide to climb up the left ivy: go to the north and open the middle dwarf. Answer “girl” to gain 20 HP or “boy” to lose 20 HP. The left dwarf is a liar, don’t trust him: there’s a hidden path to the left but it will bring you back where the three doors are. Talk to the right dwarf and go to the right. Go down to reach the abyss, go the right and go to the north. Check the surround and use the boat to cross the river. You’ll lose 5 HP for your effort but you’ll reach the other side. Now carry on to the north then go to the east. You’ll find the door.
We can carry on from this door now. As I previously said, depending on how you will interact with this door, the way will be interesting or not. If you push the door, you’ll find nothing else but a trapped chest. If you pull the door, you’ll be able to find an item. So I suggest you to pull the door since you can get a prize during your progress or, I should say, your exploration. But you can choose the other option if you wish, it’s up to you. Just do not open the chest otherwise you’ll face a grimlock. And, believe me or not, this creature might be a pain in the butt. Besides the fact that it can steal your coins, it can use the spell “recmax” (spell that you can learn if you reach the level 20 which is really annoying when it abuses this spell after each of your hits). If you pushed the door, go to the east, then to the north and open the door to the left. Go to the north, go to the west then north if you want to buy some stuff (touch the chest) or go to the north to reach the castle’s gate. Now, if you did pull the door, the item lies in wait in a chest located to the south then to the east. Ignore the pile of rocks in the previous room, go to the north then to the east, open the door and go to the north. Go to the west then to the north if you want to buy some stuff (it’s the last merchant you’ll see in this game so feel free to buy all you need), then head to the castle’s gate located to the north. Try to open the gate, it’s closed. Unfortunately, you didn’t have any key in order to unlock it. Try to climb the ivy seed: you can’t. Nothing to do… unless you remember the hint somewhere in the undergrounds: you can reach the interior of the castle if you have an ivy seed. Hey, you have one, right? Use it and climb up the new ivy seed to reach the balcony. Go to the east to enter the throne room, hit the throne and take the scroll of secret (11). Now go to the south then to the east, use the spell of secret to reveal a secret path leading to the mirror world. If you need some heal, go to the south and open the faucet to recover some health. Otherwise, go through the new path. As you can see, it’s the inverted castle or mirror world. Go to the east, then to the south twice, then go to the east and take the recovery item in the chest, in the kitchen located to the north. Go to the south to reach the garden. Go to the south one more time, talk to the roses. Nothing here, they say? Don’t trust them and check the rose. Yes, they did lie to you! There’s a secret path leading to a cave. Enter the cave, keep going to the west, then keep going to the south and to the east twice. Hit the rock to reveal another secret path. Climb down the ladder, try to open the door to your right and use the ruby to unlock it. Now I hope you are ready to face the final boss because this is the last trial. Hit the wall to reveal a painting and prepare to face King Hennesy. A real pain! He is immune to all the offensive spells, he hits really hard and he is really tough to beat. I hope your lucky star shines above your head because you’ll need it in order to use the spore quite often and make him fall asleep (and pray that he will sleep for a while and probably the entire battle otherwise you might be screwed). Use the spore then, attack while he is sleeping and don’t forget to heal yourself. Wait, it’s not over. There’s a second form. This time, King Hennesy is a dragon. Compared to the first form, there’s nothing really difficult. Attack your opponent with physical attacks only. The first strike of the dragon will hurt you, however it will increase the chances of critical hits in order to send this dragon back where it came. Same thing, use the spore (don’t forget to pray when you use this item Well, it's the end of this walkthrough. I hope you enjoyed it and I see you next time for another adventure. And I think it's time to go back in time, when my passion for videogames started... -------------------- |


| Games have secrets, I have my eagle gaze. |
Affected by 'Laziness Syndrome'
Registered: 10-21-11
Location: France
Last Post: 2627 days
Last Active: 1800 days
11-16-12 09:17 AM
 Singelli is Offline
| ID: 689142 | 37 Words
Singelli is Offline
| ID: 689142 | 37 Words
 Singelli is Offline

POSTS: 1420/8698
POST EXP: 1189395
LVL EXP: 57714628
CP: 67403.2
VIZ: 3154377
This is -very- nicely done. It's informative, visually appealing, and quite detailed. Thank you very much for this. It's one of the best walkthroughs I've seen on this site. I look forward to more walkthroughs from you. This is -very- nicely done. It's informative, visually appealing, and quite detailed. Thank you very much for this. It's one of the best walkthroughs I've seen on this site. I look forward to more walkthroughs from you. |
| Singelli |
Affected by 'Laziness Syndrome'
Registered: 08-09-12
Location: Alabama
Last Post: 3312 days
Last Active: 3287 days
