

 User Notice
 Forum Links
Zelda no Densetsu - The Hyrule Fantasy: Zelda no Densetsu: The Hyrule Fantasy (FDS)
aka The Legend of Zelda on the NES (Vizzed exclusive)
aka The Legend of Zelda on the NES (Vizzed exclusive)
Play Zelda no Densetsu - The Hyrule Fantasy Online


Thread Information
Thread Actions
Thread Closed

New Thread
New Poll
Order
Zelda no Densetsu: The Hyrule Fantasy (FDS)
10-09-12 12:46 AM
Azul Fria is Offline
| ID: 669170 | 1392 Words
| ID: 669170 | 1392 Words
Azul Fria
Level: 59


POSTS: 7/806
POST EXP: 151458
LVL EXP: 1603330
CP: 24611.2
VIZ: 778200

POSTS: 7/806
POST EXP: 151458
LVL EXP: 1603330
CP: 24611.2
VIZ: 778200
Likes: 0 Dislikes: 0
Note: This is the 1st Vizzed-exclusive (non-GameFAQs) walkthrough. Because of certain games having too many FAQs, they are rejected due to oversaturation. If I come across a game like that I want to make a guide for, I'll post them here as an exclusive though they'll also end up on my website.
Zelda no Densetsu: The Hyrule Fantasy System: Famicom Disk System/Nintendo Entertainment System INTRODUCTION Journey to the Land of Hyrule where people of every race roam around. You are stunning young lad named Link and your quest is to journey through nine dungeons and collect the 8 pieces of the Triforce of Wisdom that Princess Zelda had scattered all over the land to keep it out of the Evil Gannon's hands then once all pieces are gathered, head over to Death Mountain to defeat Gannon whom already controls the Triforce of Power and save the Land of Hyrule from impending doom. CONTROLS D-pad = Move in that direction (no diagonal movements) B button = Use Sub-item/Sub-Weapon A button = Sword Start button = Inventory Select button = Pause ENEMIES - OVERWORLD   Octorock OctorockThe Octorocks will spit rocks at link but they can be defleted by his Shield when he is not attacking them. Blue ones take an extra hit to destroy with a regular sword.   Tektite TektiteThe Tektites are spider-like creatures that hop around the screen and try to land on you. The blue ones seem to drop more 5-Rupies.   Leever LeeverLeevers rise from the ground and try to crash into Link. Red ones will try to sprout from somewhere underneath him and follow him around. Blue ones cause more damage to Link and wander aimlessly.   Moblin MoblinMoblins are dog-faced enemies that appear and shoot arrows in Link's direction. the blue ones take more hits to destroy.   Lynel LynelLynels heave Swords at Link similar to the ones that Link throws when he is at full health. They do sever damage if Link doesn't have a Blue or Red Ring on him. Blue ones take more damage to defeat. The swords can only be deflected by the Magic Shield. Peahats are enemies who fly around aimlessly then stop for a few seconds before flying again. You can only hit them while they are still or you can blow them up with a bomb.  Zora ZoraZoras hide in the water and only come out to attack with a spherical beam that can only be deflected by a Magic Shield.  Ghini GhiniGhini is a ghost that appears in the graveyard area of Hyrule. The first one you see is the only one that can be harmed. Touching a tombstone will make more come out but they can't be harmed. Killing the head Ghini will kill them though and they will drop hearts or rupies.  Armos ArmosDespite having what looks like a shield, they are not invincible from the front. They are still until you touch them. Don't touch them from the front or they will damage you. They often guard secret areas including the entrance to the 2nd dungeon in Quest 2.  Boulder BoulderThey are not really enemies but they do come tumbling down on certain screens and damage Link if they make contact with him. ENEMIES - DUNGEON  Keese KeeseKeese are bats that serve as annoying pests to get rid of. They can be defeated by anything that does damage to them including the boomerang. Small enemies that move around the room in random patterns. They can be killed by Boomerangs too.  Zol ZolWhen you kill these with the normal sword, they split into two Gels.  Stalfos StalfosSkeletons that move around in random patterns. In Quest 2, they shoot sword beams. Watch out for these guys. If you have a Magic Shield, they will eat it up if they catch you and you don't beat them off in time.  Pols Voice Pols VoiceRabbit heads that hop around the room. They do heavy damage if they crash into you. The arrows can defeat them in one shot. On the Famicom Disk System version, you can blow into the microphone on Controller 2 to kill them and make them drop items.  Vire VireHops all around the room, killing them with a normal or white swords splits them into two red Keese. They guard boss rooms. If they catch you, they'll drag you back to the beginning of the dungeon.  Gibdo GibdoThese mummies move around aimlessly. What makes them so dangerous is that they pack up quickly and take lots of damage before they die.  Blade Trap Blade TrapWhen Link is level with them, they try to close up on him. Move in then move out to make them close then move forward when they reset.  Moldorm MoldormThey'll sprout out the ground and move around the room wildly. They compose of many sections that must be destroyed to defeat it completely.  Stone Statue Stone StatueSome of these statues will spit orbs wherever Link stands. Magic Shields can repel bullets.  Patra PatraFound only in the 9th dungeon, it lets the Mini Patras damage you. You must kill all the mini-Patras in order to harm Patra whom offers no resistance once defenseless.   Goriya GoriyaThey heave boomerangs at Link. Blue ones take more damage to kill. There is a certain red one named "Grumble Grumble" that appears in some dungeouns that you must give it Meat to pass through to the next section of the dungeon.   Darknut DarknutThese are the most annoying enemies in the game. They block frontal attacks so you have to maneuver around them at the right angle to get a stab in. Blue ones take more damage.   Wizzrobe WizzrobeWizzrobes come in two varieties that both shoot magic spells that can only be deflected by the Magic Shield. Orange ones will disappear then appear at spots level with Link and shoot before disappearing again. Blue ones will float over to a spot level with Link and rapidly shoot spells as long as they are level with him.   Lanmola LanmolaThey'll sprout out the ground and move around the room wildly. They compose of many sections that must be destroyed to defeat it completely. Blue ones move faster.   Rope RopeWhen level with Link, they dart towards him. Flashing ones appear in Quest 2 and dish out more damage.    Bubble BubbleIf a Bubble hits Link, he'll be unable to use his sword for a few seconds unless he uses the Recorder. Red and Blue ones appear in Quest 2. Red ones will take away his sword permanently unless he touches a Blue one to restore it or visits a fairy fountain on the outside. BOSSES  Aquamentus AquamentusThe first boss you'll likely meet in the game. They'll shoot three orbs in Link's direction simultaneously. You can move between the orbs to get to it and start stabbing at it or fire at it from afar with full health.  Dodongo DodongoNothing can penetrate Dodongo's armor unless you blow it up from the inside. Feed it a bomb by placing one in its line of travel. If it eats it, it'll blow up in its belly. 2 bombs will do the trick. Another way to kill it is to plant a bomb that it doesn't eat but the explosion will stun it and allow you to slash it once with your sword to kill it.  Manhandla ManhandlaYou must destroy all four arms to kill it. The more arms it loses, the master it moves. One well placed bomb can kill all four in one blast.  Gleeok GleeokThey have 2, 3 or 4 heads depending on the dungeoun you are in. You must defeat each head to defeat it completely. Each defeated head turns red and starts moving around the room shooting at Link.  Digdogger DigdoggerIf you blow the recorder, Digdogger will shrink down to the size of Link and sometimes split into 3 miniature Digdoggers. Once shrunken, it will move around the room and be vulnerable to sword slashes.  Gohma GohmaGohma can only be hurt by shooting an arrow into its eye while it's completely open. They shoot orbs at Link's location.  Ganon GanonThe head boss himself will turn invisible and warp around different parts of the room shooting orbs. If you manage to hit him, he'll appear and then disappear again. After you do enough damage to him, he turns brown and one Silver Arrow will finish him off. Zelda no Densetsu: The Hyrule Fantasy System: Famicom Disk System/Nintendo Entertainment System INTRODUCTION Journey to the Land of Hyrule where people of every race roam around. You are stunning young lad named Link and your quest is to journey through nine dungeons and collect the 8 pieces of the Triforce of Wisdom that Princess Zelda had scattered all over the land to keep it out of the Evil Gannon's hands then once all pieces are gathered, head over to Death Mountain to defeat Gannon whom already controls the Triforce of Power and save the Land of Hyrule from impending doom. CONTROLS D-pad = Move in that direction (no diagonal movements) B button = Use Sub-item/Sub-Weapon A button = Sword Start button = Inventory Select button = Pause ENEMIES - OVERWORLD OctorockThe Octorocks will spit rocks at link but they can be defleted by his Shield when he is not attacking them. Blue ones take an extra hit to destroy with a regular sword. TektiteThe Tektites are spider-like creatures that hop around the screen and try to land on you. The blue ones seem to drop more 5-Rupies. LeeverLeevers rise from the ground and try to crash into Link. Red ones will try to sprout from somewhere underneath him and follow him around. Blue ones cause more damage to Link and wander aimlessly. MoblinMoblins are dog-faced enemies that appear and shoot arrows in Link's direction. the blue ones take more hits to destroy. LynelLynels heave Swords at Link similar to the ones that Link throws when he is at full health. They do sever damage if Link doesn't have a Blue or Red Ring on him. Blue ones take more damage to defeat. The swords can only be deflected by the Magic Shield. Peahats are enemies who fly around aimlessly then stop for a few seconds before flying again. You can only hit them while they are still or you can blow them up with a bomb. ZoraZoras hide in the water and only come out to attack with a spherical beam that can only be deflected by a Magic Shield. GhiniGhini is a ghost that appears in the graveyard area of Hyrule. The first one you see is the only one that can be harmed. Touching a tombstone will make more come out but they can't be harmed. Killing the head Ghini will kill them though and they will drop hearts or rupies. ArmosDespite having what looks like a shield, they are not invincible from the front. They are still until you touch them. Don't touch them from the front or they will damage you. They often guard secret areas including the entrance to the 2nd dungeon in Quest 2. BoulderThey are not really enemies but they do come tumbling down on certain screens and damage Link if they make contact with him. ENEMIES - DUNGEON KeeseKeese are bats that serve as annoying pests to get rid of. They can be defeated by anything that does damage to them including the boomerang. Small enemies that move around the room in random patterns. They can be killed by Boomerangs too. ZolWhen you kill these with the normal sword, they split into two Gels. StalfosSkeletons that move around in random patterns. In Quest 2, they shoot sword beams. Watch out for these guys. If you have a Magic Shield, they will eat it up if they catch you and you don't beat them off in time. Pols VoiceRabbit heads that hop around the room. They do heavy damage if they crash into you. The arrows can defeat them in one shot. On the Famicom Disk System version, you can blow into the microphone on Controller 2 to kill them and make them drop items. VireHops all around the room, killing them with a normal or white swords splits them into two red Keese. They guard boss rooms. If they catch you, they'll drag you back to the beginning of the dungeon. GibdoThese mummies move around aimlessly. What makes them so dangerous is that they pack up quickly and take lots of damage before they die. Blade TrapWhen Link is level with them, they try to close up on him. Move in then move out to make them close then move forward when they reset. MoldormThey'll sprout out the ground and move around the room wildly. They compose of many sections that must be destroyed to defeat it completely. Stone StatueSome of these statues will spit orbs wherever Link stands. Magic Shields can repel bullets. PatraFound only in the 9th dungeon, it lets the Mini Patras damage you. You must kill all the mini-Patras in order to harm Patra whom offers no resistance once defenseless. GoriyaThey heave boomerangs at Link. Blue ones take more damage to kill. There is a certain red one named "Grumble Grumble" that appears in some dungeouns that you must give it Meat to pass through to the next section of the dungeon. DarknutThese are the most annoying enemies in the game. They block frontal attacks so you have to maneuver around them at the right angle to get a stab in. Blue ones take more damage. WizzrobeWizzrobes come in two varieties that both shoot magic spells that can only be deflected by the Magic Shield. Orange ones will disappear then appear at spots level with Link and shoot before disappearing again. Blue ones will float over to a spot level with Link and rapidly shoot spells as long as they are level with him. LanmolaThey'll sprout out the ground and move around the room wildly. They compose of many sections that must be destroyed to defeat it completely. Blue ones move faster. RopeWhen level with Link, they dart towards him. Flashing ones appear in Quest 2 and dish out more damage. BubbleIf a Bubble hits Link, he'll be unable to use his sword for a few seconds unless he uses the Recorder. Red and Blue ones appear in Quest 2. Red ones will take away his sword permanently unless he touches a Blue one to restore it or visits a fairy fountain on the outside. BOSSES AquamentusThe first boss you'll likely meet in the game. They'll shoot three orbs in Link's direction simultaneously. You can move between the orbs to get to it and start stabbing at it or fire at it from afar with full health. DodongoNothing can penetrate Dodongo's armor unless you blow it up from the inside. Feed it a bomb by placing one in its line of travel. If it eats it, it'll blow up in its belly. 2 bombs will do the trick. Another way to kill it is to plant a bomb that it doesn't eat but the explosion will stun it and allow you to slash it once with your sword to kill it. ManhandlaYou must destroy all four arms to kill it. The more arms it loses, the master it moves. One well placed bomb can kill all four in one blast. GleeokThey have 2, 3 or 4 heads depending on the dungeoun you are in. You must defeat each head to defeat it completely. Each defeated head turns red and starts moving around the room shooting at Link. DigdoggerIf you blow the recorder, Digdogger will shrink down to the size of Link and sometimes split into 3 miniature Digdoggers. Once shrunken, it will move around the room and be vulnerable to sword slashes. GohmaGohma can only be hurt by shooting an arrow into its eye while it's completely open. They shoot orbs at Link's location. GanonThe head boss himself will turn invisible and warp around different parts of the room shooting orbs. If you manage to hit him, he'll appear and then disappear again. After you do enough damage to him, he turns brown and one Silver Arrow will finish him off. |
Vizzed Elite
Affected by 'Laziness Syndrome'
Registered: 10-06-12
Last Post: 2510 days
Last Active: 11 days
| Ice Queen Zero |
Affected by 'Laziness Syndrome'
Registered: 10-06-12
Last Post: 2510 days
Last Active: 11 days
(edited by Azul Fria on 10-18-12 02:28 AM)
10-09-12 11:07 AM
 Davideo7 is Online
| ID: 669313 | 33 Words
Davideo7 is Online
| ID: 669313 | 33 Words
 Davideo7 is Online
| ID: 669313 | 33 Words
Davideo7
Level: 356
POSTS: 23929/45642
POST EXP: 3528714
LVL EXP: 859550140
CP: 198327.2
VIZ: 128969926

POSTS: 23929/45642
POST EXP: 3528714
LVL EXP: 859550140
CP: 198327.2
VIZ: 128969926
Likes: 0 Dislikes: 0
Very nice so far, I love how organized your walkthrough is and I love the use of graphics.
Is Zelda for the Famicom Disk System the same as the Zelda for the NES? Is Zelda for the Famicom Disk System the same as the Zelda for the NES? |
The Owner
Owner, Developer, Advertiser, etc
Affected by 'Laziness Syndrome'
Registered: 12-06-04
Location: Wisconsin
Last Post: 42 days
Last Active: 1 min.
Owner, Developer, Advertiser, etc
| Founder, Mod, Investor |
Affected by 'Laziness Syndrome'
Registered: 12-06-04
Location: Wisconsin
Last Post: 42 days
Last Active: 1 min.
10-09-12 11:15 AM
Sairek Ceareste is Offline
| ID: 669319 | 80 Words
| ID: 669319 | 80 Words
Level: 41
POSTS: 104/344
POST EXP: 38177
LVL EXP: 447003
CP: 61.0
VIZ: 46035
POSTS: 104/344
POST EXP: 38177
LVL EXP: 447003
CP: 61.0
VIZ: 46035
Likes: 0 Dislikes: 0
I love how you used the images for the enemies with descr Davideo7 : They were pretty much the same game. The Famicom Disk System version though was able to get an extra sound channel into the game (the standard was five sound channels, the disk system had six), but other than that they were mostly the same. Davideo7 : They were pretty much the same game. The Famicom Disk System version though was able to get an extra sound channel into the game (the standard was five sound channels, the disk system had six), but other than that they were mostly the same. |
Member
Affected by 'Laziness Syndrome'
Registered: 10-07-12
Last Post: 4904 days
Last Active: 1771 days
Affected by 'Laziness Syndrome'
Registered: 10-07-12
Last Post: 4904 days
Last Active: 1771 days
(edited by Sairek Ceareste on 10-09-12 11:16 AM)
10-09-12 12:53 PM
Azul Fria is Offline
| ID: 669391 | 18 Words
| ID: 669391 | 18 Words
Azul Fria
Level: 59
POSTS: 8/806
POST EXP: 151458
LVL EXP: 1603330
CP: 24611.2
VIZ: 778200
POSTS: 8/806
POST EXP: 151458
LVL EXP: 1603330
CP: 24611.2
VIZ: 778200
Likes: 0 Dislikes: 0
Another difference is that you can blow in the microphone on COntroller 2 to kill Pols Voices (rabbits). |
Vizzed Elite
Affected by 'Laziness Syndrome'
Registered: 10-06-12
Last Post: 2510 days
Last Active: 11 days
| Ice Queen Zero |
Affected by 'Laziness Syndrome'
Registered: 10-06-12
Last Post: 2510 days
Last Active: 11 days
10-09-12 12:55 PM
Sairek Ceareste is Offline
| ID: 669393 | 15 Words
| ID: 669393 | 15 Words
Level: 41
POSTS: 117/344
POST EXP: 38177
LVL EXP: 447003
CP: 61.0
VIZ: 46035
POSTS: 117/344
POST EXP: 38177
LVL EXP: 447003
CP: 61.0
VIZ: 46035
Likes: 0 Dislikes: 0
Member
Affected by 'Laziness Syndrome'
Registered: 10-07-12
Last Post: 4904 days
Last Active: 1771 days
Affected by 'Laziness Syndrome'
Registered: 10-07-12
Last Post: 4904 days
Last Active: 1771 days
10-09-12 02:25 PM
Azul Fria is Offline
| ID: 669487 | 7 Words
| ID: 669487 | 7 Words
Azul Fria
Level: 59
POSTS: 9/806
POST EXP: 151458
LVL EXP: 1603330
CP: 24611.2
VIZ: 778200
POSTS: 9/806
POST EXP: 151458
LVL EXP: 1603330
CP: 24611.2
VIZ: 778200
Likes: 0 Dislikes: 0
Updated with the Dungeon enemies and Bosses. |
Vizzed Elite
Affected by 'Laziness Syndrome'
Registered: 10-06-12
Last Post: 2510 days
Last Active: 11 days
| Ice Queen Zero |
Affected by 'Laziness Syndrome'
Registered: 10-06-12
Last Post: 2510 days
Last Active: 11 days
10-09-12 02:27 PM
Sairek Ceareste is Offline
| ID: 669489 | 45 Words
| ID: 669489 | 45 Words
Level: 41
POSTS: 130/344
POST EXP: 38177
LVL EXP: 447003
CP: 61.0
VIZ: 46035
POSTS: 130/344
POST EXP: 38177
LVL EXP: 447003
CP: 61.0
VIZ: 46035
Likes: 0 Dislikes: 0
I never ever finished the game and I must say: Ganon does not look very menacing at all. He looks more comical; that sprite just makes me laugh. "GRR!! YOU HAVE BEEN A VERY NAUGHTY CHILD. NOW I'M GOING TO HAVE TO KICK YOU BUTT!!" Ganon does not look very menacing at all. He looks more comical; that sprite just makes me laugh. "GRR!! YOU HAVE BEEN A VERY NAUGHTY CHILD. NOW I'M GOING TO HAVE TO KICK YOU BUTT!!" |
Member
Affected by 'Laziness Syndrome'
Registered: 10-07-12
Last Post: 4904 days
Last Active: 1771 days
Affected by 'Laziness Syndrome'
Registered: 10-07-12
Last Post: 4904 days
Last Active: 1771 days
10-15-12 05:10 PM
Davideo7 is Online
| ID: 673034 | 33 Words
Davideo7 is Online
| ID: 673034 | 33 Words
Davideo7
Level: 356
POSTS: 23941/45642
POST EXP: 3528714
LVL EXP: 859550140
CP: 198327.2
VIZ: 128969926
POSTS: 23941/45642
POST EXP: 3528714
LVL EXP: 859550140
CP: 198327.2
VIZ: 128969926
Likes: 0 Dislikes: 0
Azul Fria : Looking great. I keep looking back to this thread every time I remember to see what's added. Thanks for keeping it up to date and responding each time you add info. |
The Owner
Owner, Developer, Advertiser, etc
Affected by 'Laziness Syndrome'
Registered: 12-06-04
Location: Wisconsin
Last Post: 42 days
Last Active: 1 min.
Owner, Developer, Advertiser, etc
| Founder, Mod, Investor |
Affected by 'Laziness Syndrome'
Registered: 12-06-04
Location: Wisconsin
Last Post: 42 days
Last Active: 1 min.
10-18-12 02:34 AM
Azul Fria is Offline
| ID: 674671 | 1373 Words
| ID: 674671 | 1373 Words
Azul Fria
Level: 59
POSTS: 11/806
POST EXP: 151458
LVL EXP: 1603330
CP: 24611.2
VIZ: 778200
POSTS: 11/806
POST EXP: 151458
LVL EXP: 1603330
CP: 24611.2
VIZ: 778200
Likes: 0 Dislikes: 0
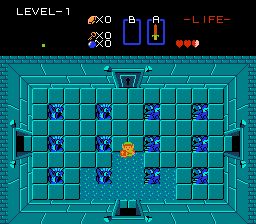
Updated with Weapons info. The next post will have Walkthrough. MAP A1 A2 A3 A4 A5 A6 A7 A8 A9 A10 A11 A12 A13 A14 A15 A16 B1 B2 B3 B4 B5 B6 B7 B8 B9 B10 B11 B12 B13 B14 B15 B16 . . . . . H1 H2 H3 H4 H5 H6 H7 H8 H9 H10 H11 H12 H13 H14 H15 H16
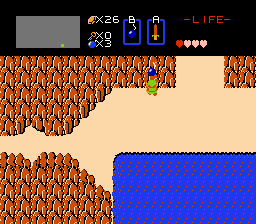
 Your quest starts in H8. Go inside that cave and an old man who gives you a wooden sword. Your quest starts in H8. Go inside that cave and an old man who gives you a wooden sword.
 Hitoride Hakikenja Kore wo Sazukeyou (It's too dangerous to go alone, take this!) Hitoride Hakikenja Kore wo Sazukeyou (It's too dangerous to go alone, take this!)Once out of the cave with your sword, do some rupy farming by traveling around killing enemies and looking for secret rupies. Some secret rupies are easy to find but others require you to burn a bush, blow up a wall, or (in the second quest) toot the recorder in certain spots. You'll earn ten, thirty, or even a hundred rupies.
   Minnani Naishodayo (It's a secret for everyone)
Just keep in mind that you cannot have more than 255 Rupies. Any extra ones will not count. The reason for this is that the rupy count was designed in hexadecimal. 255 = the numeral value for FF (max).
The first two items that take priority for purchasing are the Blue Candle found in G7 shop and the bombs found in E5 shop. The shopkeeper has awful manners in the earlier releases of Zelda and more polite in later releases he's more polite.
 Nankakoutewareya (Buy something, will ya?/Please buy something) Nankakoutewareya (Buy something, will ya?/Please buy something) If you are still want to do some pre-dungeon farming then you can also visit the secret shop and by the Blue Ring off the bat to take half-damage (located in D5 under the top middle Armos and it is worth a whopping 250 Rupees). There is also magical shield which you notice the 160 Rupy price tag but that's downright ridiculous. Once you get the Blue Candle, you can find the Magic Shield for 90 Rupies by burning the top-leftmost bush in E7. The next screen (E8) to the right has a burnable bush too. Here you will find a old man who gives you the choice of getting a Red Potion or Life Container. Always pick the Life Container as you can always by a red potion (or blue) when you give the prescr
   Sukina Houwo Sazukeyou (Choose Life or Medicine) Sukina Houwo Sazukeyou (Choose Life or Medicine)With 4 hearts, I still say it's not quite time to go dungeon exploring just yet. You do want a White Sword to deal double the damage after all. The first dungeon is located in D8 but skip that for now and head to C13 and blow up the wall on the small rock for another life container. Now we got the required number of hearts to get the White Sword without having to kill any bosses.
 From here, go up one screen, left 3 screens, and up one (A10). Kill the Lynel if necessary and get the white sword.
 Tsukai Konaserunara Korewo Sazukeyou (those who master this sword can hold this) Tsukai Konaserunara Korewo Sazukeyou (those who master this sword can hold this)Now that we hopefully got the White Sword, Magic Shield and Blue Ring, we are heavily armed to the teeth and ready to tackle the first dungeon but for good measure, lets get the sixth heart since it's still physically possible. The other 2 overworld hearts require a ladder and a raft respectively so we'll ignore those. Head over to H12 and blow up the wall.
 Now onward to D8 where our first dungeon awaits.
  Tune in next time as we tackle the first dungeon.
MAP A1 A2 A3 A4 A5 A6 A7 A8 A9 A10 A11 A12 A13 A14 A15 A16 B1 B2 B3 B4 B5 B6 B7 B8 B9 B10 B11 B12 B13 B14 B15 B16 . . . . . H1 H2 H3 H4 H5 H6 H7 H8 H9 H10 H11 H12 H13 H14 H15 H16
Your quest starts in H8. Go inside that cave and an old man who gives you a wooden sword.
Hitoride Hakikenja Kore wo Sazukeyou (It's too dangerous to go alone, take this!)Once out of the cave with your sword, do some rupy farming by traveling around killing enemies and looking for secret rupies. Some secret rupies are easy to find but others require you to burn a bush, blow up a wall, or (in the second quest) toot the recorder in certain spots. You'll earn ten, thirty, or even a hundred rupies.
Minnani Naishodayo (It's a secret for everyone)
Just keep in mind that you cannot have more than 255 Rupies. Any extra ones will not count. The reason for this is that the rupy count was designed in hexadecimal. 255 = the numeral value for FF (max).
The first two items that take priority for purchasing are the Blue Candle found in G7 shop and the bombs found in E5 shop. The shopkeeper has awful manners in the earlier releases of Zelda and more polite in later releases he's more polite.
Nankakoutewareya (Buy something, will ya?/Please buy something) If you are still want to do some pre-dungeon farming then you can also visit the secret shop and by the Blue Ring off the bat to take half-damage (located in D5 under the top middle Armos and it is worth a whopping 250 Rupees). There is also magical shield which you notice the 160 Rupy price tag but that's downright ridiculous. Once you get the Blue Candle, you can find the Magic Shield for 90 Rupies by burning the top-leftmost bush in E7. The next screen (E8) to the right has a burnable bush too. Here you will find a old man who gives you the choice of getting a Red Potion or Life Container. Always pick the Life Container as you can always by a red potion (or blue) when you give the prescr
Sukina Houwo Sazukeyou (Choose Life or Medicine)With 4 hearts, I still say it's not quite time to go dungeon exploring just yet. You do want a White Sword to deal double the damage after all. The first dungeon is located in D8 but skip that for now and head to C13 and blow up the wall on the small rock for another life container. Now we got the required number of hearts to get the White Sword without having to kill any bosses.
From here, go up one screen, left 3 screens, and up one (A10). Kill the Lynel if necessary and get the white sword.
Tsukai Konaserunara Korewo Sazukeyou (those who master this sword can hold this)Now that we hopefully got the White Sword, Magic Shield and Blue Ring, we are heavily armed to the teeth and ready to tackle the first dungeon but for good measure, lets get the sixth heart since it's still physically possible. The other 2 overworld hearts require a ladder and a raft respectively so we'll ignore those. Head over to H12 and blow up the wall.
Now onward to D8 where our first dungeon awaits.
Tune in next time as we tackle the first dungeon.
|
Vizzed Elite
Affected by 'Laziness Syndrome'
Registered: 10-06-12
Last Post: 2510 days
Last Active: 11 days
| Ice Queen Zero |
Affected by 'Laziness Syndrome'
Registered: 10-06-12
Last Post: 2510 days
Last Active: 11 days
(edited by Azul Fria on 10-22-12 02:52 AM)
Links

Page Comments
This page has no comments