

 User Notice
 Forum Links
Thread Information
Thread Actions


Order
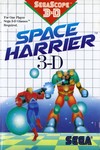
Space Harrier 3-D
10-08-12 03:40 AM
Azul Fria is Offline
| ID: 668105 | 2499 Words
| ID: 668105 | 2499 Words
Azul Fria
Level: 59


POSTS: 5/806
POST EXP: 151458
LVL EXP: 1609915
CP: 24621.8
VIZ: 778270

POSTS: 5/806
POST EXP: 151458
LVL EXP: 1609915
CP: 24621.8
VIZ: 778270
Likes: 0 Dislikes: 0
Edit: This forum's formatting is atrocious. I meant to post this in the walkthrough section
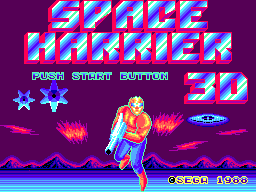
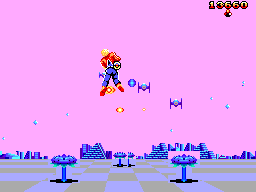
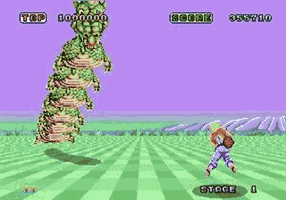
Game : Space Harrier 3-D The intergalactic warrior Space Harrier returns... in an all-new 3D adventure! The peaceful Land of the Dragons is again under attack. Evil creatures fill the land and sky. Euria, the magnificent white dragon, is being held prisoner in a diabolical trap. Only you, the Space Harrier, can set him free. But this time, the challenge is greater than ever before! Put on your SegaScope 3D Glasses. The screen will come alive with new 3D graphics, enemies and wild new battle scenes! Only you stand between the peaceful dragons and defeat. Get ready for the battle of a lifetime! INTRODUCTION Space Harrier 3-D for the Sega Master System is one of eight SMS games that are made in 3-D and require the Sega 3D glasses in order to play it properly. It is the sequel to the original Space Harrier not the same game. Therefore the secret options code won't work in this version of the game though. STORY Once, the peaceful Land of the Dragons had suffered under a reign of terror. Evil creatures stalked the land, leaving death and destruction in their wake. A call went out to the farthest reaches of the Galaxy for a Champion brave enough to challenge this evil. The call was answered by Space Harrier, a young warrior with an atomic blaster and the ability to fly. With the help of Euria, the true Dragon Prince, Space Harrier defeated the enemies of the Land of the Dragons and returned the Dragon King to his throne. With peace again ruling the land, Space Harrier departed. Then, one year later, the Dragon King died... and the Land of the Dragons was thrown into chaos! As Euria prepared to take the throne, his evil cousin invaded Euria's castle and took the throne. Even worse... Euria disappeared! Now Space Harrier has returned to the Land of Dragons to find Euria and restore him to the rightful throne. But this time, he must journey farther than he ever has before, right into the jaws of the most vicious monsters in the galaxy! To complete this mission, Space Harrier needs your help. The Land of the Dragons is depending on you! CONTROLS D-pad = move around the area in any direction 1 or 2 button = Start game/Shoot ENEMIES + SCORING You earn 10 points for every second you are alive. You even earn points this way even after the game is already won so it's more like you get points everytime the screen itself is actively moving. Blossom: 1,000pts Turbo Jet: 3,000pts Flyer: 3,000pts Loidal: 3,000pts Rathon: 3,000pts Be: 1,000pts Slime: 1,000pts Ice Pole: 1,000pts Laser: 3,000pts Clone: 3,000pts Moula (non-boss): 10,000pts Apparition: 3,000pts TFO: 3,000pts Hobogoblin: 3,000pts Qab: 3,000pts Kentar: 3,000pts Ogre: 3,000pts Do-Go: 3,000pts Meye: 10,000pts Mount: 1,000pts - 3,000pts (Round 9) Collo: 3,000pts Inazoomi: 5,000pts Sunzu: 3,000pts Crystal: 5,000pts Aei Manta: 3,000pts Gongue: 3,000pts Hand: 3,000pts Janue-Eye: 3,000pts Cam: 3,000pts UFO: 3,000pts Guard: 3,000pts Mitokonda: 3,000pts Elecker: 10,000pts ~Boss~ Dylos: 50,000pts Moula: 30,000pts Zapple: 50,000pts Gomest: 50,000pts Musha: 30,000pts Yorde: 50,000pts Janue: 50,000pts Mecadence: 50,000pts Cool Damonia: 50,000pts Almer: 5,000pts King Doht: 50,000pts Evil Dragon King: 50,000pts ~These enemies can't be destroyed~ Pole Tower Be-Bo Rock Dog Dai Nurwall Pole-2 Samurai GAMEPLAY -You die by getting shot or collision with an enemy or object. -You gain lives every 5 million points. -After you lose all lives the game is over. -This game is in 3-D so you will need the 3-D glasses to initially play the game but if you get a high score. You can insert the word THREE in the high scores table to turn the game into 2-D. You must use the 2nd controller to insert the name. -With the same method, you can insert the word SOUND for a sound test and LEVEL to adjust the difficulty. -Difficulties is as goes: EASY = 4 Lives, NORMAL = 3 Lives, HARD = 2 Lives -If you lose all lives, press 2, 1, 2, 1, 1 before the words GAME OVER appears and you will Continue the game where you left off. WALKTHROUGH ~Level 1: Platia~Enemies: Blossom, Flyer, Turbo Jet, Tower, Dylos (Boss) Start off by running on the ground and killing the Blossoms to rack up points. The Flyers will come in waves next and will shoot at you. After a couple waves, more Blossoms appear followed by another wave of Flyers. Run past a few Towers as they can't be destroyed. The Turbo Jets will come in and shoot at you. When they reach the front of the screen, they'll fly upward and show their underside and be vulnerable to shots. After a wave of them, they'll leave for a little while then return. Continue fighting while avoiding the Towers. Flyers will come in from the rear. They can't kill you by doing this though. Shoot them the first chance you get so that's less shots to avoid. After a few seconds, they'll start flying towards you. Shoot more Blossoms as the Flyers come in from the rear then back towards you. Avoid more Towers then kill three more Turbo Jets. The first boss, Dylos appears. Boss Fight: Dylos If you've played any Space Harrier game before, then you'll know how the dragon type bosses are. They come waving in as they shoot their bullets. When they get to the front, they'll stop shooting and show their full face for all to see then wave back to retreat and shoot at you when they get far back away. The pattern repeats. They all end up eating bullets this way and the more damage they take, their color will change until they die. Dylos is no different than the others and he'll most likely fall on the first pass if fast enough. ~Level 2: Moura~Enemies: Pole, Slime, Rathon, Loidal, Moula (boss) You are in for it now. Poles can appear from the top or the bottom. They are indestructible. The ones from the top can kill you if you run into them when they touch down onto the ground. Avoid the top poles then start shooting at the slime as you avoid poles from either top or bottom. The Rathons behave like the Flyers from earlier except they don't attack in packs. They try to shoot and fly into you from random spots. Avoid more poles and kill the Loidals who do attack in packs. After several waves of Rathons, you face MoulaBoss Fight: Moula You will see three of them form in like Transformers. They will stand there and take damage before moving around in a ellipse motion. Like the planets revolving around the sun from a frontal view. Shoot each one as they pass by while you are avoiding their shots. Kill all three to advance to the next level. ~Level 3: Bits~ Enemies: Be, Be-Bo, Clone, TFO, Zapple 1 + Laser (boss) You start out shooting at the Bes. The indestructible object here is the Be-Bo which is a Be on a pole. Avoid those while shooting the Bes. The Clones arrive and they only try to collide with you. The TFOs arrive and they try to get in one shot before leaving the screen. After several waves of shooting Bes, TFOs, and Clones while avoiding Be-Bos you face off against Zapple. Boss Fight: Zapple Round 1 This is the first battle against Zapple and its a quick one. All you got to do here is shoot away the Lasers that surround him. Then get in a few shot and he goes down so quickly. Kill off any remaining Lasers to complete the level. ~Level 4: Hardegga~ Boss: Ice Pole, Apparition, Kentar, Do-Go, Qab, Gomest + Hobgolin (boss) Avoid the Ice Poles and take out the Apparitions. Next you'll go up against some Kentars that fly in and out while spitting fireballs. Kill them as the Ice Poles get in your way. Do-Gos will rain down and try to collide with you or spit fire. Qabs arrive next and they attack in wave packs. After they're gone. You face a couple wave of Kentars and Apparitions before going against Gomest. Boss Fight: Gomest Gomest ain't so tough either. Concentrate on doing away with his Hobgoblins and once they are all gone, the next shot will kill him. ~Level 5: Heam~ Enemies: Mount, Flyer, Dai, Ogre, Rock Dog, Meye, Musha (boss) It's getting hot in here but don't take off all your clothes. You start off by shooting through a series of Mounts. A wave of Flyers come in from behind and they shoot hot rocks. This is where things can be tough, you got an obstacle called Dais that come bouncing at you and they can't be destroyed. Find yourself an opening quickly to get past them. Ogres come in to pester you but they are just like the Loidals. Indestructible Rock Dogs come in and try to collide with you by getting in the way on the ground then trying to extend themselves when you are airborne. A trio of Meyes come spiraling in and they stop in front of you and open their eyes to shoot. They can only be killed when their eyes are opened. They'll go away if their not killed so killing them is not a must. Get past more Dais and kill more Mounts. Destroy another pack of Meyes and more of the Flyers. Get past more Mounts and Rock Dogs. Boss Fight: Musha You face a trio of them. The object here is avoid the fireballs they shoot by slashing downwards. The first two will fall easily. The last one will take a few shots then retreat before attacking again a couple times. Destroy it like you did the other two. ~Level 6: Yorde~ Enemies: Pole, Collo, Rathon, Lodai, Moula (non-boss), Yorde (boss) Avoid the Poles as you shoot the Collos. Just like in Level 2, the poles can get you from the top or the bottom. Kill the Rathons and several waves of Lodais. Non-boss Moula appear from behind for a few waves then they form in front of you to fight you but they fall easily. After they are dead, you face Yorde. Boss Fight: Yorde Are you kidding me? He dies in 7 or 8 shots. All you got to do is shoot him when not staying in the same spot and he is gone. ~Level 7: Dayamon~ Enemies: Nurwall, Sunzu, Hand, Inazoomi, Janue (boss) Avoid the Nurwalls as they are indestructible. Worry about killing the Sunzus and Hands as well as the Inazoomis coming from the rear who behave just like the Moulas from Yorde. You face another wave of Sunzus and Inazoomis then you face the boss already. Boss Fight: Janue Round 1 This is the toughest boss fight up to this point. Janue will send dual fireballs where you stand and they are fast. You have to be constantly on the move to get past them. What makes it even tougher is that Janue takes several shots to kill. ~Level 8: Manmo~ Enemies: Ice Pole, Kentar, Do-Go, Qab, Apparition, Mecadence (boss) The Ice Poles can't be destroyed. Avoid them and shoot the Kentars. The Do-Gos will rain in then you got Qabs to take out too as well as a wave of Apparitions and more Kentars and Qabs. The Ice Poles move in fast. After all enemies are down you face Mecadence. Boss Fight: Mecadence He fights like Dylos except he is only faster and takes more hits. ~Level 9: Alphamic~ Enemies: Pole-2, Crystal, Aei Manta, Gongue, Cool Damonia + Mount (boss) This level consists of dodging Pole-2s and shooting Crystals, Aei Mantas, and Gongues and that's pretty much it. The Pole-2 move extremely fast as do the enemy shots. Boss: Cool Damonia Shoot away all the Mounts that come in as you get in shots on Cool Damonia. It will take some quick dodging to survive here. Stay on your toes. ~Level 10: Mecamanim~ Enemies: Tower, UFO, Flyer, Aei Manta, Almer (boss) Dodge the Towers and kill the UFOs. Flyers will come in from the front and the back. Take out a few Aei Mantas here and there and more Flyers as you dodge more Towers and kill Aei Mantas on route to the boss. Boss Fight: Almer There are bunch of them that rain in and turn into igloos after they touch the ground and shoot rapidly. Fly in a circle to avoid their shots then kill them off one by one till victory. Some will even retreat and that'll help you a lot. ~Level 11: Godde~ Enemies: Hand, Mitokonda, Nurwall, Sunzu Janue + Janue Eye (boss) Shoot the Hands on the ground for points. Then shoot the Mitokonda. The Hands in the air will shoot at you. Stay in the air to avoid the Nurwall and shoot the Sunzus. Kill more Hands and Mitokondas while airborne. The ground Hands will start to shoot near the end of the level. Survive here for Round 2 with Janue. Boss Fight: Janue Round 2 This fight starts out with Janue shooting eyes at you. Shoot them all and Janue will fight you like before and shoot dual fireballs rapidly. At least Janue does not take much damage this time. ~Level 12: Doht~ Enemies: Pole 2, Meye, Cam, Rock Dog, Flyer, Ogre, King Doht (boss) Avoid the Pole 2s and soon you'll come across a wall of Meyes. Kill some of them until they retreat. Keep avoiding those Pole 2s as you take out some Cams. Now you got to avoid the Rock Dogs. Once past them, kill some Flyers and Ogres. Get past a Trio of Meyes and some Rock Dogs. Another Meye wal appears, kill them as you please but watch out for Pole 2s. A few Flyers and Ogres later and you face King Doht. Boss Fight: King Doht There are 2 of them. They fight like the Dragons except they come spiraling in rather than waving in. Like them, they stop shooting when in your face and take heavy damage before retreating for another go around. Defeat them both to win.~Level 13: Meltedia~ Enemies: Be, Be-Bo, Elecker, Clone, TFO, Laser, Zappos + Guard (boss) Avoid the Be-Bos as you shoot the Bes. Kill some Eleckers, Clones, Lasers, and TFOs too. After dealing with several waves of Eleckers you fight Zappos again. Boss Fight: Zapple Instead of Lasers, Zapple protects itself with Guards. Shoot them away then just shoot it three times and it's finished.~Boss Rush~ You face all the bosses in order, one by one. Use the same strategies as you did before to beat them. Final Boss: Dark Uriah This is the same fight with Dylos and Mecadence except Dark Uria does not stay in your face for too long thus he the fastest of the three but his pattern of attack is still the same defeat him and Euria is free. Game : Space Harrier 3-D The intergalactic warrior Space Harrier returns... in an all-new 3D adventure! The peaceful Land of the Dragons is again under attack. Evil creatures fill the land and sky. Euria, the magnificent white dragon, is being held prisoner in a diabolical trap. Only you, the Space Harrier, can set him free. But this time, the challenge is greater than ever before! Put on your SegaScope 3D Glasses. The screen will come alive with new 3D graphics, enemies and wild new battle scenes! Only you stand between the peaceful dragons and defeat. Get ready for the battle of a lifetime! INTRODUCTION Space Harrier 3-D for the Sega Master System is one of eight SMS games that are made in 3-D and require the Sega 3D glasses in order to play it properly. It is the sequel to the original Space Harrier not the same game. Therefore the secret options code won't work in this version of the game though. STORY Once, the peaceful Land of the Dragons had suffered under a reign of terror. Evil creatures stalked the land, leaving death and destruction in their wake. A call went out to the farthest reaches of the Galaxy for a Champion brave enough to challenge this evil. The call was answered by Space Harrier, a young warrior with an atomic blaster and the ability to fly. With the help of Euria, the true Dragon Prince, Space Harrier defeated the enemies of the Land of the Dragons and returned the Dragon King to his throne. With peace again ruling the land, Space Harrier departed. Then, one year later, the Dragon King died... and the Land of the Dragons was thrown into chaos! As Euria prepared to take the throne, his evil cousin invaded Euria's castle and took the throne. Even worse... Euria disappeared! Now Space Harrier has returned to the Land of Dragons to find Euria and restore him to the rightful throne. But this time, he must journey farther than he ever has before, right into the jaws of the most vicious monsters in the galaxy! To complete this mission, Space Harrier needs your help. The Land of the Dragons is depending on you! CONTROLS D-pad = move around the area in any direction 1 or 2 button = Start game/Shoot ENEMIES + SCORING You earn 10 points for every second you are alive. You even earn points this way even after the game is already won so it's more like you get points everytime the screen itself is actively moving. Blossom: 1,000pts Turbo Jet: 3,000pts Flyer: 3,000pts Loidal: 3,000pts Rathon: 3,000pts Be: 1,000pts Slime: 1,000pts Ice Pole: 1,000pts Laser: 3,000pts Clone: 3,000pts Moula (non-boss): 10,000pts Apparition: 3,000pts TFO: 3,000pts Hobogoblin: 3,000pts Qab: 3,000pts Kentar: 3,000pts Ogre: 3,000pts Do-Go: 3,000pts Meye: 10,000pts Mount: 1,000pts - 3,000pts (Round 9) Collo: 3,000pts Inazoomi: 5,000pts Sunzu: 3,000pts Crystal: 5,000pts Aei Manta: 3,000pts Gongue: 3,000pts Hand: 3,000pts Janue-Eye: 3,000pts Cam: 3,000pts UFO: 3,000pts Guard: 3,000pts Mitokonda: 3,000pts Elecker: 10,000pts ~Boss~ Dylos: 50,000pts Moula: 30,000pts Zapple: 50,000pts Gomest: 50,000pts Musha: 30,000pts Yorde: 50,000pts Janue: 50,000pts Mecadence: 50,000pts Cool Damonia: 50,000pts Almer: 5,000pts King Doht: 50,000pts Evil Dragon King: 50,000pts ~These enemies can't be destroyed~ Pole Tower Be-Bo Rock Dog Dai Nurwall Pole-2 Samurai GAMEPLAY -You die by getting shot or collision with an enemy or object. -You gain lives every 5 million points. -After you lose all lives the game is over. -This game is in 3-D so you will need the 3-D glasses to initially play the game but if you get a high score. You can insert the word THREE in the high scores table to turn the game into 2-D. You must use the 2nd controller to insert the name. -With the same method, you can insert the word SOUND for a sound test and LEVEL to adjust the difficulty. -Difficulties is as goes: EASY = 4 Lives, NORMAL = 3 Lives, HARD = 2 Lives -If you lose all lives, press 2, 1, 2, 1, 1 before the words GAME OVER appears and you will Continue the game where you left off. WALKTHROUGH ~Level 1: Platia~Enemies: Blossom, Flyer, Turbo Jet, Tower, Dylos (Boss) Start off by running on the ground and killing the Blossoms to rack up points. The Flyers will come in waves next and will shoot at you. After a couple waves, more Blossoms appear followed by another wave of Flyers. Run past a few Towers as they can't be destroyed. The Turbo Jets will come in and shoot at you. When they reach the front of the screen, they'll fly upward and show their underside and be vulnerable to shots. After a wave of them, they'll leave for a little while then return. Continue fighting while avoiding the Towers. Flyers will come in from the rear. They can't kill you by doing this though. Shoot them the first chance you get so that's less shots to avoid. After a few seconds, they'll start flying towards you. Shoot more Blossoms as the Flyers come in from the rear then back towards you. Avoid more Towers then kill three more Turbo Jets. The first boss, Dylos appears. Boss Fight: Dylos If you've played any Space Harrier game before, then you'll know how the dragon type bosses are. They come waving in as they shoot their bullets. When they get to the front, they'll stop shooting and show their full face for all to see then wave back to retreat and shoot at you when they get far back away. The pattern repeats. They all end up eating bullets this way and the more damage they take, their color will change until they die. Dylos is no different than the others and he'll most likely fall on the first pass if fast enough. ~Level 2: Moura~Enemies: Pole, Slime, Rathon, Loidal, Moula (boss) You are in for it now. Poles can appear from the top or the bottom. They are indestructible. The ones from the top can kill you if you run into them when they touch down onto the ground. Avoid the top poles then start shooting at the slime as you avoid poles from either top or bottom. The Rathons behave like the Flyers from earlier except they don't attack in packs. They try to shoot and fly into you from random spots. Avoid more poles and kill the Loidals who do attack in packs. After several waves of Rathons, you face MoulaBoss Fight: Moula You will see three of them form in like Transformers. They will stand there and take damage before moving around in a ellipse motion. Like the planets revolving around the sun from a frontal view. Shoot each one as they pass by while you are avoiding their shots. Kill all three to advance to the next level. ~Level 3: Bits~ Enemies: Be, Be-Bo, Clone, TFO, Zapple 1 + Laser (boss) You start out shooting at the Bes. The indestructible object here is the Be-Bo which is a Be on a pole. Avoid those while shooting the Bes. The Clones arrive and they only try to collide with you. The TFOs arrive and they try to get in one shot before leaving the screen. After several waves of shooting Bes, TFOs, and Clones while avoiding Be-Bos you face off against Zapple. Boss Fight: Zapple Round 1 This is the first battle against Zapple and its a quick one. All you got to do here is shoot away the Lasers that surround him. Then get in a few shot and he goes down so quickly. Kill off any remaining Lasers to complete the level. ~Level 4: Hardegga~ Boss: Ice Pole, Apparition, Kentar, Do-Go, Qab, Gomest + Hobgolin (boss) Avoid the Ice Poles and take out the Apparitions. Next you'll go up against some Kentars that fly in and out while spitting fireballs. Kill them as the Ice Poles get in your way. Do-Gos will rain down and try to collide with you or spit fire. Qabs arrive next and they attack in wave packs. After they're gone. You face a couple wave of Kentars and Apparitions before going against Gomest. Boss Fight: Gomest Gomest ain't so tough either. Concentrate on doing away with his Hobgoblins and once they are all gone, the next shot will kill him. ~Level 5: Heam~ Enemies: Mount, Flyer, Dai, Ogre, Rock Dog, Meye, Musha (boss) It's getting hot in here but don't take off all your clothes. You start off by shooting through a series of Mounts. A wave of Flyers come in from behind and they shoot hot rocks. This is where things can be tough, you got an obstacle called Dais that come bouncing at you and they can't be destroyed. Find yourself an opening quickly to get past them. Ogres come in to pester you but they are just like the Loidals. Indestructible Rock Dogs come in and try to collide with you by getting in the way on the ground then trying to extend themselves when you are airborne. A trio of Meyes come spiraling in and they stop in front of you and open their eyes to shoot. They can only be killed when their eyes are opened. They'll go away if their not killed so killing them is not a must. Get past more Dais and kill more Mounts. Destroy another pack of Meyes and more of the Flyers. Get past more Mounts and Rock Dogs. Boss Fight: Musha You face a trio of them. The object here is avoid the fireballs they shoot by slashing downwards. The first two will fall easily. The last one will take a few shots then retreat before attacking again a couple times. Destroy it like you did the other two. ~Level 6: Yorde~ Enemies: Pole, Collo, Rathon, Lodai, Moula (non-boss), Yorde (boss) Avoid the Poles as you shoot the Collos. Just like in Level 2, the poles can get you from the top or the bottom. Kill the Rathons and several waves of Lodais. Non-boss Moula appear from behind for a few waves then they form in front of you to fight you but they fall easily. After they are dead, you face Yorde. Boss Fight: Yorde Are you kidding me? He dies in 7 or 8 shots. All you got to do is shoot him when not staying in the same spot and he is gone. ~Level 7: Dayamon~ Enemies: Nurwall, Sunzu, Hand, Inazoomi, Janue (boss) Avoid the Nurwalls as they are indestructible. Worry about killing the Sunzus and Hands as well as the Inazoomis coming from the rear who behave just like the Moulas from Yorde. You face another wave of Sunzus and Inazoomis then you face the boss already. Boss Fight: Janue Round 1 This is the toughest boss fight up to this point. Janue will send dual fireballs where you stand and they are fast. You have to be constantly on the move to get past them. What makes it even tougher is that Janue takes several shots to kill. ~Level 8: Manmo~ Enemies: Ice Pole, Kentar, Do-Go, Qab, Apparition, Mecadence (boss) The Ice Poles can't be destroyed. Avoid them and shoot the Kentars. The Do-Gos will rain in then you got Qabs to take out too as well as a wave of Apparitions and more Kentars and Qabs. The Ice Poles move in fast. After all enemies are down you face Mecadence. Boss Fight: Mecadence He fights like Dylos except he is only faster and takes more hits. ~Level 9: Alphamic~ Enemies: Pole-2, Crystal, Aei Manta, Gongue, Cool Damonia + Mount (boss) This level consists of dodging Pole-2s and shooting Crystals, Aei Mantas, and Gongues and that's pretty much it. The Pole-2 move extremely fast as do the enemy shots. Boss: Cool Damonia Shoot away all the Mounts that come in as you get in shots on Cool Damonia. It will take some quick dodging to survive here. Stay on your toes. ~Level 10: Mecamanim~ Enemies: Tower, UFO, Flyer, Aei Manta, Almer (boss) Dodge the Towers and kill the UFOs. Flyers will come in from the front and the back. Take out a few Aei Mantas here and there and more Flyers as you dodge more Towers and kill Aei Mantas on route to the boss. Boss Fight: Almer There are bunch of them that rain in and turn into igloos after they touch the ground and shoot rapidly. Fly in a circle to avoid their shots then kill them off one by one till victory. Some will even retreat and that'll help you a lot. ~Level 11: Godde~ Enemies: Hand, Mitokonda, Nurwall, Sunzu Janue + Janue Eye (boss) Shoot the Hands on the ground for points. Then shoot the Mitokonda. The Hands in the air will shoot at you. Stay in the air to avoid the Nurwall and shoot the Sunzus. Kill more Hands and Mitokondas while airborne. The ground Hands will start to shoot near the end of the level. Survive here for Round 2 with Janue. Boss Fight: Janue Round 2 This fight starts out with Janue shooting eyes at you. Shoot them all and Janue will fight you like before and shoot dual fireballs rapidly. At least Janue does not take much damage this time. ~Level 12: Doht~ Enemies: Pole 2, Meye, Cam, Rock Dog, Flyer, Ogre, King Doht (boss) Avoid the Pole 2s and soon you'll come across a wall of Meyes. Kill some of them until they retreat. Keep avoiding those Pole 2s as you take out some Cams. Now you got to avoid the Rock Dogs. Once past them, kill some Flyers and Ogres. Get past a Trio of Meyes and some Rock Dogs. Another Meye wal appears, kill them as you please but watch out for Pole 2s. A few Flyers and Ogres later and you face King Doht. Boss Fight: King Doht There are 2 of them. They fight like the Dragons except they come spiraling in rather than waving in. Like them, they stop shooting when in your face and take heavy damage before retreating for another go around. Defeat them both to win.~Level 13: Meltedia~ Enemies: Be, Be-Bo, Elecker, Clone, TFO, Laser, Zappos + Guard (boss) Avoid the Be-Bos as you shoot the Bes. Kill some Eleckers, Clones, Lasers, and TFOs too. After dealing with several waves of Eleckers you fight Zappos again. Boss Fight: Zapple Instead of Lasers, Zapple protects itself with Guards. Shoot them away then just shoot it three times and it's finished.~Boss Rush~ You face all the bosses in order, one by one. Use the same strategies as you did before to beat them. Final Boss: Dark Uriah This is the same fight with Dylos and Mecadence except Dark Uria does not stay in your face for too long thus he the fastest of the three but his pattern of attack is still the same defeat him and Euria is free. -------------------- |
Vizzed Elite
Affected by 'Laziness Syndrome'
Registered: 10-06-12
Last Post: 2551 days
Last Active: 52 days
| Ice Queen Zero |
Affected by 'Laziness Syndrome'
Registered: 10-06-12
Last Post: 2551 days
Last Active: 52 days
(edited by Davideo7 on 10-08-12 10:45 AM)
10-08-12 10:51 AM
 Davideo7 is Online
| ID: 668262 | 104 Words
Davideo7 is Online
| ID: 668262 | 104 Words
 Davideo7 is Online
| ID: 668262 | 104 Words
Davideo7
Level: 357
POSTS: 23888/45806
POST EXP: 3543804
LVL EXP: 866431321
CP: 199849.8
VIZ: 129418335

POSTS: 23888/45806
POST EXP: 3543804
LVL EXP: 866431321
CP: 199849.8
VIZ: 129418335
Likes: 0 Dislikes: 0
I'm assuming you're IceQueenZer0 from GameFAQs ?
I attempted to fix your walkthrough (I failed though). My suggestion is to either use the post editor's built in paste button (which should format it properly) or Switch to the Old Post Editor (the link is to the right of the 'Submit Reply' button. Once you've done either one, than you can edit your post and try resubmitting your walkthrough. Anyways, I love the Space Harrier games but I've never actually played this one in 3D, would be pretty neat to try out. Great walkthrough by the way, can't wait to see what else you post.
|


The Owner
Owner, Developer, Advertiser, etc
Affected by 'Trooperness Syndrome'
Registered: 12-06-04
Location: Wisconsin
Last Post: 7 hours
Last Active: 3 min.
Owner, Developer, Advertiser, etc
| Founder, Mod, Investor |
Affected by 'Trooperness Syndrome'
Registered: 12-06-04
Location: Wisconsin
Last Post: 7 hours
Last Active: 3 min.
