Well, hasn't it been a while since I made one of these guides? I meant to make this a lot sooner, but I just never got around to it. Anyway:
Map summary: You're 20 units against 50 featuring some of the most famous heroes, villains, and former villains (i.e. Jaffar). You're surrounded on all sides making this a pretty big survival fest.
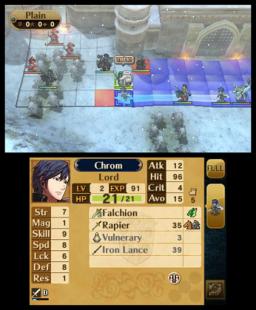
Things to watch out for: EVERYTHING! All of the enemies you face on this map combined have just about every single self-beneficial skill known to the game's engine. You'll be dealing with breaker skills literally up the arse which means letting your guard down once can lead to a unit's death before you can do something about (don't use a sword on Jaffar; that causes a greater Lethality risk). Compounded with the fact that several of the opposition will move towards you when the enemy phase starts, you'll have a rough start with trying to get rid of the stronger forces (this can be made worse if you attack a unit in a group, triggering that group to start moving when you don't need them to).
Here are some skills that can help you with this map if you're having trouble (Galeforce excluded for obvious reasons (it's useful everywhere barring Double Duel)):
I know this is being lazy, but you might need every skill you can get your hands on to make this more manageable (Pavise, Aegis, Iote's Shield, and any breaker skills would be the best options). Any skill has a use somewhere on the field.
Other tips: Some groups will only move when it gets to a certain turn, so if you see some units not moving, ignore them for the time being. The group consisting of generals and sorcerers on the left side of the fort can be easily dealt with using a powerful Manakete preferably paired with a unit that offers extra speed (i.e. Tiki paired with Lucina or Say'ri, Nowi paired with a swordmaster, Nah paired with a swordmaster, etc.). This will allow the Manaketes to double the generals with ease and they will take little damage (unless you're Arvis or possibly Gharnef). Dual strikes can help, but that also depends on the weapon choice of the support partner (swords and tomes aren't a pretty choice since swordbreaker and tomebreaker are both common). The swordmasters at the top can be fully blocked by a general such as Kellam or a wyvern lord such as Cherche. The full force at the bottom requires a bit of patience and careful planning due to powerful weapons, skills, or both. Having a rally bot at the ready can make things a bit easier on you (added with the Book of Naga for the added defense). Otherwise, you'll need to place your best units where they can move fast and aid other units when they are needed (bring those Falcon Knights!).
That's the end of this DLC guide! I'll have more strategy guides up in the coming days, so be sure to look around. Until then, adieu!
Well, hasn't it been a while since I made one of these guides? I meant to make this a lot sooner, but I just never got around to it. Anyway:
Map summary: You're 20 units against 50 featuring some of the most famous heroes, villains, and former villains (i.e. Jaffar). You're surrounded on all sides making this a pretty big survival fest.
Things to watch out for: EVERYTHING! All of the enemies you face on this map combined have just about every single self-beneficial skill known to the game's engine. You'll be dealing with breaker skills literally up the arse which means letting your guard down once can lead to a unit's death before you can do something about (don't use a sword on Jaffar; that causes a greater Lethality risk). Compounded with the fact that several of the opposition will move towards you when the enemy phase starts, you'll have a rough start with trying to get rid of the stronger forces (this can be made worse if you attack a unit in a group, triggering that group to start moving when you don't need them to).
Here are some skills that can help you with this map if you're having trouble (Galeforce excluded for obvious reasons (it's useful everywhere barring Double Duel)):
I know this is being lazy, but you might need every skill you can get your hands on to make this more manageable (Pavise, Aegis, Iote's Shield, and any breaker skills would be the best options). Any skill has a use somewhere on the field.
Other tips: Some groups will only move when it gets to a certain turn, so if you see some units not moving, ignore them for the time being. The group consisting of generals and sorcerers on the left side of the fort can be easily dealt with using a powerful Manakete preferably paired with a unit that offers extra speed (i.e. Tiki paired with Lucina or Say'ri, Nowi paired with a swordmaster, Nah paired with a swordmaster, etc.). This will allow the Manaketes to double the generals with ease and they will take little damage (unless you're Arvis or possibly Gharnef). Dual strikes can help, but that also depends on the weapon choice of the support partner (swords and tomes aren't a pretty choice since swordbreaker and tomebreaker are both common). The swordmasters at the top can be fully blocked by a general such as Kellam or a wyvern lord such as Cherche. The full force at the bottom requires a bit of patience and careful planning due to powerful weapons, skills, or both. Having a rally bot at the ready can make things a bit easier on you (added with the Book of Naga for the added defense). Otherwise, you'll need to place your best units where they can move fast and aid other units when they are needed (bring those Falcon Knights!).
That's the end of this DLC guide! I'll have more strategy guides up in the coming days, so be sure to look around. Until then, adieu!
____________________


 User Notice


 pokepower101 is Offline
| ID: 1170523 | 509 Words
pokepower101 is Offline
| ID: 1170523 | 509 Words
 pokepower101 is Offline


