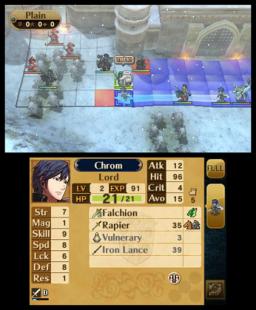
Battle number two of heroes versus villains and you find yourself...in the dark?
Map Summary: For this map, you are teamed up with Arvis, Raydrik, Hardin, Zephiel, Julius, Lyon, Gharnef, Ashnard, Black Knight, and Nergal to fight the good guys holed up in the fortress (well, sort of holed up).
Things to watch out for: This map is a LOT easier from the first one since you aren't surrounded on all sides and your allies can actually take at least one hit before getting completely destroyed. The problem remains as this: they are slow and tend to possess low luck, meaning that can have a lot of damage stacked on top of them, not to mention their usual lack of skill preventing them from hitting easily (Hardin may have benefits with Tomebreaker against a lot of the mages, but his extremely low luck stat (yes, it would be worse than Tharja's luck at this point if you bothered to use her) hinders his avoidance and he'll still have difficulties hitting certain units such as Caeda). The same thing applies: breaker skills are everywhere, but most of your allies pack Swordbreaker, so they can *sort of* hinder units like Ike, Navarre, and, most importantly, Jaffar. Yes, he's back with the same death skills from the last map, but you can get close enough to beat him at a range this time rather than risking heart attacks.
Here are some skills that can help you with this map if you're having trouble (Galeforce excluded for obvious reasons (it's useful everywhere barring Double Duel)):
In all seriousness, the same skills from the first one can be used at full capacity here, but Vantage may not serve in equality due to the fact that you can let your allies whittle down the opposition and land the finishing blow on them when they're weak. However, the new one for recommendation is Miracle, as it is very important to have some chance to survive one hit, especially with Sol at the helm.
Other tips: Let your allies chip away at enemy health. Doing this will reduce any damage your party takes throughout the entire map and give you enough leeway for it. However, Sephiran and Nanna are at the top of the map where only Gharnef has Tomebreaker, and even then, his avoidance isn't very stellar. Raydrik will more than likely die in one turn due to the Sage and Valkyrie duo if he doesn't double-proc Aegis on Sephiran and proc Aegis at least once on Nanna. Also, if you can, Hardin (with enough luck) can EASILY wipe out the mages nesting nearby because of Tomebreaker, Aegis, and Vengeance.
That's the end of this DLC guide! I'll have more strategy guides up in the coming days, so be sure to look around. Until then, adieu! Battle number two of heroes versus villains and you find yourself...in the dark?
Map Summary: For this map, you are teamed up with Arvis, Raydrik, Hardin, Zephiel, Julius, Lyon, Gharnef, Ashnard, Black Knight, and Nergal to fight the good guys holed up in the fortress (well, sort of holed up).
Things to watch out for: This map is a LOT easier from the first one since you aren't surrounded on all sides and your allies can actually take at least one hit before getting completely destroyed. The problem remains as this: they are slow and tend to possess low luck, meaning that can have a lot of damage stacked on top of them, not to mention their usual lack of skill preventing them from hitting easily (Hardin may have benefits with Tomebreaker against a lot of the mages, but his extremely low luck stat (yes, it would be worse than Tharja's luck at this point if you bothered to use her) hinders his avoidance and he'll still have difficulties hitting certain units such as Caeda). The same thing applies: breaker skills are everywhere, but most of your allies pack Swordbreaker, so they can *sort of* hinder units like Ike, Navarre, and, most importantly, Jaffar. Yes, he's back with the same death skills from the last map, but you can get close enough to beat him at a range this time rather than risking heart attacks.
Here are some skills that can help you with this map if you're having trouble (Galeforce excluded for obvious reasons (it's useful everywhere barring Double Duel)):
In all seriousness, the same skills from the first one can be used at full capacity here, but Vantage may not serve in equality due to the fact that you can let your allies whittle down the opposition and land the finishing blow on them when they're weak. However, the new one for recommendation is Miracle, as it is very important to have some chance to survive one hit, especially with Sol at the helm.
Other tips: Let your allies chip away at enemy health. Doing this will reduce any damage your party takes throughout the entire map and give you enough leeway for it. However, Sephiran and Nanna are at the top of the map where only Gharnef has Tomebreaker, and even then, his avoidance isn't very stellar. Raydrik will more than likely die in one turn due to the Sage and Valkyrie duo if he doesn't double-proc Aegis on Sephiran and proc Aegis at least once on Nanna. Also, if you can, Hardin (with enough luck) can EASILY wipe out the mages nesting nearby because of Tomebreaker, Aegis, and Vengeance.
That's the end of this DLC guide! I'll have more strategy guides up in the coming days, so be sure to look around. Until then, adieu! |
 pokepower101 is Offline
| ID: 1023968 | 469 Words
 pokepower101 is Offline


 User Notice


