

 User Notice
 Forum Links
Play Genghis Khan II - Clan of the Gray Wolf Online


Thread Information
Views
5,563
Replies
1
Rating
0
Status
OPEN
Thread
Creator
Creator
Fireproof
07-04-13 04:00 PM
07-04-13 04:00 PM
Last
Post
Post
Barathemos
07-04-13 07:57 PM
07-04-13 07:57 PM
System
8.7
Views: 3,652
Today: 3
Users: 1 unique
Today: 3
Users: 1 unique
Thread Actions


Order
Genghis Khan 2: Gray Wolf Guide
Game's Ratings
Overall
Graphics
Sound
Addictiveness
Depth
Story
Difficulty
Average User Score
8.7
5.5
7
8
7.5
6
7
07-04-13 04:00 PM
Fireproof is Offline
| ID: 835559 | 5122 Words
| ID: 835559 | 5122 Words
Fireproof
Level: 49


POSTS: 55/518
POST EXP: 219650
LVL EXP: 872051
CP: 11915.9
VIZ: 4005804

POSTS: 55/518
POST EXP: 219650
LVL EXP: 872051
CP: 11915.9
VIZ: 4005804
Likes: 0 Dislikes: 0
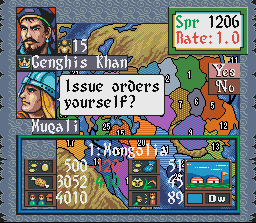
Genghis Khan 2 is a historic strategy game set back around the 1200s when Mongolia was split between many different nomadic clans. These clans fought each other for power and control until someone finally unites the nomads of Mongolia. Historically speaking, this takes place during a time when Mongolia rises to power and conquers most of Asia with the exception that assaults on Japan failed. This time around I am going to explain the in-game options before I explain the scenarios because there are many options to choose and the game does not explain, in detail, what each thing does. If you are to understand this guide you may need to read through the many options. Some are easy to figure out and others are a little more complicated. If you feel this part is boring, please feel free to skip it. I've also taken the liberty of color coding the different areas of my guide. Red indicates each section. Light Blue represents the different options. Green will separate the different categories of the commands you can do. Objective of the Game The objective of the game is to conquer whichever scenario you're playing by means of war, submission and diplomacy. The idea is to take whichever nation you play as and unite Mongolia or unite the world. You will have to balance your domestic necessities with military needs to accomplish your goals. In-Game Options The purpose of this section is to help players learn what the different tasks your leader can do in order to expand your nation. I will also explain the options you can choose before you begin your game. At the beginning of the scenario you will be given the option to choose which nation or clan you would like to be. After you choose you'll be asked if you want to view wars and combat. View Wars - If you choose "no" you will not be able to watch other nations battle each other and this goes for other territories you have in your possession. With this option all you will see is troop movements and an outcome to the war, which is usually a victory because the game will only recognize the number of troops. Enemy nations will only attack if they have numbers on their side and will not really take into consideration the training of your troops or their arms. If you choose yes, you can see the war between other nations and you can see the wars between your other territories and nations. This choice will allow you to see where the troops move on the battlefield. With this you add in the element of the terrain allowing you to ambush and retreat. This also works in favor for your nation because your other territories may be able to retreat and save you a good quality general. When I play games, I choose "Yes" and use the fast forward feature to fly through the wars. View Combat Between Units - This works just like the view wars. If you choose "no" you will not watch the actual battles. This leads to different outcomes in the war because the actual hand to hand combat is nothing like watching it on the battlefield. If you choose "yes" you will watch the actual battles. Unfortunately, this takes up tons of time even with fast forwarding so it's not something that I usually do. I normally choose "no" because I don't want to drag the game out any further. Policy (Top Left Corner of Commands) This part will handle the policies of your nation. You can use policies as a set of guidelines for your other territories to follow; Like, if you wanted to have stronger units you would choose Quality instead of Quantity will adding a policy. These policies will stay with that territory to the end of the game, even if you no longer own it. Decree New Policies - (Top left corner of Policy) Like it says, this allows you to decree new policies for any territory you own. What this does is it adjusts where your people work, where your adviser is going to invest, what kind of military the territory will support and what kind of diplomatic stance your territory is likely to take. Adviser Prepares New Policies - (Top right corner of Policy) This option will allow your adviser to prepare policies for the territory of your choosing. I don't use this option because I play my game without certain policies that the advisers may implement. Change Policies - (Bottom left corner of Policy) After you've decreed new policies either by your own doing or with your adviser you can use this choice to change them. This costs a lot less to do than decreeing new policies again. Delegate Authority - (Bottom right corner of Policy) I've never used this probably because I've never been able to get it to work. This might have something to do with certain generals in charge of a territory and taking direct command of that territory. Domestic (Top Right Corner) This part will handle your people with loyalty, tax or workforce. Allocate Labor - (Top left corner of Domestic) Here you are able to relocate people in different places to work. Your 4 options (From top to bottom) are Farming, Herding, Specialties and Economy. Farming will provide a good yield of food once a year. I've never liked farming because it requires investing if you want it to do any good. Herding will provide food every 3 months in smaller portions but most of the time you see an increase and few decreases in your food storage. Specialties are the items that can be sold in the market. Their value is purely based on what the market rate is going for. I always set this to 0. Economy will increase the commerce in your territory and it provides you with more gold every Winter. On top of that, this also builds your fortifications making it harder for an enemy to kill off your troops in a castle. I usually set this from 40-50%. Collect Special Tax - (Top right corner of Domestic) Using this option will take gold from the people but by doing so, it takes away their loyalty as well. The greater your loyalty equals the greater the outcome of your people's labor. If loyalty drops so does your outcome. Also, if loyalty drops too low, your people will take up armed resistance and you will engage them on the battlefield. They're usually weak but if there's enough of them, they could take a unit. Also, if it does get that far you will lose 200 people for every unit they create and you can have up to 4 units per a Legion. That will drop your labor outcome a lot because that's 200+ less that won't be working for you. Give to the People - (Bottom left corner of Domestic) This option allows you to give gold, food or gifts to the people and it allows you to increase their loyalty. This is essential for low loyal people who may be on the bring of taking up armed resistance. Order (2nd from the Top Left) In this command you can order other territories to do things that you need or want them to do. This part is essential for planning wars and getting supplies out to those territories that need to support a growing army. Order to Attack - (Top left corner of Order) This option is exactly as it says. You can order a territory to attack an enemy. Order to Send Supplies - (Top right corner of Order) This option orders other territories to send supplies to another territory. Order to Send Troops - (Bottom left corner of Order) This option orders a territory to send troops to another territory. Order to Send Diplomatic Action - (Bottom right corner of Order) This option orders a territory to send a diplomatic request to an enemy territory. The 2 options you can choose are "Demand Surrender" or "Demand Tribute". These are only useful if the issues territory is stronger than the enemy territory, which makes them more likely to give in to your demands. Diplomacy (2nd from the Top Right) These commands handle diplomacy. Demand Surrender - (Top left corner of Diplomacy) This will demand the surrender of an enemy. If you have a strong enough military you may be given gold or the enemy nation may actually surrender and join you. If you don't have enough troops it would be a waste of time to threaten. Negotiate Alliance - (Top right corner of Diplomacy) You can suggest a temporary alliance between your nation and another nation. The only benefit is that you've locked into an unbreakable peace treaty for the number of years which you agree to. That only means that you can not attack each other in that time frame so it's like having protection from being attacked from that direction. Demand Tribute - (Bottom left corner of Diplomacy) This will demand that an enemy give you tribute. Like demanding them to surrender, this is only good if you have enough military strength, otherwise this is a waste of time and they rarely give you anything. Person (2nd from the Bottom Left) These commands allow you to handle personal things like family and appointing governors, advisers and generals or dismissing them. Believe it or not, some of these are some of the most important pieces to your game. Please note that I am working down the left side first and up the right side of these commands. Appoint Governor - (Top left corner of Person) This option allows you to appoint a governor of any territory you own. By doing this, you will remove the governor that is already in power and they will become your general and the general you chose will become your governor for that territory. Appoint or Dismiss Adviser - (Middle left of Person) Here you can, like the title suggests, change your advisers. Advisers are good at handling politics if the governor has a low grade for it. Of course you can also remove an adviser if, for example, a surrendered territory has an adviser and you don't think they need him. Appoint or Dismiss General - (Bottom left of Person) This is a little different. This time, you can recruit a fresh new general from within the population, however, most generals suck. There is usually 1 good general in each of the different territories like Robin Hood can be found in 31 during the early 1200s. You can also dismiss generals, especially if your wife says she doesn't trust them. Read more into this in the next command. Spend Time With the Family - (Bottom right of Person) In this command you spend time with your family. Visiting your family is essential if you're looking to have a son or daughter. Sons make great generals and they're always loyal (Unless maybe captured after a war?). Daughters can be brides to your generals. I believe that this makes your generals permanently loyal, however, I am unsure whether that is true or not. You also speak with your wife sometimes and she might not trust specific generals. When she says this, she's usually right and at some point they might betray you. I've never seen a legion in a battlefield change sides but these generals will proclaim independence at some point in time, might not be until your leader (Like Genghis Khan) dies. Arrange Marriage - (Middle right of Person) If your wife gave birth to a daughter you can arrange a marriage at the age of 10. Yes, that seems a little young but it's just a game. I usually spend time with the family and the daughter will sometimes say that she thinks so and so is cute so that's who I marry her off to. Make Prince a General - (Top right of Person) Exactly as it says you can make your son a general, that's if your wife gave birth to a son. Thanks to gzimm2 you can name your sons Joti, Jagatai, Ugudei, Tolui or Kublai.. you will get their actual profile picture and not generic one. I wonder if this works for other sons in the game and if anyone knows, please leave a comment and I would be happy to add that information in here with credit to you. Market (2nd from Bottom Right) The market is always a great place to make a nice income by purchasing and selling goods. In Genghis Khan 2 you can find 4 different merchants that offer all the same specialties but at different prices depending on the market rate. If the market rate is 1.0 a Chinese merchant may offer Silk at a 1.3 rate to buy Silk. To buy 100 Silk, you will have to pay 130. Having the same market rate of 1.0 a Uigher merchant may offer Silk at a 2.0 rate which costs 200 gold instead of 130 gold for a Chinese merchant. The market rate directly effects the individual Merchant rates, however, the value of the specialties does not change. For example, Silk will always be at a higher rate in a Chinese merchant than in a Uigher merchant. This rule applies to all the merchants for all specialties. The first thing you need to understand is the Market Rate. Personally, I've seen the market rate going for as low as 0.5 and as high as 3.5. Pretending that 1.0 is the standard rate for everything a .5 means half the standard rate so pretend it's 50% off. If the rate is 1.5 that means it's at 150% the original standard rate so you're paying 50% more or selling for 50% more. The idea is to buy low and sell high using the market rate as your way to do that. Unfortunately though, the merchants will come and go, sometimes you might have 4 merchants for days and sometimes you might have none for days unless you're on the merchant's home base. Sell Goods - (Top left of Market) Here you can sell your specialties. You want to have a high market rate for selling to earn more gold. The rates at which you buy and sell are different than each other when using the same or different merchants. Hire Mercenaries - (Top right of Market) Mercenaries have a higher value and the prices change a lot based on the market rate. I believe that mercenaries are already set to 1.5 time the price of hiring mercenaries from your population when the market rate is set to 1.0. When the market is set to 0.5 I believe mercenaries can be purchased at 0.75 of the standard mercenary rate. Prices for mercenaries are different than recruiting people from your own population. Mercenaries also don't effect any populations or people's loyalty so your territory can continue to grow with no issues. I try to recruit as many mercenaries as I can when the rate is low. Buy Goods - (Bottom right of Market) Here you can buy specialties and you are able to purchase arms, which equip your troops with armor, weapons and ammo. You will want the market rate to be lower when you make purchases. War (Bottom Left Corner) This is your command center for military purposes. Attack - (Top left corner of War) This is your option to send an attack on a neighboring enemy land. You have the option of directly commanding the forces yourself or sending someone else to attack for you. Recruit Units - (Top right corner of War) This is your center to recruit directly from your population. These prices are not effected by the market rate and they will remain the same at all times. These prices, I state, are the prices for a market rate of 1.0 when comparing to the mercenaries. Move Troops - (Middle left of War) Here, you can move troops out of your territory and into other territories you own. You also have the option of moving yourself and your adviser. Train Units - (Middle corner of War) This is where you train your troops to make them more effective in battle. Move Supplies - (Bottom left of War) You can send your supplies to other neighboring territories you own by using this command. Dismiss Units - (Bottom right of War) Lastly, you are able to dismiss your units with this command. This might be useful to get rid of smaller units that die easily in battle. When you dismiss units it will add 200 people to your population. Info (Bottom Right Corner) The final set of commands belong to the info section. I won't go into major detail on this section because it provides information about your nation and the ability to spy. You may also check your alliances in here and find out other information that may be helpful (Spying helps to see what troops an enemy may have). War on the Battlefield - Attacking When you attack an enemy, the objective of the war is to defeat the 1st Legion. When you defeat the 1st Legion, you will cut off the commander and that leaves the rest of the generals for your enemy to either flee or they are captured. If you have more than double the number of attacking people than your enemy, they will immediately flee providing they have somewhere to flee to. The key to winning this begins with your legion placement. The enemy 1st Legion will always stay on a castle unless fleeing so you will want to go around any ambushing Legions (hiding in the forests). Try to aim for the unprotected sides and get at the enemies 1st Legion. If you do defeat the 1st Legion and the other Legions are captured, you will get the troops that are in their Legions (Up to a max of 20 total troops). You also have the option to do the attacking yourself, because you control you own 1st Legion or command your other Legions to do the attacking for you. If you order your other Legions to attack for you, you may want to place some of your better units into those Legions. Another key element to attacking your enemies might have to do with your ability to plunder your enemy's territory. By doing this you weaken their loyalty and that leads to revolt. When revolt happens, the population is crippled. If it drops so low no food can be made and the troops and people of that territory will begin to go hungry and that weakens the enemy's forces. A series of plunders could destroy the territory and make it useless for awhile and incapable of supporting a military. This is a useful technique against territories that have 20 units with Elite status. War on the Battlefield - Defending So now you're on the defending side. The key to winning this will probably begin with your abilities to target the Enemy's 1st Legion. The only reason why they attack is because they have number on their side and it has little to do with the quality of their units. Depending on the outline of the battlefield, you may need to chase the enemy's 1st Legion or set up ambushes in places where the Legions might move to. If there are no good ambush locations, you might just have to fight it out and hope for the best. 1 good idea is to take one of the other Legions and put your best units on it and hide them in the forest wherever the 1st Legion is or is going. The other good idea is to take your best Legion with your best troops and let them hold out in the Castle. The enemies are always targeting whoever is in the Castle and it doesn't necessarily need to be your 1st Legion. If you can take the 1st Legion, you may be able to capture other enemy Legions and add to your units. The Mongol Conquest Beginning with the scenario where you must unite the Mongolian Steppes you can choose from 4 different Nomads. You can play as Temujin (1) who later becomes the real Genghis Khan, Jamuga (6), Togorul Khan (7) and Tayan Khan (14). If you choose to play as Temujin and you win the scenario you will earn a different picture and the title Genghis Khan will be granted to you but this is not available to the other Nomads; They will keep their names and pictures will remain exactly the way they are. Now, you do have a time limit. I believe that time limit is the year 1206, 1208 or 1210 (somewhere in this ball park). If you don't win the scenario by then you won't be able to play the World Conquest campaign and you will be required to play this scenario again in order to unlock it. So now I'm going to get into playing this scenario. The key to playing this scenario starts with your ability to make gold. Mongolia is, overall, a poor band of Nomads. In order to progress, you will need to allocate your labor to make you extra gold by adding to the Economy. Usually the market rate stays low so it will be difficult to get a good price for specialties. I recommend you reduce the labor to 0 for your specialties because you won't know for sure if you can make a profit off of the market. I suggest you train troops and purchase Mongols if you can't find a good fluctuating market rate, which is hard to get in this scenario. Depending on who you play as, you might be attacked several times. If you play as Temujin, it's likely that you will be attacked by (6) and (7) usually makes their way towards you. If you are attacked, aim for their 1st Legions with ambushes and try to capture their units because that makes you more powerful. When you become more powerful, you'll be able to make diplomacy more of an option. I'd recommend you'd demand enemy nations to surrender if you're capable of defeating them and defending your territory from attack. Some enemies will turn to your side. In some games I was fortunate to have 3 or 4 nations join me because the market went in my favor so I could afford mercenaries at a great price. When you become more powerful, try to take one of the corners of the map so that you can put more units into the front lines. This makes it easier for you to defend and attack but it does leave some of the back territories vulnerable if you do this and you are attacked and lose. At the same time, this all doesn't happen in the course of a year, it might take you 6 years before you can do anything. I'm not physically able to do anything until mid to late 1190s. In the meantime I try to find better generals by appointing them; Those that have low grades I just reject but depending on where I'm at, I might find someone good. I try to recruit Qubilai, Jebe, Muqali, Borokhul and Subutai because they are the best generals you can find in this scenario (These are also all generals who are in the Genghis Khan scenario). The other thing I like to do is spend time with family. This might help give birth to sons or daughters, which both help with generals. Please note: If you appoint any sons as general at this stage, you will be forced to choose between your sons and other great generals you'll need for the next campaign. I'd advise you keep your sons until the second campaign and make them generals there. You will have to do a lot of preparing/planning, a lot of fighting and a lot of waiting to complete this scenario. Attack when you are capable of winning a victory and defending yourself if other enemy nations are adjacent. At the end of this scenario you will be taken to a screen where you will be able to choose the adviser and 8 generals you will want to take with you. The best generals are already provided in the Genghis Khan scenario so you will want to aim for those. Qubilai, Borokhul, Temuge, Jebe. Borchu, Jelme, Subtai, Muqali and Chilaun. They have the best stats and seem to be the most loyal. World Conquest If you managed to win the Mongol Conquest before the time is out, you will be able to advance on to the World Conquest. I will make one thing clear, World Conquest campaign and Genghis Khan campaign are pretty much the same thing except that in World Conquest you are given the specialties saved up from the Mongol conquest (which you can sell), you have a larger population and you have however much gold and food you had when you took the last territory in the previous scenario. The key to this campaign is similar to the Mongol Conquest except that you will automatically start in (1) Mongolia. You're located in the middle and it might take awhile to fortify yourself. Like the Mongol conquest, I recommend you reallocate labor and decree policies to other territories. You begin the game with a good supply of military strength so you may be able to demand other territories to surrender and they might. I know I've been able to get (2), (6) and (7) to surrender at times but they like to proclaim their independence too. A nice strategy to keep them from doing that is to replace the governors with your generals. Make sure that you fix up their labor because they won't be capable of producing much, especially (2). Much like the Mongol Conquest, you will have to be patient and find the right opportunities to attack. This conquest is a little more challenging because you have 33 total territories and you have new units to deal with and more strategy is involved. Theirs no time limits but mistakes can be costly. There are times when you might lose a territory and the enemy might gain 8 units from you and start cleaning house. There might be times when half your nation proclaims independence at the same time. I've had 10 territories do this to me on the same turn and some had 20 units. In this game, you have to be aware and careful with what you do. Proceed with caution because those loyal generals will run out. What I recommend is trying to make your way to Japan. Japan is a tough nation to fight at this time because Japan is covered in forests. Their Samurai are about as strong as the Mongols, if not stronger than the Mongols and their ambushes hurt bad. If you can conquer all the way to Japan, you can work your way down through (4), (5), (6), (7), (9), (10), (12), (13) China and (14), (22), (23) India. At the same time, I'd recommend you try to work your forces to (3), (8) Russia. Each number represents the territory you should conquer. If you can pull all your forces to (20) and (3) you'll own more than half the world and your main forces can be pushed to these 2 locations. Afterwards, I'd try and push further into Europe and North Africa. Just keep pushing and eventually you'll conquer them all. World Conquest Scenario In this scenario you can play as other nations. Unfortunately, at this time I do not have more information on this due to my save state being recently deleted in an effort to help my RGR Plugin. I will update this further when I work my way back up. Genghis Khan In this scenario, Mongolia has already been united by Genghis Khan (Temujin). You can play as other nations this time around (1) Genghis Khan, (11) Minamoto, (20) Ala Al-Din, (21) Ghuri, (31) John I and (32) Phillip II. The best way to describe this scenario as Genghis Khan is the easy mode. If you play as the other nations, it will be more difficult to play and each has advantages and disadvantages. I think the most challenging nation to play would be (20) Ala Al-Din because it's in the center of the world. You can play this scenario like the World Conquest. Yuan Dynasty In this scenario, time has passed since the Genghis Khan era and Genghis Khan's empire has fallen apart. The Yuan Dynasty is in the hands of Kublai Khan. You can play as (5) Kublai Khan, (11) Hojo, (15) Abaga, (18) Baybars, (25) Michael VIII and (30) Charles I. I think that this would be the most challenging scenario to play because the Yuan Dynasty is big. I think playing as (30) or (25) would be the most challenging. If you're looking to test your abilities, those would be the nations to try. Tips 1. In the market, if you have more than 1 merchant present you can buy some specialties in one and sell them in another. For example, Silk is a great one to buy in Chinese merchants and sell in Uigher, Islamic or Venetian. You might also try Spices, Jewellery or Gems. You can always switch between the buy and sell commands and write down which specialties are cheap and which sell higher. 2. During wars focus in on the 1st enemy Legion 3. If you have gold but need food, reallocate the labor so that people will do more farming or herding (That's what I recommend) 4. You can focus more on allocating food and selling food in the market instead of the economy (Providing you get merchants often) 5. It seems like the generic sons (Not Joti, Jagatai etc.) are great generals for war, leadership and charm but just plain horrible for Politics most of the time. 6. When you go to war, put your best units on a general with a rating of A in war because they'll be really effective especially in ambush Wrapping Things Up Anyway, thank you for reading thorough this guide. It doesn't necessarily tell you when to attack or what to do because each game is different (It's Strategy Gaming) but I've provided as much information as I could to help people get further into the game when they need help. If you have any questions, comments, suggestions, thoughts or anything in general, please feel free to message me here or in a private message and I will get back to you. Thanks! This time around I am going to explain the in-game options before I explain the scenarios because there are many options to choose and the game does not explain, in detail, what each thing does. If you are to understand this guide you may need to read through the many options. Some are easy to figure out and others are a little more complicated. If you feel this part is boring, please feel free to skip it. I've also taken the liberty of color coding the different areas of my guide. Red indicates each section. Light Blue represents the different options. Green will separate the different categories of the commands you can do. Objective of the Game The objective of the game is to conquer whichever scenario you're playing by means of war, submission and diplomacy. The idea is to take whichever nation you play as and unite Mongolia or unite the world. You will have to balance your domestic necessities with military needs to accomplish your goals. In-Game Options The purpose of this section is to help players learn what the different tasks your leader can do in order to expand your nation. I will also explain the options you can choose before you begin your game. At the beginning of the scenario you will be given the option to choose which nation or clan you would like to be. After you choose you'll be asked if you want to view wars and combat. View Wars - If you choose "no" you will not be able to watch other nations battle each other and this goes for other territories you have in your possession. With this option all you will see is troop movements and an outcome to the war, which is usually a victory because the game will only recognize the number of troops. Enemy nations will only attack if they have numbers on their side and will not really take into consideration the training of your troops or their arms. If you choose yes, you can see the war between other nations and you can see the wars between your other territories and nations. This choice will allow you to see where the troops move on the battlefield. With this you add in the element of the terrain allowing you to ambush and retreat. This also works in favor for your nation because your other territories may be able to retreat and save you a good quality general. When I play games, I choose "Yes" and use the fast forward feature to fly through the wars. View Combat Between Units - This works just like the view wars. If you choose "no" you will not watch the actual battles. This leads to different outcomes in the war because the actual hand to hand combat is nothing like watching it on the battlefield. If you choose "yes" you will watch the actual battles. Unfortunately, this takes up tons of time even with fast forwarding so it's not something that I usually do. I normally choose "no" because I don't want to drag the game out any further. Policy (Top Left Corner of Commands) This part will handle the policies of your nation. You can use policies as a set of guidelines for your other territories to follow; Like, if you wanted to have stronger units you would choose Quality instead of Quantity will adding a policy. These policies will stay with that territory to the end of the game, even if you no longer own it. Decree New Policies - (Top left corner of Policy) Like it says, this allows you to decree new policies for any territory you own. What this does is it adjusts where your people work, where your adviser is going to invest, what kind of military the territory will support and what kind of diplomatic stance your territory is likely to take. Adviser Prepares New Policies - (Top right corner of Policy) This option will allow your adviser to prepare policies for the territory of your choosing. I don't use this option because I play my game without certain policies that the advisers may implement. Change Policies - (Bottom left corner of Policy) After you've decreed new policies either by your own doing or with your adviser you can use this choice to change them. This costs a lot less to do than decreeing new policies again. Delegate Authority - (Bottom right corner of Policy) I've never used this probably because I've never been able to get it to work. This might have something to do with certain generals in charge of a territory and taking direct command of that territory. Domestic (Top Right Corner) This part will handle your people with loyalty, tax or workforce. Allocate Labor - (Top left corner of Domestic) Here you are able to relocate people in different places to work. Your 4 options (From top to bottom) are Farming, Herding, Specialties and Economy. Farming will provide a good yield of food once a year. I've never liked farming because it requires investing if you want it to do any good. Herding will provide food every 3 months in smaller portions but most of the time you see an increase and few decreases in your food storage. Specialties are the items that can be sold in the market. Their value is purely based on what the market rate is going for. I always set this to 0. Economy will increase the commerce in your territory and it provides you with more gold every Winter. On top of that, this also builds your fortifications making it harder for an enemy to kill off your troops in a castle. I usually set this from 40-50%. Collect Special Tax - (Top right corner of Domestic) Using this option will take gold from the people but by doing so, it takes away their loyalty as well. The greater your loyalty equals the greater the outcome of your people's labor. If loyalty drops so does your outcome. Also, if loyalty drops too low, your people will take up armed resistance and you will engage them on the battlefield. They're usually weak but if there's enough of them, they could take a unit. Also, if it does get that far you will lose 200 people for every unit they create and you can have up to 4 units per a Legion. That will drop your labor outcome a lot because that's 200+ less that won't be working for you. Give to the People - (Bottom left corner of Domestic) This option allows you to give gold, food or gifts to the people and it allows you to increase their loyalty. This is essential for low loyal people who may be on the bring of taking up armed resistance. Order (2nd from the Top Left) In this command you can order other territories to do things that you need or want them to do. This part is essential for planning wars and getting supplies out to those territories that need to support a growing army. Order to Attack - (Top left corner of Order) This option is exactly as it says. You can order a territory to attack an enemy. Order to Send Supplies - (Top right corner of Order) This option orders other territories to send supplies to another territory. Order to Send Troops - (Bottom left corner of Order) This option orders a territory to send troops to another territory. Order to Send Diplomatic Action - (Bottom right corner of Order) This option orders a territory to send a diplomatic request to an enemy territory. The 2 options you can choose are "Demand Surrender" or "Demand Tribute". These are only useful if the issues territory is stronger than the enemy territory, which makes them more likely to give in to your demands. Diplomacy (2nd from the Top Right) These commands handle diplomacy. Demand Surrender - (Top left corner of Diplomacy) This will demand the surrender of an enemy. If you have a strong enough military you may be given gold or the enemy nation may actually surrender and join you. If you don't have enough troops it would be a waste of time to threaten. Negotiate Alliance - (Top right corner of Diplomacy) You can suggest a temporary alliance between your nation and another nation. The only benefit is that you've locked into an unbreakable peace treaty for the number of years which you agree to. That only means that you can not attack each other in that time frame so it's like having protection from being attacked from that direction. Demand Tribute - (Bottom left corner of Diplomacy) This will demand that an enemy give you tribute. Like demanding them to surrender, this is only good if you have enough military strength, otherwise this is a waste of time and they rarely give you anything. Person (2nd from the Bottom Left) These commands allow you to handle personal things like family and appointing governors, advisers and generals or dismissing them. Believe it or not, some of these are some of the most important pieces to your game. Please note that I am working down the left side first and up the right side of these commands. Appoint Governor - (Top left corner of Person) This option allows you to appoint a governor of any territory you own. By doing this, you will remove the governor that is already in power and they will become your general and the general you chose will become your governor for that territory. Appoint or Dismiss Adviser - (Middle left of Person) Here you can, like the title suggests, change your advisers. Advisers are good at handling politics if the governor has a low grade for it. Of course you can also remove an adviser if, for example, a surrendered territory has an adviser and you don't think they need him. Appoint or Dismiss General - (Bottom left of Person) This is a little different. This time, you can recruit a fresh new general from within the population, however, most generals suck. There is usually 1 good general in each of the different territories like Robin Hood can be found in 31 during the early 1200s. You can also dismiss generals, especially if your wife says she doesn't trust them. Read more into this in the next command. Spend Time With the Family - (Bottom right of Person) In this command you spend time with your family. Visiting your family is essential if you're looking to have a son or daughter. Sons make great generals and they're always loyal (Unless maybe captured after a war?). Daughters can be brides to your generals. I believe that this makes your generals permanently loyal, however, I am unsure whether that is true or not. You also speak with your wife sometimes and she might not trust specific generals. When she says this, she's usually right and at some point they might betray you. I've never seen a legion in a battlefield change sides but these generals will proclaim independence at some point in time, might not be until your leader (Like Genghis Khan) dies. Arrange Marriage - (Middle right of Person) If your wife gave birth to a daughter you can arrange a marriage at the age of 10. Yes, that seems a little young but it's just a game. I usually spend time with the family and the daughter will sometimes say that she thinks so and so is cute so that's who I marry her off to. Make Prince a General - (Top right of Person) Exactly as it says you can make your son a general, that's if your wife gave birth to a son. Thanks to gzimm2 you can name your sons Joti, Jagatai, Ugudei, Tolui or Kublai.. you will get their actual profile picture and not generic one. I wonder if this works for other sons in the game and if anyone knows, please leave a comment and I would be happy to add that information in here with credit to you. Market (2nd from Bottom Right) The market is always a great place to make a nice income by purchasing and selling goods. In Genghis Khan 2 you can find 4 different merchants that offer all the same specialties but at different prices depending on the market rate. If the market rate is 1.0 a Chinese merchant may offer Silk at a 1.3 rate to buy Silk. To buy 100 Silk, you will have to pay 130. Having the same market rate of 1.0 a Uigher merchant may offer Silk at a 2.0 rate which costs 200 gold instead of 130 gold for a Chinese merchant. The market rate directly effects the individual Merchant rates, however, the value of the specialties does not change. For example, Silk will always be at a higher rate in a Chinese merchant than in a Uigher merchant. This rule applies to all the merchants for all specialties. The first thing you need to understand is the Market Rate. Personally, I've seen the market rate going for as low as 0.5 and as high as 3.5. Pretending that 1.0 is the standard rate for everything a .5 means half the standard rate so pretend it's 50% off. If the rate is 1.5 that means it's at 150% the original standard rate so you're paying 50% more or selling for 50% more. The idea is to buy low and sell high using the market rate as your way to do that. Unfortunately though, the merchants will come and go, sometimes you might have 4 merchants for days and sometimes you might have none for days unless you're on the merchant's home base. Sell Goods - (Top left of Market) Here you can sell your specialties. You want to have a high market rate for selling to earn more gold. The rates at which you buy and sell are different than each other when using the same or different merchants. Hire Mercenaries - (Top right of Market) Mercenaries have a higher value and the prices change a lot based on the market rate. I believe that mercenaries are already set to 1.5 time the price of hiring mercenaries from your population when the market rate is set to 1.0. When the market is set to 0.5 I believe mercenaries can be purchased at 0.75 of the standard mercenary rate. Prices for mercenaries are different than recruiting people from your own population. Mercenaries also don't effect any populations or people's loyalty so your territory can continue to grow with no issues. I try to recruit as many mercenaries as I can when the rate is low. Buy Goods - (Bottom right of Market) Here you can buy specialties and you are able to purchase arms, which equip your troops with armor, weapons and ammo. You will want the market rate to be lower when you make purchases. War (Bottom Left Corner) This is your command center for military purposes. Attack - (Top left corner of War) This is your option to send an attack on a neighboring enemy land. You have the option of directly commanding the forces yourself or sending someone else to attack for you. Recruit Units - (Top right corner of War) This is your center to recruit directly from your population. These prices are not effected by the market rate and they will remain the same at all times. These prices, I state, are the prices for a market rate of 1.0 when comparing to the mercenaries. Move Troops - (Middle left of War) Here, you can move troops out of your territory and into other territories you own. You also have the option of moving yourself and your adviser. Train Units - (Middle corner of War) This is where you train your troops to make them more effective in battle. Move Supplies - (Bottom left of War) You can send your supplies to other neighboring territories you own by using this command. Dismiss Units - (Bottom right of War) Lastly, you are able to dismiss your units with this command. This might be useful to get rid of smaller units that die easily in battle. When you dismiss units it will add 200 people to your population. Info (Bottom Right Corner) The final set of commands belong to the info section. I won't go into major detail on this section because it provides information about your nation and the ability to spy. You may also check your alliances in here and find out other information that may be helpful (Spying helps to see what troops an enemy may have). War on the Battlefield - Attacking When you attack an enemy, the objective of the war is to defeat the 1st Legion. When you defeat the 1st Legion, you will cut off the commander and that leaves the rest of the generals for your enemy to either flee or they are captured. If you have more than double the number of attacking people than your enemy, they will immediately flee providing they have somewhere to flee to. The key to winning this begins with your legion placement. The enemy 1st Legion will always stay on a castle unless fleeing so you will want to go around any ambushing Legions (hiding in the forests). Try to aim for the unprotected sides and get at the enemies 1st Legion. If you do defeat the 1st Legion and the other Legions are captured, you will get the troops that are in their Legions (Up to a max of 20 total troops). You also have the option to do the attacking yourself, because you control you own 1st Legion or command your other Legions to do the attacking for you. If you order your other Legions to attack for you, you may want to place some of your better units into those Legions. Another key element to attacking your enemies might have to do with your ability to plunder your enemy's territory. By doing this you weaken their loyalty and that leads to revolt. When revolt happens, the population is crippled. If it drops so low no food can be made and the troops and people of that territory will begin to go hungry and that weakens the enemy's forces. A series of plunders could destroy the territory and make it useless for awhile and incapable of supporting a military. This is a useful technique against territories that have 20 units with Elite status. War on the Battlefield - Defending So now you're on the defending side. The key to winning this will probably begin with your abilities to target the Enemy's 1st Legion. The only reason why they attack is because they have number on their side and it has little to do with the quality of their units. Depending on the outline of the battlefield, you may need to chase the enemy's 1st Legion or set up ambushes in places where the Legions might move to. If there are no good ambush locations, you might just have to fight it out and hope for the best. 1 good idea is to take one of the other Legions and put your best units on it and hide them in the forest wherever the 1st Legion is or is going. The other good idea is to take your best Legion with your best troops and let them hold out in the Castle. The enemies are always targeting whoever is in the Castle and it doesn't necessarily need to be your 1st Legion. If you can take the 1st Legion, you may be able to capture other enemy Legions and add to your units. The Mongol Conquest Beginning with the scenario where you must unite the Mongolian Steppes you can choose from 4 different Nomads. You can play as Temujin (1) who later becomes the real Genghis Khan, Jamuga (6), Togorul Khan (7) and Tayan Khan (14). If you choose to play as Temujin and you win the scenario you will earn a different picture and the title Genghis Khan will be granted to you but this is not available to the other Nomads; They will keep their names and pictures will remain exactly the way they are. Now, you do have a time limit. I believe that time limit is the year 1206, 1208 or 1210 (somewhere in this ball park). If you don't win the scenario by then you won't be able to play the World Conquest campaign and you will be required to play this scenario again in order to unlock it. So now I'm going to get into playing this scenario. The key to playing this scenario starts with your ability to make gold. Mongolia is, overall, a poor band of Nomads. In order to progress, you will need to allocate your labor to make you extra gold by adding to the Economy. Usually the market rate stays low so it will be difficult to get a good price for specialties. I recommend you reduce the labor to 0 for your specialties because you won't know for sure if you can make a profit off of the market. I suggest you train troops and purchase Mongols if you can't find a good fluctuating market rate, which is hard to get in this scenario. Depending on who you play as, you might be attacked several times. If you play as Temujin, it's likely that you will be attacked by (6) and (7) usually makes their way towards you. If you are attacked, aim for their 1st Legions with ambushes and try to capture their units because that makes you more powerful. When you become more powerful, you'll be able to make diplomacy more of an option. I'd recommend you'd demand enemy nations to surrender if you're capable of defeating them and defending your territory from attack. Some enemies will turn to your side. In some games I was fortunate to have 3 or 4 nations join me because the market went in my favor so I could afford mercenaries at a great price. When you become more powerful, try to take one of the corners of the map so that you can put more units into the front lines. This makes it easier for you to defend and attack but it does leave some of the back territories vulnerable if you do this and you are attacked and lose. At the same time, this all doesn't happen in the course of a year, it might take you 6 years before you can do anything. I'm not physically able to do anything until mid to late 1190s. In the meantime I try to find better generals by appointing them; Those that have low grades I just reject but depending on where I'm at, I might find someone good. I try to recruit Qubilai, Jebe, Muqali, Borokhul and Subutai because they are the best generals you can find in this scenario (These are also all generals who are in the Genghis Khan scenario). The other thing I like to do is spend time with family. This might help give birth to sons or daughters, which both help with generals. Please note: If you appoint any sons as general at this stage, you will be forced to choose between your sons and other great generals you'll need for the next campaign. I'd advise you keep your sons until the second campaign and make them generals there. You will have to do a lot of preparing/planning, a lot of fighting and a lot of waiting to complete this scenario. Attack when you are capable of winning a victory and defending yourself if other enemy nations are adjacent. At the end of this scenario you will be taken to a screen where you will be able to choose the adviser and 8 generals you will want to take with you. The best generals are already provided in the Genghis Khan scenario so you will want to aim for those. Qubilai, Borokhul, Temuge, Jebe. Borchu, Jelme, Subtai, Muqali and Chilaun. They have the best stats and seem to be the most loyal. World Conquest If you managed to win the Mongol Conquest before the time is out, you will be able to advance on to the World Conquest. I will make one thing clear, World Conquest campaign and Genghis Khan campaign are pretty much the same thing except that in World Conquest you are given the specialties saved up from the Mongol conquest (which you can sell), you have a larger population and you have however much gold and food you had when you took the last territory in the previous scenario. The key to this campaign is similar to the Mongol Conquest except that you will automatically start in (1) Mongolia. You're located in the middle and it might take awhile to fortify yourself. Like the Mongol conquest, I recommend you reallocate labor and decree policies to other territories. You begin the game with a good supply of military strength so you may be able to demand other territories to surrender and they might. I know I've been able to get (2), (6) and (7) to surrender at times but they like to proclaim their independence too. A nice strategy to keep them from doing that is to replace the governors with your generals. Make sure that you fix up their labor because they won't be capable of producing much, especially (2). Much like the Mongol Conquest, you will have to be patient and find the right opportunities to attack. This conquest is a little more challenging because you have 33 total territories and you have new units to deal with and more strategy is involved. Theirs no time limits but mistakes can be costly. There are times when you might lose a territory and the enemy might gain 8 units from you and start cleaning house. There might be times when half your nation proclaims independence at the same time. I've had 10 territories do this to me on the same turn and some had 20 units. In this game, you have to be aware and careful with what you do. Proceed with caution because those loyal generals will run out. What I recommend is trying to make your way to Japan. Japan is a tough nation to fight at this time because Japan is covered in forests. Their Samurai are about as strong as the Mongols, if not stronger than the Mongols and their ambushes hurt bad. If you can conquer all the way to Japan, you can work your way down through (4), (5), (6), (7), (9), (10), (12), (13) China and (14), (22), (23) India. At the same time, I'd recommend you try to work your forces to (3), (8) Russia. Each number represents the territory you should conquer. If you can pull all your forces to (20) and (3) you'll own more than half the world and your main forces can be pushed to these 2 locations. Afterwards, I'd try and push further into Europe and North Africa. Just keep pushing and eventually you'll conquer them all. World Conquest Scenario In this scenario you can play as other nations. Unfortunately, at this time I do not have more information on this due to my save state being recently deleted in an effort to help my RGR Plugin. I will update this further when I work my way back up. Genghis Khan In this scenario, Mongolia has already been united by Genghis Khan (Temujin). You can play as other nations this time around (1) Genghis Khan, (11) Minamoto, (20) Ala Al-Din, (21) Ghuri, (31) John I and (32) Phillip II. The best way to describe this scenario as Genghis Khan is the easy mode. If you play as the other nations, it will be more difficult to play and each has advantages and disadvantages. I think the most challenging nation to play would be (20) Ala Al-Din because it's in the center of the world. You can play this scenario like the World Conquest. Yuan Dynasty In this scenario, time has passed since the Genghis Khan era and Genghis Khan's empire has fallen apart. The Yuan Dynasty is in the hands of Kublai Khan. You can play as (5) Kublai Khan, (11) Hojo, (15) Abaga, (18) Baybars, (25) Michael VIII and (30) Charles I. I think that this would be the most challenging scenario to play because the Yuan Dynasty is big. I think playing as (30) or (25) would be the most challenging. If you're looking to test your abilities, those would be the nations to try. Tips 1. In the market, if you have more than 1 merchant present you can buy some specialties in one and sell them in another. For example, Silk is a great one to buy in Chinese merchants and sell in Uigher, Islamic or Venetian. You might also try Spices, Jewellery or Gems. You can always switch between the buy and sell commands and write down which specialties are cheap and which sell higher. 2. During wars focus in on the 1st enemy Legion 3. If you have gold but need food, reallocate the labor so that people will do more farming or herding (That's what I recommend) 4. You can focus more on allocating food and selling food in the market instead of the economy (Providing you get merchants often) 5. It seems like the generic sons (Not Joti, Jagatai etc.) are great generals for war, leadership and charm but just plain horrible for Politics most of the time. 6. When you go to war, put your best units on a general with a rating of A in war because they'll be really effective especially in ambush Wrapping Things Up Anyway, thank you for reading thorough this guide. It doesn't necessarily tell you when to attack or what to do because each game is different (It's Strategy Gaming) but I've provided as much information as I could to help people get further into the game when they need help. If you have any questions, comments, suggestions, thoughts or anything in general, please feel free to message me here or in a private message and I will get back to you. Thanks! -------------------- |
Perma Banned
Affected by 'Laziness Syndrome'
Registered: 07-22-11
Location: Ohio, USA
Last Post: 3983 days
Last Active: 3983 days
| Tactician |
Affected by 'Laziness Syndrome'
Registered: 07-22-11
Location: Ohio, USA
Last Post: 3983 days
Last Active: 3983 days
07-04-13 07:57 PM
 Barathemos is Offline
| ID: 835795 | 42 Words
Barathemos is Offline
| ID: 835795 | 42 Words
 Barathemos is Offline
| ID: 835795 | 42 Words
Barathemos
Level: 213

POSTS: 3055/15991
POST EXP: 689463
LVL EXP: 141479499
CP: 48791.3
VIZ: 1900420

POSTS: 3055/15991
POST EXP: 689463
LVL EXP: 141479499
CP: 48791.3
VIZ: 1900420
Likes: 0 Dislikes: 0
Wow. That was great. It was also very helpful! I found it when I was looking at your posts to see which posts got you 1st in words today. Wow. That was great. It was also very helpful! I found it when I was looking at your posts to see which posts got you 1st in words today. |
Local Moderator
Minecraft Admin
Affected by 'Laziness Syndrome'
Registered: 02-17-13
Location: Atlanta, Georgia
Last Post: 11 days
Last Active: 3 days
Minecraft Admin
Affected by 'Laziness Syndrome'
Registered: 02-17-13
Location: Atlanta, Georgia
Last Post: 11 days
Last Active: 3 days
