

 User Notice
 Forum Links
Thread Information
8.1
Views: 5,629
Today: 18
Users: 2 unique
Today: 18
Users: 2 unique
Thread Actions


Order
DBGT: Final Bout Character Guide
Game's Ratings
Overall
Graphics
Sound
Addictiveness
Depth
Story
Difficulty
Average User Score
8.1
5
6
2
2
N/A
6.5
01-22-20 07:26 PM
 EX Palen is Offline
| ID: 1375687 | 4446 Words
EX Palen is Offline
| ID: 1375687 | 4446 Words
 EX Palen is Offline
| ID: 1375687 | 4446 Words
EX Palen
Spanish Davideo7
Spanish Davideo7
Level: 144


POSTS: 5028/6563
POST EXP: 1206659
LVL EXP: 36640808
CP: 196217.1
VIZ: 11470305

POSTS: 5028/6563
POST EXP: 1206659
LVL EXP: 36640808
CP: 196217.1
VIZ: 11470305
Likes: 0 Dislikes: 0
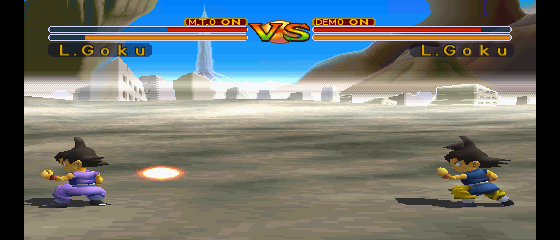
The mid to late 90s brought forth the revolution of 3D games, and fighting games were among the first genres to adapt it into their gameplay. As one of the staples in that genre, Dragon Ball soon moved on from the traditional 2D that reigned in their iconic videogames to the new revolution of the 3D, as well as taking the chance to create even more realistically-looking characters to entertain the fanbase. If I’m correct, Dragon Ball GT Final Bout hit the stores right after the 500th Dragon Ball episode had aired. It was the first of only two games to wield GT in the title, and the last Dragon Ball videogame for roughly 5 years (new anime content of any kind would wait a lot more, with only a special OVA airing for the next 15 years). After these facts, most will probably think that this game being so clunky influenced the release of any further material, but I honestly doubt that this game was so bad it “killed” Dragon Ball on its entirety until the next generation of consoles. Another major fact that played a role in this game’s reputation is that, despite the title, only 8 of the characters are actually from the GT anime (9 if we count the unplayable boss), with the remainder of the cast being actually “filler” to attract the all-time fans because GT didn’t have a dubbed version until months (or years, depending on the region) after this game released. Plus, this game released by the time not even the full series had been aired (not many episodes remained, actually), meaning there wasn’t much to select from the anime during game development. For that reason, characters like Vegeta or Gohan don’t display their GT versions, and only one villain from GT made the cut, which is the aforementioned unplayable boss. Before Starting In this game, all fighters start with two full bars of health, the first colored yellow and the second red, and below them there’s a full bar of energy, colored orange. The energy bar will deplete when using energy attacks, and if it’s completely depleted, your character will be unable to move or block, so always keep an eye on it. Of course, if the second health bar is depleted, the character will lose the match. After the first health bar is depleted, the characters can enter some kind of damaged stance which can gradually get worse as their health depletes further. In those stances, characters will hunch, show difficulty to remain upright or even show movements of panting. This is important because, apparently, these stances also make characters a bit slower compared to when they were on their usual fighting position, meaning another obstacle in the way of victory if you don’t have the advantage in health, and the hunching also reduces their height a bit meaning some attacks may now miss them. This game basically features physical attacks and super moves. The former are melee combinations, which can deal big damage in certain cases, and are the main asset for close combat. The latter are the long-range attacks, which rely on big loads of energy to fire and which can deplete a decent chunk of life away. The only other energy attack seen is the generic Continuous Energy Bullet, available to all fighters but sometimes modified slightly. Within the game’s options, there are two special motions that can be enabled or disabled. One of them is super move demos, which is a short cutscene in which the character charges the attack before firing it. The opponent has one chance to react, though slim, and overall they make fights last longer than when they’re disabled. The second special motion is Meteor Moves, which are generic to all fighters and similar to demos in that they affect the overall flow of the game. Meteor Moves initiate close to the opponent and can be chained one after another for massive damage, but countering them is hard because there’s no way to know what kind of attack will come at you (each attack has its own specific counter), so it’s better to simply disable them. After all, they’ll be disabled no matter what when fighting the game’s final boss because said boss doesn’t have them. NOTE: Super moves here are listed when used with demos active. This is because the effects of the attacks are unique with the demos on, but become generic when not using them (they all push the opponent away). Control Explanation Buttons: Directional buttons will be represented by its initial: d for down, u for up, f for forward and b for back. Square, Circle and Triangle will be represented by their full name, since they will be the last buttons pressed in any combo Sequences: While all combos could be listed with the directional button input, due to this game basically dealing with four directional buttons instead of the usual eight, I prefer to use initials to refer to sequences which are mostly a staple of fighting games since decades ago. Here’s a list of all the sequences to be seen below: -half circle forward (hcf): b, d, f -half circle back (hcb): f, d, b -quarter circle forward (qcf): d, f -quarter circle back (qcb): d, b -inverse quarter back (iqb): f, d -double/triple forward: ff/fff -double back: bb Goku GT incarnation of our favorite hero, seen very briefly in the anime but the game would be void without it Aerial Somersault: iqb + Circle (while jumping). Two hits, very low damage Meteor Combination: qcf + Square. Covers a great distance, several hits, last uppercut knocks out the opponent with great damage Dash Elbow: ff + Square. A quick rush, pushes away the opponent Spinning Kick: hcf + Circle. A four hits combination dealing massive damage Flying Knee Kick: d, u + Circle. Three hits which go very high into flying opponents, the last hit doesn’t knock out but pushes away instead Continuous Energy Bullet: qcf + Triangle. Three blasts in quick succession, even though only one will hit the damage is substantially higher Kamehameha: hcf + Triangle. The series’ trademark standard blast, not very damaging, consumes a bit more than 1/3 of the bar Super Kamehameha: qcb, f + Triangle. A stronger variant, depletes half a life bar and consumes half of the ki bar Energy Bomb: f, b, d, u + Triangle. It takes an awfully long time to charge, but depletes half a life bar while consuming a bit more than 1/3 of the bar. Super Goku Not seen in the series, but we’ll agree he needed it Aerial Somersault: iqb + Circle (while jumping). Two hits, very low damage Super Meteor Combination: qcf + Square. Covers a great distance, several hits, last uppercut knocks out the opponent with great damage Dash Elbow: ff + Square. A quick rush, pushes away the opponent Multi Kick: hcf + Circle. A several hits combination dealing massive damage, depletes half a life bar if all hits connect Flying Knee Kick: d, u + Circle. Three hits which go very high into flying opponents, the last hit doesn’t knock out but pushes away instead Continuous Energy Bullet: qcf + Triangle. Three blasts in quick succession, even though only one will hit the damage is substantially higher Kamehameha: hcf + Triangle. The series’ trademark standard blast, not very damaging, consumes a bit more than 1/3 of the bar Super Kamehameha: qcb, f + Triangle. A stronger variant, depletes half a life bar and consumes half of the ki bar Super Saiyan Goku The Dragon Ball Z version, referenced in his clothing. Not sure why he has the status of being more powerful than in GT when it’s lacking at least a decade worth of training, but it’s not like logic can be applied to this game Aerial Somersault: iqb + Circle (while jumping). Two hits, very low damage Super Meteor Combination: qcf + Square. Covers a great distance, several hits, last uppercut knocks out the opponent with great damage Dash Elbow: ff + Square. A quick rush, pushes away the opponent Spin Kick Combo: hcf + Circle. A several hits combination dealing massive damage, more than half of a life bar if all hits connect Flying Knee Kick: d, u + Circle. Three hits which go very high into flying opponents, the last hit doesn’t knock out but pushes away instead Continuous Energy Bullet: qcf + Triangle. Three blasts in quick succession, even though only one will hit the damage is substantially higher Kamehameha: hcf + Triangle. The series’ trademark standard blast, not very damaging, consumes a bit more than 1/3 of the ki bar Super Kamehameha: qcb, f + Triangle. A stronger variant, depletes half a life bar and consumes half of the ki bar Pan The female lead of GT, with a short stature that can drive the taller characters mad. Also, first female character to star in a Dragon Ball fighting game on the heroes’ side (she was beaten by Zangya appearing in Super Butoden 2 some four years prior) Assault Combo: qcf + Square. Several hits, depletes half a life bar or more but doesn’t knock out nor push away Forward Somersault: qcf + Circle. Jumps forward a great distance to deliver a mild-damaging kick, again with no added effect whatsoever Flash Uppercut: f, b, f + Square. Two hits, mild damage but knocks out Eagle Kick: d, u + Circle. Single hit of great damage, doesn’t have a great vertical reach but knocks out Meteo Punch: f, b, d, u + Square. Kind of a strange attack that needs the first hit to connect and initiate the combo, depletes half a life bar or more but with no added effect Continuous Energy Bullet: qcf + Triangle. Three blasts in quick succession but only one will hit, damage is equal to a single blast though Atomic Side Blitz: hcf + Triangle. An energy wave much similar to the standard Kamehameha, not very damaging and consumes a bit more than 1/3 of the ki bar Twin Energy Ball: qcb, f + Triangle. Name is self-explanatory, depletes half a life bar and consumes half of the ki bar Little Goku The actual Goku we see throughout GT, turned back into child form after a wish to a special set of Dragon Balls. Again, a character of noticeably short stature. Aerial Double Kick: iqb + Circle (while jumping). Two hits of great damage and knocks out opponent, but careful with the wide trajectory missing on opponents that are too close Headbutt Combo: qcf + Circle. Several hits, standard damage, no added effect Slide Kick: hcf + Square. Two hits, decent damage, knocks out Meteor Rush: hcb + Square. Several hits, can deplete up to half a life bar but no added effect Raging Strike: fff + Circle. A series of kicks dealing very little damage and with no added effect Continuous Energy Bullet: qcf + Triangle. Three blasts in quick succession, even though only one will hit the damage is substantially higher Kamehameha: hcf + Triangle. The series’ trademark standard blast, not very damaging and consumes a bit more than 1/3 of the ki bar Super Kamehameha: qcb, f + Triangle. A stronger variant, depletes nearly half a life bar and consumes half of the ki bar Super Little Goku The transformation we saw Little Goku take most of the time, because his small body couldn’t handle superior forms. His short stature, which allows him to evade high attacks, makes for a good advantage in this game Aerial Double Kick: iqb + Circle (while jumping). Two hits, knocks out opponent, wide trajectory Headbutt Combo: qcf + Circle. Several hits, standard damage Slide Kick: hcf + Square. Two hits, decent damage, knocks out Helicopter Combo: hcb + Square. Several hits, can deplete half a life bar if all hits connect Raging Assault: fff + Circle. Three simple kicks, very low damage and no added effect Continuous Energy Bullet: qcf + Triangle. Three blasts in quick succession, even though only one will hit the damage is substantially higher Kamehameha: hcf + Triangle. The series’ trademark standard blast, not very damaging and consumes a bit more than 1/3 of the ki bar Super Kamehameha: qcb, f + Triangle. A stronger variant, depletes nearly half a life bar and consumes half of the ki bar Trunks The GT incarnation of Trunks, the natural young adult version of the kid we’re used to see in DBZ and Super. In order to somewhat pair him with his Future counterpart, he has a penchant to kicks and very rarely uses punches Lightning Kick: bb + Circle. Three hits, standard damage Rush Kick: ff + Circle. Several hits, last one can knock out, decent damage Dash Elbow: qcb + Circle. Two hits, the second only if the attack connects, standard damage Sliding Kick: hcf + Circle. Two hits, pushes away, standard damage Brave Kick: f, b, f + Square. Two hits, knocks out on the spot, decent damage Energy Barrage: qcf + Triangle. Launches three round energy balls, one straight, one diagonally upwards and another diagonally downwards; only one can hit but damage is substantially higher. Burning Attack: hcf + Triangle. Trunks’ iconic attack here disguised as an energy wave, not very damaging and consumes a bit more than 1/3 of the ki bar Finish Buster: qcb, f + Triangle. Trunks’ signature energy ball attack, depletes nearly half a life bar and consumes half of the ki bar Super Trunks GT Trunks turned Super Saiyan. Not sure why the developers made him go from meek and somewhat reluctant or afraid to battle to a confident and capable warrior, because standard Trunks already had these attributes in the anime, but whatever Lightning Kick: bb + Circle. Three hits, standard damage Rush Kick: ff + Circle. Several hits, last one can knock out, decent damage Dash Elbow: qcb + Circle. Two hits, the second only if the attack connects, standard damage Sliding Kick: hcf + Circle. Two hits, pushes away, standard damage Brave Kick: f, b, f + Square. Two hits, doesn’t knock out, decent damage Energy Barrage: qcf + Triangle. Launches three round energy balls, one straight, one diagonally upwards and another diagonally downwards; only one can hit but damage is substantially higher Burning Attack: hcf + Triangle. Trunks’ iconic attack here disguised as an energy wave, not very damaging and consumes a bit more than 1/3 of the ki bar Finish Buster: qcb, f + Triangle. Trunks’ signature energy ball attack, depletes nearly half a life bar and consumes half of the ki bar Super Saiyan Trunks This is actually Future Trunks from Dragon Ball Z, as seen from his clothing and even more confident manners. Of course, he’s more powerful than GT Trunks and possesses the most changes in moveset between all the transformations Lightning Assault: bb + Circle. A four hits combo, decent damage Rush Combo: ff + Circle. Several kicks, last one pushes away, decent damage Dash Elbow: qcb + Circle. Two hits, the second only if the attack connects, standard damage Sliding Kick: hcf + Circle. Two hits, pushes away, standard damage Triple Kick: f, b, f + Square. Three hits, high damage Energy Barrage: qcf + Triangle. Launches three round energy balls, one straight, one diagonally upwards and another diagonally downwards; only one can hit but damage is substantially higher. Burning Attack: hcf + Triangle. Trunks’ iconic attack here disguised as an energy wave, not very damaging and consumes a bit more than 1/3 of the ki bar Finish Buster: qcb, f + Triangle. Trunks’ signature energy ball attack, depletes nearly half a life bar and consumes half of the ki bar Super Vegeta As iconic as Vegeta is, apparently this game features his Super Saiyan 2 form seen briefly in the last arc of DBZ judging for the electrical discharges around him in-game. Why this transformation out of everything is beyond my knowledge, but I guess this way the prince can stand above them all Arrow Kick: iqb + Circle (while jumping). Two hits, very low damage Dash Elbow: ff + Square. Single hit, pushes away, very low damage Rush Combo: qcf + Circle. Three hits, low damage Super Kick: qcb + Circle. Two hits, low damage Spin Kick (Heel Shoot): ff + Circle. Two hits, standard damage Vegeta Hammer: d, u + Square. Can only hit flying foes, damage is standard Super Arrow Kick: d, u + Circle. Upwards hit knocks out, downwards is like the standard Arrow Kick mentioned above, damage is decent for both movements. Continuous Energy Bullet: qcf + Triangle. Three blasts in quick succession, even though only one will hit the damage is substantially higher Big Bang Attack: hcf + Triangle. Vegeta’s trademark energy ball attack, more damaging than usual and consumes a bit more than 1/3 of the ki bar Final Flash: qcb, f + Triangle. Vegeta’s signature energy wave attack, depletes nearly half a life bar and consumes half of the ki bar Final Explosion: f, b, d, u + Triangle. Not user-damaging in this game but with actually decent range, depletes 3/4 of the opponent’s health bar while consuming half the ki bar Ultimate Gohan Gohan’s unique transformation from the end of DBZ. We could say it’s actually Gohan’s most powerful form, because we didn’t see much of him in GT and he proved to be less powerful, like happened to him after the defeat of Cell. Halo Stomp: iqb + Circle (while jumping). Multiple hits, depletes 3/4 of the health bar Hammer Kick: qcf + Circle (while jumping). Two hits, pushes away, standard damage Jet Uppercut: qcf + Square. Up to a couple hits that push away, standard damage Dash Kick: f, b, f + Circle. Two hits, standard damage Rising Kick: d, u + Circle. Single hit, knocks out, standard damage Continuous Energy Bullet: qcf + Triangle. Three blasts in quick succession, even though only one will hit the damage is substantially higher Masenko: hcf + Triangle. Gohan’s signature energy wave, not very damaging and consumes a bit more than 1/3 of the ki bar Kamehameha: qcb, f + Triangle. The standard trademark energy wave but upped up a notch due to being Gohan’s second super move, depletes nearly half a life bar and consumes half of the ki bar Cell One of DBZ’s most iconic villains, here featured in his Perfect form. He made a cameo in GT in a later saga out of his popularity, but he was kind of short-lived and soon proved to be outmatched by the heroes’ progress. Power Bash: qcf + Square. Launches some kind of ground wave, knocks out the opponent on a single hit dealing standard damage, but has some kind of “charging time” that leaves an opening for attacks. Slide Kick: qcf + Circle. Two hits, pushes away, standard damage Vertical Hammer: d, u + Square. Two hits, both push away with the first pushing upwards, decent damage Perfect Combination: f, u, f + Square. Four hits, depletes nearly half a life bar Sonic Headbutt: bb, f + Square. Single hit, low damage Rolling Kick: after Sonic Headbutt, f + Square. Much increased damage after this second hit for the whole sequence, precise timing required to pull out. Continuous Energy Bullet: qcf + Triangle. Three blasts in quick succession, even though only one will hit the damage is substantially higher Kamehameha: hcf + Triangle. The trademark standard energy wave once again, deals more damage than other standard versions and apparently consumes just 1/3 of the ki bar Perfect Barrier: qcb, f + Triangle. Disguised as a Super Explosion attack depletes more than half a life bar and knocks the opponent out on the spot while consuming half of the ki bar Kid Buu The last villain appearing in DBZ. He has very strange attacks compared to the rest of the cast, and his short stature also plays in his favor. Mystic Ball Attack: qcb + Square. Launches a part of his body at up to mid range, deals tons of hits but surprisingly low damage, though it stuns the opponent for a brief while and it also consumes a portion of the ki bar Extend Punch: f, b, f + Square. Single hit, pushes away, standard damage Massive Knuckle: hcf + Square. Single hit, pushes away, standard damage Helicopter Kick: qcf + Circle. Several hits, decent damage Earth Shaker: b, d, Circle x3. Spreads his leg underground and can hit at different ranges, knocks out the opponent dealing standard damage, but consumes a portion of the ki bar as well Assault Rain: qcf + Triangle. Shoots lots of round energy balls in almost all directions, damage is substantially higher compared to a standard blast Planet Burst: hcf + Triangle. Kid Buu’s signature attack but despite being a planet destroyer it’s just his standard super move, not very damaging and consumes a bit more than 1/3 of the ki bar Ill Flash: qcb, f + Triangle. The only mouth blast in the whole game despite not being that rare in the series, depletes nearly half a life bar and consumes half of the ki bar Revenge Death Bomber: f, b, d, u + Triangle. Another suicidal attack turned non user-damaging, depletes nearly half a life bar while consuming half of the ki bar Frieza Dragon Ball’s most iconic villain couldn’t be left out. He also made a brief cameo in a later saga in GT, but yet again he proved to have fallen behind the heroes’ new powers brought by the years. Emperor Stomp: iqb + Circle (while jumping). Two hits, pushes away, standard damage Super Dash Elbow: ff + Square. Single hit either with the dash or the tail spin after it, pushes away, standard damage Kick Combination: ff + Circle. Three hits, last one pushes away, decent damage Tail Assault: hcf + Circle. Three hits, low damage Headbutt Strike: bb, f + Square. Single hit, standard damage Death Beam Barrage: qcf + Triangle. Three blasts in quick succession, even though only one will hit and the damage isn’t noticeably higher Death Ball (fired as Destroy The Planet!): hcf + Triangle. Frieza’s two-handed planet destroyer, not very damaging and consumes a bit more than 1/3 of the ki bar Destroy the Planet! (fired as a Death Ball): qcb, f + Triangle. Frieza’s one-hand version of his planet destroyer, depletes nearly half a life bar and consumes half of the ki bar Piccolo One of the major supporters of the heroes couldn’t be left out either, despite his lack of participation in GT overall. It’s quite clear he has been outclassed by now, but he’ll always be a fan favorite and so he has a spot in every Dragon Ball videogame Halo Stomp: iqb + Circle (while jumping). Several hits, depletes nearly half a life bar Mystic Attack: ff + Square. Single hit, standard damage Sonic Kick: f, b, f + Circle. Two hits apparently, standard damage Somersault Kick: d, u + Circle. Single hit, standard damage Spin Kick: hcf + Circle. Three hits but last two only for flying foes, any of them knocks out, low damage Rush Assault: fff + Circle. Several hits, last one pushes away, decent damage Continuous Energy Bullet: qcf + Triangle. Three blasts in quick succession, even though only one will hit and the damage isn’t noticeably higher Special Beam Cannon: hcf + Triangle. Piccolo’s trademark finger beam, not very damaging and consumes a bit more than 1/3 of the ki bar Light Grenade: qcb, f + Triangle. Piccolo’s unique energy ball attack, depletes nearly half a life bar and consumes half of the ki bar Super Vegito Goku and Vegeta fused through the Potara, creating possibly the game’s most powerful fighter. He’s been made quite arrogant, shown in his poses and overall indifference when launching attacks, like if he’s just too powerful. Without demos, his Super Moves are very fast to pull out, though his extra one still takes a bit too much for the opponent to get a safety distance. Aerial Bomb: iqb + Circle (while jumping). Two hits, last one knocks out, decent damage Heel Shoot: ff + Circle. Single hit, decent damage Phantom Strike: b, d, u + Circle. Two hits, last one pushes away, decent damage Jumping Kick Combo: qcb + Circle. Three hits, last one pushes away, depletes more than half a life bar Rising Cossack Kick: d, u + Circle. Several hits as he ascends, last one knocks out, decent damage Continuous Energy Bullet: qcf + Triangle. Three blasts in quick succession, even though only one will hit the damage is substantially higher Spirit Sword: hcf + Triangle. Turned into an energy wave in this game, more damaging than the standard super moves seen up until now while still consuming a bit more than 1/3 of the ki bar Final Kamehameha: qcb, f + Triangle. The combination of his fusees’ signature attacks, depletes slightly more than half a life bar while consuming about half of the ki bar and also knocks out on the spot Psycho Whip: b, d, u + Triangle. Mid range attack, consumes even less ki than a single blast but depletes nearly a full bar of health Super Saiyan 4 Goku Goku’s brand new transformation couldn’t be bypassed, even if it’s just available via a secret code. Once again, a too powerful character who boasts his superiority, capable of defeating foes in merely a couple of attacks. Aerial Somersault: iqb + Circle (while jumping). Two hits, decent damage Dash Elbow: ff + Square. Single hit, pushes away, low damage Hyper Meteor Combination: qcf + Square. Several hits, last one knocks out, depletes more than half a life bar Hyper Multi Kick Combo: hcf + Circle. Several hits, last one knocks out, depletes nearly a full bar of health if all hits connect Flying Knee Kick: d, u + Circle. Three hits as he ascends, first one knocks out and latter two push away, low damage because landing more than one is nearly impossible Continuous Energy Bullet: qcf + Triangle. Three blasts in quick succession, even though only one will hit the damage is substantially higher Kamehameha: hcf + Triangle. One final time the series’ trademark energy wave, more damaging than the majority of standard supers but still consuming more than 1/3 of the ki bar Kamehameha x10: qcb, f + Triangle. The signature empowered version of this form but without its usual crimson color, depletes more than half a life bar while consuming about half of the ki bar and knocks out the opponent on the spot If I’m correct, Dragon Ball GT Final Bout hit the stores right after the 500th Dragon Ball episode had aired. It was the first of only two games to wield GT in the title, and the last Dragon Ball videogame for roughly 5 years (new anime content of any kind would wait a lot more, with only a special OVA airing for the next 15 years). After these facts, most will probably think that this game being so clunky influenced the release of any further material, but I honestly doubt that this game was so bad it “killed” Dragon Ball on its entirety until the next generation of consoles. Another major fact that played a role in this game’s reputation is that, despite the title, only 8 of the characters are actually from the GT anime (9 if we count the unplayable boss), with the remainder of the cast being actually “filler” to attract the all-time fans because GT didn’t have a dubbed version until months (or years, depending on the region) after this game released. Plus, this game released by the time not even the full series had been aired (not many episodes remained, actually), meaning there wasn’t much to select from the anime during game development. For that reason, characters like Vegeta or Gohan don’t display their GT versions, and only one villain from GT made the cut, which is the aforementioned unplayable boss. Before Starting In this game, all fighters start with two full bars of health, the first colored yellow and the second red, and below them there’s a full bar of energy, colored orange. The energy bar will deplete when using energy attacks, and if it’s completely depleted, your character will be unable to move or block, so always keep an eye on it. Of course, if the second health bar is depleted, the character will lose the match. After the first health bar is depleted, the characters can enter some kind of damaged stance which can gradually get worse as their health depletes further. In those stances, characters will hunch, show difficulty to remain upright or even show movements of panting. This is important because, apparently, these stances also make characters a bit slower compared to when they were on their usual fighting position, meaning another obstacle in the way of victory if you don’t have the advantage in health, and the hunching also reduces their height a bit meaning some attacks may now miss them. This game basically features physical attacks and super moves. The former are melee combinations, which can deal big damage in certain cases, and are the main asset for close combat. The latter are the long-range attacks, which rely on big loads of energy to fire and which can deplete a decent chunk of life away. The only other energy attack seen is the generic Continuous Energy Bullet, available to all fighters but sometimes modified slightly. Within the game’s options, there are two special motions that can be enabled or disabled. One of them is super move demos, which is a short cutscene in which the character charges the attack before firing it. The opponent has one chance to react, though slim, and overall they make fights last longer than when they’re disabled. The second special motion is Meteor Moves, which are generic to all fighters and similar to demos in that they affect the overall flow of the game. Meteor Moves initiate close to the opponent and can be chained one after another for massive damage, but countering them is hard because there’s no way to know what kind of attack will come at you (each attack has its own specific counter), so it’s better to simply disable them. After all, they’ll be disabled no matter what when fighting the game’s final boss because said boss doesn’t have them. NOTE: Super moves here are listed when used with demos active. This is because the effects of the attacks are unique with the demos on, but become generic when not using them (they all push the opponent away). Control Explanation Buttons: Directional buttons will be represented by its initial: d for down, u for up, f for forward and b for back. Square, Circle and Triangle will be represented by their full name, since they will be the last buttons pressed in any combo Sequences: While all combos could be listed with the directional button input, due to this game basically dealing with four directional buttons instead of the usual eight, I prefer to use initials to refer to sequences which are mostly a staple of fighting games since decades ago. Here’s a list of all the sequences to be seen below: -half circle forward (hcf): b, d, f -half circle back (hcb): f, d, b -quarter circle forward (qcf): d, f -quarter circle back (qcb): d, b -inverse quarter back (iqb): f, d -double/triple forward: ff/fff -double back: bb Goku GT incarnation of our favorite hero, seen very briefly in the anime but the game would be void without it Aerial Somersault: iqb + Circle (while jumping). Two hits, very low damage Meteor Combination: qcf + Square. Covers a great distance, several hits, last uppercut knocks out the opponent with great damage Dash Elbow: ff + Square. A quick rush, pushes away the opponent Spinning Kick: hcf + Circle. A four hits combination dealing massive damage Flying Knee Kick: d, u + Circle. Three hits which go very high into flying opponents, the last hit doesn’t knock out but pushes away instead Continuous Energy Bullet: qcf + Triangle. Three blasts in quick succession, even though only one will hit the damage is substantially higher Kamehameha: hcf + Triangle. The series’ trademark standard blast, not very damaging, consumes a bit more than 1/3 of the bar Super Kamehameha: qcb, f + Triangle. A stronger variant, depletes half a life bar and consumes half of the ki bar Energy Bomb: f, b, d, u + Triangle. It takes an awfully long time to charge, but depletes half a life bar while consuming a bit more than 1/3 of the bar. Super Goku Not seen in the series, but we’ll agree he needed it Aerial Somersault: iqb + Circle (while jumping). Two hits, very low damage Super Meteor Combination: qcf + Square. Covers a great distance, several hits, last uppercut knocks out the opponent with great damage Dash Elbow: ff + Square. A quick rush, pushes away the opponent Multi Kick: hcf + Circle. A several hits combination dealing massive damage, depletes half a life bar if all hits connect Flying Knee Kick: d, u + Circle. Three hits which go very high into flying opponents, the last hit doesn’t knock out but pushes away instead Continuous Energy Bullet: qcf + Triangle. Three blasts in quick succession, even though only one will hit the damage is substantially higher Kamehameha: hcf + Triangle. The series’ trademark standard blast, not very damaging, consumes a bit more than 1/3 of the bar Super Kamehameha: qcb, f + Triangle. A stronger variant, depletes half a life bar and consumes half of the ki bar Super Saiyan Goku The Dragon Ball Z version, referenced in his clothing. Not sure why he has the status of being more powerful than in GT when it’s lacking at least a decade worth of training, but it’s not like logic can be applied to this game Aerial Somersault: iqb + Circle (while jumping). Two hits, very low damage Super Meteor Combination: qcf + Square. Covers a great distance, several hits, last uppercut knocks out the opponent with great damage Dash Elbow: ff + Square. A quick rush, pushes away the opponent Spin Kick Combo: hcf + Circle. A several hits combination dealing massive damage, more than half of a life bar if all hits connect Flying Knee Kick: d, u + Circle. Three hits which go very high into flying opponents, the last hit doesn’t knock out but pushes away instead Continuous Energy Bullet: qcf + Triangle. Three blasts in quick succession, even though only one will hit the damage is substantially higher Kamehameha: hcf + Triangle. The series’ trademark standard blast, not very damaging, consumes a bit more than 1/3 of the ki bar Super Kamehameha: qcb, f + Triangle. A stronger variant, depletes half a life bar and consumes half of the ki bar Pan The female lead of GT, with a short stature that can drive the taller characters mad. Also, first female character to star in a Dragon Ball fighting game on the heroes’ side (she was beaten by Zangya appearing in Super Butoden 2 some four years prior) Assault Combo: qcf + Square. Several hits, depletes half a life bar or more but doesn’t knock out nor push away Forward Somersault: qcf + Circle. Jumps forward a great distance to deliver a mild-damaging kick, again with no added effect whatsoever Flash Uppercut: f, b, f + Square. Two hits, mild damage but knocks out Eagle Kick: d, u + Circle. Single hit of great damage, doesn’t have a great vertical reach but knocks out Meteo Punch: f, b, d, u + Square. Kind of a strange attack that needs the first hit to connect and initiate the combo, depletes half a life bar or more but with no added effect Continuous Energy Bullet: qcf + Triangle. Three blasts in quick succession but only one will hit, damage is equal to a single blast though Atomic Side Blitz: hcf + Triangle. An energy wave much similar to the standard Kamehameha, not very damaging and consumes a bit more than 1/3 of the ki bar Twin Energy Ball: qcb, f + Triangle. Name is self-explanatory, depletes half a life bar and consumes half of the ki bar Little Goku The actual Goku we see throughout GT, turned back into child form after a wish to a special set of Dragon Balls. Again, a character of noticeably short stature. Aerial Double Kick: iqb + Circle (while jumping). Two hits of great damage and knocks out opponent, but careful with the wide trajectory missing on opponents that are too close Headbutt Combo: qcf + Circle. Several hits, standard damage, no added effect Slide Kick: hcf + Square. Two hits, decent damage, knocks out Meteor Rush: hcb + Square. Several hits, can deplete up to half a life bar but no added effect Raging Strike: fff + Circle. A series of kicks dealing very little damage and with no added effect Continuous Energy Bullet: qcf + Triangle. Three blasts in quick succession, even though only one will hit the damage is substantially higher Kamehameha: hcf + Triangle. The series’ trademark standard blast, not very damaging and consumes a bit more than 1/3 of the ki bar Super Kamehameha: qcb, f + Triangle. A stronger variant, depletes nearly half a life bar and consumes half of the ki bar Super Little Goku The transformation we saw Little Goku take most of the time, because his small body couldn’t handle superior forms. His short stature, which allows him to evade high attacks, makes for a good advantage in this game Aerial Double Kick: iqb + Circle (while jumping). Two hits, knocks out opponent, wide trajectory Headbutt Combo: qcf + Circle. Several hits, standard damage Slide Kick: hcf + Square. Two hits, decent damage, knocks out Helicopter Combo: hcb + Square. Several hits, can deplete half a life bar if all hits connect Raging Assault: fff + Circle. Three simple kicks, very low damage and no added effect Continuous Energy Bullet: qcf + Triangle. Three blasts in quick succession, even though only one will hit the damage is substantially higher Kamehameha: hcf + Triangle. The series’ trademark standard blast, not very damaging and consumes a bit more than 1/3 of the ki bar Super Kamehameha: qcb, f + Triangle. A stronger variant, depletes nearly half a life bar and consumes half of the ki bar Trunks The GT incarnation of Trunks, the natural young adult version of the kid we’re used to see in DBZ and Super. In order to somewhat pair him with his Future counterpart, he has a penchant to kicks and very rarely uses punches Lightning Kick: bb + Circle. Three hits, standard damage Rush Kick: ff + Circle. Several hits, last one can knock out, decent damage Dash Elbow: qcb + Circle. Two hits, the second only if the attack connects, standard damage Sliding Kick: hcf + Circle. Two hits, pushes away, standard damage Brave Kick: f, b, f + Square. Two hits, knocks out on the spot, decent damage Energy Barrage: qcf + Triangle. Launches three round energy balls, one straight, one diagonally upwards and another diagonally downwards; only one can hit but damage is substantially higher. Burning Attack: hcf + Triangle. Trunks’ iconic attack here disguised as an energy wave, not very damaging and consumes a bit more than 1/3 of the ki bar Finish Buster: qcb, f + Triangle. Trunks’ signature energy ball attack, depletes nearly half a life bar and consumes half of the ki bar Super Trunks GT Trunks turned Super Saiyan. Not sure why the developers made him go from meek and somewhat reluctant or afraid to battle to a confident and capable warrior, because standard Trunks already had these attributes in the anime, but whatever Lightning Kick: bb + Circle. Three hits, standard damage Rush Kick: ff + Circle. Several hits, last one can knock out, decent damage Dash Elbow: qcb + Circle. Two hits, the second only if the attack connects, standard damage Sliding Kick: hcf + Circle. Two hits, pushes away, standard damage Brave Kick: f, b, f + Square. Two hits, doesn’t knock out, decent damage Energy Barrage: qcf + Triangle. Launches three round energy balls, one straight, one diagonally upwards and another diagonally downwards; only one can hit but damage is substantially higher Burning Attack: hcf + Triangle. Trunks’ iconic attack here disguised as an energy wave, not very damaging and consumes a bit more than 1/3 of the ki bar Finish Buster: qcb, f + Triangle. Trunks’ signature energy ball attack, depletes nearly half a life bar and consumes half of the ki bar Super Saiyan Trunks This is actually Future Trunks from Dragon Ball Z, as seen from his clothing and even more confident manners. Of course, he’s more powerful than GT Trunks and possesses the most changes in moveset between all the transformations Lightning Assault: bb + Circle. A four hits combo, decent damage Rush Combo: ff + Circle. Several kicks, last one pushes away, decent damage Dash Elbow: qcb + Circle. Two hits, the second only if the attack connects, standard damage Sliding Kick: hcf + Circle. Two hits, pushes away, standard damage Triple Kick: f, b, f + Square. Three hits, high damage Energy Barrage: qcf + Triangle. Launches three round energy balls, one straight, one diagonally upwards and another diagonally downwards; only one can hit but damage is substantially higher. Burning Attack: hcf + Triangle. Trunks’ iconic attack here disguised as an energy wave, not very damaging and consumes a bit more than 1/3 of the ki bar Finish Buster: qcb, f + Triangle. Trunks’ signature energy ball attack, depletes nearly half a life bar and consumes half of the ki bar Super Vegeta As iconic as Vegeta is, apparently this game features his Super Saiyan 2 form seen briefly in the last arc of DBZ judging for the electrical discharges around him in-game. Why this transformation out of everything is beyond my knowledge, but I guess this way the prince can stand above them all Arrow Kick: iqb + Circle (while jumping). Two hits, very low damage Dash Elbow: ff + Square. Single hit, pushes away, very low damage Rush Combo: qcf + Circle. Three hits, low damage Super Kick: qcb + Circle. Two hits, low damage Spin Kick (Heel Shoot): ff + Circle. Two hits, standard damage Vegeta Hammer: d, u + Square. Can only hit flying foes, damage is standard Super Arrow Kick: d, u + Circle. Upwards hit knocks out, downwards is like the standard Arrow Kick mentioned above, damage is decent for both movements. Continuous Energy Bullet: qcf + Triangle. Three blasts in quick succession, even though only one will hit the damage is substantially higher Big Bang Attack: hcf + Triangle. Vegeta’s trademark energy ball attack, more damaging than usual and consumes a bit more than 1/3 of the ki bar Final Flash: qcb, f + Triangle. Vegeta’s signature energy wave attack, depletes nearly half a life bar and consumes half of the ki bar Final Explosion: f, b, d, u + Triangle. Not user-damaging in this game but with actually decent range, depletes 3/4 of the opponent’s health bar while consuming half the ki bar Ultimate Gohan Gohan’s unique transformation from the end of DBZ. We could say it’s actually Gohan’s most powerful form, because we didn’t see much of him in GT and he proved to be less powerful, like happened to him after the defeat of Cell. Halo Stomp: iqb + Circle (while jumping). Multiple hits, depletes 3/4 of the health bar Hammer Kick: qcf + Circle (while jumping). Two hits, pushes away, standard damage Jet Uppercut: qcf + Square. Up to a couple hits that push away, standard damage Dash Kick: f, b, f + Circle. Two hits, standard damage Rising Kick: d, u + Circle. Single hit, knocks out, standard damage Continuous Energy Bullet: qcf + Triangle. Three blasts in quick succession, even though only one will hit the damage is substantially higher Masenko: hcf + Triangle. Gohan’s signature energy wave, not very damaging and consumes a bit more than 1/3 of the ki bar Kamehameha: qcb, f + Triangle. The standard trademark energy wave but upped up a notch due to being Gohan’s second super move, depletes nearly half a life bar and consumes half of the ki bar Cell One of DBZ’s most iconic villains, here featured in his Perfect form. He made a cameo in GT in a later saga out of his popularity, but he was kind of short-lived and soon proved to be outmatched by the heroes’ progress. Power Bash: qcf + Square. Launches some kind of ground wave, knocks out the opponent on a single hit dealing standard damage, but has some kind of “charging time” that leaves an opening for attacks. Slide Kick: qcf + Circle. Two hits, pushes away, standard damage Vertical Hammer: d, u + Square. Two hits, both push away with the first pushing upwards, decent damage Perfect Combination: f, u, f + Square. Four hits, depletes nearly half a life bar Sonic Headbutt: bb, f + Square. Single hit, low damage Rolling Kick: after Sonic Headbutt, f + Square. Much increased damage after this second hit for the whole sequence, precise timing required to pull out. Continuous Energy Bullet: qcf + Triangle. Three blasts in quick succession, even though only one will hit the damage is substantially higher Kamehameha: hcf + Triangle. The trademark standard energy wave once again, deals more damage than other standard versions and apparently consumes just 1/3 of the ki bar Perfect Barrier: qcb, f + Triangle. Disguised as a Super Explosion attack depletes more than half a life bar and knocks the opponent out on the spot while consuming half of the ki bar Kid Buu The last villain appearing in DBZ. He has very strange attacks compared to the rest of the cast, and his short stature also plays in his favor. Mystic Ball Attack: qcb + Square. Launches a part of his body at up to mid range, deals tons of hits but surprisingly low damage, though it stuns the opponent for a brief while and it also consumes a portion of the ki bar Extend Punch: f, b, f + Square. Single hit, pushes away, standard damage Massive Knuckle: hcf + Square. Single hit, pushes away, standard damage Helicopter Kick: qcf + Circle. Several hits, decent damage Earth Shaker: b, d, Circle x3. Spreads his leg underground and can hit at different ranges, knocks out the opponent dealing standard damage, but consumes a portion of the ki bar as well Assault Rain: qcf + Triangle. Shoots lots of round energy balls in almost all directions, damage is substantially higher compared to a standard blast Planet Burst: hcf + Triangle. Kid Buu’s signature attack but despite being a planet destroyer it’s just his standard super move, not very damaging and consumes a bit more than 1/3 of the ki bar Ill Flash: qcb, f + Triangle. The only mouth blast in the whole game despite not being that rare in the series, depletes nearly half a life bar and consumes half of the ki bar Revenge Death Bomber: f, b, d, u + Triangle. Another suicidal attack turned non user-damaging, depletes nearly half a life bar while consuming half of the ki bar Frieza Dragon Ball’s most iconic villain couldn’t be left out. He also made a brief cameo in a later saga in GT, but yet again he proved to have fallen behind the heroes’ new powers brought by the years. Emperor Stomp: iqb + Circle (while jumping). Two hits, pushes away, standard damage Super Dash Elbow: ff + Square. Single hit either with the dash or the tail spin after it, pushes away, standard damage Kick Combination: ff + Circle. Three hits, last one pushes away, decent damage Tail Assault: hcf + Circle. Three hits, low damage Headbutt Strike: bb, f + Square. Single hit, standard damage Death Beam Barrage: qcf + Triangle. Three blasts in quick succession, even though only one will hit and the damage isn’t noticeably higher Death Ball (fired as Destroy The Planet!): hcf + Triangle. Frieza’s two-handed planet destroyer, not very damaging and consumes a bit more than 1/3 of the ki bar Destroy the Planet! (fired as a Death Ball): qcb, f + Triangle. Frieza’s one-hand version of his planet destroyer, depletes nearly half a life bar and consumes half of the ki bar Piccolo One of the major supporters of the heroes couldn’t be left out either, despite his lack of participation in GT overall. It’s quite clear he has been outclassed by now, but he’ll always be a fan favorite and so he has a spot in every Dragon Ball videogame Halo Stomp: iqb + Circle (while jumping). Several hits, depletes nearly half a life bar Mystic Attack: ff + Square. Single hit, standard damage Sonic Kick: f, b, f + Circle. Two hits apparently, standard damage Somersault Kick: d, u + Circle. Single hit, standard damage Spin Kick: hcf + Circle. Three hits but last two only for flying foes, any of them knocks out, low damage Rush Assault: fff + Circle. Several hits, last one pushes away, decent damage Continuous Energy Bullet: qcf + Triangle. Three blasts in quick succession, even though only one will hit and the damage isn’t noticeably higher Special Beam Cannon: hcf + Triangle. Piccolo’s trademark finger beam, not very damaging and consumes a bit more than 1/3 of the ki bar Light Grenade: qcb, f + Triangle. Piccolo’s unique energy ball attack, depletes nearly half a life bar and consumes half of the ki bar Super Vegito Goku and Vegeta fused through the Potara, creating possibly the game’s most powerful fighter. He’s been made quite arrogant, shown in his poses and overall indifference when launching attacks, like if he’s just too powerful. Without demos, his Super Moves are very fast to pull out, though his extra one still takes a bit too much for the opponent to get a safety distance. Aerial Bomb: iqb + Circle (while jumping). Two hits, last one knocks out, decent damage Heel Shoot: ff + Circle. Single hit, decent damage Phantom Strike: b, d, u + Circle. Two hits, last one pushes away, decent damage Jumping Kick Combo: qcb + Circle. Three hits, last one pushes away, depletes more than half a life bar Rising Cossack Kick: d, u + Circle. Several hits as he ascends, last one knocks out, decent damage Continuous Energy Bullet: qcf + Triangle. Three blasts in quick succession, even though only one will hit the damage is substantially higher Spirit Sword: hcf + Triangle. Turned into an energy wave in this game, more damaging than the standard super moves seen up until now while still consuming a bit more than 1/3 of the ki bar Final Kamehameha: qcb, f + Triangle. The combination of his fusees’ signature attacks, depletes slightly more than half a life bar while consuming about half of the ki bar and also knocks out on the spot Psycho Whip: b, d, u + Triangle. Mid range attack, consumes even less ki than a single blast but depletes nearly a full bar of health Super Saiyan 4 Goku Goku’s brand new transformation couldn’t be bypassed, even if it’s just available via a secret code. Once again, a too powerful character who boasts his superiority, capable of defeating foes in merely a couple of attacks. Aerial Somersault: iqb + Circle (while jumping). Two hits, decent damage Dash Elbow: ff + Square. Single hit, pushes away, low damage Hyper Meteor Combination: qcf + Square. Several hits, last one knocks out, depletes more than half a life bar Hyper Multi Kick Combo: hcf + Circle. Several hits, last one knocks out, depletes nearly a full bar of health if all hits connect Flying Knee Kick: d, u + Circle. Three hits as he ascends, first one knocks out and latter two push away, low damage because landing more than one is nearly impossible Continuous Energy Bullet: qcf + Triangle. Three blasts in quick succession, even though only one will hit the damage is substantially higher Kamehameha: hcf + Triangle. One final time the series’ trademark energy wave, more damaging than the majority of standard supers but still consuming more than 1/3 of the ki bar Kamehameha x10: qcb, f + Triangle. The signature empowered version of this form but without its usual crimson color, depletes more than half a life bar while consuming about half of the ki bar and knocks out the opponent on the spot -------------------- |
Administrator
Site Staff Manager, Content Writer, Console Manager
Affected by 'Laziness Syndrome'
Registered: 07-03-13
Location: Barcelona, Spain
Last Post: 2 days
Last Active: 2 days
Site Staff Manager, Content Writer, Console Manager
| Vizzed #1 Hardstyle fan |
Affected by 'Laziness Syndrome'
Registered: 07-03-13
Location: Barcelona, Spain
Last Post: 2 days
Last Active: 2 days
