

 User Notice
 Forum Links


Thread Information
Thread Actions


Order
Horizon Zero Dawn Guide to Hunting Machines
Game's Ratings
Overall
Graphics
Sound
Addictiveness
Depth
Story
Difficulty
Average User Score
9.2
10
9
10
10
9
3
01-02-19 04:46 PM
 zanderlex is Offline
| ID: 1361030 | 3184 Words
zanderlex is Offline
| ID: 1361030 | 3184 Words
 zanderlex is Offline
| ID: 1361030 | 3184 Words
zanderlex
dark mode
dark mode
Level: 272


POSTS: 24195/28848
POST EXP: 1962217
LVL EXP: 334935993
CP: 162895.2
VIZ: 11729902

POSTS: 24195/28848
POST EXP: 1962217
LVL EXP: 334935993
CP: 162895.2
VIZ: 11729902
Likes: 0 Dislikes: 0
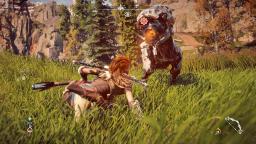
Lots of people love Horizon Zero Dawn. It's so much fun and has so many good reviews. But have you ever been worried by the sheer number of machines that are present in the game? It can get confusing and figuring out how to handle each one through trial and error can be a pain.
So I went ahead and listed all of the machines that have "open spawns" and discussed some of the best ways to deal with them. Watcher Watchers I think are the first machine that you encounter in the game and they are one of two machines in the starting area. They are small and look kind of like velocirapters. I guess they kind of act like them too. What do they do? They watch. If one sees you, they alert the others and start attacking you. It's very possible to avoid watchers all the time but if you want to fight them, they're easy to kill too. It's best to strike before they see you with your arrows. Most of the time, one powerful shot to their eye will be enough for a KO. If you miss your opportunity and they start attacking, you just gotta stand your ground and go hand to hand and they'll go down easily. Strider Striders are the other machine that spawn in the starting area and along with Watchers, they are the two most common machines that you will see playing this game. They look just like horses and 99% of the time they are peaceful. In addition to fighting them, you eventually get the power to tame them and once you do that, you can ride them. Goodbye legs. If you want to fight them, It's best to do it quickly because once you hit one, the one you attacked along with all the others around it will most likely run away. Sometimes one will fight back though. The best way to kill these guys is with arrows, 3 or 4 should do the job. But, if you get to knock one down, you could just go up to it and go hand to hand to finish the job. Fighting Striders are the easiest way to get used to the controls and collect early resources. Grazer These machines are peaceful like the Striders and will bolt if you fire a single arrow at them. But they are also pretty easy to kill, especially if you go after one of the canisters on their backs. If you hit one of the canisters, it should explode and knock them down. It will take a second for them to get back up so you will have enough time to fire another shot to kill them. If you have a strong enough arrow, it should be enough for a one hit KO, which would also give you enough time to aim for a second one before they start running. The canisters that you knock off of them are pretty valuable too so it's win win if you kill them this way. Scrapper The Scrappers are the first machines you will encounter that will actually be dangerous. They are small, probably wolf sized but they are fast, and their bite is pretty painful. Not only can they hurt you like this, but they have lasers too so they can attack you from far away or they will be really dangerous if there's a lot around you. The best thing to do with Scrappers is use your fire arrows. You might not even need a lot, and it's best to fire them when they are far away from you, before they start charging you. A good hit will make them catch on fire and they start losing small amounts of health as they're running to you. 2 or 3 shots of the fire arrows coupled with burn damage should be enough to put them out of commission before they even reach you. If they reach you, you're going to have to do a lot of jumping and rolling. Broadhead The Broadhead is another machine that kind of resembles a bull and they are pretty easy to find throughout the world, especially in some areas near the start of the game. Like the Strider, the Broadhead is another machine that can be tamed and ridden. Broadheads have powerful attacks so it's suggested that you sneak up on them and then either attack them or tame them. The best way to attack them is by using fire arrows because the canisters on their back will explode pretty easily. Sometimes it will be a one hit KO but most of the times you will be able to kill them while they're down with a few melee attacks or a few arrows. The only thing you have to worry about when it comes to these machines is they are really fast. The largest concentration of Broadheads is near the 1st spawn of ThunderJaw, Glinthawk, and Stormbird Charger Chargers are exactly what they sound like, they charge. They are a big smaller than Broadheads but are more agile and it can get harder to avoid their attacks or knock them down as a result. In order to get things started, you need to sneak up on Chargers and destroy both their horns and their canisters. Destroying both would not only cause significant damage but also disable most of its attacks. If you don't do this before attacking, you will easily be knocked around a bit making it harder to do anything. Sawtooth There isn't a machine in the game that's as savage as the Sawtooth. It's bigger than the Scrapper and much more aggressive, meaning if it sees you, it's going to try to kill you on sight. If it gets to you, you're going to take a lot of damage and if you get hurt and try to run away, it's only going to catch up to you. As a result, there's only two logical and safe ways to battle the Sawtooths, which each take a long amount of time. The first way is to be a safe distance away and fire 1 or 2 arrows. Then you run away before it even starts chasing you. Eventually it won't be able to follow you anymore and will return to the spawn. The other option is to do this while riding a Strider. This is going to allow you to go back and forth quicker and you'll also be able to get up close and do a few melee attacks with the Strider. Both techniques are going to take a long time and lots of arrows to pull off. Trampler Tramplers are big, they look like bulls, and they will randomly charge you. They are also my favorite to attack because they travel in herds so once you beat one, it's on to the next one within seconds and it becomes a very fast paced and exciting battle. Despite being big and fast, all you need to do to kill one is place a few well placed arrows, especially around its canister and it will explode in no time. Because of the amount of stuff they give you and how many spawn together, attacking Tramplers are one of the most rewarding things to do. Just attack one herd and you've got some really valuable stuff. Just make sure that you aren't standing in front of one when they are charging you and look around a lot to see where the others are because it will suck if you're attacking one and you randomly get blindspotted by another. Shell-Walker These machines are one of the more difficult ones to beat for a number of reasons but it's mostly like battling a Metapod that only uses Harden. They look like a giant crab with part of a tank on their backs. They love to fight and not only can they attack you if they get up close, but they also have a ranged electrical attack so you have to make sure that you're a safe distance away and that you're always moving. The worst part is that they also have an energy shield in front of them most of the time so you can't attack them. You'll have to move quick or jump a lot in order to get a shot past the shield or you have to wait until their shields are recharging. It's also going to take a decent number of arrows to take them out. Snapmaw Snapmaws are so annoying. They are like giant alligators/crocodiles and they are relentless. If you are close to one, they won't hesitate to bite you and their bites pack a punch. But even if you're far away they have an ice attack that's just brutal. They fire a bolt of ice that will freeze the area around you. It will slow you down for a very brief amount of time and cause a small amount of damage. But it's not a one and done attack. After you're hit, the Snapmaw keeps aiming at you and fires another bolt of ice one after the other, usually five consecutive attacks a few seconds apart. So if you jump out of the way of one attack, you'll probably land right in the path of another. There's barely any time to recover from these attacks before the next one is launched. When they aren't attacking you, you need to be on the offensive. Shoot a bunch of fire arrows at them, especially near their canisters and they will eventually go down. One issue with Snapmaws is that there's never just one. They're always in a group of like 3 to 5. So if you're fighting one, you could randomly start getting hit by random ice attacks from all over. Glinthawk These guys are small metal birds that will fly around in groups of like 3 to 5 and they are pretty easy to beat. Their attacks are kind of weak, very toned down versions of the Snapmaws ice attack and they are very easy to avoid. Even though the Glinthawks fly around, it's very easy to aim and get a direct hit and if you use fire arrows like me, it should be an easy fight. I learned that two well placed and strong fire arrow attacks will be enough to knock one out of the sky. They'll fall to the ground and lay there unconscious for a few seconds. Depending on how strong your melee weapons are, this should give you plenty of time to get up close and do enough damage to take them out for good. The only thing you have to worry about is making sure that a Glinthawk isn't too high off the ground because if it is, your arrow might not even reach and you're going to lose it. Other than that, it's straightforward and easy to kill. Stormbird Stormbirds are like Glinthawks but they are much bigger, much stronger, and like to attack more often. Underneath their wings are a bunch of small canisters and ideally you should destroy all of them in order to be able to kill a Stormbird (and to maximize loot.) One direct hit to a canister isn't going to do much damage to its health but it's a lot more effective than doing regular attacks to other parts of its body, which will only do like 1% damage each time. It's difficult to get a clean hit because the Stormbird is almost always movong and if it isn't moving, that means that it's getting ready to attack you, so you should be the one moving. This is one of just two machines along with the Sawtooth that I would recommend avoiding unless it's a mandatory encounter or you really want the challenge or loot. Sometimes a group of roaming NPC's will also be fighting the Stormbird so that's a good time to fight. Thunderjaw The Thunderjaw is the machine that I enjoy fighting the most. It's by far the biggest machine that has a regular spawn and it kind of looks like a T-Rex. It has some super strong defense, a ton of health, and some wicked laser and explosive attacks. You don't want to attack unless you have a lot of fire arrows and strong regular arrows, and you never want to be too close. The Thunderjaw is a slow machine except for when it's doing its charge attack so you should have plenty of time to retreat and perform long chains of attacks. You can't just attack anywhere though, multiple hits of your strongest arrow to its armor will combine for like 1% of damage. First you want to aim for its weapons. This will do a lot of damage and will take its weapons out of play. Then you want to aim for othet parts that can be removed. This will also cause a lot of damage and will then allow you to aim shots inside of the machine. In total, expect to use 50 to 100 arrows and fight for 5 to 10 minutes so come prepared. The first place you encounter a Thunderjaw actually has anothet spawn about 60 seconds away and they redrawn if you go to the other site. This way you can keep going back and forth, fighting, and collecting sweet loot. Bellowback The Bellowback has two variants, fire and ice. There's no difference between the two other than the attacks that they use. Bellowbacks are fun to kill because they go boom. These are giant machines that have large compartments of liquid underneath them. These compartments are basically what gives them their energy and power and is what you need to go after first. Be a safe distance away and launch a handful of strong fire attacks at the compartent. Eventually you're going to be treated to a massive explosion which is why you need to be a safe distance away. Once the Bellowback goes boom, it will be disabled for a little while and it won't be able to use its elemental attacks anymore. At this point, you're free to keep using regular arrows until the job is done and then collect your reward. Stalker You know how cats love to be stealthy and sneak up on their prey and then pounce? Well that was where the inspiration for the Stalker came from. It's a giant metal cat that loves hiding and can be super deadly x2 if it does a surprise attack on you. If you don't see it coming or you're caught off guard, it's over, you're as dead as vizzed was in 2018. It doesn't sound too difficult right? Just pay attention to your surroundings. But wait, there's more. The Stalker can also turn invisible. If it just so happens that you did the sneaking and you see it first, you can use special tear arrows to disable the cloak of invisibility. If you can manage that, then the rest should be pretty easy, you just need to use your strongest arrows and you'll be victorious. Just be careful because most of the time, if you see one Stalker, there's probably another one close by. If there are, make sure you disable the stealth of all of them before you do regular attacks on one. Ravager The Ravager is a lot like the Stalker but it chooses to do an all out assault instead of hiding in the shadows. It doesn't turn invisible but it has cannons! The canons can do a lot of damage and the Ravager is super aggressive. However, it is possible to remove the Canon from its back and use it against it. That's really the best way to kill a Ravager, you fire a few shots to dislocate the canon, retrieve the canon, unload canon ammo on Ravager, and then finish it off with powerful ammo. I haven't seen the Ravager attack and travel in packs so it might be a bit easier than battling the Stalker since you might not have to worry about other machines coming to finish you off. Just make sure you have enough ammo and health or you're going to he finished, same goes for the Stalker. Corrupters The Corrupters are probably the most important machines to kill in the game. Not only are they big, deadly, and tough to kill, but they also make other machines stronger. If this machines corrupts a regular machine, that machine becomes much stronger and much more aggressive and violent. Corruptions are so powerful that just standing close to a corrupted machine will cause you to take damage. As far as I can tell, any machine can become corrupted by Corrupters. The Corrupters themselves are a nightmare as well. They are big and very deadly as their melee attacks snd projectile attacks are super powerful and relentless. If you aren't constantly moving, you will die and you only get about 1 second at a time to attack. The only way to really stand a chance is to unleash a stream of fire attacks so that the machine can overheat. Then after that, you attack with the strongest arrows that you have. You are first introduced to the Corrupters very early in the game so it poses quite a challenge. Lancehorn and Longleg The two remaining machines that you are going to encounter are the Lancehorn and the Longleg, which are very similar to each other. They both represent birds but unlike the Glinthawk and the Stormbird, they can't fly. So just for that reason alone, they will both be a bit easier to kill than their flying counterparts. Though they will still turn out to be quite the opponent. The Lancehorn is pretty timid but once you attack it, it's gonna fight back. On the other hand, the Longleg wants to kill you and will normally travel in groups with other machines. Both machines can be killed easily by first removing parts off of their body using a powerful arrow and then doing quick attacks until it's dead. Both are known to give fairly decent loot. You only need to make sure that you aren't close to a Longleg when the canisters explode because like with some of the other machines with similar powerful canisters, you're going to take some damage. That's really all there is to machines that spawn regularly and how to beat them. There's a number of ways to go around killing each one but these are the ways that I found that were either the easiest, quickest, or the most fun. I'm going to leave a few machines off of this list that aren't open spawn ones like these. Those machines are very limited to where they appear because of the story and have a specific way to defeat them, which should either be explained in the game or pretty obvious. These machines include the Behemoth, Deathbringer, and Rockbreaker. I also won't go into details of how to beat the snow variations of each machine which are only found in the Horizon Zero Dawn DLC. So I went ahead and listed all of the machines that have "open spawns" and discussed some of the best ways to deal with them. Watcher Watchers I think are the first machine that you encounter in the game and they are one of two machines in the starting area. They are small and look kind of like velocirapters. I guess they kind of act like them too. What do they do? They watch. If one sees you, they alert the others and start attacking you. It's very possible to avoid watchers all the time but if you want to fight them, they're easy to kill too. It's best to strike before they see you with your arrows. Most of the time, one powerful shot to their eye will be enough for a KO. If you miss your opportunity and they start attacking, you just gotta stand your ground and go hand to hand and they'll go down easily. Strider Striders are the other machine that spawn in the starting area and along with Watchers, they are the two most common machines that you will see playing this game. They look just like horses and 99% of the time they are peaceful. In addition to fighting them, you eventually get the power to tame them and once you do that, you can ride them. Goodbye legs. If you want to fight them, It's best to do it quickly because once you hit one, the one you attacked along with all the others around it will most likely run away. Sometimes one will fight back though. The best way to kill these guys is with arrows, 3 or 4 should do the job. But, if you get to knock one down, you could just go up to it and go hand to hand to finish the job. Fighting Striders are the easiest way to get used to the controls and collect early resources. Grazer These machines are peaceful like the Striders and will bolt if you fire a single arrow at them. But they are also pretty easy to kill, especially if you go after one of the canisters on their backs. If you hit one of the canisters, it should explode and knock them down. It will take a second for them to get back up so you will have enough time to fire another shot to kill them. If you have a strong enough arrow, it should be enough for a one hit KO, which would also give you enough time to aim for a second one before they start running. The canisters that you knock off of them are pretty valuable too so it's win win if you kill them this way. Scrapper The Scrappers are the first machines you will encounter that will actually be dangerous. They are small, probably wolf sized but they are fast, and their bite is pretty painful. Not only can they hurt you like this, but they have lasers too so they can attack you from far away or they will be really dangerous if there's a lot around you. The best thing to do with Scrappers is use your fire arrows. You might not even need a lot, and it's best to fire them when they are far away from you, before they start charging you. A good hit will make them catch on fire and they start losing small amounts of health as they're running to you. 2 or 3 shots of the fire arrows coupled with burn damage should be enough to put them out of commission before they even reach you. If they reach you, you're going to have to do a lot of jumping and rolling. Broadhead The Broadhead is another machine that kind of resembles a bull and they are pretty easy to find throughout the world, especially in some areas near the start of the game. Like the Strider, the Broadhead is another machine that can be tamed and ridden. Broadheads have powerful attacks so it's suggested that you sneak up on them and then either attack them or tame them. The best way to attack them is by using fire arrows because the canisters on their back will explode pretty easily. Sometimes it will be a one hit KO but most of the times you will be able to kill them while they're down with a few melee attacks or a few arrows. The only thing you have to worry about when it comes to these machines is they are really fast. The largest concentration of Broadheads is near the 1st spawn of ThunderJaw, Glinthawk, and Stormbird Charger Chargers are exactly what they sound like, they charge. They are a big smaller than Broadheads but are more agile and it can get harder to avoid their attacks or knock them down as a result. In order to get things started, you need to sneak up on Chargers and destroy both their horns and their canisters. Destroying both would not only cause significant damage but also disable most of its attacks. If you don't do this before attacking, you will easily be knocked around a bit making it harder to do anything. Sawtooth There isn't a machine in the game that's as savage as the Sawtooth. It's bigger than the Scrapper and much more aggressive, meaning if it sees you, it's going to try to kill you on sight. If it gets to you, you're going to take a lot of damage and if you get hurt and try to run away, it's only going to catch up to you. As a result, there's only two logical and safe ways to battle the Sawtooths, which each take a long amount of time. The first way is to be a safe distance away and fire 1 or 2 arrows. Then you run away before it even starts chasing you. Eventually it won't be able to follow you anymore and will return to the spawn. The other option is to do this while riding a Strider. This is going to allow you to go back and forth quicker and you'll also be able to get up close and do a few melee attacks with the Strider. Both techniques are going to take a long time and lots of arrows to pull off. Trampler Tramplers are big, they look like bulls, and they will randomly charge you. They are also my favorite to attack because they travel in herds so once you beat one, it's on to the next one within seconds and it becomes a very fast paced and exciting battle. Despite being big and fast, all you need to do to kill one is place a few well placed arrows, especially around its canister and it will explode in no time. Because of the amount of stuff they give you and how many spawn together, attacking Tramplers are one of the most rewarding things to do. Just attack one herd and you've got some really valuable stuff. Just make sure that you aren't standing in front of one when they are charging you and look around a lot to see where the others are because it will suck if you're attacking one and you randomly get blindspotted by another. Shell-Walker These machines are one of the more difficult ones to beat for a number of reasons but it's mostly like battling a Metapod that only uses Harden. They look like a giant crab with part of a tank on their backs. They love to fight and not only can they attack you if they get up close, but they also have a ranged electrical attack so you have to make sure that you're a safe distance away and that you're always moving. The worst part is that they also have an energy shield in front of them most of the time so you can't attack them. You'll have to move quick or jump a lot in order to get a shot past the shield or you have to wait until their shields are recharging. It's also going to take a decent number of arrows to take them out. Snapmaw Snapmaws are so annoying. They are like giant alligators/crocodiles and they are relentless. If you are close to one, they won't hesitate to bite you and their bites pack a punch. But even if you're far away they have an ice attack that's just brutal. They fire a bolt of ice that will freeze the area around you. It will slow you down for a very brief amount of time and cause a small amount of damage. But it's not a one and done attack. After you're hit, the Snapmaw keeps aiming at you and fires another bolt of ice one after the other, usually five consecutive attacks a few seconds apart. So if you jump out of the way of one attack, you'll probably land right in the path of another. There's barely any time to recover from these attacks before the next one is launched. When they aren't attacking you, you need to be on the offensive. Shoot a bunch of fire arrows at them, especially near their canisters and they will eventually go down. One issue with Snapmaws is that there's never just one. They're always in a group of like 3 to 5. So if you're fighting one, you could randomly start getting hit by random ice attacks from all over. Glinthawk These guys are small metal birds that will fly around in groups of like 3 to 5 and they are pretty easy to beat. Their attacks are kind of weak, very toned down versions of the Snapmaws ice attack and they are very easy to avoid. Even though the Glinthawks fly around, it's very easy to aim and get a direct hit and if you use fire arrows like me, it should be an easy fight. I learned that two well placed and strong fire arrow attacks will be enough to knock one out of the sky. They'll fall to the ground and lay there unconscious for a few seconds. Depending on how strong your melee weapons are, this should give you plenty of time to get up close and do enough damage to take them out for good. The only thing you have to worry about is making sure that a Glinthawk isn't too high off the ground because if it is, your arrow might not even reach and you're going to lose it. Other than that, it's straightforward and easy to kill. Stormbird Stormbirds are like Glinthawks but they are much bigger, much stronger, and like to attack more often. Underneath their wings are a bunch of small canisters and ideally you should destroy all of them in order to be able to kill a Stormbird (and to maximize loot.) One direct hit to a canister isn't going to do much damage to its health but it's a lot more effective than doing regular attacks to other parts of its body, which will only do like 1% damage each time. It's difficult to get a clean hit because the Stormbird is almost always movong and if it isn't moving, that means that it's getting ready to attack you, so you should be the one moving. This is one of just two machines along with the Sawtooth that I would recommend avoiding unless it's a mandatory encounter or you really want the challenge or loot. Sometimes a group of roaming NPC's will also be fighting the Stormbird so that's a good time to fight. Thunderjaw The Thunderjaw is the machine that I enjoy fighting the most. It's by far the biggest machine that has a regular spawn and it kind of looks like a T-Rex. It has some super strong defense, a ton of health, and some wicked laser and explosive attacks. You don't want to attack unless you have a lot of fire arrows and strong regular arrows, and you never want to be too close. The Thunderjaw is a slow machine except for when it's doing its charge attack so you should have plenty of time to retreat and perform long chains of attacks. You can't just attack anywhere though, multiple hits of your strongest arrow to its armor will combine for like 1% of damage. First you want to aim for its weapons. This will do a lot of damage and will take its weapons out of play. Then you want to aim for othet parts that can be removed. This will also cause a lot of damage and will then allow you to aim shots inside of the machine. In total, expect to use 50 to 100 arrows and fight for 5 to 10 minutes so come prepared. The first place you encounter a Thunderjaw actually has anothet spawn about 60 seconds away and they redrawn if you go to the other site. This way you can keep going back and forth, fighting, and collecting sweet loot. Bellowback The Bellowback has two variants, fire and ice. There's no difference between the two other than the attacks that they use. Bellowbacks are fun to kill because they go boom. These are giant machines that have large compartments of liquid underneath them. These compartments are basically what gives them their energy and power and is what you need to go after first. Be a safe distance away and launch a handful of strong fire attacks at the compartent. Eventually you're going to be treated to a massive explosion which is why you need to be a safe distance away. Once the Bellowback goes boom, it will be disabled for a little while and it won't be able to use its elemental attacks anymore. At this point, you're free to keep using regular arrows until the job is done and then collect your reward. Stalker You know how cats love to be stealthy and sneak up on their prey and then pounce? Well that was where the inspiration for the Stalker came from. It's a giant metal cat that loves hiding and can be super deadly x2 if it does a surprise attack on you. If you don't see it coming or you're caught off guard, it's over, you're as dead as vizzed was in 2018. It doesn't sound too difficult right? Just pay attention to your surroundings. But wait, there's more. The Stalker can also turn invisible. If it just so happens that you did the sneaking and you see it first, you can use special tear arrows to disable the cloak of invisibility. If you can manage that, then the rest should be pretty easy, you just need to use your strongest arrows and you'll be victorious. Just be careful because most of the time, if you see one Stalker, there's probably another one close by. If there are, make sure you disable the stealth of all of them before you do regular attacks on one. Ravager The Ravager is a lot like the Stalker but it chooses to do an all out assault instead of hiding in the shadows. It doesn't turn invisible but it has cannons! The canons can do a lot of damage and the Ravager is super aggressive. However, it is possible to remove the Canon from its back and use it against it. That's really the best way to kill a Ravager, you fire a few shots to dislocate the canon, retrieve the canon, unload canon ammo on Ravager, and then finish it off with powerful ammo. I haven't seen the Ravager attack and travel in packs so it might be a bit easier than battling the Stalker since you might not have to worry about other machines coming to finish you off. Just make sure you have enough ammo and health or you're going to he finished, same goes for the Stalker. Corrupters The Corrupters are probably the most important machines to kill in the game. Not only are they big, deadly, and tough to kill, but they also make other machines stronger. If this machines corrupts a regular machine, that machine becomes much stronger and much more aggressive and violent. Corruptions are so powerful that just standing close to a corrupted machine will cause you to take damage. As far as I can tell, any machine can become corrupted by Corrupters. The Corrupters themselves are a nightmare as well. They are big and very deadly as their melee attacks snd projectile attacks are super powerful and relentless. If you aren't constantly moving, you will die and you only get about 1 second at a time to attack. The only way to really stand a chance is to unleash a stream of fire attacks so that the machine can overheat. Then after that, you attack with the strongest arrows that you have. You are first introduced to the Corrupters very early in the game so it poses quite a challenge. Lancehorn and Longleg The two remaining machines that you are going to encounter are the Lancehorn and the Longleg, which are very similar to each other. They both represent birds but unlike the Glinthawk and the Stormbird, they can't fly. So just for that reason alone, they will both be a bit easier to kill than their flying counterparts. Though they will still turn out to be quite the opponent. The Lancehorn is pretty timid but once you attack it, it's gonna fight back. On the other hand, the Longleg wants to kill you and will normally travel in groups with other machines. Both machines can be killed easily by first removing parts off of their body using a powerful arrow and then doing quick attacks until it's dead. Both are known to give fairly decent loot. You only need to make sure that you aren't close to a Longleg when the canisters explode because like with some of the other machines with similar powerful canisters, you're going to take some damage. That's really all there is to machines that spawn regularly and how to beat them. There's a number of ways to go around killing each one but these are the ways that I found that were either the easiest, quickest, or the most fun. I'm going to leave a few machines off of this list that aren't open spawn ones like these. Those machines are very limited to where they appear because of the story and have a specific way to defeat them, which should either be explained in the game or pretty obvious. These machines include the Behemoth, Deathbringer, and Rockbreaker. I also won't go into details of how to beat the snow variations of each machine which are only found in the Horizon Zero Dawn DLC. -------------------- |
Vizzed Elite
Affected by 'Laziness Syndrome'
Registered: 09-25-13
Location: Inaba
Last Post: 88 days
Last Active: 3 days
| Sergei's Mustache |
Affected by 'Laziness Syndrome'
Registered: 09-25-13
Location: Inaba
Last Post: 88 days
Last Active: 3 days
