

 User Notice
 Forum Links
Guide: Metroid Fusion Walkthrough
This was my illustration essay that I wrote for college a week or two ago, and my first walkthrough I've ever written.
This was my illustration essay that I wrote for college a week or two ago, and my first walkthrough I've ever written.
Play Metroid Fusion Online


Thread Information
Thread Actions


Order
Metroid Fusion Walkthrough
Game's Ratings
Overall
Graphics
Sound
Addictiveness
Depth
Story
Difficulty
Average User Score
9.5
9
9.1
8.9
8.6
9
7.1
11-12-16 01:06 PM
 Ridley12 is Offline
| ID: 1313859 | 1506 Words
Ridley12 is Offline
| ID: 1313859 | 1506 Words
 Ridley12 is Offline
| ID: 1313859 | 1506 Words
Ridley12
TaySwift13
TaySwift13
Level: 28


POSTS: 123/143
POST EXP: 5493
LVL EXP: 117784
CP: 5319.8
VIZ: 1035312

POSTS: 123/143
POST EXP: 5493
LVL EXP: 117784
CP: 5319.8
VIZ: 1035312
Likes: 0 Dislikes: 0
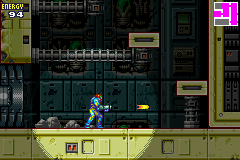
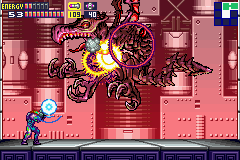
The game begins when the player lands in the hanger of the Biological Space Laboratories' research station or the B.S.L. The first task is to check on an area of the station that recently had an explosion, then go to an area of the Main Deck that is showing the presence of the X. But first, go to the Data Room in the Main Deck to receive the Missiles. Then, search the Main Deck for the X presence, eventually finding the creature causing the bio-signs: Arachnus-X. After defeating the creature, acquire the Morph Ball, then head to the nearest Navigation Room, with the objective to go to Sector 1 (SRX) and clear five atmospheric filters. Right after going down the main elevator towards the six sectors, including SRX, there’s another explosion. The culprit for this one is a “monster” called the SA-X, Samus’ X-infected Power Suit that was surgically removed during the cutscene at the beginning of the game, and is being controlled by the X, like a pawn to a king in chess. After clearing the filters, then head to Sector 2 (TRO) to get a Morph Ball Bomb upgrade, but first, find the Security Room to unlock Level 1 doors. On the way back to the Navigation Room, however, take an alternate route. Along the way, face Zazabi X, a purple, tall, single-eyed creature. Once defeated and the Core-X that it deforms to, acquire the Hi-Jump and Jumpball (jumping with A while in Morph Ball mode) upgrades. On the way to the Navigation Room, get another glimpse of the SA-X. After getting to the Navigation Room, the next task is to head to Sector 4 (AQA) to investigate some unusual behavior: find and eliminate a creature called Serris, a high-speed-moving, dragon-snake-like creature. Serris, one realizes, has been infected by the X. Defeat the Core-X that appears after defeating Serris-X to regain the Speed Booster. After exploring more of Sector 4, head back to the Navigation Room. The next task is to head to Sector 3 (PYR) to pick up the Super Missile upgrade. As with Sector 2, find the Security Room and unlock Level 2 doors to get to it. After getting the Super Missile upgrade, tremors erupt. It's probably nothing, but check out what's causing it anyway. Go back, the entrance damaged, and there's a gaping hole in the ground. There's only one option, to go down. Come back up from the crater; the ground starts quaking more violently. Find out what's causing the tremors: a Security Robot B.O.X. After defeating the Security Robot, continue towards the Navigation Room. The next objective is to head to Sector 6 (NOC) since the harsh winter environment of Sector 5 (ARC) make it impossible to enter for right now. Once in Sector 6, there are two things: get to the Data Room for the Varia Suit, and avoid the blue X floating around Sector 6. Along the way to the Data Room, the SA-X is visible once more. Get to the Data Room to see something incredible happen: a Core-X was absorbing information from a Data Station. Follow it and defeat it to get the Varia Suit. The next room, a third of it as water, houses this giant, shielded version of a Core-X. After defeating it and retrieve the Varia Suit upgrade, head back to this sector's Navigation Room. The next objective is to head into Sector 5 with the acquired Varia Suit and go to the Data Room to retrieve the Ice Missile, since, being part Metroid, an Ice Beam upgrade is impossible. But first, find the Security Room to unlock Level 3 doors. Get the Ice Missile upgrade and head back towards the Navigation Room, then an alarm goes off, with the announcement, “Emergency in Sector 3”, prompting where to go next. Upon coming back to Sector 5's Navigation Room, there are approximately 6 minutes to get to Sector 3 and find and reactivate the cooling unit in the Control Room. Get to the Main Boiler Control Room, and discover what appears to be a scientist at the controls. But he isn't an ally; he's a Core-X, mimicking a scientist. Oh, and the timer doesn't stop during the fight. After defeating the Core-X, get the Wide Beam. After getting it, reactivate the cooling unit, pronto. After being briefed at the Navigation Room at the beginning of Sector 3, return to the Main Deck to check out some bio-signs at the Habitation Deck. Upon freeing creatures called Etecoons and Dachoras, and heading to the nearest Navigation Room, they were the detected bio-signs and not human survivors. The next objective: retrieve the Power Bomb upgrade from the Sector 5 Data Room. Take an alternate path to the Navigation Room, which will brief the next target. While returning to the Main Deck, the power to the station will go out, causing the Main Elevator to stop, forcing an alternate path. Return to the hanger, elevators and Save Stations are not functional. The next objective is to try and activate the auxiliary power to the station. On the way to the control terminal, there is a black spider in the way, and it can spin around during the second phase of the fight. After defeating it and the Core-X, get the Space Jump upgrade. The auxiliary controls are just past the boss room. With auxiliary power, Save Stations are functional, but the elevators are still not working. Search more of the station and up in Sector 2. There are roots everywhere, but that’s not the only thing found there; at the beginning of the area, drop down to another room, with the SA-X! After running from the SA-X, escape through a tunnel in Morph Ball mode. A little bit later, come to the source of the roots and the power loss: a Chozo statue. During the second part of the fight, it fires a Plasma Beam + Wide Beam-like weapon. After defeating it and the Core-X, acquire the Plasma Beam, which can pierce through enemies. Get back to Sector 2’s Navigation Room to be briefed on the next objective: go to Sector 5 and locate the source of trouble. At the briefing, the cause of the problem is a creature called Nightmare. It is a horrific, gravity-altering creature. After defeating it and the Core-X, get the Gravity Suit. Acquired, uncover a shortcut to Sector 4 that will lead through a path to the last Security Room, unlocking Level 4 doors, and eventually getting the Diffusion Missile upgrade. From there, head to the Navigation Room. After a scolding, go to Sector 6 and finish off the Security Robot previously encountered in Sector 3. After exploring the sector for the rogue robot, go to the Restricted Zone, which is closed off for the moment. Turn around and go back, and find the robot. And without surprise, the Security Robot’s organic parts had been infected by the X, so that means there will be a Core-X to defeat. After getting rid of it, receive the Wave Beam, which is just what is needed to get past that gate blocking the way. Once inside the restricted laboratory, notice it is home to Metroid research, raising Metroids at an accelerated rate. Reach the second floor, and there is the sound of glass breaking and an alarm going off. The SA-X has just entered the restricted area and released the Metroids from their containment! Only then, the zone is going to detach and self-destruct! After exiting the Restricted Zone, head to the Navigation Room. After another scolding, including information that there are now no fewer than 10 SA-X aboard this station, head through this uncharted area of Sector 1. Along the way, encounter a familiar creature: Ridley-X. After defeating him and the Core-X that emerges, get the Screw Attack upgrade. After that battle, continue towards the Navigation Room at the beginning of the sector. After an interesting conversation, there is one last objective: set the B.S.L's course for SR388 and destroy the station and, unfortunately, the planet in the process. Make your way to the Operations Room on the Main Deck, and challenge one of the SA-X. After defeating it, the Core-X's upgrade leaves the area. After reaching the Operations Room, set the station's course for the planet below. After that, there are just 3 minutes – half the time of the cooling unit situation – to leave the station. Return to the hanger, and find an Omega Metroid. There is no way to damage it, and one swipe from the Omega Metroid puts the player in a precarious situation. Just then, the Core-X's upgrade flies in and reforms as the SA-X and starts attacking the Omega Metroid. Unfortunately, the SA-X is no match for the Omega Metroid and is quickly defeated. Get the Ice Beam upgrade from the SA-X. After getting the Ice Beam, defeat the Omega Metroid and leave the station. After leaving the station, the B.S.L crashes into SR388, blowing up not only the station but also the planet itself. After clearing the filters, then head to Sector 2 (TRO) to get a Morph Ball Bomb upgrade, but first, find the Security Room to unlock Level 1 doors. On the way back to the Navigation Room, however, take an alternate route. Along the way, face Zazabi X, a purple, tall, single-eyed creature. Once defeated and the Core-X that it deforms to, acquire the Hi-Jump and Jumpball (jumping with A while in Morph Ball mode) upgrades. On the way to the Navigation Room, get another glimpse of the SA-X. After getting to the Navigation Room, the next task is to head to Sector 4 (AQA) to investigate some unusual behavior: find and eliminate a creature called Serris, a high-speed-moving, dragon-snake-like creature. Serris, one realizes, has been infected by the X. Defeat the Core-X that appears after defeating Serris-X to regain the Speed Booster. After exploring more of Sector 4, head back to the Navigation Room. The next task is to head to Sector 3 (PYR) to pick up the Super Missile upgrade. As with Sector 2, find the Security Room and unlock Level 2 doors to get to it. After getting the Super Missile upgrade, tremors erupt. It's probably nothing, but check out what's causing it anyway. Go back, the entrance damaged, and there's a gaping hole in the ground. There's only one option, to go down. Come back up from the crater; the ground starts quaking more violently. Find out what's causing the tremors: a Security Robot B.O.X. After defeating the Security Robot, continue towards the Navigation Room. The next objective is to head to Sector 6 (NOC) since the harsh winter environment of Sector 5 (ARC) make it impossible to enter for right now. Once in Sector 6, there are two things: get to the Data Room for the Varia Suit, and avoid the blue X floating around Sector 6. Along the way to the Data Room, the SA-X is visible once more. Get to the Data Room to see something incredible happen: a Core-X was absorbing information from a Data Station. Follow it and defeat it to get the Varia Suit. The next room, a third of it as water, houses this giant, shielded version of a Core-X. After defeating it and retrieve the Varia Suit upgrade, head back to this sector's Navigation Room. The next objective is to head into Sector 5 with the acquired Varia Suit and go to the Data Room to retrieve the Ice Missile, since, being part Metroid, an Ice Beam upgrade is impossible. But first, find the Security Room to unlock Level 3 doors. Get the Ice Missile upgrade and head back towards the Navigation Room, then an alarm goes off, with the announcement, “Emergency in Sector 3”, prompting where to go next. Upon coming back to Sector 5's Navigation Room, there are approximately 6 minutes to get to Sector 3 and find and reactivate the cooling unit in the Control Room. Get to the Main Boiler Control Room, and discover what appears to be a scientist at the controls. But he isn't an ally; he's a Core-X, mimicking a scientist. Oh, and the timer doesn't stop during the fight. After defeating the Core-X, get the Wide Beam. After getting it, reactivate the cooling unit, pronto. After being briefed at the Navigation Room at the beginning of Sector 3, return to the Main Deck to check out some bio-signs at the Habitation Deck. Upon freeing creatures called Etecoons and Dachoras, and heading to the nearest Navigation Room, they were the detected bio-signs and not human survivors. The next objective: retrieve the Power Bomb upgrade from the Sector 5 Data Room. Take an alternate path to the Navigation Room, which will brief the next target. While returning to the Main Deck, the power to the station will go out, causing the Main Elevator to stop, forcing an alternate path. Return to the hanger, elevators and Save Stations are not functional. The next objective is to try and activate the auxiliary power to the station. On the way to the control terminal, there is a black spider in the way, and it can spin around during the second phase of the fight. After defeating it and the Core-X, get the Space Jump upgrade. The auxiliary controls are just past the boss room. With auxiliary power, Save Stations are functional, but the elevators are still not working. Search more of the station and up in Sector 2. There are roots everywhere, but that’s not the only thing found there; at the beginning of the area, drop down to another room, with the SA-X! After running from the SA-X, escape through a tunnel in Morph Ball mode. A little bit later, come to the source of the roots and the power loss: a Chozo statue. During the second part of the fight, it fires a Plasma Beam + Wide Beam-like weapon. After defeating it and the Core-X, acquire the Plasma Beam, which can pierce through enemies. Get back to Sector 2’s Navigation Room to be briefed on the next objective: go to Sector 5 and locate the source of trouble. At the briefing, the cause of the problem is a creature called Nightmare. It is a horrific, gravity-altering creature. After defeating it and the Core-X, get the Gravity Suit. Acquired, uncover a shortcut to Sector 4 that will lead through a path to the last Security Room, unlocking Level 4 doors, and eventually getting the Diffusion Missile upgrade. From there, head to the Navigation Room. After a scolding, go to Sector 6 and finish off the Security Robot previously encountered in Sector 3. After exploring the sector for the rogue robot, go to the Restricted Zone, which is closed off for the moment. Turn around and go back, and find the robot. And without surprise, the Security Robot’s organic parts had been infected by the X, so that means there will be a Core-X to defeat. After getting rid of it, receive the Wave Beam, which is just what is needed to get past that gate blocking the way. Once inside the restricted laboratory, notice it is home to Metroid research, raising Metroids at an accelerated rate. Reach the second floor, and there is the sound of glass breaking and an alarm going off. The SA-X has just entered the restricted area and released the Metroids from their containment! Only then, the zone is going to detach and self-destruct! After exiting the Restricted Zone, head to the Navigation Room. After another scolding, including information that there are now no fewer than 10 SA-X aboard this station, head through this uncharted area of Sector 1. Along the way, encounter a familiar creature: Ridley-X. After defeating him and the Core-X that emerges, get the Screw Attack upgrade. After that battle, continue towards the Navigation Room at the beginning of the sector. After an interesting conversation, there is one last objective: set the B.S.L's course for SR388 and destroy the station and, unfortunately, the planet in the process. Make your way to the Operations Room on the Main Deck, and challenge one of the SA-X. After defeating it, the Core-X's upgrade leaves the area. After reaching the Operations Room, set the station's course for the planet below. After that, there are just 3 minutes – half the time of the cooling unit situation – to leave the station. Return to the hanger, and find an Omega Metroid. There is no way to damage it, and one swipe from the Omega Metroid puts the player in a precarious situation. Just then, the Core-X's upgrade flies in and reforms as the SA-X and starts attacking the Omega Metroid. Unfortunately, the SA-X is no match for the Omega Metroid and is quickly defeated. Get the Ice Beam upgrade from the SA-X. After getting the Ice Beam, defeat the Omega Metroid and leave the station. After leaving the station, the B.S.L crashes into SR388, blowing up not only the station but also the planet itself. |
Vizzed Elite
Affected by 'Laziness Syndrome'
Registered: 11-21-12
Location: Kansas, United States
Last Post: 1487 days
Last Active: 349 days
| Knight of God |
Affected by 'Laziness Syndrome'
Registered: 11-21-12
Location: Kansas, United States
Last Post: 1487 days
Last Active: 349 days
(edited by TaySwift13 on 08-27-18 09:29 PM)
