

 User Notice
 Forum Links
Guide: It's your world...Eat it! Pt. 2
Pac man world walk through area 2 100%
Pac man world walk through area 2 100%
Play Pac-Man World 20th Anniversary Online


Thread Information
Views
1,222
Replies
4
Rating
1
Status
OPEN
Thread
Creator
Creator
FaithFighter
02-26-15 08:19 PM
02-26-15 08:19 PM
Last
Post
Post
ZeroTails
02-27-15 09:18 AM
02-27-15 09:18 AM
System
9.5
Views: 687
Today: 3
Users: 0 unique
Today: 3
Users: 0 unique
Thread Actions


Order
It's your world...Eat it! Pt. 2
Game's Ratings
Overall
Graphics
Sound
Addictiveness
Depth
Story
Difficulty
Average User Score
9.5
9
9
10
10
8
9
02-26-15 08:19 PM
 FaithFighter is Offline
| ID: 1141681 | 2809 Words
FaithFighter is Offline
| ID: 1141681 | 2809 Words
 FaithFighter is Offline
| ID: 1141681 | 2809 Words
FaithFighter
Level: 68


POSTS: 937/1208
POST EXP: 167129
LVL EXP: 2711003
CP: 10755.7
VIZ: 26210

POSTS: 937/1208
POST EXP: 167129
LVL EXP: 2711003
CP: 10755.7
VIZ: 26210
Likes: 0 Dislikes: 0
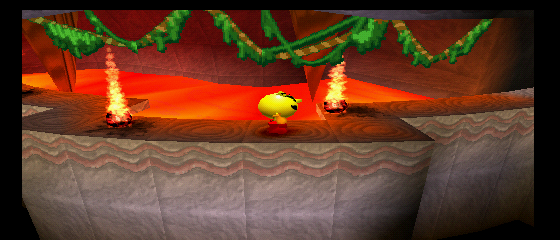
I have a tendency to get impatient, and I like to git 'er done, so here we go with part two! On to world two. Level one crisis cavern. At the start, we have on of the cave pacsters that seem to like hitting you with clubs and a crate with dots inside. Behind you, there should be something resembling steps. Take these up and you should find a platform with a crate and an apple inside. Moving to the right of where we started you should see some wooden platforms. Watch out for the cris-crossed ones, they'll fall quickly. Towards the back you will see a blue switch. Hit the two spiders along the way. Once you hit the blue switch, head over to what looks like a waterfall, pac dots will be falling from it, along with an extra life. So be sure to grab those before heading farther right towards the apple door Behind that door is a green switch that activates a Pac Dot chain which will take you to a high platform with the letter "p". Now proceed past the checkpoint. You'll head down into a dark room. In the back left corner of the room is a couple of boxes you can use to mount the nearby helivator. Once you take that to the top, beware of the spider. Move back towards the wall and to the left. This should take you along a path to a b-boing pad. Take that to the next platform where you'll see one of those spiders. Now head past the checkpoint and stop before the green does. The tile directly in front of the green is a trap tile, so try to avoid it, unless you want rocks dropped on your head! Move past that and down a few steps, and you will come to a pumpkin door. Move down past that, watching the traps and spider in your way and you should come to a green switch. If you hit that, the door behind it will open. Grab the pumpkin in the crate, and open the pumpkin door. Then, grab the pac dot chain that appears, and it will take you to a higher level. Go to the left, and watch for the spider that's just waiting to drop on your head!. Bounce up to your left and head as far left as you can to reach the letter "a". Then, return to where you got the pumpkin. Past that, you will find a bridge with lava that keeps spewing onto it. Time your move so you don't get fried. Once you survive that, you come to a wide open area where you should see an apple door. Watch the patrolling ghost, and move to the platform on the right. There, you will see a crate. Break it and grab the apple. Open the door, hit the button, eat the ghosts. After that, head to the far right of the room where you will find a small broken path leading across a lava river. Easy does it on this segment. Once you brave the river, you'll be greeted by another one of the cave pacs. Proceed past the checkpoint. Watch the spider and the falling stalactites. Watch the spot that looks like a stump. You'll want to get past that and jump to the other side, grab the crate and hit the rev roll pad. A platform will raise and you can ride it to the lower level. Take out the spider and go down the steps. Into the darkness...Oooohhh! You'll pass another wooded tile and spider, and get to another rev roll pad. Behind this rev roll pad, hidden in the darkness is the letter "c" Well, I'm sure you know what to do here! You'll find another spider. After you hit it, just run straight until you are able to see lava so you can get away from more of the falling stalactites. Once in the area, attack the spider and take the helivator across the lava to the other side, where yet another spider is waiting for you. Go up the steps on your right, and go to the right first and grab the cherry in the crate that you see. Then head to your left keeping in mind that there will be more stalactites. You'll go up a few steps and jump to the platform on your right. Watch out for the spider there! You'll go up a few more steps, and then jump to the platform at the left. To the very left of the platform, you will find a cherry door with the letter "m" inside. Now, back to the right. Proceed past the checkpoint and bounce the cave pac. Follow the water to the top, and then head right. The first crate you after the river, has the bell that you need to open the door on the other side. Inside is a blue switch that reverses the direction of a helivator, so you can reach the letter "a" Moving on you should see a little water fountain area that is guarded by cave pacs. First head to the back of the fountain, use the platforms and b-bounce to reach the apple. Go towards the front of the fountain and to the right, and get onto the little hill. Get past the spider and get across the gap with the helivator. Watch for traps and repeat the process until you get to the top. You will be able to open the door, and the blue switch inside will open the hatch in the water so you can swim down there! Once at the bottom, you will see two crates, as well as two of those mean fish! Surface on the other side. On the far left, there should be a crate with a chrome pellet inside. Now you can grab the galaxian that's in the box to the left, and the health wedge in the right, if you need it. Past that, you will see a checkpoint and a galaxian door. Time for a maze! Now, head to the right. Okay, watch for a new trap...the swinging logs! Head past that towards the back wall. You will find a blue switch that activates another helivator. Take that to the top, but watch the hanging spider! Head to the right, past the swinging log trap, and you should be able to open the lemon door. The blue switch inside will allow you to access the bell door. On the second step past the lemon door you will find a crate that has the bell that you need to open the bell door. So if you head back to your left, you shall find the helivator that will take you to the bell door hiding the final letter. All right, now go back to where we were. If you bounce on the edge of the trap tile, you should be able to get across it without setting it off. Go all the way to the right, then the path branches to the back where we can exit the level. Let the game begin! New world, new game. Take the fruit and two pacdots at the bottom level and one helivator can take you to the top. You'll collect the stuff up top and go back down the other side. Just be sure to watch the steam. If you lose a life the minigame's over. All right, now we can head to the second level of the cave zone, Manic Mines. As soon as you walk into the level, a door will open. And that's no friendly coming to congratulate you! You cannot bounce that mummy because of the spike on his head. You'll either have to rev roll him or hit him with pac dots (there's some in the crate)To throw a pac dot, press the circle button. To use a power shot, you have to have enough pac dots, first of all, then you have to hold the circle button down and release. Pow! Those bad guys won't know what hit them! All right, let's roll along. Literally, down to the bottome of the hill on your right. You'll go past the apple door to the tracks with the mine carts. You'll need to use the b-bounce to safely get over them. On the other side is an apple that you can use to open the door and get the letter "p". Down to the right, you will find a track with another mine cart. Go over it, that way, you won't get hit with a stalactite! maneuver your way around them, and be careful. There is a spider hanging one block to the left and forward from the green switch that you see. Take the helivator. Once you hit the checkpoint on the other side, be careful of yet another spider. Now, go up the steps. At the top, there is another hanging spider. There is also a crat in the back on the right that will give you a health wedge. Now, let's go to the left. On the other platform, you will see a melon door. Be careful of the collapsing tile trap. Right after that, there is another mine cart track with stalactites, so head's up. If you go up the steps, the ledge goes to the back where you will find a crate with a melon, now you can open the melon door. Behind it is the letter "a". Go to the left once your at the top of the steps. Caution! There are more mine carts! If you're in the middle you should be fine. After you get past that, another pesky spider stands in your way. Hit the b-boing. At the next platform, another spider will try to drop onto you. So watch your head. Take the next b-boing. What's this? We actually landed on an entirely safe platform? Don't get used to it! The next room has 4 tracks, 4 karts, and 4 ghosts. As well as an orange door. Go to the other side of the room, then down the hill. You will see another orange door. Go further still to the next platform. There you will find a crate with an orange. Two doors, one orange. The door at the bottom has the letter get that one, right? No, you can get both. You'll need a good rev roll to get back up the hill, then unlock that orange door, the switch inside will allow you to eat the ghosts in that room and also causes another orange to show up. Now you can unlock the door at the bottom of the hill and move on. You'll have to walk along the tracks to get across the lava, and remember that you can b-bounce over the carts. You should come to a galaxian door. But we still need a galaxian. Take the track away from the door. You'll have to do some tricky track changes, but you should be able to reach the next platform and get the galaxian. Now for the maze! All right, back to the main event. Past the platform where you got the galaxian, there is a narrow road across the lava, with many spots being pummeled with fire balls. Easy does it, and watch your timing. You should see a couple platforms that are just one block. The one has a crate with a melon and a helivator close by. The helivator will take you up to another track. At the end of which is another helivator. That takes you to another track, which has a moving platform at the other end of it. Once you get to the top, go to the left so you can open the melon door and get the letter "M" Then go back to the other side, but watch the spider. Up the steps you should reach a checkpoint. All right, I'm going to introduce you to the next enemy. Frankly, I do not know what on earth it is called, but it is a statue. Whenever you get near it, it turns into a whirlwind. You cannot defeat these things, only avoid them. So move it. Run, hit the green switch and get on the platform before it can get you. As you're running from these wierd enemies, you'll pass an apple door. Continue on up the steps. There are some b-boings that you lead you to a ledge that holds the needed apple. The switch back at the door opens a few pac dots. Once again, you'll have to beware the whirlwind. Quickly hit the switch and get on the helivator that is coming your way from the right. On the next platform, you'll need to deal with the spike mummy. Then you can hit the green switch. Beyond is a water area and...another galaxian? Oh well! Dive into the water. Going down as far as you can, there are two boxes, one with the galaxian and the other with an extra life. If you swim up from there, and look to the left, you should be able to find a chrome pellet. Time to go do something amazing! (I know corny.) After you get out of the water on the other side, Continue past the checkpoint. Avoid the traps. You'll pass a bell door. Hit the green switch to get the platform moving. Once you hit the other side. Beware the spike mummy. Grab what's in the crates that you see. Hit the green switch and move on up. Go to the left and grab the bell so you can get the letter "a" behind the bell door. Moving on towards the left. You'll go down a few steps and take the helivator up. On the platform to the right is a crate with an extra life. Get it, then head to the left. On the last platform, you'll climb up and go to the right. Watch out for that swinging log trap. you will pass a banana door, and continue to the right. You'll be traversing a narrow path. What doesn't help is that you have to worry about the flame thrower on the other side of the fence! But if you can get across that, you will come to a maze-like arena. Once you hit the switch, it's time to gobble some ghosts, and be sure to gobble the bananas that appear as well. Once you got the bananas, you'll have to leave chomp-chomp temporarily to open the banana door. The door hides a switch that reverses the direction of another helivator past the swinging trap just before this point. At the top is the key that you need to free chomp-chomp! Once you've freed him, get out of the maze section back to where the switch is. Head right, and we should be out of this level soon! Just a few paths to cross and some spewing lava to avoid. Ah look at that, that banana door has the last letter! If you collect both bananas on that maze, you should be able to unlock it. Watch out for the demented mummy, and exit the level Whew! Level 3. Anubis rex. Oh! This is the boss level. Hang on! The first part, you are running from what appears to be a evil mummy hand. The whole time you're hearing this low growl...Creepy! You have to stay far enough ahead, while still avoiding all the deadly spikes. If you can make it through that, just wait till the next part. Ok. We appear to be fighting a big rock statue. How hard can that be. Well let's just see. What do I have to do here? All right, not too hard. Rev roll on the pads to move his fists and unveil his weak spot. Not bad. Rev roll him in the heart. Cool. All right, we got one down. Perhaps I should roll the outer pads first then do the inner two, that way, I'll be closer to him when I need to rev roll this major creep. Wait! Is he throwing tornadoes at me! You're kidding. If you bounce on the pillar at the right time, you should be able to avoid the tornado. Okay, now I've made him angry! He's throwing tornadoes at me, and fireballs on the pillars! Two down, I think two to go. Oh, he's super angry at me! Now he's shooting some sort of fire out of his head! All right. Dodged the tornadoes, Avoided the fire. It sweeps from left to right, and the fireballs, do the same. It's just a matter of timing your moves just right. Wow! that was tough! And I've beaten that guy so many times before, he's always tough for me. Well, that's all for part two! Hope this info helps! Now, head to the right. Okay, watch for a new trap...the swinging logs! Head past that towards the back wall. You will find a blue switch that activates another helivator. Take that to the top, but watch the hanging spider! Head to the right, past the swinging log trap, and you should be able to open the lemon door. The blue switch inside will allow you to access the bell door. On the second step past the lemon door you will find a crate that has the bell that you need to open the bell door. So if you head back to your left, you shall find the helivator that will take you to the bell door hiding the final letter. All right, now go back to where we were. If you bounce on the edge of the trap tile, you should be able to get across it without setting it off. Go all the way to the right, then the path branches to the back where we can exit the level. Let the game begin! New world, new game. Take the fruit and two pacdots at the bottom level and one helivator can take you to the top. You'll collect the stuff up top and go back down the other side. Just be sure to watch the steam. If you lose a life the minigame's over. All right, now we can head to the second level of the cave zone, Manic Mines. As soon as you walk into the level, a door will open. And that's no friendly coming to congratulate you! You cannot bounce that mummy because of the spike on his head. You'll either have to rev roll him or hit him with pac dots (there's some in the crate)To throw a pac dot, press the circle button. To use a power shot, you have to have enough pac dots, first of all, then you have to hold the circle button down and release. Pow! Those bad guys won't know what hit them! All right, let's roll along. Literally, down to the bottome of the hill on your right. You'll go past the apple door to the tracks with the mine carts. You'll need to use the b-bounce to safely get over them. On the other side is an apple that you can use to open the door and get the letter "p". Down to the right, you will find a track with another mine cart. Go over it, that way, you won't get hit with a stalactite! maneuver your way around them, and be careful. There is a spider hanging one block to the left and forward from the green switch that you see. Take the helivator. Once you hit the checkpoint on the other side, be careful of yet another spider. Now, go up the steps. At the top, there is another hanging spider. There is also a crat in the back on the right that will give you a health wedge. Now, let's go to the left. On the other platform, you will see a melon door. Be careful of the collapsing tile trap. Right after that, there is another mine cart track with stalactites, so head's up. If you go up the steps, the ledge goes to the back where you will find a crate with a melon, now you can open the melon door. Behind it is the letter "a". Go to the left once your at the top of the steps. Caution! There are more mine carts! If you're in the middle you should be fine. After you get past that, another pesky spider stands in your way. Hit the b-boing. At the next platform, another spider will try to drop onto you. So watch your head. Take the next b-boing. What's this? We actually landed on an entirely safe platform? Don't get used to it! The next room has 4 tracks, 4 karts, and 4 ghosts. As well as an orange door. Go to the other side of the room, then down the hill. You will see another orange door. Go further still to the next platform. There you will find a crate with an orange. Two doors, one orange. The door at the bottom has the letter get that one, right? No, you can get both. You'll need a good rev roll to get back up the hill, then unlock that orange door, the switch inside will allow you to eat the ghosts in that room and also causes another orange to show up. Now you can unlock the door at the bottom of the hill and move on. You'll have to walk along the tracks to get across the lava, and remember that you can b-bounce over the carts. You should come to a galaxian door. But we still need a galaxian. Take the track away from the door. You'll have to do some tricky track changes, but you should be able to reach the next platform and get the galaxian. Now for the maze! All right, back to the main event. Past the platform where you got the galaxian, there is a narrow road across the lava, with many spots being pummeled with fire balls. Easy does it, and watch your timing. You should see a couple platforms that are just one block. The one has a crate with a melon and a helivator close by. The helivator will take you up to another track. At the end of which is another helivator. That takes you to another track, which has a moving platform at the other end of it. Once you get to the top, go to the left so you can open the melon door and get the letter "M" Then go back to the other side, but watch the spider. Up the steps you should reach a checkpoint. All right, I'm going to introduce you to the next enemy. Frankly, I do not know what on earth it is called, but it is a statue. Whenever you get near it, it turns into a whirlwind. You cannot defeat these things, only avoid them. So move it. Run, hit the green switch and get on the platform before it can get you. As you're running from these wierd enemies, you'll pass an apple door. Continue on up the steps. There are some b-boings that you lead you to a ledge that holds the needed apple. The switch back at the door opens a few pac dots. Once again, you'll have to beware the whirlwind. Quickly hit the switch and get on the helivator that is coming your way from the right. On the next platform, you'll need to deal with the spike mummy. Then you can hit the green switch. Beyond is a water area and...another galaxian? Oh well! Dive into the water. Going down as far as you can, there are two boxes, one with the galaxian and the other with an extra life. If you swim up from there, and look to the left, you should be able to find a chrome pellet. Time to go do something amazing! (I know corny.) After you get out of the water on the other side, Continue past the checkpoint. Avoid the traps. You'll pass a bell door. Hit the green switch to get the platform moving. Once you hit the other side. Beware the spike mummy. Grab what's in the crates that you see. Hit the green switch and move on up. Go to the left and grab the bell so you can get the letter "a" behind the bell door. Moving on towards the left. You'll go down a few steps and take the helivator up. On the platform to the right is a crate with an extra life. Get it, then head to the left. On the last platform, you'll climb up and go to the right. Watch out for that swinging log trap. you will pass a banana door, and continue to the right. You'll be traversing a narrow path. What doesn't help is that you have to worry about the flame thrower on the other side of the fence! But if you can get across that, you will come to a maze-like arena. Once you hit the switch, it's time to gobble some ghosts, and be sure to gobble the bananas that appear as well. Once you got the bananas, you'll have to leave chomp-chomp temporarily to open the banana door. The door hides a switch that reverses the direction of another helivator past the swinging trap just before this point. At the top is the key that you need to free chomp-chomp! Once you've freed him, get out of the maze section back to where the switch is. Head right, and we should be out of this level soon! Just a few paths to cross and some spewing lava to avoid. Ah look at that, that banana door has the last letter! If you collect both bananas on that maze, you should be able to unlock it. Watch out for the demented mummy, and exit the level Whew! Level 3. Anubis rex. Oh! This is the boss level. Hang on! The first part, you are running from what appears to be a evil mummy hand. The whole time you're hearing this low growl...Creepy! You have to stay far enough ahead, while still avoiding all the deadly spikes. If you can make it through that, just wait till the next part. Ok. We appear to be fighting a big rock statue. How hard can that be. Well let's just see. What do I have to do here? All right, not too hard. Rev roll on the pads to move his fists and unveil his weak spot. Not bad. Rev roll him in the heart. Cool. All right, we got one down. Perhaps I should roll the outer pads first then do the inner two, that way, I'll be closer to him when I need to rev roll this major creep. Wait! Is he throwing tornadoes at me! You're kidding. If you bounce on the pillar at the right time, you should be able to avoid the tornado. Okay, now I've made him angry! He's throwing tornadoes at me, and fireballs on the pillars! Two down, I think two to go. Oh, he's super angry at me! Now he's shooting some sort of fire out of his head! All right. Dodged the tornadoes, Avoided the fire. It sweeps from left to right, and the fireballs, do the same. It's just a matter of timing your moves just right. Wow! that was tough! And I've beaten that guy so many times before, he's always tough for me. Well, that's all for part two! Hope this info helps! |
Trusted Member
Affected by 'Laziness Syndrome'
Registered: 06-18-14
Location: Ohio
Last Post: 2086 days
Last Active: 2086 days
| I am the FaithFighter. I stand. I fight. I live. By the Grace of GOD, I live. |
Affected by 'Laziness Syndrome'
Registered: 06-18-14
Location: Ohio
Last Post: 2086 days
Last Active: 2086 days
(edited by FaithFighter on 02-27-15 09:14 AM)
02-27-15 08:21 AM
 ZeroTails is Offline
| ID: 1141818 | 66 Words
ZeroTails is Offline
| ID: 1141818 | 66 Words
 ZeroTails is Offline
| ID: 1141818 | 66 Words
ZeroTails
Cool Davideo7
Cool Davideo7
Level: 92

POSTS: 236/2465
POST EXP: 215125
LVL EXP: 7744579
CP: 18968.7
VIZ: 401000

POSTS: 236/2465
POST EXP: 215125
LVL EXP: 7744579
CP: 18968.7
VIZ: 401000
Likes: 0 Dislikes: 0
I've seen a YouTube LP of this game, and I'll like to try it out sometime. This is a good guide so far. Well, I'm the complete opposite of you when it comes to making guides. It took me 3 months to finally start making good progress on my Mega Man X guide. Just, the color choice is making the guide a little hard to read. |
Vizzed Elite
Affected by 'Laziness Syndrome'
Registered: 11-30-14
Location: depression land
Last Post: 2116 days
Last Active: 985 days
| Zt is dead |
Affected by 'Laziness Syndrome'
Registered: 11-30-14
Location: depression land
Last Post: 2116 days
Last Active: 985 days
02-27-15 09:13 AM
FaithFighter is Offline
| ID: 1141840 | 43 Words
FaithFighter is Offline
| ID: 1141840 | 43 Words
FaithFighter
Level: 68
POSTS: 945/1208
POST EXP: 167129
LVL EXP: 2711003
CP: 10755.7
VIZ: 26210
POSTS: 945/1208
POST EXP: 167129
LVL EXP: 2711003
CP: 10755.7
VIZ: 26210
Likes: 0 Dislikes: 0
ZeroTails : Thanks for the hint, I'll have to edit that. I am not sure why it is doing that all of a sudden, usually, it automatically fixes and turns white on the background, but for some reason, it is not doing that now. |
Trusted Member
Affected by 'Laziness Syndrome'
Registered: 06-18-14
Location: Ohio
Last Post: 2086 days
Last Active: 2086 days
| I am the FaithFighter. I stand. I fight. I live. By the Grace of GOD, I live. |
Affected by 'Laziness Syndrome'
Registered: 06-18-14
Location: Ohio
Last Post: 2086 days
Last Active: 2086 days
02-27-15 09:15 AM
FaithFighter is Offline
| ID: 1141841 | 17 Words
FaithFighter is Offline
| ID: 1141841 | 17 Words
FaithFighter
Level: 68
POSTS: 946/1208
POST EXP: 167129
LVL EXP: 2711003
CP: 10755.7
VIZ: 26210
POSTS: 946/1208
POST EXP: 167129
LVL EXP: 2711003
CP: 10755.7
VIZ: 26210
Likes: 0 Dislikes: 0
FaithFighter : Well, that's fixed, I'd better check on the third part, and make sure it looks fine. |
Trusted Member
Affected by 'Laziness Syndrome'
Registered: 06-18-14
Location: Ohio
Last Post: 2086 days
Last Active: 2086 days
| I am the FaithFighter. I stand. I fight. I live. By the Grace of GOD, I live. |
Affected by 'Laziness Syndrome'
Registered: 06-18-14
Location: Ohio
Last Post: 2086 days
Last Active: 2086 days
02-27-15 09:18 AM
ZeroTails is Offline
| ID: 1141843 | 15 Words
ZeroTails is Offline
| ID: 1141843 | 15 Words
ZeroTails
Cool Davideo7
Cool Davideo7
Level: 92
POSTS: 239/2465
POST EXP: 215125
LVL EXP: 7744579
CP: 18968.7
VIZ: 401000
POSTS: 239/2465
POST EXP: 215125
LVL EXP: 7744579
CP: 18968.7
VIZ: 401000
Likes: 1 Dislikes: 0
I'm sure that's annoying... well, good luck on having the text color work for once. |
Vizzed Elite
Affected by 'Laziness Syndrome'
Registered: 11-30-14
Location: depression land
Last Post: 2116 days
Last Active: 985 days
| Zt is dead |
Affected by 'Laziness Syndrome'
Registered: 11-30-14
Location: depression land
Last Post: 2116 days
Last Active: 985 days
Post Rating: 1 Liked By: FaithFighter,
