INTRODUCTIONBefore I get started with the walkthrough for this hidden gem, I feel I need to mention that this is my first ever walkthrough that I have ever done. So if you catch a couple mistakes I make, feel free to tell me as soon as possible because I want to make this clear and professional. If you're playing Clash at Demonhead for the first time, let me warn you that it may take you a while to get used to this game. In my opinion, it's one of the most challenging games for the NES. This game will require time, skill, and lots of patience for you to get through it entirely, especially for the many boss fights. I will try to get through this game in the quickest, easiest, and most efficient way that I know how. Let me go ahead and mention that you should try to kill every enemy you come across...unless of course you can't kill them. This way, you'll pick up the most money and force you'll need throughout the game. I also should mention that I recommend you go to Google and search "Clash at Demonhead map" and keep the map that shows you where all the routes are, whether you print it out or keep it open in a separate window. There are some points where we'll be teleporting from one side of the map to the other, so you'll be needing it. With all that said, lets get into this great game, and of course I hope you enjoy reading! WALKTHROUGHSo you start the game by pressing the Start button with the "Attack!" option selected, and you start on route 1. The levels in this game are called "routes" so you'll see that word a lot in this guide. Quickly shoot the 3 missiles coming at you. When you shoot them, hopefully you'll notice that it takes them about a full second to completely explode. Don't run into that explosion or it will hurt you! The next set of enemies will likely drop a dollar sign ($). This is your money, so pick it up before it disappears. Keep going to the right and you'll run into a big skeleton guy. This is Tom Guycot, and he's the big boss in this game. That's right...you've played this game all of 30 seconds and you've already met the big boss. Keep going to the right and the next set of enemies will likely drop an apple icon. This is your force, and it is VERY important...perhaps maybe even more important then the money. Before I go any further, let me point out your life bar at the bottom-left of the screen. By now you've probably been hit a couple times. Sometime you do NOT lose a life bar when you're hit. It all depends on how you got hit and who/what hit you. Anyway, continue going to the right until you get to the orange metal head. This is the end of the route and it takes you to the next set of routes. Select route 3. This route is what I will refer to in the future as a "nothing route." Basically, this means that there's nothing special about this route and you should just go through it and gather as much money and force as you can from the enemies. Let me point out something else here...your first journey across water. Water can be very dangerous in this game. Every time you go under (without wearing an Aqua Lung), you risk losing a life bar. So you should just coast through the water and try not to jump in and out of it, unless you absolutely have to. Keep going to the right until you get to a character moving back and forth. This guy is named Michael and for right now, he seems to be a friend. Keep going to the right until you get to the blue metal head. Select route 9. As I just talked about, this is an example of a nothing route. Just to remind you, try to get as much money and force as possible. You'll also come to your first climable wall in this route. Select route 11. I know it's still a little early, but hopefully by now you've got the basics down. In this route, you'll encounter your very first boss fight! As soon as you start the route, you'll see a castle with a door. I would first check that you have full health and a full supply of Ultra Food. If not, you should have enough money to buy some Ultra Food. Bring up your menu by pressing the Select button and select the "Shop Call" at the top-right. You'll be using these a lot throughout the game so go ahead and familiarize yourself with it. Whenever you're ready, enter the castle and you'll see an angry red rhino on a jet powered scooter. I know this is your first boss fight, but every boss has a "strategy" you can use to easily beat them. Here's the strategy for this particular boss...you immediately shoot him while standing. When you hit him, he'll start shooting fireballs at you. Shoot the fireball that's directly in your line of fire, then immediately duck. He'll go in the air and when he comes down, stand again and shoot the fireball again, and duck again. Repeat the process from here until you've killed him. If he gets too close to you, just run under him when he goes in the air. It might sound complicated while you're reading this, but you should quickly get the hang of it. After you've "exploded" him, grab your 1st medallion and head back out of the castle and to the right, to the orange metal head from where you came. Select route 9, a nothing route. Select route 12, another nothing route. However, I should point out that at some point during this route, you'll stop and say something like "Aaaaaahh! There's something in my head!" Trust me, you'll know what is causing that later. Select route 17. Start heading to the right until you have to crouch underneath the walls. Keep going underneath the walls until you get to the edge of the cliff. From here, you have 2 options...you can make a Shop Call and purchase some Power Boots to make your impending platform jumping a little easier or you can wing it, and try your luck across this HUGE gap. When you eventually reach the other side, keep heading to the right until you get to a sprite named Faysha. She tells you that you have to go save the Hermit! After you're done talking with her, simply go all the way back where you came from at the start of this route. Easy, right? Select route 14, a nothing route. It's not required that you read the letter that drops with a parachute, but if you must know, it's from some guy named Jake who's "taking care of Mary (your girlfriend) for you." Select route 6. Let yourself fall all the way down to the bottom of this waterfall. You'll see a green statue. Kill the enemy and just walk inside the statue. Keep going to the left until you get to the end of the water. Go inside the doorway, and you'll find yourself on route 35. Keep going to the right until you get to the climable wall. Climb up the wall one screen, kill the enemy, and go through the doorway at the top. Make your way to the right and immediately STOP when you start to see a figure. This is Rowdy, the guy who's keeping the Hermit captive. After you're done talking if you're far enough away from him, all you have to do is immediately duck and keep shooting his legs until you "explode" him. Go up to the Hermit, and he'll extend your life bar by 2! After you've saved the Hermit, go back to the left through the doorway. Go down one screen and from here you have to bring up your menu, select the Hermit at the bottom-right, and select Micro Power. Go underneath the wall, and through the doorway. Go down one screen and make your way to the right until you get to another doorway. Enter the doorway, and you'll find yourself in a cave on route 8. Get to the left wall however you can, whether it's jumping on the 2 stones or just falling to the left, and climb all the way to the top. When you reach the top, kill the birds, and make a Shop Call here. Purchase some Power Boots (if you don't already have some), an Aqua Lung, and another Shop Call. Leave the shop, put on the Power Boots, and get to that ledge above the gap. I promise you, if you time your jump right, you can easily make it. Keep heading to the right until you get to the green metal head. Select route 7. Head to the left unitl you get to a castle. Make sure your health and Ultra Food are both full, and prepare for your 2nd boss fight! Go inside the castle and you see a little green dot. Here's the strategy for this boss...keep shooting him until he gets bigger and floats in the air. When he does, don't try to shoot him anymore! Just focus on shooting the little guys he throws at you until he runs out. Then, he'll come down at you and just start jumping back and forth. All you have to do from here is shoot him in the mouth until you've "exploded" him. I understand this one might take you a while, and he's probably one of the harder bosses in the game, but I promise it CAN be done! Head back out of the castle when you get done, and don't forget to pick up your 2nd medallion. At this point, if you don't have at least 200 force, you'll need to keep making Shop Calls until the Dyna Punch becomes available. Don't forget to buy another Shop Call when you make a Shop Call. Dyna Punch gives you a quick boost of force, and you'll need at least 200 to make Teleporting available. When you get to 200 force, bring up your menu, select the Hermit, and select Teleport. Press the B button until the icon is at the intersection of routes 12, 14, 17, and 20. You'll need the map that you Google searched to see exactly where that is. Select route 20, a nothing route. Select route 15. Head to the right, past the pillars in the water. Keep going to the right until you get to...hey, it's Michael again! This time he tells you about a Magic Stone on route 27, so lets go get it then! Head all the way back to the start of the route from which you came. Select route 18, a nothing route. There's a letter at the beginning that's not required for you to read. Select route 19, a 2nd straight nothing route. Select route 28 and before you do anything else, make a Shop Call and fill up on Aqua Lung suits. You'll need them for this water-filled route. Go ahead and get yourself a Jet Pack too, if they're available. Leave the shop and start heading to the right until you get to a pillar in the water. Suspicious, right? Will put on an Aqua Lung, head underwater, and you'll find your 3rd boss fight. Even though this fight is underwater, it's one of the more easier boss fights in the game. The strategy here is remember these 3 words...shoot and move! If you run out of an Aqua Lung suit, simply put on another one until you "explode" the boss. Pick up your 3rd medallion, and head back up to the surface. Go to the right until you get to the orange metal head. Select route 22. Head to the left until you get to a wall, then go up. You don't have to read the letter here, but do go in the doorway. This is the gold exchange store. You can exchange your gold for money, depending on how much gold you have. Simply pick one of the two panels. Hopefully you pick the larger amount of the two. When you're done, bring up your menu, select the Hermit, and select Teleport. Press the B button until the icon is at the intersection of routes 16, 18, and 19. Select route 16, and prepare for your 4th boss fight! Head as far right as you can go, then you'll need to go up through a hole in the wall. Go up, and make your way to the right until you get to a castle. Head inside and shoot the 3 ladies. The boss will then make his appearance. The strategy...make sure you shoot his hat that he throws at you, and not the mohawked guy under it! Do this enough times and you'll "explode" him, and receive your 4th medallion! Leave the castle and head to the right until you get to the pink metal head. Select route 27. Hey, there's Michael yet again! After you get done talking, make sure you have a Supersuit before you go any further. Go to the right and head down one screen. Again, make sure you have the Supersuit on before you go in the lava. Head all the way to the right until you get to a wall, but don't jump out just yet. Go down into the lava to get the Magic Stone, then go back to the surface and jump out. You're life bar is increased by 2 more! Climb up the wall one screen, kill the enemy, and climb up the wall another screen. Climb all the way to the top, and head to the right until you get to the blue metal head. Select route 37, a nothing route. The only thing to note here is when you get to the water, put on an Aqua Lung, and go through the underwater passageway. Select route 40. Go to the right until you get to the statue. Jump on top of the red tunnel and press Down. Head to the right until you get to the door that's currently blocked. You see Michael again, and he tells you to "open the door with the Magic Stone." So bring up your menu, select the Magic Stone, and press the A button. This will open the door. Talk to the Demon and let it kill you. I know that sounds crazy, but right now there's no way to kill it. When the screen says "game over" press the Start button twice, and you're right back where you died. Head out of that room, and go all the way to the left until you are unable to go any further. From here, go down one screen, head to the left, and go through the doorway at the end. Put on your Aqua Lung, and go through the short underwater passageway. Jump out of the water, and go through the doorway on the right. Keep going to the right until you get to another doorway and go through it. You come out on route 33. Route 33 sound familiar? This is where Tom Guycot's fortress is! Before you do anything else, make a Shop Call and buy as much items as you can. We haven't purchased anything in a while and this is a great place to do it. After you're done, leave the shop, and head to the right until you get to a castle. Go inside and you see...Tom Guycot lying on the ground? Walk over to him, and he tells you that the Demon came in and beat him up. All that time waiting to battle this Guycot guy, and someone gets to him before you can! Anyway, leave the fortress and continue going to the right until you get to...Faysha, the pretty little sprite again! She tells you to go see the Hermit immediately. So without any hesitation, bring up your menu, select the Hermit, select Teleport, and press the B button until the icon is at the intersection of routes 6 and 14. Select route 6. Let yourself fall all the way to the bottom of the waterfall. Remember that statue? Well, walk inside it like you did the first time, and go through the cave like you did the first time. When you come out, go to the right until you come to the climable wall. Climb up the wall one screen, kill the enemy, and go through the doorway at the top. Walk all the way to the right until you get to the Hermit, who is still unable to move. After you're done talking, bring up your menu, select the Hermit, select Teleport, and press the B button until the icon is at the intersection of routes 37, 40, and 41. Select route 40. Go to the right until you get to the statue. This time, you have to get where the heart is. You have to do some weird jumping in order to get there but when you get to the statue's chest, bring up your menu, select the Magic Stone, and press the A button. The statue's head will change into the Sword of Apollo! Plus, your life bar will be increased by another 2! Once you get the sword, go down the red tunnel again, but this time go to the left all the way to the end. From here, go down one screen, go to the left, and go through the doorway. I bet this seems familiar too, doesn't it? Get out your Aqua Lung and go through the short underwater passageway. Go through the doorway when you come out the other side. Head all the way to the right until you get to another doorway. Route 33 yet again...anyway, head to the right, past Tom Guycot's castle, until you get to the gold metal head. Select route 39. This is the Devil's Tower. Kill the enemies and jump up 2 screens. Jump to the top of the tower and press Down. Let yourself fall all the way to the bottom, and head to the left until you get to a doorway. Make sure you're health and Ultra Food supply are good because you may need them for this battle. Head inside whenever you're ready, and there's Demon! After you talk, immediately bring up your menu, and break out Apollo's Sword! This Demon really isn't all that hard to beat, but each time he hits you it takes away 2 life bars. The strategy here is to jump and shoot at him, then run under him, then jump and shoot at him from the other side. Try to avoid his projectiles at all costs! It doesn't take too long to "explode" him but when you do, grab your 5th medallion and head down the passageway that opens up. As you keep going to the left, make sure you destroy ALL of Demon's eggs with Apollo's Sword so the other passageway opens up. Head down when it opens, and go all the way to the left until you get to a wall. You can't climb up this wall, so the only thing to do is put on your Jet Pack and fly up 2 screens to the doorway at the top-left. Go inside and you'll come out on route 38. Climb up the wall one screen all the way to the top, and head to the left until you get to another wall. Climb up this wall one screen and climb up the wall on the right as well. Head to the left until you get to the green metal head. Select route 30. Thankfully, this is a much-needed nothing route. Just try not to fall down... Select route 21. In my opinion, this is the most annoying route on the game because enemies are constantly shooting bullets at you, and it's almost impossible to dodge any of them. Go to the right across the bridge, and go through the doorway when you come to it. Go to the right until you can go down one screen. Getting tired of these enemies yet? Go down and make your way to the right until you get to another doorway. You mad now? Well, not only are you probably upset but now you have to prepare to face a boss, and you can NOT make a Shop Call to buy more Ultra Food here. Go inside and you'll see a bald guy wearing sunglasses, riding a hovercraft. He's very easy to kill so I won't give you a strategy. When you finish destroying his hovercraft, he still manages to fly away. He doesn't leave you a medallion and you don't get your health restored! Leave this room and head up one screen. Before you go to the green metal head, make a Shop Call here and fill up on anything you don't have 3 of. Leave the shop, and access the green metal head. Select route 42. This is another difficult/annoying route. I would instantly get out my Jet Pack and fly all the way up until you get to the troll that makes you fall. Shoot him as many times as you can before he makes you fall. It may take you a couple times, but it is worth it to just fly up and kill this guy. Hopefully you don't sustain too much damage, but when you've finally killed him, keep heading up until you get to the hole you see in the ceiling. Go up and head to the right. Go up through the first hole you see in the ceiling, and you'll be in the clouds! Of course the only way to go any further is to put on your Jet Pack again and fly up. At this point, make sure your health is good (it doesn't have to be perfect) and a full supply of Ultra Food. Fly straight up until you get to a doorway, then go through it. It's Bopper again, and this time he has an Uzi! If you want you can put on a Supersuit until you've either killed him, or you run out of it. The best strategy I can think of is just hang back behind the tunnel, and jump/shoot when you get the chance to. He'll finally get "exploded" after a while, so pick up your 6th and final medallion. Climb up the wall on the right one screen. Kill the enemies and head to the left until you get to...Professor Plum! Wait...it's not really him, so back away from him as he explodes. Climb up the wall one screen, and prepare yourself for the final boss battle! After you've talked to the real big boss, the strategy here is to climb up the left wall and shoot the left orb until it explodes. Then bring up your menu, select Thunder Shot, and shoot the right orb until it explodes. After that, climb back up the right wall and shoot the orb in the middle. You'll see a series of explosions when you're done and finally, the boss will explode! Climb up the left wall 2 screens until you're at the top. Head to the right past the "alien" and head down. Crawl underneath the wall and kill the enemy. I SUGGEST YOU SAVE YOU'RE PROGRESS BEFORE YOU GET TO THE BOMB! To do that, bring up your menu, select the Micro Recorder on the right, and make a note of your password, just in case you fail at this next part. Now this is the final part of the game. You have to put the medallions together to stop the bomb from exploding. You have exactly 66.66 seconds OR 5 tries to defuse it. You CAN fail, and if you do, the bomb will explode, and all of mankind will cease to exist! If you stop the bomb, then you're a big hero, and you've saved the world! If you manage to stop the bomb, keep making your way to the right until you get to a doorway. After this, the game will play itself out, and everyone lives happily ever after! CONCLUSIONWhew! That was one challenging game, wasn't it? I have one last thing to say before I go...to whoever reads this and/or plays this game, please let me know how I did, what changes I can make, or any future advice you might have for me. Thanks for reading!  INTRODUCTION
Before I get started with the walkthrough for this hidden gem, I feel I need to mention that this is my first ever walkthrough that I have ever done. So if you catch a couple mistakes I make, feel free to tell me as soon as possible because I want to make this clear and professional. If you're playing Clash at Demonhead for the first time, let me warn you that it may take you a while to get used to this game. In my opinion, it's one of the most challenging games for the NES. This game will require time, skill, and lots of patience for you to get through it entirely, especially for the many boss fights. I will try to get through this game in the quickest, easiest, and most efficient way that I know how. Let me go ahead and mention that you should try to kill every enemy you come across...unless of course you can't kill them. This way, you'll pick up the most money and force you'll need throughout the game. I also should mention that I recommend you go to Google and search "Clash at Demonhead map" and keep the map that shows you where all the routes are, whether you print it out or keep it open in a separate window. There are some points where we'll be teleporting from one side of the map to the other, so you'll be needing it. With all that said, lets get into this great game, and of course I hope you enjoy reading!
WALKTHROUGH
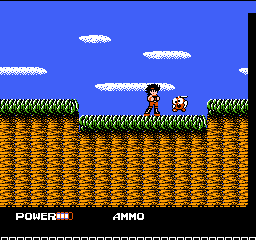
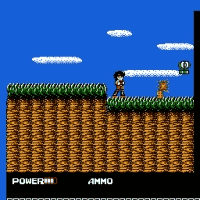
So you start the game by pressing the Start button with the "Attack!" option selected, and you start on route 1. The levels in this game are called "routes" so you'll see that word a lot in this guide. Quickly shoot the 3 missiles coming at you. When you shoot them, hopefully you'll notice that it takes them about a full second to completely explode. Don't run into that explosion or it will hurt you! The next set of enemies will likely drop a dollar sign ($). This is your money, so pick it up before it disappears. Keep going to the right and you'll run into a big skeleton guy. This is Tom Guycot, and he's the big boss in this game. That's right...you've played this game all of 30 seconds and you've already met the big boss. Keep going to the right and the next set of enemies will likely drop an apple icon. This is your force, and it is VERY important...perhaps maybe even more important then the money. Before I go any further, let me point out your life bar at the bottom-left of the screen. By now you've probably been hit a couple times. Sometime you do NOT lose a life bar when you're hit. It all depends on how you got hit and who/what hit you. Anyway, continue going to the right until you get to the orange metal head. This is the end of the route and it takes you to the next set of routes.
Select route 3. This route is what I will refer to in the future as a "nothing route." Basically, this means that there's nothing special about this route and you should just go through it and gather as much money and force as you can from the enemies. Let me point out something else here...your first journey across water. Water can be very dangerous in this game. Every time you go under (without wearing an Aqua Lung), you risk losing a life bar. So you should just coast through the water and try not to jump in and out of it, unless you absolutely have to. Keep going to the right until you get to a character moving back and forth. This guy is named Michael and for right now, he seems to be a friend. Keep going to the right until you get to the blue metal head.
Select route 9. As I just talked about, this is an example of a nothing route. Just to remind you, try to get as much money and force as possible. You'll also come to your first climable wall in this route.
Select route 11. I know it's still a little early, but hopefully by now you've got the basics down. In this route, you'll encounter your very first boss fight! As soon as you start the route, you'll see a castle with a door. I would first check that you have full health and a full supply of Ultra Food. If not, you should have enough money to buy some Ultra Food. Bring up your menu by pressing the Select button and select the "Shop Call" at the top-right. You'll be using these a lot throughout the game so go ahead and familiarize yourself with it. Whenever you're ready, enter the castle and you'll see an angry red rhino on a jet powered scooter. I know this is your first boss fight, but every boss has a "strategy" you can use to easily beat them. Here's the strategy for this particular boss...you immediately shoot him while standing. When you hit him, he'll start shooting fireballs at you. Shoot the fireball that's directly in your line of fire, then immediately duck. He'll go in the air and when he comes down, stand again and shoot the fireball again, and duck again. Repeat the process from here until you've killed him. If he gets too close to you, just run under him when he goes in the air. It might sound complicated while you're reading this, but you should quickly get the hang of it. After you've "exploded" him, grab your 1st medallion and head back out of the castle and to the right, to the orange metal head from where you came.
Select route 9, a nothing route.
Select route 12, another nothing route. However, I should point out that at some point during this route, you'll stop and say something like "Aaaaaahh! There's something in my head!" Trust me, you'll know what is causing that later.
Select route 17. Start heading to the right until you have to crouch underneath the walls. Keep going underneath the walls until you get to the edge of the cliff. From here, you have 2 options...you can make a Shop Call and purchase some Power Boots to make your impending platform jumping a little easier or you can wing it, and try your luck across this HUGE gap. When you eventually reach the other side, keep heading to the right until you get to a sprite named Faysha. She tells you that you have to go save the Hermit! After you're done talking with her, simply go all the way back where you came from at the start of this route. Easy, right?
Select route 14, a nothing route. It's not required that you read the letter that drops with a parachute, but if you must know, it's from some guy named Jake who's "taking care of Mary (your girlfriend) for you."
Select route 6. Let yourself fall all the way down to the bottom of this waterfall. You'll see a green statue. Kill the enemy and just walk inside the statue. Keep going to the left until you get to the end of the water. Go inside the doorway, and you'll find yourself on route 35. Keep going to the right until you get to the climable wall. Climb up the wall one screen, kill the enemy, and go through the doorway at the top. Make your way to the right and immediately STOP when you start to see a figure. This is Rowdy, the guy who's keeping the Hermit captive. After you're done talking if you're far enough away from him, all you have to do is immediately duck and keep shooting his legs until you "explode" him. Go up to the Hermit, and he'll extend your life bar by 2! After you've saved the Hermit, go back to the left through the doorway. Go down one screen and from here you have to bring up your menu, select the Hermit at the bottom-right, and select Micro Power. Go underneath the wall, and through the doorway. Go down one screen and make your way to the right until you get to another doorway. Enter the doorway, and you'll find yourself in a cave on route 8. Get to the left wall however you can, whether it's jumping on the 2 stones or just falling to the left, and climb all the way to the top. When you reach the top, kill the birds, and make a Shop Call here. Purchase some Power Boots (if you don't already have some), an Aqua Lung, and another Shop Call. Leave the shop, put on the Power Boots, and get to that ledge above the gap. I promise you, if you time your jump right, you can easily make it. Keep heading to the right until you get to the green metal head.
Select route 7. Head to the left unitl you get to a castle. Make sure your health and Ultra Food are both full, and prepare for your 2nd boss fight! Go inside the castle and you see a little green dot. Here's the strategy for this boss...keep shooting him until he gets bigger and floats in the air. When he does, don't try to shoot him anymore! Just focus on shooting the little guys he throws at you until he runs out. Then, he'll come down at you and just start jumping back and forth. All you have to do from here is shoot him in the mouth until you've "exploded" him. I understand this one might take you a while, and he's probably one of the harder bosses in the game, but I promise it CAN be done! Head back out of the castle when you get done, and don't forget to pick up your 2nd medallion. At this point, if you don't have at least 200 force, you'll need to keep making Shop Calls until the Dyna Punch becomes available. Don't forget to buy another Shop Call when you make a Shop Call. Dyna Punch gives you a quick boost of force, and you'll need at least 200 to make Teleporting available. When you get to 200 force, bring up your menu, select the Hermit, and select Teleport. Press the B button until the icon is at the intersection of routes 12, 14, 17, and 20. You'll need the map that you Google searched to see exactly where that is.
Select route 20, a nothing route.
Select route 15. Head to the right, past the pillars in the water. Keep going to the right until you get to...hey, it's Michael again! This time he tells you about a Magic Stone on route 27, so lets go get it then! Head all the way back to the start of the route from which you came.
Select route 18, a nothing route. There's a letter at the beginning that's not required for you to read.
Select route 19, a 2nd straight nothing route.
Select route 28 and before you do anything else, make a Shop Call and fill up on Aqua Lung suits. You'll need them for this water-filled route. Go ahead and get yourself a Jet Pack too, if they're available. Leave the shop and start heading to the right until you get to a pillar in the water. Suspicious, right? Will put on an Aqua Lung, head underwater, and you'll find your 3rd boss fight. Even though this fight is underwater, it's one of the more easier boss fights in the game. The strategy here is remember these 3 words...shoot and move! If you run out of an Aqua Lung suit, simply put on another one until you "explode" the boss. Pick up your 3rd medallion, and head back up to the surface. Go to the right until you get to the orange metal head.
Select route 22. Head to the left until you get to a wall, then go up. You don't have to read the letter here, but do go in the doorway. This is the gold exchange store. You can exchange your gold for money, depending on how much gold you have. Simply pick one of the two panels. Hopefully you pick the larger amount of the two. When you're done, bring up your menu, select the Hermit, and select Teleport. Press the B button until the icon is at the intersection of routes 16, 18, and 19.
Select route 16, and prepare for your 4th boss fight! Head as far right as you can go, then you'll need to go up through a hole in the wall. Go up, and make your way to the right until you get to a castle. Head inside and shoot the 3 ladies. The boss will then make his appearance. The strategy...make sure you shoot his hat that he throws at you, and not the mohawked guy under it! Do this enough times and you'll "explode" him, and receive your 4th medallion! Leave the castle and head to the right until you get to the pink metal head.
Select route 27. Hey, there's Michael yet again! After you get done talking, make sure you have a Supersuit before you go any further. Go to the right and head down one screen. Again, make sure you have the Supersuit on before you go in the lava. Head all the way to the right until you get to a wall, but don't jump out just yet. Go down into the lava to get the Magic Stone, then go back to the surface and jump out. You're life bar is increased by 2 more! Climb up the wall one screen, kill the enemy, and climb up the wall another screen. Climb all the way to the top, and head to the right until you get to the blue metal head.
Select route 37, a nothing route. The only thing to note here is when you get to the water, put on an Aqua Lung, and go through the underwater passageway.
Select route 40. Go to the right until you get to the statue. Jump on top of the red tunnel and press Down. Head to the right until you get to the door that's currently blocked. You see Michael again, and he tells you to "open the door with the Magic Stone." So bring up your menu, select the Magic Stone, and press the A button. This will open the door. Talk to the Demon and let it kill you. I know that sounds crazy, but right now there's no way to kill it. When the screen says "game over" press the Start button twice, and you're right back where you died. Head out of that room, and go all the way to the left until you are unable to go any further. From here, go down one screen, head to the left, and go through the doorway at the end. Put on your Aqua Lung, and go through the short underwater passageway. Jump out of the water, and go through the doorway on the right. Keep going to the right until you get to another doorway and go through it. You come out on route 33. Route 33 sound familiar? This is where Tom Guycot's fortress is! Before you do anything else, make a Shop Call and buy as much items as you can. We haven't purchased anything in a while and this is a great place to do it. After you're done, leave the shop, and head to the right until you get to a castle. Go inside and you see...Tom Guycot lying on the ground? Walk over to him, and he tells you that the Demon came in and beat him up. All that time waiting to battle this Guycot guy, and someone gets to him before you can! Anyway, leave the fortress and continue going to the right until you get to...Faysha, the pretty little sprite again! She tells you to go see the Hermit immediately. So without any hesitation, bring up your menu, select the Hermit, select Teleport, and press the B button until the icon is at the intersection of routes 6 and 14.
Select route 6. Let yourself fall all the way to the bottom of the waterfall. Remember that statue? Well, walk inside it like you did the first time, and go through the cave like you did the first time. When you come out, go to the right until you come to the climable wall. Climb up the wall one screen, kill the enemy, and go through the doorway at the top. Walk all the way to the right until you get to the Hermit, who is still unable to move. After you're done talking, bring up your menu, select the Hermit, select Teleport, and press the B button until the icon is at the intersection of routes 37, 40, and 41.
Select route 40. Go to the right until you get to the statue. This time, you have to get where the heart is. You have to do some weird jumping in order to get there but when you get to the statue's chest, bring up your menu, select the Magic Stone, and press the A button. The statue's head will change into the Sword of Apollo! Plus, your life bar will be increased by another 2! Once you get the sword, go down the red tunnel again, but this time go to the left all the way to the end. From here, go down one screen, go to the left, and go through the doorway. I bet this seems familiar too, doesn't it? Get out your Aqua Lung and go through the short underwater passageway. Go through the doorway when you come out the other side. Head all the way to the right until you get to another doorway. Route 33 yet again...anyway, head to the right, past Tom Guycot's castle, until you get to the gold metal head.
Select route 39. This is the Devil's Tower. Kill the enemies and jump up 2 screens. Jump to the top of the tower and press Down. Let yourself fall all the way to the bottom, and head to the left until you get to a doorway. Make sure you're health and Ultra Food supply are good because you may need them for this battle. Head inside whenever you're ready, and there's Demon! After you talk, immediately bring up your menu, and break out Apollo's Sword! This Demon really isn't all that hard to beat, but each time he hits you it takes away 2 life bars. The strategy here is to jump and shoot at him, then run under him, then jump and shoot at him from the other side. Try to avoid his projectiles at all costs! It doesn't take too long to "explode" him but when you do, grab your 5th medallion and head down the passageway that opens up. As you keep going to the left, make sure you destroy ALL of Demon's eggs with Apollo's Sword so the other passageway opens up. Head down when it opens, and go all the way to the left until you get to a wall. You can't climb up this wall, so the only thing to do is put on your Jet Pack and fly up 2 screens to the doorway at the top-left. Go inside and you'll come out on route 38. Climb up the wall one screen all the way to the top, and head to the left until you get to another wall. Climb up this wall one screen and climb up the wall on the right as well. Head to the left until you get to the green metal head.
Select route 30. Thankfully, this is a much-needed nothing route. Just try not to fall down...
Select route 21. In my opinion, this is the most annoying route on the game because enemies are constantly shooting bullets at you, and it's almost impossible to dodge any of them. Go to the right across the bridge, and go through the doorway when you come to it. Go to the right until you can go down one screen. Getting tired of these enemies yet? Go down and make your way to the right until you get to another doorway. You mad now? Well, not only are you probably upset but now you have to prepare to face a boss, and you can NOT make a Shop Call to buy more Ultra Food here. Go inside and you'll see a bald guy wearing sunglasses, riding a hovercraft. He's very easy to kill so I won't give you a strategy. When you finish destroying his hovercraft, he still manages to fly away. He doesn't leave you a medallion and you don't get your health restored! Leave this room and head up one screen. Before you go to the green metal head, make a Shop Call here and fill up on anything you don't have 3 of. Leave the shop, and access the green metal head.
Select route 42. This is another difficult/annoying route. I would instantly get out my Jet Pack and fly all the way up until you get to the troll that makes you fall. Shoot him as many times as you can before he makes you fall. It may take you a couple times, but it is worth it to just fly up and kill this guy. Hopefully you don't sustain too much damage, but when you've finally killed him, keep heading up until you get to the hole you see in the ceiling. Go up and head to the right. Go up through the first hole you see in the ceiling, and you'll be in the clouds! Of course the only way to go any further is to put on your Jet Pack again and fly up. At this point, make sure your health is good (it doesn't have to be perfect) and a full supply of Ultra Food. Fly straight up until you get to a doorway, then go through it. It's Bopper again, and this time he has an Uzi! If you want you can put on a Supersuit until you've either killed him, or you run out of it. The best strategy I can think of is just hang back behind the tunnel, and jump/shoot when you get the chance to. He'll finally get "exploded" after a while, so pick up your 6th and final medallion. Climb up the wall on the right one screen. Kill the enemies and head to the left until you get to...Professor Plum! Wait...it's not really him, so back away from him as he explodes. Climb up the wall one screen, and prepare yourself for the final boss battle! After you've talked to the real big boss, the strategy here is to climb up the left wall and shoot the left orb until it explodes. Then bring up your menu, select Thunder Shot, and shoot the right orb until it explodes. After that, climb back up the right wall and shoot the orb in the middle. You'll see a series of explosions when you're done and finally, the boss will explode! Climb up the left wall 2 screens until you're at the top. Head to the right past the "alien" and head down. Crawl underneath the wall and kill the enemy. I SUGGEST YOU SAVE YOU'RE PROGRESS BEFORE YOU GET TO THE BOMB! To do that, bring up your menu, select the Micro Recorder on the right, and make a note of your password, just in case you fail at this next part.
Now this is the final part of the game. You have to put the medallions together to stop the bomb from exploding. You have exactly 66.66 seconds OR 5 tries to defuse it. You CAN fail, and if you do, the bomb will explode, and all of mankind will cease to exist! If you stop the bomb, then you're a big hero, and you've saved the world! If you manage to stop the bomb, keep making your way to the right until you get to a doorway. After this, the game will play itself out, and everyone lives happily ever after!
CONCLUSION
Whew! That was one challenging game, wasn't it? I have one last thing to say before I go...to whoever reads this and/or plays this game, please let me know how I did, what changes I can make, or any future advice you might have for me.
Thanks for reading! |


 User Notice


 MattyIce is Offline
| ID: 1130212 | 4125 Words
MattyIce is Offline
| ID: 1130212 | 4125 Words
 MattyIce is Offline


 Kruzer is Offline
| ID: 1130248 | 150 Words
Kruzer is Offline
| ID: 1130248 | 150 Words
 Kruzer is Offline


 Jordanv78 is Offline
| ID: 1130751 | 100 Words
Jordanv78 is Offline
| ID: 1130751 | 100 Words
 Jordanv78 is Offline