Hello everyone and welcome to another walkthrough. This month was a bit “rock’n’roll” for me, I encountered another problem with the previous game I planned to make a walkthrough. The game worked perfectly but the screenshots system didn’t agree with me ha ha. So I had to abort this game and work on another one. After discussing with one of my friends about Disney games, I had an idea. What about a walkthrough of this game?
Yes, this is the walkthrough of Quackshot, released on Sega Genesis. In this game, we control Donald Duck who will travel around the world in order to find a great treasure: the Duck treasure of King Garuzia. Like Indiana Jones, we will explore some temples and solve some puzzles. But enough talk about the game itself, let’s start this walkthrough, shall we? Well, right after I said what you already know:
USE THIS WALKTHROUGH IN CASE OF EMERGENCY, THANKS FOR YOUR UNDERSTANDING!
After the cutscene, you start the quest on the world map with three destinations: Duckburg, Mexico and Transylvania. Let’s go to Duckburg first, shall we?
Go to the right, stun a guy with a plunge, then two others enemies, climb up the ladder and take all the red hot chili peppers on the balconies. You have collected enough red hot chili peppers to be invincible for a short period of time, run like an angry bull and get rid of some enemies. Use this skill to avoid the guys who drop some muds and make some progress. Carry on until you see an explorer (1). He will tell you that you need something specific to climb high walls like the one behind him. Donald will set a flag (or an anchor, whatever you want to call that). With this flag, you will start from this point next time you will go to Duckburg. Go in your inventory, select “Call the airplane” and go to Mexico now.
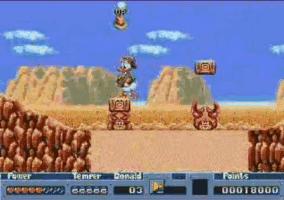
Stun the cactus when you land then another one and a bad guy. Make your progress stunning all the enemies you will encounter and jumping over the quicksand, use the stone platforms to cross the other quicksands. You will find some good stuff like an extra life, a bag of gold, some corn and an ice cream which recovers one life point, all that stuff is above a stone platform (2). A cactus is waiting for you. Oh thank you, mister cactus, you deserve a good plunge for your nice effort. Carry on to the next part of the level. It’s platforms time now. That means falling down is forbidden unless you feel like losing a life. The first enemy you will encounter is a turtle. One plunge in order to stun this enemy and you can carry on. You will get an ice cream from the turtle. Farther, you’ll see a moving platform and a detonator. Pass by it and jump to the next platform because you are chasing by an explosion on the ground (woohoo, firework ^^). After the moving platforms, there’s another detonator but this one is really close of the edge so as you jump on the platform, go to the next platform quickly or you will be hit by the explosion. While you are jumping from moving platform to moving platform, a bird will bother you, ready to drop a hive. If you aim and wait the good time, you will be able to get the chicken this enemy will drop once you stunned him (notice that a chicken recovers all your life). The next detonator is a bit tricky. You will think that you are screwed because the next platform is so high and you can’t reach it. Don’t worry, just jump over the explosion and let the platform fall. Carry on, take care of the bad guy and go to the next screen. You managed to reach the temple. That’s good to hear that. Bad news: it’s locked. The guardian tells you that you need a special key to open the temple (3). And the key is held by… the explorer in Duckburg! Time to talk once again with this person and ask for the key. Donald will set a new flag in front of the temple. Call the airplane and go back to Duckburg.
  
Talk with the man and get the hero key (why didn’t he talk about the temple and this key the first time we met him?! Ah, yes indeed, we haven’t ask him XP ), then go back to Mexico. Stand in fornt of the door, go in your inventory, use the key on the door and go in the temple.
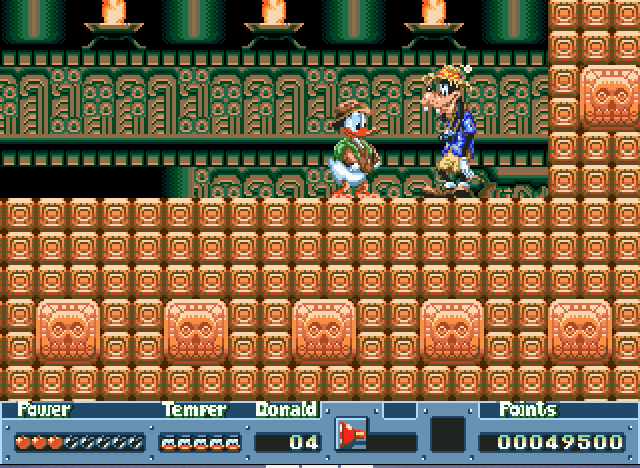
Avoid the flames, climb up the ladder, avoid another bouncing flame, then a circle of flames and get the chicken to the left (4). Stun the green blocks with your plunges and use them as some platform to reach the upper floor. Get rid of the enemies who wants to burn you with a wall of fire, go down using the ladder (beware of the second circle of fire when you are climbing down the second ladder), after the deadly spikes of death go up here to find some gold (5). Go through the passageway with a slide (press “down” button and the “jump” button) and go up. Slide once again (there’s some corn above your head, stop your slide halfway to get it), stun the green blocks and use them to go up, do another slide to go through the next passageways, paying attention to the blocks. Use the next blocks to go up (I don’t have to say that you have to stun them with some plunges before using them, I suppose you already know it ^^). Caution: there are two bouncing flames at the end of the slope. Avoid them, carry on and meet Goofy (6). He will give you a note and the red plunges. This upgrade will allow you to use the plunges in order to climb the high walls. Now go outside the temple and go back to Duckburg.
You’ll notice that the explorer has disappeared (like the guardian in Mexico when you get out of the temple). Use the red plunge to climb the high wall in front of you and go to the next screen. Climb up the wall to the right, avoid the noise produced by the stuff to the left, jump over the gap, shoot the turtle in order to get a chicken, then the others. Climb up another wall to the right, shoot a plunge to create a platform, reach the next roof using it and shoot the bad guy. He will drop some corn. Don’t fall off, shoot a plunge to the right, go to the next roof, go down using the ladder (beware of the noisy stuff) and go to the next part. Now, it’s a cool and funny part with some tryoleans on the electric cables. Grab the first tyrolean, then the next one, then the next one (don’t take the one underneath, carry on) and finally grab all the other tyroleans in order to reach Gyro. You will get the bubblegum ammos (7). This is a new kind of ammos which can destroy some walls or blocks you will encounter during your quest. If you run out of bubblegum ammos, go back here and Gyro will give you some. Use the tyrolean to go back, return to the green flag and call the airplane. Now, let’s go to my favorite place, the one that we haven’t explored yet: Transylvania.
  
Shoot the bad guy, carry on, avoid the bat, jump over the marsh (DO NOT fall down into one of those things or you will lose a life), then another one farther, shoot the bad guy to get an extra life, then another enemy for some corn and another bad guy for an ice cream (they are generous here ^^). Avoid the bats while you are crossing the last marsh (the longest one of this part) until you reach Count Dracula’s castle. Donald will set a flag, call the airplane if you need to go back to Duckburg and get some bubblegum ammos then go in the castle.
You will meet a nice ghost who will tell you that Count Dracula has the map leading to the treasure of King Garuzia. Blow up the wall with the bubblegum ammos like the ghost said, switch to the red plunge, avoid the first bad ghost of this place (no, we can’t kill the ghosts like Slash said in one of his songs ^^). The next one is a bit tough to avoid. You have to go back, wait until he disappears then go up. Blow up the barrels with a bubblegum, you will find an ice cream. You will find some stuff (and some slimes) in the barrels like an extra life (8). Climb up the wall to the right, avoid the ghost, shoot the skeletons coming from the coffins, destroy the next wall with a bubblegum, then the barrels and carry on. Shoot the skeletons and fall down the hole. Welcome to the flooded torture chamber of Count Dracula’s castle. Go down, avoid the ball then the spikes on the floor and then some blocks. Go up, avoid the balls and the spikes, fall down, avoid some spikes and go up in order to get some stuff (9). Use the plunge to leave the flooded torture chamber and go back to the surface. You will encounter the ghost butler… which is in fact some ghosts who wants to trick you. When he smiles, the ghosts will show their true form. Wait until they are gone, carry on, blow up the blocks for some bubblegums, avoid the next faked butler and blow up the new bunch of blocks. A last block will stay. Jump on it, oh it’s an elevator. Yes it’s the only way out because if you carry on to the right, you will do an endless loop over and over again. Climb up the wall with the plunges and go through the door. Use the holes to avoid the ghosts in the next part of this level, shoot the skeletons and hurry up to climb the wall to the right because the wall to the left is about to crush you. Shoot the barrels in order to get some bubblegum ammos and a chicken (beware of the slimes) then carry on. More butlers err ghosts making a lame joke. Blow up the the first bunch of blocks, use the next one to go up (don’t forget to use your plunge on the wall to the left) and open the door. Say hello to Count Dracula. Shoot, you don’t have any whip, any wooden picket with a hammer and any garlic. But you know what? He enjoys bubble gums. He will fly from left to the right and calls his minions to hurt you. Stay close to him, crouch in order to avoid the bats and shoot a bubblegum (don’t spam, it’s futile, one shot at the time). At one point, when he will be almost dead, he will fly a bit higher (I think he knows the bubblegum trick now, nice try Count Dracula, unfortunately the shot does a wave ^^). Repeat this method until he dies. You will get the real treasure map and some new destinations will appear on the world map: the Viking ship, South Pole, Egypt and Maharajah. Let’s go to the last destination, shall we?
The way is really linear and simple. Shoot the enemies to get some stuff (like some red hot chili peppers), climb up the walls with the plunges, I think the only difficulty is the snake charmers. Shoot two bubblegums to get rid of them, don’t be hit by the notes or else the snake will hurt you. You will find farther the big maharajah’s palace. Go in and talk to him. He offers you a challenge. If you manage to beat the tiger in the garden, you will get the sphinx tear. Challenge accepted, O big maharajah. Go to the right now to begin the trial. This is the tough part of this level. I called that the riddle of the doors. See those numbers on the doors? You think that it’s not a big deal and all you have to do is go through the door number 1, then the door number 2 and etc…? WRONG. There’s a specific way to reach the garden and it will give you some troubles to find out… unless you follow the instructions of your host Laian. Here is the path: shoot the bad guy, go down, jump over the first door, shoot the bad guy with some corn or a bubblegum, switch to the red plunges and climb up the wall to the left to reach the door up here. Get rid of the snake charmer, go up using the red plunges, jump over the first door you will encounter, shoot some enemies and open the next door. In the next part, there’s a chicken to the left and to the right, there’s the door to open in order to make some progress. Jump over the first door number 2 you will encounter, climb up the wall to the left, do a slide to go through the passageway to the right and open the door. Now, get rid of the two snake charmers, then the turtle, slide and go up to reach the door leading to the garden. Here is the tiger (10). He will spit some fire and will jump all over the room. Avoid his breath of fire and shoot when he is jumping. A few hits in his face and he will be defeated. A door magically appears, leading to the maharajah. You will get the sphinx tear. Well, I don’t have to tell you where we will go next, this item is the key. Indeed, to the Egypt we go now!
  
Shoot the enemies during your progress, collect some stuff (red hot chili peppers, healing items…) and jump multiples to cross the quicksands, that’s all you have to do in order to reach the pyramid. Well, the only difficulty could be the bunch of bricks halfway with the turtles. I said “could be” because the way may be relatively easy to find out. If you have some troubles, making this part, just follow those instructions: shoot the turtle in front of you, slide to avoid the one above your head, then go up and finally go down. You see? It’s relatively easy as I said. You will reach the pyramid. Use the sphinx tear to open the door and go in the pyramid.
Climb up the moving blocks in order to make your progress in the pyramid, climb up the ladder and avoid the spikes. Slide underneath the spikes, use the corn to get rid of the enemies who wants to burn you, slide one more time to go through the passageway and go up. Beware of the circles of fire when you are climbing up the slope, carry on, kill the enemy with the corn, use the platform to cross the pit of fit (don’t stay on the platform, it will fall down in the flames), fall down to get some stuff then go back up here using your plunges and carry on. In the next part, you will see more pits of fire, more crumbling platforms and some flames (like the ones in the temple) but this time some of them will appear and fall down from the ceiling (and from the void, I’m not kidding). Cross the first pit of fire using the platforms, then hold the “dash” button to cross the crumbling bridges, cross another pit of fire, then another crumbling bridge and finally cross the last pit of fire. In the next part, some fireballs will chase you during your progress. It shouldn’t be so difficult to make this part if you use the “dash”. Be careful when you fall down, hold the right button otherwise you will taste the nice pit of fire. Remember the note Goody gave to you? Use it and remember the code. Now hurry up to press the good symbols (stay on it then jump) in order to stop the trap. Climb up the wall and get the scepter of Ra (11). Now, climb down the ladder and here we go for another funny part with… some mine carts woohoo!!! After this cool trip, you are outside the pyramid. Call the airplane and go to the South Pole now.
Welcome to the South Pole. This level is a bit tough considering that you will have to dash quite often if you want to avoid some hits, every move you will do might be decisive for you because you are walking on the snow and the ice so you will slide a bit like a sledge and you will probably have some troubles during this level. First, dash to climb up the slope and shoot the first guy you will encounter at the top of the iced hill then carry on. Avoid the bomb dropped by the bird, dash to climb up the hill and shoot another bad guy. He will drop an ice cream. Avoid the first penguin, then another, go up and use the frozen block to slide, get rid of the penguin and get some bags of gold. Avoid another penguin, then a bird, dash to reach the top and shoot another Bad Pete’s henchman. Use another block to go down and you will find a key in a block in an iced block. Hmm, that’s interesting. What will happen if we use some warmth? Yes I hear you: wait, how are we supposed to create some warmth in the South Pole? Using the Scepter of Ra (Ra is the god of the sun in the Egyptian mythology ^^). Stay on the block, use the scepter and get the Viking key (12). Now, call the airplane and go to the Viking Ship.
The first part of this level is on the deck of a Viking ship which looks really old, like a ghost ship. You will obviously encounter lot of Vikings shooting arrows that you can easily avoid and some Bad Pete’s henchmen. When you land, wait until the Vikings hide to make your progress, kill the bad guys and carry on. Avoid more Vikings, don’t stay on the rottens boards, those are indeed a sign of sudden death. Avoid all the Vikings, shoot the bad guy, avoid other Vikings and go to the next screen using the red plunges on the mast. Use the grey “elevator” (let’s call that an elevator, shall we? ^^) to go up, walk on the rope, avoid the bird, use another elevator, then walk on another rope, skip the tyroleans and get the extra life down. Now, go back and take the first tyrolean, climb down the ladder paying attention to the bird, dash on the ropes in order to climb it up easily, avoid the shots and shoot the bad guys. Farther, dash on the broken bridge, climb down the ladder to go back on the deck. You will meet a desperate Viking who is the captain of the ship. The ghosts have captured his ship and ask you to get rid of the leader who is in the hold. He will give you the Viking diary which reveals the location of the treasure. The door of the hold is locked. Oh well, we have the Viking key so let’s use it. Stay on it, use the Viking key and enter the hold of the ship. The hold is really short. First, climb down the ladder, use the red plunges to climb up the pile of crates to the right, there’s a secret passageway leading to some bags of gold (13). Go back, climb up the ladder, then go to the right, avoid the ghosts then the Vikings, climb down the other ladder, jump in the crates to the left, there’s another passageway leading to the door. Open it and get ready to face the leader. How to beat him? Well it’s easy, shoot the head when he doesn’t guard and avoid his hammer-boomerang. Needless to use the corn or the bubblegums, use the plunges. If you aim perfectly, you will not let him a chance to hit you with his hammer. A few hits in his face and he will be defeated. Go through the opened door to the right to be teleported on the deck. The captain will be proud of you but will not give the diary because… he doesn’t have it. However, he will tell you the location… of the diary (not the treasure, hey that wouldn’t be funny ^^) and will give you the green plunges. With this last upgrade, you can shoot the flying things and grab the plunge to cross long gaps. Now, go to the South Pole, where the Viking diary is hidden.
  
Go to the next screen, shoot a bird above your head and grad the plunge to cross the gap. On your way you will have to go up and down in order to avoid the other birds. Watch out, one hit and you will fall down so be extremely careful during this part. The bombs dropped by the birds will not hurt you, don’t worry about that. In the next screen, avoid the penguin then jump from platform to platform to cross the cold lake and carry on. Avoid another penguin, cross another cold lake then avoid the other penguin. The next lake has some rising platforms which makes the gap a bit difficult to cross. In the next screen, you will find some bags of gold and some bubblegums ammos. Go down to get them. In the second cave a bit farther, you will get some other stuff. You can’t use the third passageway so go to the right and break all the ice blocks with some bubblegums. Go down, avoid the massive bad guy, shoot the walruses and break the blue ice blocks to go up. To the left, you will find an extra life (14). Go to the right, shoot the walrus, go up, shoot another walrus and shoot the blue block. Shoot the other blocks above your head and the ones to the right. The Viking diary is hidden in those ones. Unfortunately, you can’t read it here; it’s too dark to see anything. Go up now, slide to go through the passageway and take the bags of gold. Go up to leave the cave, unfortunately you will meet Bad Pete who kidnapped your nephews. He wants you to give the map and the diary to him. You have no choice and are forced to give them to Bad Pete. A deal is a deal. He releases your nephews and will flee. Wait, we can’t let him go away like that so let’s chase after him. You will come to his hideout.
When you come to the new level, dash to avoid the bouncing blocks and climb up the hill. Use a plunge on a bird and use it to cross the gap. Same thing like the South Pole: don’t touch the birds or you will fall down. And about the hives dropped, well they will not hurt you. Once you landed on the ground, jump over the marshes, dash when you are on the crumbling bridges in order to avoid the snakes and the fall. Shoot the snakes (or avoid them) and use the tyrolean to get some stuff and enter the hideout. A small part with some mine carts for a change. Nothing really tough, get the stuff and use the mine carts to make your progress like in Egypt. In the next part of the level, use the new kind of platform to make your progress. When you reached the eighth series of platform, go down, shoot a plunge, then go up and use the plunge to reach the other side. Now, go up everytime, shoot some enemies, avoid the guy with the blue shirt and slide in the passageway. Fall down where the turtle is, not the other hole or else you will die. Use the corn or the bubblegums to get rid of the turtles, make your progress throught the passageways, go down using the elevator and shoot the bad guy you will encounter. Go to the right, jump over the gap, use another elevator to go up, shoot the bad guys to the left and to the right for some stuff (corn and chickens) and avoid the blue henchman. Are you ready to face Bad Pete and get the diary back? Then, go to the next screen. Bad Pete is waiting for you and will disappear. He has a surprise for you: a flying machine with a crusher. Oh, that’s nice, Bad Pete, but you know I don’t feel like eating the floor and turning into a pancake. First, use the corn or the bubblegums on the two henchmen to the right, then focus your shots on Bad Pete once you cleared the room. Aim correctly even if it’s a bit tough, avoid the crusher and it should be ok. After a few hits, he will be defeated and you will get the diary back. Now read it to leave the hideout and go to our final destination (which will appear after dripping the map in the water): the island.
  This is the last level of the game. Now that Bad Pete is “off-road”, nothing can prevent you to grab the treasure so let’s go ahead, shall we? Avoid the block and the snakes while you are climbing up the slope, jump over the gaps and use the flying platforms to get some stuff and cross the huge gap. Another series of flying platform is waiting for you after this one. Shoot the snakes, jump over the gaps and step on the rotten boards to go down. Hold the right button while you are falling down, step on the rotten boards to the right, get the bags of cash and go to the right. Hold the right button a few times In order to reach a place with some platforms… Those are flammable platforms in fact. Hurry up, go up and enter the temple. Here we are, where the treasure lies in wait (no, it’s not the Treasure of the Four Crowns if anyone knows the reference ^^). Avoid the spears, use the tyrolean to cross the spikes and get some stuff. This is the new enemy: the guardians. They like corn and bubblegums. Get rid of them, go up using your plunges and carry on. Avoid the circles of flames, shoot the guardians and use the moving blocks to make your progress. You will find nothing to the left, so when you come on the second moving block, go up using your plunges and carry on. It’s a bit tough to go up, make sure to be to the right on the block, jump and shoot at the right time. In the next screen, you will think there’s no way out but falling down. WRONG! The platforms are just invisible and will appear when you are jumping. It’s the last effort before the final boss. Take your time and it should be ok. Now, you will face the last boss who is a knight or a guardian (this passage reminds me of a scene from Indiana Jones and The Last Crusade, well this game is a tribute to this great movie in case you haven’t noticed yet ^^). In order to beat him, nothing really hard. Wait until he throws his sword at you, avoid it, shoot his face and shoot a plunge in direction of the wall to the left or to the right in order to stay on it and avoid the blocks falling down. After a few hits, the knight will be defeated and the treasure will be yours. Congratulations, you beat Quackshot, now enjoy the cutscene and the credits.
So, this is the end of Quackshot and this walkthrough. It’s a good game honestly, well in my opinion Disney games are really good (and I don’t say that because I love Walt Disney ^^). I had fun playing this game. I hope you enjoyed this walkthrough and I see you next time for another game and walkthrough 
Hello everyone and welcome to another walkthrough. This month was a bit “rock’n’roll” for me, I encountered another problem with the previous game I planned to make a walkthrough. The game worked perfectly but the screenshots system didn’t agree with me ha ha. So I had to abort this game and work on another one. After discussing with one of my friends about Disney games, I had an idea. What about a walkthrough of this game?
Yes, this is the walkthrough of Quackshot, released on Sega Genesis. In this game, we control Donald Duck who will travel around the world in order to find a great treasure: the Duck treasure of King Garuzia. Like Indiana Jones, we will explore some temples and solve some puzzles. But enough talk about the game itself, let’s start this walkthrough, shall we? Well, right after I said what you already know:
USE THIS WALKTHROUGH IN CASE OF EMERGENCY, THANKS FOR YOUR UNDERSTANDING!
After the cutscene, you start the quest on the world map with three destinations: Duckburg, Mexico and Transylvania. Let’s go to Duckburg first, shall we?
Go to the right, stun a guy with a plunge, then two others enemies, climb up the ladder and take all the red hot chili peppers on the balconies. You have collected enough red hot chili peppers to be invincible for a short period of time, run like an angry bull and get rid of some enemies. Use this skill to avoid the guys who drop some muds and make some progress. Carry on until you see an explorer (1). He will tell you that you need something specific to climb high walls like the one behind him. Donald will set a flag (or an anchor, whatever you want to call that). With this flag, you will start from this point next time you will go to Duckburg. Go in your inventory, select “Call the airplane” and go to Mexico now.
Stun the cactus when you land then another one and a bad guy. Make your progress stunning all the enemies you will encounter and jumping over the quicksand, use the stone platforms to cross the other quicksands. You will find some good stuff like an extra life, a bag of gold, some corn and an ice cream which recovers one life point, all that stuff is above a stone platform (2). A cactus is waiting for you. Oh thank you, mister cactus, you deserve a good plunge for your nice effort. Carry on to the next part of the level. It’s platforms time now. That means falling down is forbidden unless you feel like losing a life. The first enemy you will encounter is a turtle. One plunge in order to stun this enemy and you can carry on. You will get an ice cream from the turtle. Farther, you’ll see a moving platform and a detonator. Pass by it and jump to the next platform because you are chasing by an explosion on the ground (woohoo, firework ^^). After the moving platforms, there’s another detonator but this one is really close of the edge so as you jump on the platform, go to the next platform quickly or you will be hit by the explosion. While you are jumping from moving platform to moving platform, a bird will bother you, ready to drop a hive. If you aim and wait the good time, you will be able to get the chicken this enemy will drop once you stunned him (notice that a chicken recovers all your life). The next detonator is a bit tricky. You will think that you are screwed because the next platform is so high and you can’t reach it. Don’t worry, just jump over the explosion and let the platform fall. Carry on, take care of the bad guy and go to the next screen. You managed to reach the temple. That’s good to hear that. Bad news: it’s locked. The guardian tells you that you need a special key to open the temple (3). And the key is held by… the explorer in Duckburg! Time to talk once again with this person and ask for the key. Donald will set a new flag in front of the temple. Call the airplane and go back to Duckburg.
Talk with the man and get the hero key (why didn’t he talk about the temple and this key the first time we met him?! Ah, yes indeed, we haven’t ask him XP ), then go back to Mexico. Stand in fornt of the door, go in your inventory, use the key on the door and go in the temple.
Avoid the flames, climb up the ladder, avoid another bouncing flame, then a circle of flames and get the chicken to the left (4). Stun the green blocks with your plunges and use them as some platform to reach the upper floor. Get rid of the enemies who wants to burn you with a wall of fire, go down using the ladder (beware of the second circle of fire when you are climbing down the second ladder), after the deadly spikes of death go up here to find some gold (5). Go through the passageway with a slide (press “down” button and the “jump” button) and go up. Slide once again (there’s some corn above your head, stop your slide halfway to get it), stun the green blocks and use them to go up, do another slide to go through the next passageways, paying attention to the blocks. Use the next blocks to go up (I don’t have to say that you have to stun them with some plunges before using them, I suppose you already know it ^^). Caution: there are two bouncing flames at the end of the slope. Avoid them, carry on and meet Goofy (6). He will give you a note and the red plunges. This upgrade will allow you to use the plunges in order to climb the high walls. Now go outside the temple and go back to Duckburg.
You’ll notice that the explorer has disappeared (like the guardian in Mexico when you get out of the temple). Use the red plunge to climb the high wall in front of you and go to the next screen. Climb up the wall to the right, avoid the noise produced by the stuff to the left, jump over the gap, shoot the turtle in order to get a chicken, then the others. Climb up another wall to the right, shoot a plunge to create a platform, reach the next roof using it and shoot the bad guy. He will drop some corn. Don’t fall off, shoot a plunge to the right, go to the next roof, go down using the ladder (beware of the noisy stuff) and go to the next part. Now, it’s a cool and funny part with some tryoleans on the electric cables. Grab the first tyrolean, then the next one, then the next one (don’t take the one underneath, carry on) and finally grab all the other tyroleans in order to reach Gyro. You will get the bubblegum ammos (7). This is a new kind of ammos which can destroy some walls or blocks you will encounter during your quest. If you run out of bubblegum ammos, go back here and Gyro will give you some. Use the tyrolean to go back, return to the green flag and call the airplane. Now, let’s go to my favorite place, the one that we haven’t explored yet: Transylvania.
Shoot the bad guy, carry on, avoid the bat, jump over the marsh (DO NOT fall down into one of those things or you will lose a life), then another one farther, shoot the bad guy to get an extra life, then another enemy for some corn and another bad guy for an ice cream (they are generous here ^^). Avoid the bats while you are crossing the last marsh (the longest one of this part) until you reach Count Dracula’s castle. Donald will set a flag, call the airplane if you need to go back to Duckburg and get some bubblegum ammos then go in the castle.
You will meet a nice ghost who will tell you that Count Dracula has the map leading to the treasure of King Garuzia. Blow up the wall with the bubblegum ammos like the ghost said, switch to the red plunge, avoid the first bad ghost of this place (no, we can’t kill the ghosts like Slash said in one of his songs ^^). The next one is a bit tough to avoid. You have to go back, wait until he disappears then go up. Blow up the barrels with a bubblegum, you will find an ice cream. You will find some stuff (and some slimes) in the barrels like an extra life (8). Climb up the wall to the right, avoid the ghost, shoot the skeletons coming from the coffins, destroy the next wall with a bubblegum, then the barrels and carry on. Shoot the skeletons and fall down the hole. Welcome to the flooded torture chamber of Count Dracula’s castle. Go down, avoid the ball then the spikes on the floor and then some blocks. Go up, avoid the balls and the spikes, fall down, avoid some spikes and go up in order to get some stuff (9). Use the plunge to leave the flooded torture chamber and go back to the surface. You will encounter the ghost butler… which is in fact some ghosts who wants to trick you. When he smiles, the ghosts will show their true form. Wait until they are gone, carry on, blow up the blocks for some bubblegums, avoid the next faked butler and blow up the new bunch of blocks. A last block will stay. Jump on it, oh it’s an elevator. Yes it’s the only way out because if you carry on to the right, you will do an endless loop over and over again. Climb up the wall with the plunges and go through the door. Use the holes to avoid the ghosts in the next part of this level, shoot the skeletons and hurry up to climb the wall to the right because the wall to the left is about to crush you. Shoot the barrels in order to get some bubblegum ammos and a chicken (beware of the slimes) then carry on. More butlers err ghosts making a lame joke. Blow up the the first bunch of blocks, use the next one to go up (don’t forget to use your plunge on the wall to the left) and open the door. Say hello to Count Dracula. Shoot, you don’t have any whip, any wooden picket with a hammer and any garlic. But you know what? He enjoys bubble gums. He will fly from left to the right and calls his minions to hurt you. Stay close to him, crouch in order to avoid the bats and shoot a bubblegum (don’t spam, it’s futile, one shot at the time). At one point, when he will be almost dead, he will fly a bit higher (I think he knows the bubblegum trick now, nice try Count Dracula, unfortunately the shot does a wave ^^). Repeat this method until he dies. You will get the real treasure map and some new destinations will appear on the world map: the Viking ship, South Pole, Egypt and Maharajah. Let’s go to the last destination, shall we?
The way is really linear and simple. Shoot the enemies to get some stuff (like some red hot chili peppers), climb up the walls with the plunges, I think the only difficulty is the snake charmers. Shoot two bubblegums to get rid of them, don’t be hit by the notes or else the snake will hurt you. You will find farther the big maharajah’s palace. Go in and talk to him. He offers you a challenge. If you manage to beat the tiger in the garden, you will get the sphinx tear. Challenge accepted, O big maharajah. Go to the right now to begin the trial. This is the tough part of this level. I called that the riddle of the doors. See those numbers on the doors? You think that it’s not a big deal and all you have to do is go through the door number 1, then the door number 2 and etc…? WRONG. There’s a specific way to reach the garden and it will give you some troubles to find out… unless you follow the instructions of your host Laian. Here is the path: shoot the bad guy, go down, jump over the first door, shoot the bad guy with some corn or a bubblegum, switch to the red plunges and climb up the wall to the left to reach the door up here. Get rid of the snake charmer, go up using the red plunges, jump over the first door you will encounter, shoot some enemies and open the next door. In the next part, there’s a chicken to the left and to the right, there’s the door to open in order to make some progress. Jump over the first door number 2 you will encounter, climb up the wall to the left, do a slide to go through the passageway to the right and open the door. Now, get rid of the two snake charmers, then the turtle, slide and go up to reach the door leading to the garden. Here is the tiger (10). He will spit some fire and will jump all over the room. Avoid his breath of fire and shoot when he is jumping. A few hits in his face and he will be defeated. A door magically appears, leading to the maharajah. You will get the sphinx tear. Well, I don’t have to tell you where we will go next, this item is the key. Indeed, to the Egypt we go now!
Shoot the enemies during your progress, collect some stuff (red hot chili peppers, healing items…) and jump multiples to cross the quicksands, that’s all you have to do in order to reach the pyramid. Well, the only difficulty could be the bunch of bricks halfway with the turtles. I said “could be” because the way may be relatively easy to find out. If you have some troubles, making this part, just follow those instructions: shoot the turtle in front of you, slide to avoid the one above your head, then go up and finally go down. You see? It’s relatively easy as I said. You will reach the pyramid. Use the sphinx tear to open the door and go in the pyramid.
Climb up the moving blocks in order to make your progress in the pyramid, climb up the ladder and avoid the spikes. Slide underneath the spikes, use the corn to get rid of the enemies who wants to burn you, slide one more time to go through the passageway and go up. Beware of the circles of fire when you are climbing up the slope, carry on, kill the enemy with the corn, use the platform to cross the pit of fit (don’t stay on the platform, it will fall down in the flames), fall down to get some stuff then go back up here using your plunges and carry on. In the next part, you will see more pits of fire, more crumbling platforms and some flames (like the ones in the temple) but this time some of them will appear and fall down from the ceiling (and from the void, I’m not kidding). Cross the first pit of fire using the platforms, then hold the “dash” button to cross the crumbling bridges, cross another pit of fire, then another crumbling bridge and finally cross the last pit of fire. In the next part, some fireballs will chase you during your progress. It shouldn’t be so difficult to make this part if you use the “dash”. Be careful when you fall down, hold the right button otherwise you will taste the nice pit of fire. Remember the note Goody gave to you? Use it and remember the code. Now hurry up to press the good symbols (stay on it then jump) in order to stop the trap. Climb up the wall and get the scepter of Ra (11). Now, climb down the ladder and here we go for another funny part with… some mine carts woohoo!!! After this cool trip, you are outside the pyramid. Call the airplane and go to the South Pole now.
Welcome to the South Pole. This level is a bit tough considering that you will have to dash quite often if you want to avoid some hits, every move you will do might be decisive for you because you are walking on the snow and the ice so you will slide a bit like a sledge and you will probably have some troubles during this level. First, dash to climb up the slope and shoot the first guy you will encounter at the top of the iced hill then carry on. Avoid the bomb dropped by the bird, dash to climb up the hill and shoot another bad guy. He will drop an ice cream. Avoid the first penguin, then another, go up and use the frozen block to slide, get rid of the penguin and get some bags of gold. Avoid another penguin, then a bird, dash to reach the top and shoot another Bad Pete’s henchman. Use another block to go down and you will find a key in a block in an iced block. Hmm, that’s interesting. What will happen if we use some warmth? Yes I hear you: wait, how are we supposed to create some warmth in the South Pole? Using the Scepter of Ra (Ra is the god of the sun in the Egyptian mythology ^^). Stay on the block, use the scepter and get the Viking key (12). Now, call the airplane and go to the Viking Ship.
The first part of this level is on the deck of a Viking ship which looks really old, like a ghost ship. You will obviously encounter lot of Vikings shooting arrows that you can easily avoid and some Bad Pete’s henchmen. When you land, wait until the Vikings hide to make your progress, kill the bad guys and carry on. Avoid more Vikings, don’t stay on the rottens boards, those are indeed a sign of sudden death. Avoid all the Vikings, shoot the bad guy, avoid other Vikings and go to the next screen using the red plunges on the mast. Use the grey “elevator” (let’s call that an elevator, shall we? ^^) to go up, walk on the rope, avoid the bird, use another elevator, then walk on another rope, skip the tyroleans and get the extra life down. Now, go back and take the first tyrolean, climb down the ladder paying attention to the bird, dash on the ropes in order to climb it up easily, avoid the shots and shoot the bad guys. Farther, dash on the broken bridge, climb down the ladder to go back on the deck. You will meet a desperate Viking who is the captain of the ship. The ghosts have captured his ship and ask you to get rid of the leader who is in the hold. He will give you the Viking diary which reveals the location of the treasure. The door of the hold is locked. Oh well, we have the Viking key so let’s use it. Stay on it, use the Viking key and enter the hold of the ship. The hold is really short. First, climb down the ladder, use the red plunges to climb up the pile of crates to the right, there’s a secret passageway leading to some bags of gold (13). Go back, climb up the ladder, then go to the right, avoid the ghosts then the Vikings, climb down the other ladder, jump in the crates to the left, there’s another passageway leading to the door. Open it and get ready to face the leader. How to beat him? Well it’s easy, shoot the head when he doesn’t guard and avoid his hammer-boomerang. Needless to use the corn or the bubblegums, use the plunges. If you aim perfectly, you will not let him a chance to hit you with his hammer. A few hits in his face and he will be defeated. Go through the opened door to the right to be teleported on the deck. The captain will be proud of you but will not give the diary because… he doesn’t have it. However, he will tell you the location… of the diary (not the treasure, hey that wouldn’t be funny ^^) and will give you the green plunges. With this last upgrade, you can shoot the flying things and grab the plunge to cross long gaps. Now, go to the South Pole, where the Viking diary is hidden.
Go to the next screen, shoot a bird above your head and grad the plunge to cross the gap. On your way you will have to go up and down in order to avoid the other birds. Watch out, one hit and you will fall down so be extremely careful during this part. The bombs dropped by the birds will not hurt you, don’t worry about that. In the next screen, avoid the penguin then jump from platform to platform to cross the cold lake and carry on. Avoid another penguin, cross another cold lake then avoid the other penguin. The next lake has some rising platforms which makes the gap a bit difficult to cross. In the next screen, you will find some bags of gold and some bubblegums ammos. Go down to get them. In the second cave a bit farther, you will get some other stuff. You can’t use the third passageway so go to the right and break all the ice blocks with some bubblegums. Go down, avoid the massive bad guy, shoot the walruses and break the blue ice blocks to go up. To the left, you will find an extra life (14). Go to the right, shoot the walrus, go up, shoot another walrus and shoot the blue block. Shoot the other blocks above your head and the ones to the right. The Viking diary is hidden in those ones. Unfortunately, you can’t read it here; it’s too dark to see anything. Go up now, slide to go through the passageway and take the bags of gold. Go up to leave the cave, unfortunately you will meet Bad Pete who kidnapped your nephews. He wants you to give the map and the diary to him. You have no choice and are forced to give them to Bad Pete. A deal is a deal. He releases your nephews and will flee. Wait, we can’t let him go away like that so let’s chase after him. You will come to his hideout.
When you come to the new level, dash to avoid the bouncing blocks and climb up the hill. Use a plunge on a bird and use it to cross the gap. Same thing like the South Pole: don’t touch the birds or you will fall down. And about the hives dropped, well they will not hurt you. Once you landed on the ground, jump over the marshes, dash when you are on the crumbling bridges in order to avoid the snakes and the fall. Shoot the snakes (or avoid them) and use the tyrolean to get some stuff and enter the hideout. A small part with some mine carts for a change. Nothing really tough, get the stuff and use the mine carts to make your progress like in Egypt. In the next part of the level, use the new kind of platform to make your progress. When you reached the eighth series of platform, go down, shoot a plunge, then go up and use the plunge to reach the other side. Now, go up everytime, shoot some enemies, avoid the guy with the blue shirt and slide in the passageway. Fall down where the turtle is, not the other hole or else you will die. Use the corn or the bubblegums to get rid of the turtles, make your progress throught the passageways, go down using the elevator and shoot the bad guy you will encounter. Go to the right, jump over the gap, use another elevator to go up, shoot the bad guys to the left and to the right for some stuff (corn and chickens) and avoid the blue henchman. Are you ready to face Bad Pete and get the diary back? Then, go to the next screen. Bad Pete is waiting for you and will disappear. He has a surprise for you: a flying machine with a crusher. Oh, that’s nice, Bad Pete, but you know I don’t feel like eating the floor and turning into a pancake. First, use the corn or the bubblegums on the two henchmen to the right, then focus your shots on Bad Pete once you cleared the room. Aim correctly even if it’s a bit tough, avoid the crusher and it should be ok. After a few hits, he will be defeated and you will get the diary back. Now read it to leave the hideout and go to our final destination (which will appear after dripping the map in the water): the island.
This is the last level of the game. Now that Bad Pete is “off-road”, nothing can prevent you to grab the treasure so let’s go ahead, shall we? Avoid the block and the snakes while you are climbing up the slope, jump over the gaps and use the flying platforms to get some stuff and cross the huge gap. Another series of flying platform is waiting for you after this one. Shoot the snakes, jump over the gaps and step on the rotten boards to go down. Hold the right button while you are falling down, step on the rotten boards to the right, get the bags of cash and go to the right. Hold the right button a few times In order to reach a place with some platforms… Those are flammable platforms in fact. Hurry up, go up and enter the temple. Here we are, where the treasure lies in wait (no, it’s not the Treasure of the Four Crowns if anyone knows the reference ^^). Avoid the spears, use the tyrolean to cross the spikes and get some stuff. This is the new enemy: the guardians. They like corn and bubblegums. Get rid of them, go up using your plunges and carry on. Avoid the circles of flames, shoot the guardians and use the moving blocks to make your progress. You will find nothing to the left, so when you come on the second moving block, go up using your plunges and carry on. It’s a bit tough to go up, make sure to be to the right on the block, jump and shoot at the right time. In the next screen, you will think there’s no way out but falling down. WRONG! The platforms are just invisible and will appear when you are jumping. It’s the last effort before the final boss. Take your time and it should be ok. Now, you will face the last boss who is a knight or a guardian (this passage reminds me of a scene from Indiana Jones and The Last Crusade, well this game is a tribute to this great movie in case you haven’t noticed yet ^^). In order to beat him, nothing really hard. Wait until he throws his sword at you, avoid it, shoot his face and shoot a plunge in direction of the wall to the left or to the right in order to stay on it and avoid the blocks falling down. After a few hits, the knight will be defeated and the treasure will be yours. Congratulations, you beat Quackshot, now enjoy the cutscene and the credits.
So, this is the end of Quackshot and this walkthrough. It’s a good game honestly, well in my opinion Disney games are really good (and I don’t say that because I love Walt Disney ^^). I had fun playing this game. I hope you enjoyed this walkthrough and I see you next time for another game and walkthrough
|


 User Notice


 pacman1755 is Offline
| ID: 574373 | 36 Words
pacman1755 is Offline
| ID: 574373 | 36 Words
 pacman1755 is Offline

 septembern is Offline
| ID: 574427 | 61 Words
septembern is Offline
| ID: 574427 | 61 Words
 septembern is Offline

