

 User Notice
 Forum Links
Play Mega Man X Online

Thread Information
Views
5,173
Replies
3
Rating
3
Status
OPEN
Thread
Creator
Creator
ZeroTails
02-28-15 11:10 AM
02-28-15 11:10 AM
Last
Post
Post
sonicthehedgeho..
02-28-15 11:34 AM
02-28-15 11:34 AM
System
9.2
Views: 4,248
Today: 1
Users: 1 unique
Today: 1
Users: 1 unique
Thread Actions


Order
Mega Man X Walkthrough Part 3
Game's Ratings
Overall
Graphics
Sound
Addictiveness
Depth
Story
Difficulty
Average User Score
9.2
9.4
9.2
8.9
8.2
7.8
7.1
02-28-15 11:10 AM
 ZeroTails is Offline
| ID: 1142272 | 1827 Words
ZeroTails is Offline
| ID: 1142272 | 1827 Words
 ZeroTails is Offline
| ID: 1142272 | 1827 Words
ZeroTails
Cool Davideo7
Cool Davideo7
Level: 92


POSTS: 247/2465
POST EXP: 215125
LVL EXP: 7664425
CP: 18968.7
VIZ: 401000

POSTS: 247/2465
POST EXP: 215125
LVL EXP: 7664425
CP: 18968.7
VIZ: 401000
Likes: 1 Dislikes: 0
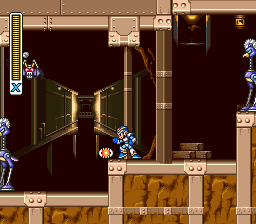
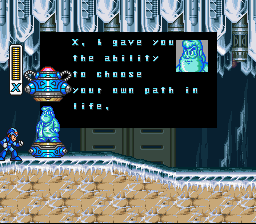
Part 1: https://www.vizzed.com/boards/thread.php?id=84353 Part 2: https://www.vizzed.com/boards/thread.php?id=84982 Part Final: https://www.vizzed.com/boards/thread.php?id=85187 Launch Octopus’ Stage: This is a water level. Before you go on and complain about it, let me say that this is a rather enjoyable one. You start off in waist-high water. Oh no we’re gonna drown! Actually, Mega Man X can’t drown. Okay, back to the level. You will face a new enemy called a “Amenhopper”. It walks on water, and runs into you. Rapidly shoot at it, since it’s rather weak. There are those Mega Tortoises again as well. After a while of going to the right, you will see a pit of spikes yet again. Remember, spikes are insta-kill. Now proceed on until the water starts getting so deep that it goes way above your head (helmet?). In water, you can jump really high. Okay, there is a little dent in the floor, AND SEAHORSE ATTACK! These are called “Sea Attackers”. They are small, and weak. You can tell they’re coming, because there will be air bubbles. A bit (a lot) more to the right will be a mini-boss. Say hello to “Anglerge”. This is one of the two mini-bosses in this stage. It can do one of two things to attack you: summon these serpent things that move in pretty erratic ways, and the other is to suck you in. Try to avoid the serpent things as best as you can. They don’t hurt that much anyways, though. Now there will be lots of “Gulpfers”. They suck you in, then SLOWLY kill you. If you get sucked in, that’s good. You’ll be able to shoot it down inside FAR before you will start taking damage. Alright, now there is another Anglerge, but this time with SPIKES! Gasp! Same rules apply, just avoid the spikes. Not long after the Anglerge, will be a machine that makes an air current going up. You can “jump” up the current. Congratulations, by following that current, you can now use a health container. Alright, now get on the THIRD air current created by the THIRD machine, and you will see a boat. Get on it. Then destroy it with Storm Tornado. It’s called a “Cruiziler”, if you were wondering. Oh, it creates Sky Claws and propeller bombs. Now you are falling with the Cruiziler, and you are in a room with spike pits. There will be a “Utuboros” trying to kill you. A well-timed shot with the Storm Tornado to the head should destroy it no problem. Just make sure you don’t land in the spikes! To the right is a Heart Tank.   Now go left, where the Cruiziler crashed, and wall jump up the walls. After a bit (a lot) to the right, will be the Utuboros, getting revenge on you. Same rules apply, only no spikes this time. After some Gulpfers, will be the boss door. That wasn’t to bad, was it? Equip the Rolling Shield, since it’s Launch Octopus’ weakness. Boss Fight: Launch Octopus: You are fighting an… octopus maverick. Okay, forget Armored Armadillo. This is one hard maverick, even with the weakness. Okay, he shoots out missiles (lots of them), teeny tiny fish, and he can pull you in by making a… underwater tornado, all which can obstruct the passageway of the shield. My only advice is to avoid the missiles, kill the fish quickly, and get a shot in at him when the coast is clear, or jump and try to get his head. Oh, and if he catches you in the tornado thing, he will suck up your health, and replenish his own. If you managed to beat the boss, you will get the Homing Torpedo! It’s a torpedo that homes in on enemies. Next is Boomer Kuwanger! Boomer Kuwanger’s Stage: This stage starts you off in a room with a ladder. Go up the ladder (duh). After some ladder climbing will be a Hoganmer. You know what to do. Fun fact, if you charge up to a pink shot, you can get the toe of the Hoganmer, allowing you to “cheat”. A bit more up will be a “Dodge Blaster” Try to shoot it from a distance, because it will get away from you if you get near. There will be a ladder you will have to dash jump to. Now to the part where there are no ladders. In the ceiling will be a hole. A “Sine Faller” will appear from the hole. It’s like a Jamminger, but it moves down swaying from left to right. A charge shot would be overkill. Also, there are invincible enemies that has a detector laser below it. It turns on and off, but if you walk in the laser when it’s active, it will shoot a laser that hurts. Yea.  Get up that ladder that you will see (eventually) and destroy that Mega Tortoise. There will be a succession of Mega Tortoises on each level of the ladder segment. It’s a SPIKE elevator! Yea, don’t touch the spikes. These aren’t insta-kill, but they hurt. In this elevator segment, there will be things that can crush you, and Jammigers. Don’t get crushed and kill (or avoid) the Jammigers as fast as possible. It’s an easy elevator segment, if you ask me.  Now you are outside. Go up a ladder, then go up another ladder. Oh no it’s a platform that’s going out of the wall, with a cannon on it! That cannon is called a “Slide Cannon”. Just charge shot it. Go up the other ladder. Now there will be a lizard on a ladder you want to go on. This is called a “Ladder Yadder”, and it stays on a ladder. Shoot it down, please. After a segment with these enemies, you will be back inside. See that Heart Tank? There are two ways to get it: Boomer Kuwanger’s weapon, or a Shotgun Ice trick. Charge up Chill Penguin’s weapon, and you will get a penguin sled. Get on the sled, and jump off when you can reach the Heat Tank.  Now there will be a segment with cannons and moving platforms. Here’s my suggestion: ignore the moving platforms as much as possible. It’s so annoying to get on them. You should reach the boss door. Equip the Homing Torpedo, and go through it. Boss Fight: Boomer Kuwanger: This is supposed to be a Japanese beetle. Anyways, the Homing Torpedo makes quick work of him. You can get away with spamming the Torpedo. Well, he can pick you up, and throw you. This is an easy maverick with the weakness.  Okay, now you have the Boomerang Cutter. This goes in a circle like a boomerang, and retrieves items as well. The last maverick is Sting Chameleon, but first item collection! Item Collection #2: Go to Spark Mandrill’s stage. When you have the choice to go down or up a ladder, go down the ladder. Go right. See that Sub Tank? Use the Boomerang Cutter to get the Sub Tank. Make sure to jump before you shoot it, though. Now use the Escape Unit. I forgot something in Flame Mammoth’s stage as well… so go there :p. Go to that room with the Heart Tank, then go up, and left. You should see the Sub Tank. Break the wall covering it by wall climbing on it. You have a Sub Tank. Use the Escape Unit. Sting Chameleon's Stage: You start off in a forest. To the right will be a Amenhopper and a new enemy resembling the Metool, only with leaves on it’s head. It’s called a “Planty” (*claps*), and it will create “Iworms”. Take care of the Planty the same way you would a Metool, and get rid of the Iworms with a semi-charged shot. Why? It’s so small that a regular shot can’t reach it! 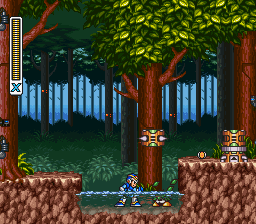 There will be Axe Maxes as well around here. Eventually, you will go inside a cave. See that pit? Jump down it. There will be those breakable blocks again, and you can break them by wall climbing on them. Dash jump to the Heart Tank. Get back to that cave area, and now wall jump up where that area begins. proceed right, and you will face a mini-boss. It’s name is “RT-55J”. Really complicated name, I know. Let’s call him “Random Dude”. You can only hurt Random Dude on the head. So Random Dude will either: jump at you (very clever, dude) or use his claw to grab you. Dash away from the claw, and dash under him. He has no weakness, so just use the buster. I like using small shots, since it’s more accurate. You now have the body armor! This means that you take half of all damage! Yay.   Okay, let’s go back to the cave and.. falling blocks! Just shoot them down. To the right will be a new enemy called the “Crag Man”. It looks like a rock at first, but then it reveals it’s true identity, a random enemy. Just destroy it with a charge shot. It will throw rocks at you, so dodge the rocks. There are lots of them here. When you go outside, you will see woodpecker, called a “Mad Pecker”. It drops “Creepers” (must not use a MineCraft reference) which are very similar to the Iworms. There will be the Plantys, as well. Eventually, you will encounter a Hoganmer. Above it is a incove with an extra life. Further more to the right will be a Ride Armor. Get in it. 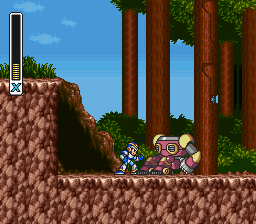 You know what to do… go on a rampage! You should reach the boss door eventually. Equip the Boomerang Cutter, and go through it. Boss Fight: Sting Chameleon: You are fighting the last maverick! Yea! You can get him in a REALLY easy pattern with his weakness. Shoot him with the Boomerang Cutter, then shoot him again when he goes to the other side of the room. He can attack with his tongue, shoot green stuff, and go invisible. Avoid it the best you can. Now you have the Chameleon Sting! It’s the green stuff that Sting Chameleon was shooting. The next maverick is… um… we beat all the mavericks! Yea! Cutscene time! Zero says that we finally found Sigma’s fortress, and that we should go in it. Very helpful, I’m sure. Let’s go to Sigma’s fortress, but not now. We need one more thing. Item Collection Final: Go to Armored Armadillo’s stage. Make sure you have every weapon from the mavericks, every Heart Tank, every Sub Tank, and every Dr. Light capsule. Make sure you have five or more lives. Now go to that area with the health container, above the boss door. Suicide. Go to that area with the health container again, 3 more times. A Dr. Light capsule should appear.  Congratulations, you can now do the Hadouken! Press down,forward then attack. You have to be at full health to do the Hadouken, though. Use the Escape Unit. Next part will be the Sigma fortress! Part 2: https://www.vizzed.com/boards/thread.php?id=84982 Part Final: https://www.vizzed.com/boards/thread.php?id=85187 Launch Octopus’ Stage: This is a water level. Before you go on and complain about it, let me say that this is a rather enjoyable one. You start off in waist-high water. Oh no we’re gonna drown! Actually, Mega Man X can’t drown. Okay, back to the level. You will face a new enemy called a “Amenhopper”. It walks on water, and runs into you. Rapidly shoot at it, since it’s rather weak. There are those Mega Tortoises again as well. After a while of going to the right, you will see a pit of spikes yet again. Remember, spikes are insta-kill. Now proceed on until the water starts getting so deep that it goes way above your head (helmet?). In water, you can jump really high. Okay, there is a little dent in the floor, AND SEAHORSE ATTACK! These are called “Sea Attackers”. They are small, and weak. You can tell they’re coming, because there will be air bubbles. A bit (a lot) more to the right will be a mini-boss. Say hello to “Anglerge”. This is one of the two mini-bosses in this stage. It can do one of two things to attack you: summon these serpent things that move in pretty erratic ways, and the other is to suck you in. Try to avoid the serpent things as best as you can. They don’t hurt that much anyways, though. Now there will be lots of “Gulpfers”. They suck you in, then SLOWLY kill you. If you get sucked in, that’s good. You’ll be able to shoot it down inside FAR before you will start taking damage. Alright, now there is another Anglerge, but this time with SPIKES! Gasp! Same rules apply, just avoid the spikes. Not long after the Anglerge, will be a machine that makes an air current going up. You can “jump” up the current. Congratulations, by following that current, you can now use a health container. Alright, now get on the THIRD air current created by the THIRD machine, and you will see a boat. Get on it. Then destroy it with Storm Tornado. It’s called a “Cruiziler”, if you were wondering. Oh, it creates Sky Claws and propeller bombs. Now you are falling with the Cruiziler, and you are in a room with spike pits. There will be a “Utuboros” trying to kill you. A well-timed shot with the Storm Tornado to the head should destroy it no problem. Just make sure you don’t land in the spikes! To the right is a Heart Tank. Now go left, where the Cruiziler crashed, and wall jump up the walls. After a bit (a lot) to the right, will be the Utuboros, getting revenge on you. Same rules apply, only no spikes this time. After some Gulpfers, will be the boss door. That wasn’t to bad, was it? Equip the Rolling Shield, since it’s Launch Octopus’ weakness. Boss Fight: Launch Octopus: You are fighting an… octopus maverick. Okay, forget Armored Armadillo. This is one hard maverick, even with the weakness. Okay, he shoots out missiles (lots of them), teeny tiny fish, and he can pull you in by making a… underwater tornado, all which can obstruct the passageway of the shield. My only advice is to avoid the missiles, kill the fish quickly, and get a shot in at him when the coast is clear, or jump and try to get his head. Oh, and if he catches you in the tornado thing, he will suck up your health, and replenish his own. If you managed to beat the boss, you will get the Homing Torpedo! It’s a torpedo that homes in on enemies. Next is Boomer Kuwanger! Boomer Kuwanger’s Stage: This stage starts you off in a room with a ladder. Go up the ladder (duh). After some ladder climbing will be a Hoganmer. You know what to do. Fun fact, if you charge up to a pink shot, you can get the toe of the Hoganmer, allowing you to “cheat”. A bit more up will be a “Dodge Blaster” Try to shoot it from a distance, because it will get away from you if you get near. There will be a ladder you will have to dash jump to. Now to the part where there are no ladders. In the ceiling will be a hole. A “Sine Faller” will appear from the hole. It’s like a Jamminger, but it moves down swaying from left to right. A charge shot would be overkill. Also, there are invincible enemies that has a detector laser below it. It turns on and off, but if you walk in the laser when it’s active, it will shoot a laser that hurts. Yea. Get up that ladder that you will see (eventually) and destroy that Mega Tortoise. There will be a succession of Mega Tortoises on each level of the ladder segment. It’s a SPIKE elevator! Yea, don’t touch the spikes. These aren’t insta-kill, but they hurt. In this elevator segment, there will be things that can crush you, and Jammigers. Don’t get crushed and kill (or avoid) the Jammigers as fast as possible. It’s an easy elevator segment, if you ask me. Now you are outside. Go up a ladder, then go up another ladder. Oh no it’s a platform that’s going out of the wall, with a cannon on it! That cannon is called a “Slide Cannon”. Just charge shot it. Go up the other ladder. Now there will be a lizard on a ladder you want to go on. This is called a “Ladder Yadder”, and it stays on a ladder. Shoot it down, please. After a segment with these enemies, you will be back inside. See that Heart Tank? There are two ways to get it: Boomer Kuwanger’s weapon, or a Shotgun Ice trick. Charge up Chill Penguin’s weapon, and you will get a penguin sled. Get on the sled, and jump off when you can reach the Heat Tank. Now there will be a segment with cannons and moving platforms. Here’s my suggestion: ignore the moving platforms as much as possible. It’s so annoying to get on them. You should reach the boss door. Equip the Homing Torpedo, and go through it. Boss Fight: Boomer Kuwanger: This is supposed to be a Japanese beetle. Anyways, the Homing Torpedo makes quick work of him. You can get away with spamming the Torpedo. Well, he can pick you up, and throw you. This is an easy maverick with the weakness. Okay, now you have the Boomerang Cutter. This goes in a circle like a boomerang, and retrieves items as well. The last maverick is Sting Chameleon, but first item collection! Item Collection #2: Go to Spark Mandrill’s stage. When you have the choice to go down or up a ladder, go down the ladder. Go right. See that Sub Tank? Use the Boomerang Cutter to get the Sub Tank. Make sure to jump before you shoot it, though. Now use the Escape Unit. I forgot something in Flame Mammoth’s stage as well… so go there :p. Go to that room with the Heart Tank, then go up, and left. You should see the Sub Tank. Break the wall covering it by wall climbing on it. You have a Sub Tank. Use the Escape Unit. Sting Chameleon's Stage: You start off in a forest. To the right will be a Amenhopper and a new enemy resembling the Metool, only with leaves on it’s head. It’s called a “Planty” (*claps*), and it will create “Iworms”. Take care of the Planty the same way you would a Metool, and get rid of the Iworms with a semi-charged shot. Why? It’s so small that a regular shot can’t reach it! There will be Axe Maxes as well around here. Eventually, you will go inside a cave. See that pit? Jump down it. There will be those breakable blocks again, and you can break them by wall climbing on them. Dash jump to the Heart Tank. Get back to that cave area, and now wall jump up where that area begins. proceed right, and you will face a mini-boss. It’s name is “RT-55J”. Really complicated name, I know. Let’s call him “Random Dude”. You can only hurt Random Dude on the head. So Random Dude will either: jump at you (very clever, dude) or use his claw to grab you. Dash away from the claw, and dash under him. He has no weakness, so just use the buster. I like using small shots, since it’s more accurate. You now have the body armor! This means that you take half of all damage! Yay. Okay, let’s go back to the cave and.. falling blocks! Just shoot them down. To the right will be a new enemy called the “Crag Man”. It looks like a rock at first, but then it reveals it’s true identity, a random enemy. Just destroy it with a charge shot. It will throw rocks at you, so dodge the rocks. There are lots of them here. When you go outside, you will see woodpecker, called a “Mad Pecker”. It drops “Creepers” (must not use a MineCraft reference) which are very similar to the Iworms. There will be the Plantys, as well. Eventually, you will encounter a Hoganmer. Above it is a incove with an extra life. Further more to the right will be a Ride Armor. Get in it. You know what to do… go on a rampage! You should reach the boss door eventually. Equip the Boomerang Cutter, and go through it. Boss Fight: Sting Chameleon: You are fighting the last maverick! Yea! You can get him in a REALLY easy pattern with his weakness. Shoot him with the Boomerang Cutter, then shoot him again when he goes to the other side of the room. He can attack with his tongue, shoot green stuff, and go invisible. Avoid it the best you can. Now you have the Chameleon Sting! It’s the green stuff that Sting Chameleon was shooting. The next maverick is… um… we beat all the mavericks! Yea! Cutscene time! Zero says that we finally found Sigma’s fortress, and that we should go in it. Very helpful, I’m sure. Let’s go to Sigma’s fortress, but not now. We need one more thing. Item Collection Final: Go to Armored Armadillo’s stage. Make sure you have every weapon from the mavericks, every Heart Tank, every Sub Tank, and every Dr. Light capsule. Make sure you have five or more lives. Now go to that area with the health container, above the boss door. Suicide. Go to that area with the health container again, 3 more times. A Dr. Light capsule should appear. Congratulations, you can now do the Hadouken! Press down,forward then attack. You have to be at full health to do the Hadouken, though. Use the Escape Unit. Next part will be the Sigma fortress! |
Vizzed Elite
Affected by 'Laziness Syndrome'
Registered: 11-30-14
Location: depression land
Last Post: 2033 days
Last Active: 903 days
| Zt is dead |
Affected by 'Laziness Syndrome'
Registered: 11-30-14
Location: depression land
Last Post: 2033 days
Last Active: 903 days
(edited by ZeroTails on 04-12-15 10:20 AM) Post Rating: 1 Liked By: Laian,
02-28-15 11:20 AM
ZeroTails is Offline
| ID: 1142280 | 23 Words
ZeroTails is Offline
| ID: 1142280 | 23 Words
ZeroTails
Cool Davideo7
Cool Davideo7
Level: 92
POSTS: 248/2465
POST EXP: 215125
LVL EXP: 7664425
CP: 18968.7
VIZ: 401000
POSTS: 248/2465
POST EXP: 215125
LVL EXP: 7664425
CP: 18968.7
VIZ: 401000
Likes: 0 Dislikes: 0
Might as well summon some people. Eniitan : RMJEtheReploid : sonicthehedgehog57 : Jordanv78 : Sorry for not editing. megamanmaniac : Sorry for not summoning for the second part. Eniitan : RMJEtheReploid : sonicthehedgehog57 : Jordanv78 : Sorry for not editing. megamanmaniac : Sorry for not summoning for the second part. |
Vizzed Elite
Affected by 'Laziness Syndrome'
Registered: 11-30-14
Location: depression land
Last Post: 2033 days
Last Active: 903 days
| Zt is dead |
Affected by 'Laziness Syndrome'
Registered: 11-30-14
Location: depression land
Last Post: 2033 days
Last Active: 903 days
02-28-15 11:31 AM
 Eniitan is Offline
| ID: 1142286 | 11 Words
Eniitan is Offline
| ID: 1142286 | 11 Words
 Eniitan is Offline
| ID: 1142286 | 11 Words
Eniitan
Level: 177

POSTS: 2688/10522
POST EXP: 959649
LVL EXP: 74450502
CP: 55415.9
VIZ: 2632526

POSTS: 2688/10522
POST EXP: 959649
LVL EXP: 74450502
CP: 55415.9
VIZ: 2632526
Likes: 1 Dislikes: 0
Your improving a lot. Keep up the good work zerotails. ^^ |
Vizzed Elite
Affected by 'Laziness Syndrome'
Registered: 08-16-12
Last Post: 1060 days
Last Active: 163 days
  Number 1 Sailor Moon, Final Fantasy And Freedom Planet Fan On Vizzed! Number 1 Sailor Moon, Final Fantasy And Freedom Planet Fan On Vizzed! |
Affected by 'Laziness Syndrome'
Registered: 08-16-12
Last Post: 1060 days
Last Active: 163 days
Post Rating: 1 Liked By: ZeroTails,
02-28-15 11:34 AM
sonicthehedgehog57 is Offline
| ID: 1142291 | 58 Words
| ID: 1142291 | 58 Words
Level: 70

POSTS: 817/1185
POST EXP: 342082
LVL EXP: 2992297
CP: 43682.1
VIZ: 55687

POSTS: 817/1185
POST EXP: 342082
LVL EXP: 2992297
CP: 43682.1
VIZ: 55687
Likes: 1 Dislikes: 0
ZeroTails : Agree so much with Eniitan ^-^ specially for your age you're continuing to improve so much ^.^ still love your descr Great job again Zero ^^ hope to see the next one after this < 3 Great job again Zero ^^ hope to see the next one after this < 3 |
Vizzed Elite
Affected by 'Laziness Syndrome'
Registered: 12-02-10
Location: Springfield, MO
Last Post: 1027 days
Last Active: 122 days
Affected by 'Laziness Syndrome'
Registered: 12-02-10
Location: Springfield, MO
Last Post: 1027 days
Last Active: 122 days
Post Rating: 1 Liked By: ZeroTails,
