

 User Notice
 Forum Links
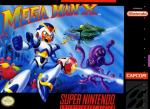
Play Mega Man X Online
Thread Information
Thread Actions


Order
Mega Man X Walkthrough Part 1
Game's Ratings
Overall
Graphics
Sound
Addictiveness
Depth
Story
Difficulty
Average User Score
9.2
9.4
9.2
8.9
8.2
7.8
7.1
02-01-15 08:52 PM
 ZeroTails is Offline
| ID: 1132898 | 2929 Words
ZeroTails is Offline
| ID: 1132898 | 2929 Words
 ZeroTails is Offline
| ID: 1132898 | 2929 Words
ZeroTails
Cool Davideo7
Cool Davideo7
Level: 90


POSTS: 146/2465
POST EXP: 215125
LVL EXP: 7172202
CP: 18922.4
VIZ: 400242

POSTS: 146/2465
POST EXP: 215125
LVL EXP: 7172202
CP: 18922.4
VIZ: 400242
Likes: 4 Dislikes: 0
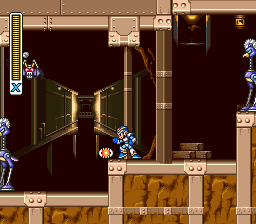
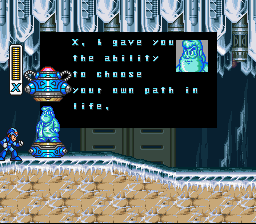
Part 2: https://www.vizzed.com/boards/thread.php?id=84982 Part 3: https://www.vizzed.com/boards/thread.php?id=85146 Part Final: https://www.vizzed.com/boards/thread.php?id=85187 Introduction This is a guide that I will split into multiple parts. The separate parts will have a link to them when I finish them, of course, so be on the watch out for edits. This part will be the introductory segment, and the first two levels, the Intro Stage and Chill Penguin's stage. This is my first walkthrough. So let's go! Characters/Story (at the beginning of the game) Mega Man X is some advanced robot created by Dr.Light when he was almost dead. X (that's what most people call Mega Man X) was found a hundred years later by Dr.Cain. Dr.Cain replicated X's programming to create a new type of robot, called "Reploids". Now since reploids have the ability to think for themselves, eventually some of them started attacking humans. Some of the reploids didn't like that, of course, so they banded together to create the "Maverick Hunters". (maverick is the terminology for what they call reploids who have gone evil. It's normally caused by a virus.) X, having a sense of justice, eventually joined the maverick hunters as a B-rank maverick hunter. He meets Zero, an A-rank hunter, and they became friends. The maverick hunters found out that the mavericks had a leader, called Sigma. So they hunted down Sigma, in hope of having more peace. Controls (for now) You start the game off as Mega Man X, and you will stay as X for the whole entire game. So let's go over his controls, why not. The control pad moves him left and right, of course (You can't duck in this game). You jump with the B button, and you shoot a shot with the Y button. You can charge a bit by holding down the Y button, and then shoot a green shot. Now if you charge up all the way, you will shoot out a powerful blue shot. That's about it for the beginning of the game. Items There are several items that you should be aware of. Health Container: This is self explanatory. Refills your health. Weapon Container: This will fill up your weapon energy. Heart Tank: This will increase your overall health bar. There are 8 in all. Sub Tank:This fills up your health bar when you fill it up. There are 4 in all. Extra Life: This is an extra life Dr.Light Capsule: This will give you extra abilities. There are 4 in all. The Actual Walkthrough Intro Stage(Central Highway): Well, you start off on...a highway. When you go right, a spiky ball thing tries to attack you! It's called a "Spikey" (very original I know). A charge shot will take it out no problem though. Not long after the Spikey is a big robot thing. It's called a "Gun Volt". One of its attacks is to shot out electric energy things that you can easily jump over. It also shots missiles that you can also jump over. A few charged shots will destroy the Gun Volt. A few steps more, and you encounter a PIT! Gasp! It's not hard at all to jump over it. After the pit is another new enemy called a "Crusher". All it does is destroy the ground. There are about four of them here. I find that they drop health pretty often. A charge shot should take care of it. After another pointless pit, you will fight some more Crushers and a couple of Gun Volts. After that you will fight a miniboss that appears a few times, "Bee Blader". It likes to drop "Ball De Voux" while it shots you with teeny tiny gun bullets and missiles. Ball De Voux is a enemy that walks. You can only hurt its head, not the legs. Not very hard to defeat. After you beat the Bee Blader, it will crash land, and you will fall into a pit. Don't worry, X can wall jump! Press the jump button when you are close to or on the wall to kick the wall and go higher up that same wall. In the next pit, there are health power ups to fill your health. I recommend sliding down the wall since there is a bottomless pit near the health power ups. You will encounter a couple of Ball De Vouxes and another Bee Blader. This Bee Blader will also crash land so you have too wall jump again. I'd recommend getting used to wall jumping since it's used a lot in this game. After a bigger pit, you will encounter another Spikey. Around this point you will notice that the floor starts falling when you walk on it. It really doesn't do much. You also encounter a "Bomb Been". They throw bombs onto the ground from the sky. A charge shot should also destroy it no problem. You will encounter the falling floor and the Bomb Beens for a bit. After that, you will encounter yet another new enemy, called the "Jamminger". They can overwhelm you if too many are on a screen at one time, so I'd recommend inching along after that small pit when you meet a Jamminger until you reach another pit. Now you will face a car enemy thing, called the "Road Attacker". They attack you on a road by trying to run into you. Charge a shot, shoot them, and jump over it when only a car part is left. After the part with the Road Attackers, you will be walking for a while. Then, suddenly, an aircraft! 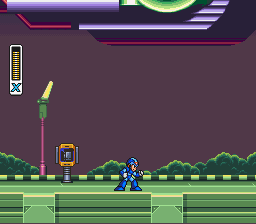 This aircraft will drop Road Attackers and you have to kill them quickly or the aircraft will send more out. I recommend charging then shooting rapidly until the enemy is COMPLETELY gone. Now the aircraft will slowly lower a platform with Vile on it. Vile is a maverick with a ride armor. Here, you should do nothing. Yes, you read right, do nothing. You can't beat Vile right now, because this is an unbeatable boss fight. When Vile grabs you, he will talk about how weak you are and blah blah blah, when suddenly you hear a charge noise and a charge shot blows off Vile's ride armor's arm. That is Zero, ladies and gentlemen. He is a guy, to clear up any gender confusion you might have since he has a ponytail. So Vile escapes and Zero talks about how you haven't reached full potential, and that one day, you might become as strong as he is. Yea, in this game, Zero's a bit of a jerk. That pretty much wraps up the intro stage guys. Now you have the choice between 8 mavericks to fight. You can choose anyone, but like everyone else, I recommend Chill Penguin. Chill Penguin's Stage: When you start the level, you will face a bunny. It's called a Ray Bit, and it jumps around and sometimes shots a laser out of its ears. Shot it. Next, you will see some robot chopping "wood". That's called an "Axe Max". He will chop wood, and the wood will fly forwards for some reason. Jump over the wood, get behind him, and rapidly shot. The Bomb Beens also come back. After some time of fighting, you come across a cave. In the cave are "Batton Bones". They are bats that will die in one shot. There are quiet a lot of them here, so aim your shots to beat them all. After some time, the Spikeys comes back for a visit. They like to come from a incline platform thing that you have to wall jump up to get across, so beware. Get up these incline platform things, destroying the Spikeys, then you will encounter a long, vertical hallway. Wall jump up and you will see Dr.Light!  Or to be more accurate, a capsule with a recording of Dr.Light. He talks about you, and peace, and blah blah blah...you get the point. When he stops talking, step into the capsule. You will get the ability to dash. Press the A button or double tap the left or right area of the control pad to dash. You can also press the jump button, and the dash button to dash jump. Yes, that is why everyone fights Chill Penguin first. In the later games, you can do this immediately, but in this game you have to find a capsule. Now let's progress through the level more, shall we? After the capsule are Jammingers and pits. A bit more to the right is a new type of enemy, called a "Flammingle". It will throw saw blade things at you. Take it out with a charge shot, and some more little shots. After you get outside, you will see a ride armor. Get in it. Any hits you take will not hurt you. The controls are the same, except that the Y button makes you punch, as opposed to shooting. Well, you will encounter bug robots called a "Tombot", and reploids in ride armors called "Armor Soldiers". The ride armor should be more than enough to destroy them. After a while, you have to get out of the ride armor to proceed. Press B and up to get out. There is a ledge right above you, but there will only be an igloo that can only be destroyed by either the ride armor, or Flame Mammoth's weapon. We'll go back later. Now you are going right, jumping over pits when suddenly, a giant snowball! Jump over it. The robot throwing the snowballs are called "Snow Shooters". They throw snowballs. Jump over their snowballs, and shot a charged shot at them then shot a bit more and they should be dead. After the Snow Shooters, you will see a door. Go through it. You will see another door. After the door is the boss, Chill Penguin. Don't worry, he's fairly easy to beat. Boss Fight: Chill Penguin: Well, with bosses I'm going to explain their attacks and how to avoid them. One of Chill Penguin's attack is to breath chunks of ice, I guess. Jumping over them is quite easy, but I recommend wall jumping because he likes to have some of the ice chunks slide on the ground (which slows down the ice chunks) and some of them fly through the sky, which can mess up your timing. He might try to slide into you, and when that happens just wall jump. He also likes to create ice penguins. I like to shot the ice penguins to break them, then shot Chill Penguin himself. He also jumps, and I find that if you are on the highest part of the wall, he misses you. Then there's the ice wind thing. It can go left or right, and you can't go against it unless you dash, so dash! I find that you can get away with wall jumping to avoid all of his attacks. Also, charging while wall jumping helps the fight go faster than if you use uncharged shots. Now you have Chill Penguin's weapon, Shotgun Ice! Shotgun Ice can be used as a normal projectile, but if it hits a wall, it will spit into four different snowflakes and rebound off that wall. Spark Mandrill has a weakness to Shotgun Ice, but for the sake of not backtracking for items as much, let's go on to Storm Eagle. Storm Eagle's Stage: When you first start off the stage, you will first encounter a robot that likes to grab you, called a "Sky Claw". It's fairly weak, so a regular shot or two should have no problem taking it out. Now, there are these contraptions with platforms on them that go over a bottomless pit. Get on one of the platforms, then be on the lookout for Sky Claws. At the top of the first one, jump to the other platform that is on the second contraption. I think you need to wall jump onto the platform. At the top of the second platform, dash jump left. You should land on a small platform with this heart-like thing on it. It's called a "Heart Tank" and it will increase your max health by two dashes or whatever those little lines in your health bar is called. (Note: The following instructions in this paragraph are just for level mapping purposes and is in no way required to get anything that’s worth getting, unless you’re almost dead.) Now get on those contraptions again, and when you see a platform to the right, (The lowest one) jump to it. A "Hoganmer" will be there. This enemy has a shield so you can't damage it until it throws a spiked ball at you, leaving it open to attack. Or, you can be cheap and just jump over it and destroy it from behind. A charge shot and then some little shots should kill it just fine. Behind it is a wall that's destructible. Flame Mammoth's weapon makes destroying these walls a lot quicker, but if you shoot lots and lots of shots at the wall, you should destroy it. Behind it is...a health container. This was just for demonstration, so let's go on. Now there's another ledge right above the one you were on with another Hoganmer. There's the destructible wall again, and another health container behind that wall. Above that ledge is another ledge with a...you get the point. Now get to the very top of this area and proceed. You shall see a "Lift Cannon" on a moving platform. Wait for the platform to lower, then shot it to destroy it. Now, get on the moving platform. When the platform goes to the very top, you should see glass. Go up to that glass by wall jumping, then shot it. The glass should break. Now, get inside the area that the glass was protecting. You should see a Gun Volt. Just avoid its attacks then kill it. A bit more to the right and...Sub Tank!!! There is another way to get that Sub Tank, and that is to ignore the moving platform, and going right. There are two Gun Volts to deal with. Get on the first platform you can get on, then jump to the platforms to the left. You can break the glass this way, and grab the sub tank as well.  After the Sub Tank are these platforms that move up and down. On those platforms are "Flamers". They shot fire that pushes you back, and the platforms you are on are a bit small, so stand on the edge farthest away to the Flamers when you deal with them. Near the end of the Flamer section, you will see that destructible wall again. Destroy it and you will get an extra life. Now you will walk right then see this huge tower thing. Wall jump up, then fall down between those platforms because then you will get another Dr.Light capsule. Dash jump to that ledge with that destructible wall then break the wall. Walk into that little passage you made then you should see Dr.Light. This is the helmet upgrade. You can now break specific blocks with your head! Sorta like Mario! There are some of those blocks near the capsule just in case you want to practice breaking blocks. It's limited, though.  Now get back up the tower thing, and jump to that other area that we ignored earlier. You will see the returning Sky Claws. Now the first opportunity you get to go higher, take it and go left. You should see another extra life. Also, up here are "Metall C-15s" from the classic series but we shall call them Metools because that is just so much easier to say. Besides, that's what they were called in the classic series. Proceed on right where you will see the returning Ball De Vouxes and those platforms over a bottomless pit. Jump on them, but get off quick since they will fall. You will find yourself on a ship that... vibrates! The whole screen shakes but it's not that bad. You also see cannons that you can kill with two charged shots. They shot missiles though, so jump over them. Get through to ship, and you should be at the boss. Boss Fight: Storm Eagle: This fight is a little unique because of the area it's being fought in. You are on a plane thing with no walls on either side meaning that Storm Eagle can push you off the platform to kill you. But, this is also an easy fight. He likes to create a wind current, pushing you away from him. The only way to go against it is to dash. He also shoots a stronger air current that can push you into the pit. I recommend you jump constantly so that you don't get pushed away as much. He tends to dive at you and the best way to avoid that is to keep on walking. If you time it right, you can get in several shots while he dives. Now his last attack: the birds. He drops an egg that contains four birds that homes in on you. You can charge shot the birds to get some out of the way, then jump over the other ones. Now you have Storm Eagle's weapon, Storm Tornado! This is the best weapon in the game (excluding the Hadouken, of course). Basically, you shot out a tornado that is very damaging to regular enemies and some bosses. Now, to the next maverick, Flame Mammoth. In part 2 (it's at the top of the walkthrough). Part 3: https://www.vizzed.com/boards/thread.php?id=85146 Part Final: https://www.vizzed.com/boards/thread.php?id=85187 Introduction This is a guide that I will split into multiple parts. The separate parts will have a link to them when I finish them, of course, so be on the watch out for edits. This part will be the introductory segment, and the first two levels, the Intro Stage and Chill Penguin's stage. This is my first walkthrough. So let's go! Characters/Story (at the beginning of the game) Mega Man X is some advanced robot created by Dr.Light when he was almost dead. X (that's what most people call Mega Man X) was found a hundred years later by Dr.Cain. Dr.Cain replicated X's programming to create a new type of robot, called "Reploids". Now since reploids have the ability to think for themselves, eventually some of them started attacking humans. Some of the reploids didn't like that, of course, so they banded together to create the "Maverick Hunters". (maverick is the terminology for what they call reploids who have gone evil. It's normally caused by a virus.) X, having a sense of justice, eventually joined the maverick hunters as a B-rank maverick hunter. He meets Zero, an A-rank hunter, and they became friends. The maverick hunters found out that the mavericks had a leader, called Sigma. So they hunted down Sigma, in hope of having more peace. Controls (for now) You start the game off as Mega Man X, and you will stay as X for the whole entire game. So let's go over his controls, why not. The control pad moves him left and right, of course (You can't duck in this game). You jump with the B button, and you shoot a shot with the Y button. You can charge a bit by holding down the Y button, and then shoot a green shot. Now if you charge up all the way, you will shoot out a powerful blue shot. That's about it for the beginning of the game. Items There are several items that you should be aware of. Health Container: This is self explanatory. Refills your health. Weapon Container: This will fill up your weapon energy. Heart Tank: This will increase your overall health bar. There are 8 in all. Sub Tank:This fills up your health bar when you fill it up. There are 4 in all. Extra Life: This is an extra life Dr.Light Capsule: This will give you extra abilities. There are 4 in all. The Actual Walkthrough Intro Stage(Central Highway): Well, you start off on...a highway. When you go right, a spiky ball thing tries to attack you! It's called a "Spikey" (very original I know). A charge shot will take it out no problem though. Not long after the Spikey is a big robot thing. It's called a "Gun Volt". One of its attacks is to shot out electric energy things that you can easily jump over. It also shots missiles that you can also jump over. A few charged shots will destroy the Gun Volt. A few steps more, and you encounter a PIT! Gasp! It's not hard at all to jump over it. After the pit is another new enemy called a "Crusher". All it does is destroy the ground. There are about four of them here. I find that they drop health pretty often. A charge shot should take care of it. After another pointless pit, you will fight some more Crushers and a couple of Gun Volts. After that you will fight a miniboss that appears a few times, "Bee Blader". It likes to drop "Ball De Voux" while it shots you with teeny tiny gun bullets and missiles. Ball De Voux is a enemy that walks. You can only hurt its head, not the legs. Not very hard to defeat. After you beat the Bee Blader, it will crash land, and you will fall into a pit. Don't worry, X can wall jump! Press the jump button when you are close to or on the wall to kick the wall and go higher up that same wall. In the next pit, there are health power ups to fill your health. I recommend sliding down the wall since there is a bottomless pit near the health power ups. You will encounter a couple of Ball De Vouxes and another Bee Blader. This Bee Blader will also crash land so you have too wall jump again. I'd recommend getting used to wall jumping since it's used a lot in this game. After a bigger pit, you will encounter another Spikey. Around this point you will notice that the floor starts falling when you walk on it. It really doesn't do much. You also encounter a "Bomb Been". They throw bombs onto the ground from the sky. A charge shot should also destroy it no problem. You will encounter the falling floor and the Bomb Beens for a bit. After that, you will encounter yet another new enemy, called the "Jamminger". They can overwhelm you if too many are on a screen at one time, so I'd recommend inching along after that small pit when you meet a Jamminger until you reach another pit. Now you will face a car enemy thing, called the "Road Attacker". They attack you on a road by trying to run into you. Charge a shot, shoot them, and jump over it when only a car part is left. After the part with the Road Attackers, you will be walking for a while. Then, suddenly, an aircraft! This aircraft will drop Road Attackers and you have to kill them quickly or the aircraft will send more out. I recommend charging then shooting rapidly until the enemy is COMPLETELY gone. Now the aircraft will slowly lower a platform with Vile on it. Vile is a maverick with a ride armor. Here, you should do nothing. Yes, you read right, do nothing. You can't beat Vile right now, because this is an unbeatable boss fight. When Vile grabs you, he will talk about how weak you are and blah blah blah, when suddenly you hear a charge noise and a charge shot blows off Vile's ride armor's arm. That is Zero, ladies and gentlemen. He is a guy, to clear up any gender confusion you might have since he has a ponytail. So Vile escapes and Zero talks about how you haven't reached full potential, and that one day, you might become as strong as he is. Yea, in this game, Zero's a bit of a jerk. That pretty much wraps up the intro stage guys. Now you have the choice between 8 mavericks to fight. You can choose anyone, but like everyone else, I recommend Chill Penguin. Chill Penguin's Stage: When you start the level, you will face a bunny. It's called a Ray Bit, and it jumps around and sometimes shots a laser out of its ears. Shot it. Next, you will see some robot chopping "wood". That's called an "Axe Max". He will chop wood, and the wood will fly forwards for some reason. Jump over the wood, get behind him, and rapidly shot. The Bomb Beens also come back. After some time of fighting, you come across a cave. In the cave are "Batton Bones". They are bats that will die in one shot. There are quiet a lot of them here, so aim your shots to beat them all. After some time, the Spikeys comes back for a visit. They like to come from a incline platform thing that you have to wall jump up to get across, so beware. Get up these incline platform things, destroying the Spikeys, then you will encounter a long, vertical hallway. Wall jump up and you will see Dr.Light! Or to be more accurate, a capsule with a recording of Dr.Light. He talks about you, and peace, and blah blah blah...you get the point. When he stops talking, step into the capsule. You will get the ability to dash. Press the A button or double tap the left or right area of the control pad to dash. You can also press the jump button, and the dash button to dash jump. Yes, that is why everyone fights Chill Penguin first. In the later games, you can do this immediately, but in this game you have to find a capsule. Now let's progress through the level more, shall we? After the capsule are Jammingers and pits. A bit more to the right is a new type of enemy, called a "Flammingle". It will throw saw blade things at you. Take it out with a charge shot, and some more little shots. After you get outside, you will see a ride armor. Get in it. Any hits you take will not hurt you. The controls are the same, except that the Y button makes you punch, as opposed to shooting. Well, you will encounter bug robots called a "Tombot", and reploids in ride armors called "Armor Soldiers". The ride armor should be more than enough to destroy them. After a while, you have to get out of the ride armor to proceed. Press B and up to get out. There is a ledge right above you, but there will only be an igloo that can only be destroyed by either the ride armor, or Flame Mammoth's weapon. We'll go back later. Now you are going right, jumping over pits when suddenly, a giant snowball! Jump over it. The robot throwing the snowballs are called "Snow Shooters". They throw snowballs. Jump over their snowballs, and shot a charged shot at them then shot a bit more and they should be dead. After the Snow Shooters, you will see a door. Go through it. You will see another door. After the door is the boss, Chill Penguin. Don't worry, he's fairly easy to beat. Boss Fight: Chill Penguin: Well, with bosses I'm going to explain their attacks and how to avoid them. One of Chill Penguin's attack is to breath chunks of ice, I guess. Jumping over them is quite easy, but I recommend wall jumping because he likes to have some of the ice chunks slide on the ground (which slows down the ice chunks) and some of them fly through the sky, which can mess up your timing. He might try to slide into you, and when that happens just wall jump. He also likes to create ice penguins. I like to shot the ice penguins to break them, then shot Chill Penguin himself. He also jumps, and I find that if you are on the highest part of the wall, he misses you. Then there's the ice wind thing. It can go left or right, and you can't go against it unless you dash, so dash! I find that you can get away with wall jumping to avoid all of his attacks. Also, charging while wall jumping helps the fight go faster than if you use uncharged shots. Now you have Chill Penguin's weapon, Shotgun Ice! Shotgun Ice can be used as a normal projectile, but if it hits a wall, it will spit into four different snowflakes and rebound off that wall. Spark Mandrill has a weakness to Shotgun Ice, but for the sake of not backtracking for items as much, let's go on to Storm Eagle. Storm Eagle's Stage: When you first start off the stage, you will first encounter a robot that likes to grab you, called a "Sky Claw". It's fairly weak, so a regular shot or two should have no problem taking it out. Now, there are these contraptions with platforms on them that go over a bottomless pit. Get on one of the platforms, then be on the lookout for Sky Claws. At the top of the first one, jump to the other platform that is on the second contraption. I think you need to wall jump onto the platform. At the top of the second platform, dash jump left. You should land on a small platform with this heart-like thing on it. It's called a "Heart Tank" and it will increase your max health by two dashes or whatever those little lines in your health bar is called. (Note: The following instructions in this paragraph are just for level mapping purposes and is in no way required to get anything that’s worth getting, unless you’re almost dead.) Now get on those contraptions again, and when you see a platform to the right, (The lowest one) jump to it. A "Hoganmer" will be there. This enemy has a shield so you can't damage it until it throws a spiked ball at you, leaving it open to attack. Or, you can be cheap and just jump over it and destroy it from behind. A charge shot and then some little shots should kill it just fine. Behind it is a wall that's destructible. Flame Mammoth's weapon makes destroying these walls a lot quicker, but if you shoot lots and lots of shots at the wall, you should destroy it. Behind it is...a health container. This was just for demonstration, so let's go on. Now there's another ledge right above the one you were on with another Hoganmer. There's the destructible wall again, and another health container behind that wall. Above that ledge is another ledge with a...you get the point. Now get to the very top of this area and proceed. You shall see a "Lift Cannon" on a moving platform. Wait for the platform to lower, then shot it to destroy it. Now, get on the moving platform. When the platform goes to the very top, you should see glass. Go up to that glass by wall jumping, then shot it. The glass should break. Now, get inside the area that the glass was protecting. You should see a Gun Volt. Just avoid its attacks then kill it. A bit more to the right and...Sub Tank!!! There is another way to get that Sub Tank, and that is to ignore the moving platform, and going right. There are two Gun Volts to deal with. Get on the first platform you can get on, then jump to the platforms to the left. You can break the glass this way, and grab the sub tank as well. After the Sub Tank are these platforms that move up and down. On those platforms are "Flamers". They shot fire that pushes you back, and the platforms you are on are a bit small, so stand on the edge farthest away to the Flamers when you deal with them. Near the end of the Flamer section, you will see that destructible wall again. Destroy it and you will get an extra life. Now you will walk right then see this huge tower thing. Wall jump up, then fall down between those platforms because then you will get another Dr.Light capsule. Dash jump to that ledge with that destructible wall then break the wall. Walk into that little passage you made then you should see Dr.Light. This is the helmet upgrade. You can now break specific blocks with your head! Sorta like Mario! There are some of those blocks near the capsule just in case you want to practice breaking blocks. It's limited, though. Now get back up the tower thing, and jump to that other area that we ignored earlier. You will see the returning Sky Claws. Now the first opportunity you get to go higher, take it and go left. You should see another extra life. Also, up here are "Metall C-15s" from the classic series but we shall call them Metools because that is just so much easier to say. Besides, that's what they were called in the classic series. Proceed on right where you will see the returning Ball De Vouxes and those platforms over a bottomless pit. Jump on them, but get off quick since they will fall. You will find yourself on a ship that... vibrates! The whole screen shakes but it's not that bad. You also see cannons that you can kill with two charged shots. They shot missiles though, so jump over them. Get through to ship, and you should be at the boss. Boss Fight: Storm Eagle: This fight is a little unique because of the area it's being fought in. You are on a plane thing with no walls on either side meaning that Storm Eagle can push you off the platform to kill you. But, this is also an easy fight. He likes to create a wind current, pushing you away from him. The only way to go against it is to dash. He also shoots a stronger air current that can push you into the pit. I recommend you jump constantly so that you don't get pushed away as much. He tends to dive at you and the best way to avoid that is to keep on walking. If you time it right, you can get in several shots while he dives. Now his last attack: the birds. He drops an egg that contains four birds that homes in on you. You can charge shot the birds to get some out of the way, then jump over the other ones. Now you have Storm Eagle's weapon, Storm Tornado! This is the best weapon in the game (excluding the Hadouken, of course). Basically, you shot out a tornado that is very damaging to regular enemies and some bosses. Now, to the next maverick, Flame Mammoth. In part 2 (it's at the top of the walkthrough). |
Vizzed Elite
Affected by 'Laziness Syndrome'
Registered: 11-30-14
Location: depression land
Last Post: 1546 days
Last Active: 415 days
| Zt is dead |
Affected by 'Laziness Syndrome'
Registered: 11-30-14
Location: depression land
Last Post: 1546 days
Last Active: 415 days
(edited by ZeroTails on 04-12-15 10:26 AM) Post Rating: 4 Liked By: Eniitan, Jordanv78, Laian, RMJEtheReploid,
02-02-15 01:57 AM
 Eniitan is Offline
| ID: 1132950 | 70 Words
Eniitan is Offline
| ID: 1132950 | 70 Words
 Eniitan is Offline
| ID: 1132950 | 70 Words
Eniitan
Level: 174

POSTS: 2650/10522
POST EXP: 959649
LVL EXP: 70532882
CP: 55219.3
VIZ: 2613565

POSTS: 2650/10522
POST EXP: 959649
LVL EXP: 70532882
CP: 55219.3
VIZ: 2613565
Likes: 0 Dislikes: 0
ZeroTails : Well done! It is very informative, simple and straight to the point. I like how you added the colour as well so that your walkthrough is not so dull. You also have had added some pictures which will be a big help! I think I should call in big bro to see this work of yours. Keep it up zerotails. Laian : Here's something that you should see. ^^ Laian : Here's something that you should see. ^^ |
Vizzed Elite
Affected by 'Laziness Syndrome'
Registered: 08-16-12
Last Post: 572 days
Last Active: 60 days
  Number 1 Sailor Moon, Final Fantasy And Freedom Planet Fan On Vizzed! Number 1 Sailor Moon, Final Fantasy And Freedom Planet Fan On Vizzed! |
Affected by 'Laziness Syndrome'
Registered: 08-16-12
Last Post: 572 days
Last Active: 60 days
02-02-15 10:00 AM
Laian is Offline
| ID: 1133022 | 92 Words
| ID: 1133022 | 92 Words
Laian
Level: 90

POSTS: 1907/2232
POST EXP: 457173
LVL EXP: 7129064
CP: 23726.2
VIZ: 3569925

POSTS: 1907/2232
POST EXP: 457173
LVL EXP: 7129064
CP: 23726.2
VIZ: 3569925
Likes: 0 Dislikes: 0
Impressive, interesting first part of that game guide. Eniitan stated this: the use of color is great, different to my code color. It's not a bad thing, don't worry. Each game guide maker has its own way of walkthrough making. I like the bit of humor you added at some points, especially when it deals with typical things such as "there was peace and love a long time ago, now it's war and a hero comes". To sum it up, great job on your first game guide, ZeroTails. Keep it up Impressive, interesting first part of that game guide. Eniitan stated this: the use of color is great, different to my code color. It's not a bad thing, don't worry. Each game guide maker has its own way of walkthrough making. I like the bit of humor you added at some points, especially when it deals with typical things such as "there was peace and love a long time ago, now it's war and a hero comes". To sum it up, great job on your first game guide, ZeroTails. Keep it up |
Vizzed Elite
Affected by 'Laziness Syndrome'
Registered: 10-21-11
Location: France
Last Post: 1842 days
Last Active: 1016 days
| Games have secrets, I have my eagle gaze. |
Affected by 'Laziness Syndrome'
Registered: 10-21-11
Location: France
Last Post: 1842 days
Last Active: 1016 days
02-02-15 02:12 PM
 Jordanv78 is Offline
| ID: 1133090 | 41 Words
Jordanv78 is Offline
| ID: 1133090 | 41 Words
 Jordanv78 is Offline
| ID: 1133090 | 41 Words
Jordanv78
Level: 190

POSTS: 7878/12281
POST EXP: 809836
LVL EXP: 95661629
CP: 78618.7
VIZ: 577650

POSTS: 7878/12281
POST EXP: 809836
LVL EXP: 95661629
CP: 78618.7
VIZ: 577650
Likes: 0 Dislikes: 0
Great work! I loved how well it was laid out, color coded and included screenshots. Very informative.
I hope that you edit part2 onto this Post so all the info can be found on one page. Keep up the great work! I hope that you edit part2 onto this Post so all the info can be found on one page. Keep up the great work! |
Vizzed Elite
Former Admin
Affected by 'Laziness Syndrome'
Registered: 10-16-10
Location: Chicagoland
Last Post: 2418 days
Last Active: 2391 days
Former Admin
| Special Assault Brigade for Real Emergencies |
Affected by 'Laziness Syndrome'
Registered: 10-16-10
Location: Chicagoland
Last Post: 2418 days
Last Active: 2391 days
02-02-15 07:35 PM
ZeroTails is Offline
| ID: 1133189 | 176 Words
ZeroTails is Offline
| ID: 1133189 | 176 Words
ZeroTails
Cool Davideo7
Cool Davideo7
Level: 90
POSTS: 149/2465
POST EXP: 215125
LVL EXP: 7172202
CP: 18922.4
VIZ: 400242
POSTS: 149/2465
POST EXP: 215125
LVL EXP: 7172202
CP: 18922.4
VIZ: 400242
Likes: 0 Dislikes: 0
Eniitan : I am honestly surprised that you think this work of mine is worthy of being shown to Laian, the guide writer! I have worked hard on it, and it's nice to see that people like it. Laian : I am honored that you have though this was worthy of you posting about it, and you apparently only have good things to say about it. I do like reading funny stuff, and I didn't like how guides were normally dry. I think the color and my reaction to typical things helps out a bit. Jordanv78 : I know that I did a good job. I wont be editing, but I will edit in links to other parts. I hope that's good enough. If you want to be summoned to the next part, I will summon you. This took a long time, partly because I was working on and off on it. The next part might take a while, but I will try to post it as soon as possible. I am already halfway done with the next part. Laian : I am honored that you have though this was worthy of you posting about it, and you apparently only have good things to say about it. I do like reading funny stuff, and I didn't like how guides were normally dry. I think the color and my reaction to typical things helps out a bit. Jordanv78 : I know that I did a good job. I wont be editing, but I will edit in links to other parts. I hope that's good enough. If you want to be summoned to the next part, I will summon you. This took a long time, partly because I was working on and off on it. The next part might take a while, but I will try to post it as soon as possible. I am already halfway done with the next part. |
Vizzed Elite
Affected by 'Laziness Syndrome'
Registered: 11-30-14
Location: depression land
Last Post: 1546 days
Last Active: 415 days
| Zt is dead |
Affected by 'Laziness Syndrome'
Registered: 11-30-14
Location: depression land
Last Post: 1546 days
Last Active: 415 days
02-02-15 08:09 PM
Jordanv78 is Offline
| ID: 1133203 | 63 Words
Jordanv78 is Offline
| ID: 1133203 | 63 Words
Jordanv78
Level: 190
POSTS: 7879/12281
POST EXP: 809836
LVL EXP: 95661629
CP: 78618.7
VIZ: 577650
POSTS: 7879/12281
POST EXP: 809836
LVL EXP: 95661629
CP: 78618.7
VIZ: 577650
Likes: 0 Dislikes: 0
ZeroTails : What I'm saying is that it would make more sense for you to edit on top of this one rather than having it be split into parts. Reason being if the entire walkthrough is in one part, it makes it easier for the reader to find the information they need. Just a helpful tip.
Sorry you seemed offended by my compliment lol. Sorry you seemed offended by my compliment lol. |
Vizzed Elite
Former Admin
Affected by 'Laziness Syndrome'
Registered: 10-16-10
Location: Chicagoland
Last Post: 2418 days
Last Active: 2391 days
Former Admin
| Special Assault Brigade for Real Emergencies |
Affected by 'Laziness Syndrome'
Registered: 10-16-10
Location: Chicagoland
Last Post: 2418 days
Last Active: 2391 days
02-02-15 09:05 PM
Eniitan is Offline
| ID: 1133232 | 72 Words
Eniitan is Offline
| ID: 1133232 | 72 Words
Eniitan
Level: 174
POSTS: 2656/10522
POST EXP: 959649
LVL EXP: 70532882
CP: 55219.3
VIZ: 2613565
POSTS: 2656/10522
POST EXP: 959649
LVL EXP: 70532882
CP: 55219.3
VIZ: 2613565
Likes: 0 Dislikes: 0
ZeroTails : I am still a game guide maker even though I have stepped down from staff and always will be. If I see a walkthrough with what it is meant to look like. Details, described properly, adding pictures or more to it. Of course I would summon big bro, and its not all the time that I do this. I only do so for an eye catcher of a great walkthough. |
Vizzed Elite
Affected by 'Laziness Syndrome'
Registered: 08-16-12
Last Post: 572 days
Last Active: 60 days
| Number 1 Sailor Moon, Final Fantasy And Freedom Planet Fan On Vizzed! |
Affected by 'Laziness Syndrome'
Registered: 08-16-12
Last Post: 572 days
Last Active: 60 days
02-07-15 10:52 AM
ZeroTails is Offline
| ID: 1134943 | 79 Words
ZeroTails is Offline
| ID: 1134943 | 79 Words
ZeroTails
Cool Davideo7
Cool Davideo7
Level: 90
POSTS: 164/2465
POST EXP: 215125
LVL EXP: 7172202
CP: 18922.4
VIZ: 400242
POSTS: 164/2465
POST EXP: 215125
LVL EXP: 7172202
CP: 18922.4
VIZ: 400242
Likes: 1 Dislikes: 0
Jordanv78 : After thinking about it for a week, I've decided to edit my post, like you said. I was only a bit hesitant because I would lose all of the Viz and CP. I'm a little greedy, I know. I will add two more levels to the post, then create a new part covering all the other mavericks. After I edit, I plan on taking a little break to do a mini walkthrough, and perhaps a review as well. |
Vizzed Elite
Affected by 'Laziness Syndrome'
Registered: 11-30-14
Location: depression land
Last Post: 1546 days
Last Active: 415 days
| Zt is dead |
Affected by 'Laziness Syndrome'
Registered: 11-30-14
Location: depression land
Last Post: 1546 days
Last Active: 415 days
Post Rating: 1 Liked By: Jordanv78,
02-07-15 11:11 PM
Jordanv78 is Offline
| ID: 1135235 | 87 Words
Jordanv78 is Offline
| ID: 1135235 | 87 Words
Jordanv78
Level: 190
POSTS: 7896/12281
POST EXP: 809836
LVL EXP: 95661629
CP: 78618.7
VIZ: 577650
POSTS: 7896/12281
POST EXP: 809836
LVL EXP: 95661629
CP: 78618.7
VIZ: 577650
Likes: 0 Dislikes: 0
ZeroTails : Oh I understood where you are coming from. totally understandable. I was just trying to think from the other side of a coin. If I need help with a game, do I really want to search through several long posts to find the information I need, or would I rather just read one long well done walkthrough.
In the end, I think people looking for help with this game will appreciate it more that you put it all in one post. Keep up the great work! In the end, I think people looking for help with this game will appreciate it more that you put it all in one post. Keep up the great work! |
Vizzed Elite
Former Admin
Affected by 'Laziness Syndrome'
Registered: 10-16-10
Location: Chicagoland
Last Post: 2418 days
Last Active: 2391 days
Former Admin
| Special Assault Brigade for Real Emergencies |
Affected by 'Laziness Syndrome'
Registered: 10-16-10
Location: Chicagoland
Last Post: 2418 days
Last Active: 2391 days
02-08-15 12:07 AM
 megamanmaniac is Offline
| ID: 1135252 | 31 Words
megamanmaniac is Offline
| ID: 1135252 | 31 Words
 megamanmaniac is Offline
| ID: 1135252 | 31 Words
megamanmaniac
Level: 127

POSTS: 4191/4966
POST EXP: 452698
LVL EXP: 23203444
CP: 17207.5
VIZ: 151134

POSTS: 4191/4966
POST EXP: 452698
LVL EXP: 23203444
CP: 17207.5
VIZ: 151134
Likes: 0 Dislikes: 0
This is a nice walkthrough so far, and I can't wait to see the finished product. I usually start with Flame Mammoth to give myself a bit of a challenge though. |
Vizzed Elite
Affected by 'Laziness Syndrome'
Registered: 04-12-12
Location: Access withheld from you
Last Post: 2525 days
Last Active: 2521 days
| Triple M |
Affected by 'Laziness Syndrome'
Registered: 04-12-12
Location: Access withheld from you
Last Post: 2525 days
Last Active: 2521 days
02-16-15 12:37 PM
ZeroTails is Offline
| ID: 1137913 | 20 Words
ZeroTails is Offline
| ID: 1137913 | 20 Words
ZeroTails
Cool Davideo7
Cool Davideo7
Level: 90
POSTS: 197/2465
POST EXP: 215125
LVL EXP: 7172202
CP: 18922.4
VIZ: 400242
POSTS: 197/2465
POST EXP: 215125
LVL EXP: 7172202
CP: 18922.4
VIZ: 400242
Likes: 0 Dislikes: 0
Eniitan : Jordanv78 : megamanmaniac : Edited in Storm Eagle, like you wanted, Jordanv78. I just though I would let you guys know. Jordanv78 : megamanmaniac : Edited in Storm Eagle, like you wanted, Jordanv78. I just though I would let you guys know. |
Vizzed Elite
Affected by 'Laziness Syndrome'
Registered: 11-30-14
Location: depression land
Last Post: 1546 days
Last Active: 415 days
| Zt is dead |
Affected by 'Laziness Syndrome'
Registered: 11-30-14
Location: depression land
Last Post: 1546 days
Last Active: 415 days
