

 User Notice
 Forum Links
The curious souls will be rewarded by a secret surprise. Do you have what it takes to find the secret?
Thread Information
Thread Actions


Walkthrough MediEvil 2
08-30-14 09:22 AM
Laian is Offline
| ID: 1073285 | 9600 Words

POSTS: 1757/2232
POST EXP: 457173
LVL EXP: 7557950
CP: 23733.5
VIZ: 3570463

Hello everyone, it's your host Laian and welcome to a new walkthrough. So yeah, I've been on vacations but I managed to deliver another walkthrough just in time. Isn't that lovely? So here we are this month with a PSX game called "MediEvil 2", the sequel to MediEvil. Don't ask me why I played this one instead of the first episode, I don't really know but I'll do the first episode, do not worry. So I think we'll start this walkthrough without wasting any more time. We have a long adventure to go on so let's visit London in 1886.
CHAPTER 1: THE MUSEUM Yes, Sir Daniel Fortesque, back from the underworld, inside a museum. After the discussion with that nice little ghost (get used to it, he will appear quite often during this game), go in the room before you, destroy the display and grab the small sword, your very first weapon if we don't count your useless but loyal "arm-rang". Carry on, fight the first enemies of the game, which are zombies and pick up the museum key. You might have noticed that, everytime you kill an enemy, its soul goes up in the sky and a goblet with a percentage appears at the top of the screen. This goblet is "The Chalice of Souls". There are ten Chalices to fill with souls and you can find them all if you want. Sometimes, they are obvious, they can be found easily, but at some points, you'll have to look everywhere and try everything possible. Do not worry, I, Laian, will make sure to tell you where to find the Chalices. Grabbing the Chalice will grant you a new weapon but we'll see that in due time. Also, the ending changes if you find all the Chalices of the game. Anyway, go in the next room to fight another type of enemy. Move constantly and strike everywhere. You can do a charged attack if you want but I really don't recommend doing that in this situation and in front of these two living armors. Grab the bags of gold hidden behind the colored relic and the energy vial, then go up the stairs, destroy the display and grab the pistol. A feature that the developpers added to this game allows you to equip up to two weapons and switch easily to each weapon equipped with a simple command: L1+ the square button. I suggest you to keep a weapon with a short range (for example the small sword) and a weapon with a long range in the other slot (the pistol for example).
Carry on, grab the copper shield in the chest and some gold then open the locked door with the key. The bronze shield can be only used if you crouch by pressing the triangle button. Yes, that doesn't work like The Legend of Zelda. It's really nice to block the projectiles for example, though keep in mind there's a durability. In the next room, go down, using the ladder. If you don't do that, Sir Daniel Fortesque will die instantly. And I have to tell you there's no lives, nor continues. Just some recovery items here and there. You'll face a new type of enemy sent by that living tyrannosaurus wreck. Kill them and the tyrannosaurus will be so mad that the statue will fall down, creating a path to the next room. Use the fountain of energy to recover some health (note that the fountains have a limited amount of energy, will become useless when they couldn't give you any more energy and won't be fully restored when you will replay the level so use these things wisely) grab the bag of gold, equip the pistol and go in the next room. Shoot each of the guards until they die, avoid their projectiles, leap over the fence and grab the gold to the left and to the right. In the next room, you'll meet the spiv. He CHAPTER 2: TYRANNOSAURUS WRECKS Move just a bit forward to have a discussion with the little ghost. Besides giving you a hint about how to beat the boss, he will suggest you to save your progress. Say "Yes", check the room to find some gold and go in the next room to face the boss. This fight has two rounds. The first form is the one you saw earlier twice. For now, avoid his attack, go through the passageway, buy some ammo to the spiv if you need some and go to the second floor. Avoid his attacks and wait until he calls for help. You'll see some kind of red bulb on his head. That is the weak point. He always shows this bulb when he summons the minions so go down then on the tyrannosaurus and hit the bulb. Repeat this method once more until he's defeated. It's not over though. Now, he turned into a gargoyle. Go back to the second floor and wait until he summons the minions. Unfortunately, he's flying so your sword will be useless. However, it's a good opportunity to use the pistol and shoot the bulb a few times. Repeat this method and, this time, he will die. Grab the life bottle (this item is exactly like the energy tank from Metroid and can be filled with the vials and the fountains of life you'll find during your journey) and go through the door that just opened to end the level and go to meet the doctor.
CHAPTER 3: THE PROFESSOR'S LAB Welcome to the doctor's lab, the hub of the game. After the discussion, step on the tile to the right to give the Chalice and get a new weapon: the cane stick. It's slightly better than the sword except one thing: you don't swing it like the sword, you poke the enemy with the other side of the cane stick. It's fashionable though (and I would give anything to have a cane stick like this one). The charged attack is a special attack. The cane stick hits the ground and creates three lightnings that go straight. Now go to the projector and
CHAPTER 4: KENSINGTON Move forward to face a new enemy. Your new opponent uses its cane stick to resurrect the zombies. When the zombies are alive, you can't hit the gentleman necromancer (yes, it's a cool name for this enemy, don't you think so? ^^ ). So you must kill the zombies first and then hit the gentleman before he has a chance to resurrect the zombies once again. Avoid the attack of the cane stick and poke him with yours (or use your sword) and hit him until he dies. The zombies will die as well and you'll get their soul and some gold from the gentleman. Now, go to the left to see the museum, kill the gentleman and his minions and use the fountain of life if you need to recover some health. Climb up the ladder to go on the rails, find the spiv and buy some ammo if you want to. Don't ring the bell next to him, it calls some sort of doombuggy in which you'll find the Chalice of Souls of the stage. Unfortunately, two gentlemen and some zombies are not enough to collect this item so you have to wait and dispatch more enemies. Stay on the track, open the chest, grab the copper shield and go down. Go through the passageway next to the ladder, kill the gentleman and the minions then activate the switch behind the building with the sign (2). Go in, grab the bag of gold, then move the crate to go up the pile of crates and pick up the depot key. Leave the building by the opening to your right, kill the zombies and go back nearby the museum to kill more zombies. Open the door with the key you just got, go to the left and open the chest to activate a trap. Run away and let the trap kill the zombies for you then go in the building. At the top of the pile of crate, you can see another key waiting for you and a fountain of life nearby. Hmm, that doesn't smell good here. Grab the town house key and prepare to face a new enemy: Anubis. Well, a thin and tiny version of the god. Remember the laser beam that the minions in the museum fired? This enemy fires FOUR laser beams in FOUR directions: behind him, straight forward, to the left and to the right. It's not one replica of Anubis you'll have to face but three. Kill them to complete the Chalice of Souls, move the crate on the chariot and leave the building. Go back to the area where the museum is, kill the zombies and open the door to the left. Welcome to the town house, where all that mess started. Will we find the magic book mentioned by the doctor? Let's see. Go up the stairs, then check behind the crates to find a chest containing a pocket watch. Hmm interesting, how to use it now... And where... And when... I guess we'll find out later. For now, go downstairs, leave the house, go back on the rail and call the doombuggy with the bell. Grab the Chalice of Souls and go on the rooftop of the museum to activate a cutscene. Now, go back to the museum by the new opening.
CHAPTER 5: KENSINGTON, THE TOMB That room should be familiar to you. Right at the beginning, Winston suggests you to save your progress. You are on some kind of platform suspended at an incredible height. You might die if you fail your jump (or lose some life if you're lucky) unless you have a full life bottle. Jump from platform to platform until you reach the monument. Grab the gold, buy some ammo, go down, kill the enemies and enter the tomb. There's a fountain of life a bit further to the right if you need to recover some health from the last fight. Kill the enemies and carry on. In the next room, use the columns to create some stairs in order to grab the tablet of Horus, the staff of Anubis and the scroll of Sekhmet. There are three creatures to slay by the way, so watch out. Go in the next room and give the items to their respective owners (from left to right): the tablet, the staff and the scroll. After the cutscene, you'll be back to the professor's lab.
CHAPTER 6: THE PROFESSOR'S LAB Talk to the professor. He will analyse that pocket watch in the mean time, while you keep looking for zombie juice apparently. I... I think he means more clues about the incident. Give the Chalice of Souls to get a new weapon: the hammer. A slow but powerful weapon. Now, it's time to go to the next level: the freakshow.
CHAPTER 7: THE FREAKSHOW That level has a cool music but, trust me, it might give you some troubles. The very first enemy is that fat lady with a beard. She has two attacks: the belly attack and the bodyslam. Both of these attacks are embarrassing. But you know what? It's perfect for our new toy. Equip it and whack'em all. The pistol works fine against them as well. It takes a while and ten shots to kill one of these fat ladies but it's safe. Grab the gold and go through the passageway to the left. Whack the new enemy and its brother (or sister), grab the gold, the life bottle and the chest on the platform then go back to the other side... the safe way. Water means instant death by the way. Carry on and face a new enemy: the sorcerer. He summons a spiritual red dragon that will chase you before going back to the sorcerer. You can only hit the sorcerer when he does that. Otherwise, move constantly to avoid the harassing red dragon. Once the sorcerer is dead, go through the door that just opened. Kill the enemies with the devastating orb trapped in the chest and go in the house nearby the trampoline to find a spiv who sells some ammo for the pistol. There's also a mini-game in this section of the stage if you have the hammer. Locate a house with a hammer on a door and enter. It's a new version of "whack-a-mole" called "whack-an-imp". You have to whack 8, then 10 and 12 imps, all that before time runs out. You can lose some health during this mini-game, since these creatures like to throw some kind of green mud at your face but, don't worry, there will be from time to time some energy vials in order to recover some health. At the end of each round, if you whack the number required to finish the round, you'll win ten chicken drumsticks. That special weapon turns some enemies into roast chickens that will recover some health once picked up. Also, use the charged attack of your hammer on the strenght game outside next to this mini-game to hit the jackpot and get three bags of gold. You might note some hands following you. They are friendly but you can't do anything with them at the moment. Keep moving forward, note the two locks and kill the imps nearby the huge tent. To the right, there's a fountain of life. To the left, nothing apparently... unless you check behind the tent with the clown. Oh, a secret chest. Here is 50 gold pieces for the curious souls
Now, go down the slope and enter the tent with the scary face. Fight the enemies to open the door and carry on. Step on the trampoline then go on the platform, leap over the red and white striped fence to find another secret chest. 50 more gold pieces for you. Now, kill the imps and the fat ladies and enter the building to the left. Kill the enemies, use the trampoline to go up, buy some ammo if you need some and collect the copper shield and the Chalice of Souls if you killed enough enemies to complete it (otherwise remember its location and come back once you killed enough enemies). Leave the house, go through the tunnel and fight one of these elephant-bots mentioned by Winston in the last area (if you did interact with the spectral light). You must find where they come from in this freakshow and destroy the source of these robots. How to beat this enemy? First, equip the pistol, then go underneath the elephant-bot then shoot him in the back. Yes, they are controlled by an imp. A few shots and you'll get the elephant key 2. Now, go back to the last area and jump from trampoline to trampoline to reach the other side of the pool. It's a tricky part so take your time if you want to keep your health. Beat the new elephant-bot, exactly like the other one and grab the elephant key 1 (3). Now, go back to the locks, use the keys and go in the giant tent. Your next opponent is an elephant-bot with a difference: the imp is protected by a shell. You see these pieces of metal hanging from the ceiling? There's a lever nearby and you must activate each of these levers exactly when the elephant-bot V2.0 is underneath the piece. It's the only way to destroy this one. The chest contains a copper shield. Go to the nearest lever, wait until the elephant-bot is underneath the piece and activate the lever to drop the piece. Do that with the two other levers to beat this enemy and go back to the first area of the level. Go through the open door in front of you to go back to the professor's lab.
CHAPTER 8: THE PROFESSOR'S LAB Same old song. Talk to the professor to learn more about the pocket watch, give the Chalice of Souls you found at the freakshow in exchange of the crossbow and go to the next level: Greenwich observatory.
CHAPTER 9: GREENWICH OBSERVATORY Move forward to activate a cutscene. Yes, a bird just stole your head, that's embarrassing. You must find it. You also learn a new command if you summon Winston. Make your way to the entrance of the observatory and climb up the ladder to the left to find your head. Put it back on your body with the command you learned earlier, go down and go east. There's a fountain of life and some gold. If you go to the left, you'll find a trap and a copper shield. Go to the docks. Kill the two sailors then go on the roof by the ladder to find a fountain of life and a bird to kill (they can steal your head so kill it before it has a chance to pick your head up). Go down and carry on. You'll face the most annoying enemy of the level (and probably of the game in my opinion): some kind of alien head with legs. They are terribly annoying. Not only they spit their strange goo but they possess the dead bodies. You can whack the dead bodies before they stand up on their feet, which I highly recommend since they won't give you their soul if they are possessed by the alien head. Only the alien head will drop its soul once dead. Kill its brother a bit further and the other enemies and buy some ammo to the spiv in the corner. Don't go in the building, go behind to find a life bottle and note the Chalice of Souls at the other side of the canal. Now go in the building. Here is another puzzle. You'll see four levers in the room and a hole. Put your head into the hole, switch to the head and use L2+R2 to see a code. Now, switch back to Sir headless Daniel Fortesque and enter the code, using the levers. The bridge outside will be lowered and you could move on. Take your head back, go outside, go down and kill the enemies. Go back up, cross the bridge, jump from boat to boat and go grab the Chalice of Souls to the left. Hit the lever to make a platform appear and carry on. Kill the last enemies of the level, grab the chest and enter the building.
CHAPTER 10: GREENWICH NAVAL ACADEMY Kill the enemies outside (beware of the cannons, though they can help you in order to kill your opponents), grab the energy vial to the right and use the fountain of life to the left if you need some health then go in the building. Kill the enemies, go up and put the head into the strange submarine. Now, switch to the head, use the command L2+R2 and locate the item in the pool. Go down and move the crane to grab the item. The location of the item in the pool is randomly generated by the way. Go get the bellows, then go back up, take your head back and go up. Before using the bellows on the balloon, barter with the spiv to the right if you need some ammo. Now, use the bellows, then equip the torch, go get some fire, jump on the bellows and flyyyyyyyyyy... to the observatory. And land like Launchpad McQuack. After the cutscene, take care of the two henchmen. As you can see, the formation is... interesting: Dogman is protecting Mander. Use the charged attack of the hammer to hit both of them. Dogman will faint after a few hits and Mander will be mad at you. He will move faster and whip you hard with his tail. He is really tough to beat at this point of the fight but, with a few shots, he should be knocked out as well. Ah, one more thing: avoid his projectiles and Dogman's punches, otherwise you'll be stunned. And trust me, they like to beat you when you're defenceless. If you need some health and ammo, you'll find a spiv and a fountain of life in a room to the left from where you start the fight. After this fight, you'll be back to the professor's lab.
CHAPTER 11: THE PROFESSOR'S LAB Should I really tell you what to do here? No but I'll do it anyways. Talk to the professor then give the Chalice of Souls to get the axe and go to the next level.
CHAPTER 12: KEW GARDENS This level is a pain in the butt. How many times did I retry it to make that specific part? I really wish the emulator used for PSX games in Vizzed had the save state function. You don't know what I'm talking about? Oh don't worry, you'll see what I meant by this. First things first, you will notice that the Chalice is filled up at 41%. That's for a good reason. It's the only level in which you won't get the Chalice if you screw up. Right at the beginning, go to the right, avoid the giant rolling pumpkin and go grab the potting shed key. Now go to the left, avoid the rolling pumpkins, kill the enemies and grab the antidotes they dropped and the life bottle. Carry on, open the potting shed and grab the water tank valve. Now, leave the potting shed and enter the giant building outside. And here starts the tough part of the level. In this section of the level, you must save the civilians infected before they turn into one of these horrible creatures. That's why you picked up some antidote. You need to use that item when you are close to a civilian. There's some creatures with them so it adds more fun to the task (and by "fun", I mean "troubles" ;D ). Equip the antidote (yes, you MUST equip it otherwise it won't work) and spray the civilians if they have been infected by the creatures. They will focus more on the civilians than you so get rid of them as soon as possible. Don't forget to grab the antidote they drop in order to refill the flask. You shouldn't run out of antidote if you use it wisely and kill the enemies. Ah also, you can hit the civilians so... don't kill them. What happens if you slay one, on purpose or accidentally, you may ask? Well, you'll lose some percentage for the completion of the Chalice of Souls and that's it. There are three civilians to save in the first room. Once you took care of this room, proceed to the next room, go down, kill the creatures, grab the gold and use the fountain of life if you need some health. You can't go north at the moment so go west, save the two civilians and kill the creatures. Climb the tree up to notice the Chalice of Souls at the top of it and carry on. Go up, grab the bags of gold and run away from the rolling pumpkin. Go in the new area, buy some ammo if you need some, then use the valve to sprinkle the evil bulbs of the first room. Go back there, go up and grab the pond room valve. Go back to the room with the two civilians, go up and use the valve on the machine. Go get the hothouse valve (4), go back to the last room and go north. Save the last civilians, use the valve on the machine, go to the left and grab the life bottle. Go back to the last room, go up and kill the last enemies. There's a fountain of life you need some health and an energy vial at one point of that fight. The chest contains a silver shield, which has a better durability compared to the copper shield. Also, beware of the bouncing and rolling pumpkins. Before carrying on, go grab the Chalice of Souls at the top of the tree. Now, you can go through the new passageway to end the level.
CHAPTER 13: DANKENSTEIN Hmm, why is the music of the freakshow played? Anyway, get the bombs from Winston, save your progress and go to the right. Hey, that door wasn't opened before! What's going on here?! Go in the next room. After the cutscene, grab the limbs one by one and put them into the device on the floor. There is a Chalice to grab in this level so make sure to pick it up once you fully filled it with the souls of your opponents. In order to get to the Chalice, go in the next room, follow the rail that goes southeast from the entrance of the room. You'll be in the last room, above all the professor's stuff. There's a spiv but there's also some platforms. Use these platforms to grab the chest and the Chalice. Since the professor already has the head, you must kill these mutants and find the torso, the two legs, the two arms and the bum. The bum can be obtained if you kill the farting minecart on the rail. The limbs, well... you have to kill these freaks. Bring them back the device one by one before time runs out. The bombs Winston just gave you will come in handy for this task. You can throw the bomb if you press the square button or put it on the ground if you press the X button. The axe throwing (square button when you have the axe in your hand) is an alternate way. There's also a chest with a silver shield inside and a life bottle down below to the right. You'll find a fountain of life right next to the chest that contains the silver shield. Once you brought all the stuff back to the professor, another cutscene will start and you'll go to the next stage.
CHAPTER 14: IRON SLUGGER Here we are. The long-awaited clash of the titans. This fight is kinda tough to be honest and you will probably retry a lot of times. I have no other strategy but this one: look for the weak spot everytime he blocks. Let me explain this to you: if he blocks his head, hit under the belt (yes, that thing... please, don't make me say that word) by pressing the X button or the circle button. If he blocks the low attacks, try to hit the head by pressing the square or the triangle button. He hits hard so try to keep some health by blocking his attacks: R1 for the high attacks and R2 for the low attacks. At some points, he will use an unblockable attack. It takes him a few seconds to do it so you have enough time to hit once or twice before being hit. At the end of each round, you need to find two of your limbs stolen by the imps. Kill them and grab the limbs to carry on the fight. You don't actually need both of the limbs but it helps when you find them. The fight lasts six rounds so make sure to beat Iron Slugger as soon as possible. It's impossible to beat him during the first round since he is tough so you'll need more rounds to defeat him. Don't worry, you lose your limbs but he also lose his limbs aswell during the fight. And, as opposed as you, he won't take them back, which is neat. I don't have to tell that the beginning of this fight will be harder than the end when he will be on his knees, weak, and you will finish him with your head or your fists, depending of your health. Once you beat Iron Slugger, you'll be back to the professor's lab.
CHAPTER 15: THE PROFESSOR'S LAB Well, I think you have two Chalices of Souls to bring back to the doctor: the one from the Kew Gardens and the one you got during Dankenstein. Do that to get the broad sword. It's your sword with a difference. Now it's enchanted and you can recharge it if you talk to the spiv in the levels. Now, you can do something else. Something interesting: you can now use the green hands you saw at some points in the game. Indeed, it's exactly like the submarine but you will put your head on the hand instead. Like this, you can reach some places that Dan can't reach, which is good. I suggest you to go back to the places you already visited to find some good stuff in these extra areas. I'll make a special part later in this walkthrough with all the secrets areas. A new level has been unlocked: Wulfrum Hall. It's your next destination, since Kiya goes to Whitechapel. Whitechapel... Lair of Jack the Ripper, brrrrrrrrr... hopefully she will be fine. Even though, I have a bad feeling about this.
CHAPTER 16: WULFRUM HALL What a nice building. It must be the mansion of a wealthy man. Go ring the bell. Apparently, we are greeted by the butler, who is not black (yes, I wanted to quote that reference). He doesn't want to let you in so you'll need to find another way. Use the help of a hand, then leap over the fence to the right and go through the open window. Hide underneath the table, wait until the (adorable?) butler is not looking at you and go underneath the other table. Wait until he goes to the room you came from to grab the front door key on the table and go in the next room to find an energy vial. Now that you have the key, you must leave the basement without being spotted by the butler otherwise you won't get the key. How? Well, you should have noticed a pressure plate when you went in the basement. Go back there, call the elevator and drop in (if you dare...). Now go underneath the table, wait until the creepy little girl is not looking at you and go to the main hall. Note the Chalice of Souls on the table and the armors around you and go in the next room. Avoid the little girl and go on the bookshelves to reach the window and leave the manor. Now, bring the key back to your other half, grab the gold nearby the small window to the left, open the door with the key and enter the house.
Well, the armors are now moving... Figures. Go to the office to the left after killing them, grab the energy vial and go back to the main hall and blast the planks with the hammer to go to the next room. Underneath the stairs, there's a passageway to the basement. Go slay the butler and go back to the last room. Go up the stairs, grab the silver shield in the chest and kill the butler. You can't kill the little girl unfortunately. Go check the first room to the right, go east and grab the life bottle. Go check the next room to the right. Uh oh, coffins. And, to be honest, I don't think they are empty. Good thing their owners are This room is quite tricky. First, move the long pile of wood to the far left in order to create the path to the elevator for our nice fellows. Step on the elevator, bash the planks and push the first coffin. Now, go back down, attract the vampire near the elevator, dodge him and trap him in the path with the crate. The final touch? Push the vampire using the crate in order to let him take the elevator of no return. Same thing with the last vampire of the room. A new door will open. Go there, then enter the room to the right. Memorize the pattern on the wall (5), use the fountain of life to recover some health and leave the room. Go up, bash the planks and go back down. Grab the bag of gold, move the coffins in the round room with the chandelier, using the pattern on the wall, otherwise you'll wake them up and will be forced to run away until they come back to their coffin. Then, go activate the switch three times to make the chandeliers go up and destroy the three vampires. Now, go back up and go through the open door. Time to meet the owner and rant about the staff of the mansion. They need to be fired. Oh wait, it's already done
CHAPTER 17: THE COUNT As always, before a good boss fight, you can save your progress with Winston. Also, keep in mind his hint. Buy some stuff and enter the room. The Count is quite hard, the only way to beat him is to reflect his miagic missiles. He will start the fight with that attack so hit a mirror, stand right before it and go away when a shot is thrown at you. The mirror will send the projectile back to the Count if the position is correct. Avoid his next attacks and repeat the method once more. Now, he will throw another type of projectile that you must avoid at all times. Beware of the bombs. Once he stands in the middle of the room, it's time for more magic missiles to reflect. Avoid his next attacks and repeat the same method. Keep pressing the triangle button to avoid his fury of punches and the bats. Time for the round two. His wrath made the planks fly away and the sunlight is now in the room. Time to reflect the halo to our dear opponent. Be warned, your opponent can change the angle of the mirror if he is close to it. Also, be fast when you change the angle of the mirrors because he uses an attack that will litterally erased all the work you've done, in other words you'll be forced to restart from the beginning. Two hits and the Count will die. Time to head back to the professor's lab.
CHAPTER 18: THE PROFESSOR'S LAB Well, as I expected, Kiya is not back so the professor is worried about her. You must go to Whitechapel and see if she is ok. Give the Chalice of Souls to get the lightning and go to your next destination.
CHAPTER 19: WHITECHAPEL The first part of the level, when you are in the graveyard, is not hard. Just kill the zombies and go downstairs. Welcome to the streets, where all the policemen won't stop harassing you if they spot you. You can only stun them for a short period of time. Handy if you want to run away from them. The club, where Kiya has been seen for the last time, is right before you but you need a membership card in order to enter. The streets are a terrible maze, I swear. Anyway, go to the left, then right, and go in the building to find a spiv and a fountain of life. Go outside, then go to your left, find the entrance of a pub in an alley, go in, then carry on. Smash the crates then grab the bags of gold, go through the other door and go in the dressing room. Now, you are a gentleman. Though, that doesn't mean the guards outside will leave you alone. Oh no, they are really annoying. Now, leave the shop, keep going forward to find the location of the Chalice of Souls. Despite the fact that you can't kill the guards patrolling around, you can however kill the zombies around. And the rats but they only drop one coin when you kill one. Go get it once it's complete as always. Go left, note the door to the left, go in the building to the right and get the flaming crossbow. Now, go outside, stand in front of the statue, turn the three projectors and enter that code with the specific pressure plates, from left to right: green, red and blue. Grab the unicorn shield then go back to the club. Go east now, move the crate, go on the roof and enter the house by the window. Use the fountain of life to recover some health, then go down to the basement, grab the gold hidden by the crates and use your head on a hand. Go through the small opening, step on the pressure plate and go get the griffin shield with your other half. Now, take your head back, smash all the crates and grab the library key. Go up the stairs, use the key to open the door, pick up the silver shield in the chest and the club membership card and go back to the graveyard. Locate the crypt with the two emblems and use the shields. Go in, kill the zombies until you wake up the gentleman. Now, focus on him and hit him multiple times until he dies. Grab the beard and go back to the club. You should be able to go inside now. Behind the counter there's a chest of gold. Now go talk to the hmm woman with lot of make-up on her face to get a life bottle, make sure you collected the Chalice of the level and go to the door nearby the statue. Move a bit forward to watch a sad cutscene and end the level.
CHAPTER 20: THE PROFESSOR'S LAB Time to bring the bad news to the professor. The Ripper got Kiya sadly. After the cutscene, you won't get a chance to give the Chalice (nor before the cutscene). You will be teleported to the next level: the sewers.
CHAPTER 21: THE SEWERS Winston will give you the blunderbuss. Cool, let's act like Scrooge McDuck now! I think you get this item if you collected the Chalice of Souls of Whitechapel. Anyway, go down and follow that nice fellow. They seem to have a problem with their pet. Shoot the beast to see that one of these freaks from Greenwich Obsvervatory is back to business. Smash this alien head to free the creature from this mess and carry on. After the cutscene, grab the gold shield in the chest, then go to the left, recover some health with the fountain of life and go through the passageway. Kill the two alien freaks, grab the bag of gold, carry on, use the help of the hand to go behind the door and step on the button to open it. Now, bring your other half there, get your head back and carry on. Use the hand once more to go in the small opening above the crates, then go to the next room with the other half. Activate the switch to create a path to the button, step on it and bring Dan there. Grab your head, climb up the ladder, grab the bags of gold and carry on. Go left, get the poster from the spiv and slay the plant to free the first woman of the tribe. Four more to go. Go back, then take the other path. Shoot the alien freaks down below with a ranged weapon (for example the blunderbuss), then save the two women and grab the energy vials behind the control panel. Carry on, keep in mind that place and go through the passageway up the stairs. Now, go to the east wing, recover some health with the fountain of life and kill the alien head. Hit a bull a few times until he breaks the wall and save the fourth woman in the next room. Kill the two aliens freaks in the next room, climb up the ladder and grab a life bottle. Go down, hit a bull to break the wall and save the last woman. Use the hand to go in the middle hole and grab the Chalice of Souls (if you completed it, which shouldn't be a problem if you killed all the enemies). Now go back and talk to the chief. Now, you can call the ferryman. Grab the chests of gold and go on the raft to end the level.
CHAPTER 22: THE PROFESSOR'S LAB Hey, where's the professor? Is he still crying in his room after what happened to Kiya? Oh boy. Well, I guess the Chalice can wait. Go through the open door to activate a cutscene and go to the next level. There's nothing else to do, seriously. Well, back to the museum.
CHAPTER 23: THE TIME MACHINE Yes, one of the professor's experiments is in the museum: the time machine. With that device, it might be possible to leap through time and save Kiya before she gets murdered by Jack the Ripper, who knows. Winston will give you the magic sword if you collected the last Chalice. Powerful and fashionable. I'm not a fan of blue color but the blade of this sword is just amazing. You can also save your progress. Grab the chest of gold to the right and go downstairs. Ah, the living armor knights. They do want to taste our new toy, I suppose. Go downstairs, use the fountain of life to recover some health and go through the passageway. Use a hand to go in the device and grab a part of the time machine (6). Now, go back upstairs and go the other way. Go left and play a game of "Simon says". Don't tell me you don't know that game, it was really popular at that time. Ok, the rules are simple: memorize the pattern and do it. Grab another part of the time machine and go to the room to the north. With the help of the hand, go through the glass and stand right before the spaceship. Now, with your other half, step on the pressure plates, following this order: left, right and middle. Grab the third part of the machine and leave the room (with your head, of course). Go to the last room, use the parts on the machine and time to leap through time.
CHAPTER 24: THE TIME MACHINE, THE SEWERS Back to the sewers, yeah. Save your progress and make your way to the tribe village. Use the fountain of life to the left and go in the building. Note the pressure plate in the fi
CHAPTER 25: THE TIME MACHINE, THE RIPPER Ready to face Jack the Ripper? Some payback needs to be done, I suppose. Save your progress, buy some stuff and go to the rescue. He is only vulnerable when he steals Kiya's soul. So use the dash to avoid his attacks and hit him with the magic sword when he's collecting her soul. She has 150 HP and he has 200 HP. Don't waste your time when he's absorbing Kiya's life, she is not supposed to die this time. The Ripper on the other hand... his soul will be perfect in a goblet. At the end of the fight, you'll get a Chalice of Souls and a nice golden armor. You saved Kiya, now you can go back to the professor's lab and chase Palethorn. He's next on the list so hurry up.
CHAPTER 26: THE PROFESSOR'S LAB This is the last time you'll be here for the rest of the game. Here is the dilemma: you can give the Chalice of Souls to the professor and get the galting gun, the last weapon you can get after collecting a Chalice of Souls (best ranged weapon of the game for sure), or keep it for yourself and not get that weapon. Depending of your choice, the ending will change so choose wisely, like the knight of the Holy Grail would say. After taking your decision, talk to the professor and go to the next level.
CHAPTER 27: CATHEDRAL SPIRES Grab the bag of gold to the right and the gold shield in the chest in front of you and go west. Your mission here is to collect the souls wandering around the cathedral in order to open the door at the top of the building. The first one is to the left. Also, if you talked to Winston, he told you to find a spiv somewhere in this level to charge up your new armor. Why? Because your armor protects you from any attack (except falling damages) but it doesn't last forever. As you might have noticed, your life bar just had a change of color, it's now golden. However, everytime you take a hit, the protection will decrease until it's down to zero. And you know the score: no more protection and your hit points will drop down hit by hit until you charge up the armor. 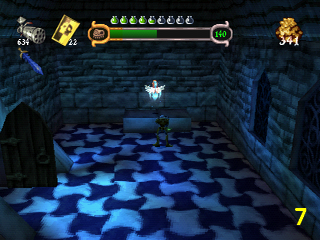  Reach the top of the cathedral, killing all the gargoyles and the cauldrons of boiled oil (you can use you shield while climbing up a ladder or climb it up slowly to the left without using your shield. You'll find some chests of gold here and there oin your way to the summit. Once you're on the roof, collect the second soul to your right and clear the roof of the gargoyles you'll encounter. Now, explore the room to the left, collect another soul (7) and kill the gargoyles invited to the party. Do the same thing with the room to the east and go in the room the north, behind the hight tower. Buy some stuff, use the fountain of life to recover some health and climb up the high tower outside. The fifth soul to collect is on the edge of the tower with a life bottle. Go up, take the bag of gold and go in the tower. Don't worry about the other souls, they are inside the cathedral.
CHAPTER 28: CATHEDRAL SPIRES, THE DESCENT Now that we're inside the cathedral, we need to go down. That's why it's called "the descent". Also, the music of this stage kinda reminds me of Nox Arcana. Save your progress, jump on the chandeliers and hit the lever to go down. Don't forget the two souls on the platforms. Get rid of the armor knights and go through the small opening first. Collect the soul and kill the statues. Go through the other passageway, kill the gargoyles, then collect the three souls and go through the door to the north. Grab the chests of gold, buy some stuff and use the chandelier to get the golden cog. You'll need to make a dash jump for this item (run then press the triangle button and the circle button). Go back to the last room, go down, kill the armor knights and go through the passageway. Collect the last life bottle of the game and the soul then kill the statues. Go in the next room, recover some health with the fountain of life and use the golden cog on the mechanism. Go to the next room, go up the stairs and use a hand to jump into the pit. Now, go get the golden cog and escape the obnoxious place by the pipe over there. Bring the cog back to your other half, go back to the room with the mechanism and hit the switch a few times until the other mechanism is reachable (and by that, I mean it's located to the bottom right hand corner). Now, go to the next room, put the golden cog and hit the switch until the ladder in the next room can be reached. Go there. The souls you collected will get rid of the demon in the next room and you'll get the spell page. Now, you have exactly one minute to escape the cathedral. You must go back to the beginning of this level to end the stage. If you fail, don't worry. You won't restart from the beginning of the level but right after killing the demon. Beware of the crumbling stuff though. You think it's over? Ha ha ha ha... it's not over. It's time for the final showdown.
LAST CHAPTER: THE DEMON Save your progress and carry on. You must fight Mander and Dogman once again. The strategy is exactly the same as the last fight. Dogman will be the shield of Mander. Keep your distances and use the charged up attack of the hammer to get rid of Dogman and weaken Mander as well. Then, switch to a ranged weapon and shoot Mander until he faints. Go through the door and prepare yourself for the last battle. Palethorn will summon the demon. Compared to the last fight, the arena is tiny. So how to beat this demon? By shooting it, that's why Winston said "buy some ammo". There's the casual way and the glitch. I'm going to explain both of the methods. First, the casual way. There are two opportunities to seize in order to hit him. First, avoid the demon's fury of fists. The first punch will always hit the opposite way. Then, go to the left, wait until Palethorn comes and shoot a few times before avoiding the homing missile he's throwing at you. That's the first opportunity to seize. Then, jump over the fire waves and get ready to shoot the airship a few times because he will come after that attack. Those are the patterns you need to memorize for this fight. After a few shots, Palethorn will lose control of his airship and will accidentally shoot the demon. Repeat this method until the hit points of the demon are down to 0. The glitch is tough to be performed correctly and you need a perfect timing. First, equip the crossbow then wait until the demon does his fury of punches. Stand nearby his head when he does the first punch, jump and shoot. If you do it correctly, the demon will lose some health. Repeat that three times and the boss will be defeated. Depending if you collected all the Chalices of the game or not, the ending will change. I'm not going to spoil it to you, folks. Just see by yourself. Either way, you completed MediEvil 2. Congratulations. Time for the bonus part.
BONUS CHAPTER: SECRET AREAS As mentioned earlier in this walkthrough, once you get the opportunity to use your head on the green hands, you will be able to find all the secret areas in the levels. Everytime you see a hand greeting you, there's a secret area nearby so look everywhere. This part will tell you where to find these secret areas for each stage before Dankenstein. Who knows what you can find there. One more thing: you must finish the level in order to get all the stuff you collected.
THE MUSEUM Right at the beginning, a hand will greet you. A small opening is located nearby the passageway to the next room, to the left. Go in, use the crates to go up and grab the gold. In the next room, you'll find more gold, an energy vial and a fountain of life. Now, go up the stairs, then follow the path to the left and jump into the hole to go back to the room where your body is waiting for your return.
KENSINGTON Once you're in the tomb, kil the two mummy dogs and find the hand. Go in the small opening, grab the two chests of gold and recover some health with the fountain of life. Leave the room by either the small opening nearby one of the chests or where you came from.
Once you reach the place with the mini-game, check the red and white striped tent with the help of a hand. Beware of the imps inside, since you can't attack with this form. Use the trampoline to go to the other side and grab the three chests and the bag of gold then leave the tent.
GREENWICH OBSERVATORY Go to the docks and locate a ship with a small opening, nearby where you have to solve the puzzle. Go in with the help of a hand, go right and jump from crate to crate to reach the other side. Don't dive into the water, remember you can't swim. Avoid the rats and grab the chests of gold and recover some health with the fountain of life on the pile of crates. Leave the wreck once you're done with this.
KEW GARDENS You must reach the room with the last tow civilians to save. Save them, then use the help of a hand to enter the hothouse to the right (8). It's a mini-game in which you must find four hands lost in this mini-maze. Find them all and bring them back to the statue in the centre of the maze. Beware of the rats and the pumpkins. There's a chest to grab to the north and three more chests as your reward for helping the hands. Now, leave the hothouse.
DANKENSTEIN The passageway is right next to the slope at the entrance of the room with the freaks. Grab the two chests of gold and some health from the fountain of life as soon as possible because you'll be harassed by two pesky rats.
Well, that's all, folks. I hope you enjoyed that walkthrough. See you in the next adventure. Bye and take care. Laian out.
Hello everyone, it's your host Laian and welcome to a new walkthrough. So yeah, I've been on vacations but I managed to deliver another walkthrough just in time. Isn't that lovely? So here we are this month with a PSX game called "MediEvil 2", the sequel to MediEvil. Don't ask me why I played this one instead of the first episode, I don't really know but I'll do the first episode, do not worry. So I think we'll start this walkthrough without wasting any more time. We have a long adventure to go on so let's visit London in 1886.
CHAPTER 1: THE MUSEUM Yes, Sir Daniel Fortesque, back from the underworld, inside a museum. After the discussion with that nice little ghost (get used to it, he will appear quite often during this game), go in the room before you, destroy the display and grab the small sword, your very first weapon if we don't count your useless but loyal "arm-rang". Carry on, fight the first enemies of the game, which are zombies and pick up the museum key. You might have noticed that, everytime you kill an enemy, its soul goes up in the sky and a goblet with a percentage appears at the top of the screen. This goblet is "The Chalice of Souls". There are ten Chalices to fill with souls and you can find them all if you want. Sometimes, they are obvious, they can be found easily, but at some points, you'll have to look everywhere and try everything possible. Do not worry, I, Laian, will make sure to tell you where to find the Chalices. Grabbing the Chalice will grant you a new weapon but we'll see that in due time. Also, the ending changes if you find all the Chalices of the game. Anyway, go in the next room to fight another type of enemy. Move constantly and strike everywhere. You can do a charged attack if you want but I really don't recommend doing that in this situation and in front of these two living armors. Grab the bags of gold hidden behind the colored relic and the energy vial, then go up the stairs, destroy the display and grab the pistol. A feature that the developpers added to this game allows you to equip up to two weapons and switch easily to each weapon equipped with a simple command: L1+ the square button. I suggest you to keep a weapon with a short range (for example the small sword) and a weapon with a long range in the other slot (the pistol for example).
Carry on, grab the copper shield in the chest and some gold then open the locked door with the key. The bronze shield can be only used if you crouch by pressing the triangle button. Yes, that doesn't work like The Legend of Zelda. It's really nice to block the projectiles for example, though keep in mind there's a durability. In the next room, go down, using the ladder. If you don't do that, Sir Daniel Fortesque will die instantly. And I have to tell you there's no lives, nor continues. Just some recovery items here and there. You'll face a new type of enemy sent by that living tyrannosaurus wreck. Kill them and the tyrannosaurus will be so mad that the statue will fall down, creating a path to the next room. Use the fountain of energy to recover some health (note that the fountains have a limited amount of energy, will become useless when they couldn't give you any more energy and won't be fully restored when you will replay the level so use these things wisely) grab the bag of gold, equip the pistol and go in the next room. Shoot each of the guards until they die, avoid their projectiles, leap over the fence and grab the gold to the left and to the right. In the next room, you'll meet the spiv. He CHAPTER 2: TYRANNOSAURUS WRECKS Move just a bit forward to have a discussion with the little ghost. Besides giving you a hint about how to beat the boss, he will suggest you to save your progress. Say "Yes", check the room to find some gold and go in the next room to face the boss. This fight has two rounds. The first form is the one you saw earlier twice. For now, avoid his attack, go through the passageway, buy some ammo to the spiv if you need some and go to the second floor. Avoid his attacks and wait until he calls for help. You'll see some kind of red bulb on his head. That is the weak point. He always shows this bulb when he summons the minions so go down then on the tyrannosaurus and hit the bulb. Repeat this method once more until he's defeated. It's not over though. Now, he turned into a gargoyle. Go back to the second floor and wait until he summons the minions. Unfortunately, he's flying so your sword will be useless. However, it's a good opportunity to use the pistol and shoot the bulb a few times. Repeat this method and, this time, he will die. Grab the life bottle (this item is exactly like the energy tank from Metroid and can be filled with the vials and the fountains of life you'll find during your journey) and go through the door that just opened to end the level and go to meet the doctor.
CHAPTER 3: THE PROFESSOR'S LAB Welcome to the doctor's lab, the hub of the game. After the discussion, step on the tile to the right to give the Chalice and get a new weapon: the cane stick. It's slightly better than the sword except one thing: you don't swing it like the sword, you poke the enemy with the other side of the cane stick. It's fashionable though (and I would give anything to have a cane stick like this one). The charged attack is a special attack. The cane stick hits the ground and creates three lightnings that go straight. Now go to the projector and
CHAPTER 4: KENSINGTON Move forward to face a new enemy. Your new opponent uses its cane stick to resurrect the zombies. When the zombies are alive, you can't hit the gentleman necromancer (yes, it's a cool name for this enemy, don't you think so? ^^ ). So you must kill the zombies first and then hit the gentleman before he has a chance to resurrect the zombies once again. Avoid the attack of the cane stick and poke him with yours (or use your sword) and hit him until he dies. The zombies will die as well and you'll get their soul and some gold from the gentleman. Now, go to the left to see the museum, kill the gentleman and his minions and use the fountain of life if you need to recover some health. Climb up the ladder to go on the rails, find the spiv and buy some ammo if you want to. Don't ring the bell next to him, it calls some sort of doombuggy in which you'll find the Chalice of Souls of the stage. Unfortunately, two gentlemen and some zombies are not enough to collect this item so you have to wait and dispatch more enemies. Stay on the track, open the chest, grab the copper shield and go down. Go through the passageway next to the ladder, kill the gentleman and the minions then activate the switch behind the building with the sign (2). Go in, grab the bag of gold, then move the crate to go up the pile of crates and pick up the depot key. Leave the building by the opening to your right, kill the zombies and go back nearby the museum to kill more zombies. Open the door with the key you just got, go to the left and open the chest to activate a trap. Run away and let the trap kill the zombies for you then go in the building. At the top of the pile of crate, you can see another key waiting for you and a fountain of life nearby. Hmm, that doesn't smell good here. Grab the town house key and prepare to face a new enemy: Anubis. Well, a thin and tiny version of the god. Remember the laser beam that the minions in the museum fired? This enemy fires FOUR laser beams in FOUR directions: behind him, straight forward, to the left and to the right. It's not one replica of Anubis you'll have to face but three. Kill them to complete the Chalice of Souls, move the crate on the chariot and leave the building. Go back to the area where the museum is, kill the zombies and open the door to the left. Welcome to the town house, where all that mess started. Will we find the magic book mentioned by the doctor? Let's see. Go up the stairs, then check behind the crates to find a chest containing a pocket watch. Hmm interesting, how to use it now... And where... And when... I guess we'll find out later. For now, go downstairs, leave the house, go back on the rail and call the doombuggy with the bell. Grab the Chalice of Souls and go on the rooftop of the museum to activate a cutscene. Now, go back to the museum by the new opening.
CHAPTER 5: KENSINGTON, THE TOMB That room should be familiar to you. Right at the beginning, Winston suggests you to save your progress. You are on some kind of platform suspended at an incredible height. You might die if you fail your jump (or lose some life if you're lucky) unless you have a full life bottle. Jump from platform to platform until you reach the monument. Grab the gold, buy some ammo, go down, kill the enemies and enter the tomb. There's a fountain of life a bit further to the right if you need to recover some health from the last fight. Kill the enemies and carry on. In the next room, use the columns to create some stairs in order to grab the tablet of Horus, the staff of Anubis and the scroll of Sekhmet. There are three creatures to slay by the way, so watch out. Go in the next room and give the items to their respective owners (from left to right): the tablet, the staff and the scroll. After the cutscene, you'll be back to the professor's lab.
CHAPTER 6: THE PROFESSOR'S LAB Talk to the professor. He will analyse that pocket watch in the mean time, while you keep looking for zombie juice apparently. I... I think he means more clues about the incident. Give the Chalice of Souls to get a new weapon: the hammer. A slow but powerful weapon. Now, it's time to go to the next level: the freakshow.
CHAPTER 7: THE FREAKSHOW That level has a cool music but, trust me, it might give you some troubles. The very first enemy is that fat lady with a beard. She has two attacks: the belly attack and the bodyslam. Both of these attacks are embarrassing. But you know what? It's perfect for our new toy. Equip it and whack'em all. The pistol works fine against them as well. It takes a while and ten shots to kill one of these fat ladies but it's safe. Grab the gold and go through the passageway to the left. Whack the new enemy and its brother (or sister), grab the gold, the life bottle and the chest on the platform then go back to the other side... the safe way. Water means instant death by the way. Carry on and face a new enemy: the sorcerer. He summons a spiritual red dragon that will chase you before going back to the sorcerer. You can only hit the sorcerer when he does that. Otherwise, move constantly to avoid the harassing red dragon. Once the sorcerer is dead, go through the door that just opened. Kill the enemies with the devastating orb trapped in the chest and go in the house nearby the trampoline to find a spiv who sells some ammo for the pistol. There's also a mini-game in this section of the stage if you have the hammer. Locate a house with a hammer on a door and enter. It's a new version of "whack-a-mole" called "whack-an-imp". You have to whack 8, then 10 and 12 imps, all that before time runs out. You can lose some health during this mini-game, since these creatures like to throw some kind of green mud at your face but, don't worry, there will be from time to time some energy vials in order to recover some health. At the end of each round, if you whack the number required to finish the round, you'll win ten chicken drumsticks. That special weapon turns some enemies into roast chickens that will recover some health once picked up. Also, use the charged attack of your hammer on the strenght game outside next to this mini-game to hit the jackpot and get three bags of gold. You might note some hands following you. They are friendly but you can't do anything with them at the moment. Keep moving forward, note the two locks and kill the imps nearby the huge tent. To the right, there's a fountain of life. To the left, nothing apparently... unless you check behind the tent with the clown. Oh, a secret chest. Here is 50 gold pieces for the curious souls
Now, go down the slope and enter the tent with the scary face. Fight the enemies to open the door and carry on. Step on the trampoline then go on the platform, leap over the red and white striped fence to find another secret chest. 50 more gold pieces for you. Now, kill the imps and the fat ladies and enter the building to the left. Kill the enemies, use the trampoline to go up, buy some ammo if you need some and collect the copper shield and the Chalice of Souls if you killed enough enemies to complete it (otherwise remember its location and come back once you killed enough enemies). Leave the house, go through the tunnel and fight one of these elephant-bots mentioned by Winston in the last area (if you did interact with the spectral light). You must find where they come from in this freakshow and destroy the source of these robots. How to beat this enemy? First, equip the pistol, then go underneath the elephant-bot then shoot him in the back. Yes, they are controlled by an imp. A few shots and you'll get the elephant key 2. Now, go back to the last area and jump from trampoline to trampoline to reach the other side of the pool. It's a tricky part so take your time if you want to keep your health. Beat the new elephant-bot, exactly like the other one and grab the elephant key 1 (3). Now, go back to the locks, use the keys and go in the giant tent. Your next opponent is an elephant-bot with a difference: the imp is protected by a shell. You see these pieces of metal hanging from the ceiling? There's a lever nearby and you must activate each of these levers exactly when the elephant-bot V2.0 is underneath the piece. It's the only way to destroy this one. The chest contains a copper shield. Go to the nearest lever, wait until the elephant-bot is underneath the piece and activate the lever to drop the piece. Do that with the two other levers to beat this enemy and go back to the first area of the level. Go through the open door in front of you to go back to the professor's lab.
CHAPTER 8: THE PROFESSOR'S LAB Same old song. Talk to the professor to learn more about the pocket watch, give the Chalice of Souls you found at the freakshow in exchange of the crossbow and go to the next level: Greenwich observatory.
CHAPTER 9: GREENWICH OBSERVATORY Move forward to activate a cutscene. Yes, a bird just stole your head, that's embarrassing. You must find it. You also learn a new command if you summon Winston. Make your way to the entrance of the observatory and climb up the ladder to the left to find your head. Put it back on your body with the command you learned earlier, go down and go east. There's a fountain of life and some gold. If you go to the left, you'll find a trap and a copper shield. Go to the docks. Kill the two sailors then go on the roof by the ladder to find a fountain of life and a bird to kill (they can steal your head so kill it before it has a chance to pick your head up). Go down and carry on. You'll face the most annoying enemy of the level (and probably of the game in my opinion): some kind of alien head with legs. They are terribly annoying. Not only they spit their strange goo but they possess the dead bodies. You can whack the dead bodies before they stand up on their feet, which I highly recommend since they won't give you their soul if they are possessed by the alien head. Only the alien head will drop its soul once dead. Kill its brother a bit further and the other enemies and buy some ammo to the spiv in the corner. Don't go in the building, go behind to find a life bottle and note the Chalice of Souls at the other side of the canal. Now go in the building. Here is another puzzle. You'll see four levers in the room and a hole. Put your head into the hole, switch to the head and use L2+R2 to see a code. Now, switch back to Sir headless Daniel Fortesque and enter the code, using the levers. The bridge outside will be lowered and you could move on. Take your head back, go outside, go down and kill the enemies. Go back up, cross the bridge, jump from boat to boat and go grab the Chalice of Souls to the left. Hit the lever to make a platform appear and carry on. Kill the last enemies of the level, grab the chest and enter the building.
CHAPTER 10: GREENWICH NAVAL ACADEMY Kill the enemies outside (beware of the cannons, though they can help you in order to kill your opponents), grab the energy vial to the right and use the fountain of life to the left if you need some health then go in the building. Kill the enemies, go up and put the head into the strange submarine. Now, switch to the head, use the command L2+R2 and locate the item in the pool. Go down and move the crane to grab the item. The location of the item in the pool is randomly generated by the way. Go get the bellows, then go back up, take your head back and go up. Before using the bellows on the balloon, barter with the spiv to the right if you need some ammo. Now, use the bellows, then equip the torch, go get some fire, jump on the bellows and flyyyyyyyyyy... to the observatory. And land like Launchpad McQuack. After the cutscene, take care of the two henchmen. As you can see, the formation is... interesting: Dogman is protecting Mander. Use the charged attack of the hammer to hit both of them. Dogman will faint after a few hits and Mander will be mad at you. He will move faster and whip you hard with his tail. He is really tough to beat at this point of the fight but, with a few shots, he should be knocked out as well. Ah, one more thing: avoid his projectiles and Dogman's punches, otherwise you'll be stunned. And trust me, they like to beat you when you're defenceless. If you need some health and ammo, you'll find a spiv and a fountain of life in a room to the left from where you start the fight. After this fight, you'll be back to the professor's lab.
CHAPTER 11: THE PROFESSOR'S LAB Should I really tell you what to do here? No but I'll do it anyways. Talk to the professor then give the Chalice of Souls to get the axe and go to the next level.
CHAPTER 12: KEW GARDENS This level is a pain in the butt. How many times did I retry it to make that specific part? I really wish the emulator used for PSX games in Vizzed had the save state function. You don't know what I'm talking about? Oh don't worry, you'll see what I meant by this. First things first, you will notice that the Chalice is filled up at 41%. That's for a good reason. It's the only level in which you won't get the Chalice if you screw up. Right at the beginning, go to the right, avoid the giant rolling pumpkin and go grab the potting shed key. Now go to the left, avoid the rolling pumpkins, kill the enemies and grab the antidotes they dropped and the life bottle. Carry on, open the potting shed and grab the water tank valve. Now, leave the potting shed and enter the giant building outside. And here starts the tough part of the level. In this section of the level, you must save the civilians infected before they turn into one of these horrible creatures. That's why you picked up some antidote. You need to use that item when you are close to a civilian. There's some creatures with them so it adds more fun to the task (and by "fun", I mean "troubles" ;D ). Equip the antidote (yes, you MUST equip it otherwise it won't work) and spray the civilians if they have been infected by the creatures. They will focus more on the civilians than you so get rid of them as soon as possible. Don't forget to grab the antidote they drop in order to refill the flask. You shouldn't run out of antidote if you use it wisely and kill the enemies. Ah also, you can hit the civilians so... don't kill them. What happens if you slay one, on purpose or accidentally, you may ask? Well, you'll lose some percentage for the completion of the Chalice of Souls and that's it. There are three civilians to save in the first room. Once you took care of this room, proceed to the next room, go down, kill the creatures, grab the gold and use the fountain of life if you need some health. You can't go north at the moment so go west, save the two civilians and kill the creatures. Climb the tree up to notice the Chalice of Souls at the top of it and carry on. Go up, grab the bags of gold and run away from the rolling pumpkin. Go in the new area, buy some ammo if you need some, then use the valve to sprinkle the evil bulbs of the first room. Go back there, go up and grab the pond room valve. Go back to the room with the two civilians, go up and use the valve on the machine. Go get the hothouse valve (4), go back to the last room and go north. Save the last civilians, use the valve on the machine, go to the left and grab the life bottle. Go back to the last room, go up and kill the last enemies. There's a fountain of life you need some health and an energy vial at one point of that fight. The chest contains a silver shield, which has a better durability compared to the copper shield. Also, beware of the bouncing and rolling pumpkins. Before carrying on, go grab the Chalice of Souls at the top of the tree. Now, you can go through the new passageway to end the level.
CHAPTER 13: DANKENSTEIN Hmm, why is the music of the freakshow played? Anyway, get the bombs from Winston, save your progress and go to the right. Hey, that door wasn't opened before! What's going on here?! Go in the next room. After the cutscene, grab the limbs one by one and put them into the device on the floor. There is a Chalice to grab in this level so make sure to pick it up once you fully filled it with the souls of your opponents. In order to get to the Chalice, go in the next room, follow the rail that goes southeast from the entrance of the room. You'll be in the last room, above all the professor's stuff. There's a spiv but there's also some platforms. Use these platforms to grab the chest and the Chalice. Since the professor already has the head, you must kill these mutants and find the torso, the two legs, the two arms and the bum. The bum can be obtained if you kill the farting minecart on the rail. The limbs, well... you have to kill these freaks. Bring them back the device one by one before time runs out. The bombs Winston just gave you will come in handy for this task. You can throw the bomb if you press the square button or put it on the ground if you press the X button. The axe throwing (square button when you have the axe in your hand) is an alternate way. There's also a chest with a silver shield inside and a life bottle down below to the right. You'll find a fountain of life right next to the chest that contains the silver shield. Once you brought all the stuff back to the professor, another cutscene will start and you'll go to the next stage.
CHAPTER 14: IRON SLUGGER Here we are. The long-awaited clash of the titans. This fight is kinda tough to be honest and you will probably retry a lot of times. I have no other strategy but this one: look for the weak spot everytime he blocks. Let me explain this to you: if he blocks his head, hit under the belt (yes, that thing... please, don't make me say that word) by pressing the X button or the circle button. If he blocks the low attacks, try to hit the head by pressing the square or the triangle button. He hits hard so try to keep some health by blocking his attacks: R1 for the high attacks and R2 for the low attacks. At some points, he will use an unblockable attack. It takes him a few seconds to do it so you have enough time to hit once or twice before being hit. At the end of each round, you need to find two of your limbs stolen by the imps. Kill them and grab the limbs to carry on the fight. You don't actually need both of the limbs but it helps when you find them. The fight lasts six rounds so make sure to beat Iron Slugger as soon as possible. It's impossible to beat him during the first round since he is tough so you'll need more rounds to defeat him. Don't worry, you lose your limbs but he also lose his limbs aswell during the fight. And, as opposed as you, he won't take them back, which is neat. I don't have to tell that the beginning of this fight will be harder than the end when he will be on his knees, weak, and you will finish him with your head or your fists, depending of your health. Once you beat Iron Slugger, you'll be back to the professor's lab.
CHAPTER 15: THE PROFESSOR'S LAB Well, I think you have two Chalices of Souls to bring back to the doctor: the one from the Kew Gardens and the one you got during Dankenstein. Do that to get the broad sword. It's your sword with a difference. Now it's enchanted and you can recharge it if you talk to the spiv in the levels. Now, you can do something else. Something interesting: you can now use the green hands you saw at some points in the game. Indeed, it's exactly like the submarine but you will put your head on the hand instead. Like this, you can reach some places that Dan can't reach, which is good. I suggest you to go back to the places you already visited to find some good stuff in these extra areas. I'll make a special part later in this walkthrough with all the secrets areas. A new level has been unlocked: Wulfrum Hall. It's your next destination, since Kiya goes to Whitechapel. Whitechapel... Lair of Jack the Ripper, brrrrrrrrr... hopefully she will be fine. Even though, I have a bad feeling about this.
CHAPTER 16: WULFRUM HALL What a nice building. It must be the mansion of a wealthy man. Go ring the bell. Apparently, we are greeted by the butler, who is not black (yes, I wanted to quote that reference). He doesn't want to let you in so you'll need to find another way. Use the help of a hand, then leap over the fence to the right and go through the open window. Hide underneath the table, wait until the (adorable?) butler is not looking at you and go underneath the other table. Wait until he goes to the room you came from to grab the front door key on the table and go in the next room to find an energy vial. Now that you have the key, you must leave the basement without being spotted by the butler otherwise you won't get the key. How? Well, you should have noticed a pressure plate when you went in the basement. Go back there, call the elevator and drop in (if you dare...). Now go underneath the table, wait until the creepy little girl is not looking at you and go to the main hall. Note the Chalice of Souls on the table and the armors around you and go in the next room. Avoid the little girl and go on the bookshelves to reach the window and leave the manor. Now, bring the key back to your other half, grab the gold nearby the small window to the left, open the door with the key and enter the house.
Well, the armors are now moving... Figures. Go to the office to the left after killing them, grab the energy vial and go back to the main hall and blast the planks with the hammer to go to the next room. Underneath the stairs, there's a passageway to the basement. Go slay the butler and go back to the last room. Go up the stairs, grab the silver shield in the chest and kill the butler. You can't kill the little girl unfortunately. Go check the first room to the right, go east and grab the life bottle. Go check the next room to the right. Uh oh, coffins. And, to be honest, I don't think they are empty. Good thing their owners are This room is quite tricky. First, move the long pile of wood to the far left in order to create the path to the elevator for our nice fellows. Step on the elevator, bash the planks and push the first coffin. Now, go back down, attract the vampire near the elevator, dodge him and trap him in the path with the crate. The final touch? Push the vampire using the crate in order to let him take the elevator of no return. Same thing with the last vampire of the room. A new door will open. Go there, then enter the room to the right. Memorize the pattern on the wall (5), use the fountain of life to recover some health and leave the room. Go up, bash the planks and go back down. Grab the bag of gold, move the coffins in the round room with the chandelier, using the pattern on the wall, otherwise you'll wake them up and will be forced to run away until they come back to their coffin. Then, go activate the switch three times to make the chandeliers go up and destroy the three vampires. Now, go back up and go through the open door. Time to meet the owner and rant about the staff of the mansion. They need to be fired. Oh wait, it's already done
CHAPTER 17: THE COUNT As always, before a good boss fight, you can save your progress with Winston. Also, keep in mind his hint. Buy some stuff and enter the room. The Count is quite hard, the only way to beat him is to reflect his miagic missiles. He will start the fight with that attack so hit a mirror, stand right before it and go away when a shot is thrown at you. The mirror will send the projectile back to the Count if the position is correct. Avoid his next attacks and repeat the method once more. Now, he will throw another type of projectile that you must avoid at all times. Beware of the bombs. Once he stands in the middle of the room, it's time for more magic missiles to reflect. Avoid his next attacks and repeat the same method. Keep pressing the triangle button to avoid his fury of punches and the bats. Time for the round two. His wrath made the planks fly away and the sunlight is now in the room. Time to reflect the halo to our dear opponent. Be warned, your opponent can change the angle of the mirror if he is close to it. Also, be fast when you change the angle of the mirrors because he uses an attack that will litterally erased all the work you've done, in other words you'll be forced to restart from the beginning. Two hits and the Count will die. Time to head back to the professor's lab.
CHAPTER 18: THE PROFESSOR'S LAB Well, as I expected, Kiya is not back so the professor is worried about her. You must go to Whitechapel and see if she is ok. Give the Chalice of Souls to get the lightning and go to your next destination.
CHAPTER 19: WHITECHAPEL The first part of the level, when you are in the graveyard, is not hard. Just kill the zombies and go downstairs. Welcome to the streets, where all the policemen won't stop harassing you if they spot you. You can only stun them for a short period of time. Handy if you want to run away from them. The club, where Kiya has been seen for the last time, is right before you but you need a membership card in order to enter. The streets are a terrible maze, I swear. Anyway, go to the left, then right, and go in the building to find a spiv and a fountain of life. Go outside, then go to your left, find the entrance of a pub in an alley, go in, then carry on. Smash the crates then grab the bags of gold, go through the other door and go in the dressing room. Now, you are a gentleman. Though, that doesn't mean the guards outside will leave you alone. Oh no, they are really annoying. Now, leave the shop, keep going forward to find the location of the Chalice of Souls. Despite the fact that you can't kill the guards patrolling around, you can however kill the zombies around. And the rats but they only drop one coin when you kill one. Go get it once it's complete as always. Go left, note the door to the left, go in the building to the right and get the flaming crossbow. Now, go outside, stand in front of the statue, turn the three projectors and enter that code with the specific pressure plates, from left to right: green, red and blue. Grab the unicorn shield then go back to the club. Go east now, move the crate, go on the roof and enter the house by the window. Use the fountain of life to recover some health, then go down to the basement, grab the gold hidden by the crates and use your head on a hand. Go through the small opening, step on the pressure plate and go get the griffin shield with your other half. Now, take your head back, smash all the crates and grab the library key. Go up the stairs, use the key to open the door, pick up the silver shield in the chest and the club membership card and go back to the graveyard. Locate the crypt with the two emblems and use the shields. Go in, kill the zombies until you wake up the gentleman. Now, focus on him and hit him multiple times until he dies. Grab the beard and go back to the club. You should be able to go inside now. Behind the counter there's a chest of gold. Now go talk to the hmm woman with lot of make-up on her face to get a life bottle, make sure you collected the Chalice of the level and go to the door nearby the statue. Move a bit forward to watch a sad cutscene and end the level.
CHAPTER 20: THE PROFESSOR'S LAB Time to bring the bad news to the professor. The Ripper got Kiya sadly. After the cutscene, you won't get a chance to give the Chalice (nor before the cutscene). You will be teleported to the next level: the sewers.
CHAPTER 21: THE SEWERS Winston will give you the blunderbuss. Cool, let's act like Scrooge McDuck now! I think you get this item if you collected the Chalice of Souls of Whitechapel. Anyway, go down and follow that nice fellow. They seem to have a problem with their pet. Shoot the beast to see that one of these freaks from Greenwich Obsvervatory is back to business. Smash this alien head to free the creature from this mess and carry on. After the cutscene, grab the gold shield in the chest, then go to the left, recover some health with the fountain of life and go through the passageway. Kill the two alien freaks, grab the bag of gold, carry on, use the help of the hand to go behind the door and step on the button to open it. Now, bring your other half there, get your head back and carry on. Use the hand once more to go in the small opening above the crates, then go to the next room with the other half. Activate the switch to create a path to the button, step on it and bring Dan there. Grab your head, climb up the ladder, grab the bags of gold and carry on. Go left, get the poster from the spiv and slay the plant to free the first woman of the tribe. Four more to go. Go back, then take the other path. Shoot the alien freaks down below with a ranged weapon (for example the blunderbuss), then save the two women and grab the energy vials behind the control panel. Carry on, keep in mind that place and go through the passageway up the stairs. Now, go to the east wing, recover some health with the fountain of life and kill the alien head. Hit a bull a few times until he breaks the wall and save the fourth woman in the next room. Kill the two aliens freaks in the next room, climb up the ladder and grab a life bottle. Go down, hit a bull to break the wall and save the last woman. Use the hand to go in the middle hole and grab the Chalice of Souls (if you completed it, which shouldn't be a problem if you killed all the enemies). Now go back and talk to the chief. Now, you can call the ferryman. Grab the chests of gold and go on the raft to end the level.
CHAPTER 22: THE PROFESSOR'S LAB Hey, where's the professor? Is he still crying in his room after what happened to Kiya? Oh boy. Well, I guess the Chalice can wait. Go through the open door to activate a cutscene and go to the next level. There's nothing else to do, seriously. Well, back to the museum.
CHAPTER 23: THE TIME MACHINE Yes, one of the professor's experiments is in the museum: the time machine. With that device, it might be possible to leap through time and save Kiya before she gets murdered by Jack the Ripper, who knows. Winston will give you the magic sword if you collected the last Chalice. Powerful and fashionable. I'm not a fan of blue color but the blade of this sword is just amazing. You can also save your progress. Grab the chest of gold to the right and go downstairs. Ah, the living armor knights. They do want to taste our new toy, I suppose. Go downstairs, use the fountain of life to recover some health and go through the passageway. Use a hand to go in the device and grab a part of the time machine (6). Now, go back upstairs and go the other way. Go left and play a game of "Simon says". Don't tell me you don't know that game, it was really popular at that time. Ok, the rules are simple: memorize the pattern and do it. Grab another part of the time machine and go to the room to the north. With the help of the hand, go through the glass and stand right before the spaceship. Now, with your other half, step on the pressure plates, following this order: left, right and middle. Grab the third part of the machine and leave the room (with your head, of course). Go to the last room, use the parts on the machine and time to leap through time.
CHAPTER 24: THE TIME MACHINE, THE SEWERS Back to the sewers, yeah. Save your progress and make your way to the tribe village. Use the fountain of life to the left and go in the building. Note the pressure plate in the fi
CHAPTER 25: THE TIME MACHINE, THE RIPPER Ready to face Jack the Ripper? Some payback needs to be done, I suppose. Save your progress, buy some stuff and go to the rescue. He is only vulnerable when he steals Kiya's soul. So use the dash to avoid his attacks and hit him with the magic sword when he's collecting her soul. She has 150 HP and he has 200 HP. Don't waste your time when he's absorbing Kiya's life, she is not supposed to die this time. The Ripper on the other hand... his soul will be perfect in a goblet. At the end of the fight, you'll get a Chalice of Souls and a nice golden armor. You saved Kiya, now you can go back to the professor's lab and chase Palethorn. He's next on the list so hurry up.
CHAPTER 26: THE PROFESSOR'S LAB This is the last time you'll be here for the rest of the game. Here is the dilemma: you can give the Chalice of Souls to the professor and get the galting gun, the last weapon you can get after collecting a Chalice of Souls (best ranged weapon of the game for sure), or keep it for yourself and not get that weapon. Depending of your choice, the ending will change so choose wisely, like the knight of the Holy Grail would say. After taking your decision, talk to the professor and go to the next level.
CHAPTER 27: CATHEDRAL SPIRES Grab the bag of gold to the right and the gold shield in the chest in front of you and go west. Your mission here is to collect the souls wandering around the cathedral in order to open the door at the top of the building. The first one is to the left. Also, if you talked to Winston, he told you to find a spiv somewhere in this level to charge up your new armor. Why? Because your armor protects you from any attack (except falling damages) but it doesn't last forever. As you might have noticed, your life bar just had a change of color, it's now golden. However, everytime you take a hit, the protection will decrease until it's down to zero. And you know the score: no more protection and your hit points will drop down hit by hit until you charge up the armor. Reach the top of the cathedral, killing all the gargoyles and the cauldrons of boiled oil (you can use you shield while climbing up a ladder or climb it up slowly to the left without using your shield. You'll find some chests of gold here and there oin your way to the summit. Once you're on the roof, collect the second soul to your right and clear the roof of the gargoyles you'll encounter. Now, explore the room to the left, collect another soul (7) and kill the gargoyles invited to the party. Do the same thing with the room to the east and go in the room the north, behind the hight tower. Buy some stuff, use the fountain of life to recover some health and climb up the high tower outside. The fifth soul to collect is on the edge of the tower with a life bottle. Go up, take the bag of gold and go in the tower. Don't worry about the other souls, they are inside the cathedral.
CHAPTER 28: CATHEDRAL SPIRES, THE DESCENT Now that we're inside the cathedral, we need to go down. That's why it's called "the descent". Also, the music of this stage kinda reminds me of Nox Arcana. Save your progress, jump on the chandeliers and hit the lever to go down. Don't forget the two souls on the platforms. Get rid of the armor knights and go through the small opening first. Collect the soul and kill the statues. Go through the other passageway, kill the gargoyles, then collect the three souls and go through the door to the north. Grab the chests of gold, buy some stuff and use the chandelier to get the golden cog. You'll need to make a dash jump for this item (run then press the triangle button and the circle button). Go back to the last room, go down, kill the armor knights and go through the passageway. Collect the last life bottle of the game and the soul then kill the statues. Go in the next room, recover some health with the fountain of life and use the golden cog on the mechanism. Go to the next room, go up the stairs and use a hand to jump into the pit. Now, go get the golden cog and escape the obnoxious place by the pipe over there. Bring the cog back to your other half, go back to the room with the mechanism and hit the switch a few times until the other mechanism is reachable (and by that, I mean it's located to the bottom right hand corner). Now, go to the next room, put the golden cog and hit the switch until the ladder in the next room can be reached. Go there. The souls you collected will get rid of the demon in the next room and you'll get the spell page. Now, you have exactly one minute to escape the cathedral. You must go back to the beginning of this level to end the stage. If you fail, don't worry. You won't restart from the beginning of the level but right after killing the demon. Beware of the crumbling stuff though. You think it's over? Ha ha ha ha... it's not over. It's time for the final showdown.
LAST CHAPTER: THE DEMON Save your progress and carry on. You must fight Mander and Dogman once again. The strategy is exactly the same as the last fight. Dogman will be the shield of Mander. Keep your distances and use the charged up attack of the hammer to get rid of Dogman and weaken Mander as well. Then, switch to a ranged weapon and shoot Mander until he faints. Go through the door and prepare yourself for the last battle. Palethorn will summon the demon. Compared to the last fight, the arena is tiny. So how to beat this demon? By shooting it, that's why Winston said "buy some ammo". There's the casual way and the glitch. I'm going to explain both of the methods. First, the casual way. There are two opportunities to seize in order to hit him. First, avoid the demon's fury of fists. The first punch will always hit the opposite way. Then, go to the left, wait until Palethorn comes and shoot a few times before avoiding the homing missile he's throwing at you. That's the first opportunity to seize. Then, jump over the fire waves and get ready to shoot the airship a few times because he will come after that attack. Those are the patterns you need to memorize for this fight. After a few shots, Palethorn will lose control of his airship and will accidentally shoot the demon. Repeat this method until the hit points of the demon are down to 0. The glitch is tough to be performed correctly and you need a perfect timing. First, equip the crossbow then wait until the demon does his fury of punches. Stand nearby his head when he does the first punch, jump and shoot. If you do it correctly, the demon will lose some health. Repeat that three times and the boss will be defeated. Depending if you collected all the Chalices of the game or not, the ending will change. I'm not going to spoil it to you, folks. Just see by yourself. Either way, you completed MediEvil 2. Congratulations. Time for the bonus part.
BONUS CHAPTER: SECRET AREAS As mentioned earlier in this walkthrough, once you get the opportunity to use your head on the green hands, you will be able to find all the secret areas in the levels. Everytime you see a hand greeting you, there's a secret area nearby so look everywhere. This part will tell you where to find these secret areas for each stage before Dankenstein. Who knows what you can find there. One more thing: you must finish the level in order to get all the stuff you collected.
THE MUSEUM Right at the beginning, a hand will greet you. A small opening is located nearby the passageway to the next room, to the left. Go in, use the crates to go up and grab the gold. In the next room, you'll find more gold, an energy vial and a fountain of life. Now, go up the stairs, then follow the path to the left and jump into the hole to go back to the room where your body is waiting for your return.
KENSINGTON Once you're in the tomb, kil the two mummy dogs and find the hand. Go in the small opening, grab the two chests of gold and recover some health with the fountain of life. Leave the room by either the small opening nearby one of the chests or where you came from.
Once you reach the place with the mini-game, check the red and white striped tent with the help of a hand. Beware of the imps inside, since you can't attack with this form. Use the trampoline to go to the other side and grab the three chests and the bag of gold then leave the tent.
GREENWICH OBSERVATORY Go to the docks and locate a ship with a small opening, nearby where you have to solve the puzzle. Go in with the help of a hand, go right and jump from crate to crate to reach the other side. Don't dive into the water, remember you can't swim. Avoid the rats and grab the chests of gold and recover some health with the fountain of life on the pile of crates. Leave the wreck once you're done with this.
KEW GARDENS You must reach the room with the last tow civilians to save. Save them, then use the help of a hand to enter the hothouse to the right (8). It's a mini-game in which you must find four hands lost in this mini-maze. Find them all and bring them back to the statue in the centre of the maze. Beware of the rats and the pumpkins. There's a chest to grab to the north and three more chests as your reward for helping the hands. Now, leave the hothouse.
DANKENSTEIN The passageway is right next to the slope at the entrance of the room with the freaks. Grab the two chests of gold and some health from the fountain of life as soon as possible because you'll be harassed by two pesky rats.
Well, that's all, folks. I hope you enjoyed that walkthrough. See you in the next adventure. Bye and take care. Laian out. |


| Games have secrets, I have my eagle gaze. |
Affected by 'Laziness Syndrome'
Registered: 10-21-11
Location: France
Last Post: 2409 days
Last Active: 1582 days
06-13-25 03:07 PM
Lum is Offline
| ID: 1415220 | 12 Words

Thank you very much for the clarifying walkthrough of this great game! |
Affected by 'Laziness Syndrome'
Registered: 06-13-25
Last Post: 152 days
Last Active: 126 days
