

 User Notice
 Forum Links
Thread Information
Thread Actions


The Legend of Zelda Link's Awakening DX - Walkthrough
12-29-13 08:20 PM
Laian is Offline
| ID: 947944 | 14726 Words

POSTS: 1531/2232
POST EXP: 457173
LVL EXP: 7575891
CP: 23733.5
VIZ: 3570463

Hello everyone, Laian here with a new walkthrough. This month, we'll play another Legend of Zelda game. I decided to play another one since I played a long time ago Legend of Zelda released for NES (the walkthrough was kind of wacky due to the problems I encountered but anyway it belongs to the past now). No it's not a pun, folks. I 'm not gonna play A Link to the Past. I could have chosen that one but I chose Link's Awakening DX, the remastered version of the Gameboy version. Released for Gameboy Color, with colors and extra stuff, such as a short optional dungeon. Anyway, enough ramble, time to start this journey! CHAPTER 1: GETTING THE STUFF BACK (AND MORE) After the discussion with Marin (that poor Link mixed her up with Zelda... well there's a slight difference between Marin and Zelda now that I think of that... no, it's just my imagination Now, go to the house next to Tarin's house, go in the small room, give the ribbon to the little chomp and you'll get the dog food. Go back to the shore, exactly where you found your sword. From here, go east then north, ignore the monkey, go west, go in the house and talk to the crocodile. Give the dog food to him and you'll get some bananas. That's pretty much all we can do right now so let's suspend this side quest for now and let's go to the Mysterious Forest... or not. We are not done with this village, we have to find another piece of heart and buy the shovel in the shop. In order to get the piece of heart, go behind the house with the chomps, talk to the fisherman and catch the shy fish stuck in the alcove to the right. This fish might be kind of hard to get, you'll need some patience and some rupees. Your reward will be this magnificent piece of heart stuck in the fish's stomach. Don't worry, if the fish runs away, just leave the pond, go back and talk to the fisherman to retry. The fishes will reappear. Now, time to get the shovel. The hard way is farming the rupees until you can afford the shovel, the easy way is the mini-game. However, there's one difficulty with the mini-game: the timing. You need to grab the two red rupees in order to gain 60 rupees and that is quite tricky to get. But with some practice, you'll get these easily. You'll have to talk to the guy between two games though. Once you got the rupees, go outside then go back in the building: the rewards will reappear. Play the game as many times as you need to collect the 200 rupees and go buy the shovel. There's no purpose for that right now, let's just say we'll plan of using it in due time. Now you can go to the Mysterious Forest. CHAPTER 2: THE MYSTERIOUS FOREST Go north from the pit, meet the ancient owl that will give you another lead. There's an item you need in this forest for a cave located to the south. Hmmm interesting, let's find it, shall we? Go north, then east, then north and talk to the racoon. Powder? Alright, I hope you have the magic powder at this point cause you'll need to use it one this racoon. The magic powder can be gained during the mini-game, it's the bag. Otherwise there's another way to get it. Go south, then east, enter the cave and push the rocks to get 50 rupees, Farther, push some rocks, go outside and grab the mushroom. Now go back, leave the forest by the eastern path, take the piece of heart, go south, then the first to the east. Go in the cottage, give the mushroom to the witch and she will give you some free magic powder. It's the only time you can do that. If you grab the magic powder during the trendy game, the mushroom will disappear forever and you couldn't do this optional stuff. If you have the magic powder, use it on the racoon and... Tarin? Looks like it's Tarin... anyway, Marin should be somewhere nearby. Go north, open the chest and get the tail key. The ancient owl will come back and ask you to find the first instrument in the cave. There's nothing else to do in this forest for now so go back to the village. Go south twice then go east, carry on and use the key on the keyhole to open the entrance of the first dungeon. Now, go in the Tail cave. CHAPTER 3: THE TAIL CAVE Go west, push the two creatures into the holes and grab the small key. Now, go west, kill the creatures, open the chest and grab the compass (2). You can now see the chests, the boss AND the hidden keys. Go back to the entrance, go north, clean this room up, press the button and open the chest to get another small key. Go east, kill the creatures, open the chest and grab the dungeon map. The shape to the north is a shotcut but it's a one-way path. Go west now, kill the bats, then go north, break the crystals, kill the worm and open the chest to get 20?rupees. You can notice a crack on the wall to the left: you'll have to go back here once the bombs will be yours. Go east, kill the worm, open the chest to find a small key, go east, open the locked door an go north. You have to hit the creatures and match three same symbols. Open the chest and get the stone beak. Now, you can speak with the owl statues you will encounter. As you can see, there's one in this room. Now, go back to the room with the crack on the wall, go north, open the locked door, carry on, talk to the owl statue, push the single block and go to the next room. Remember the hint given by one of the owl statues? With this hint, you can get rid of the spiky creatures in this room. Some stairs will appear. Go down, kill the goombas, go up and open the chest at the end of the line to get the Roc's feather. Now you can jump over the holes, which is awesome. Now go east and face a new creature. Jump over the spiky log and hit the creature a couple of times. After a few hits, he will die and a fairy and a portal will appear. Go back two rooms to the west, go north, make the gap, use the last small key to get rid of the block and go get the Nigtmare's key i nthe chest. Now go back where the warphole is, go north, don't go downstairs since there's nothing, open the door and prepare yourself for the boss fight.    If you have played A Link to the past, this boss should be familiar. Otherwise, let me introduce you the giant worm. His weak point is his tail. Watch out, he will try to make you fall off. If you fall off, go to the east, go up and go back to the boss room. Four hits with your sword and you'll kill him. Yes, that's it, four hits on his tail and the match is over. Well, it's the first dungeon and the first dungeon,don't expect anything challenging ha ha. Grab your reward, go to the next room and take the first instrument: the full moon cello (3). Your new lead is the swamp to the north now. CHAPTER 3: BOWWOW'S MISSING! On your way back to the village, the ancient owl will talk to you. And, because he is Captain Obvious and you probably don't remember the message after getting the first instrument (unless you did skip it), he will give you the next instructions: the swamp. But, you know, you'll have to suspend your main quest for a while since the village is under attack. Go to the shop, the store keeper has two new items: a stack of 10 bombs for 10 rupees and a bow and arrows set for... 980 rupees?! WHAT?! Anyway, I don't think you can afford it so let's just buy one stack of bombs for now. Ah and now you can also buy three hearts for 10 rupees if you need to recover some health. Ok, you have some bombs, you are probably interested in this crack earlier in the dungeon. You know what? Let's save BowWow, shall we? Talk to the lady, she will tell you that the moblins "dognapped" BowWow. Hmm, they are probably in the forest. Let's check it. Anyone? No? Ok, so leave the forest by the eastern path, take the piece of heart if it's not done yet, go north, then east. A cave... hmm, how interesting. Let's check it. Oh look, a moblin is greeting us! Looks like we're close to BowWow. Get rid of the enemy, go to the next room, kill more moblins, go to the next room and face the leader. This boss is not hard. Avoid the spears he throws at you, then avoid his tackle. If he hit the wall, he will be stunned for a few seconds and you'll be able to hit him once. Otherwise, that means he was not close enough. Four hits and he will die. A fairy will be your reward for this fight. Now go to the next room, save BowWow and go back to the village. Talk to the woman, she asks you to take him for a walk... ok, fine. Go to the trendy game and grab a sack of magic powder, you'll need that for the next dungeon. Let's go to the Tail cave and let's destroy the cracked wall now. There's a secret seashell in the chest, go take it. Then go to the shore, exactly where you found the sword, go east twice, blast the cracked wall and go in the cave. There's a suspicious pool. We should come back here later. Let's go to the swamp now. Leave the forest by the northern path. Since BowWow can swallow everything on his way, he can get rid of the nasty flowers in the swamp. You should be able to get the 50 rupees in the chest and open the entrance to the next dungeon. BowWow won't come with you in the dungeon, that's too bad. Well, it wouldn't be funny after all. And, you know, he is probably scared of dungeons. Anyway, time to find the second instrument. CHAPTER 4: BOTTLE GROTTO In the first room, you can see a chest surrounded by pots. You'll need something if you want to open it so let's carry on. In the next room, use the magic powder on the two torches to light the room then go east since the other way is locked. Kill the skeletons, grab the small key, then go south, use the special power of the sword and stab the enemy in the back. Open the chest, get the compass, go back and go to the right. There's an owl statue but you can't communicate with this one unfortunately, you'll have to find the stone beak in this dungeon. Yes, this item works for the entire dungeon. When you go to another dungeon, he will instantly vanish. Touch the orb, go down, kill the enemy, hit the orb and open the chest to get a small key (4). Go east, equip the feather and go hit the orb. You can grab a sack of magic powder floating in the air if you need to. Press the button, open the chest to get a small key, go north, stab the next enemies, go take the small key, go back and go east. Kill the spiky enemies, open the locked door, kill the enemies and notice the owl statue. Now, go back to the dark room, open the door to the left, kill the bats and go north. Get rid of the enemy, open the chest and grab the stone beak. Now, you should have explored all the rooms and you are wondering "how am I going to carry on?". Well, you saw two owl statues. And we all know that owl is wisdom. So if you talk to the statues, you'll get some hints. One will tell you to tap the orbs (thanks, we already figure this out), the other will tell you to move the blocks in the room. Do it and some stairs will appear. Go down and carry on.  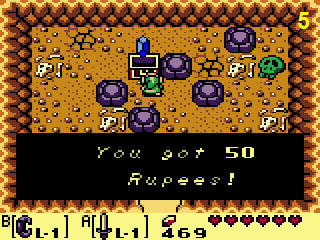  This is the second part of the dungeon. Kill the bat, go up and face a mini-boss. This ogre is easy to beat. Just hit him once, then stay back in order to avoid the bomb that he throws at you and strike back. Normally, it shouldn't be able to grab you and throw you away if you do this technique. Don't stay on the cracked tiles if you don't want to fall off. He will die after a few hits and a fairy and a portal will appear. Go east now, talk to the owl statue for a hint and carry on. The eye in the bottom left corner will attract you and try to make you fall off. Struggle against this force with the opposite direction, open the chest and get the dungeon map. Carry on, kill the bats, grab the sack of magic powder, open the chest to get 20 rupees and open the door to the left. In this dark room, two boos will greet you. You can't kill them unless you light one of the two torches with the magic powder and hit them with your sword before they leave the screen. Your reward will be a nice chest with the power bracelet. Now you can lift up the pots and the stones. Let's try to clear the way to the right in the previous room, why don't we? Use one of the pots to hit the orb, then equip the feather to make the gap, open the chest to get a small key, hit the orb and go to the next room. Kill the enemies, go south and go up. You are back to the room after the mini boss room. Use the warp hole, get rid of the pots and open the chest to get 50 rupees. We still have to find the Nightmare's key. Go back to the room on your map where there's the only chest left. Now how to get it since it's hidden? Well, you remember the hint given by the owl in the second poart of the dungeon. You have to hit the creatures in this specific order to make the chest appear. The order is the imprisoned creature, then the bat and stalfos. Open the chest, grab the Nightmare's key, go back to the previous room, open the door to the right, kill the enemies and go downstairs. Use the pot in the next screen to lower the platform, go up, open the door and face the boss of this dungeon. Equip the sword and the power bracelet, that's all you need to defeat this boss. Now, you can't hurt the bottle with your sword, nor the clown djinn coming from the bottle so you have to dodge the fireballs he'll throw at you. When he come back in the bottle, this one will move. Use your sword to stun the bottle, then use the power bracelet to lift the bottle and throw it back against a wall. After a few hits, the bottle will break and the clown djinn will be so mad at you. But hey, now you can hit him with your sword. Dodge the fireballs and hit him four times and you will be done with this fight and this dungeon. Now go get your reward and the second instrument: the conch horn. CHAPTER 5: TO THE NEXT DUNGEON Go back to the forest by the northen way, jump over the hole, go in the cave, push the blocks and get rid of the skulls in order to get the piece of heart (which means you should get another heart added to your life bar at this point). Go to the right, kill the enemies, get rid of the crystals, move the block, open the chest and take the 50 rupees (if you haven't taken these yet of course). Go outside, go up, get rid of the rock and go downstairs. Use the magic powder on the altar to summon a vampire. Answer "yes" twice and you could carry more magic powder (up to 40, which is really nice). Go back to the southern part of the forest, get rid of the rock, open the chest to get a secret seashell. Go back to the village, bring BowWow back to the woman, she will give you... a kiss. Awesome. Anyway, go to the cottage blocked by the rocks, go through the door after getting rid of the rocks and go to Go back up, then go north twice, then go to the east. Enter the house, talk to Crazy Tracy and give her 28 rupees. You'll get her special medicine. It gives you a second chance if you lose all your life. It might come in handy, however you can only one at the time. And there's more to know about this medicine: Crazy Tracy increases the price! Now, go south until you see a warp hole. You can't use it, you need to find another one. Now, from the warp hole, go south. You'll see the next dungeon, however you need the key. Go back to the warp hole, go east and carry on. You'll see a giant stone head farther. Use a bomb to get rid of it and carry on. Go south and go in Richard's Villa a bit farther. He will give you the key if you bring the golden feather back to him. Accept the deal and go to the castle. You'll find it to the north, just follow the signboards. You also need the shovel, that's why I told you to purchase it at the beginning of the game. The door of the castle is locked. Well, there must be another way to go in. Go south twice, then east, then north. This house is the seashell mansion. You'll have to come back here once you'll have collected all the secret seashells. The spirit will give you something really nice that he calls "the ultimate weapon". Ok, go to the right now, cut the grass and grab a secret seashell. Go back on the road, go east and talk to the monkey. It's Kiki and he wants some bananas. Oh wait, we have some! Give them to Kiki and his friends will make a wooden bridge for you. Plus, you'll get a stick. Yes, this side quest is not over. Cross the bridge, go north three time and go west. Cut the grass to reveal some stairs, go down and carry on. Here you are in the courtyard of the castle. Go east, kill the guard, go south and let's play "whack the mole" with this red guy. Yes, yo uhave to hit this guard four times as if it was a mole. Beware of the bombs though if you're too slow. He will drop one of the five golden leaves required to get the key of the dungeon. Now carry on your exploration of the courtyard. To the east, you'll see a crow in the tree. He won't move a finger so we have to help him. Equip the power bracelet, lift a rock and scare the crow with that (which means throw the rock at him, it was just a pun). He will be so mad at you and will try to attack you before running away like a coward. No way! Use your sword and slice this crow into pieces, you'll get the second golden leaf. Go in the castle now. Go west, kill the enemies (use the magic powder on the spinning enemy to get rid of it and get a fairy), grab the golden leaf, carry on, press the button in order to open the castle gate and go upstairs. Blast the shape to the left with a bomb, kill the enemy and get another golden leaf. Leave this part of the castle and go in the next part. Throw a pot to the door to bash it and get ready to face the next enemy. He has a flail. This castle should looks familiar if you have played A Link to the past. It looks at some points like Hyrule castle, indeed. This enemy is not that hard. Avoid the flail, hit him with your sword a few times and he will drop a golden leaf. You have the five golden leaves, you can go back to Richard's villa, give them back to Richard and get the key to the next dungeon. You'll find it in the basement. Move the box, go downstairs. Go to the left, jump over the hole, open the chest and grab the secret seashell. Go to the right now, go upstairs and exit the cave. It's some kind of amazing maze. You have to reach the statue next to the cave. The key is there. However, you have to cut the grass and be cautious because the grass also hides some holes. Once you made to the statue, use the shovel (that's why I told you to buy it at the beginning of the walkthrough) and dig exactly in front of the statue. The slime key will appear (6). Grab it. Now, let's go to the next dungeon. Go back outside Richard's villa, go west, go up and down (and all around... Oh god, did I just quote this reference? Really? CHAPTER 6: KEY CAVERN The door to the north is shut down, we have to go to the east then. You'll meet your good friend "the eye of doom that wants to make you fall off". This time, he looks like he's keeping something safe in this chest and doesn't want you to get it. Well, let's find an agreement and keep walking. Sadly, you can't make it to the chest. Alright, let's go back to the first room of this dungeon. Do you remember how you opened this door in the castle? Use a pot to bash this one and carry on. Kill the enemies, open the chest to get a small key, go to the right, kill the enemies and open the chest. It's a trap, a slime will appear from the chest. Kill him and go north. Kill some enemies and go downstairs. Four locked doors, one small key. I like this kind of sadistic puzzle. It looks like this dungeon is going to be tricky and will try to trick us. Ok, let's try the door to the left. Besides the slime, you'll face a new creature really annoying. If you come close to it, it will teleport to the opposite side and throw some kind of shuriken at you. There is a way to kill this creature. Charge a sword attack, clome close to the creature and go immediately to the other side. Dodge the shuriken and release the power of your sword to kill it. Once you take care of the creatures, grab the small key before it falls off and go open the door to the north. Oh look, an orb! And an owl statue. And some enemies to kill. Cool, let's clean this room up, grab the small key, hit the orb and go back up for a while. There are two chests to open. One is close to the stairs and contains the stone beak, the other is in a room to the east from the trapped chest. Kill the enemy and go open it. You'll get the dungeon map (7). Go back to the the room with the locked door, open the door to the east with the key, get rid of the enemies and go upstairs. Kill the slimes, pick up the small key, go back downstairs and open the last door. Kill all the enemies, grab the small key, lift the pots to get some bombs and go talk to the owl statue to the north. Keep in mind this wise hint, go east and go back upstairs. Go west, kill the enemies, keep going to the left, kill more enemies, grab the small key and go north. Kill the enemies to make a chest appear, carry on, kill the enemies, grab the floating bomb, talk to the owl statue and go upstairs. Go south, open the chest to get 50 rupees, then go east, notice the cracked wall and carry on. Dead end... ok let's go to the south then north. If you have played the first Legend of Zelda, you should recall the dodongos. In order to beat them, they had to swallow some bombs. Well, it's the same way to beat those two creatures. Those are the black monsters mentioned by the owl statue earlier. Equip the bombs and get rid of them. Three bombs for each of them and they will die. You'll get two fairies (one per black monster killed) and the portal. Go east now, move the blocks to reach the chest and take the Pegasus boots. Now you can dash and shatter the green crystals. You can also combine the Pegasus boots and the feather to make a long jump after a dash, which will come in handy. Go south then go back to the north and go east. Talk to the owl statue. Hmm, suspicious walls, you say? What about this arrow pointing at the the wall to the south? Let's use use a bomb, shall we? Oh, a secret passageway, how convenient. Kill the enemies, use a bomb on the crack, then combine the pegasus boots and the feather to make the gap. Make the other gap and get the Nightmare's key. Go back to the room with the arrow and go north now. Take the enemies down, get the compass in the chest, use a bomb on the wall to the left, kill the next enemies and grab the small key. There's also a fairy underneath one of the pots. Now we can face the boss of this dungeon but let's go back to the entrance first. Use the portal, go to the east and go get the chest since you have the Pegasus boots now. There's a small key inside. Yes, a small key for that, what a troll ha ha! There's another chest in this section of the dungeon according to the map. Kill the lonely slime to the left, then the skeletons to the right and open the chest to get... 200 rupees! Woohoo, you hit the jackpot! Now time to face the boss. Go through the portal, go south then unlock the way next to the door with a small key. Carry on, go downstairs, Dash to make the block fall down, then make the gaps, go down the ladder, dash to kill the next enemies, get the small key (I'm kind of confused about this key... the developers didn't pay attention ? There's no more locked door in this dungeon, oh well) and get ready to face the boss. Wait where is the boss? There are just some slimes. Don't try to kill them, they will come back. Dash and hit a wall to make the boss fall down, then get rid of the slimes and use the dash to hit the boss. As you can see, everytime you will hit the boss, you'll start splitting him up. Four dashes right in the middle of the boss and he'll become two giant slimes. Now use your sword and kill them. Be careful, they can use the body slam and stun you for a short period of time. Your reward will be another heart container in your collection and the third instrument in the next room: the Sea Lily's Bell. CHAPTER 7: THE Outside the dungeon, the ancient owl will make an appearance in order to ask you to go to the desert. Go to the right, go up, kill the creatures and dig in the center of the circle of grass to get a secret seashell. Keep in mind that you need to find them all and go back to the seashell mansion if you want to get the "ultimate weapon". Go down, then north, then east and go back to the castle. There are two caves on your way to the castle. The first one requires a bomb to be opened and the Pegasus boots to get rid of the crystals inside. The chest at the end contains 50 rupees. It's always nice to get, don't you think so? There's also a secret room in this cave. Poke the wall to the east until you hear a suspicious sound. It's a fake wall. Blast it with a bomb and get the piece of heart inside. The second cave is the lair of a fairy who will fully heal you if you need to recover some health. Also, you'll see outside a person standing in front of a tree with a bee hive. It's Tarin and he wants to borrow your stick in order to make the honeycomb fall down with it. Grab it then carry on. From the castle, keep going south. Go in the zone surrounded by purple rocks and find a rock to lift. There's another secret seashell below. There's a cave to the west but we'll see that later. For now, go back to the village. If you can afford the bow and arrows set, go buy it. Just a reminder: it costs 980 rupees. Otherwise, go see the woman and her baby. The husband went to the forest and is lost... Oh boy. Well, another side quest to do... but that can wait. Go to the library, use the pegasus boots on the bookshelf and read the book that just fell off. This puzzle also appears in A Link to the Past at one point. Yes, there's lot of references to Mario universe and self-references. It's a hint for a puzzle later in the adventure. It mentions five gravestones and an order. You'll see that later. For now, let's find more stuff and then go to the next dungeon. Now that you have the bombs and the Pegasus boots, you can do more stuff outside the dungeons. You can tackle the greens crystals, hit the lonely trees and make long jumps with the boots and you can use the bombs to blast some walls and find some secrets secretly secret.    Go back to the dreamworld and shatter the crystal to the right. You'll find the ocarina in the chest upstairs (8). Leave the dreamworld, talk to the woman next to the statue and answer "yes" at the end of the duet. You'll learn the "Ballad of the Wind Fish". That's not the only song you're going to learn but this one is crucial for the adventure. Go back to the prairie, from the warp hole go south then west and south. Next to the phone booth, there's a tree. If you tackle the tree, a secret seashell will fall down. Go get it. Remember the cave that we did ignore earlier? Go in, in the next screen, blast the wall to the west to reveal a secret room, make the gap and go up. Make you way to the exit, go north, dig nearby the statue to get a secret seashell and go back to the first floor of the cave. Go south, exit the cave, go south then west. There's a cottage and a chest with 50 rupees. Go east now, you'll see some stairs surrounded by some bushes. You can't reach those stairs at that moment. However, if you go north from here and if you cut the bush, you'll find a secret seashell. There's also a mermaid statue to the other side but we'll see that in due time. You should get 10 secret seashells at this point of the game. Go back to the seashell mansion and get your surprise. Unfortunately, it's not the "ultimate weapon". You need more secret seashells. However, the spirit will give you another secret seashell for your effort. Now, time to carry on the main quest. Go outside, then west, then south and east. Nearby the signboard, there's an underground path. It leads to the other side of the river. There are some fishes in this passageway so be careful. Tackle the crystals, go upstairs, go south twice then east. Welcome to the animal village. Everything is ok here except one or two things. The first thing is the fact that the animals want Marin to come and sing a song. Ok, and the second thing is in the house next to the well. The chief needs something that you have at this point: the honeycomb. Give it to him and you'll get a pineapple. Yeah, maybe you'll find Spongebob Squarepants inside this pineapple (just kidding This enemy is really famous in the Legend of Zelda universe. In order to beat him, just charge your attack, wiat until he shows off his face and strike. The only difficulty here is the quicksands. Try to avoid the center of the arena or else you'll fall down into the cave. He will drop after a few hits the angler key. Grab it as soon as possible, fall down, blast the wall to the north and get the piece of heart (9). Go east now, leave the cave and go south. Lift the rock to find a secret seashell and leave the desert. The ancient owl comes and gives you the words of wisdom as always. Time to go to the dungeon! Remember where you saved BowWow? From here, go east if you want to see more side stuff. You'll see a house. This house is the photograph. It's another feature included in the remastered version. It's another side stuff but there's nothing to get at the end. It's just for fun. Go in, talk to the photograph and answer "yes" to get your first picture called "Here stands the brave man". If you answer "no", you'll get another picture called "Game over". Now, you can try to complete your album and find the eleven pictures left, it's up to you. I'll make an extra part at the end with the locations of the pictures, no worries. Back to the moblins cave, go north, kill the monsters, lift the rocks and go east. Ignore the stairs, go east until you find a keyhole. Use the key and the entrance to the fourth dungeon will be revealed. Now, how to get there? The owl said to leap off from the mountains. Hmmm... well, go back to the stairs and go up the ones to the right. Go in the cave after lifting the rocks, kill the enemies, go downstairs, kill more enemies and go up. You'll see a piece of heart that you can't get at this point and a chest that you have to ignore for now. Go outside, open the chest to get 50 rupees, then go back inside, shatter the crystals and go outside. Go to the east, enter another cave, go up and carry on (the chest is a trap). Outside, talk to the man, give the pineapple to him and get the hibiscus. Hey, lady goat wanted some! We'll see that after the dungeon. Now, time for the leap of faith! Leap off the edge to west, go east and leap off the edge to reach the entrance of the fourth dungeon. Enter the dungeon. CHAPTER 8: ANGLER'S TUNNEL In the next room, kill the spiky enemies (remember that you need to guard with your shield and then strike with your sword), then go to the right, kill the enemies, open the chest to get the compass and go south. Be careful: you can't swim so avoid the deepwater and go open the chest to get a small key. Go back in the last room, open the locked door, and notice the locked door. Go back to the room in which you fought the very first enemies of this dungeon, go up then to the right. Get the stone beak, go back to the last room and go north. Carry on, make the gap, blast the cracked block, then move the other block and open the chest to get a small key. Go north, blast the block, grab another small key and go back. Go north after the gap and grab the dungeon map. Go back to the locked next to the stone beak, open it, ignore the chest and make the gap to the north. Unlock the way, move the block and go west. Kill the enemies, watch your reward fall down from the ceiling and disappear (that's not nice) and go down. Kill the enemies, talk to the owl for a hint, go west, make a diagonal long jump to reach the chest and take the 50 rupees inside. Go back to the last screen, go south then west, don't open the trapped chest, go north and activate the tiles following this order: middle, south-west, north-east, north-west (make the long jump to get this one, if you step on a tile already activated, you reset the puzzle) and south-east. Some stairs will appear in the corner. Go east, open the chest, get the small key, go back in the last room and go downstairs.    Dodge the first block, then jump on the second one to reach the ladder, go south and open the chest to get the Nightmare's Key. We can go to the boss's lair, however we are not done with this dungeon. There's a small portion to the north to explore first. Open the locked door to the north and face the mini-boss of this dungeon. This boss is not that hard, you need to hit him fives times with a charged attack. Be careful he sometimes changes his directions so he can surprise you if you don't pay attention and might hit you. After this battle, a portal and a fairy will appear. Carry on, pull the lever, go west, kill the enemies and open the chest to get the flippers (10). Weeeeee, now you can swim in the deepwater and dive like Michael Phelps! Go back to the stairs you couldn't go when you pushed the block, grab the teasing small key underwater, then open the chest you couldn't open earlier, grab the 50 rupees and go meet the boss of this dungeon. You probably noticed a switch earlier: go to this room, activate the switch, unlock the block and go downstairs. Dive and kill the fishes then go back to the surface. Kill the slimes, open the door and face the boss. This boss... honestly, no comments. I thought that this big fish would have been a pain in the butt. No, it's a joke, a pushover. He goes up and down, calls his minions that you can avoid easliy and that's it! Don't be scared of this fish, spam your attacks on his head and he will die after a few hits. Grab the heart container, go back to the surface and grab the fourth instrument: the surf harp. CHAPTER 9: THE RESTLESS GHOST With the flippers, you can now swim in peace in deepwater and get some stuff. Go downstairs, push the block, make the gap and go back to the surface. You will be next to the warp hole. Go east, jump in the water, go in the cave, stand in the middle of this flooded room and dive to get a piece of heart. Next to the entrance of the fourth dungeon, there another cave. Go in, talk to the big fish, answer "yes" and you'll learn a new song for the ocarina: Manbo's Mambo (Aye Caramba! Go back to Mr. Write's house. Go north, enter the cave and grad the rupees in the two chests. Now, go to the wooden bridge built by the monkeys earlier in the game (next to the castle), jump into the water to the right, go down, then go east and north. There's a cave with a fairy inside that will fully heal you if you need to. Jump into the other pool and go in the next cave. Go up, then south, enter the raft shop and pay a nice raft ride if you can afford it (it costs 100 rupees). This is a mini-game in which you'll be able to get some goodies: rupees, bombs, arrows and magcic powder. There are some chests too to get with nice things in these. In order to get the chests, step on the raft, ignore the first waterfall and fall down at the end of the river. Grab some stuff and go open the chest to get 20 rupees. There's another chest with 20 rupees in the next screen to the east so be prepared. The last chest can't be reached for now so end the ride and go to the next dungeon. You'll notice that you can't go in. It's surrounded by rocks and other stuff. There's a passageway underwater, no worries. Dive an go in the dungeon. CHAPTER 10: CATFISH'S MAW Go west, kill the enemies on your way, open the chest to get the compass (11) and go downstairs. Jump from platform to platform, go up, move the blocks to the left and to the right to make a square and get a small key. Go back, open the locked door, get rid of the enemies in the room and go west. Kill the enemies in the room, open the chest suddenly appeared and pick up the stone beak. Grab the bombs if you need some, go back in the last room, then go north. Kill the two slimes, notice the bridge, go west, notice this deathtrap as well and go back to the last room. Go east then north, kill the skeletons, carry on and face the master of skeletons. The only way to beat him is how the owl statue said in the last room. But first, you have to stun him with a charged attack and then use a bomb. After three hits, he will ran away (oh poor guy, he was not prepared for this Go downstairs, in the next room kill the enemies, then go to the next room and kill the enemies. Get another hint from the owl statue, carry on, avoid the next enemy, move the block and go downstairs. Kill the slimes in the next room, move the block and go back to the room in which you found the empty chest earlier. Go north, push the block and go west. Kill the enemies, ignore the pool for now and go north. Hmm, how convenient, we are stuck, nowhere to go... unless the crossroads room with the switch. Go back there, go north, kill some enemies, make a long jump to reach the chest, open it and get 50 rupees. Go north, then west, kill the slimes in this room (don't forget to move a block in order to kill one of the slimes) and go north. Carry on, kill the skeletons in the next room, grab the hearts floating in the air and open the chest to get the dungeon map. Go back to the crossroads room, press the button and go east. Here is round two! You know how to beat the master. Stun him with the sword and a bomb when he is down. This time, he will ran away after two hits and you'll have to pursue him for the round three. Go to the room next to the one in which you found the dungeon map. And here we go, round 3! You got used of this giant skeleton, he will run away for the third time after being hit twice. The next room is next to the one in which you found the small key. Round 4, fight! No worries, it's the last round (phew The boss is not that hard to beat. The only difficulty is his swinging flail tail. Otherwise, you have to wait until he shows off his face, use the hook shot to grapple him and hit the heart with your sword before he hides. Be careful, you might grapple a copy of him that has no heart. Run away otherwise the explosion caused by this enemy will hurt you Do this a few times until he dies. He tells that you don't know what this island is. Wait what?! What does he mean by this? Anyway, grab the heart container and go get the instrument in the next room: the wind marimba. CHAPTER 11: THE IDENTITY OF THE ISLAND Well, time for some side stuff. Outside the dungeon, go north and talk to the mermaid. She tells you that an artist needed a scale from her tail to make a painting. This artist is in one of the houses of the animal village. Go there and talk to the crocodile. You need to finish the mermaid statue. This statue is located to the west, from where you found the necklace. Use the hook shot to reach this part of the peninsula, use the scale and go downstairs. There are invisible enemies in this cave, be careful. In the next room, you'll find the magnifying lens. They allow you to see what's invisible when you hold it. Go back to the animal village and go in the house next to the house of Lady goat if you want to add another picture to your album. Also, he will tell you a secret. Otherwise, go explore the cave next to this house, blast the wall to the north and throw a bomb at the cracked block farther. Now go back, go west and grab the piece of heart. Go back to the village, enter the little house next to BowWow and dig in the corner to get a secret seashell. Go to the shore, as mentioned by the Zora in the house. The shortest way to go there is to the west. Find a cracked wall (south from the monkey), blast it and go in the cave. You'll see a curious character who has an item. However, he wants to trade it to you for what you hold in B button. You can only trade the shovel, the feather, the hook shot and the Pegasus boots. I suggest you to trade the shovel, you don't need that anymore at this point of the adventure. You'll get the boomerang. This item is amazing. Do not worry, if you need to use the item you did trade, give the boomerang back to him and you'll get back the item.  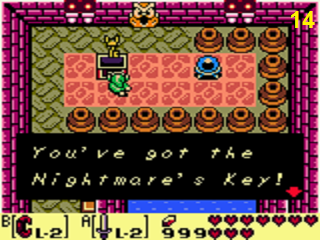 Go in the cave surrounded by the rocks in the mysterious woods to get some rupees, then go back next to the entrance of the first dungeon, use the pegasus boots on the lonely tree to get a secret seashell, then go back to the lonely grave (for another picture) and lift the rocks to go downstairs. Grab the piece of heart, go up, return to the castle and dive nearby the bridge of the castle to get another piece of heart (13). Let's go grab the teasing piece of heart we saw earlier in this cave. Now that we have the hook shot, we can cross the bridge . Also, we can open the chest in the cave that contains 50 rupees. In order to get the piece of heart, from where you did leap off to enter the fourth dungeon, go east then go upstairs and go west. Ignore the cave, go up then use the hook shot to cross the bridge and cut the bush. Go downstairs, blast the wall to the south, go in the next room and go get the piece of heart in the next room. We have two things to get before going to the dungeon. And our next destination is north from the animal village. Oh and if you don't have the bow, go buy it now. On your way to the next dungeon, the ancient owl will give (as always) the words of wisdom. After the discussion, carry on, go south, then west, use the bow to instantly kill the moving armors, go up and go east. Underneath one of the statues, you'll find some stairs. Go down, open the chest and grab a secret seashell. You should have enough secret seashells now for the ultimate weapon promised by the spirit of the seashell mansion. Go back to the surface and go west. Enter the temple and get ready for a boss fight. This enemy is a recycled enemy from A Link to the Past. In order to beat this enemy, you have to hit him when he is on the ground. His earthquakes will stun you so be careful. Otherwise, he is not that hard. After a couple of hits, he will drop the face key. Go north, light the room with the magic powder and read the relief on the wall. You know the identity of the island now. It's an illusion and, like any illusion, the awakening of the wind fish will make the island disappear forever. Exit the temple now and meet the ancient owl. After the discussion, go get your ultimate weapon from the spirit of the seashell mansion. This weapon is amazing . It's a magic sword that can shoot laser from the sword when you have full health only. Now it's time to go to the dungeon. From the ruins, get rid of the ocks and the bushes and swim into the pool to the left to reach an isle with two statues. Kill the one to the left, go downstairs, kill the enemies and go up. Go to the right and use the key. The dungeon emerges from the ground. Go up and go in. CHAPTER 12: FACE SHRINE This dungeon... has the most annoying enemy of this game: the wizzrobes. I hate that creature, I can tell you. And you know what? I'll be honored to introduce them to you. Go west and meet them. You can't kill them without the bow. And there's more: it takes fives arrows to kill one (or one bomb, well you better stun him before using a bomb). What else can I say about this creature? They disappear and reappear, they throw some fireballs at you. I hate them from the bottom of my heart. Anyway, after killing those enemies, go through the opened door, open the chest to get 50 rupees and go check the corridor with the worm. Carry on, kill the enemy, go to the next room, go north and north the owl statue farther. Now, go back to the room with the orb, use a bomb, stand behind the red tile and wait until the bomb explodes. Go to the next room, press the button behind one of the jars and go west. Now, go north, then east, open the chest and pick up the stone beak. Now, go back to the last room, grab a jar and throw it at the sealed door then go through the passageway. Go east, open another chest to get the compass, go upstairs, hit the orb and carry on. Kill the wizzrobes, take the small key, go back to the room with the three wizzrobes and the floating arrows, kill them, open the chest to get the dungeon map and go back to the owl statue for a hint. Go back to the entrance, go east this time, pass the two trap rooms and open the locked door with the key. Get rid of the enemies, poke the wall to the north and blast the fake wall to go in a secret room. That's what the owl statue mentoned: the eyes have walls. The next enemy is funny and wants to play with a ball. Oh it's so cute, let's paly with him, shall we? Oh, you wonder which game? Dodgeball! Yes, all you need to do in order to beat this enemy is equip the power bracelet, dodge the ball, grab it and throw it at the enemy. You can carry on and throw it until he takes the ball to throw it at you. After fives hits with the ball, a portal will appear, a fairy as well to recover your health. There's some bomb if you need some in the next room, otherwise go back to the room of jars with the switch and blast the wall to the east. Kill the slimes in the dark room, go downstairs, kill the enemies in the next room, go to the next room, open the chest and get the upgrade for the power bracelet. Now you can pull the giant elephants statues of this dungeon and more stuff. Go back to the first room of the western part of the dungeon (the one with the first wizzrobes). Kill them, go back in the room with the chest that contains the rupees, lift the statue and carry on. Open the chest to get 100 rupees, go back to the room in which you found the compass, hit the orb, go west and use a statue to bash the door to the north. Go in the room, open the chest to get 50 rupees, go upstairs, open the chest to get a secret seashell (or 50 rupees if you already have the ultimate weapon) and go back to the eastern part of the dungeon. After the room with the floating tiles, grab a statue and bash the door to the right. Get rid of the wizzrobes, ignore the chest for now and go north. Kill the enemies, open the chest farther, get a small key and go back to the first room with an orb. Hit the orb and go back to the east. Now go get the chest to get a free sample of the secret medicine, go back to the right eye room, go north, lift the statue to the left and go downstairs. Slice the tiles in the next room, grab the small key, unlock the way to the north, grab the statue and bash the door with it, then make the horse heads stand up and go downstairs in the next room. Kill the enemies, go north, hit the orb, open the chest, grab the 200 rupees and go south. The last chest contains the Nightmare's key. But you'll need to fight an old friend. Oh don't tell me you don't remember those two enemies! They love bombs! Three bombs for each of those enemies and you can carry on. Use the hook shot to reach the other side, use a pot to open the chest and get the Nightmare's key (14). Now, time to face the boss of this dungeon. Go back to the room with the "heart", destroy the tiles, go south this time, kill the slimes (you can get rid of the eye if you wish to), kill the wizzrobe in the next room, move the block, go in the next room, light the two torches to turn the fireballs into nice fairies and go open the boss' lair. This boss is not that hard. You have to bomb his face five times and he'll die. But first avoid or destroy the tiles and the pots he will throw at you then avoid the holes appearing and disappearing and use your bombs in order to beat him. Like the last boss, he will talk about the wind fish's awakening. And then, he'll disappear, dropping a heart container for you. Go take the sixth instrument in the next room: the coral triangle. CHAPTER 13: THE FLYING ROOSTER At this point of the game, there's just a few extra things to get in the mountains such as the last piece of heart of the game and four secret seashells (or rupees if you have the ultimate weapon in your possession). Those goodies can wait. We need to find something else in order to get a key required to enter the next dungeon. The whisper at the end of the dungeon told you to head to the mountais. The ancient owl awaits you and tells you to go east. Ok, let's go to the eastern part of the mountains. Ignore the stairs, then notice the chest up here and go in the cave. Step on the little sand tile, use a bomb to blast the wall and go in the secret room. Go up and solve this little puzzle. I don't think you can get all the chests, however you will be able to get the secret seashell in the chest outside the cave (or some rupees if you already have the sword from the spirit. Go back where you came from and go east. You'll see a owl statue, a cave and a hole. Actually, the hole leads to the cave in which you can find the piece of heart underwater. Otherwise, go in the cave. In the next part of the mountains, there are a cave and a cracked wall. Blast it, go in the cave to recover your health from the fairy, then go in the next cave. You are now at the summit of the mountains. To your left, there's the eagle's tower. However, you need the key to open the dungeon. We'll come back later. Now go upstairs next to the waterfall, then east, lift the rocks to get another secret seashell (if, of course, you don't have the ultimate weapon yet). If you step on the bridge to the east, you can get another picture for your album. Go back to the entrance of the third dungeon and go south to reach the signpost maze. The starting point of this maze is south from the phone booth next to the dungeon. Make the gap, read the signboard and follow the direction. You have to read and follow those informations otherwise you'll have to restart from the beginning. Your reward will be... some stairs! No, go downstairs and talk to Mamu the frog. Pay 300 rupees and you'll learn a new song and the last one for your ocarina: the frog's song of soul. This song is extremely useful in order to get an item. Back to Mabe village now. Push the statue of the flying rooster and play the new song to resurrect the dead rooster. Now it's your ally and you can go to places you can't go, even with the pegasus boots and the feather combined. For example, the stairs to the west of the castle. Go there, use the power bracelet to grapple the rooster and make the gap. Downstairs, there's a secret seashell (or 20 rupees if you have the sword in your possession). How about getting more ammos?  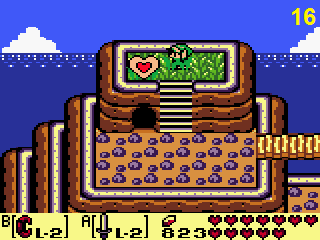 Remember the stairs surrounded by bushes on the peninsula? Go there, fly with the rooster and go downstairs. Farther, you'll see a familiar altar. Yes, exactly the same atler, like in the mysterious woods. Use the magic powder and answer "yes" to get more bombs. Now, time to get the key of the dungeon. Go back to the mountains, find a house with a strange man inside and go in the cave below. Go north with the rooster and grab the bird key. It's the last key of the game, don't worry. Go back to the tower, use the key and enter th dungeon. CHAPTER 14: EAGLE'S TOWER Here is the hardest dungeon of all the game. Why? Because there are four floors to explore! Weeeee, let's have some fun! Go east first, kill the enemies, grab the small key and open the locked door with it. Go to the second floor, use the boomerang to hit the orb and open the chest to get the mirror shield (15). Yes, you have already found the treasure of this dungeon: the upgrade for your shield. Stand on the red tiles, hit the orb and go down. Go west, match three symbols to make a chest appear, carry on and beat this mini-boss. Four hits and he will die, dropping a fairy and a small key. Go back and use the key on the block to unlock the way. Go north-west, fall down, then go south, hit the orb, go back in the last room and go north. Go west, jump over the spikes, match three symbols, open the chest and grab the compass. Go in the room next to this one (on the map it's the one with the chest), get rid of the enemy with the magic powder and make the two horses head stand up. A chest will appear. Open it to get the dungeon map, go downstairs, step on the red tile, hit the orb, go west, then south and open the chest to get the stone beak. You should have noticed some owl statues during your exploration, go get some hints from these. Go to the last unexplored room of the second floor. Fall down into a hole to the est and grab the last secret seashell of the game (or the 20 rupees) in the chest. Go back to this room, kill the annoying enemy with the magic powder, then all the tiles, go to the next room, poke the wall to the south then blast it and go down to reach another chest with a bomb. The last chest in the first floor contains a small key. In order to get it, jump down the hole next to the orb in the room to the east, in the second floor. Now time to go to the third floor. The stairs are next to the orb located to the south. Go north, then beat the bats thrown at you by the skeletons. Upset, he will run away and a portal will appear, leading back to the entrance of the dungeon. Go north, push the blocks to stick them together and grab the Nightmare's key. Go back to the second floor going up the eastern stairs, go north, pull the lever, grab the ball and use it to make the four pillars fall. They are in the central rooms, one pillar in each room. The four pillar fallen will lower the fourth floor. Now go back to the thrid floor. Go back to the room in which you found the Nightmare's key, hit the orb, go west, open the door to Nightmare's lair and go north. Make the two horse heads stand up, open the chest that just appeared and get a free sample of the secret medicine. Now time to face the boss. Go up the stairs, use the hook shot and go upstairs. Climb up the ladder and here we go! This boss is not that hard. He will ride an eagle but it's not a big deal. Just wait until he shows off and strike. Three hits with the ultimate weapon and he will die. Grab the heart container, go down, go in the room next to the stairs and take the seventh instrument: the organ of the evening calm. CHAPTER 15: TO THE LAST DUNGEON One more instrument to get and we will wake the wind fish up. The next dungeon is located to the north-west of the map. On your way to the dungeon, you'll see Marin stuck on the bridge. Use the hook shot to cross the bridge with her. She wants to thank you and tell you something else but... Tarin comes and interrupts the discussion (thanks Tarin CHAPTER 16: TURTLE ROCK Last dungeon of the game. Go in the next room, kill the enemy, go west, kill more enemies and go north. Defeat this enemy, go west, push the weird block to make a bridge and go south. Open the chest to get 50 rupees, go west, fight this enemy once again and go south. Yes, you'll fight once again those damn mini-bosses, that's pretty much the gimmick of this dungeon. Open the chest, take the compass, go back to the last room and go north. Kill the enemy, grab the small key and go back to the entrance. Go north, then north again and go west. Go downstairs, kill the enemies in the next room, open the chest and grab the stone beak. In the next room, beat this mini-boss (he wants to play dodgeball again), go west, use the weird block to make a bridge, kill the slimes, carry on, go south, kill the two enemies and go downstairs. Go talk to the owl statue for a hint, lift the jar, press the button and go west. Now, control the weird block in order to fill the holes as the owl statue mentions. It's kind of tricky, I tell you. If you screw this puzzle up, you'll have to go back to the last room, go back to this one nad restart from the beginning. Grab the small key, go back to the west and do the same thing with the block. Open the chest to get 20 rupees, go north and notice the two torches. Go back Now go back to the entrance, go north and control the block in order to make a bridge leading to the chest to the west. You'll find the dungeon map. Now, use the block to make a bridge to the east, blast the wall to the east and go in the secret room. Hit the orb, blast the wall to the south and go back to the room with the weird block. Now, this time, move it between the two blocks to the north, move the block to the east, unlock the way using a key, go east, unlock the door and go north. Kill the slimes, talk to the owl, go north, kill the creatures, grab the small key and go west. Kill the creatures with the bombs, go west, ignore the locked door, go up, use the hook shot and open the chest to get the special medicine. Go back to the room with the owl statue, get rid of the blocks with bombs, then the wall to the west, as shown by the arrow on the floor. Unlock the way, kill the enemies, blast the wall to the south and the one to the west. Go west, talk to the owl statue, shoot the statue with the bow, grab the small key, go south for some goodies and go north. Kill the enemies, go upstairs, collect the last piece of heart (16), then go east. Enter the dungeon, kill both of the creatures with the bombs and open the chest this time to get a small key. Go west now from the room with the statue, move the blocks, open the chest and grab another small key. Go north, then east and open the locked door. Go west, go upstairs, use the hook shot, open the chest and get 50 rupees. Now go back to the locked block, unlock the way, use the hook shot, unlock the stairs and go downstairs. Go south, beat the boss, go hit the orb, go back here and go open the chest. You'll get the magic rod. With that you can light the torches and melt the ice. Go back to the room with the torches and use the magic rod to light them and make a chest appear. You'll find a small key. Now, we have to head to the small portion of the dungeon to the west. Go back to the central room, use the block to make a bridge to the stairs, go upstairs and open the door with the key. Remember this enemy? Time for the rematch then! With the ultimate weapon (that you should have at this point), two charged hits will kill him. Go north, solve this puzzle and get the Nightmare's key in the chest. Go back to the central room, go east, go upstairs, make your progress using the magic rod, open the door and face the boss of this dungeon. In order to beat him, it's simple: equip the magic rod and attack with it when he shows off. Spam your attacks while he is stunned and after a few hits, he will die. Beware of the goo he spreads when he dives in the pool and his movements when he is hit by the magic rod. He might be able to do the second attack if you spam your attacks properly. Grab the last heart container and the last instrument in the next room: the thunder drum. Time to wake the wind fish up... or not. CHAPTER 17: THE COLOR DUNGEON We're not gonna wake the wind fish up, not yet. There is one more thing to do. Well you can skip this chapter if you want to but it's the optional dungeon. Remember the book on the shelf, he mentioned five gravestones and a world of color. Go to the cemetary, find where you can find five gravestones and move them in this order: the one to the south (south), then the one to its left (left), then the one above (north), then the one to its right (right) and finally the last one (north). You just opened the entrance of the secret dungeon. This dungeon can be done anytime you want after getting the pegasus boots (in order to know the pattern of the gravestones) and the magic powder. You see two skeletons. Talk to them and tell them their colors to pass. In the next room, kill the enemies, then carry on, match the same colors to make a chest appear, open it and grab the compass. Blast the wall to the south to find a secret room with lot of rupees. Go east, ignore the locked door, kill the enemies and use the sword to turn the next enemies into balls. Lift them and put them into the specific holes to make a chest appear with the stone beak inside. Go south, then west, kill the enemies, open the chest and get a small key. Go back to the room with the holes, go north, kill the enemies, solve the puzzle in the next room and grab another small key. Carry on, kill some enemies, open the locked door and face this curious enemy. His weakness is the magic powder. Use it on him to turn him into a slime and hit him with the sword. The magic powder will hurt him, no worries. After a few hits, he will perish. Go west, move the block and get the Nightmare's key in the chest. Go back to the locked door, open it and face a golem. Use the sword to hit him. His only attacks are the earthquakes and the boulders. Those two attacks are combined. The earthquake will stun you. Avoid the boulder and give him your best hit. Four hits with the ultimate weapon and the match is over. Go west now, kill the enemies, lift the jar at the top left hand corner, press the button and go north. Kill all the slimes, open the chest, take the dungeon map, go east, turn the enemies into balls and put them into the specific holes. Grab the key, go west now, solve he puzzle, go in the next room, kill the slimes, then go west, open the door and face... a moving metroid?! Looks like a metroid. Anyway, blue is safe, yellow is caution, red is alert. Common code but it's how this boss work. The only way to kill him is to hit him until he turns red. He will obviously move around the room and throw some projectiles at you. The magic rod is really effective on him so dodge the projectiles and use your magic powers to beat your opponent. No heart container and instrument at the end, however, in the next room you'll meet the queen fairy. You have now the choice between two tunics: the blue tunic or the red tunic. The blue tunic will reduce the damages taken by half, the other tunic will increase the damges you give to your opponents. Choose wisely, you won't be able to go back to this dungeon after leaving it. I took the red tunic during my playthrough because... I like red. And power ha ha. Anyway, time to wake the wind fish up. CHAPTER 18: THE END OF THE LINE Before heading to the egg at the summit, go to the library and read the book you couldn't read earlier during the adventure. Now with the magnifying lens, you can. Kee pin mind the pattern written in this book and go to the last portion of the island to the north. It's where the egg is. The ancient owl will tell you the words of wisdom once you are there. Go up, play the ballad of the wind fish, the owl comes back to tell you more sacred words and you can go in the egg after the cutscene. Start your progress, fall down and follow the pattern mentioned in the book. Go down, and fight the first boss of the last dungeon. It's a shadow. Your sword won't do anything against him, nor the hook shot. However, the magic powder... yes, it's his weakness. How about some magic powder then, Mister the shadow? Oh really? It's not tasty? Oh well, get used of it because I have plenty for you! Use the magic powder to beat him. After a few hits with the magic powder, the shadow will take another form. The people who played A Link to the Past will recognize Agahnim the wizard. You remember how to beat him. Otherwise, you need your sword, a good timing and aim at him when he throws the sphere. The third form is the worm. Hit the tail a few times, it's simple like ABC. The fourth form is Ganon. Equip the Pegasus boots, avoid the bats and the swinging axe and dash at him. After a few hits, he will turn into his normal form and will try to hurt you. Use the magic rod in this situation to stop his rush. Now, his new form is kind of impressive. He will swing his arms in order to hit you. At one point, he will open his eye. Shoot an arrow to hit him. Use the feather to avoid the swinging arms, it's the easiest way. After a dozen of arrows in the eye, the shadow will disappear forever. Go upstairs and watch the final cutscene. There's a special ending if you haven't died once during the adventure. But, in any case, congratulations. You beat The Legend of Zelda: Link's Awakening DX. BONUS CHAPTER: THE PICTURES AND ABOUT A SECRET SEASHELL I FORGOT Yes, there are actually 26 secret seashells instead of 25. I forgot to mention one but, how to say, you need 5 secret seashells to get it in the seashell mansion. Be careful, you need FIVE, not four, nor six but five of these and go to the mansion to get this secret seashell. If you don't do like this, you will never get it. Yes, it sucks and, to be honest, I've been screwed by this thing (and totally confused). So yeah, do it if you want to collect all the secret seashells. But keep in mind that you only need 20 of these to get the ultimate sword. Ok, now time to explain how to get the 12 pictures of the album. I haven't included all the pictures in the main quest because it has nothing to do. You get nothing f you complete the album. It's just a feature included in this version, like the optional dungeon. To trigger this event and get the other pictures, you need to see the photograph first. He will take the first picture of the album and put the album on the table. You can see all the photos you got and print these if you wish to. Now, without wasting anymore time, let's see how to get all the pictures. 1- HERE STANDS A BRAVE MAN or GAME OVER It's basically the first picture you're going to get when you'll meet the photograph. Depending of your answer, this picture will be different. Answer "yes" and you'll get "Here stands a brave man", answer "no" and you'll get the other picture. 2- OCEAN VIEW Marin must follow you for this one. From the library, go south, to the cliff. The photograph will appear and take the picture. 3- HEADS UP! Same thing, Marin must follow you for this one. Jump down the well of Mabe village to get this picture. 4- CAMERA HOG Marin must follow you for this one too. Go to the statue in Mabe village to get this picture. 5- (NAME) DISCOVERS ULRIRA'S SECRET Check out the window outside of Grandpa Ulrira's house in Mabe village to get this one. You can unlock this one once BowWow has been returned to the woman. 6- LINK PLAYS WITH BOWWOW! After returning Bowwow, come close to Bowwow to get that picture. 7- THIEF! Well, I think it doesn't have to be explained. You have to steal something from the shop in Mabe village to get that picture. Keep in mind that this act will upset the storekeeper and, next time you'll enter his shop, he will kill you. 8- CAN'T SWIM? Anytime after getting the magnifying lens, go talk to the fisherman who gives you the necklace to get that picture. 9- I FOUND ZORA Anytime after getting the magnifying lens, go in the house next to Lady Goat's house to get thiat picture. 10- A REGAL HOME You can only get that picture after triggering the quest for the five golden leaves and before getting these. Go to the main gate of the castle to get the picture. 11- I WAS VERY AFRAID After leading the ghost to his grave, go back to this grave to get this picture. 12- CLOSE CALL As soon as you found the hen house at the top of the mountain, step on the bridge to get this photo. And that conclude the bonus chapter and this walkthrough, folks. I see you in the next walkthrough. Bye bye  Hello everyone, Laian here with a new walkthrough. This month, we'll play another Legend of Zelda game. I decided to play another one since I played a long time ago Legend of Zelda released for NES (the walkthrough was kind of wacky due to the problems I encountered but anyway it belongs to the past now). No it's not a pun, folks. I 'm not gonna play A Link to the Past. I could have chosen that one but I chose Link's Awakening DX, the remastered version of the Gameboy version. Released for Gameboy Color, with colors and extra stuff, such as a short optional dungeon. Anyway, enough ramble, time to start this journey! CHAPTER 1: GETTING THE STUFF BACK (AND MORE) After the discussion with Marin (that poor Link mixed her up with Zelda... well there's a slight difference between Marin and Zelda now that I think of that... no, it's just my imagination Now, go to the house next to Tarin's house, go in the small room, give the ribbon to the little chomp and you'll get the dog food. Go back to the shore, exactly where you found your sword. From here, go east then north, ignore the monkey, go west, go in the house and talk to the crocodile. Give the dog food to him and you'll get some bananas. That's pretty much all we can do right now so let's suspend this side quest for now and let's go to the Mysterious Forest... or not. We are not done with this village, we have to find another piece of heart and buy the shovel in the shop. In order to get the piece of heart, go behind the house with the chomps, talk to the fisherman and catch the shy fish stuck in the alcove to the right. This fish might be kind of hard to get, you'll need some patience and some rupees. Your reward will be this magnificent piece of heart stuck in the fish's stomach. Don't worry, if the fish runs away, just leave the pond, go back and talk to the fisherman to retry. The fishes will reappear. Now, time to get the shovel. The hard way is farming the rupees until you can afford the shovel, the easy way is the mini-game. However, there's one difficulty with the mini-game: the timing. You need to grab the two red rupees in order to gain 60 rupees and that is quite tricky to get. But with some practice, you'll get these easily. You'll have to talk to the guy between two games though. Once you got the rupees, go outside then go back in the building: the rewards will reappear. Play the game as many times as you need to collect the 200 rupees and go buy the shovel. There's no purpose for that right now, let's just say we'll plan of using it in due time. Now you can go to the Mysterious Forest. CHAPTER 2: THE MYSTERIOUS FOREST Go north from the pit, meet the ancient owl that will give you another lead. There's an item you need in this forest for a cave located to the south. Hmmm interesting, let's find it, shall we? Go north, then east, then north and talk to the racoon. Powder? Alright, I hope you have the magic powder at this point cause you'll need to use it one this racoon. The magic powder can be gained during the mini-game, it's the bag. Otherwise there's another way to get it. Go south, then east, enter the cave and push the rocks to get 50 rupees, Farther, push some rocks, go outside and grab the mushroom. Now go back, leave the forest by the eastern path, take the piece of heart, go south, then the first to the east. Go in the cottage, give the mushroom to the witch and she will give you some free magic powder. It's the only time you can do that. If you grab the magic powder during the trendy game, the mushroom will disappear forever and you couldn't do this optional stuff. If you have the magic powder, use it on the racoon and... Tarin? Looks like it's Tarin... anyway, Marin should be somewhere nearby. Go north, open the chest and get the tail key. The ancient owl will come back and ask you to find the first instrument in the cave. There's nothing else to do in this forest for now so go back to the village. Go south twice then go east, carry on and use the key on the keyhole to open the entrance of the first dungeon. Now, go in the Tail cave. CHAPTER 3: THE TAIL CAVE Go west, push the two creatures into the holes and grab the small key. Now, go west, kill the creatures, open the chest and grab the compass (2). You can now see the chests, the boss AND the hidden keys. Go back to the entrance, go north, clean this room up, press the button and open the chest to get another small key. Go east, kill the creatures, open the chest and grab the dungeon map. The shape to the north is a shotcut but it's a one-way path. Go west now, kill the bats, then go north, break the crystals, kill the worm and open the chest to get 20?rupees. You can notice a crack on the wall to the left: you'll have to go back here once the bombs will be yours. Go east, kill the worm, open the chest to find a small key, go east, open the locked door an go north. You have to hit the creatures and match three same symbols. Open the chest and get the stone beak. Now, you can speak with the owl statues you will encounter. As you can see, there's one in this room. Now, go back to the room with the crack on the wall, go north, open the locked door, carry on, talk to the owl statue, push the single block and go to the next room. Remember the hint given by one of the owl statues? With this hint, you can get rid of the spiky creatures in this room. Some stairs will appear. Go down, kill the goombas, go up and open the chest at the end of the line to get the Roc's feather. Now you can jump over the holes, which is awesome. Now go east and face a new creature. Jump over the spiky log and hit the creature a couple of times. After a few hits, he will die and a fairy and a portal will appear. Go back two rooms to the west, go north, make the gap, use the last small key to get rid of the block and go get the Nigtmare's key i nthe chest. Now go back where the warphole is, go north, don't go downstairs since there's nothing, open the door and prepare yourself for the boss fight. If you have played A Link to the past, this boss should be familiar. Otherwise, let me introduce you the giant worm. His weak point is his tail. Watch out, he will try to make you fall off. If you fall off, go to the east, go up and go back to the boss room. Four hits with your sword and you'll kill him. Yes, that's it, four hits on his tail and the match is over. Well, it's the first dungeon and the first dungeon,don't expect anything challenging ha ha. Grab your reward, go to the next room and take the first instrument: the full moon cello (3). Your new lead is the swamp to the north now. CHAPTER 3: BOWWOW'S MISSING! On your way back to the village, the ancient owl will talk to you. And, because he is Captain Obvious and you probably don't remember the message after getting the first instrument (unless you did skip it), he will give you the next instructions: the swamp. But, you know, you'll have to suspend your main quest for a while since the village is under attack. Go to the shop, the store keeper has two new items: a stack of 10 bombs for 10 rupees and a bow and arrows set for... 980 rupees?! WHAT?! Anyway, I don't think you can afford it so let's just buy one stack of bombs for now. Ah and now you can also buy three hearts for 10 rupees if you need to recover some health. Ok, you have some bombs, you are probably interested in this crack earlier in the dungeon. You know what? Let's save BowWow, shall we? Talk to the lady, she will tell you that the moblins "dognapped" BowWow. Hmm, they are probably in the forest. Let's check it. Anyone? No? Ok, so leave the forest by the eastern path, take the piece of heart if it's not done yet, go north, then east. A cave... hmm, how interesting. Let's check it. Oh look, a moblin is greeting us! Looks like we're close to BowWow. Get rid of the enemy, go to the next room, kill more moblins, go to the next room and face the leader. This boss is not hard. Avoid the spears he throws at you, then avoid his tackle. If he hit the wall, he will be stunned for a few seconds and you'll be able to hit him once. Otherwise, that means he was not close enough. Four hits and he will die. A fairy will be your reward for this fight. Now go to the next room, save BowWow and go back to the village. Talk to the woman, she asks you to take him for a walk... ok, fine. Go to the trendy game and grab a sack of magic powder, you'll need that for the next dungeon. Let's go to the Tail cave and let's destroy the cracked wall now. There's a secret seashell in the chest, go take it. Then go to the shore, exactly where you found the sword, go east twice, blast the cracked wall and go in the cave. There's a suspicious pool. We should come back here later. Let's go to the swamp now. Leave the forest by the northern path. Since BowWow can swallow everything on his way, he can get rid of the nasty flowers in the swamp. You should be able to get the 50 rupees in the chest and open the entrance to the next dungeon. BowWow won't come with you in the dungeon, that's too bad. Well, it wouldn't be funny after all. And, you know, he is probably scared of dungeons. Anyway, time to find the second instrument. CHAPTER 4: BOTTLE GROTTO In the first room, you can see a chest surrounded by pots. You'll need something if you want to open it so let's carry on. In the next room, use the magic powder on the two torches to light the room then go east since the other way is locked. Kill the skeletons, grab the small key, then go south, use the special power of the sword and stab the enemy in the back. Open the chest, get the compass, go back and go to the right. There's an owl statue but you can't communicate with this one unfortunately, you'll have to find the stone beak in this dungeon. Yes, this item works for the entire dungeon. When you go to another dungeon, he will instantly vanish. Touch the orb, go down, kill the enemy, hit the orb and open the chest to get a small key (4). Go east, equip the feather and go hit the orb. You can grab a sack of magic powder floating in the air if you need to. Press the button, open the chest to get a small key, go north, stab the next enemies, go take the small key, go back and go east. Kill the spiky enemies, open the locked door, kill the enemies and notice the owl statue. Now, go back to the dark room, open the door to the left, kill the bats and go north. Get rid of the enemy, open the chest and grab the stone beak. Now, you should have explored all the rooms and you are wondering "how am I going to carry on?". Well, you saw two owl statues. And we all know that owl is wisdom. So if you talk to the statues, you'll get some hints. One will tell you to tap the orbs (thanks, we already figure this out), the other will tell you to move the blocks in the room. Do it and some stairs will appear. Go down and carry on. This is the second part of the dungeon. Kill the bat, go up and face a mini-boss. This ogre is easy to beat. Just hit him once, then stay back in order to avoid the bomb that he throws at you and strike back. Normally, it shouldn't be able to grab you and throw you away if you do this technique. Don't stay on the cracked tiles if you don't want to fall off. He will die after a few hits and a fairy and a portal will appear. Go east now, talk to the owl statue for a hint and carry on. The eye in the bottom left corner will attract you and try to make you fall off. Struggle against this force with the opposite direction, open the chest and get the dungeon map. Carry on, kill the bats, grab the sack of magic powder, open the chest to get 20 rupees and open the door to the left. In this dark room, two boos will greet you. You can't kill them unless you light one of the two torches with the magic powder and hit them with your sword before they leave the screen. Your reward will be a nice chest with the power bracelet. Now you can lift up the pots and the stones. Let's try to clear the way to the right in the previous room, why don't we? Use one of the pots to hit the orb, then equip the feather to make the gap, open the chest to get a small key, hit the orb and go to the next room. Kill the enemies, go south and go up. You are back to the room after the mini boss room. Use the warp hole, get rid of the pots and open the chest to get 50 rupees. We still have to find the Nightmare's key. Go back to the room on your map where there's the only chest left. Now how to get it since it's hidden? Well, you remember the hint given by the owl in the second poart of the dungeon. You have to hit the creatures in this specific order to make the chest appear. The order is the imprisoned creature, then the bat and stalfos. Open the chest, grab the Nightmare's key, go back to the previous room, open the door to the right, kill the enemies and go downstairs. Use the pot in the next screen to lower the platform, go up, open the door and face the boss of this dungeon. Equip the sword and the power bracelet, that's all you need to defeat this boss. Now, you can't hurt the bottle with your sword, nor the clown djinn coming from the bottle so you have to dodge the fireballs he'll throw at you. When he come back in the bottle, this one will move. Use your sword to stun the bottle, then use the power bracelet to lift the bottle and throw it back against a wall. After a few hits, the bottle will break and the clown djinn will be so mad at you. But hey, now you can hit him with your sword. Dodge the fireballs and hit him four times and you will be done with this fight and this dungeon. Now go get your reward and the second instrument: the conch horn. CHAPTER 5: TO THE NEXT DUNGEON Go back to the forest by the northen way, jump over the hole, go in the cave, push the blocks and get rid of the skulls in order to get the piece of heart (which means you should get another heart added to your life bar at this point). Go to the right, kill the enemies, get rid of the crystals, move the block, open the chest and take the 50 rupees (if you haven't taken these yet of course). Go outside, go up, get rid of the rock and go downstairs. Use the magic powder on the altar to summon a vampire. Answer "yes" twice and you could carry more magic powder (up to 40, which is really nice). Go back to the southern part of the forest, get rid of the rock, open the chest to get a secret seashell. Go back to the village, bring BowWow back to the woman, she will give you... a kiss. Awesome. Anyway, go to the cottage blocked by the rocks, go through the door after getting rid of the rocks and go to Go back up, then go north twice, then go to the east. Enter the house, talk to Crazy Tracy and give her 28 rupees. You'll get her special medicine. It gives you a second chance if you lose all your life. It might come in handy, however you can only one at the time. And there's more to know about this medicine: Crazy Tracy increases the price! Now, go south until you see a warp hole. You can't use it, you need to find another one. Now, from the warp hole, go south. You'll see the next dungeon, however you need the key. Go back to the warp hole, go east and carry on. You'll see a giant stone head farther. Use a bomb to get rid of it and carry on. Go south and go in Richard's Villa a bit farther. He will give you the key if you bring the golden feather back to him. Accept the deal and go to the castle. You'll find it to the north, just follow the signboards. You also need the shovel, that's why I told you to purchase it at the beginning of the game. The door of the castle is locked. Well, there must be another way to go in. Go south twice, then east, then north. This house is the seashell mansion. You'll have to come back here once you'll have collected all the secret seashells. The spirit will give you something really nice that he calls "the ultimate weapon". Ok, go to the right now, cut the grass and grab a secret seashell. Go back on the road, go east and talk to the monkey. It's Kiki and he wants some bananas. Oh wait, we have some! Give them to Kiki and his friends will make a wooden bridge for you. Plus, you'll get a stick. Yes, this side quest is not over. Cross the bridge, go north three time and go west. Cut the grass to reveal some stairs, go down and carry on. Here you are in the courtyard of the castle. Go east, kill the guard, go south and let's play "whack the mole" with this red guy. Yes, yo uhave to hit this guard four times as if it was a mole. Beware of the bombs though if you're too slow. He will drop one of the five golden leaves required to get the key of the dungeon. Now carry on your exploration of the courtyard. To the east, you'll see a crow in the tree. He won't move a finger so we have to help him. Equip the power bracelet, lift a rock and scare the crow with that (which means throw the rock at him, it was just a pun). He will be so mad at you and will try to attack you before running away like a coward. No way! Use your sword and slice this crow into pieces, you'll get the second golden leaf. Go in the castle now. Go west, kill the enemies (use the magic powder on the spinning enemy to get rid of it and get a fairy), grab the golden leaf, carry on, press the button in order to open the castle gate and go upstairs. Blast the shape to the left with a bomb, kill the enemy and get another golden leaf. Leave this part of the castle and go in the next part. Throw a pot to the door to bash it and get ready to face the next enemy. He has a flail. This castle should looks familiar if you have played A Link to the past. It looks at some points like Hyrule castle, indeed. This enemy is not that hard. Avoid the flail, hit him with your sword a few times and he will drop a golden leaf. You have the five golden leaves, you can go back to Richard's villa, give them back to Richard and get the key to the next dungeon. You'll find it in the basement. Move the box, go downstairs. Go to the left, jump over the hole, open the chest and grab the secret seashell. Go to the right now, go upstairs and exit the cave. It's some kind of amazing maze. You have to reach the statue next to the cave. The key is there. However, you have to cut the grass and be cautious because the grass also hides some holes. Once you made to the statue, use the shovel (that's why I told you to buy it at the beginning of the walkthrough) and dig exactly in front of the statue. The slime key will appear (6). Grab it. Now, let's go to the next dungeon. Go back outside Richard's villa, go west, go up and down (and all around... Oh god, did I just quote this reference? Really? CHAPTER 6: KEY CAVERN The door to the north is shut down, we have to go to the east then. You'll meet your good friend "the eye of doom that wants to make you fall off". This time, he looks like he's keeping something safe in this chest and doesn't want you to get it. Well, let's find an agreement and keep walking. Sadly, you can't make it to the chest. Alright, let's go back to the first room of this dungeon. Do you remember how you opened this door in the castle? Use a pot to bash this one and carry on. Kill the enemies, open the chest to get a small key, go to the right, kill the enemies and open the chest. It's a trap, a slime will appear from the chest. Kill him and go north. Kill some enemies and go downstairs. Four locked doors, one small key. I like this kind of sadistic puzzle. It looks like this dungeon is going to be tricky and will try to trick us. Ok, let's try the door to the left. Besides the slime, you'll face a new creature really annoying. If you come close to it, it will teleport to the opposite side and throw some kind of shuriken at you. There is a way to kill this creature. Charge a sword attack, clome close to the creature and go immediately to the other side. Dodge the shuriken and release the power of your sword to kill it. Once you take care of the creatures, grab the small key before it falls off and go open the door to the north. Oh look, an orb! And an owl statue. And some enemies to kill. Cool, let's clean this room up, grab the small key, hit the orb and go back up for a while. There are two chests to open. One is close to the stairs and contains the stone beak, the other is in a room to the east from the trapped chest. Kill the enemy and go open it. You'll get the dungeon map (7). Go back to the the room with the locked door, open the door to the east with the key, get rid of the enemies and go upstairs. Kill the slimes, pick up the small key, go back downstairs and open the last door. Kill all the enemies, grab the small key, lift the pots to get some bombs and go talk to the owl statue to the north. Keep in mind this wise hint, go east and go back upstairs. Go west, kill the enemies, keep going to the left, kill more enemies, grab the small key and go north. Kill the enemies to make a chest appear, carry on, kill the enemies, grab the floating bomb, talk to the owl statue and go upstairs. Go south, open the chest to get 50 rupees, then go east, notice the cracked wall and carry on. Dead end... ok let's go to the south then north. If you have played the first Legend of Zelda, you should recall the dodongos. In order to beat them, they had to swallow some bombs. Well, it's the same way to beat those two creatures. Those are the black monsters mentioned by the owl statue earlier. Equip the bombs and get rid of them. Three bombs for each of them and they will die. You'll get two fairies (one per black monster killed) and the portal. Go east now, move the blocks to reach the chest and take the Pegasus boots. Now you can dash and shatter the green crystals. You can also combine the Pegasus boots and the feather to make a long jump after a dash, which will come in handy. Go south then go back to the north and go east. Talk to the owl statue. Hmm, suspicious walls, you say? What about this arrow pointing at the the wall to the south? Let's use use a bomb, shall we? Oh, a secret passageway, how convenient. Kill the enemies, use a bomb on the crack, then combine the pegasus boots and the feather to make the gap. Make the other gap and get the Nightmare's key. Go back to the room with the arrow and go north now. Take the enemies down, get the compass in the chest, use a bomb on the wall to the left, kill the next enemies and grab the small key. There's also a fairy underneath one of the pots. Now we can face the boss of this dungeon but let's go back to the entrance first. Use the portal, go to the east and go get the chest since you have the Pegasus boots now. There's a small key inside. Yes, a small key for that, what a troll ha ha! There's another chest in this section of the dungeon according to the map. Kill the lonely slime to the left, then the skeletons to the right and open the chest to get... 200 rupees! Woohoo, you hit the jackpot! Now time to face the boss. Go through the portal, go south then unlock the way next to the door with a small key. Carry on, go downstairs, Dash to make the block fall down, then make the gaps, go down the ladder, dash to kill the next enemies, get the small key (I'm kind of confused about this key... the developers didn't pay attention ? There's no more locked door in this dungeon, oh well) and get ready to face the boss. Wait where is the boss? There are just some slimes. Don't try to kill them, they will come back. Dash and hit a wall to make the boss fall down, then get rid of the slimes and use the dash to hit the boss. As you can see, everytime you will hit the boss, you'll start splitting him up. Four dashes right in the middle of the boss and he'll become two giant slimes. Now use your sword and kill them. Be careful, they can use the body slam and stun you for a short period of time. Your reward will be another heart container in your collection and the third instrument in the next room: the Sea Lily's Bell. CHAPTER 7: THE Outside the dungeon, the ancient owl will make an appearance in order to ask you to go to the desert. Go to the right, go up, kill the creatures and dig in the center of the circle of grass to get a secret seashell. Keep in mind that you need to find them all and go back to the seashell mansion if you want to get the "ultimate weapon". Go down, then north, then east and go back to the castle. There are two caves on your way to the castle. The first one requires a bomb to be opened and the Pegasus boots to get rid of the crystals inside. The chest at the end contains 50 rupees. It's always nice to get, don't you think so? There's also a secret room in this cave. Poke the wall to the east until you hear a suspicious sound. It's a fake wall. Blast it with a bomb and get the piece of heart inside. The second cave is the lair of a fairy who will fully heal you if you need to recover some health. Also, you'll see outside a person standing in front of a tree with a bee hive. It's Tarin and he wants to borrow your stick in order to make the honeycomb fall down with it. Grab it then carry on. From the castle, keep going south. Go in the zone surrounded by purple rocks and find a rock to lift. There's another secret seashell below. There's a cave to the west but we'll see that later. For now, go back to the village. If you can afford the bow and arrows set, go buy it. Just a reminder: it costs 980 rupees. Otherwise, go see the woman and her baby. The husband went to the forest and is lost... Oh boy. Well, another side quest to do... but that can wait. Go to the library, use the pegasus boots on the bookshelf and read the book that just fell off. This puzzle also appears in A Link to the Past at one point. Yes, there's lot of references to Mario universe and self-references. It's a hint for a puzzle later in the adventure. It mentions five gravestones and an order. You'll see that later. For now, let's find more stuff and then go to the next dungeon. Now that you have the bombs and the Pegasus boots, you can do more stuff outside the dungeons. You can tackle the greens crystals, hit the lonely trees and make long jumps with the boots and you can use the bombs to blast some walls and find some secrets secretly secret. Go back to the dreamworld and shatter the crystal to the right. You'll find the ocarina in the chest upstairs (8). Leave the dreamworld, talk to the woman next to the statue and answer "yes" at the end of the duet. You'll learn the "Ballad of the Wind Fish". That's not the only song you're going to learn but this one is crucial for the adventure. Go back to the prairie, from the warp hole go south then west and south. Next to the phone booth, there's a tree. If you tackle the tree, a secret seashell will fall down. Go get it. Remember the cave that we did ignore earlier? Go in, in the next screen, blast the wall to the west to reveal a secret room, make the gap and go up. Make you way to the exit, go north, dig nearby the statue to get a secret seashell and go back to the first floor of the cave. Go south, exit the cave, go south then west. There's a cottage and a chest with 50 rupees. Go east now, you'll see some stairs surrounded by some bushes. You can't reach those stairs at that moment. However, if you go north from here and if you cut the bush, you'll find a secret seashell. There's also a mermaid statue to the other side but we'll see that in due time. You should get 10 secret seashells at this point of the game. Go back to the seashell mansion and get your surprise. Unfortunately, it's not the "ultimate weapon". You need more secret seashells. However, the spirit will give you another secret seashell for your effort. Now, time to carry on the main quest. Go outside, then west, then south and east. Nearby the signboard, there's an underground path. It leads to the other side of the river. There are some fishes in this passageway so be careful. Tackle the crystals, go upstairs, go south twice then east. Welcome to the animal village. Everything is ok here except one or two things. The first thing is the fact that the animals want Marin to come and sing a song. Ok, and the second thing is in the house next to the well. The chief needs something that you have at this point: the honeycomb. Give it to him and you'll get a pineapple. Yeah, maybe you'll find Spongebob Squarepants inside this pineapple (just kidding This enemy is really famous in the Legend of Zelda universe. In order to beat him, just charge your attack, wiat until he shows off his face and strike. The only difficulty here is the quicksands. Try to avoid the center of the arena or else you'll fall down into the cave. He will drop after a few hits the angler key. Grab it as soon as possible, fall down, blast the wall to the north and get the piece of heart (9). Go east now, leave the cave and go south. Lift the rock to find a secret seashell and leave the desert. The ancient owl comes and gives you the words of wisdom as always. Time to go to the dungeon! Remember where you saved BowWow? From here, go east if you want to see more side stuff. You'll see a house. This house is the photograph. It's another feature included in the remastered version. It's another side stuff but there's nothing to get at the end. It's just for fun. Go in, talk to the photograph and answer "yes" to get your first picture called "Here stands the brave man". If you answer "no", you'll get another picture called "Game over". Now, you can try to complete your album and find the eleven pictures left, it's up to you. I'll make an extra part at the end with the locations of the pictures, no worries. Back to the moblins cave, go north, kill the monsters, lift the rocks and go east. Ignore the stairs, go east until you find a keyhole. Use the key and the entrance to the fourth dungeon will be revealed. Now, how to get there? The owl said to leap off from the mountains. Hmmm... well, go back to the stairs and go up the ones to the right. Go in the cave after lifting the rocks, kill the enemies, go downstairs, kill more enemies and go up. You'll see a piece of heart that you can't get at this point and a chest that you have to ignore for now. Go outside, open the chest to get 50 rupees, then go back inside, shatter the crystals and go outside. Go to the east, enter another cave, go up and carry on (the chest is a trap). Outside, talk to the man, give the pineapple to him and get the hibiscus. Hey, lady goat wanted some! We'll see that after the dungeon. Now, time for the leap of faith! Leap off the edge to west, go east and leap off the edge to reach the entrance of the fourth dungeon. Enter the dungeon. CHAPTER 8: ANGLER'S TUNNEL In the next room, kill the spiky enemies (remember that you need to guard with your shield and then strike with your sword), then go to the right, kill the enemies, open the chest to get the compass and go south. Be careful: you can't swim so avoid the deepwater and go open the chest to get a small key. Go back in the last room, open the locked door, and notice the locked door. Go back to the room in which you fought the very first enemies of this dungeon, go up then to the right. Get the stone beak, go back to the last room and go north. Carry on, make the gap, blast the cracked block, then move the other block and open the chest to get a small key. Go north, blast the block, grab another small key and go back. Go north after the gap and grab the dungeon map. Go back to the locked next to the stone beak, open it, ignore the chest and make the gap to the north. Unlock the way, move the block and go west. Kill the enemies, watch your reward fall down from the ceiling and disappear (that's not nice) and go down. Kill the enemies, talk to the owl for a hint, go west, make a diagonal long jump to reach the chest and take the 50 rupees inside. Go back to the last screen, go south then west, don't open the trapped chest, go north and activate the tiles following this order: middle, south-west, north-east, north-west (make the long jump to get this one, if you step on a tile already activated, you reset the puzzle) and south-east. Some stairs will appear in the corner. Go east, open the chest, get the small key, go back in the last room and go downstairs. Dodge the first block, then jump on the second one to reach the ladder, go south and open the chest to get the Nightmare's Key. We can go to the boss's lair, however we are not done with this dungeon. There's a small portion to the north to explore first. Open the locked door to the north and face the mini-boss of this dungeon. This boss is not that hard, you need to hit him fives times with a charged attack. Be careful he sometimes changes his directions so he can surprise you if you don't pay attention and might hit you. After this battle, a portal and a fairy will appear. Carry on, pull the lever, go west, kill the enemies and open the chest to get the flippers (10). Weeeeee, now you can swim in the deepwater and dive like Michael Phelps! Go back to the stairs you couldn't go when you pushed the block, grab the teasing small key underwater, then open the chest you couldn't open earlier, grab the 50 rupees and go meet the boss of this dungeon. You probably noticed a switch earlier: go to this room, activate the switch, unlock the block and go downstairs. Dive and kill the fishes then go back to the surface. Kill the slimes, open the door and face the boss. This boss... honestly, no comments. I thought that this big fish would have been a pain in the butt. No, it's a joke, a pushover. He goes up and down, calls his minions that you can avoid easliy and that's it! Don't be scared of this fish, spam your attacks on his head and he will die after a few hits. Grab the heart container, go back to the surface and grab the fourth instrument: the surf harp. CHAPTER 9: THE RESTLESS GHOST With the flippers, you can now swim in peace in deepwater and get some stuff. Go downstairs, push the block, make the gap and go back to the surface. You will be next to the warp hole. Go east, jump in the water, go in the cave, stand in the middle of this flooded room and dive to get a piece of heart. Next to the entrance of the fourth dungeon, there another cave. Go in, talk to the big fish, answer "yes" and you'll learn a new song for the ocarina: Manbo's Mambo (Aye Caramba! Go back to Mr. Write's house. Go north, enter the cave and grad the rupees in the two chests. Now, go to the wooden bridge built by the monkeys earlier in the game (next to the castle), jump into the water to the right, go down, then go east and north. There's a cave with a fairy inside that will fully heal you if you need to. Jump into the other pool and go in the next cave. Go up, then south, enter the raft shop and pay a nice raft ride if you can afford it (it costs 100 rupees). This is a mini-game in which you'll be able to get some goodies: rupees, bombs, arrows and magcic powder. There are some chests too to get with nice things in these. In order to get the chests, step on the raft, ignore the first waterfall and fall down at the end of the river. Grab some stuff and go open the chest to get 20 rupees. There's another chest with 20 rupees in the next screen to the east so be prepared. The last chest can't be reached for now so end the ride and go to the next dungeon. You'll notice that you can't go in. It's surrounded by rocks and other stuff. There's a passageway underwater, no worries. Dive an go in the dungeon. CHAPTER 10: CATFISH'S MAW Go west, kill the enemies on your way, open the chest to get the compass (11) and go downstairs. Jump from platform to platform, go up, move the blocks to the left and to the right to make a square and get a small key. Go back, open the locked door, get rid of the enemies in the room and go west. Kill the enemies in the room, open the chest suddenly appeared and pick up the stone beak. Grab the bombs if you need some, go back in the last room, then go north. Kill the two slimes, notice the bridge, go west, notice this deathtrap as well and go back to the last room. Go east then north, kill the skeletons, carry on and face the master of skeletons. The only way to beat him is how the owl statue said in the last room. But first, you have to stun him with a charged attack and then use a bomb. After three hits, he will ran away (oh poor guy, he was not prepared for this Go downstairs, in the next room kill the enemies, then go to the next room and kill the enemies. Get another hint from the owl statue, carry on, avoid the next enemy, move the block and go downstairs. Kill the slimes in the next room, move the block and go back to the room in which you found the empty chest earlier. Go north, push the block and go west. Kill the enemies, ignore the pool for now and go north. Hmm, how convenient, we are stuck, nowhere to go... unless the crossroads room with the switch. Go back there, go north, kill some enemies, make a long jump to reach the chest, open it and get 50 rupees. Go north, then west, kill the slimes in this room (don't forget to move a block in order to kill one of the slimes) and go north. Carry on, kill the skeletons in the next room, grab the hearts floating in the air and open the chest to get the dungeon map. Go back to the crossroads room, press the button and go east. Here is round two! You know how to beat the master. Stun him with the sword and a bomb when he is down. This time, he will ran away after two hits and you'll have to pursue him for the round three. Go to the room next to the one in which you found the dungeon map. And here we go, round 3! You got used of this giant skeleton, he will run away for the third time after being hit twice. The next room is next to the one in which you found the small key. Round 4, fight! No worries, it's the last round (phew The boss is not that hard to beat. The only difficulty is his swinging flail tail. Otherwise, you have to wait until he shows off his face, use the hook shot to grapple him and hit the heart with your sword before he hides. Be careful, you might grapple a copy of him that has no heart. Run away otherwise the explosion caused by this enemy will hurt you Do this a few times until he dies. He tells that you don't know what this island is. Wait what?! What does he mean by this? Anyway, grab the heart container and go get the instrument in the next room: the wind marimba. CHAPTER 11: THE IDENTITY OF THE ISLAND Well, time for some side stuff. Outside the dungeon, go north and talk to the mermaid. She tells you that an artist needed a scale from her tail to make a painting. This artist is in one of the houses of the animal village. Go there and talk to the crocodile. You need to finish the mermaid statue. This statue is located to the west, from where you found the necklace. Use the hook shot to reach this part of the peninsula, use the scale and go downstairs. There are invisible enemies in this cave, be careful. In the next room, you'll find the magnifying lens. They allow you to see what's invisible when you hold it. Go back to the animal village and go in the house next to the house of Lady goat if you want to add another picture to your album. Also, he will tell you a secret. Otherwise, go explore the cave next to this house, blast the wall to the north and throw a bomb at the cracked block farther. Now go back, go west and grab the piece of heart. Go back to the village, enter the little house next to BowWow and dig in the corner to get a secret seashell. Go to the shore, as mentioned by the Zora in the house. The shortest way to go there is to the west. Find a cracked wall (south from the monkey), blast it and go in the cave. You'll see a curious character who has an item. However, he wants to trade it to you for what you hold in B button. You can only trade the shovel, the feather, the hook shot and the Pegasus boots. I suggest you to trade the shovel, you don't need that anymore at this point of the adventure. You'll get the boomerang. This item is amazing. Do not worry, if you need to use the item you did trade, give the boomerang back to him and you'll get back the item. Go in the cave surrounded by the rocks in the mysterious woods to get some rupees, then go back next to the entrance of the first dungeon, use the pegasus boots on the lonely tree to get a secret seashell, then go back to the lonely grave (for another picture) and lift the rocks to go downstairs. Grab the piece of heart, go up, return to the castle and dive nearby the bridge of the castle to get another piece of heart (13). Let's go grab the teasing piece of heart we saw earlier in this cave. Now that we have the hook shot, we can cross the bridge . Also, we can open the chest in the cave that contains 50 rupees. In order to get the piece of heart, from where you did leap off to enter the fourth dungeon, go east then go upstairs and go west. Ignore the cave, go up then use the hook shot to cross the bridge and cut the bush. Go downstairs, blast the wall to the south, go in the next room and go get the piece of heart in the next room. We have two things to get before going to the dungeon. And our next destination is north from the animal village. Oh and if you don't have the bow, go buy it now. On your way to the next dungeon, the ancient owl will give (as always) the words of wisdom. After the discussion, carry on, go south, then west, use the bow to instantly kill the moving armors, go up and go east. Underneath one of the statues, you'll find some stairs. Go down, open the chest and grab a secret seashell. You should have enough secret seashells now for the ultimate weapon promised by the spirit of the seashell mansion. Go back to the surface and go west. Enter the temple and get ready for a boss fight. This enemy is a recycled enemy from A Link to the Past. In order to beat this enemy, you have to hit him when he is on the ground. His earthquakes will stun you so be careful. Otherwise, he is not that hard. After a couple of hits, he will drop the face key. Go north, light the room with the magic powder and read the relief on the wall. You know the identity of the island now. It's an illusion and, like any illusion, the awakening of the wind fish will make the island disappear forever. Exit the temple now and meet the ancient owl. After the discussion, go get your ultimate weapon from the spirit of the seashell mansion. This weapon is amazing . It's a magic sword that can shoot laser from the sword when you have full health only. Now it's time to go to the dungeon. From the ruins, get rid of the ocks and the bushes and swim into the pool to the left to reach an isle with two statues. Kill the one to the left, go downstairs, kill the enemies and go up. Go to the right and use the key. The dungeon emerges from the ground. Go up and go in. CHAPTER 12: FACE SHRINE This dungeon... has the most annoying enemy of this game: the wizzrobes. I hate that creature, I can tell you. And you know what? I'll be honored to introduce them to you. Go west and meet them. You can't kill them without the bow. And there's more: it takes fives arrows to kill one (or one bomb, well you better stun him before using a bomb). What else can I say about this creature? They disappear and reappear, they throw some fireballs at you. I hate them from the bottom of my heart. Anyway, after killing those enemies, go through the opened door, open the chest to get 50 rupees and go check the corridor with the worm. Carry on, kill the enemy, go to the next room, go north and north the owl statue farther. Now, go back to the room with the orb, use a bomb, stand behind the red tile and wait until the bomb explodes. Go to the next room, press the button behind one of the jars and go west. Now, go north, then east, open the chest and pick up the stone beak. Now, go back to the last room, grab a jar and throw it at the sealed door then go through the passageway. Go east, open another chest to get the compass, go upstairs, hit the orb and carry on. Kill the wizzrobes, take the small key, go back to the room with the three wizzrobes and the floating arrows, kill them, open the chest to get the dungeon map and go back to the owl statue for a hint. Go back to the entrance, go east this time, pass the two trap rooms and open the locked door with the key. Get rid of the enemies, poke the wall to the north and blast the fake wall to go in a secret room. That's what the owl statue mentoned: the eyes have walls. The next enemy is funny and wants to play with a ball. Oh it's so cute, let's paly with him, shall we? Oh, you wonder which game? Dodgeball! Yes, all you need to do in order to beat this enemy is equip the power bracelet, dodge the ball, grab it and throw it at the enemy. You can carry on and throw it until he takes the ball to throw it at you. After fives hits with the ball, a portal will appear, a fairy as well to recover your health. There's some bomb if you need some in the next room, otherwise go back to the room of jars with the switch and blast the wall to the east. Kill the slimes in the dark room, go downstairs, kill the enemies in the next room, go to the next room, open the chest and get the upgrade for the power bracelet. Now you can pull the giant elephants statues of this dungeon and more stuff. Go back to the first room of the western part of the dungeon (the one with the first wizzrobes). Kill them, go back in the room with the chest that contains the rupees, lift the statue and carry on. Open the chest to get 100 rupees, go back to the room in which you found the compass, hit the orb, go west and use a statue to bash the door to the north. Go in the room, open the chest to get 50 rupees, go upstairs, open the chest to get a secret seashell (or 50 rupees if you already have the ultimate weapon) and go back to the eastern part of the dungeon. After the room with the floating tiles, grab a statue and bash the door to the right. Get rid of the wizzrobes, ignore the chest for now and go north. Kill the enemies, open the chest farther, get a small key and go back to the first room with an orb. Hit the orb and go back to the east. Now go get the chest to get a free sample of the secret medicine, go back to the right eye room, go north, lift the statue to the left and go downstairs. Slice the tiles in the next room, grab the small key, unlock the way to the north, grab the statue and bash the door with it, then make the horse heads stand up and go downstairs in the next room. Kill the enemies, go north, hit the orb, open the chest, grab the 200 rupees and go south. The last chest contains the Nightmare's key. But you'll need to fight an old friend. Oh don't tell me you don't remember those two enemies! They love bombs! Three bombs for each of those enemies and you can carry on. Use the hook shot to reach the other side, use a pot to open the chest and get the Nightmare's key (14). Now, time to face the boss of this dungeon. Go back to the room with the "heart", destroy the tiles, go south this time, kill the slimes (you can get rid of the eye if you wish to), kill the wizzrobe in the next room, move the block, go in the next room, light the two torches to turn the fireballs into nice fairies and go open the boss' lair. This boss is not that hard. You have to bomb his face five times and he'll die. But first avoid or destroy the tiles and the pots he will throw at you then avoid the holes appearing and disappearing and use your bombs in order to beat him. Like the last boss, he will talk about the wind fish's awakening. And then, he'll disappear, dropping a heart container for you. Go take the sixth instrument in the next room: the coral triangle. CHAPTER 13: THE FLYING ROOSTER At this point of the game, there's just a few extra things to get in the mountains such as the last piece of heart of the game and four secret seashells (or rupees if you have the ultimate weapon in your possession). Those goodies can wait. We need to find something else in order to get a key required to enter the next dungeon. The whisper at the end of the dungeon told you to head to the mountais. The ancient owl awaits you and tells you to go east. Ok, let's go to the eastern part of the mountains. Ignore the stairs, then notice the chest up here and go in the cave. Step on the little sand tile, use a bomb to blast the wall and go in the secret room. Go up and solve this little puzzle. I don't think you can get all the chests, however you will be able to get the secret seashell in the chest outside the cave (or some rupees if you already have the sword from the spirit. Go back where you came from and go east. You'll see a owl statue, a cave and a hole. Actually, the hole leads to the cave in which you can find the piece of heart underwater. Otherwise, go in the cave. In the next part of the mountains, there are a cave and a cracked wall. Blast it, go in the cave to recover your health from the fairy, then go in the next cave. You are now at the summit of the mountains. To your left, there's the eagle's tower. However, you need the key to open the dungeon. We'll come back later. Now go upstairs next to the waterfall, then east, lift the rocks to get another secret seashell (if, of course, you don't have the ultimate weapon yet). If you step on the bridge to the east, you can get another picture for your album. Go back to the entrance of the third dungeon and go south to reach the signpost maze. The starting point of this maze is south from the phone booth next to the dungeon. Make the gap, read the signboard and follow the direction. You have to read and follow those informations otherwise you'll have to restart from the beginning. Your reward will be... some stairs! No, go downstairs and talk to Mamu the frog. Pay 300 rupees and you'll learn a new song and the last one for your ocarina: the frog's song of soul. This song is extremely useful in order to get an item. Back to Mabe village now. Push the statue of the flying rooster and play the new song to resurrect the dead rooster. Now it's your ally and you can go to places you can't go, even with the pegasus boots and the feather combined. For example, the stairs to the west of the castle. Go there, use the power bracelet to grapple the rooster and make the gap. Downstairs, there's a secret seashell (or 20 rupees if you have the sword in your possession). How about getting more ammos? Remember the stairs surrounded by bushes on the peninsula? Go there, fly with the rooster and go downstairs. Farther, you'll see a familiar altar. Yes, exactly the same atler, like in the mysterious woods. Use the magic powder and answer "yes" to get more bombs. Now, time to get the key of the dungeon. Go back to the mountains, find a house with a strange man inside and go in the cave below. Go north with the rooster and grab the bird key. It's the last key of the game, don't worry. Go back to the tower, use the key and enter th dungeon. CHAPTER 14: EAGLE'S TOWER Here is the hardest dungeon of all the game. Why? Because there are four floors to explore! Weeeee, let's have some fun! Go east first, kill the enemies, grab the small key and open the locked door with it. Go to the second floor, use the boomerang to hit the orb and open the chest to get the mirror shield (15). Yes, you have already found the treasure of this dungeon: the upgrade for your shield. Stand on the red tiles, hit the orb and go down. Go west, match three symbols to make a chest appear, carry on and beat this mini-boss. Four hits and he will die, dropping a fairy and a small key. Go back and use the key on the block to unlock the way. Go north-west, fall down, then go south, hit the orb, go back in the last room and go north. Go west, jump over the spikes, match three symbols, open the chest and grab the compass. Go in the room next to this one (on the map it's the one with the chest), get rid of the enemy with the magic powder and make the two horses head stand up. A chest will appear. Open it to get the dungeon map, go downstairs, step on the red tile, hit the orb, go west, then south and open the chest to get the stone beak. You should have noticed some owl statues during your exploration, go get some hints from these. Go to the last unexplored room of the second floor. Fall down into a hole to the est and grab the last secret seashell of the game (or the 20 rupees) in the chest. Go back to this room, kill the annoying enemy with the magic powder, then all the tiles, go to the next room, poke the wall to the south then blast it and go down to reach another chest with a bomb. The last chest in the first floor contains a small key. In order to get it, jump down the hole next to the orb in the room to the east, in the second floor. Now time to go to the third floor. The stairs are next to the orb located to the south. Go north, then beat the bats thrown at you by the skeletons. Upset, he will run away and a portal will appear, leading back to the entrance of the dungeon. Go north, push the blocks to stick them together and grab the Nightmare's key. Go back to the second floor going up the eastern stairs, go north, pull the lever, grab the ball and use it to make the four pillars fall. They are in the central rooms, one pillar in each room. The four pillar fallen will lower the fourth floor. Now go back to the thrid floor. Go back to the room in which you found the Nightmare's key, hit the orb, go west, open the door to Nightmare's lair and go north. Make the two horse heads stand up, open the chest that just appeared and get a free sample of the secret medicine. Now time to face the boss. Go up the stairs, use the hook shot and go upstairs. Climb up the ladder and here we go! This boss is not that hard. He will ride an eagle but it's not a big deal. Just wait until he shows off and strike. Three hits with the ultimate weapon and he will die. Grab the heart container, go down, go in the room next to the stairs and take the seventh instrument: the organ of the evening calm. CHAPTER 15: TO THE LAST DUNGEON One more instrument to get and we will wake the wind fish up. The next dungeon is located to the north-west of the map. On your way to the dungeon, you'll see Marin stuck on the bridge. Use the hook shot to cross the bridge with her. She wants to thank you and tell you something else but... Tarin comes and interrupts the discussion (thanks Tarin CHAPTER 16: TURTLE ROCK Last dungeon of the game. Go in the next room, kill the enemy, go west, kill more enemies and go north. Defeat this enemy, go west, push the weird block to make a bridge and go south. Open the chest to get 50 rupees, go west, fight this enemy once again and go south. Yes, you'll fight once again those damn mini-bosses, that's pretty much the gimmick of this dungeon. Open the chest, take the compass, go back to the last room and go north. Kill the enemy, grab the small key and go back to the entrance. Go north, then north again and go west. Go downstairs, kill the enemies in the next room, open the chest and grab the stone beak. In the next room, beat this mini-boss (he wants to play dodgeball again), go west, use the weird block to make a bridge, kill the slimes, carry on, go south, kill the two enemies and go downstairs. Go talk to the owl statue for a hint, lift the jar, press the button and go west. Now, control the weird block in order to fill the holes as the owl statue mentions. It's kind of tricky, I tell you. If you screw this puzzle up, you'll have to go back to the last room, go back to this one nad restart from the beginning. Grab the small key, go back to the west and do the same thing with the block. Open the chest to get 20 rupees, go north and notice the two torches. Go back Now go back to the entrance, go north and control the block in order to make a bridge leading to the chest to the west. You'll find the dungeon map. Now, use the block to make a bridge to the east, blast the wall to the east and go in the secret room. Hit the orb, blast the wall to the south and go back to the room with the weird block. Now, this time, move it between the two blocks to the north, move the block to the east, unlock the way using a key, go east, unlock the door and go north. Kill the slimes, talk to the owl, go north, kill the creatures, grab the small key and go west. Kill the creatures with the bombs, go west, ignore the locked door, go up, use the hook shot and open the chest to get the special medicine. Go back to the room with the owl statue, get rid of the blocks with bombs, then the wall to the west, as shown by the arrow on the floor. Unlock the way, kill the enemies, blast the wall to the south and the one to the west. Go west, talk to the owl statue, shoot the statue with the bow, grab the small key, go south for some goodies and go north. Kill the enemies, go upstairs, collect the last piece of heart (16), then go east. Enter the dungeon, kill both of the creatures with the bombs and open the chest this time to get a small key. Go west now from the room with the statue, move the blocks, open the chest and grab another small key. Go north, then east and open the locked door. Go west, go upstairs, use the hook shot, open the chest and get 50 rupees. Now go back to the locked block, unlock the way, use the hook shot, unlock the stairs and go downstairs. Go south, beat the boss, go hit the orb, go back here and go open the chest. You'll get the magic rod. With that you can light the torches and melt the ice. Go back to the room with the torches and use the magic rod to light them and make a chest appear. You'll find a small key. Now, we have to head to the small portion of the dungeon to the west. Go back to the central room, use the block to make a bridge to the stairs, go upstairs and open the door with the key. Remember this enemy? Time for the rematch then! With the ultimate weapon (that you should have at this point), two charged hits will kill him. Go north, solve this puzzle and get the Nightmare's key in the chest. Go back to the central room, go east, go upstairs, make your progress using the magic rod, open the door and face the boss of this dungeon. In order to beat him, it's simple: equip the magic rod and attack with it when he shows off. Spam your attacks while he is stunned and after a few hits, he will die. Beware of the goo he spreads when he dives in the pool and his movements when he is hit by the magic rod. He might be able to do the second attack if you spam your attacks properly. Grab the last heart container and the last instrument in the next room: the thunder drum. Time to wake the wind fish up... or not. CHAPTER 17: THE COLOR DUNGEON We're not gonna wake the wind fish up, not yet. There is one more thing to do. Well you can skip this chapter if you want to but it's the optional dungeon. Remember the book on the shelf, he mentioned five gravestones and a world of color. Go to the cemetary, find where you can find five gravestones and move them in this order: the one to the south (south), then the one to its left (left), then the one above (north), then the one to its right (right) and finally the last one (north). You just opened the entrance of the secret dungeon. This dungeon can be done anytime you want after getting the pegasus boots (in order to know the pattern of the gravestones) and the magic powder. You see two skeletons. Talk to them and tell them their colors to pass. In the next room, kill the enemies, then carry on, match the same colors to make a chest appear, open it and grab the compass. Blast the wall to the south to find a secret room with lot of rupees. Go east, ignore the locked door, kill the enemies and use the sword to turn the next enemies into balls. Lift them and put them into the specific holes to make a chest appear with the stone beak inside. Go south, then west, kill the enemies, open the chest and get a small key. Go back to the room with the holes, go north, kill the enemies, solve the puzzle in the next room and grab another small key. Carry on, kill some enemies, open the locked door and face this curious enemy. His weakness is the magic powder. Use it on him to turn him into a slime and hit him with the sword. The magic powder will hurt him, no worries. After a few hits, he will perish. Go west, move the block and get the Nightmare's key in the chest. Go back to the locked door, open it and face a golem. Use the sword to hit him. His only attacks are the earthquakes and the boulders. Those two attacks are combined. The earthquake will stun you. Avoid the boulder and give him your best hit. Four hits with the ultimate weapon and the match is over. Go west now, kill the enemies, lift the jar at the top left hand corner, press the button and go north. Kill all the slimes, open the chest, take the dungeon map, go east, turn the enemies into balls and put them into the specific holes. Grab the key, go west now, solve he puzzle, go in the next room, kill the slimes, then go west, open the door and face... a moving metroid?! Looks like a metroid. Anyway, blue is safe, yellow is caution, red is alert. Common code but it's how this boss work. The only way to kill him is to hit him until he turns red. He will obviously move around the room and throw some projectiles at you. The magic rod is really effective on him so dodge the projectiles and use your magic powers to beat your opponent. No heart container and instrument at the end, however, in the next room you'll meet the queen fairy. You have now the choice between two tunics: the blue tunic or the red tunic. The blue tunic will reduce the damages taken by half, the other tunic will increase the damges you give to your opponents. Choose wisely, you won't be able to go back to this dungeon after leaving it. I took the red tunic during my playthrough because... I like red. And power ha ha. Anyway, time to wake the wind fish up. CHAPTER 18: THE END OF THE LINE Before heading to the egg at the summit, go to the library and read the book you couldn't read earlier during the adventure. Now with the magnifying lens, you can. Kee pin mind the pattern written in this book and go to the last portion of the island to the north. It's where the egg is. The ancient owl will tell you the words of wisdom once you are there. Go up, play the ballad of the wind fish, the owl comes back to tell you more sacred words and you can go in the egg after the cutscene. Start your progress, fall down and follow the pattern mentioned in the book. Go down, and fight the first boss of the last dungeon. It's a shadow. Your sword won't do anything against him, nor the hook shot. However, the magic powder... yes, it's his weakness. How about some magic powder then, Mister the shadow? Oh really? It's not tasty? Oh well, get used of it because I have plenty for you! Use the magic powder to beat him. After a few hits with the magic powder, the shadow will take another form. The people who played A Link to the Past will recognize Agahnim the wizard. You remember how to beat him. Otherwise, you need your sword, a good timing and aim at him when he throws the sphere. The third form is the worm. Hit the tail a few times, it's simple like ABC. The fourth form is Ganon. Equip the Pegasus boots, avoid the bats and the swinging axe and dash at him. After a few hits, he will turn into his normal form and will try to hurt you. Use the magic rod in this situation to stop his rush. Now, his new form is kind of impressive. He will swing his arms in order to hit you. At one point, he will open his eye. Shoot an arrow to hit him. Use the feather to avoid the swinging arms, it's the easiest way. After a dozen of arrows in the eye, the shadow will disappear forever. Go upstairs and watch the final cutscene. There's a special ending if you haven't died once during the adventure. But, in any case, congratulations. You beat The Legend of Zelda: Link's Awakening DX. BONUS CHAPTER: THE PICTURES AND ABOUT A SECRET SEASHELL I FORGOT Yes, there are actually 26 secret seashells instead of 25. I forgot to mention one but, how to say, you need 5 secret seashells to get it in the seashell mansion. Be careful, you need FIVE, not four, nor six but five of these and go to the mansion to get this secret seashell. If you don't do like this, you will never get it. Yes, it sucks and, to be honest, I've been screwed by this thing (and totally confused). So yeah, do it if you want to collect all the secret seashells. But keep in mind that you only need 20 of these to get the ultimate sword. Ok, now time to explain how to get the 12 pictures of the album. I haven't included all the pictures in the main quest because it has nothing to do. You get nothing f you complete the album. It's just a feature included in this version, like the optional dungeon. To trigger this event and get the other pictures, you need to see the photograph first. He will take the first picture of the album and put the album on the table. You can see all the photos you got and print these if you wish to. Now, without wasting anymore time, let's see how to get all the pictures. 1- HERE STANDS A BRAVE MAN or GAME OVER It's basically the first picture you're going to get when you'll meet the photograph. Depending of your answer, this picture will be different. Answer "yes" and you'll get "Here stands a brave man", answer "no" and you'll get the other picture. 2- OCEAN VIEW Marin must follow you for this one. From the library, go south, to the cliff. The photograph will appear and take the picture. 3- HEADS UP! Same thing, Marin must follow you for this one. Jump down the well of Mabe village to get this picture. 4- CAMERA HOG Marin must follow you for this one too. Go to the statue in Mabe village to get this picture. 5- (NAME) DISCOVERS ULRIRA'S SECRET Check out the window outside of Grandpa Ulrira's house in Mabe village to get this one. You can unlock this one once BowWow has been returned to the woman. 6- LINK PLAYS WITH BOWWOW! After returning Bowwow, come close to Bowwow to get that picture. 7- THIEF! Well, I think it doesn't have to be explained. You have to steal something from the shop in Mabe village to get that picture. Keep in mind that this act will upset the storekeeper and, next time you'll enter his shop, he will kill you. 8- CAN'T SWIM? Anytime after getting the magnifying lens, go talk to the fisherman who gives you the necklace to get that picture. 9- I FOUND ZORA Anytime after getting the magnifying lens, go in the house next to Lady Goat's house to get thiat picture. 10- A REGAL HOME You can only get that picture after triggering the quest for the five golden leaves and before getting these. Go to the main gate of the castle to get the picture. 11- I WAS VERY AFRAID After leading the ghost to his grave, go back to this grave to get this picture. 12- CLOSE CALL As soon as you found the hen house at the top of the mountain, step on the bridge to get this photo. And that conclude the bonus chapter and this walkthrough, folks. I see you in the next walkthrough. Bye bye |
| Games have secrets, I have my eagle gaze. |
Affected by 'Laziness Syndrome'
Registered: 10-21-11
Location: France
Last Post: 2433 days
Last Active: 1607 days
12-29-13 08:29 PM
 megamanmaniac is Offline
| ID: 947948 | 27 Words
megamanmaniac is Offline
| ID: 947948 | 27 Words
 megamanmaniac is Offline

POSTS: 2649/4966
POST EXP: 452698
LVL EXP: 24713695
CP: 17259.2
VIZ: 152622
Laian : Another amazing review by the king of Walkthrough makers. I hereby grant Walkthrough King Laian with my congratulations. Nice job. I wonder what you'll do next! |
| Triple M |
Affected by 'Laziness Syndrome'
Registered: 04-12-12
Location: Access withheld from you
Last Post: 3116 days
Last Active: 3112 days
12-29-13 08:42 PM
 PixelBrick is Offline
| ID: 947958 | 35 Words
PixelBrick is Offline
| ID: 947958 | 35 Words
 PixelBrick is Offline

POSTS: 2105/2625
POST EXP: 172950
LVL EXP: 9060069
CP: 7070.0
VIZ: 50099
How long did it take you to actually type this? This is the longest post I've ever seen without plagiarism. And how did you manipulate multiple screenshots without editing? Anyways, keep up the good work. |
| Here's looking at you, kid |
Affected by 'Laziness Syndrome'
Registered: 07-05-13
Location: MGM Vault
Last Post: 2675 days
Last Active: 2529 days
12-29-13 08:47 PM
Laian is Offline
| ID: 947962 | 80 Words
POSTS: 1532/2232
POST EXP: 457173
LVL EXP: 7575891
CP: 23733.5
VIZ: 3570463
megamanmaniac : King of walkthrough makers... is that a beautiful tan or a sunburn on my face? Of course not, I'm kind of flattered and honored Next game, hmm honestly I'm not sure at 100%. I have many games in mind but I want to try another system. A system that I haven't done yet. I'll see if I can undertake any walkthrough of any game released for this system. I'm kind of tired today, I'll see that tomorrow King of walkthrough makers... is that a beautiful tan or a sunburn on my face? Of course not, I'm kind of flattered and honored Next game, hmm honestly I'm not sure at 100%. I have many games in mind but I want to try another system. A system that I haven't done yet. I'll see if I can undertake any walkthrough of any game released for this system. I'm kind of tired today, I'll see that tomorrow |
| Games have secrets, I have my eagle gaze. |
Affected by 'Laziness Syndrome'
Registered: 10-21-11
Location: France
Last Post: 2433 days
Last Active: 1607 days
12-30-13 11:23 PM
megamanmaniac is Offline
| ID: 948481 | 12 Words
megamanmaniac is Offline
POSTS: 2666/4966
POST EXP: 452698
LVL EXP: 24713695
CP: 17259.2
VIZ: 152622
| Triple M |
Affected by 'Laziness Syndrome'
Registered: 04-12-12
Location: Access withheld from you
Last Post: 3116 days
Last Active: 3112 days
12-31-13 03:50 AM
Laian is Offline
| ID: 948570 | 297 Words
POSTS: 1533/2232
POST EXP: 457173
LVL EXP: 7575891
CP: 23733.5
VIZ: 3570463
megamanmaniac : Maybe yes. Maybe no. Look closely at my list of walkthroughs PixelBrick : I should make a FAQ of all the questions I had to answer since I'm a Walkthrough writer of the Vizzed community. Maybe in the future, who knows Anyway, I will answer your interesting questions. I have one month to make the walkthrough. It usually takes me the month to make it but sometimes it takes less time than I expect. It happens if I know the game, otherwise it's a bit longer (and another story The screenshots... well let's say that I'm a magician for this and I can't really reveal my secrets. Magic powers flow in my veins... Ok stop it, Laian. No one's going to trust you Maybe yes. Maybe no. Look closely at my list of walkthroughs PixelBrick : I should make a FAQ of all the questions I had to answer since I'm a Walkthrough writer of the Vizzed community. Maybe in the future, who knows Anyway, I will answer your interesting questions. I have one month to make the walkthrough. It usually takes me the month to make it but sometimes it takes less time than I expect. It happens if I know the game, otherwise it's a bit longer (and another story The screenshots... well let's say that I'm a magician for this and I can't really reveal my secrets. Magic powers flow in my veins... Ok stop it, Laian. No one's going to trust you |
| Games have secrets, I have my eagle gaze. |
Affected by 'Laziness Syndrome'
Registered: 10-21-11
Location: France
Last Post: 2433 days
Last Active: 1607 days
