

 User Notice
 Forum Links

Thread Information
Thread Actions


Galerians - Walkthrough
05-31-12 10:04 AM
Laian is Offline
| ID: 592433 | 6148 Words

POSTS: 1375/2232
POST EXP: 457173
LVL EXP: 7552979
CP: 23733.5
VIZ: 3570463

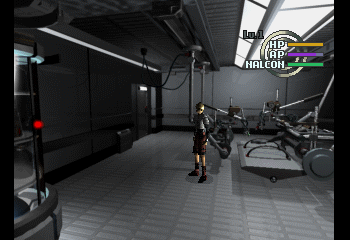
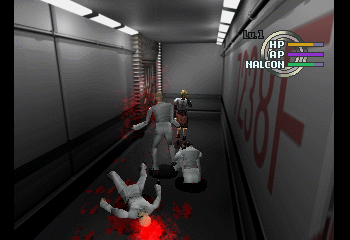
Hello everyone, this is your host Laian with a new walkthrough. In order to celebrate the new feature alled Video Game Room, I planned to make a walkthrough of a game released on PS1. Ah, the PS1... probably the system I played so many times during my childhood. And among all the games I own on this system and I ever played, I have my favorite ones and, among those favorite games, there's Galerians. I could say many things about this game but I'm not here to make a review. I am the walkthrough maker, the raider of the secrets secretly secret in the videogame and here is the walkthrough of this month. Well, I'm sick of saying the "use the walkthrough bla bla bla in case of emergency" (who cares about that honestly? ^^) so let's start this walkthrough, shall we? After the FMV, check the room to find the medical staff notes then try to escape the room going through the door to the right. Unfortunately, it’s locked from the other side. Ok, try the other one then. It’s locked too. Locked? No! Press the “triangle button” to activate another FMV and open the door, now that you can unlock it. After the new FMV, charge your power holding R1 button and press “X” button to unleash it on this poor scientist. Check this room now to find a recovery capsule and the security card (1). Open the door, kill the scientists and open the next door. Use the security card to unlock the metallic door to the left, open it and, after the FMV, kill the guard. You’ll find a recovery capsule in the bunch of stuff not so far from the doors and a button which will unlock the metallic door you went through, just in case you want to go back. Open the door to the right, kill the other guard, check the room in order to find a button which will unlock the door with the red light in the previous room and the freezer room key. Use the mirror in this room, hop another FMV. Before going back to the previous room, open the door to the right. In this room, there are a delmetor, a recovery capsule, some Nalcon and the beeject in the orange box on the shelf (use the ladder to get it). Now you can go through the door you unlocked. Kill the guard who is sleeping, then the other one and another one at the end of the corridor. Don’t pay attention to the first door, you need a specific key to open it. The second door leads to a save room, the third one to the toilets where nothing will happen (nothing useful there so you can skip this room honestly) and the last one is the one you need to open in order to carry on. Kill the guards in the corridor, notice the metallic curtain with the “14th floor” written on it, open the door with the red light using the freezer room key and go in the room. In this room, if you interact with the stuff in the middle, you will start a FMV. Check the room to find some nalcon, a recovery capsule and a fuse (2). Oops, cold air is on, you must stop it before being frozen forever. No, just kidding but you must stop it in order to leave this place. The monitor is not so far from the stuff in the middle. Once you turned off the cold air, you can leave this room and open the door to the left to carry on. In this room, two scientists are working on… well, I don’t exactly know but they are working on something, the fact is they don’t notice you entering the room ha ha (hearing the noise made by the door, they probably need a surgery of their ears too XP ). Kill them. But why, Laian, why? Those are two morons, not paying attention to a young boy with some psychic powers. You want to know why? Really? Kill them and check the monitors. You’ll find a delmetor and the PPEC storage key. Press “triangle” button on the machine to engage a FMV. Now, open the other door, in this room takethe nalcon if you need it, press “triangle” button on the chair to start another FMV and remember the code written in the wall (or write it down on a piece of paper, that will avoid a backtracking if you forget it ^^ ). Remember the stuff in the first room when you start the game? Go there. No need to do all the way back, there’s a door not so far in order to go back to this room (3). You’ll need a fuse to make it work though. Oh wait, we have one so let’s use it, shall we? Woohoo, that works! Go in the room, open the storage cabinet to the right with the key you just got, take the liquid explosive and, if you need it, the delmetor. Leave the room opening the door you opened in order to go in, go back to the metallic curtain, on the way you will encounter a man with a rifle who wants to take you down. Let’s play this game then and get rid of him. Use the liquid explosive on the metallic curtain and press “triangle” button to activate a FMV. Now go down to reach the lower floor.    Kill the two guards. One of the two doors needs a security card. Not a big deal, we have one. Shoot, it’s rejected. Of course, it wouldn’t be funny otherwise. Well, let’s open the other door, shall we? It looks like the other one is not so capricious. Move forward just a bit in order to activate a FMV. You just met Dr. Lame… err no, Dr. Lem who is the clinic chief. He looked really happy to see us. Push the button located on the small column in order to open the door, however don’t go open it yet. Check the two other rooms to find a newspaper in the toilets (not really useful but it’s just something dealing with the plot, it’s up to you if you want to take it or not) and a save point. Now, open the unlocked door, kill some scientists, take the recovery capsule on the table and the red in the kind of column next to the giant screen. Turn the screen on to get the G Project report and go in the room to the right. You will find a delmetor next to the door and the Special PPEC Office key on the stuff at the end of all those incubators. Also, check the one with some light in order to activate a FMV. Now, go back to the 15th floor and open the door you haven’t unlocked yet with the key. You will encounter some guards during this backtracking, feel free to tame them. Once you are in the room, kill the scientists, take the nalcon, the delmetor on the shelf and the red in the storage cabinet. Now, insert the security card in the computer next to the storage cabinet and enter the code you found in the small room. The card has a new code now and can probably open the door it couldn’t unlock before, I mean the one to the right when you come to the 14th floor. Go open it now. Oh, and there’s a guard waiting for you there. Go in the room to the right, there’s a lot of stuff to take (nalcon, red, delmetors,recovery capsules and skip) and a cutscene. Take what you need (with a priority for the skip, which will be handy later in this level), go back in the corridor and carry on killing two guards with a rifle. In the next room, you will meet a new enemy: Robocop (4). Ah sorry, just a reference to my Let’s Play, anyway. It’s a robot immune to the red, so use the nalcon to get rid of him, avoid his attacks (especially his shots), then take the recovery capsule if you need it and go down to reach the 13th floor.
If you like puzzles, this part of the level is for you. First, kill the guards here then open the door next to the stairs if you want to save your progress. Open the door to the right, move a few steps forward, the lights will be off and you will be locked in the room. This is the first puzzle of this floor, a short one in order to start. Notice the red dots? Before interacting with that, go to the stuff in front of you, press “triangle” button and remember the location of the blue dots. Now, interact with the red dots following this order: right, left and middle. Go back to the stuff and check it in order to get some pictures of your parents. Turn back and push the red button to light the lights up. Now check this room to find some red, some nalcon and the Control Room key (5). Now go back to the corridor, go to the west on the map and open the only door you can open. See those columns? This is the most important puzzle of this floor. You need to find four stones in order to solve this puzzle. Now, go back to the corridor and go to the east. A new FMV will activate and you will have to face a new enemy. And as they are really brave, it’s not one but THREE guys you will have to take care woohoo! Kill them and open the door to the west (not the red and grey one, this one is locked). Open the door to the right, step on the middle of the room to activate a cutsene related to the puzzle of the columns. Remember the order, it’s the solution of the puzzle. Go back and open the other door. Kill some scientists, take the recovery capsule and the nalcon if you need it but don’t forget the Test Lab key on the stuff between the nalcon and the recovery capsule. Go back now and… oh, three robots! Using the skip here is the best thing you can do to get rid of them quickly and obviously moving constantly then striking. Once, you killed them, unlock the door to the south with the Test Lab key and go in. Kill all the scientists and take the two-headed snake stone. Now open the locked door to the east with the Control Room key, kill the guards, take the nalcon and the red if you need that and push the first two buttons to unlock the armory and the clinic chief’s room. Go to the armory (the red and grey door). Normally, if you haven’t been hurt, the effect of the skip is still activated and you shouldn’t have any troubles to kill the two robots in this room. Otherwise, well you can take the skip on the shelf, use it and kill them. Once they are dead, take the two-headed wolf stone and go to the clinic chief’s room. You will probably encounter a guard with a rifle (unless you have already taken care of him). In this room, you will find the clinic chief’s notes on the desk and the two-headed eagle stone (6). Open the door next to the desk to go to the balony, take a recovery capsule ans activate a cutscene. Go back to the office, unlock the other door if you want, go back where there’s the statue and go up the staircases.    Kill the two enemies, check the shelf to find some red then open the door to the right (the door to the left is locked from the other side). Kill the scientists, take the delmetor on the restraining bed, the nalcon, the recovery capsule on the shelves and the Research Lab key on the table. Turn the computer on and check it to get Rion’s test data. Go back to the control room, open the other door with the key, kill some sientists and check the room to find some delmetor, some recovery capsule, some nalcon, some skip and the two-headed monkey stone. Now that you have the four stones, go back where the four columns are and put those stones following the order of the room with the animals on the walls: snake, eagle, wolf and monkey. A FMV will start. Open the new door, kill the cyborg, use a skip before entering the next room and open the door. Kill the cyborgs, take the skip and check the stuff in the middle to activate a FMV. Open the door to the right, don’t go up the staircases, open another door at the end of the corridor, press “triangle” button when you are in front of the incubators, face a new enemy (well, they are two) and take the red on the table and the recovery capsule on the stuff with the red dot. Now, go back to the corridor, go up the staircases, save your progress and open the door. Check the computer twice in order to activate a FMV. Now, you have to face Dr. Lame, erh sorry I meant Dr. Lem. A few hits with the red and it’s no longer a threat. Congratulations, you beat Dr. Lem… first form though. Now, it’s a robot. Use the nalcon on him, avoid his attacks (dash and spinning clothesline) and hit him with your best shot (use the skip if you want to make this fight really easy and quick). At some points, he will do an earthquake that you can’t avoid, however it’s recommended to stay away from him when he is doing that otherwise he will crush you like a pancake while you are stunned. After a few hits, he will die. Check his body and the last FMV of this level will start. This is the end of this long stage A. Save your progress and… to the stage B!
NOTE: You will probably notice if you go in the “movie preview” via the title screen that two scenes are missing. One will be unlocked if you inject the Red when you run out of this power and the other one will be unlocked once you will inject the D-Felon, power that you will get later in the game. Remember that the Red scene can only be unlocked during this stage.
STAGE-B: YOUR HOUSE You are now in front of the house. The front door is locked from the other side, the door to the left leads to the playground, which is pointless to go right now. Open the door to the right, check the garage to find a recovery capsule and the car to get the backdoor key. Notice the pool, it will be useful later. Use the key to open the backdoor and go in the house. Oh sweet, we have some guests! Anyway, check the kitchen to find a recovery capsule. The door to the east has a missing knob, you’ll need another one in order to open it. Open the door to the west, don’t open the two doors to the west yet, open the other door, cross the corridor, open another door, kill the new enemy and open the first door you will see. You are in the living room now. Check the fireplace to activate a FMV. You will find in this roomsome delmetor, some red and a painting called “Metamorphosis” (7). Go back to the corridor, go to the east, there’s a save room and the bar. Go in this room, find the door knob and some other stuff (nalcon, delmetor and recovery capsule). Check the billiard: two balls are missing. Now, go back to the corridor and check the bathrooms. In one of them, you’ll find the second floor key if you empty the tub, pressing the button (that reminds me of a puzzle in another videogame ^^). In the other one, well right now there’s nothing useful to do but we’ll see that later. Go back to the kitchen, after the FMV, use the door knob on the door, open it, kill the enemies and go up the staircases. Use the second floor key to unlock the door, kill the enemies in the corridor, open the door to the left and check the study in order to activate a FMV and find some delmetor, some nalcon and the bedroom key. In the other room, there’s a book named “New replicative computer theory” to take and two holes in the wall. Keep in mind those two holes, you need two specific items. Now, go back to the corridor, open the last door, jump over the gap, open the door then open the first door you will see. Here is Rion’s room. Press “triangle” button when you are in front of the bed to start a FMV. You will find a delmetor if you check one of the windows and some red among the toys. Put the painting where something is missing on the wall (the bright shape). A ladder will appear and you will be able to go from the bedroom to the living room and vice versa. Go back in the corridor, go to the right and open the door to your right. This is the balcony where you can find a recovery capsule if you need one. There’s another bathroom to your left but it’s really useless to go there, there’s nothing interesting. Carry on, unlock the door to the right with the bedroom key and go in the parents’ bedroom. Keep in mind the jewelry box between the two beds, you need something to open it. Check the room to find a letter from your mom and a recovery capsule. Back to the corridor, check the last room of this floor located to the left, a FMV will start. There’s nothing else in this room so you can leave. Go to the small bathroom in the lower floor (not the one where you found the key, the other one) to activate a FMV. Press “triangle” button where the ring fell off to start a cutscene and get the mother’s ring (8). What does this item do? Well, first, it’s the key of the jewelry box and, second, it’s a piece of the puzzle in the files room. Where is the other piece then? Well, go back to the parents’ bedroom but I suggest you to go in the living room in order to activate another FMV and because it’s obivously the shortest way to go there using the ladder. Once you are in the parents’ bedroom, use the mother’s room to open the jewelry box and get the father’s ring, the last piece of the puzzle. Don’t forget the mother’s ring pressing “X” button right after getting the father’s ring. Go back to the files room now, kill the enemies on your way and use the two rings on the specific holes to reveal a secret door behind a shelf. In this new room, check the desk to start a FMV and get one of the two missing billiard balls: the 3 ball. There are also two recovery capsules in this room. Now, go back to the courtyard, press “triangle” button when you are in front of the pool and check the car to get the 9 ball. Now, go back to the bar, put the two balls on the billiard and go down. It’s too dark, you can’t see anything here. Turn the light on with the device with the green light, check the desk not so far from the staircases for some red and Dr. Pascalle’s diary with the shed key on the other desk next to the giant machine. A FMV will start. Now, go to the playground, take the nalcon on the bench if you need some and use the key to unlock the shed. Birdman will play with you in the house: one hit each time he appears and he will disappear. In the shed, you’ll find Lilia’s doll, some nalcon and some skip. Now, leave the shed and prepare to fight Birdman in the playground. One thing: short is useless on him so use your delmetor when your AP gauge blinks. The first part of this fight is simple: avoid his balls and strike. Sometimes, he will show up without throwing any balls at you. When he does that, it’s possible to hit him but I suggest you to wait until he throws the balls at you, you have more time to charge your power to the max and unleash a full power in his face. After a few hits, he will make some clones. That’s the second part of the fight. This will be a bit tough to find out the right Birdman among all those Birdman, like the succubus in Castlevania: Symphony of the Night (if anyone knows). Either you will have the right one with the first strike if you have some luck, or you will kill a clone. It’s 50-50. Just move constantly this time, strike the one you want and you will probably hit the true Birdman, who knows. If you find the real Birdman, stick with him (well, not so close otherwise he will unleash a shockwave if you are too close), I mean don’t lose him. He will unleash at some points a terrible shockwave. But before unleashing it, the real Birdman and his clones spin around like a record in the air. Stay away from this circle of doom, it’s the only way to avoid this attack. Keep doing the same method until he dies. After another FMV showing Birdman’s death, you can save your progress and carry on the adventure. It’s also the end of Disc 1. Now, let’s find Lilia in Babylon Hotel.
STAGE-C: BABYLON HOTEL Welcome to the Hotel California, such a lonely place… hmm hmm my apologies, it came out of my mind. This is Babylon Hotel and Lilia should be here. You start in the lobby. Talk to the desk clerk. You will get the room 302. Before going there, let’s talk to the other people in this hotel. There must be some other guests who know about a certain Lilia Steiner. The room next to the elevator is a save room and the only save point of this level. The room next to the save room is the toilets and the only toilets of this hotel (with obviously nothing useful here but we will come in this room later for some reasons). Go in the elevator, press button “2” and go in the rooms 203 and 206. A cutscene will start in each room. The other rooms (201, 202, 204 and 205) are locked right now. Keep in mind the clock, we will see that later. Go in the elevator and press button “3”. Go in the room 303 twice, then in the room 304 and go in your room. A FMV will start (and the troubles too so get ready for this, here comes the storm). There’s a recovery capsule on the desk and a note in the bathroom. Go where the note says, after the cutscene go back inside and check the room for a delmetor and a recovery capsule (9). Now, go to the lobby, then behind the front desk. Blood! All the stuff in the front desk has been taken oddly. Open the door, you’ll see the desk clerk dead. Oh god, who did such a thing? Anyway, we must hurry, Lilia is probably in danger. Press “triangle” button when you are in front of the desk clerk in order to see a discussion between the young boy and the young woman. You will find a recovery capsule on the desk and a lever. Don’t flip it right now, go back to the lobby. A cutscene will start. Oh look, the man of the room 306 is here as planned. Talk to him, he will tell you how to go in the room 204. The code is tough to remember and to do (yes, because in order to open the door of the room 204, you have to do the same code… awesome). Step in front of the door of the room 204, press “X” button twice and do the code (press “X” button to knock on the door). It will probably take a while to make this part (it took me more than 20 times and a part of my sanity honestly). Open the door, a FMV will start. Talk to the dealer, then check the shelves to find an appolinar (that you MUST take in priority for later), a skip, some nalcon and some red. Before leaving the room, the dealer will give you a new power: the D-Felon (10). It’s an anti-gravity power and it’s really fun to use it when there's a group of enemies. Inject it to activate a FMV and refill this power then go to the room 201. The first time, you will not be able to enter. Retry over and over again and you will go in the room. A FMV will start. Talk to him after the FMV, find some delmetor on the bed and two recovery capsules (one in the shelf, the other on the desk next to the plumber) and go to the room 304. An enemy will greet you in front of the door. Kill him and enter the room 304. After the cutscene, go back in this room, not to get another information but to find some stuff here and there if you need some (recovery capsule and nalcon). You can leave the room now.   
The suspicious little boy is in the corridor. Talk to him and go to the room 301. Two bad guys, woohoo it’s a trap! Get rid of them and check the room. You will find a letter from Lilia on the desk and a delmetor on the stuff next to the bathroom. Go back to the corridor, unfortunately the little boy is gone. Go back to the room 304, you’ll see the woman dead in the bathroom. Press “triangle” button to see a vision about her death. It’s not the only person dead, remember the desk clerk and go to the toilets of the hotel to see the man from the room 306, dead. Same thing, press “triangle” button to see a vision of his death. Now you have to talk with the other people: the priest, the guy obsessed by his thirst of domination and the drunken man. Each of those people will ask you to go to a specific room. Let’s see the insane man first. Go to the room 204, after the cutscene, go back and talk with him. Go to the room 305, use the appolinar and kill all the enemies when you are “short”. Go back to the room 204, the man will be dead. Press “triangle” button for a vision of his deat. Now, go to the room 206 and , after the cutscene, go back and talk with the priest. Go to the room 202, kill the enemy and check the room in order to find a recovery capsule. Go back to the room 206, the priest is dead. Check the room: two recovery capsules can be found (one on the bed, the other on the table next to the bed). Now, go to the room 303. After the cutscene, talk with the drunken man and go to the room 205. No enemies this time, however there’s a phone call, so feel free to answer. Get some red where the phone is and some nalcon next to the bed. Leave the room, kill the enemies, go back to the room 303, the drunken man is dead in a blood bath (yeah for the pun). Check the room for a recovery capsule and some red. Remember the clock? Go back there then. You’ll see the suspicious little boy. Talk with him to start a FMV. Shoot, he ran away. Go save your progress, go to the third floor and chase Rainheart. He will enter the room 305. Switch to the nalcon if you were using the red and go in the room. After the cutscene, the fight will begin. Rainheart use fire power, that’s why the red is not effective on him. Like Birdman, he is immune to “short”, he will teleport and will try to attack you with several attacks. He can push you, give you some punches and use the fire to hurt you. Avoid his attacks and strike. At some points, he will summon some zombies. Those enemies are not frightening at all, they will not hurt you. They will try to catch you but they’ll fall on the ground and disappear. Stay focused on Rainheart, avoid his attacks, charge your power and strike until it’s over. A FMV will start. Go back to the room 204, the dealer is unfortunately dead. It’s not necessary to do that but it’s the last murder in this hotel. Go back to the lobby, after the cutscene, save your progress, go back to the room with the dead desk clerk, flip the circuit breaker and go down the stairs. Kill the enemies (or pass by them) and use the elevator because you will find nothing in the boiler room.  
Now you are in the restaurant, well in the kitchen. Check this room to get some red (11). Go to the east on your map. Oh sweet, toilets! There are a skip, some red and a recovery capsule. Go back to the kitchen, kill the enemy and go to the south now. A FMV will start and you will face Rita. She will always be on a floating table, well not exactly. Sometimes, she will land on the ground for a short period of time before summoning another table and floating in the air. She is also immune to “short”, a bit logic beause it would not be easy to kill her with the “short” honestly. Her attacks are the table dash (a bit annoying) and the waltz of chairs and tables with a table dash as a finale. Move constantly, avoid her attacks and strike when she lands on the ground. After a few hits, she will die, a FMV will start and this will be the end of this stage (and the Disc 2 too). NOTE: The scene 19 is a bonus FMV. You can only unlock it if you collect all the FMV and cutscenes of the game. It's not a big deal so no panic. However, you’ll have to find by yourself about this bonus FMV
STAGE-D: MUSHROOM TOWER This is the last stage of the game, really linear to be honest. And guess what? We’re going to play a famous game! Isn’t that lovely? Which one? Ah ha, first check the room to find some recovery capsules, some red and some D-Felon. Now go in front of one of the three shooters. A cutscene will start and you will have to face two enemies. Use whatever you want to kill them, one light will turn on. Now you have to light the others on. Press “triangle” button in front of each shooter and look for the one which has those colors: yellow, green, blue purple and red. Switch to Lilia (by the way, there’s a save point where Lilia is) and push the buttons on the ground following this order. A FMV will start and the shooter will work. Use it to go to the upper floor. Ladies and gentlemen, I hope you remember Robocop in Michelangelo Memorial Hospital because here is Robocop version 2.0, with a yellow suit, a shield and the rifle. They are annoying and will dash sometimes. Reunite all of them and use the D-Felon to get rid of them easily (12). Another light will turn on, two more to go. Same method like the last time: check the shooter to the left from where you came, switch to Lilia and push the buttons in the correct order. After the two FMVs, the shooter will work. Go to the upper floor, kill the enemies to light another light on, check the tables next to the shooters for some stuff (nalcon, red, recovery capsules and D-Felon) then the shooter to the left from where you came and play Simon with Lilia (yes, the famous game with colors, you know?). After the two FMVs, use the shooter, kill the enemies in order to turn the last light on. Check the one to the right from where you came, switch to Lilia and play Simon for the last time. After two FMVs, use the shooter to start a cutscene.  
You are now at the top of the Mushroom Tower. Check the tables to find some red, some nalcon, some recovery capsules and some delmetors (13). Open the door, save your progress, go back and check all the capsules starting from the one to the left. Birdman, Rainheart, Rita, you beat them. Now who is this Cain in the fourth capsule? And who is this unknown person in the last capsule, belonging to the Pegasus family like Cain? Well, press “triangle” button on the last capsule to activate a FMV and get ready to face your twin and evil brother Cain after the cutscene. Among all the bosses in this game, Cain is my favorite character in the game, probably a pain and the hardest boss of the game. I don’t have to tell you that “short” is futile against him so use some delmetors when your AP gauge is full. About his attacks, he will start with some blue fireballs then at one point he will unleash the rain and the thunder then the fireballs and finally he will unleash the ring of fire. For the first two attacks, no big deal: spin around him like a record and strike when he finishes his blow of fireballs (he will disappear but, don’t worry, he will reappear in front of you each time so you can charge your power, wait until he shows up and hit him with your best shot). The last attack, well, you have to stay in the ring of fire, charge your power and strike. It’s a bit tough sometimes because the floor will be electrified too and you may be hurt by that. Stay focused on Cain, use your powers (except the D-Felon, it’s useless) to get rid of him and activate a FMV. Now take some stuff on the tables here and there, open the door, watch another FMV and get ready to face Dorothy, the last boss of the game. Seriously, if you tell me a final boss easier than Dorothy, I’ll eat my hat (even if I don’t own one ^^). A JOKE! That’s all we can say to describe this boss. You don’t even need the “short” to kill her (well, “short” will not make the fight easier I suppose, you’ll see why). See those flying eyeballs? You have to kill them. Yes, you have to unleash your powers (except the D-Felon, completely useless now) on those eyeballs. Dorothy has a laser beam, she unleashes the thunder too and the earthquake. Nothing really frightening. Now the eyeballs. When you hit one eyeball, it’s getting mad and will tackle you before joining his friends. You can dodge all those attacks, except the earthquake, if you move constantly. Otherwise, charge your power and strike as you usually did during the adventure with the other bosses. Nothing really hard, everything should be ok in you have some stuff to help you. Once she is dead, watch the final FMV and the credits. Don’t forget to save your game at the end and, congratulations, you beat Galerians. Hello everyone, this is your host Laian with a new walkthrough. In order to celebrate the new feature alled Video Game Room, I planned to make a walkthrough of a game released on PS1. Ah, the PS1... probably the system I played so many times during my childhood. And among all the games I own on this system and I ever played, I have my favorite ones and, among those favorite games, there's Galerians. I could say many things about this game but I'm not here to make a review. I am the walkthrough maker, the raider of the secrets secretly secret in the videogame and here is the walkthrough of this month. Well, I'm sick of saying the "use the walkthrough bla bla bla in case of emergency" (who cares about that honestly? ^^) so let's start this walkthrough, shall we? After the FMV, check the room to find the medical staff notes then try to escape the room going through the door to the right. Unfortunately, it’s locked from the other side. Ok, try the other one then. It’s locked too. Locked? No! Press the “triangle button” to activate another FMV and open the door, now that you can unlock it. After the new FMV, charge your power holding R1 button and press “X” button to unleash it on this poor scientist. Check this room now to find a recovery capsule and the security card (1). Open the door, kill the scientists and open the next door. Use the security card to unlock the metallic door to the left, open it and, after the FMV, kill the guard. You’ll find a recovery capsule in the bunch of stuff not so far from the doors and a button which will unlock the metallic door you went through, just in case you want to go back. Open the door to the right, kill the other guard, check the room in order to find a button which will unlock the door with the red light in the previous room and the freezer room key. Use the mirror in this room, hop another FMV. Before going back to the previous room, open the door to the right. In this room, there are a delmetor, a recovery capsule, some Nalcon and the beeject in the orange box on the shelf (use the ladder to get it). Now you can go through the door you unlocked. Kill the guard who is sleeping, then the other one and another one at the end of the corridor. Don’t pay attention to the first door, you need a specific key to open it. The second door leads to a save room, the third one to the toilets where nothing will happen (nothing useful there so you can skip this room honestly) and the last one is the one you need to open in order to carry on. Kill the guards in the corridor, notice the metallic curtain with the “14th floor” written on it, open the door with the red light using the freezer room key and go in the room. In this room, if you interact with the stuff in the middle, you will start a FMV. Check the room to find some nalcon, a recovery capsule and a fuse (2). Oops, cold air is on, you must stop it before being frozen forever. No, just kidding but you must stop it in order to leave this place. The monitor is not so far from the stuff in the middle. Once you turned off the cold air, you can leave this room and open the door to the left to carry on. In this room, two scientists are working on… well, I don’t exactly know but they are working on something, the fact is they don’t notice you entering the room ha ha (hearing the noise made by the door, they probably need a surgery of their ears too XP ). Kill them. But why, Laian, why? Those are two morons, not paying attention to a young boy with some psychic powers. You want to know why? Really? Kill them and check the monitors. You’ll find a delmetor and the PPEC storage key. Press “triangle” button on the machine to engage a FMV. Now, open the other door, in this room takethe nalcon if you need it, press “triangle” button on the chair to start another FMV and remember the code written in the wall (or write it down on a piece of paper, that will avoid a backtracking if you forget it ^^ ). Remember the stuff in the first room when you start the game? Go there. No need to do all the way back, there’s a door not so far in order to go back to this room (3). You’ll need a fuse to make it work though. Oh wait, we have one so let’s use it, shall we? Woohoo, that works! Go in the room, open the storage cabinet to the right with the key you just got, take the liquid explosive and, if you need it, the delmetor. Leave the room opening the door you opened in order to go in, go back to the metallic curtain, on the way you will encounter a man with a rifle who wants to take you down. Let’s play this game then and get rid of him. Use the liquid explosive on the metallic curtain and press “triangle” button to activate a FMV. Now go down to reach the lower floor. Kill the two guards. One of the two doors needs a security card. Not a big deal, we have one. Shoot, it’s rejected. Of course, it wouldn’t be funny otherwise. Well, let’s open the other door, shall we? It looks like the other one is not so capricious. Move forward just a bit in order to activate a FMV. You just met Dr. Lame… err no, Dr. Lem who is the clinic chief. He looked really happy to see us. Push the button located on the small column in order to open the door, however don’t go open it yet. Check the two other rooms to find a newspaper in the toilets (not really useful but it’s just something dealing with the plot, it’s up to you if you want to take it or not) and a save point. Now, open the unlocked door, kill some scientists, take the recovery capsule on the table and the red in the kind of column next to the giant screen. Turn the screen on to get the G Project report and go in the room to the right. You will find a delmetor next to the door and the Special PPEC Office key on the stuff at the end of all those incubators. Also, check the one with some light in order to activate a FMV. Now, go back to the 15th floor and open the door you haven’t unlocked yet with the key. You will encounter some guards during this backtracking, feel free to tame them. Once you are in the room, kill the scientists, take the nalcon, the delmetor on the shelf and the red in the storage cabinet. Now, insert the security card in the computer next to the storage cabinet and enter the code you found in the small room. The card has a new code now and can probably open the door it couldn’t unlock before, I mean the one to the right when you come to the 14th floor. Go open it now. Oh, and there’s a guard waiting for you there. Go in the room to the right, there’s a lot of stuff to take (nalcon, red, delmetors,recovery capsules and skip) and a cutscene. Take what you need (with a priority for the skip, which will be handy later in this level), go back in the corridor and carry on killing two guards with a rifle. In the next room, you will meet a new enemy: Robocop (4). Ah sorry, just a reference to my Let’s Play, anyway. It’s a robot immune to the red, so use the nalcon to get rid of him, avoid his attacks (especially his shots), then take the recovery capsule if you need it and go down to reach the 13th floor.
If you like puzzles, this part of the level is for you. First, kill the guards here then open the door next to the stairs if you want to save your progress. Open the door to the right, move a few steps forward, the lights will be off and you will be locked in the room. This is the first puzzle of this floor, a short one in order to start. Notice the red dots? Before interacting with that, go to the stuff in front of you, press “triangle” button and remember the location of the blue dots. Now, interact with the red dots following this order: right, left and middle. Go back to the stuff and check it in order to get some pictures of your parents. Turn back and push the red button to light the lights up. Now check this room to find some red, some nalcon and the Control Room key (5). Now go back to the corridor, go to the west on the map and open the only door you can open. See those columns? This is the most important puzzle of this floor. You need to find four stones in order to solve this puzzle. Now, go back to the corridor and go to the east. A new FMV will activate and you will have to face a new enemy. And as they are really brave, it’s not one but THREE guys you will have to take care woohoo! Kill them and open the door to the west (not the red and grey one, this one is locked). Open the door to the right, step on the middle of the room to activate a cutsene related to the puzzle of the columns. Remember the order, it’s the solution of the puzzle. Go back and open the other door. Kill some scientists, take the recovery capsule and the nalcon if you need it but don’t forget the Test Lab key on the stuff between the nalcon and the recovery capsule. Go back now and… oh, three robots! Using the skip here is the best thing you can do to get rid of them quickly and obviously moving constantly then striking. Once, you killed them, unlock the door to the south with the Test Lab key and go in. Kill all the scientists and take the two-headed snake stone. Now open the locked door to the east with the Control Room key, kill the guards, take the nalcon and the red if you need that and push the first two buttons to unlock the armory and the clinic chief’s room. Go to the armory (the red and grey door). Normally, if you haven’t been hurt, the effect of the skip is still activated and you shouldn’t have any troubles to kill the two robots in this room. Otherwise, well you can take the skip on the shelf, use it and kill them. Once they are dead, take the two-headed wolf stone and go to the clinic chief’s room. You will probably encounter a guard with a rifle (unless you have already taken care of him). In this room, you will find the clinic chief’s notes on the desk and the two-headed eagle stone (6). Open the door next to the desk to go to the balony, take a recovery capsule ans activate a cutscene. Go back to the office, unlock the other door if you want, go back where there’s the statue and go up the staircases. Kill the two enemies, check the shelf to find some red then open the door to the right (the door to the left is locked from the other side). Kill the scientists, take the delmetor on the restraining bed, the nalcon, the recovery capsule on the shelves and the Research Lab key on the table. Turn the computer on and check it to get Rion’s test data. Go back to the control room, open the other door with the key, kill some sientists and check the room to find some delmetor, some recovery capsule, some nalcon, some skip and the two-headed monkey stone. Now that you have the four stones, go back where the four columns are and put those stones following the order of the room with the animals on the walls: snake, eagle, wolf and monkey. A FMV will start. Open the new door, kill the cyborg, use a skip before entering the next room and open the door. Kill the cyborgs, take the skip and check the stuff in the middle to activate a FMV. Open the door to the right, don’t go up the staircases, open another door at the end of the corridor, press “triangle” button when you are in front of the incubators, face a new enemy (well, they are two) and take the red on the table and the recovery capsule on the stuff with the red dot. Now, go back to the corridor, go up the staircases, save your progress and open the door. Check the computer twice in order to activate a FMV. Now, you have to face Dr. Lame, erh sorry I meant Dr. Lem. A few hits with the red and it’s no longer a threat. Congratulations, you beat Dr. Lem… first form though. Now, it’s a robot. Use the nalcon on him, avoid his attacks (dash and spinning clothesline) and hit him with your best shot (use the skip if you want to make this fight really easy and quick). At some points, he will do an earthquake that you can’t avoid, however it’s recommended to stay away from him when he is doing that otherwise he will crush you like a pancake while you are stunned. After a few hits, he will die. Check his body and the last FMV of this level will start. This is the end of this long stage A. Save your progress and… to the stage B!
NOTE: You will probably notice if you go in the “movie preview” via the title screen that two scenes are missing. One will be unlocked if you inject the Red when you run out of this power and the other one will be unlocked once you will inject the D-Felon, power that you will get later in the game. Remember that the Red scene can only be unlocked during this stage.
STAGE-B: YOUR HOUSE You are now in front of the house. The front door is locked from the other side, the door to the left leads to the playground, which is pointless to go right now. Open the door to the right, check the garage to find a recovery capsule and the car to get the backdoor key. Notice the pool, it will be useful later. Use the key to open the backdoor and go in the house. Oh sweet, we have some guests! Anyway, check the kitchen to find a recovery capsule. The door to the east has a missing knob, you’ll need another one in order to open it. Open the door to the west, don’t open the two doors to the west yet, open the other door, cross the corridor, open another door, kill the new enemy and open the first door you will see. You are in the living room now. Check the fireplace to activate a FMV. You will find in this roomsome delmetor, some red and a painting called “Metamorphosis” (7). Go back to the corridor, go to the east, there’s a save room and the bar. Go in this room, find the door knob and some other stuff (nalcon, delmetor and recovery capsule). Check the billiard: two balls are missing. Now, go back to the corridor and check the bathrooms. In one of them, you’ll find the second floor key if you empty the tub, pressing the button (that reminds me of a puzzle in another videogame ^^). In the other one, well right now there’s nothing useful to do but we’ll see that later. Go back to the kitchen, after the FMV, use the door knob on the door, open it, kill the enemies and go up the staircases. Use the second floor key to unlock the door, kill the enemies in the corridor, open the door to the left and check the study in order to activate a FMV and find some delmetor, some nalcon and the bedroom key. In the other room, there’s a book named “New replicative computer theory” to take and two holes in the wall. Keep in mind those two holes, you need two specific items. Now, go back to the corridor, open the last door, jump over the gap, open the door then open the first door you will see. Here is Rion’s room. Press “triangle” button when you are in front of the bed to start a FMV. You will find a delmetor if you check one of the windows and some red among the toys. Put the painting where something is missing on the wall (the bright shape). A ladder will appear and you will be able to go from the bedroom to the living room and vice versa. Go back in the corridor, go to the right and open the door to your right. This is the balcony where you can find a recovery capsule if you need one. There’s another bathroom to your left but it’s really useless to go there, there’s nothing interesting. Carry on, unlock the door to the right with the bedroom key and go in the parents’ bedroom. Keep in mind the jewelry box between the two beds, you need something to open it. Check the room to find a letter from your mom and a recovery capsule. Back to the corridor, check the last room of this floor located to the left, a FMV will start. There’s nothing else in this room so you can leave. Go to the small bathroom in the lower floor (not the one where you found the key, the other one) to activate a FMV. Press “triangle” button where the ring fell off to start a cutscene and get the mother’s ring (8). What does this item do? Well, first, it’s the key of the jewelry box and, second, it’s a piece of the puzzle in the files room. Where is the other piece then? Well, go back to the parents’ bedroom but I suggest you to go in the living room in order to activate another FMV and because it’s obivously the shortest way to go there using the ladder. Once you are in the parents’ bedroom, use the mother’s room to open the jewelry box and get the father’s ring, the last piece of the puzzle. Don’t forget the mother’s ring pressing “X” button right after getting the father’s ring. Go back to the files room now, kill the enemies on your way and use the two rings on the specific holes to reveal a secret door behind a shelf. In this new room, check the desk to start a FMV and get one of the two missing billiard balls: the 3 ball. There are also two recovery capsules in this room. Now, go back to the courtyard, press “triangle” button when you are in front of the pool and check the car to get the 9 ball. Now, go back to the bar, put the two balls on the billiard and go down. It’s too dark, you can’t see anything here. Turn the light on with the device with the green light, check the desk not so far from the staircases for some red and Dr. Pascalle’s diary with the shed key on the other desk next to the giant machine. A FMV will start. Now, go to the playground, take the nalcon on the bench if you need some and use the key to unlock the shed. Birdman will play with you in the house: one hit each time he appears and he will disappear. In the shed, you’ll find Lilia’s doll, some nalcon and some skip. Now, leave the shed and prepare to fight Birdman in the playground. One thing: short is useless on him so use your delmetor when your AP gauge blinks. The first part of this fight is simple: avoid his balls and strike. Sometimes, he will show up without throwing any balls at you. When he does that, it’s possible to hit him but I suggest you to wait until he throws the balls at you, you have more time to charge your power to the max and unleash a full power in his face. After a few hits, he will make some clones. That’s the second part of the fight. This will be a bit tough to find out the right Birdman among all those Birdman, like the succubus in Castlevania: Symphony of the Night (if anyone knows). Either you will have the right one with the first strike if you have some luck, or you will kill a clone. It’s 50-50. Just move constantly this time, strike the one you want and you will probably hit the true Birdman, who knows. If you find the real Birdman, stick with him (well, not so close otherwise he will unleash a shockwave if you are too close), I mean don’t lose him. He will unleash at some points a terrible shockwave. But before unleashing it, the real Birdman and his clones spin around like a record in the air. Stay away from this circle of doom, it’s the only way to avoid this attack. Keep doing the same method until he dies. After another FMV showing Birdman’s death, you can save your progress and carry on the adventure. It’s also the end of Disc 1. Now, let’s find Lilia in Babylon Hotel.
STAGE-C: BABYLON HOTEL Welcome to the Hotel California, such a lonely place… hmm hmm my apologies, it came out of my mind. This is Babylon Hotel and Lilia should be here. You start in the lobby. Talk to the desk clerk. You will get the room 302. Before going there, let’s talk to the other people in this hotel. There must be some other guests who know about a certain Lilia Steiner. The room next to the elevator is a save room and the only save point of this level. The room next to the save room is the toilets and the only toilets of this hotel (with obviously nothing useful here but we will come in this room later for some reasons). Go in the elevator, press button “2” and go in the rooms 203 and 206. A cutscene will start in each room. The other rooms (201, 202, 204 and 205) are locked right now. Keep in mind the clock, we will see that later. Go in the elevator and press button “3”. Go in the room 303 twice, then in the room 304 and go in your room. A FMV will start (and the troubles too so get ready for this, here comes the storm). There’s a recovery capsule on the desk and a note in the bathroom. Go where the note says, after the cutscene go back inside and check the room for a delmetor and a recovery capsule (9). Now, go to the lobby, then behind the front desk. Blood! All the stuff in the front desk has been taken oddly. Open the door, you’ll see the desk clerk dead. Oh god, who did such a thing? Anyway, we must hurry, Lilia is probably in danger. Press “triangle” button when you are in front of the desk clerk in order to see a discussion between the young boy and the young woman. You will find a recovery capsule on the desk and a lever. Don’t flip it right now, go back to the lobby. A cutscene will start. Oh look, the man of the room 306 is here as planned. Talk to him, he will tell you how to go in the room 204. The code is tough to remember and to do (yes, because in order to open the door of the room 204, you have to do the same code… awesome). Step in front of the door of the room 204, press “X” button twice and do the code (press “X” button to knock on the door). It will probably take a while to make this part (it took me more than 20 times and a part of my sanity honestly). Open the door, a FMV will start. Talk to the dealer, then check the shelves to find an appolinar (that you MUST take in priority for later), a skip, some nalcon and some red. Before leaving the room, the dealer will give you a new power: the D-Felon (10). It’s an anti-gravity power and it’s really fun to use it when there's a group of enemies. Inject it to activate a FMV and refill this power then go to the room 201. The first time, you will not be able to enter. Retry over and over again and you will go in the room. A FMV will start. Talk to him after the FMV, find some delmetor on the bed and two recovery capsules (one in the shelf, the other on the desk next to the plumber) and go to the room 304. An enemy will greet you in front of the door. Kill him and enter the room 304. After the cutscene, go back in this room, not to get another information but to find some stuff here and there if you need some (recovery capsule and nalcon). You can leave the room now.
The suspicious little boy is in the corridor. Talk to him and go to the room 301. Two bad guys, woohoo it’s a trap! Get rid of them and check the room. You will find a letter from Lilia on the desk and a delmetor on the stuff next to the bathroom. Go back to the corridor, unfortunately the little boy is gone. Go back to the room 304, you’ll see the woman dead in the bathroom. Press “triangle” button to see a vision about her death. It’s not the only person dead, remember the desk clerk and go to the toilets of the hotel to see the man from the room 306, dead. Same thing, press “triangle” button to see a vision of his death. Now you have to talk with the other people: the priest, the guy obsessed by his thirst of domination and the drunken man. Each of those people will ask you to go to a specific room. Let’s see the insane man first. Go to the room 204, after the cutscene, go back and talk with him. Go to the room 305, use the appolinar and kill all the enemies when you are “short”. Go back to the room 204, the man will be dead. Press “triangle” button for a vision of his deat. Now, go to the room 206 and , after the cutscene, go back and talk with the priest. Go to the room 202, kill the enemy and check the room in order to find a recovery capsule. Go back to the room 206, the priest is dead. Check the room: two recovery capsules can be found (one on the bed, the other on the table next to the bed). Now, go to the room 303. After the cutscene, talk with the drunken man and go to the room 205. No enemies this time, however there’s a phone call, so feel free to answer. Get some red where the phone is and some nalcon next to the bed. Leave the room, kill the enemies, go back to the room 303, the drunken man is dead in a blood bath (yeah for the pun). Check the room for a recovery capsule and some red. Remember the clock? Go back there then. You’ll see the suspicious little boy. Talk with him to start a FMV. Shoot, he ran away. Go save your progress, go to the third floor and chase Rainheart. He will enter the room 305. Switch to the nalcon if you were using the red and go in the room. After the cutscene, the fight will begin. Rainheart use fire power, that’s why the red is not effective on him. Like Birdman, he is immune to “short”, he will teleport and will try to attack you with several attacks. He can push you, give you some punches and use the fire to hurt you. Avoid his attacks and strike. At some points, he will summon some zombies. Those enemies are not frightening at all, they will not hurt you. They will try to catch you but they’ll fall on the ground and disappear. Stay focused on Rainheart, avoid his attacks, charge your power and strike until it’s over. A FMV will start. Go back to the room 204, the dealer is unfortunately dead. It’s not necessary to do that but it’s the last murder in this hotel. Go back to the lobby, after the cutscene, save your progress, go back to the room with the dead desk clerk, flip the circuit breaker and go down the stairs. Kill the enemies (or pass by them) and use the elevator because you will find nothing in the boiler room.
Now you are in the restaurant, well in the kitchen. Check this room to get some red (11). Go to the east on your map. Oh sweet, toilets! There are a skip, some red and a recovery capsule. Go back to the kitchen, kill the enemy and go to the south now. A FMV will start and you will face Rita. She will always be on a floating table, well not exactly. Sometimes, she will land on the ground for a short period of time before summoning another table and floating in the air. She is also immune to “short”, a bit logic beause it would not be easy to kill her with the “short” honestly. Her attacks are the table dash (a bit annoying) and the waltz of chairs and tables with a table dash as a finale. Move constantly, avoid her attacks and strike when she lands on the ground. After a few hits, she will die, a FMV will start and this will be the end of this stage (and the Disc 2 too). NOTE: The scene 19 is a bonus FMV. You can only unlock it if you collect all the FMV and cutscenes of the game. It's not a big deal so no panic. However, you’ll have to find by yourself about this bonus FMV
STAGE-D: MUSHROOM TOWER This is the last stage of the game, really linear to be honest. And guess what? We’re going to play a famous game! Isn’t that lovely? Which one? Ah ha, first check the room to find some recovery capsules, some red and some D-Felon. Now go in front of one of the three shooters. A cutscene will start and you will have to face two enemies. Use whatever you want to kill them, one light will turn on. Now you have to light the others on. Press “triangle” button in front of each shooter and look for the one which has those colors: yellow, green, blue purple and red. Switch to Lilia (by the way, there’s a save point where Lilia is) and push the buttons on the ground following this order. A FMV will start and the shooter will work. Use it to go to the upper floor. Ladies and gentlemen, I hope you remember Robocop in Michelangelo Memorial Hospital because here is Robocop version 2.0, with a yellow suit, a shield and the rifle. They are annoying and will dash sometimes. Reunite all of them and use the D-Felon to get rid of them easily (12). Another light will turn on, two more to go. Same method like the last time: check the shooter to the left from where you came, switch to Lilia and push the buttons in the correct order. After the two FMVs, the shooter will work. Go to the upper floor, kill the enemies to light another light on, check the tables next to the shooters for some stuff (nalcon, red, recovery capsules and D-Felon) then the shooter to the left from where you came and play Simon with Lilia (yes, the famous game with colors, you know?). After the two FMVs, use the shooter, kill the enemies in order to turn the last light on. Check the one to the right from where you came, switch to Lilia and play Simon for the last time. After two FMVs, use the shooter to start a cutscene.
You are now at the top of the Mushroom Tower. Check the tables to find some red, some nalcon, some recovery capsules and some delmetors (13). Open the door, save your progress, go back and check all the capsules starting from the one to the left. Birdman, Rainheart, Rita, you beat them. Now who is this Cain in the fourth capsule? And who is this unknown person in the last capsule, belonging to the Pegasus family like Cain? Well, press “triangle” button on the last capsule to activate a FMV and get ready to face your twin and evil brother Cain after the cutscene. Among all the bosses in this game, Cain is my favorite character in the game, probably a pain and the hardest boss of the game. I don’t have to tell you that “short” is futile against him so use some delmetors when your AP gauge is full. About his attacks, he will start with some blue fireballs then at one point he will unleash the rain and the thunder then the fireballs and finally he will unleash the ring of fire. For the first two attacks, no big deal: spin around him like a record and strike when he finishes his blow of fireballs (he will disappear but, don’t worry, he will reappear in front of you each time so you can charge your power, wait until he shows up and hit him with your best shot). The last attack, well, you have to stay in the ring of fire, charge your power and strike. It’s a bit tough sometimes because the floor will be electrified too and you may be hurt by that. Stay focused on Cain, use your powers (except the D-Felon, it’s useless) to get rid of him and activate a FMV. Now take some stuff on the tables here and there, open the door, watch another FMV and get ready to face Dorothy, the last boss of the game. Seriously, if you tell me a final boss easier than Dorothy, I’ll eat my hat (even if I don’t own one ^^). A JOKE! That’s all we can say to describe this boss. You don’t even need the “short” to kill her (well, “short” will not make the fight easier I suppose, you’ll see why). See those flying eyeballs? You have to kill them. Yes, you have to unleash your powers (except the D-Felon, completely useless now) on those eyeballs. Dorothy has a laser beam, she unleashes the thunder too and the earthquake. Nothing really frightening. Now the eyeballs. When you hit one eyeball, it’s getting mad and will tackle you before joining his friends. You can dodge all those attacks, except the earthquake, if you move constantly. Otherwise, charge your power and strike as you usually did during the adventure with the other bosses. Nothing really hard, everything should be ok in you have some stuff to help you. Once she is dead, watch the final FMV and the credits. Don’t forget to save your game at the end and, congratulations, you beat Galerians. |
| Games have secrets, I have my eagle gaze. |
Affected by 'Laziness Syndrome'
Registered: 10-21-11
Location: France
Last Post: 2402 days
Last Active: 1576 days
09-23-21 03:47 PM
Azymack is Offline
| ID: 1393011 | 36 Words
On stage-b, you should have specified how to jump the gap. I had to search for another walkthrough. You have to bump/mash/keep pressing X, and that's not really obvious, even less in this kind of game |
Affected by 'Laziness Syndrome'
Registered: 09-23-21
Last Post: 1505 days
Last Active: 1504 days
