

 User Notice
 Forum Links

Thread Information
Creator
03-31-12 08:31 AM
Post
11-20-14 09:58 PM
9.6
Today: 9
Users: 0 unique
Thread Actions


Super Metroid - 100% items walkthrough
03-31-12 08:31 AM
Laian is Offline
| ID: 557858 | 10573 Words

POSTS: 963/2232
POST EXP: 457173
LVL EXP: 7564923
CP: 23733.5
VIZ: 3570463

Hello everybody and welcome to another walkthrough. This time, we are back in 1994 on SNES. We will reach the stars, the planets, yes we will go in outer space with the famous bounty hunter of all the time: Samus Aran. This walkthrough is a 100% item walkthrough which means all the items will appear in this walkthrough. If you are not interested in this, you can skip some parts of the walkthrough, it’s up to you. Let’s say it’s a goal that some players want to reach and the others don’t want, like doing all the optional quests and bosses or find all the secrets secretly secret of a game. Anyway, I will not tell you all the troubles I got to make this 100% walkthrough, I never played this game before, and it took me two tries to get all the items. The first time, I got 96% of the items collected, I was a bit frustrated for only 4% which represents 4 items so I decided to play this game a second time and I made it. But, huge facepalm, I didn’t pay attention the first time I played the games, some items were obvious so that means I could beat this game the first time at 100%, if only I was smart ha ha. Well enough talk about that, let’s start this walkthrough shall we? And yes, you already know it so I will not repeat the same thing over and over again. USE THIS WALKTHROUGH IN CASE OF EMERGENCY, THANK YOU! Dang it, oh well, let’s start the adventure!
CHAPTER 1: SOS FROM CERES STATION You started the adventure in the research station. Everything is so quiet, that doesn’t smell good. This level is really linear, there’s no difficulty. Just make your progress until you see the metroid larva in its capsule. Ok, it’s still here (1). We can go… Ridley! Yes, he appears from the darkness and is about to kidnap the metroid larva. No way! Shoot him and avoid his attacks. In spite of all your efforts, you will not be able to kill him, Ridley will flee with the metroid larva (dang it!). Now, it’s time to escape from the space colony. Not a big deal, go as fast as possible to the elevator and get ready to go back to Planet Zebes.
CHAPTER 2: A MOVING STATUE Welcome back to Planet Zebes, the lair of Ridley and his friends. You land on Crateria, the first zone of this planet. There are other zones: Brinstar, Norfair, Maridia, Tourian and the wrecked ship. The next destination will be Brinstar. Also, you can save your game, recover your life and reload all your weapons if you go in your spaceship (press “down” when you are on the top of it). Actually, you can’t go to the right a wall of rocks blocks the way to the wrecked ship. So go to the left and open the door with a shot. Oh, it’s quite here too, hmm… anyway, carry on to the west until you see another wall of rocks and go down. Don’t pay attention to the doors to the left and to the right, open the one to the south with another shot. Go down, open the door to the east, carry on and use the elevator to go to Brinstar.
Go to the left and get the first upgrade: the morphing ball (2). You’ve been detected unfortunately but look at the bright side: you can turn into a ball if you press “down” twice and go through the small passageways you couldn’t before. Crouch, shoot the cracked block and use the morphing ball to go back to the elevator. Don’t use it right now, go to the right before. Go down, open the door to the left, shoot the orb on the statue and take the missiles (3). Now, you can shoot missiles and open the pink doors you will encounter during your adventure (woohoo!), however you’ll need fives missiles to open it (awww). Oh well, each pack of missiles will increase your max amount of missiles by five, which is really good. Go back, go to the right now and open the first pink door with those missiles. Don’t pay attention to the thing which are watching you, use the morphing ball to go to the other side of the wall of blocks and grab some missiles. Go back to Crateria using the elevator. Oh sweet, the welcoming committee, at last. Get rid of them, open the door, go up avoiding the enemies (or killing them ^^ ). Kill more enemies, open the pink door to the right, kill the flying enemies and download the map of Crateria in the next room (4). Unfortunately, this map is a bit incomplete, for example you don’t see the secret rooms (indeed, it wouldn’t be funny after all ha ha ^^ ) and a few rooms have disappeared too. It will be the same thing with the other maps you will download from a computer. Oh well, that’s better than nothing though. Anyway, go back now, use the morphing ball to go through the small passageway to the right and save your game with the stuff in the center of the room (let’s call that a capsule, shall we? ^^ ). Go back, then go up, go through the next passageway, go down and open the door to the east. More flying enemies to kill. Don’t kill them right now, go to the other side, open the pink door and kill them to gain some missiles. Now, go to the next room, shoot the orb and get the bombs (5). Those are unlimited and are useful to blow up some walls in order to make some progress and find some secrets here and there in the areas of Planet Zebes. Unfortunately, it’s a trap and the chozo statue will move and will not be happy (it’s understandable, you took the treasure he kept for a long time ^^). This enemy is not a pain in the butt. Just avoid his bombs (or shoot them for some stuff), use the morphing ball and go behind him when he wants to hurt you with his claws and shoot some missiles until he perishes. CHAPTER 3: THE SECRET OF THE HUGE STATUE Now, before going to Brinstar and making some progress, let’s pick some stuff up, shall we? Go back, then go up, blow up the blocks with the bombs, go to the left then go down, open the blue door at the bottom of the save room, go through the passageway with the morphing ball, use the bombs to clear the way and get some missiles. Go back where the welcoming committee was, stay on the big broken stuff, use the bombs to blow up the floor and grab some missiles (6). Now go back, blow up the wall of rocks with the bombs to the left, make some progress and take the first energy tank on the floor at the end of the corridor. With this item, your energy will increase like the heart containers of The Legend of Zelda. In the next room, get rid of the enemies with the missiles, then go to the right. You will see a huge statue composed of four creatures. Don’t worry, this one will not move. It’s just the main puzzle of this adventure and we’re going to solve it. Go back and go to the left now. You will meet in the next corridor some enemies and some kind of cocoons. Shoot them, some bugs will appear, kill them for some stuff then use the elevator in the next room to reach Brinstar.
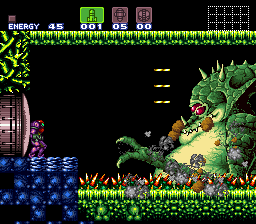
CHAPTER 4: KRAID Welcome back to Brinstar, but this time it’s the huge part. First, open the first door you will encounter to the left with some missiles, kill the enemies in the corridor, blow up the lowest part of the wall and use another bomb to blow up the other blocks at the end. Download the map of Brinstar in the next room (incomplete too), go back, kill the enemies and open the next door to the left. It’s a save room if you want to save your progress. Go back then open the last door with your missiles, in the next corridor, don’t kill or touch the fireflies or else darkness will fall. Go down carefully, you will see a missile reloader (7). One information about this stuff: it only reloads missiles, not the other weapons you will get during the adventure. Go back, open the other pink door to the right, kill all the enemies and blow up the wall with your bombs. Notice the blocks on the floor while you are walking: you need a special upgrade in order to go down (the speed booster). In the next room, go down to find some missiles and two blocks that you can blow up easily with your bombs (8). Go through the passageway, you will get the charge beam if you shoot the orb held by the statue. Now, you can charge your shots if you hold the “shoot” button for a few seconds. Really handy to get rid of some enemies easily. Reach the top of the room now, the next destination is east of here. However, if you blow up the little block to the left with a bomb, you will find a save room. Save your game if you want, go to the right, open the pink door, kill the flying enemies (one charged shot is enough to send those enemies to a better world ^^ ) and open the blue door above your head. Time to face the spore spawn. As its name says, this ball will use some spores to hurt you. You can shoot them to get some goodies or avoid them. Watch out though, this ball will be invincible and will bounce all over the place for a short period of time then it will stop and show its “heart”. Seize this opportunity to attack with a charged shot or a missile. After a few shots and when the ball will be weakened, it will go faster. Two or three more shots and the ball will perish, dropping some good stuff for you. Go up, open the door, step on the this thing at the end of the corridor, you will fall off in too deep but you will get the super missiles in the orb to the right (9). Go to the left now, use your new weapon to open the green door (one super missile opens the pink doors too but the green doors can only be opened with the super missiles) and the little block in the next room, your only way out. Go back where you found the missiles and the two blocks, go through the passageway using a bomb to jump a bit (yes, bombs can be used to bounce but the timing is tough especially when you have to climb up a high wall) and open the green door. In this new room, some bugs will appear from the holes here and there… except one, a bit high though but we will see that later. Carry on, open the metallic curtain shooting the button with a simple shot. In the next cooridor, go on the platform and run as fast as possible holding the “dash” button to make this part with the crumbling floor. Open the door at the end, go down, shoot the floor (no, it’s not a joke ^^ ), go down, to the left you will find an energy reloader (which recovers all your energy, even the energy tanks but not the reserve tanks). In the next room to the right, it’s flooded and the water will slow you down like a snail. Run and jump, kill the enemies and carry on. In the next room, shoot the cracked block in the ceiling, do a wall jump to go up here (jump them press the opposite direction and the “jump” button to do a wall jump), blow up the first block and shoot the other one (if you dare to use a bomb for the second block, you will fall off because there’s a sneaky block close to the cracked block and this one will blow up too if you use a bomb so it’s not a good idea I suppose ^^ ). Open the door and get the spazer in the next room (10). Go back, open the door to the right, go through the glass tube, use the elevator to go to Norfair.
Here is Norfair, a new area. Unfortunately, we are here for an upgrade and nothing else. Don’t pay attention to the green door and the orange door to the left (and the blue doors to the right), just open the pink door. Get the second energy tank, find the way to go to the passageway, go down and open the door. Shoot the upper part of the wall and pick up the hi-jump boots, the new upgrade (11). With those boots, you will jump higher (it makes sense ^^ ). Go back, kill the enemy and get the missiles up here, then go back to Brinstar. Blow up the wall to the right with a super missile once you are back to Brinstar, reach the upper platform and open the door. Go down, blow up the lowest part of the wall in front of the locked door. Go through the secret passageway, then open the door. Kill the enemies in the next room. Blow up the lowest part of the wall to the east (fall off in the small hole and use a bomb), go throught the passageway, open the door and save your game if you want. Go back where the flying enemies are, you will notice a crack on the floor (12): shoot it and open the door. Kill the enemies in the corridor then go to the next corridor. Shoot the little part above your head, go up and open the door. The small room you just discovered has an energy and a missile reloader. Go back, get rid of the eye blocking the door with a super missile at the end of the corridor and get ready to face the boss of Brinstar: Kraid.
The first round, you will notice that he is not a threat in spite of his size, the rocks he will throw at you and his hand. Shoot when he opens his mouth (you will probably have to shoot once in order to let him open his mouth and then a second time to hit him). After two hits, the second round will begin (and the troubles too ^^ ). Kraid will use new skills like some kind of hands coming from his navels and some claws will appears too in the room (like the scythes of Death in Castlevania). You can shoot the claws but not the hands, however you can use them to avoid the spikes on the floor, especially if you accidentally fall off (and if you are lucky ^^ ). Repeat the same technic until he dies. Congratulations, you solved a part of the secret of the statue. Indeed, if you remember a part of the statue in Crateria had the shape of Kraid. You got it? Yes, you have to kill the others guardians and you will solve the secret of the huge statue in Crateria. But enough talk about the statue, open the door to the right and get the Varia suit (13). With this new suit, you will be able to resist to the heat of Norfair. And good thing, it’s our next destination because some nice stuff is waiting for us. But, first of all, go back to the locked door, watch out the enemies in this room, use your missiles or the bombs if they catch you and get the energy tank hidden in the ceiling (shoot the ceiling to make it appear). Now go back to the elevator and go back to Norfair. CHAPTER 5: IN THE HEAT OF NORFAIR… We’re going to find some good stuff like three upgrades really useful. The first upgrade we will pick up is to the east. Open the first door to the right, shoot the floor, kill the enemies and go to the next room. This room has a bit of lava and that will hurt you a bit if you don’t pay attention (well it depends of how long you stay in the lava ^^). Make some progress, kill the creatures you will encounter, get the missiles shooting the small part in the lava where the bouncing creature in second pool is waiting for you (or you can wait to get the gravity suit, it’s safe but, if you are not patient, well this option is available but you have to be fast if you don’t want to lose a ton of energy) and open the other door to the other side. Use the platforms to reach the other door at the end of the corridor, in the next room, you will find a save room if you open the blue door above your head and some missiles if you go to the right then fall off and jump over the spikes (14). You probably noticed two kind of heads while you were going to get those missiles. Stay between those two statues, use a bomb then another one, make some progress in the small passageway you just discovered, take care of the crawlings creatures and the blocks on your way with the bombs and open the blue door to the south. The first blue door leads to an empty room with some enemies which will respawn everytime from the hole in the center of the room. The only purpose of this room is farming some energy and some ammo, that’s it. The second door leads to where we supposed to go. In the next corridor, use the platforms to reach the other door (the creatures in the lava can be destroyed with the super missiles), then open the other door to the right. The screen is shaking now and the lava will start to rise. No time to lose: use the platforms to reach the other side, go through the passageway, shoot the ceiling and go up. Open the door, oh sweet there’s more lava… and some spikes apparently. Use the moving platforms and the morphing ball to go to the other side of the corridor, open the door, go up killing all the enemies and open the door. You are back in this room. Climb up, don’t fall off (that would be foolish and you will have to do all the way back) and open the door to the east. Kill the enemies, shoot the ceiling (but I think it will be ok since you got rid of the enemies ^^ ), go up then to the right. The next corridor has some creatures, some holes, some crumbling floors some spikes and… some lava. At the end of the corridor, shoot the ceiling to make some missiles appear and get them (15). Now open the door, get the speed booster in the orb and hold the “dash” button to escape this place because the lava is rising. As you could see, the speed booster increases your dash power. With this upgrade, you can perform many other moves like the comet attack (hold the “dash” button then crouch when Samus shines and finally press “jump” button) and break some walls. But enough talk about that, let’s carry on the walkthrough. Back to the room with the save room, go down where you opened the door leading to the south and open the other door to the left. Use the platform to go to the left, open the door and dash like a bull in the corridor to kill the enemies and break the walls on your way. Open the door, save your game if you want, then open the other door and go back to the green door now. Open it with a super missile, use the speed booster to go through the metallic curtains and notice the tiles with a symbol on them: we will focus on that later. Open the door, use the moving platforms to go to the other side and notice a small passageway to the right in the next room (where the crawling things come from): it’s where the next upgrade is hidden. In order to get this upgrade, go up, use a bomb to blow up the small pipe not so far from the next door, then use the morphing ball to fall off and go through the passageway. Open the door, shoot the orb and get the ice beam (16). Yes, I know it’s a bit awkward to find such an item in this place but anyway, now you can freeze the enemies and use them as some platforms. Needless to shoot twice, one shot will freeze them (and two shots or more will probably kill them, it depends of the enemies). Go back, open the other door, freeze the yellow things which jump from the lava to make some platforms and go through the passageway, then the flying creature to reach the other door. Fall off, blow up the metallic block to the right and the crawling creature in the passageway then go back to Brinstar using the elevator.
Go back where the energy reloader is, freeze the flying creatures to go up and open the door to the right. Kill all the bugs you will encounter, watch out the spikes and the plants around the place and use the platforms to go to the other side of the corridor. You see those two giant blocks on the floor? Shoot them to make a secret passage appear with some worms to kill. Open the door, watch out the spikes, the plants and the yellow blobs (remember you can freeze those things if they are annoying ^^), shoot the orb and get the power bombs (17). Those bombs are better than the bombs but they are limited unfortunately. However, they can blow up some walls that the bombs and the speed booster can’t destroy and open the orange doors. Use one to give a shot with the wall to the left and get some missiles. Go back, then go up, there’s a save room to the right, another door to the left and an elevator. Don’t use it yet, open the door the left, kill the enemies and blow up the metallic floor with a power bomb and fall down the first plant which has no creatures: it’s in fact the entrance of a secret room with some power bombs. Now that we have this new weapon, let’s go back to Norfair and get the next upgrade, shall we? First, open the orange door, you will find a monitor in order to download the map of Norfair (still incomplete, oh well). Now, go back where the tiles with the symbol are, use a power bomb to blow them up and make some progress. In the next room, shoot quickly the wall to the left to make some missiles appear and get them. This part is a bit tough because, when you go in the room, you have to move a bit to the right or else you will fall off because all the platforms crumble if you step on them. If you fall off, don’t worry, you can jump from platform to platform and get those missiles but you need a good timing to jump. In the next corridor, use the speed booster to make some progress and break the walls on your way. You will come to a place with two doors, one leads to an energy reloader, the other leads to a boss. If you go up, you will see two other doors: the one to the right leads to a save room and the other one to the left leads to the elevator. Don’t go through this one yet, open the door to the south first. Go to the right and face the boss. In order to beat him, don’t stay so close to him, avoid the balls he will throw at you sometimes, shoot him with a charged shot, a missile or a super missile when he opens his mouth and he will move backward. Repeat the operation until he falls off in the acid. Notice the stuff above your head, you need something to go to the other side of the pool using this stuff in the ceiling. The music stops, go to the left until you face wall of spikes. The boss fight music will restart and the boss, after smashing the wall of spikes, will want a rematch. But the second encounter will be short (dying once and for all in front of you, that’s a cool death ha ha ^^ ). Now, go to the left using the platforms to cross the pool of acid. In the next room, open the door to the south, go down and open the door to the right. In this corridor, the acid will rise and fall. The speed booster is pointless here because you will have to use the morphing ball to go through a passageway. Take your time, jump over the spikes and grab the missiles. Now, go back, open the door to the south, get rid of the enemies and use a power bomb to clear the way. Start from the right, run to the left and jump using the springboard to reach the door to the left. Open the door, shoot the orb, pick up the grappling beam (18) and go back in the previous room. Don’t fall off, equip the grappling beam, jump and grab the flying thing. Like Simon Belmont in Super Castlevania 4, you can swing and grab whatever you can grab like those enemies or the metallic stuff like the one you saw above the pool of acid earlier. You can kill some enemies with this beam too. Use the other flying things to reach the other side and get some missiles. It’s possible with the grappling beam but, if you have some troubles, you can wait to have the space jump, go back here and get those missiles with this upgrade (which is a bit easier). Go back where the grappling beam was, go up and use the grappling beam to reach the door to the right. Make your progress using the grappling until you reach a metallic curtain. Use a super missile to open it, don’t fall off, go up, save your game with the room to the right, go up and grab the flying thing. Open the door to the other side, get the power bombs and go back where you fought the boss. Use the grappling beam to cross the pool of acid and get an energy tank (19). We still have a few things to get before leaving Norfair.
Go back, open the door to the north, then the one to the east, jump over the pools of lava and the enemies, open the door, use the energy reloader if you need it and open the other door. Use the grappling beam to cross the pool of lava and spikes (and creatures too), open the door then the metallic curtain and go through the passageway. Do you remember this place? No? Ok, then go to the right. Deja-vu, you say? Indeed, the lava which rises, yes you know what you have to do now. Cross the room with the lava, the spikes and the moving platforms, go up, don’t open the first door to the right but the second one. Now don’t fall off or else you will have to go out the room with the door to the left and then go back. Use the platforms to reach the metallic curtain, shoot the button, take the missiles, then use the grappling beam to cross the hole of spikes and grab the wave beam in the next room (20). With this shot, you can open the metallic curtain with the blue button only, even if the button is unreachable, which is great. Go back now, then go up, open the door to the left, climb up the hill (let’s call that a hill ^^), use the grappling beam to reach the other side, open the door, get the missiles and shoot in the lava to make a platform appear. Use a bomb (or shoot the wall), go through the secret passageway, open the door, shoot one of the small platforms to reveal some missiles and get the first reserve tank. This item is quite useful. In the game, there are four reserve tanks and they can be filled with energy. If you lose all your energy and you have some energy in the reserve tanks, it will automatically let you a second chance and fill some energy, depending of how much you have collected in your reserve tanks. You can switch to “manual” if you go in your inventory, then in “supply” and press “jump” button. However, the energy reloaders will not recharge the reserve tanks ( otherwise it wouldn’t be funny
CHAPTER 6: BEFORE GOING TO THE WRECKED SHIP We will get some stuff in Brinstar first and then Crateria. From the elevator, blow up the wall to the right with the super missile and go back where the flying creatures are and use a power bomb at the end to make a secret passageway appear. It leads to some missiles. Use your bombs to bounce and go through the passageway and the missiles will be yours. You can wait to get the spring ball in order to grab those missiles if you have some troubles with this move. Go back where the energy reloader is, go up and open the first door you will encounter on your left, behind a wall that you have to blow up with a power bomb. Avoid the fireflies and the spikes, use the grappling beam and take the X-Ray scope in the next room (22). With this item, you can see all the secrets of Planet Zebes. But you can’t move when you are wearing it. Use it in order to find your way out, go back and open the second door to the left. Go back where all the bugs come from the pipes, locate the one which doesn’t have any bugs, freeze a bug coming from the pipe to the left and jump in the other pipe to get some missiles. Carry on to the left and freeze another bug coming from the first pipe located to the right. Use it like a platform and reach the orange door to the right. Kill the enemies, blow up the lowest part of the wall with a bomb, grab the power bombs, use one on the other wall, don’t use the elevator and go to the right. Open the door to the right and shoot the ceiling to make an energy tank appear. Grab it, go back to the room with all the pipes and the bugs and open the door to the left. Go up, open the orange door to the right, kill the enemies, use the grappling beam to swing and step on the metallic block, shoot the button to open the metallic curtain, go down and get the energy tank in the next room (23). Go back, use a bomb to blow up a little part of the floor then another one to make a platform rise, open the metallic curtain, kill the enemies and get out of this room. Go up, use the grappling beam when you see some metallic stuff in the ceiling and get some missiles. Use a power bomb to blow up the wall to the left, then use the bombs to bounce and reach the secret passageway in the wall to the left. In the next room, you will notice something wrong on the floor. Use a super missile to destroy this part and get some power bombs. Shoot the metallic curtain, use a bomb to blow up the block, go in the passageway and go back to the previous room using the bombs in order to bounce. Go up, open the door to the left, cross the corridor, in the next room, blow up the floor with a power bomb, open the door to the left, get rid of the enemies, open the other door, jump over the hidden hole in front of the energy tank, grab it and get the super missiles in the room to the left. Now fall off, there’s a save room to the left if you want to save your progress, otherwise go to the right. In the next room, some funny creatures will sing the “item collected” song just for giggles and they will flee from you, doing some wall jumps. Go up using the same move and notice the hole to the right. In order to go in this hole, you have three ways: the first choice requires nothing else but the spring ball (the easy way), the second choice requires some patience and some bombs to climb up the wall or to be launched like a cannonball from the edge and, the last choice requires some dexterity with your fingers: run then jump and turn into the morphing ball to go in the passageway. Whatever you choose, your reward will be some power bombs. Go back to the elevator (the one to the west of Brinstar), open the pink door, get the missiles, go out then go back and use the speed booster to go through the metallic curtains. Open the door, get the reserve tank (24), then go through the pipe under the statue to get some missiles (some of them are hidden in the wall, use the X-Ray scope to find them). Go back in the previous room, shoot the ceiling to reveal a secret passageway with some enemies and some super missiles. Step on the base to go back down and use the elevator to go back to Crateria.
Go back where some creatures are climbing up and down the walls. Check the wall to the right to find some blocks to blow up with the bombs (25). Go through the passageway, open the door, freeze the yellow blobs to make a bridge (they don’t have to bounce, it’s really important), then go back a few steps to the left do a comet attack (use the speed booster, then crouch when Samus is shining and finally press the “jump” button) to reach some super missiles. Go to the left, use the grappling beam, open the door, blow up the wall to the left to go out and go back to your spaceship (save your game if you want). Now blow up the wall to the right, open the door, make some progress killing some enemies and using the grappling beam and get the missiles halfway. Jump from platform to platform and use the grappling beam to reach the main door of the wrecked ship. CHAPTER 7: A GHOST IN A WRECKED SHIP Welcome to the wrecked ship. Nothing works inside, it’s really quiet here so let’s check this place and get some stuff, shall we? Also the power is cut off (they probably haven’t paid the bill ^^) so the things you can do right now are really minor. First, cross the main corridor, in the next room, beware of the ghosts appearing around the place. Go down, don’t pay attention to the blue door and the locked door, blow up the lowest part of the wall to the left, go through the passageway and get the missiles at the end of the corridor (26). Now, go down, shoot the floor to make a passage appear and shoot the door. Equip the super missiles, go the right, use the morphing ball to go through the passageway to the east, blow up the blocks with a bomb, shoot the eye and open the door. Ladies and gentlemen, allow me to introduce you Phantoon, the boss of the wrecked ship. Yes, I’m not kidding. The boss? Already? Of course! After a short prelude to the battle with the dance of the blue flames, Phantoon will show his face but you will not be able to hit him with your best shot. He will start to move all over the place and throwing some blue flames at you then he will disappear but not the flames. Kill all the flames until he shows his face and opens his big eye. Watch out the flames which will fall off and shoot this fiend. This only way to hit him is when his eye is opened as you can see. Repeat this operation until he dies (even if it’s already dead because it’s a ghost… oh well ^^). No upgrades, just some good stuff but the power is on, that’s the bright side of your victory. Now you can explore what you couldn’t earlier. Go back to the previous room, kill the enemies and go to the left to download the map of the wrecked ship (do I have to mention that it’s incomplete? ^^). Go back, open the door to the north, then the one to the left to get some super missiles (27). Go back, blow up the walls to the right, open the door, reach the end of the corridor, blow up the wall to the right and go through the second passageway from the bottom to get some super missiles. Go up, don’t pay attention to the flashing door to the right, use the save room in front of the main corridor to save, then shoot the ceiling. Open the door, kill all the enemies then go to the right, push the robots in the holes of spikes to reach some missiles. Go back in the previous room, kill all the enemies once again and go to the left. You are outside the wrecked ship. Go to the left using the platforms until you see some moving platforms. Go to the highest moving platform, shoot the wall to the left and grab the missiles you just discovered. Fall off, check to the left to see a small part that you can destroy with a super missile (28). Do it, blow up the small part to the left and get some missiles. Use the bombs to go back to the surface and shoot the floor to destroy a part of it. Go in the passageway and open the door. Kill the enemies, then carry on in order to go back to the wrecked ship. Use the grappling beam to cross the spikes, jump on the hand of the statue and use the morphing ball. The statue will move and will help breaking the spikes and going down. Don’t open the door yet, use a bomb to destroy the floor, go through the passageway, destroy the ceiling then push the robots in the holes to reach some missiles. Use a power bomb, go back a bit to the left, the run to the right and do a comet attack. Jump over the sneaky gap, shoot the orb and grab the reserve tank. Fall off now and go gack to the door. Open it, shoot the orb and get the gravity suit (29). This is the last suit and it’s really a nice upgrade. Now, with this suit, you can move normally in the water and the lava but not the acid though. Open the door to the left, fall off, go to the left use some bombs to bounce and blow up a part of the wall. Go through the passageway to get some missiles. Go back to the wrecked ship, and open the flashing door now. Kill the enemy and carry on. Avoid the spikes in the next room, open the door, go up, and shoot the ceiling. Open the door, use the grappling beam and the floating platforms to cross this flooded room with some spikes and some fishes and get an energy tank (30). Now go back, open the blue door to the right and let’s go to Maridia. The way to Maridia is really linear and not so difficult. Just kill the enemies on your way, use the platforms to reach the door to the right, then go down, killing the cocoons. Go down then to the left, use the morphing ball to go underwater and through the passageways, kill the bugs if they are annoying, use a bomb to blow up the ceiling, carry on and open the door. Go to the south and use the elevator to go to Maridia.
CHAPTER 8: DRAYGON Here is Maridia. The alliance of water and sand. Isn’t that lovely? Anyway, go down and open the pink door in order to save your progress if you want. Go down, open the door to the left, cross the corridor killing the enemies and open the door to the other side of the quicksands. Don’t worry though, if you fall off or are caught by the sand worms, open the door to the left and go up. In the next room, look for a green door to the left and open it. Go to the right, cross another corridor of quicksands and creatures throwing some kind of spiked balls at you, in the next room use the grappling beam, fall off and go through the hole above your head (as you can see, the cracked block has disappeared and you can go up now). Do some wall jumps, kill the flying bugs then go down and open the door to the right. If you have some troubles with the wall jumps, wait until you have the space jump, it will be easier to go up. In the next room, use a power bomb to blow up the pipe to the right, let the robot get rid of the sand wall and open the door. Go down, then to the left and final to the right in order to get the spring ball in the orb (31). With this upgrade, you can jump and bounce like a rabbit when you turn into a ball. Needless to use the bombs now. Go back to the previous room using the spring ball, then go to the west. More quicksands and more creatures throwing spiked balls at you, woohoo! Cross this cooridor, then the other room, kill the enemies and go down, under the metallic blocks. To the right, there’s a monitor where you can download the incomplete map of Maridia (indeed ^^) and, to the left, you will go back to Brinstar. It’s actually where we supposed to go.
Open the metallic curtain with a super missile, fall off, open the door to the left and use a power bomb in the glass tube. It will blow up and you will be able to go down in order to save your progress or up in order to carry on the exploration of Maridia. Open the pink door to the right, in the next room, open the metallic curtain with a super missile, kill the enemies, re-open the door you just went through, go to the right, use the speed booster, then crouch before going through the door and do the comet once you are stepping on this seaweed in the next room (32). You will get some missiles hidden in a rock above your head. It’s really tough to get those missiles and you will probably need more than one try to grab them. You have to be fast when Samus is shining, step on the correct seaweed and push the “jump” button without any stop. Dexterity is probably necessary to attempt this tough part but you can make it, it’s possible. Now, use the platform to reach the second door to the right from the bottom. Go up, don’t pay attention to the door to the north, do a wall jump on the wall to the right to reach the top (or freeze the fish if you have some troubles), go down, avoid the enemy and go through the wall. In the next room, you will see some little turtles and a rock. Well, it looks like a rock but if you touch the little turtles, you will wake the mother up and she will be mad at you. Use the mother turtle to reach the missiles hidden on the wall to the right and the energy tank on the metallic block above your head that you have to grab with the grappling beam. Go back, open one of the two doors to the north, look for a secret passageway to the left (if you are lucky, you’ll see a creature going in the passageway), use the spring ball to reach this passageway, carry on and get some super missiles. Now, go back then go up and use your grappling beam to go to the east. Go up, open the door, go to the right then through the wall to get some missiles (33). Open the door to the left, go through the wall in the next room, go up and open another door. Go down, kill the enemy and fall off in order to find some missiles and some super missiles. Go back, open the door to the south, go down, shoot the floor and open the door to the east. Use a power bomb, go down, there’s a save room to the left if you want to save your progress, do a comet attack to break the blocks above your head (34). Up here, you will find some missiles and some super missiles (watch out the crumbling floor between the two items). Step on the crumbling floor, then go to the left, fall off then to the right, use a bomb to destroy a part of the floor. You will see two quicksands. The one to the left leads to a room with a reserve tank and some missiles (use the spring ball to get those items) and the one to the right leads to another room with some missiles and some power bombs (use the morphing ball, step on the block above the passageway and go through the hole to get them). Fall off in the quicksands at the bottom of the room to go out and then go back to the previous room. Now, use the grappling beam on the metallic walls in order to go up, then go to the left and open the door to the north. In the next room, go up then down, destroy everything you can with your beam, use the speed booster to get rid of the remaining things, open the door to the right and prepare to fight Botwoon. This boss is not a big deal. He will go out, spin around like a record and then go back in a hole. Sometimes, he will show his face and throw some little green balls at you. Stay where you are when you come in the room and shoot his head a few times with the charged shot, the missiles or the super missiles until he dies. You will get some stuff, the pipe to the right will blow up and you will be able to carry on.
Use the speed booster to cross the next corridor, go back a bit to the left, go through the hole and reach the energy tank, stuck in the ceiling (35). Open the door, kill the metroids, the pipe to the left is a secret passageway leading to a missile reloader, go up and open another door to the right. Use the grappling beam to cross this room, kill the metroids if they are annoying, the upper door leads to a save room and an energy reloader, the lower door leads to Draygon, the boss of Maridia. Save your progress, go down, open the door, get the missiles in the pipes to the right (36) and fall off in the first pool of spikes (no, no they will not hurt you, don’t worry ^^). Go down, shoot the eye with a super missile and prepare to face Draygon. How to beat him easily? There’s indeed a tip to make this fight short (let’s say a good KO in 30 seconds ^^). Notice the turrets on the walls. Destroy them before Draygon shows his face. Then equip the grappling beam and allow him to catch you. Now, try to grab one of the turrets out of order. The electricity will go through your grappling beam, then through Samus and finally will hurt this poor Draygon who thought he was going to get a good meal. After this “tough” fight, open the door to the left and get the space jump in the orb (37). With this upgrade you can jump as long as you want. Use it to leave the room where you just fought Draygon. Go back where the locked door to the left was and the metroids. You can open it now and it’s the shortest way to go to the next upgrade and the last item that we have to take in Maridia. Cross the new room, open the door to the left, go down, open another door to the left then the other in front of you. Remember this room? Go up, don’t open the door to the left (neither the one to the east), use your new skill to reach a new door (38). Open it, go up, open another door, kill the enemy then open the door and go down to get the plasma beam. This one is powerful (have fun ^^). Give it a shot with the enemies in this room and get out of here. Now that we did everything we have to do here, let’s go back to Crateria and then Brinstar for some stuff. CHAPTER 9: BEFORE GOING BACK TO NORFAIR Go back to your spaceship and climb up the rock to the right. Use your new skill to reach a door to the right above your head. In the next corridor, kill the enemies, watch out the acid which rises and fall and get the power bombs. Now, back to Brinstar, where you found the morphing ball. Go to the right then open the door in front of you. Use a power bomb to blow up a part of the wall of rocks. Do a comet attack to reach a secret room up here and open the door to the left. In the next room you will see nothing else but some spikes. Well, use the X-Ray scope to see an invisible platform. Jump on it and go to the other side of the room to get some missiles (39). Go back where you found the charge beam now. Use a power bomb, go through the passageway, go down and open the door. Kill the worms and use the speed booster to destroy the lowest parst of this room and reach an energy tank. Now, it’s time to go back to Norfair and face the boss of this area: your worst enemy Ridley. CHAPTER 10: RIDLEY This is the shortest way to go where we supposed to go. From the elevator, go down, go through the save room, open the other door and cross the corridor with your speed booster. Go down in the next room, open the metallic curtain, open the door, go down and to the right. After the room with the energy reloader, use the grappling beam to cross the corridor of lava, spikes and worms, open the door, go down and open the orange door. Go in the lava and use the new skill to reach the entrance of Ridley’s lair (40). To the left, you can save your progress. Use the elevator to go in the depths of Norfair.
Go to the left, kill the enemies, avoid the flames and the acid and open the door. Use the space jump to go to the other side then use a power bomb to blow up the wall and reveal a chozo statue. Activate the statue like you did in the wrecked ship (using the morphing ball). The acid will completely fall and you will be able to go down. Open the door, then another one to the right, use the space jump to get the missiles and step on the crumbling floor to go down. Go to the right, notice the locked door, then go back and face another chozo statue but this one is a bit different. Of course, this statue will throw some bombs at you, but also some minions, some shockwaves and some explosives bubbles. Don’t use the missiles on this boss, it’s useless. Needless to waste your super missiles too, just charge your plasma beam and shoot. After a few hits, the statue will die and you will get some stuff. Open the door, shoot the orb and get the screw attack (41). With this upgrade you can break some walls and kill some enemies. Go back in the previous room and try it where the statue was before falling off. You will find some super missiles. Now, go back where you got the upgrade, use it to break the ceiling, the first door to the right leads to an energy reloader, the second door leads to where we supposed to go. In the next room, kill the flying enemies with the screw attack, open the metallic curtain then the door and go to the right. In the next room, the screw attack is necessary to break the pillars and reach the other door without being hurt by the rising acid. Go up in the next room, don’t open the door yet, shoot the ceiling and open the door. Fall off carefully now or else you will miss the secret passageway to the left and you will have to do all the way back. The secret passageway leads to some missiles. Now go back to the previous room and open the door. Climb up as fast as possible this room using the platforms (or the screw attack), open the door, don’t open the door to the right yet, shoot the floor and go down. The door to the right leads to a save room. Use a power bomb, go through the passageway, use another power bomb and go down. Shoot the spikes to the left to make a platform appear. Use a bomb, go through the passageway, kill the enemies, use a power bomb and go through the passage to get some power bombs. Go down, open the door and face a new kind of enemy. The only way to hit this enemy is when his cuirass is removed, when he wants to kick your butt with a special move that he will automatically do after a somersault. Seize this opportunity to shoot with a charged plasma beam and repeat the operation until he dies. Open the door, cross the corridor, open the other door, cross another corridor, shoot the eye with a super missile and prepare to face Ridley. The difficulty of this boss fight is in fact the design of the room. It’s small, there’s some acid (or lava), Ridley is really huge and the platform is a bit small. Oh well, you have a better equipment now so it shouldn’t be a big deal compared to the first time you met him in the space colony. Avoid his attacks (the fireballs he will throw at you, his tail and his tackle) and shoot his face. Now, get the stuff he dropped, open the door and… wait! Where is the Metroid larva? The capsule is empty as you can see and there’s no upgrade to get… unless you shoot the wall to the right in order to get an energy tank (42). Go back to the door you haven’t opened yet, kill the enemy and go through the wall in front of you. Go down, try to not hit the fireflies and get the energy tank using the screw attack. Go back then go up, go through the wall to the left, go up then to the right to get some missiles. Use a power bomb then the spring ball to go in this maze. Find the exit of this short maze (use the X-Ray scope if you have some troubles), use a bomb to blow up the block and open the door. Get the power bombs to the right, open the door to the left, go through the wall in front of you, open the door, go up and open the door to the left. Avoid the flames and the lava which rises and falls, go up and use a bomb to blow up a block on the floor (43). Go through the secret passageway, get the missiles, go back and open the door to the left. Break the pillars with the screw attack, go through the passageway and open the door to the left. Remember this place? Ok, now I can tell you that there’s nothing else to do here so let’s go back to the spaceship in Crateria for the last items to get. Use the screw attack to find a passageway in the wall to the left (44). Open the door, use the screw attack to cross this corridor and break the walls on your way, take the energy tank, use a power bomb on the floor and go through the passageway once the lava fell. Use the screw attack to break everything on your way and cross this corridor. Open the door, shoot the wall in front of you, step on the crumbling floor, shoot the wall to the left or to the right and take some missiles to the left or to the right. Any missiles you take, you will have to go back here and take the last missiles in order to get a 100% at the end of the game. After having collected all those items, go back where the statue is, watch the cutscene, go down and use the elevator to go to Tourian, the last area of the game.
FINAL CHAPTER: MOTHER BRAIN This is it. Where this adventure will come to an end. To the right, there’s a save room. Open the door to the left, get rid of the metroids with some power bombs, in the next room, kill the metroids, go down then open the door to the right. Kill more metroids in the next room, open the door, go down, kill the metroids and open the door. Kill the next enemies with your super missiles, carry on until you face a boss… which will no longer exist thanks to the help of a giant metroid. But this giant metroid wants to kill you now. You can’t escape this room, you can’t kill him, so you can just surrender and give your energy to him. But he will stop draining your energy and will recognize you. Yes, it’s Samus Aran, the person who saved you last time! Why didn’t you recognize her with her suit?! Anyway, carry on, go to the left and use the energy reloader to recover your energy and the missile reloader if you want. Carry on, use a super missile to kill the eye, go down, save your progress with the save room to the left and carry on. Shoot all the red parts with your super missiles (or your missiles) in order to make some progress and shoot the mother brain multiples times with your missiles and your super missiles until she’s dead. Well, not yet. She will wake up and you will have to fight her. Avoid her attacks (the plasma beams, the blue bubbles and the orange stuff coming from her hands). After a few hits, she will prepare a special attack that you will not be able to avoid: a powerful beam which will drain your energy and your missiles. After a few beams, Samus will feel weakened and you will not be able to control her (it’s not a bug, it’s scr Now it’s the great escape. Planet Zebes is about to blow up. You have to go back to your spaceship and leave this planet immediately. Go to the left, shoot the metallic curtains and open the door. Go down, open the door. Jump on the platform in front of you and make your progress killing all the enemies with your beam. In the next room, go up and carry on in order to reach the door to the right. Kill the enemies, blow up the wall and use the platform to reach the door to the north. Now, go up then to the right, open the door and go in your spaceship. Watch the cutscene and the credits now and MISSION ACCOMPLISHED!
Well, that’s the end of this walkthrough. You found all the items (or not if you have chosen to beat this game without a 100% of the items collected ^^). Do you want a bonus? Yes? Ok, so listen up: if you go to the room where you fought the first chozo statue and found the bombs when you are escaping from Planet Zebes, you will find the innocent creatures of Planet Zebes. You know, they saved you when you were locked or trapped in some rooms and revealed a tip to go out of those rooms. Now it’s their turn to be trapped in this room. Be nice, free them shooting the wall to the right (45). Once they left the room, go back to your spaceship. The ending will change a bit, you will be able to see their spaceship flying in direction of the east when the planet blows up, like a shooting star (46). Do it if you have time, it’s not really necessary but it’s something really good. Also, the ending will change according to your clear time. There are three endings: -Over 10 hours, Samus will give you a thumbs up, then jump and finally shoot the screen, -From 3 to 10 hours, she will remove her helmet, give you a thumbs up, then jump and shoot the screen, -Under 3hours, ah ha it’s a surprise that you have to discover by yourself ^^ Well then, see you next time for another walkthrough Hello everybody and welcome to another walkthrough. This time, we are back in 1994 on SNES. We will reach the stars, the planets, yes we will go in outer space with the famous bounty hunter of all the time: Samus Aran. This walkthrough is a 100% item walkthrough which means all the items will appear in this walkthrough. If you are not interested in this, you can skip some parts of the walkthrough, it’s up to you. Let’s say it’s a goal that some players want to reach and the others don’t want, like doing all the optional quests and bosses or find all the secrets secretly secret of a game. Anyway, I will not tell you all the troubles I got to make this 100% walkthrough, I never played this game before, and it took me two tries to get all the items. The first time, I got 96% of the items collected, I was a bit frustrated for only 4% which represents 4 items so I decided to play this game a second time and I made it. But, huge facepalm, I didn’t pay attention the first time I played the games, some items were obvious so that means I could beat this game the first time at 100%, if only I was smart ha ha. Well enough talk about that, let’s start this walkthrough shall we? And yes, you already know it so I will not repeat the same thing over and over again. USE THIS WALKTHROUGH IN CASE OF EMERGENCY, THANK YOU! Dang it, oh well, let’s start the adventure!
CHAPTER 1: SOS FROM CERES STATION You started the adventure in the research station. Everything is so quiet, that doesn’t smell good. This level is really linear, there’s no difficulty. Just make your progress until you see the metroid larva in its capsule. Ok, it’s still here (1). We can go… Ridley! Yes, he appears from the darkness and is about to kidnap the metroid larva. No way! Shoot him and avoid his attacks. In spite of all your efforts, you will not be able to kill him, Ridley will flee with the metroid larva (dang it!). Now, it’s time to escape from the space colony. Not a big deal, go as fast as possible to the elevator and get ready to go back to Planet Zebes.
CHAPTER 2: A MOVING STATUE Welcome back to Planet Zebes, the lair of Ridley and his friends. You land on Crateria, the first zone of this planet. There are other zones: Brinstar, Norfair, Maridia, Tourian and the wrecked ship. The next destination will be Brinstar. Also, you can save your game, recover your life and reload all your weapons if you go in your spaceship (press “down” when you are on the top of it). Actually, you can’t go to the right a wall of rocks blocks the way to the wrecked ship. So go to the left and open the door with a shot. Oh, it’s quite here too, hmm… anyway, carry on to the west until you see another wall of rocks and go down. Don’t pay attention to the doors to the left and to the right, open the one to the south with another shot. Go down, open the door to the east, carry on and use the elevator to go to Brinstar.
Go to the left and get the first upgrade: the morphing ball (2). You’ve been detected unfortunately but look at the bright side: you can turn into a ball if you press “down” twice and go through the small passageways you couldn’t before. Crouch, shoot the cracked block and use the morphing ball to go back to the elevator. Don’t use it right now, go to the right before. Go down, open the door to the left, shoot the orb on the statue and take the missiles (3). Now, you can shoot missiles and open the pink doors you will encounter during your adventure (woohoo!), however you’ll need fives missiles to open it (awww). Oh well, each pack of missiles will increase your max amount of missiles by five, which is really good. Go back, go to the right now and open the first pink door with those missiles. Don’t pay attention to the thing which are watching you, use the morphing ball to go to the other side of the wall of blocks and grab some missiles. Go back to Crateria using the elevator. Oh sweet, the welcoming committee, at last. Get rid of them, open the door, go up avoiding the enemies (or killing them ^^ ). Kill more enemies, open the pink door to the right, kill the flying enemies and download the map of Crateria in the next room (4). Unfortunately, this map is a bit incomplete, for example you don’t see the secret rooms (indeed, it wouldn’t be funny after all ha ha ^^ ) and a few rooms have disappeared too. It will be the same thing with the other maps you will download from a computer. Oh well, that’s better than nothing though. Anyway, go back now, use the morphing ball to go through the small passageway to the right and save your game with the stuff in the center of the room (let’s call that a capsule, shall we? ^^ ). Go back, then go up, go through the next passageway, go down and open the door to the east. More flying enemies to kill. Don’t kill them right now, go to the other side, open the pink door and kill them to gain some missiles. Now, go to the next room, shoot the orb and get the bombs (5). Those are unlimited and are useful to blow up some walls in order to make some progress and find some secrets here and there in the areas of Planet Zebes. Unfortunately, it’s a trap and the chozo statue will move and will not be happy (it’s understandable, you took the treasure he kept for a long time ^^). This enemy is not a pain in the butt. Just avoid his bombs (or shoot them for some stuff), use the morphing ball and go behind him when he wants to hurt you with his claws and shoot some missiles until he perishes. CHAPTER 3: THE SECRET OF THE HUGE STATUE Now, before going to Brinstar and making some progress, let’s pick some stuff up, shall we? Go back, then go up, blow up the blocks with the bombs, go to the left then go down, open the blue door at the bottom of the save room, go through the passageway with the morphing ball, use the bombs to clear the way and get some missiles. Go back where the welcoming committee was, stay on the big broken stuff, use the bombs to blow up the floor and grab some missiles (6). Now go back, blow up the wall of rocks with the bombs to the left, make some progress and take the first energy tank on the floor at the end of the corridor. With this item, your energy will increase like the heart containers of The Legend of Zelda. In the next room, get rid of the enemies with the missiles, then go to the right. You will see a huge statue composed of four creatures. Don’t worry, this one will not move. It’s just the main puzzle of this adventure and we’re going to solve it. Go back and go to the left now. You will meet in the next corridor some enemies and some kind of cocoons. Shoot them, some bugs will appear, kill them for some stuff then use the elevator in the next room to reach Brinstar.
CHAPTER 4: KRAID Welcome back to Brinstar, but this time it’s the huge part. First, open the first door you will encounter to the left with some missiles, kill the enemies in the corridor, blow up the lowest part of the wall and use another bomb to blow up the other blocks at the end. Download the map of Brinstar in the next room (incomplete too), go back, kill the enemies and open the next door to the left. It’s a save room if you want to save your progress. Go back then open the last door with your missiles, in the next corridor, don’t kill or touch the fireflies or else darkness will fall. Go down carefully, you will see a missile reloader (7). One information about this stuff: it only reloads missiles, not the other weapons you will get during the adventure. Go back, open the other pink door to the right, kill all the enemies and blow up the wall with your bombs. Notice the blocks on the floor while you are walking: you need a special upgrade in order to go down (the speed booster). In the next room, go down to find some missiles and two blocks that you can blow up easily with your bombs (8). Go through the passageway, you will get the charge beam if you shoot the orb held by the statue. Now, you can charge your shots if you hold the “shoot” button for a few seconds. Really handy to get rid of some enemies easily. Reach the top of the room now, the next destination is east of here. However, if you blow up the little block to the left with a bomb, you will find a save room. Save your game if you want, go to the right, open the pink door, kill the flying enemies (one charged shot is enough to send those enemies to a better world ^^ ) and open the blue door above your head. Time to face the spore spawn. As its name says, this ball will use some spores to hurt you. You can shoot them to get some goodies or avoid them. Watch out though, this ball will be invincible and will bounce all over the place for a short period of time then it will stop and show its “heart”. Seize this opportunity to attack with a charged shot or a missile. After a few shots and when the ball will be weakened, it will go faster. Two or three more shots and the ball will perish, dropping some good stuff for you. Go up, open the door, step on the this thing at the end of the corridor, you will fall off in too deep but you will get the super missiles in the orb to the right (9). Go to the left now, use your new weapon to open the green door (one super missile opens the pink doors too but the green doors can only be opened with the super missiles) and the little block in the next room, your only way out. Go back where you found the missiles and the two blocks, go through the passageway using a bomb to jump a bit (yes, bombs can be used to bounce but the timing is tough especially when you have to climb up a high wall) and open the green door. In this new room, some bugs will appear from the holes here and there… except one, a bit high though but we will see that later. Carry on, open the metallic curtain shooting the button with a simple shot. In the next cooridor, go on the platform and run as fast as possible holding the “dash” button to make this part with the crumbling floor. Open the door at the end, go down, shoot the floor (no, it’s not a joke ^^ ), go down, to the left you will find an energy reloader (which recovers all your energy, even the energy tanks but not the reserve tanks). In the next room to the right, it’s flooded and the water will slow you down like a snail. Run and jump, kill the enemies and carry on. In the next room, shoot the cracked block in the ceiling, do a wall jump to go up here (jump them press the opposite direction and the “jump” button to do a wall jump), blow up the first block and shoot the other one (if you dare to use a bomb for the second block, you will fall off because there’s a sneaky block close to the cracked block and this one will blow up too if you use a bomb so it’s not a good idea I suppose ^^ ). Open the door and get the spazer in the next room (10). Go back, open the door to the right, go through the glass tube, use the elevator to go to Norfair.
Here is Norfair, a new area. Unfortunately, we are here for an upgrade and nothing else. Don’t pay attention to the green door and the orange door to the left (and the blue doors to the right), just open the pink door. Get the second energy tank, find the way to go to the passageway, go down and open the door. Shoot the upper part of the wall and pick up the hi-jump boots, the new upgrade (11). With those boots, you will jump higher (it makes sense ^^ ). Go back, kill the enemy and get the missiles up here, then go back to Brinstar. Blow up the wall to the right with a super missile once you are back to Brinstar, reach the upper platform and open the door. Go down, blow up the lowest part of the wall in front of the locked door. Go through the secret passageway, then open the door. Kill the enemies in the next room. Blow up the lowest part of the wall to the east (fall off in the small hole and use a bomb), go throught the passageway, open the door and save your game if you want. Go back where the flying enemies are, you will notice a crack on the floor (12): shoot it and open the door. Kill the enemies in the corridor then go to the next corridor. Shoot the little part above your head, go up and open the door. The small room you just discovered has an energy and a missile reloader. Go back, get rid of the eye blocking the door with a super missile at the end of the corridor and get ready to face the boss of Brinstar: Kraid.
The first round, you will notice that he is not a threat in spite of his size, the rocks he will throw at you and his hand. Shoot when he opens his mouth (you will probably have to shoot once in order to let him open his mouth and then a second time to hit him). After two hits, the second round will begin (and the troubles too ^^ ). Kraid will use new skills like some kind of hands coming from his navels and some claws will appears too in the room (like the scythes of Death in Castlevania). You can shoot the claws but not the hands, however you can use them to avoid the spikes on the floor, especially if you accidentally fall off (and if you are lucky ^^ ). Repeat the same technic until he dies. Congratulations, you solved a part of the secret of the statue. Indeed, if you remember a part of the statue in Crateria had the shape of Kraid. You got it? Yes, you have to kill the others guardians and you will solve the secret of the huge statue in Crateria. But enough talk about the statue, open the door to the right and get the Varia suit (13). With this new suit, you will be able to resist to the heat of Norfair. And good thing, it’s our next destination because some nice stuff is waiting for us. But, first of all, go back to the locked door, watch out the enemies in this room, use your missiles or the bombs if they catch you and get the energy tank hidden in the ceiling (shoot the ceiling to make it appear). Now go back to the elevator and go back to Norfair. CHAPTER 5: IN THE HEAT OF NORFAIR… We’re going to find some good stuff like three upgrades really useful. The first upgrade we will pick up is to the east. Open the first door to the right, shoot the floor, kill the enemies and go to the next room. This room has a bit of lava and that will hurt you a bit if you don’t pay attention (well it depends of how long you stay in the lava ^^). Make some progress, kill the creatures you will encounter, get the missiles shooting the small part in the lava where the bouncing creature in second pool is waiting for you (or you can wait to get the gravity suit, it’s safe but, if you are not patient, well this option is available but you have to be fast if you don’t want to lose a ton of energy) and open the other door to the other side. Use the platforms to reach the other door at the end of the corridor, in the next room, you will find a save room if you open the blue door above your head and some missiles if you go to the right then fall off and jump over the spikes (14). You probably noticed two kind of heads while you were going to get those missiles. Stay between those two statues, use a bomb then another one, make some progress in the small passageway you just discovered, take care of the crawlings creatures and the blocks on your way with the bombs and open the blue door to the south. The first blue door leads to an empty room with some enemies which will respawn everytime from the hole in the center of the room. The only purpose of this room is farming some energy and some ammo, that’s it. The second door leads to where we supposed to go. In the next corridor, use the platforms to reach the other door (the creatures in the lava can be destroyed with the super missiles), then open the other door to the right. The screen is shaking now and the lava will start to rise. No time to lose: use the platforms to reach the other side, go through the passageway, shoot the ceiling and go up. Open the door, oh sweet there’s more lava… and some spikes apparently. Use the moving platforms and the morphing ball to go to the other side of the corridor, open the door, go up killing all the enemies and open the door. You are back in this room. Climb up, don’t fall off (that would be foolish and you will have to do all the way back) and open the door to the east. Kill the enemies, shoot the ceiling (but I think it will be ok since you got rid of the enemies ^^ ), go up then to the right. The next corridor has some creatures, some holes, some crumbling floors some spikes and… some lava. At the end of the corridor, shoot the ceiling to make some missiles appear and get them (15). Now open the door, get the speed booster in the orb and hold the “dash” button to escape this place because the lava is rising. As you could see, the speed booster increases your dash power. With this upgrade, you can perform many other moves like the comet attack (hold the “dash” button then crouch when Samus shines and finally press “jump” button) and break some walls. But enough talk about that, let’s carry on the walkthrough. Back to the room with the save room, go down where you opened the door leading to the south and open the other door to the left. Use the platform to go to the left, open the door and dash like a bull in the corridor to kill the enemies and break the walls on your way. Open the door, save your game if you want, then open the other door and go back to the green door now. Open it with a super missile, use the speed booster to go through the metallic curtains and notice the tiles with a symbol on them: we will focus on that later. Open the door, use the moving platforms to go to the other side and notice a small passageway to the right in the next room (where the crawling things come from): it’s where the next upgrade is hidden. In order to get this upgrade, go up, use a bomb to blow up the small pipe not so far from the next door, then use the morphing ball to fall off and go through the passageway. Open the door, shoot the orb and get the ice beam (16). Yes, I know it’s a bit awkward to find such an item in this place but anyway, now you can freeze the enemies and use them as some platforms. Needless to shoot twice, one shot will freeze them (and two shots or more will probably kill them, it depends of the enemies). Go back, open the other door, freeze the yellow things which jump from the lava to make some platforms and go through the passageway, then the flying creature to reach the other door. Fall off, blow up the metallic block to the right and the crawling creature in the passageway then go back to Brinstar using the elevator.
Go back where the energy reloader is, freeze the flying creatures to go up and open the door to the right. Kill all the bugs you will encounter, watch out the spikes and the plants around the place and use the platforms to go to the other side of the corridor. You see those two giant blocks on the floor? Shoot them to make a secret passage appear with some worms to kill. Open the door, watch out the spikes, the plants and the yellow blobs (remember you can freeze those things if they are annoying ^^), shoot the orb and get the power bombs (17). Those bombs are better than the bombs but they are limited unfortunately. However, they can blow up some walls that the bombs and the speed booster can’t destroy and open the orange doors. Use one to give a shot with the wall to the left and get some missiles. Go back, then go up, there’s a save room to the right, another door to the left and an elevator. Don’t use it yet, open the door the left, kill the enemies and blow up the metallic floor with a power bomb and fall down the first plant which has no creatures: it’s in fact the entrance of a secret room with some power bombs. Now that we have this new weapon, let’s go back to Norfair and get the next upgrade, shall we? First, open the orange door, you will find a monitor in order to download the map of Norfair (still incomplete, oh well). Now, go back where the tiles with the symbol are, use a power bomb to blow them up and make some progress. In the next room, shoot quickly the wall to the left to make some missiles appear and get them. This part is a bit tough because, when you go in the room, you have to move a bit to the right or else you will fall off because all the platforms crumble if you step on them. If you fall off, don’t worry, you can jump from platform to platform and get those missiles but you need a good timing to jump. In the next corridor, use the speed booster to make some progress and break the walls on your way. You will come to a place with two doors, one leads to an energy reloader, the other leads to a boss. If you go up, you will see two other doors: the one to the right leads to a save room and the other one to the left leads to the elevator. Don’t go through this one yet, open the door to the south first. Go to the right and face the boss. In order to beat him, don’t stay so close to him, avoid the balls he will throw at you sometimes, shoot him with a charged shot, a missile or a super missile when he opens his mouth and he will move backward. Repeat the operation until he falls off in the acid. Notice the stuff above your head, you need something to go to the other side of the pool using this stuff in the ceiling. The music stops, go to the left until you face wall of spikes. The boss fight music will restart and the boss, after smashing the wall of spikes, will want a rematch. But the second encounter will be short (dying once and for all in front of you, that’s a cool death ha ha ^^ ). Now, go to the left using the platforms to cross the pool of acid. In the next room, open the door to the south, go down and open the door to the right. In this corridor, the acid will rise and fall. The speed booster is pointless here because you will have to use the morphing ball to go through a passageway. Take your time, jump over the spikes and grab the missiles. Now, go back, open the door to the south, get rid of the enemies and use a power bomb to clear the way. Start from the right, run to the left and jump using the springboard to reach the door to the left. Open the door, shoot the orb, pick up the grappling beam (18) and go back in the previous room. Don’t fall off, equip the grappling beam, jump and grab the flying thing. Like Simon Belmont in Super Castlevania 4, you can swing and grab whatever you can grab like those enemies or the metallic stuff like the one you saw above the pool of acid earlier. You can kill some enemies with this beam too. Use the other flying things to reach the other side and get some missiles. It’s possible with the grappling beam but, if you have some troubles, you can wait to have the space jump, go back here and get those missiles with this upgrade (which is a bit easier). Go back where the grappling beam was, go up and use the grappling beam to reach the door to the right. Make your progress using the grappling until you reach a metallic curtain. Use a super missile to open it, don’t fall off, go up, save your game with the room to the right, go up and grab the flying thing. Open the door to the other side, get the power bombs and go back where you fought the boss. Use the grappling beam to cross the pool of acid and get an energy tank (19). We still have a few things to get before leaving Norfair.
Go back, open the door to the north, then the one to the east, jump over the pools of lava and the enemies, open the door, use the energy reloader if you need it and open the other door. Use the grappling beam to cross the pool of lava and spikes (and creatures too), open the door then the metallic curtain and go through the passageway. Do you remember this place? No? Ok, then go to the right. Deja-vu, you say? Indeed, the lava which rises, yes you know what you have to do now. Cross the room with the lava, the spikes and the moving platforms, go up, don’t open the first door to the right but the second one. Now don’t fall off or else you will have to go out the room with the door to the left and then go back. Use the platforms to reach the metallic curtain, shoot the button, take the missiles, then use the grappling beam to cross the hole of spikes and grab the wave beam in the next room (20). With this shot, you can open the metallic curtain with the blue button only, even if the button is unreachable, which is great. Go back now, then go up, open the door to the left, climb up the hill (let’s call that a hill ^^), use the grappling beam to reach the other side, open the door, get the missiles and shoot in the lava to make a platform appear. Use a bomb (or shoot the wall), go through the secret passageway, open the door, shoot one of the small platforms to reveal some missiles and get the first reserve tank. This item is quite useful. In the game, there are four reserve tanks and they can be filled with energy. If you lose all your energy and you have some energy in the reserve tanks, it will automatically let you a second chance and fill some energy, depending of how much you have collected in your reserve tanks. You can switch to “manual” if you go in your inventory, then in “supply” and press “jump” button. However, the energy reloaders will not recharge the reserve tanks ( otherwise it wouldn’t be funny
CHAPTER 6: BEFORE GOING TO THE WRECKED SHIP We will get some stuff in Brinstar first and then Crateria. From the elevator, blow up the wall to the right with the super missile and go back where the flying creatures are and use a power bomb at the end to make a secret passageway appear. It leads to some missiles. Use your bombs to bounce and go through the passageway and the missiles will be yours. You can wait to get the spring ball in order to grab those missiles if you have some troubles with this move. Go back where the energy reloader is, go up and open the first door you will encounter on your left, behind a wall that you have to blow up with a power bomb. Avoid the fireflies and the spikes, use the grappling beam and take the X-Ray scope in the next room (22). With this item, you can see all the secrets of Planet Zebes. But you can’t move when you are wearing it. Use it in order to find your way out, go back and open the second door to the left. Go back where all the bugs come from the pipes, locate the one which doesn’t have any bugs, freeze a bug coming from the pipe to the left and jump in the other pipe to get some missiles. Carry on to the left and freeze another bug coming from the first pipe located to the right. Use it like a platform and reach the orange door to the right. Kill the enemies, blow up the lowest part of the wall with a bomb, grab the power bombs, use one on the other wall, don’t use the elevator and go to the right. Open the door to the right and shoot the ceiling to make an energy tank appear. Grab it, go back to the room with all the pipes and the bugs and open the door to the left. Go up, open the orange door to the right, kill the enemies, use the grappling beam to swing and step on the metallic block, shoot the button to open the metallic curtain, go down and get the energy tank in the next room (23). Go back, use a bomb to blow up a little part of the floor then another one to make a platform rise, open the metallic curtain, kill the enemies and get out of this room. Go up, use the grappling beam when you see some metallic stuff in the ceiling and get some missiles. Use a power bomb to blow up the wall to the left, then use the bombs to bounce and reach the secret passageway in the wall to the left. In the next room, you will notice something wrong on the floor. Use a super missile to destroy this part and get some power bombs. Shoot the metallic curtain, use a bomb to blow up the block, go in the passageway and go back to the previous room using the bombs in order to bounce. Go up, open the door to the left, cross the corridor, in the next room, blow up the floor with a power bomb, open the door to the left, get rid of the enemies, open the other door, jump over the hidden hole in front of the energy tank, grab it and get the super missiles in the room to the left. Now fall off, there’s a save room to the left if you want to save your progress, otherwise go to the right. In the next room, some funny creatures will sing the “item collected” song just for giggles and they will flee from you, doing some wall jumps. Go up using the same move and notice the hole to the right. In order to go in this hole, you have three ways: the first choice requires nothing else but the spring ball (the easy way), the second choice requires some patience and some bombs to climb up the wall or to be launched like a cannonball from the edge and, the last choice requires some dexterity with your fingers: run then jump and turn into the morphing ball to go in the passageway. Whatever you choose, your reward will be some power bombs. Go back to the elevator (the one to the west of Brinstar), open the pink door, get the missiles, go out then go back and use the speed booster to go through the metallic curtains. Open the door, get the reserve tank (24), then go through the pipe under the statue to get some missiles (some of them are hidden in the wall, use the X-Ray scope to find them). Go back in the previous room, shoot the ceiling to reveal a secret passageway with some enemies and some super missiles. Step on the base to go back down and use the elevator to go back to Crateria.
Go back where some creatures are climbing up and down the walls. Check the wall to the right to find some blocks to blow up with the bombs (25). Go through the passageway, open the door, freeze the yellow blobs to make a bridge (they don’t have to bounce, it’s really important), then go back a few steps to the left do a comet attack (use the speed booster, then crouch when Samus is shining and finally press the “jump” button) to reach some super missiles. Go to the left, use the grappling beam, open the door, blow up the wall to the left to go out and go back to your spaceship (save your game if you want). Now blow up the wall to the right, open the door, make some progress killing some enemies and using the grappling beam and get the missiles halfway. Jump from platform to platform and use the grappling beam to reach the main door of the wrecked ship. CHAPTER 7: A GHOST IN A WRECKED SHIP Welcome to the wrecked ship. Nothing works inside, it’s really quiet here so let’s check this place and get some stuff, shall we? Also the power is cut off (they probably haven’t paid the bill ^^) so the things you can do right now are really minor. First, cross the main corridor, in the next room, beware of the ghosts appearing around the place. Go down, don’t pay attention to the blue door and the locked door, blow up the lowest part of the wall to the left, go through the passageway and get the missiles at the end of the corridor (26). Now, go down, shoot the floor to make a passage appear and shoot the door. Equip the super missiles, go the right, use the morphing ball to go through the passageway to the east, blow up the blocks with a bomb, shoot the eye and open the door. Ladies and gentlemen, allow me to introduce you Phantoon, the boss of the wrecked ship. Yes, I’m not kidding. The boss? Already? Of course! After a short prelude to the battle with the dance of the blue flames, Phantoon will show his face but you will not be able to hit him with your best shot. He will start to move all over the place and throwing some blue flames at you then he will disappear but not the flames. Kill all the flames until he shows his face and opens his big eye. Watch out the flames which will fall off and shoot this fiend. This only way to hit him is when his eye is opened as you can see. Repeat this operation until he dies (even if it’s already dead because it’s a ghost… oh well ^^). No upgrades, just some good stuff but the power is on, that’s the bright side of your victory. Now you can explore what you couldn’t earlier. Go back to the previous room, kill the enemies and go to the left to download the map of the wrecked ship (do I have to mention that it’s incomplete? ^^). Go back, open the door to the north, then the one to the left to get some super missiles (27). Go back, blow up the walls to the right, open the door, reach the end of the corridor, blow up the wall to the right and go through the second passageway from the bottom to get some super missiles. Go up, don’t pay attention to the flashing door to the right, use the save room in front of the main corridor to save, then shoot the ceiling. Open the door, kill all the enemies then go to the right, push the robots in the holes of spikes to reach some missiles. Go back in the previous room, kill all the enemies once again and go to the left. You are outside the wrecked ship. Go to the left using the platforms until you see some moving platforms. Go to the highest moving platform, shoot the wall to the left and grab the missiles you just discovered. Fall off, check to the left to see a small part that you can destroy with a super missile (28). Do it, blow up the small part to the left and get some missiles. Use the bombs to go back to the surface and shoot the floor to destroy a part of it. Go in the passageway and open the door. Kill the enemies, then carry on in order to go back to the wrecked ship. Use the grappling beam to cross the spikes, jump on the hand of the statue and use the morphing ball. The statue will move and will help breaking the spikes and going down. Don’t open the door yet, use a bomb to destroy the floor, go through the passageway, destroy the ceiling then push the robots in the holes to reach some missiles. Use a power bomb, go back a bit to the left, the run to the right and do a comet attack. Jump over the sneaky gap, shoot the orb and grab the reserve tank. Fall off now and go gack to the door. Open it, shoot the orb and get the gravity suit (29). This is the last suit and it’s really a nice upgrade. Now, with this suit, you can move normally in the water and the lava but not the acid though. Open the door to the left, fall off, go to the left use some bombs to bounce and blow up a part of the wall. Go through the passageway to get some missiles. Go back to the wrecked ship, and open the flashing door now. Kill the enemy and carry on. Avoid the spikes in the next room, open the door, go up, and shoot the ceiling. Open the door, use the grappling beam and the floating platforms to cross this flooded room with some spikes and some fishes and get an energy tank (30). Now go back, open the blue door to the right and let’s go to Maridia. The way to Maridia is really linear and not so difficult. Just kill the enemies on your way, use the platforms to reach the door to the right, then go down, killing the cocoons. Go down then to the left, use the morphing ball to go underwater and through the passageways, kill the bugs if they are annoying, use a bomb to blow up the ceiling, carry on and open the door. Go to the south and use the elevator to go to Maridia.
CHAPTER 8: DRAYGON Here is Maridia. The alliance of water and sand. Isn’t that lovely? Anyway, go down and open the pink door in order to save your progress if you want. Go down, open the door to the left, cross the corridor killing the enemies and open the door to the other side of the quicksands. Don’t worry though, if you fall off or are caught by the sand worms, open the door to the left and go up. In the next room, look for a green door to the left and open it. Go to the right, cross another corridor of quicksands and creatures throwing some kind of spiked balls at you, in the next room use the grappling beam, fall off and go through the hole above your head (as you can see, the cracked block has disappeared and you can go up now). Do some wall jumps, kill the flying bugs then go down and open the door to the right. If you have some troubles with the wall jumps, wait until you have the space jump, it will be easier to go up. In the next room, use a power bomb to blow up the pipe to the right, let the robot get rid of the sand wall and open the door. Go down, then to the left and final to the right in order to get the spring ball in the orb (31). With this upgrade, you can jump and bounce like a rabbit when you turn into a ball. Needless to use the bombs now. Go back to the previous room using the spring ball, then go to the west. More quicksands and more creatures throwing spiked balls at you, woohoo! Cross this cooridor, then the other room, kill the enemies and go down, under the metallic blocks. To the right, there’s a monitor where you can download the incomplete map of Maridia (indeed ^^) and, to the left, you will go back to Brinstar. It’s actually where we supposed to go.
Open the metallic curtain with a super missile, fall off, open the door to the left and use a power bomb in the glass tube. It will blow up and you will be able to go down in order to save your progress or up in order to carry on the exploration of Maridia. Open the pink door to the right, in the next room, open the metallic curtain with a super missile, kill the enemies, re-open the door you just went through, go to the right, use the speed booster, then crouch before going through the door and do the comet once you are stepping on this seaweed in the next room (32). You will get some missiles hidden in a rock above your head. It’s really tough to get those missiles and you will probably need more than one try to grab them. You have to be fast when Samus is shining, step on the correct seaweed and push the “jump” button without any stop. Dexterity is probably necessary to attempt this tough part but you can make it, it’s possible. Now, use the platform to reach the second door to the right from the bottom. Go up, don’t pay attention to the door to the north, do a wall jump on the wall to the right to reach the top (or freeze the fish if you have some troubles), go down, avoid the enemy and go through the wall. In the next room, you will see some little turtles and a rock. Well, it looks like a rock but if you touch the little turtles, you will wake the mother up and she will be mad at you. Use the mother turtle to reach the missiles hidden on the wall to the right and the energy tank on the metallic block above your head that you have to grab with the grappling beam. Go back, open one of the two doors to the north, look for a secret passageway to the left (if you are lucky, you’ll see a creature going in the passageway), use the spring ball to reach this passageway, carry on and get some super missiles. Now, go back then go up and use your grappling beam to go to the east. Go up, open the door, go to the right then through the wall to get some missiles (33). Open the door to the left, go through the wall in the next room, go up and open another door. Go down, kill the enemy and fall off in order to find some missiles and some super missiles. Go back, open the door to the south, go down, shoot the floor and open the door to the east. Use a power bomb, go down, there’s a save room to the left if you want to save your progress, do a comet attack to break the blocks above your head (34). Up here, you will find some missiles and some super missiles (watch out the crumbling floor between the two items). Step on the crumbling floor, then go to the left, fall off then to the right, use a bomb to destroy a part of the floor. You will see two quicksands. The one to the left leads to a room with a reserve tank and some missiles (use the spring ball to get those items) and the one to the right leads to another room with some missiles and some power bombs (use the morphing ball, step on the block above the passageway and go through the hole to get them). Fall off in the quicksands at the bottom of the room to go out and then go back to the previous room. Now, use the grappling beam on the metallic walls in order to go up, then go to the left and open the door to the north. In the next room, go up then down, destroy everything you can with your beam, use the speed booster to get rid of the remaining things, open the door to the right and prepare to fight Botwoon. This boss is not a big deal. He will go out, spin around like a record and then go back in a hole. Sometimes, he will show his face and throw some little green balls at you. Stay where you are when you come in the room and shoot his head a few times with the charged shot, the missiles or the super missiles until he dies. You will get some stuff, the pipe to the right will blow up and you will be able to carry on.
Use the speed booster to cross the next corridor, go back a bit to the left, go through the hole and reach the energy tank, stuck in the ceiling (35). Open the door, kill the metroids, the pipe to the left is a secret passageway leading to a missile reloader, go up and open another door to the right. Use the grappling beam to cross this room, kill the metroids if they are annoying, the upper door leads to a save room and an energy reloader, the lower door leads to Draygon, the boss of Maridia. Save your progress, go down, open the door, get the missiles in the pipes to the right (36) and fall off in the first pool of spikes (no, no they will not hurt you, don’t worry ^^). Go down, shoot the eye with a super missile and prepare to face Draygon. How to beat him easily? There’s indeed a tip to make this fight short (let’s say a good KO in 30 seconds ^^). Notice the turrets on the walls. Destroy them before Draygon shows his face. Then equip the grappling beam and allow him to catch you. Now, try to grab one of the turrets out of order. The electricity will go through your grappling beam, then through Samus and finally will hurt this poor Draygon who thought he was going to get a good meal. After this “tough” fight, open the door to the left and get the space jump in the orb (37). With this upgrade you can jump as long as you want. Use it to leave the room where you just fought Draygon. Go back where the locked door to the left was and the metroids. You can open it now and it’s the shortest way to go to the next upgrade and the last item that we have to take in Maridia. Cross the new room, open the door to the left, go down, open another door to the left then the other in front of you. Remember this room? Go up, don’t open the door to the left (neither the one to the east), use your new skill to reach a new door (38). Open it, go up, open another door, kill the enemy then open the door and go down to get the plasma beam. This one is powerful (have fun ^^). Give it a shot with the enemies in this room and get out of here. Now that we did everything we have to do here, let’s go back to Crateria and then Brinstar for some stuff. CHAPTER 9: BEFORE GOING BACK TO NORFAIR Go back to your spaceship and climb up the rock to the right. Use your new skill to reach a door to the right above your head. In the next corridor, kill the enemies, watch out the acid which rises and fall and get the power bombs. Now, back to Brinstar, where you found the morphing ball. Go to the right then open the door in front of you. Use a power bomb to blow up a part of the wall of rocks. Do a comet attack to reach a secret room up here and open the door to the left. In the next room you will see nothing else but some spikes. Well, use the X-Ray scope to see an invisible platform. Jump on it and go to the other side of the room to get some missiles (39). Go back where you found the charge beam now. Use a power bomb, go through the passageway, go down and open the door. Kill the worms and use the speed booster to destroy the lowest parst of this room and reach an energy tank. Now, it’s time to go back to Norfair and face the boss of this area: your worst enemy Ridley. CHAPTER 10: RIDLEY This is the shortest way to go where we supposed to go. From the elevator, go down, go through the save room, open the other door and cross the corridor with your speed booster. Go down in the next room, open the metallic curtain, open the door, go down and to the right. After the room with the energy reloader, use the grappling beam to cross the corridor of lava, spikes and worms, open the door, go down and open the orange door. Go in the lava and use the new skill to reach the entrance of Ridley’s lair (40). To the left, you can save your progress. Use the elevator to go in the depths of Norfair.
Go to the left, kill the enemies, avoid the flames and the acid and open the door. Use the space jump to go to the other side then use a power bomb to blow up the wall and reveal a chozo statue. Activate the statue like you did in the wrecked ship (using the morphing ball). The acid will completely fall and you will be able to go down. Open the door, then another one to the right, use the space jump to get the missiles and step on the crumbling floor to go down. Go to the right, notice the locked door, then go back and face another chozo statue but this one is a bit different. Of course, this statue will throw some bombs at you, but also some minions, some shockwaves and some explosives bubbles. Don’t use the missiles on this boss, it’s useless. Needless to waste your super missiles too, just charge your plasma beam and shoot. After a few hits, the statue will die and you will get some stuff. Open the door, shoot the orb and get the screw attack (41). With this upgrade you can break some walls and kill some enemies. Go back in the previous room and try it where the statue was before falling off. You will find some super missiles. Now, go back where you got the upgrade, use it to break the ceiling, the first door to the right leads to an energy reloader, the second door leads to where we supposed to go. In the next room, kill the flying enemies with the screw attack, open the metallic curtain then the door and go to the right. In the next room, the screw attack is necessary to break the pillars and reach the other door without being hurt by the rising acid. Go up in the next room, don’t open the door yet, shoot the ceiling and open the door. Fall off carefully now or else you will miss the secret passageway to the left and you will have to do all the way back. The secret passageway leads to some missiles. Now go back to the previous room and open the door. Climb up as fast as possible this room using the platforms (or the screw attack), open the door, don’t open the door to the right yet, shoot the floor and go down. The door to the right leads to a save room. Use a power bomb, go through the passageway, use another power bomb and go down. Shoot the spikes to the left to make a platform appear. Use a bomb, go through the passageway, kill the enemies, use a power bomb and go through the passage to get some power bombs. Go down, open the door and face a new kind of enemy. The only way to hit this enemy is when his cuirass is removed, when he wants to kick your butt with a special move that he will automatically do after a somersault. Seize this opportunity to shoot with a charged plasma beam and repeat the operation until he dies. Open the door, cross the corridor, open the other door, cross another corridor, shoot the eye with a super missile and prepare to face Ridley. The difficulty of this boss fight is in fact the design of the room. It’s small, there’s some acid (or lava), Ridley is really huge and the platform is a bit small. Oh well, you have a better equipment now so it shouldn’t be a big deal compared to the first time you met him in the space colony. Avoid his attacks (the fireballs he will throw at you, his tail and his tackle) and shoot his face. Now, get the stuff he dropped, open the door and… wait! Where is the Metroid larva? The capsule is empty as you can see and there’s no upgrade to get… unless you shoot the wall to the right in order to get an energy tank (42). Go back to the door you haven’t opened yet, kill the enemy and go through the wall in front of you. Go down, try to not hit the fireflies and get the energy tank using the screw attack. Go back then go up, go through the wall to the left, go up then to the right to get some missiles. Use a power bomb then the spring ball to go in this maze. Find the exit of this short maze (use the X-Ray scope if you have some troubles), use a bomb to blow up the block and open the door. Get the power bombs to the right, open the door to the left, go through the wall in front of you, open the door, go up and open the door to the left. Avoid the flames and the lava which rises and falls, go up and use a bomb to blow up a block on the floor (43). Go through the secret passageway, get the missiles, go back and open the door to the left. Break the pillars with the screw attack, go through the passageway and open the door to the left. Remember this place? Ok, now I can tell you that there’s nothing else to do here so let’s go back to the spaceship in Crateria for the last items to get. Use the screw attack to find a passageway in the wall to the left (44). Open the door, use the screw attack to cross this corridor and break the walls on your way, take the energy tank, use a power bomb on the floor and go through the passageway once the lava fell. Use the screw attack to break everything on your way and cross this corridor. Open the door, shoot the wall in front of you, step on the crumbling floor, shoot the wall to the left or to the right and take some missiles to the left or to the right. Any missiles you take, you will have to go back here and take the last missiles in order to get a 100% at the end of the game. After having collected all those items, go back where the statue is, watch the cutscene, go down and use the elevator to go to Tourian, the last area of the game.
FINAL CHAPTER: MOTHER BRAIN This is it. Where this adventure will come to an end. To the right, there’s a save room. Open the door to the left, get rid of the metroids with some power bombs, in the next room, kill the metroids, go down then open the door to the right. Kill more metroids in the next room, open the door, go down, kill the metroids and open the door. Kill the next enemies with your super missiles, carry on until you face a boss… which will no longer exist thanks to the help of a giant metroid. But this giant metroid wants to kill you now. You can’t escape this room, you can’t kill him, so you can just surrender and give your energy to him. But he will stop draining your energy and will recognize you. Yes, it’s Samus Aran, the person who saved you last time! Why didn’t you recognize her with her suit?! Anyway, carry on, go to the left and use the energy reloader to recover your energy and the missile reloader if you want. Carry on, use a super missile to kill the eye, go down, save your progress with the save room to the left and carry on. Shoot all the red parts with your super missiles (or your missiles) in order to make some progress and shoot the mother brain multiples times with your missiles and your super missiles until she’s dead. Well, not yet. She will wake up and you will have to fight her. Avoid her attacks (the plasma beams, the blue bubbles and the orange stuff coming from her hands). After a few hits, she will prepare a special attack that you will not be able to avoid: a powerful beam which will drain your energy and your missiles. After a few beams, Samus will feel weakened and you will not be able to control her (it’s not a bug, it’s scr Now it’s the great escape. Planet Zebes is about to blow up. You have to go back to your spaceship and leave this planet immediately. Go to the left, shoot the metallic curtains and open the door. Go down, open the door. Jump on the platform in front of you and make your progress killing all the enemies with your beam. In the next room, go up and carry on in order to reach the door to the right. Kill the enemies, blow up the wall and use the platform to reach the door to the north. Now, go up then to the right, open the door and go in your spaceship. Watch the cutscene and the credits now and MISSION ACCOMPLISHED!
Well, that’s the end of this walkthrough. You found all the items (or not if you have chosen to beat this game without a 100% of the items collected ^^). Do you want a bonus? Yes? Ok, so listen up: if you go to the room where you fought the first chozo statue and found the bombs when you are escaping from Planet Zebes, you will find the innocent creatures of Planet Zebes. You know, they saved you when you were locked or trapped in some rooms and revealed a tip to go out of those rooms. Now it’s their turn to be trapped in this room. Be nice, free them shooting the wall to the right (45). Once they left the room, go back to your spaceship. The ending will change a bit, you will be able to see their spaceship flying in direction of the east when the planet blows up, like a shooting star (46). Do it if you have time, it’s not really necessary but it’s something really good. Also, the ending will change according to your clear time. There are three endings: -Over 10 hours, Samus will give you a thumbs up, then jump and finally shoot the screen, -From 3 to 10 hours, she will remove her helmet, give you a thumbs up, then jump and shoot the screen, -Under 3hours, ah ha it’s a surprise that you have to discover by yourself ^^ Well then, see you next time for another walkthrough |


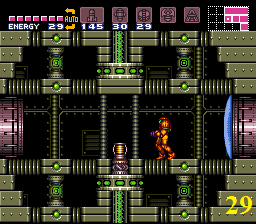


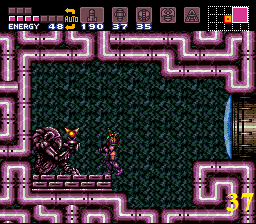


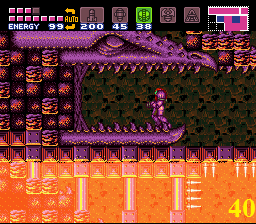


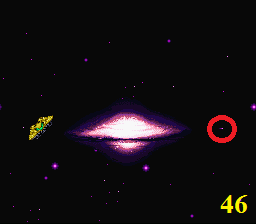
| Games have secrets, I have my eagle gaze. |
Affected by 'Laziness Syndrome'
Registered: 10-21-11
Location: France
Last Post: 2418 days
Last Active: 1592 days
04-04-12 03:12 PM
 Jordanv78 is Offline
| ID: 561907 | 77 Words
Jordanv78 is Offline
| ID: 561907 | 77 Words
 Jordanv78 is Offline

POSTS: 1759/12281
POST EXP: 809836
LVL EXP: 101084118
CP: 78857.6
VIZ: 595333
Wow this is by far one of the best walkthroughs I have seen in awhile. By far the best that I've seen on Vizzed, that's for sure. Thank you for all the hard work you have put in.
Although I have beaten this game a ton of times (it's one of my favorite games of all time) and don't need a walkthrough, I know that people who get stuck will appreciate the hell out of it Although I have beaten this game a ton of times (it's one of my favorite games of all time) and don't need a walkthrough, I know that people who get stuck will appreciate the hell out of it |
Former Admin
| Special Assault Brigade for Real Emergencies |
Affected by 'Laziness Syndrome'
Registered: 10-16-10
Location: Chicagoland
Last Post: 2994 days
Last Active: 2967 days
04-04-12 03:41 PM
Laian is Offline
| ID: 561927 | 109 Words
POSTS: 1003/2232
POST EXP: 457173
LVL EXP: 7564923
CP: 23733.5
VIZ: 3570463
Jordanv78 : Just curious, did you beat the game with 100% of the items collected at least once? Don't worry, it's ok if you didn't, I know it's not really necessary, the ending is only affected by the clear time (and if you save the creatures in the locked room at the end as it's explained in this walkthrough) but it's a 100% items walkthrough, that was my goal. I could skip a lot of items if I wanted but what is the point of that seriously? A walkthrough has to be complete and this was the only solution Thanks for the compliment, man, I really appreciate that Just curious, did you beat the game with 100% of the items collected at least once? Don't worry, it's ok if you didn't, I know it's not really necessary, the ending is only affected by the clear time (and if you save the creatures in the locked room at the end as it's explained in this walkthrough) but it's a 100% items walkthrough, that was my goal. I could skip a lot of items if I wanted but what is the point of that seriously? A walkthrough has to be complete and this was the only solution Thanks for the compliment, man, I really appreciate that |
| Games have secrets, I have my eagle gaze. |
Affected by 'Laziness Syndrome'
Registered: 10-21-11
Location: France
Last Post: 2418 days
Last Active: 1592 days
04-04-12 03:44 PM
Jordanv78 is Offline
| ID: 561931 | 59 Words
Jordanv78 is Offline
POSTS: 1769/12281
POST EXP: 809836
LVL EXP: 101084118
CP: 78857.6
VIZ: 595333
I think I've only completed the game 100% 1 time and that was years ago to be honest.
Yeah you deserve the compliment. This walkthrough is the easiest to read, and the most detailed by far that I have seen on this site. I hope you do more like this for other popular games. Keep up the great work! Yeah you deserve the compliment. This walkthrough is the easiest to read, and the most detailed by far that I have seen on this site. I hope you do more like this for other popular games. Keep up the great work! |
Former Admin
| Special Assault Brigade for Real Emergencies |
Affected by 'Laziness Syndrome'
Registered: 10-16-10
Location: Chicagoland
Last Post: 2994 days
Last Active: 2967 days
04-04-12 10:16 PM
 Davideo7 is Online
| ID: 562203 | 32 Words
Davideo7 is Online
| ID: 562203 | 32 Words
 Davideo7 is Online
POSTS: 21232/45589
POST EXP: 3516649
LVL EXP: 851709775
CP: 197110.6
VIZ: 127421322
Very nice walkthrough, I haven't played this game in so many years but next time I play it, I think I might just use this walkthrough to see how it goes |
Owner, Developer, Advertiser, etc
| Founder, Mod, Investor |
Affected by 'Laziness Syndrome'
Registered: 12-06-04
Location: Wisconsin
Last Post: 21 days
Last Active: 19 sec.
04-05-12 06:02 AM
Laian is Offline
| ID: 562362 | 31 Words
POSTS: 1011/2232
POST EXP: 457173
LVL EXP: 7564923
CP: 23733.5
VIZ: 3570463
Davideo7 : Did you read the red sentence at the beginning of this walkthrough, David? That couldn't be more clear I think: we use it in case of emergency ha ha Did you read the red sentence at the beginning of this walkthrough, David? That couldn't be more clear I think: we use it in case of emergency ha ha |
| Games have secrets, I have my eagle gaze. |
Affected by 'Laziness Syndrome'
Registered: 10-21-11
Location: France
Last Post: 2418 days
Last Active: 1592 days
04-05-12 12:10 PM
Davideo7 is Online
| ID: 562493 | 21 Words
Davideo7 is Online
POSTS: 21239/45589
POST EXP: 3516649
LVL EXP: 851709775
CP: 197110.6
VIZ: 127421322
Owner, Developer, Advertiser, etc
| Founder, Mod, Investor |
Affected by 'Laziness Syndrome'
Registered: 12-06-04
Location: Wisconsin
Last Post: 21 days
Last Active: 19 sec.
04-05-12 12:13 PM
Jordanv78 is Offline
| ID: 562497 | 44 Words
Jordanv78 is Offline
POSTS: 1863/12281
POST EXP: 809836
LVL EXP: 101084118
CP: 78857.6
VIZ: 595333
Davideo7 : That's a great idea! I'm going to do that myself once I'm done competing in this High Score competition that's going on.
It's been a little while since I beat Super Metroid anyways, so it would be fun to play through it again. It's been a little while since I beat Super Metroid anyways, so it would be fun to play through it again. |
Former Admin
| Special Assault Brigade for Real Emergencies |
Affected by 'Laziness Syndrome'
Registered: 10-16-10
Location: Chicagoland
Last Post: 2994 days
Last Active: 2967 days
04-05-12 03:52 PM
 crazycatpup is Offline
| ID: 562619 | 46 Words
crazycatpup is Offline
| ID: 562619 | 46 Words
 crazycatpup is Offline
POSTS: 3425/4338
POST EXP: 120030
LVL EXP: 21176694
CP: 6998.3
VIZ: 52489
Oh wow. This is a wonderful walkthrough,really well done. I've never really played metroid before but I do watch lets plays of the game, I'm not really one for shooters.
I doubt anyone will use it for emergencys you know how everybody loves to cheat. I doubt anyone will use it for emergencys you know how everybody loves to cheat. |
 |
Affected by 'Laziness Syndrome'
Registered: 11-08-10
Location: in a grave
Last Post: 2771 days
Last Active: 1640 days
04-05-12 04:20 PM
Laian is Offline
| ID: 562647 | 86 Words
POSTS: 1014/2232
POST EXP: 457173
LVL EXP: 7564923
CP: 23733.5
VIZ: 3570463
Davideo7 : Ha ha ok, I understand. Well, I'm waiting for the final result then crazycatpup : I know, but I also know that a few people enjoy being frustrated when they play a game because they love challenges and they want to beat the game without using a walkthrough. I'm not against looking at a walkthrough a few times when we are stuck and about to become crazy, but using it to beat it... I'm against that. That ruins all the challenge in the game Ha ha ok, I understand. Well, I'm waiting for the final result then crazycatpup : I know, but I also know that a few people enjoy being frustrated when they play a game because they love challenges and they want to beat the game without using a walkthrough. I'm not against looking at a walkthrough a few times when we are stuck and about to become crazy, but using it to beat it... I'm against that. That ruins all the challenge in the game |
| Games have secrets, I have my eagle gaze. |
Affected by 'Laziness Syndrome'
Registered: 10-21-11
Location: France
Last Post: 2418 days
Last Active: 1592 days
04-06-12 11:36 AM
 pacman1755 is Offline
| ID: 563136 | 40 Words
pacman1755 is Offline
| ID: 563136 | 40 Words
 pacman1755 is Offline

POSTS: 6087/13170
POST EXP: 454212
LVL EXP: 110012705
CP: 30704.4
VIZ: 348732
Holy crap. That's a big walkthrough you got there. Lol, I guess that can help me try out the game without me raging my pants off. So I thank you for making this post. You made a board less ragey. |
| Winner of The August VCS 2011, December VCS 2013, and Summer 2014 TDV |
Affected by 'Laziness Syndrome'
Registered: 05-22-11
Location: Wisconsin
Last Post: 2158 days
Last Active: 377 days
04-06-12 12:51 PM
rcarter2 is Offline
| ID: 563172 | 68 Words
POSTS: 3873/8463
POST EXP: 758515
LVL EXP: 56781008
CP: 33704.4
VIZ: 1690746
Well I must say this deserves an applause. I read about 1/4 the walkthrough just to see how well the writing portion is. It is like something you would see from game FAQs, only you include pictures to go along with it. Very well done. Best walkthrough I have seen from you yet (not saying the other ones weren't good. This one is just the best so far). |
| Dominating RGR Competition Hall of Fame Table! |
Affected by 'Laziness Syndrome'
Registered: 05-01-11
Location: Kansas
Last Post: 3043 days
Last Active: 338 days
04-06-12 02:13 PM
Jordanv78 is Offline
| ID: 563203 | 28 Words
Jordanv78 is Offline
POSTS: 1982/12281
POST EXP: 809836
LVL EXP: 101084118
CP: 78857.6
VIZ: 595333
I'm going to start playing this game again tonight and I will use the walkthrough when needed. I will let you know how it worked out for me. |
Former Admin
| Special Assault Brigade for Real Emergencies |
Affected by 'Laziness Syndrome'
Registered: 10-16-10
Location: Chicagoland
Last Post: 2994 days
Last Active: 2967 days
04-07-12 05:37 AM
Laian is Offline
| ID: 563573 | 265 Words
POSTS: 1026/2232
POST EXP: 457173
LVL EXP: 7564923
CP: 23733.5
VIZ: 3570463
pacman1755 : A game is supposed to be a challenge itself, with some tough parts. I can tell you that some parts of this game made me nervous and frustrated, especially the secret of Maridia with the comet attack. It's a matter of time and accuracy to succeed this part. One try to get those missiles, well you have my respect if you make it. It took me everytime more than one attempt to get those missiles. The trick is a bit obvious but as we say, "easier to say, more difficult to make though". I think this trick will always frustrate me each time I will play this game. I know, I can skip those missiles but, you know, I'm really determined each time to beat a game at 100%, well if I can make it rcarter2 : The best so far? At least, it's better than The Legend of Zelda's walkthrough ha ha XP Too bad, this one has been published in March and The Tour of Vizzed has begun this month. With the amount of words, I feel a bit mad that this one is not the walkthrough of April. Oh well, let's see what the next one will be and what it will look Oh by the way, you forgot about the colors. It's a good concept that you will never see on GameFAQs ha ha Jordanv78 : And two, oh boy. Ha ha just kidding, man. Please do. Don't forget to tell me your opinion about this walkthrough. All the comments are welcome and will help me to progress A game is supposed to be a challenge itself, with some tough parts. I can tell you that some parts of this game made me nervous and frustrated, especially the secret of Maridia with the comet attack. It's a matter of time and accuracy to succeed this part. One try to get those missiles, well you have my respect if you make it. It took me everytime more than one attempt to get those missiles. The trick is a bit obvious but as we say, "easier to say, more difficult to make though". I think this trick will always frustrate me each time I will play this game. I know, I can skip those missiles but, you know, I'm really determined each time to beat a game at 100%, well if I can make it rcarter2 : The best so far? At least, it's better than The Legend of Zelda's walkthrough ha ha XP Too bad, this one has been published in March and The Tour of Vizzed has begun this month. With the amount of words, I feel a bit mad that this one is not the walkthrough of April. Oh well, let's see what the next one will be and what it will look Oh by the way, you forgot about the colors. It's a good concept that you will never see on GameFAQs ha ha Jordanv78 : And two, oh boy. Ha ha just kidding, man. Please do. Don't forget to tell me your opinion about this walkthrough. All the comments are welcome and will help me to progress |
| Games have secrets, I have my eagle gaze. |
Affected by 'Laziness Syndrome'
Registered: 10-21-11
Location: France
Last Post: 2418 days
Last Active: 1592 days
04-25-12 02:38 PM
 The Planned Accident is Offline
| ID: 574086 | 88 Words
The Planned Accident is Offline
| ID: 574086 | 88 Words
 The Planned Accident is Offline
POSTS: 436/704
POST EXP: 38999
LVL EXP: 1352549
CP: 2259.5
VIZ: 30582
laian : Very good walkthrough. As a veteran to the game, I can do all of what you said, and beat the game in under 3 hours, so bravo, really. Another little cheat you could have mentioned was the wall jump and the mock ball tricks. It could significantly lower your game time and save a lot. Plus, if you know where all of the items are, you could beat the game in less than 3 hours, in 100%. It's great. I suggest anyone out there to try it. |
 |
Affected by 'Laziness Syndrome'
Registered: 07-16-11
Location: I don't know.
Last Post: 3644 days
Last Active: 1190 days
04-25-12 03:38 PM
 gtwalq is Offline
| ID: 574116 | 49 Words
gtwalq is Offline
| ID: 574116 | 49 Words
 gtwalq is Offline

POSTS: 1250/1365
POST EXP: 64694
LVL EXP: 3954684
CP: 528.0
VIZ: 71804
I commend you for this walkthrough, its great that someones on this board with the patience to do something like this. When I get a few free hours I think Ill have a go at something like this. Super Metroid is my all time fav SNES game, great job. Super Metroid is my all time fav SNES game, great job. |
Affected by 'Laziness Syndrome'
Registered: 01-21-09
Location: Australia
Last Post: 3164 days
Last Active: 1384 days
04-25-12 04:16 PM
Laian is Offline
| ID: 574138 | 131 Words
POSTS: 1265/2232
POST EXP: 457173
LVL EXP: 7564923
CP: 23733.5
VIZ: 3570463
gtwalq : You know, you're not the one who told me that. Indeed, patience is the key. A LOT of patience to be honest. And the fact is my nerves suffer everything in front of the games. Oh well, for the Vizzed members and for Vizzed Board, I can sacrifice my mental Thanks for the compliment, man. It's always nice to see that my stuff is enjoyed on Vizzed Board The Planned Accident : I should thank you too. And yes, I agree at 100%: a speed run with a 100% of items collected would be fun. Less than 3 hours. Hmm I should try it in the future but right now I'm a bit lazy and I think I have my surge of Planet Zebes with that ha ha You know, you're not the one who told me that. Indeed, patience is the key. A LOT of patience to be honest. And the fact is my nerves suffer everything in front of the games. Oh well, for the Vizzed members and for Vizzed Board, I can sacrifice my mental Thanks for the compliment, man. It's always nice to see that my stuff is enjoyed on Vizzed Board The Planned Accident : I should thank you too. And yes, I agree at 100%: a speed run with a 100% of items collected would be fun. Less than 3 hours. Hmm I should try it in the future but right now I'm a bit lazy and I think I have my surge of Planet Zebes with that ha ha |
| Games have secrets, I have my eagle gaze. |
Affected by 'Laziness Syndrome'
Registered: 10-21-11
Location: France
Last Post: 2418 days
Last Active: 1592 days
04-29-12 03:34 PM
 totaldramaman2 is Offline
| ID: 576705 | 48 Words
totaldramaman2 is Offline
| ID: 576705 | 48 Words
 totaldramaman2 is Offline

POSTS: 583/821
POST EXP: 57991
LVL EXP: 1758235
CP: 3186.5
VIZ: 56998
Super Metroid is one of the few Metroid games I haven;t had the chance to try. When I finally get around to playing it, I'll probably use this walkthrough if I need help. This seems very detailed, how long does it take you to make one of these? This seems very detailed, how long does it take you to make one of these? |
| You gotta slam if you wanna jam. |
Affected by 'Laziness Syndrome'
Registered: 08-07-10
Last Post: 4003 days
Last Active: 2807 days
04-29-12 04:15 PM
Laian is Offline
| ID: 576737 | 91 Words
POSTS: 1296/2232
POST EXP: 457173
LVL EXP: 7564923
CP: 23733.5
VIZ: 3570463
totaldramaman2 : One month exactly. In order to make this one, I had to play the game three times. The first time was for the maps of the zones and the secrets (it was, by the way, the first time I played this game), the second time for the remaining items I missed (four miserable items for the 100% items collected, the goal of this walkthrough, I was so mad to be honest ^^) and the third and last time for the entire walkthrough. All of that took me one month One month exactly. In order to make this one, I had to play the game three times. The first time was for the maps of the zones and the secrets (it was, by the way, the first time I played this game), the second time for the remaining items I missed (four miserable items for the 100% items collected, the goal of this walkthrough, I was so mad to be honest ^^) and the third and last time for the entire walkthrough. All of that took me one month |
| Games have secrets, I have my eagle gaze. |
Affected by 'Laziness Syndrome'
Registered: 10-21-11
Location: France
Last Post: 2418 days
Last Active: 1592 days
11-20-14 09:58 PM
www.megamanzero is Offline
| ID: 1106396 | 179 Words
POSTS: 25/39
POST EXP: 7005
LVL EXP: 15653
CP: 593.1
VIZ: 125
ANGRY VIDEO GAME NERD: Super Meteoroid take place after Meteoroid the return SAMUS , well here how it goes : SAMUS has almost complete her mission, almost because the LAST egg hatch and think she is it mother so out of compassion (and not to feel wrong because she killed it mother the queen) SAMUS took the baby to the HQ, seeing that this the last Meteoroid in the galaxy they decide to keep it and press no charges, meanwhile the space pirate having lost part of their army decide to seal it and clone it into million of clone copy in order to bring the Meteoroid back into their army under the commend of somebody in the shadow only allow RIDELY to do it evil work RIDELY seal it and fly off to the space pirate home planet the GFP send SAMUS to take back the last Meteoroid in the entire galaxy because they know that the space pirate are try to clone it. And that where the game begin this has been AVGN saying peace out. ANGRY VIDEO GAME NERD: Super Meteoroid take place after Meteoroid the return SAMUS , well here how it goes : SAMUS has almost complete her mission, almost because the LAST egg hatch and think she is it mother so out of compassion (and not to feel wrong because she killed it mother the queen) SAMUS took the baby to the HQ, seeing that this the last Meteoroid in the galaxy they decide to keep it and press no charges, meanwhile the space pirate having lost part of their army decide to seal it and clone it into million of clone copy in order to bring the Meteoroid back into their army under the commend of somebody in the shadow only allow RIDELY to do it evil work RIDELY seal it and fly off to the space pirate home planet the GFP send SAMUS to take back the last Meteoroid in the entire galaxy because they know that the space pirate are try to clone it. And that where the game begin this has been AVGN saying peace out. |
| Don't mess with the uchiha clan |
Affected by 'Laziness Syndrome'
Registered: 08-02-14
Location: Why would you care?
Last Post: 3735 days
Last Active: 3597 days
