

 User Notice
 Forum Links

Thread Information
Thread Actions


The walkthrough to save the world
Game's Ratings
Overall
Graphics
Sound
Addictiveness
Depth
Story
Difficulty
Average User Score
7.4
7
8
5
6
6
5.3
12-19-11 11:59 AM
Laian is Offline
| ID: 516640 | 4866 Words
| ID: 516640 | 4866 Words
Laian
Level: 92


POSTS: 373/2232
POST EXP: 457173
LVL EXP: 7583924
CP: 23733.5
VIZ: 3570463

POSTS: 373/2232
POST EXP: 457173
LVL EXP: 7583924
CP: 23733.5
VIZ: 3570463
Likes: 1 Dislikes: 0
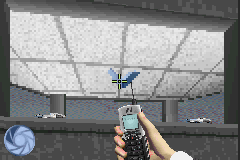
007- NIGHTFIRE Hello everybody and welcome to another walkthrough. Yes, last time, I revealed all the hidden remote controls in Gex64: Enter the Gecko, now it’s time to play and reveal the secrets of another game. Well, before I start this walkthrough, I have to tell you that a small update has been done in this one: the screenshots. Now, all the walkthroughs I’m going to make will have some screenshots. It will be handy because those screenshots will bring some informations about a location, something to do… How to use the screenshots? It’s easy, in the walkthrough, you will encounter some numbers written in yellow (ah yes, this thing is new too, the color code, I will talk about that after the screenshots ^^ ). Each number refers to the appropriate screenshot, which means (1) refers to the screenshot with a “1” written on it (made with Paint Now the color code, yes it was something that I missed in the last walkthrough, honestly it wasn’t a big deal, that was just the hidden remote controls, that’s it. But, in this one, color code was necessary. Well, three colors will be used: red for the parts, yellow for the screenshots and green for items. This is the color code I will use in this walkthrough and the next ones. Well, I think I said everything I have to tell you, so we’re going to start, oh yes, by the way, USE THIS WALKTHROUGH IN CASE OF EMERGENCY, BLA BLA BLA, THANK YOU!!! ^^ So, enough talk, let’s start this walkthrough, shall we? MISSION 1: AUSTRIAN CASTLE You start the mission on an arch. Go down and kill all the guards then follow the truck to reach the courtyard of the castle. You will see two guards next to a closed door (1). Kill them then go to the left. Another guard is hidden to your right and two others are in the outpost in front of you. Get rid of them, go inside the building and take the armor plates if you are hurt (2). Now, it’s up to you to reach your next goal. You can choose to stay on the walls or go down. Both of the two ways have their good and bad reasons. If you stay on the walls, the bad point is the number of guards which is amazing but the good points are the following ones: it’s the shortest way to reach your goal and you will find an armor vest halfway next to a guard. Now the way down has less guards (just two, one goes and goes back and the other is on the balcony once you went through the arch, notice that the last guard can see you if you take the way up too), some armor plates in case of emergency but all the guards on the walls will certainly see you (unless you kill them before going down) and there are some lights. So, if I were you, I would stay on the walls but I don’t force you after all. Reach the next door to go inside the castle (3).     After the cutscene, you are in the library and you DON’T have to be detected. Go the left when you reach the intersection, don’t go to the right, two bad guys are here and don’t want to be bothered I think. Just unlock the door to the left with your wristwatch laser to go to the meeting room (4) and watch the cutscene. You will learn more about the project Nightfire before Zoe’s capture. Now take care of the guards in the meeting room, you will find three armor plates if you go down, next to the door (5). Carry on to the left and kill another guard.    Downstairs, you will encounter three guards and Zoe. Don’t kill her, just the three bad guys, jump on the crate, take the suitcase (6) and go inside the cab, where Zoe is waiting for you. Let her kill the guards, take the stuff to your right and use your new weapon to greet the helicopter who wants to stop you. Four rockets will turn this flying machine into a burning wreck (CAUTION: rockets are deadly and can kill you and Zoe so stay focused on the helicopter, don’t be so close and shoot). MISSION ACCOMPLISHED!!! BONUS BOND: In each level, the developers have hidden a bonus Bond (it’s the 007 logo). If you find it, you will earn a good amount of points at the end of the mission, really handy to get at least the bronze medal and unlock the next mission (yeah, you need at least the bronze medal to make some progress in the story, that stinks, I know but it’s like that ^^ ). Well, the bonus Bond in this mission is hidden behind a glass. Once you reach the meeting room, don’t go down, to the left you will see a glass (7). Break it: oh a secret path!!! Check this path, it’s a shortcut which leads to the cab station and the bonus Bond is hidden on the roof, to the right. MISSION 2: MAYHEW’S ESTATE After the cutscene, kill the two guards who bothered your meeting and follow Mayhew. To the left, you will find a Deutsche M9K with some ammo (8). But it wouldn't’t be funny if it was so easy to exit the room, two guards come and want to kill you. Don’t use the Deutsche M9K right now, keep it preciously for later in this mission. Get rid of them with another weapon and open the other door in front of you. More guards yeaaaaahhh!!! Carry on, killing all the guys you will encounter, until you reach a safe place. Mayhew wants you to destroy his PC, it contents some confidential informations and reveals you that the contents you’re looking for are in his dragon safe. Also, he wants you to rescue his servants.   After the cutscene, you will be in a courtyard with some Deutsche M9K ammo, a new weapon and an armor vest. Plus some guards woohoo!!! Apparently, they don’t see Mister Bond, oh well they are probably blind. Well, get rid of them, open the door, kill another bad guy, carry on and rescue the first servant. Go back in the courtyard, kill the other guard to the other side and rescue the second servant (9). Now, it’s probably the moment where you will probably be stuck and you will spin around like a record, trying to find a secret wall leading to a secret path, if you are not reading this walkthrough. Well, either you found out the solution and it’s great, or you will read what is next. In fact, you have to use the cell phone grapple in order to grab the green hook on the ceiling in the building where you saved the second servant (10). A guard will come to greet you with his Frinesi. Once he is dead, carry on and save another servant in the kitchen. Open the door to the north, outside you will encounter two guys. Kill them and open the door to the left, this is Mayhew’s bedroom. So, the contents are here as he said earlier. Kill the guards, take the armor vest if you need it and the contents behind the dragon painting (11). Now, go back outside and open the other door. You are in the library. Kill the intruders and save two servants (watch out when you go inside the room, DON’T shoot the scared servant, the other servant is on the balcony of the library). Go down, open the door to the right and rescue the last servant, then go in the other room, kill the guy, take the armor plates if you are hurt and destroy Mayhew’s PC.    Yeaaaaaahhhh, mission accomplished, we can escape the estate now!!! Well, a ninja comes and hurts Mayhew during the escape. Automatically, you will have to face him. He is really fast, he will roll sometimes to avoid your shots (yeah, it’s a ninja, that makes sense), however he doesn’t use some shurikens or a katana in order to kill you but… a Deutsche M9K or something similar to this weapon (and that doesn’t make sense, oh whatever… ). Punish this ninja with the Deutsche M9K, that’s why I said to keep this weapon because it’s a good weapon if you want to end this fight easily. Don’t forget to strafe and stay focused on him until he is dead. Mayhew, in his last moment, tells you that you have to go to the Phoenix Tower in Tokyo to find what you are looking for (yeah, he lied about the contents in his safe… well not really ha ha). Also, Bond suggests Kiko to come with him because it’s dangerous here in the estate (no really? Bond, some guys with a shotgun who wants to kill you and Mayhew, I don’t think they were here to drink a cup of tea with you). MISSION ACCOMPLISHED!!! BONUS BOND: this one is really easy to find. In the library, check the balcony: you will see the servant and the bonus Bond (12). Piece of cake!!! MISSION 3: PHOENIX TOWER This mission gave me some troubles, really. The first part of the mission is a bit hard, you MUST remain undetected until you reach your goal. Plus, you don’t have to kill the guards, so you can only use non-lethal weapons like the keychain stunner or the pen dart to stun the guards. However, they stay stunned for a short period of time so think, react and act quickly or your cover will be blown and the mission will be failed. Then, as this first part of the mission is “infiltration time”, avoid the laser beams, the cameras and the guards. Oh, one more thing: keep ONE dart for the guard in the office where the second and last computer of the floor is.  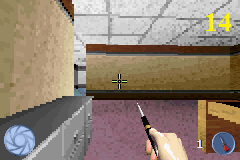  When you start, go to the left then to the right, avoid the guard or stun him and go inside the office to your left, opening the first door you will encounter. Exit the office with the other door, wait until the guard goes back to the left, stun him or avoid him and go inside the office to the left. You will find a Kowloon Mode 40 and some ammo, plus a computer to hack with the Q-Worm (13). Go back, avoid the guard if he is on his feet (or stun him) and go to the left. There’s another guard that you have to stun, to the right a camera and a guard, doing some circles. Once you have stunned him, avoid the camera taking the way to the right and hide in the room to the right (14). Wait until the guard disappears and stun the next one coming from the right before entering the office to the left. In this office, there’s a guard not so far from the computer to hack. That’s why you need a dart to stun him otherwise you will not be able to hack the PC on the desk. You can try with the keychain stunner if you have no darts left but it will be really tough. Once the way is clear, use the Q-Worm on the pc (15) and locate a vent somewhere in the room. Unlock it with your wristwatch laser (16) and go inside the vent. You are almost there, just one guard to stun at the end of the vent and the way is clear. Carry on and reach the black door.    After the cutscene, you reach the floor where, normally, the files are. You will see a giant metallic door. Yes, it’s locked, how original. Use the Q-Deck to hack the panel and, magically, the door will open (17). Stay on the platform, don’t fall off or you will be electrocuted. Now, go to the computer. Well done, it was a trap, two guys will come, greeting you with their Frinesi. Get rid of them, now you are allowed to use lethal weapons. You can use the Kowloon Mode 40 you found in one of the offices you visited earlier, it’s a bit better than the Wolfman P2K. Go to the right, kill some guys and go in the office where you will find the computer to hack with the Q-Worm (18). Now that you have the files, it’s time to leave this place. Go back where the giant door was, killing all the guys you will encounter, and go to the right.    You are on the roof now and it’s really quiet. Ok, the heliport mentioned in the cutscene earlier is to your left. The parachute is there but, unfortunately, it’s locked (19). Check the roof to find a small room with a rocket launcher, an assault rifle, some ammo, some armor plates and a panel on the wall (20). A guy will bother you, kill him quickly and use the Q-Deck on the panel to unlock the heliport. Now run as fast as possible, don’t pay attention to the helicopter and the guys, reach the heliport and take the parachute. MISSION ACCOMPLISHED!!! BONUS BOND: This bonus is above your head, in the room with the faked computer (21). Go on the computer and jump in order to grab it. MISSION 4: POWER STATION PART 1 Indeed, Drake expected our visit and sent the reception committee woooooo. Well, this mission is tough too. You come in some kind of warehouse and some guys, who still haven’t seen you, are in the same building… hmm they are probably here for some reasons. Oh well, clean the zone and go down to take an armor vest, some ammo, a sniper rifle and the jetpack test data (22). Two guards will come from downstairs, shooting at you. Kill them and carry on to the next area with the huge door in front of you.      Now, it’s time to equip the sniper rifle and be careful because this zone has so many snipers (there are eight snipers) and some of them are hidden. Move cautiously, locate the snipers and kill them. Once all the welcoming committee is dead (yes, that was the welcoming committee but you already knew it ha ha), look for a hook on a tower (23). Use the cell phone grapple to reach the platform, go to the other side of the area using the cell phone grapple with another hook located on the building to your left (24), then jump on the ledge behind you (25) and finally jump on the platform with the armor plates if you’ve been hurt (26). Carry on, take the ammo to the left before going down and kill the men in red. You will encounter the three last snipers of the zone (and the level too). One is on the kind of rusted machine, the two others are hidden to the left and to the right. Same technique: move cautiously, locate them and kill them. Now, grab the hook on the machine with your cell phone grapple (27),walk on the machine, don’t pay attention to the man in red who is bothering you and jump on the platform (where a sniper was) to go to the next area. 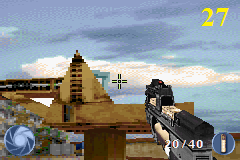    Oh, Drake is not happy and send the Red Team (the men in red in case you wonder who it is). Well, it’s understandable, we got rid of his welcoming committee outside, one bullet at a time ha ha. Now, we have to find the documents we need, which are somewhere in this building, and a way out. But, once you come in this building, some guys including a man in red are waiting for you downstairs. Before going down, to the left you will find some ammo and some armor plates. Now, take care of the guards and take the documents on the table, somewhere to the right (28). Upstairs, an armor vest is hidden behind some crates to the left, a laser is ready but you have to face a guard before using it. Now, it’s time to destroy the giant door located to the other side of the building, our way out. Oh cool, the laser is pointed in this direction (29). Well, let’s see if this can break a giant metallic door. Stay focused on the door, it will not take so long to destroy it. Now, run as fast as possible to the other side, now that there’s no more door to block the way. MISSION ACCOMPLISHED!!! BONUS BOND: In the building with the laser, the bonus is hidden behind a crate, not so far from where you start the third part, to the left (30). MISSION 5: POWER STATION PART 2 An old friend is waiting for us: Rook. Apparently, he is angry because of the wound he has on his face (thank you, James Bond). This mission is really short and not so hard. Well, except the fans during the swimming part. Yes, they are deadly and you need a good timing to go through the fans. The first one is really slow, the second is a bit faster and the last one is hellish. If your timing is not good, well the deadly fans of death will saw you in half and it will be a “game over”. This is the only tough part during the swimming part. The way is really linear, so you will not be stuck. Just move forward (with the R button) and kill all the guys you will encounter with your laser beam. At the end, four guys keep the entrance to the training facility. Either you kill them, or you skip them and reach as fast as possible the next area, it’s up to you. 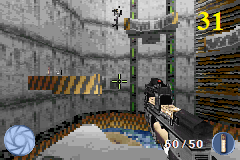 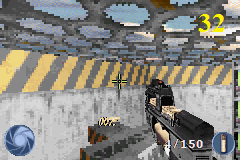 Once you reach the training facility, you will face Rook (31). He wants to murder you with his assault rifle. Reply to his shots with your assault rifle, jump from platform to platform without falling off (there’s a giant fan… yes, a deadly fan of death, big size) and take some stuff in case you need it (you will find one armor plate and some ammo on each platform). After a good amount of shots, Roof dies and you will find Kiko who has a surprise for you, with a cake and some ice cream… well, in fact, it’s not that kind of surprise, it’s a bad new indeed: she works for Drake. MISSION ACCOMPLISHED!!! BONUS BOND: The bonus is on the highest platform when you face Rook in the training facility (32). MISSION 6: PHOENIX TOWER After the cutscene, you will start in an elevator and two guys will greet you with their Frinesi. Get rid of them and grab the hook on the ceiling with the cell phone grapple to reach the platform (33). The way to the left is locked, well then, go to the right and kill some guys. Don’t forget behind an office next to the elevators an assault rifle and some ammo (34). Carry on, killing some guards on your way, until you reach a room with some armor plates, some ammo and a panel to hack with the Q-Deck (35). This will open the way to the left at the beginning of the level. Prepare to shoot when you will exit the small room because a guard is going to come. Now, go back at the beginning of the level, take all the guards down and take some armor plates if you are hurt (36). Once you reach the place where you started, avoid the shots of the helicopter and go to the other side. Kill the last guys of this part and carry on to the next area.  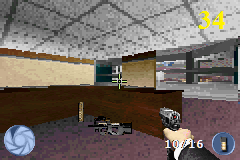 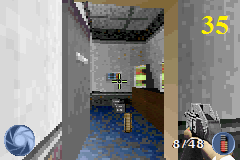  Walk a few steps and face two guards. Take the armor vest if you need it and remember the door next to this item (37): you will go back here later. Carry on, don’t shoot the scared woman, get rid of the guys and take the explosives on the ground but don’t go to the left, a turret and two guards are waiting for you and will probably kill you. Well, we have a cracked door and some explosives, what about a firework? Go back, use a charge on the door, stay away from the door and enjoy the beautiful explosion. Going this way, you will avoid the turret but you will have to kill fours guards. Take the ammo next to the turret and carry on to the left. Another guard will exit the office, kill him, avoid the shots of the turret hidden to the left and go inside the office. Take some armor plates to your right, kill two guys, carry on and leave the office. Don’t shoot the woman and kill the two guards who will come. To the left, you will encounter two guards, to the right, you will find a room with a hole. Actually, this hole leads to the emergency elevator, only way out. But two guards will prevent you to escape the floor. Ok, kill them and go to the next area if there’s no choice.  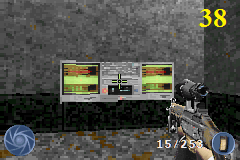  Take some armor plates and some ammo, then open the door. CAUTION: snipers zone. Locate all the four snipers and kill them with the FA1 Clarion as if you use the Silent Cover rifle (L+R buttons). Now the way is clear, you will notice a locked door to the north. Go to the right and try to go inside the security post. Two guards will come to greet you. Get rid of them and hack the monitors with the Q-Worm inside the security post (38). Yeaaaaahhh, the door is opened now but two snipers appeared and will kill you if you leave the security post. Use the FA1 Clarion to kill them and the two guys who will bother you (sorry guys, only one person at a time in the security post, please thank you). Now, carry on and take care of the four last guards who are ambushing you (two guys in front of you, the two others behind you). Now, walk in direction of the doors to end this mission and watch the cutscene. MISSION ACCOMPLISHED!!! BONUS BOND: Before the end of the mission, go to your right and locate a grey desk. The Bonus Bond is hidden behind this desk (39). MISSION 7: ISLAND CAVES In this mission, Alura will be with you. I don’t want to be sarcastic but you will not regret her presence. Well, I don’t know if we can say she is a good help or a weight during this mission, but I wondered where she had learnt to use a weapon. Plus, I think she needs some glasses or some lens because she will pass by some guards sometimes and even let some of them alive. Finally, she will say “Cover me” but the guards will shoot at you everytime. Yes, it’s going to be “rock’n’roll” and I suggest you to hide behind a wall, let her kill some guards, kill the “survivors” and walk cautiously. Enough talk about your partner, let’s start the mission. Ah yes, one more thing: do I have to tell you that you MUSTN’T kill her? 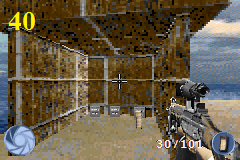 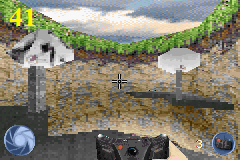 Follow Alura, killing all the guards, until you reach a cabin with some ammo and some armor plates inside (40). After the cutscene, go up, make some progress, kill some guards and reach the entrance of a cave. Take the armor vest next to the cave if you are hurt and enter the cave.   Collect the explosives to your left, you’ll need that in order to destroy the three transmitters of this area. Note that the developers were nice when we made the game: for some reasons, they put fives charges whereas there are only three transmitters to get rid of. Carry on, kill some guards and go inside the first building. Go to the left, take care of the enemies and use an explosive to destroy the first transmitter (41). Go back, make some progress, kill some guards and reach the next building. Take some armor plates if you are hurt and go to the left. Kill the guys and destroy the second transmitter. Go back, cross the bridge to the left, kill the guards and reach the next building. Take the grenade launcher, some ammo and an armor plate (42), then walk carefully on the small ledge to reach the last transmitter. Two guys will want to kill you: Put the charge on the transmitter, go back in the building and take care of the two intruders. Now, you have to do all the way back to end the mission, killing all the guards you will encounter during your escape. You will find some armor plates on your way, feel free to take them if you need them. Watch the cutscene once you reached the cave. MISSION ACCOMPLISHED!!! BONUS BOND: This one is really hard to find. Once you reached the cabin during the first part and after the cutscene, use the stairs to jump on the container to the right. You will find the bonus Bond behind the container (43). MISSION 8: ISLAND BASE Open the door, kill the two guards and carry on. Walk cautiously, killing everybody you will encounter during your progress. You will find some armor plates next to the monitors you will see here and there (44). Once you reached the control room, don’t shoot Kiko (45): go inside and watch the cutscene. Now, with the wristwatch laser, take some armor plates if you have been hurt during your progress and destroy the two panels on the wall (46). Now, go back where the locked door is (you will find it halfway, next to a monitor), take some armor plates and kill some guards while you are walking this way, woohoo!!!   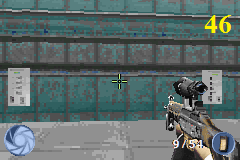 The second part of this mission is a terrible maze. Really confusing, this part will probably give you some troubles. Don’t worry, I made a map of this part in case of emergency. There it is:  You start the mission in the sector 3 (or zone 3) and you have to reach the sector 1 to the east where you will find the exit (47). You will encounter in each zone two or three guards and you will find some armor plates in a few sectors of the map. As you can see, there are different possibilities to reach the exit of this maze and the shortest path has unfortunately a sealed door (the red cross at the end of the corridor starting from the sector 2 and ending to the sector 1). Now that you have a map, it’s up to you. At the end, you will find an armor vest in front of the exit door if you are hurt.   Oh no, Kiko wants to launch Nightfire, you have to prevent her to do such a disaster. How? Well, you just have to survive. Hide in the room to the right, wait the end of the countdown and kill the four guards who wants to take you down. Do it one more time and Kiko will not be happy. MISSION ACCOMPLISHED!!! BONUS BOND: During the second part, check the zone 8. The bonus is behind the container (48). MISSION 9: SPACE STATION This is the last mission. You will have to face Drake on a space station. But the missiles are enabled and the process can’t be stop now. You have to disable the missiles launching manually, destroying the little metallic square next to each missile (49). But you have to hurry or else the missiles will reach the Earth and the mission will be failed. This is the order of the missiles launching (the "*" is the starting spot):  As you can see, one will be launched, then another one, then two in a row and finally the last two missiles. Normally, if you are fast, you could take care of the enemies who are bothering you while you are waiting for the next missile launching (yes, you can destroy the little metallic square only if the missile is ready to be launched). 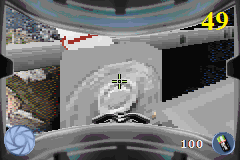 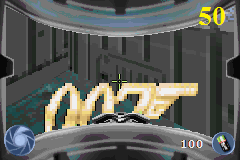 Once all the missiles are out of control, it’s not over. Drake will face you. Avoid his shots, use your laser to hit him until he is dead. MISSION ACCOMPLISHED!!! BONUS BOND: Once you disabled all the missiles, check the place where Drake was: the bonus Bond is here (50). Congratulations!!! You helped James Bond and you saved the world. This was the walkthrough of 007-Nightfire on GBA. I hope you enjoyed this walkthrough and I meet you at the next walkthrough. Ah yeah, one more thing: it’s possible to get the golden Wolfman P2K, the default weapon in each mission, a bit better than the original. How? Try to get a gold medal in a mission and you will start the next one with… the golden Wolfman P2K!!! I have to tell you that it’s really tough to get this weapon in the GBA version so… good luck, guys!!! 007- NIGHTFIRE Hello everybody and welcome to another walkthrough. Yes, last time, I revealed all the hidden remote controls in Gex64: Enter the Gecko, now it’s time to play and reveal the secrets of another game. Well, before I start this walkthrough, I have to tell you that a small update has been done in this one: the screenshots. Now, all the walkthroughs I’m going to make will have some screenshots. It will be handy because those screenshots will bring some informations about a location, something to do… How to use the screenshots? It’s easy, in the walkthrough, you will encounter some numbers written in yellow (ah yes, this thing is new too, the color code, I will talk about that after the screenshots ^^ ). Each number refers to the appropriate screenshot, which means (1) refers to the screenshot with a “1” written on it (made with Paint Now the color code, yes it was something that I missed in the last walkthrough, honestly it wasn’t a big deal, that was just the hidden remote controls, that’s it. But, in this one, color code was necessary. Well, three colors will be used: red for the parts, yellow for the screenshots and green for items. This is the color code I will use in this walkthrough and the next ones. Well, I think I said everything I have to tell you, so we’re going to start, oh yes, by the way, USE THIS WALKTHROUGH IN CASE OF EMERGENCY, BLA BLA BLA, THANK YOU!!! ^^ So, enough talk, let’s start this walkthrough, shall we? MISSION 1: AUSTRIAN CASTLE You start the mission on an arch. Go down and kill all the guards then follow the truck to reach the courtyard of the castle. You will see two guards next to a closed door (1). Kill them then go to the left. Another guard is hidden to your right and two others are in the outpost in front of you. Get rid of them, go inside the building and take the armor plates if you are hurt (2). Now, it’s up to you to reach your next goal. You can choose to stay on the walls or go down. Both of the two ways have their good and bad reasons. If you stay on the walls, the bad point is the number of guards which is amazing but the good points are the following ones: it’s the shortest way to reach your goal and you will find an armor vest halfway next to a guard. Now the way down has less guards (just two, one goes and goes back and the other is on the balcony once you went through the arch, notice that the last guard can see you if you take the way up too), some armor plates in case of emergency but all the guards on the walls will certainly see you (unless you kill them before going down) and there are some lights. So, if I were you, I would stay on the walls but I don’t force you after all. Reach the next door to go inside the castle (3). After the cutscene, you are in the library and you DON’T have to be detected. Go the left when you reach the intersection, don’t go to the right, two bad guys are here and don’t want to be bothered I think. Just unlock the door to the left with your wristwatch laser to go to the meeting room (4) and watch the cutscene. You will learn more about the project Nightfire before Zoe’s capture. Now take care of the guards in the meeting room, you will find three armor plates if you go down, next to the door (5). Carry on to the left and kill another guard. Downstairs, you will encounter three guards and Zoe. Don’t kill her, just the three bad guys, jump on the crate, take the suitcase (6) and go inside the cab, where Zoe is waiting for you. Let her kill the guards, take the stuff to your right and use your new weapon to greet the helicopter who wants to stop you. Four rockets will turn this flying machine into a burning wreck (CAUTION: rockets are deadly and can kill you and Zoe so stay focused on the helicopter, don’t be so close and shoot). MISSION ACCOMPLISHED!!! BONUS BOND: In each level, the developers have hidden a bonus Bond (it’s the 007 logo). If you find it, you will earn a good amount of points at the end of the mission, really handy to get at least the bronze medal and unlock the next mission (yeah, you need at least the bronze medal to make some progress in the story, that stinks, I know but it’s like that ^^ ). Well, the bonus Bond in this mission is hidden behind a glass. Once you reach the meeting room, don’t go down, to the left you will see a glass (7). Break it: oh a secret path!!! Check this path, it’s a shortcut which leads to the cab station and the bonus Bond is hidden on the roof, to the right. MISSION 2: MAYHEW’S ESTATE After the cutscene, kill the two guards who bothered your meeting and follow Mayhew. To the left, you will find a Deutsche M9K with some ammo (8). But it wouldn't’t be funny if it was so easy to exit the room, two guards come and want to kill you. Don’t use the Deutsche M9K right now, keep it preciously for later in this mission. Get rid of them with another weapon and open the other door in front of you. More guards yeaaaaahhh!!! Carry on, killing all the guys you will encounter, until you reach a safe place. Mayhew wants you to destroy his PC, it contents some confidential informations and reveals you that the contents you’re looking for are in his dragon safe. Also, he wants you to rescue his servants. After the cutscene, you will be in a courtyard with some Deutsche M9K ammo, a new weapon and an armor vest. Plus some guards woohoo!!! Apparently, they don’t see Mister Bond, oh well they are probably blind. Well, get rid of them, open the door, kill another bad guy, carry on and rescue the first servant. Go back in the courtyard, kill the other guard to the other side and rescue the second servant (9). Now, it’s probably the moment where you will probably be stuck and you will spin around like a record, trying to find a secret wall leading to a secret path, if you are not reading this walkthrough. Well, either you found out the solution and it’s great, or you will read what is next. In fact, you have to use the cell phone grapple in order to grab the green hook on the ceiling in the building where you saved the second servant (10). A guard will come to greet you with his Frinesi. Once he is dead, carry on and save another servant in the kitchen. Open the door to the north, outside you will encounter two guys. Kill them and open the door to the left, this is Mayhew’s bedroom. So, the contents are here as he said earlier. Kill the guards, take the armor vest if you need it and the contents behind the dragon painting (11). Now, go back outside and open the other door. You are in the library. Kill the intruders and save two servants (watch out when you go inside the room, DON’T shoot the scared servant, the other servant is on the balcony of the library). Go down, open the door to the right and rescue the last servant, then go in the other room, kill the guy, take the armor plates if you are hurt and destroy Mayhew’s PC. Yeaaaaaahhhh, mission accomplished, we can escape the estate now!!! Well, a ninja comes and hurts Mayhew during the escape. Automatically, you will have to face him. He is really fast, he will roll sometimes to avoid your shots (yeah, it’s a ninja, that makes sense), however he doesn’t use some shurikens or a katana in order to kill you but… a Deutsche M9K or something similar to this weapon (and that doesn’t make sense, oh whatever… ). Punish this ninja with the Deutsche M9K, that’s why I said to keep this weapon because it’s a good weapon if you want to end this fight easily. Don’t forget to strafe and stay focused on him until he is dead. Mayhew, in his last moment, tells you that you have to go to the Phoenix Tower in Tokyo to find what you are looking for (yeah, he lied about the contents in his safe… well not really ha ha). Also, Bond suggests Kiko to come with him because it’s dangerous here in the estate (no really? Bond, some guys with a shotgun who wants to kill you and Mayhew, I don’t think they were here to drink a cup of tea with you). MISSION ACCOMPLISHED!!! BONUS BOND: this one is really easy to find. In the library, check the balcony: you will see the servant and the bonus Bond (12). Piece of cake!!! MISSION 3: PHOENIX TOWER This mission gave me some troubles, really. The first part of the mission is a bit hard, you MUST remain undetected until you reach your goal. Plus, you don’t have to kill the guards, so you can only use non-lethal weapons like the keychain stunner or the pen dart to stun the guards. However, they stay stunned for a short period of time so think, react and act quickly or your cover will be blown and the mission will be failed. Then, as this first part of the mission is “infiltration time”, avoid the laser beams, the cameras and the guards. Oh, one more thing: keep ONE dart for the guard in the office where the second and last computer of the floor is. When you start, go to the left then to the right, avoid the guard or stun him and go inside the office to your left, opening the first door you will encounter. Exit the office with the other door, wait until the guard goes back to the left, stun him or avoid him and go inside the office to the left. You will find a Kowloon Mode 40 and some ammo, plus a computer to hack with the Q-Worm (13). Go back, avoid the guard if he is on his feet (or stun him) and go to the left. There’s another guard that you have to stun, to the right a camera and a guard, doing some circles. Once you have stunned him, avoid the camera taking the way to the right and hide in the room to the right (14). Wait until the guard disappears and stun the next one coming from the right before entering the office to the left. In this office, there’s a guard not so far from the computer to hack. That’s why you need a dart to stun him otherwise you will not be able to hack the PC on the desk. You can try with the keychain stunner if you have no darts left but it will be really tough. Once the way is clear, use the Q-Worm on the pc (15) and locate a vent somewhere in the room. Unlock it with your wristwatch laser (16) and go inside the vent. You are almost there, just one guard to stun at the end of the vent and the way is clear. Carry on and reach the black door. After the cutscene, you reach the floor where, normally, the files are. You will see a giant metallic door. Yes, it’s locked, how original. Use the Q-Deck to hack the panel and, magically, the door will open (17). Stay on the platform, don’t fall off or you will be electrocuted. Now, go to the computer. Well done, it was a trap, two guys will come, greeting you with their Frinesi. Get rid of them, now you are allowed to use lethal weapons. You can use the Kowloon Mode 40 you found in one of the offices you visited earlier, it’s a bit better than the Wolfman P2K. Go to the right, kill some guys and go in the office where you will find the computer to hack with the Q-Worm (18). Now that you have the files, it’s time to leave this place. Go back where the giant door was, killing all the guys you will encounter, and go to the right. You are on the roof now and it’s really quiet. Ok, the heliport mentioned in the cutscene earlier is to your left. The parachute is there but, unfortunately, it’s locked (19). Check the roof to find a small room with a rocket launcher, an assault rifle, some ammo, some armor plates and a panel on the wall (20). A guy will bother you, kill him quickly and use the Q-Deck on the panel to unlock the heliport. Now run as fast as possible, don’t pay attention to the helicopter and the guys, reach the heliport and take the parachute. MISSION ACCOMPLISHED!!! BONUS BOND: This bonus is above your head, in the room with the faked computer (21). Go on the computer and jump in order to grab it. MISSION 4: POWER STATION PART 1 Indeed, Drake expected our visit and sent the reception committee woooooo. Well, this mission is tough too. You come in some kind of warehouse and some guys, who still haven’t seen you, are in the same building… hmm they are probably here for some reasons. Oh well, clean the zone and go down to take an armor vest, some ammo, a sniper rifle and the jetpack test data (22). Two guards will come from downstairs, shooting at you. Kill them and carry on to the next area with the huge door in front of you. Now, it’s time to equip the sniper rifle and be careful because this zone has so many snipers (there are eight snipers) and some of them are hidden. Move cautiously, locate the snipers and kill them. Once all the welcoming committee is dead (yes, that was the welcoming committee but you already knew it ha ha), look for a hook on a tower (23). Use the cell phone grapple to reach the platform, go to the other side of the area using the cell phone grapple with another hook located on the building to your left (24), then jump on the ledge behind you (25) and finally jump on the platform with the armor plates if you’ve been hurt (26). Carry on, take the ammo to the left before going down and kill the men in red. You will encounter the three last snipers of the zone (and the level too). One is on the kind of rusted machine, the two others are hidden to the left and to the right. Same technique: move cautiously, locate them and kill them. Now, grab the hook on the machine with your cell phone grapple (27),walk on the machine, don’t pay attention to the man in red who is bothering you and jump on the platform (where a sniper was) to go to the next area. Oh, Drake is not happy and send the Red Team (the men in red in case you wonder who it is). Well, it’s understandable, we got rid of his welcoming committee outside, one bullet at a time ha ha. Now, we have to find the documents we need, which are somewhere in this building, and a way out. But, once you come in this building, some guys including a man in red are waiting for you downstairs. Before going down, to the left you will find some ammo and some armor plates. Now, take care of the guards and take the documents on the table, somewhere to the right (28). Upstairs, an armor vest is hidden behind some crates to the left, a laser is ready but you have to face a guard before using it. Now, it’s time to destroy the giant door located to the other side of the building, our way out. Oh cool, the laser is pointed in this direction (29). Well, let’s see if this can break a giant metallic door. Stay focused on the door, it will not take so long to destroy it. Now, run as fast as possible to the other side, now that there’s no more door to block the way. MISSION ACCOMPLISHED!!! BONUS BOND: In the building with the laser, the bonus is hidden behind a crate, not so far from where you start the third part, to the left (30). MISSION 5: POWER STATION PART 2 An old friend is waiting for us: Rook. Apparently, he is angry because of the wound he has on his face (thank you, James Bond). This mission is really short and not so hard. Well, except the fans during the swimming part. Yes, they are deadly and you need a good timing to go through the fans. The first one is really slow, the second is a bit faster and the last one is hellish. If your timing is not good, well the deadly fans of death will saw you in half and it will be a “game over”. This is the only tough part during the swimming part. The way is really linear, so you will not be stuck. Just move forward (with the R button) and kill all the guys you will encounter with your laser beam. At the end, four guys keep the entrance to the training facility. Either you kill them, or you skip them and reach as fast as possible the next area, it’s up to you. Once you reach the training facility, you will face Rook (31). He wants to murder you with his assault rifle. Reply to his shots with your assault rifle, jump from platform to platform without falling off (there’s a giant fan… yes, a deadly fan of death, big size) and take some stuff in case you need it (you will find one armor plate and some ammo on each platform). After a good amount of shots, Roof dies and you will find Kiko who has a surprise for you, with a cake and some ice cream… well, in fact, it’s not that kind of surprise, it’s a bad new indeed: she works for Drake. MISSION ACCOMPLISHED!!! BONUS BOND: The bonus is on the highest platform when you face Rook in the training facility (32). MISSION 6: PHOENIX TOWER After the cutscene, you will start in an elevator and two guys will greet you with their Frinesi. Get rid of them and grab the hook on the ceiling with the cell phone grapple to reach the platform (33). The way to the left is locked, well then, go to the right and kill some guys. Don’t forget behind an office next to the elevators an assault rifle and some ammo (34). Carry on, killing some guards on your way, until you reach a room with some armor plates, some ammo and a panel to hack with the Q-Deck (35). This will open the way to the left at the beginning of the level. Prepare to shoot when you will exit the small room because a guard is going to come. Now, go back at the beginning of the level, take all the guards down and take some armor plates if you are hurt (36). Once you reach the place where you started, avoid the shots of the helicopter and go to the other side. Kill the last guys of this part and carry on to the next area. Walk a few steps and face two guards. Take the armor vest if you need it and remember the door next to this item (37): you will go back here later. Carry on, don’t shoot the scared woman, get rid of the guys and take the explosives on the ground but don’t go to the left, a turret and two guards are waiting for you and will probably kill you. Well, we have a cracked door and some explosives, what about a firework? Go back, use a charge on the door, stay away from the door and enjoy the beautiful explosion. Going this way, you will avoid the turret but you will have to kill fours guards. Take the ammo next to the turret and carry on to the left. Another guard will exit the office, kill him, avoid the shots of the turret hidden to the left and go inside the office. Take some armor plates to your right, kill two guys, carry on and leave the office. Don’t shoot the woman and kill the two guards who will come. To the left, you will encounter two guards, to the right, you will find a room with a hole. Actually, this hole leads to the emergency elevator, only way out. But two guards will prevent you to escape the floor. Ok, kill them and go to the next area if there’s no choice. Take some armor plates and some ammo, then open the door. CAUTION: snipers zone. Locate all the four snipers and kill them with the FA1 Clarion as if you use the Silent Cover rifle (L+R buttons). Now the way is clear, you will notice a locked door to the north. Go to the right and try to go inside the security post. Two guards will come to greet you. Get rid of them and hack the monitors with the Q-Worm inside the security post (38). Yeaaaaahhh, the door is opened now but two snipers appeared and will kill you if you leave the security post. Use the FA1 Clarion to kill them and the two guys who will bother you (sorry guys, only one person at a time in the security post, please thank you). Now, carry on and take care of the four last guards who are ambushing you (two guys in front of you, the two others behind you). Now, walk in direction of the doors to end this mission and watch the cutscene. MISSION ACCOMPLISHED!!! BONUS BOND: Before the end of the mission, go to your right and locate a grey desk. The Bonus Bond is hidden behind this desk (39). MISSION 7: ISLAND CAVES In this mission, Alura will be with you. I don’t want to be sarcastic but you will not regret her presence. Well, I don’t know if we can say she is a good help or a weight during this mission, but I wondered where she had learnt to use a weapon. Plus, I think she needs some glasses or some lens because she will pass by some guards sometimes and even let some of them alive. Finally, she will say “Cover me” but the guards will shoot at you everytime. Yes, it’s going to be “rock’n’roll” and I suggest you to hide behind a wall, let her kill some guards, kill the “survivors” and walk cautiously. Enough talk about your partner, let’s start the mission. Ah yes, one more thing: do I have to tell you that you MUSTN’T kill her? Follow Alura, killing all the guards, until you reach a cabin with some ammo and some armor plates inside (40). After the cutscene, go up, make some progress, kill some guards and reach the entrance of a cave. Take the armor vest next to the cave if you are hurt and enter the cave. Collect the explosives to your left, you’ll need that in order to destroy the three transmitters of this area. Note that the developers were nice when we made the game: for some reasons, they put fives charges whereas there are only three transmitters to get rid of. Carry on, kill some guards and go inside the first building. Go to the left, take care of the enemies and use an explosive to destroy the first transmitter (41). Go back, make some progress, kill some guards and reach the next building. Take some armor plates if you are hurt and go to the left. Kill the guys and destroy the second transmitter. Go back, cross the bridge to the left, kill the guards and reach the next building. Take the grenade launcher, some ammo and an armor plate (42), then walk carefully on the small ledge to reach the last transmitter. Two guys will want to kill you: Put the charge on the transmitter, go back in the building and take care of the two intruders. Now, you have to do all the way back to end the mission, killing all the guards you will encounter during your escape. You will find some armor plates on your way, feel free to take them if you need them. Watch the cutscene once you reached the cave. MISSION ACCOMPLISHED!!! BONUS BOND: This one is really hard to find. Once you reached the cabin during the first part and after the cutscene, use the stairs to jump on the container to the right. You will find the bonus Bond behind the container (43). MISSION 8: ISLAND BASE Open the door, kill the two guards and carry on. Walk cautiously, killing everybody you will encounter during your progress. You will find some armor plates next to the monitors you will see here and there (44). Once you reached the control room, don’t shoot Kiko (45): go inside and watch the cutscene. Now, with the wristwatch laser, take some armor plates if you have been hurt during your progress and destroy the two panels on the wall (46). Now, go back where the locked door is (you will find it halfway, next to a monitor), take some armor plates and kill some guards while you are walking this way, woohoo!!! The second part of this mission is a terrible maze. Really confusing, this part will probably give you some troubles. Don’t worry, I made a map of this part in case of emergency. There it is: You start the mission in the sector 3 (or zone 3) and you have to reach the sector 1 to the east where you will find the exit (47). You will encounter in each zone two or three guards and you will find some armor plates in a few sectors of the map. As you can see, there are different possibilities to reach the exit of this maze and the shortest path has unfortunately a sealed door (the red cross at the end of the corridor starting from the sector 2 and ending to the sector 1). Now that you have a map, it’s up to you. At the end, you will find an armor vest in front of the exit door if you are hurt. Oh no, Kiko wants to launch Nightfire, you have to prevent her to do such a disaster. How? Well, you just have to survive. Hide in the room to the right, wait the end of the countdown and kill the four guards who wants to take you down. Do it one more time and Kiko will not be happy. MISSION ACCOMPLISHED!!! BONUS BOND: During the second part, check the zone 8. The bonus is behind the container (48). MISSION 9: SPACE STATION This is the last mission. You will have to face Drake on a space station. But the missiles are enabled and the process can’t be stop now. You have to disable the missiles launching manually, destroying the little metallic square next to each missile (49). But you have to hurry or else the missiles will reach the Earth and the mission will be failed. This is the order of the missiles launching (the "*" is the starting spot): As you can see, one will be launched, then another one, then two in a row and finally the last two missiles. Normally, if you are fast, you could take care of the enemies who are bothering you while you are waiting for the next missile launching (yes, you can destroy the little metallic square only if the missile is ready to be launched). Once all the missiles are out of control, it’s not over. Drake will face you. Avoid his shots, use your laser to hit him until he is dead. MISSION ACCOMPLISHED!!! BONUS BOND: Once you disabled all the missiles, check the place where Drake was: the bonus Bond is here (50). Congratulations!!! You helped James Bond and you saved the world. This was the walkthrough of 007-Nightfire on GBA. I hope you enjoyed this walkthrough and I meet you at the next walkthrough. Ah yeah, one more thing: it’s possible to get the golden Wolfman P2K, the default weapon in each mission, a bit better than the original. How? Try to get a gold medal in a mission and you will start the next one with… the golden Wolfman P2K!!! I have to tell you that it’s really tough to get this weapon in the GBA version so… good luck, guys!!! |
Vizzed Elite
Affected by 'Laziness Syndrome'
Registered: 10-21-11
Location: France
Last Post: 2444 days
Last Active: 1618 days
| Games have secrets, I have my eagle gaze. |
Affected by 'Laziness Syndrome'
Registered: 10-21-11
Location: France
Last Post: 2444 days
Last Active: 1618 days
(edited by laian on 03-02-12 11:27 AM) Post Rating: 1 Liked By: Davideo7,
12-19-11 04:40 PM
 Davideo7 is Online
| ID: 516817 | 46 Words
Davideo7 is Online
| ID: 516817 | 46 Words
 Davideo7 is Online
| ID: 516817 | 46 Words
Davideo7
Level: 356

POSTS: 19857/45600
POST EXP: 3520098
LVL EXP: 853457243
CP: 197353.4
VIZ: 127696209

POSTS: 19857/45600
POST EXP: 3520098
LVL EXP: 853457243
CP: 197353.4
VIZ: 127696209
Likes: 0 Dislikes: 0
This is a very thorough and lengthy walkthrough, I love it! I only skimmed through it but it was fun to look over and the screenshots made it even better. I wish more people on the site could do walkthroughs, I look forward to seeing more! |
The Owner
Owner, Developer, Advertiser, etc
Affected by 'Laziness Syndrome'
Registered: 12-06-04
Location: Wisconsin
Last Post: 5 days
Last Active: 1 min.
Owner, Developer, Advertiser, etc
| Founder, Mod, Investor |
Affected by 'Laziness Syndrome'
Registered: 12-06-04
Location: Wisconsin
Last Post: 5 days
Last Active: 1 min.
12-19-11 04:49 PM
rcarter2 is Offline
| ID: 516828 | 72 Words
| ID: 516828 | 72 Words
rcarter2
Level: 164

POSTS: 2078/8463
POST EXP: 758515
LVL EXP: 56919009
CP: 33704.4
VIZ: 1690746

POSTS: 2078/8463
POST EXP: 758515
LVL EXP: 56919009
CP: 33704.4
VIZ: 1690746
Likes: 0 Dislikes: 0
Davideo7 : Well, you said that part of the idea with the future VGR was to make this site one step closer to being a site where you could get all of your video game information. These will definitely be a good contribution to doing so. Maybe it might be worth making a staff position for this. Like reviewers make reviews, you can have a load of people who make detailed walkthroughs. |
Vizzed Elite
Affected by 'Laziness Syndrome'
Registered: 05-01-11
Location: Kansas
Last Post: 3069 days
Last Active: 364 days
| Dominating RGR Competition Hall of Fame Table! |
Affected by 'Laziness Syndrome'
Registered: 05-01-11
Location: Kansas
Last Post: 3069 days
Last Active: 364 days
12-19-11 04:52 PM
Davideo7 is Online
| ID: 516834 | 68 Words
Davideo7 is Online
| ID: 516834 | 68 Words
Davideo7
Level: 356
POSTS: 19858/45600
POST EXP: 3520098
LVL EXP: 853457243
CP: 197353.4
VIZ: 127696209
POSTS: 19858/45600
POST EXP: 3520098
LVL EXP: 853457243
CP: 197353.4
VIZ: 127696209
Likes: 0 Dislikes: 0
rcarter2 : That actually is his position, to make walkthroughs. I've never made that position available in a staff application though because I've never expected anyone would be capable (or have the time) to make such a big and detailed walkthrough like the one laian made. He got the position because he made a nice one while he wasn't staff and so I made that his staff position. |
The Owner
Owner, Developer, Advertiser, etc
Affected by 'Laziness Syndrome'
Registered: 12-06-04
Location: Wisconsin
Last Post: 5 days
Last Active: 1 min.
Owner, Developer, Advertiser, etc
| Founder, Mod, Investor |
Affected by 'Laziness Syndrome'
Registered: 12-06-04
Location: Wisconsin
Last Post: 5 days
Last Active: 1 min.
12-19-11 04:54 PM
rcarter2 is Offline
| ID: 516836 | 33 Words
| ID: 516836 | 33 Words
rcarter2
Level: 164
POSTS: 2081/8463
POST EXP: 758515
LVL EXP: 56919009
CP: 33704.4
VIZ: 1690746
POSTS: 2081/8463
POST EXP: 758515
LVL EXP: 56919009
CP: 33704.4
VIZ: 1690746
Likes: 0 Dislikes: 0
Davideo7 : I see. If you did make that available via application, the application process would probably have to be pretty brutal go go through to verify that it is all good quality. |
Vizzed Elite
Affected by 'Laziness Syndrome'
Registered: 05-01-11
Location: Kansas
Last Post: 3069 days
Last Active: 364 days
| Dominating RGR Competition Hall of Fame Table! |
Affected by 'Laziness Syndrome'
Registered: 05-01-11
Location: Kansas
Last Post: 3069 days
Last Active: 364 days
12-19-11 04:54 PM
 Someone70 is Offline
| ID: 516837 | 29 Words
Someone70 is Offline
| ID: 516837 | 29 Words
 Someone70 is Offline
| ID: 516837 | 29 Words
Someone70
Level: 161

POSTS: 5996/8111
POST EXP: 305427
LVL EXP: 53245510
CP: 5028.4
VIZ: 29251

POSTS: 5996/8111
POST EXP: 305427
LVL EXP: 53245510
CP: 5028.4
VIZ: 29251
Likes: 0 Dislikes: 0
Wow, that is indeed a very detailed walkthrough. It will definitely help someone that's struggling on this game.
Which game are you thinking about making a walkthrough for next? Which game are you thinking about making a walkthrough for next? |
Vizzed Elite
Affected by 'Laziness Syndrome'
Registered: 06-02-11
Last Post: 3432 days
Last Active: 3343 days
| #1 Touhou fan!| Nitori Kawashiro |
Affected by 'Laziness Syndrome'
Registered: 06-02-11
Last Post: 3432 days
Last Active: 3343 days
12-19-11 04:57 PM
Davideo7 is Online
| ID: 516843 | 14 Words
Davideo7 is Online
| ID: 516843 | 14 Words
Davideo7
Level: 356
POSTS: 19860/45600
POST EXP: 3520098
LVL EXP: 853457243
CP: 197353.4
VIZ: 127696209
POSTS: 19860/45600
POST EXP: 3520098
LVL EXP: 853457243
CP: 197353.4
VIZ: 127696209
Likes: 0 Dislikes: 0
The Owner
Owner, Developer, Advertiser, etc
Affected by 'Laziness Syndrome'
Registered: 12-06-04
Location: Wisconsin
Last Post: 5 days
Last Active: 1 min.
Owner, Developer, Advertiser, etc
| Founder, Mod, Investor |
Affected by 'Laziness Syndrome'
Registered: 12-06-04
Location: Wisconsin
Last Post: 5 days
Last Active: 1 min.
12-19-11 04:59 PM
Laian is Offline
| ID: 516846 | 57 Words
| ID: 516846 | 57 Words
Laian
Level: 92
POSTS: 379/2232
POST EXP: 457173
LVL EXP: 7583924
CP: 23733.5
VIZ: 3570463
POSTS: 379/2232
POST EXP: 457173
LVL EXP: 7583924
CP: 23733.5
VIZ: 3570463
Likes: 0 Dislikes: 0
Davideo7 : rcarter2: Someone70: Thanks everyone. I really appreciate that. Honestly, I thought it will not be ready in time because of the issue with the planned game but I finally made it ha ha Next walkthrough... yes I will play a famous game ( I don't know why but I was expecting that XD ) rcarter2: Someone70: Thanks everyone. I really appreciate that. Honestly, I thought it will not be ready in time because of the issue with the planned game but I finally made it ha ha Next walkthrough... yes I will play a famous game ( I don't know why but I was expecting that XD ) |
Vizzed Elite
Affected by 'Laziness Syndrome'
Registered: 10-21-11
Location: France
Last Post: 2444 days
Last Active: 1618 days
| Games have secrets, I have my eagle gaze. |
Affected by 'Laziness Syndrome'
Registered: 10-21-11
Location: France
Last Post: 2444 days
Last Active: 1618 days
(edited by laian on 12-23-11 10:25 AM)
12-19-11 04:59 PM
Someone70 is Offline
| ID: 516847 | 18 Words
Someone70 is Offline
| ID: 516847 | 18 Words
Someone70
Level: 161
POSTS: 5999/8111
POST EXP: 305427
LVL EXP: 53245510
CP: 5028.4
VIZ: 29251
POSTS: 5999/8111
POST EXP: 305427
LVL EXP: 53245510
CP: 5028.4
VIZ: 29251
Likes: 0 Dislikes: 0
What about a Legend of Zelda game? Something like that would be very effective for writing walkthroughs for. |
Vizzed Elite
Affected by 'Laziness Syndrome'
Registered: 06-02-11
Last Post: 3432 days
Last Active: 3343 days
| #1 Touhou fan!| Nitori Kawashiro |
Affected by 'Laziness Syndrome'
Registered: 06-02-11
Last Post: 3432 days
Last Active: 3343 days
12-19-11 05:01 PM
Davideo7 is Online
| ID: 516851 | 25 Words
Davideo7 is Online
| ID: 516851 | 25 Words
Davideo7
Level: 356
POSTS: 19861/45600
POST EXP: 3520098
LVL EXP: 853457243
CP: 197353.4
VIZ: 127696209
POSTS: 19861/45600
POST EXP: 3520098
LVL EXP: 853457243
CP: 197353.4
VIZ: 127696209
Likes: 0 Dislikes: 0
The Owner
Owner, Developer, Advertiser, etc
Affected by 'Laziness Syndrome'
Registered: 12-06-04
Location: Wisconsin
Last Post: 5 days
Last Active: 1 min.
Owner, Developer, Advertiser, etc
| Founder, Mod, Investor |
Affected by 'Laziness Syndrome'
Registered: 12-06-04
Location: Wisconsin
Last Post: 5 days
Last Active: 1 min.
12-19-11 05:01 PM
rcarter2 is Offline
| ID: 516854 | 65 Words
| ID: 516854 | 65 Words
rcarter2
Level: 164
POSTS: 2084/8463
POST EXP: 758515
LVL EXP: 56919009
CP: 33704.4
VIZ: 1690746
POSTS: 2084/8463
POST EXP: 758515
LVL EXP: 56919009
CP: 33704.4
VIZ: 1690746
Likes: 0 Dislikes: 0
This particular job is quite different from everyone the other positions. I think this is the only position that would require you to play through the entire game before you can actually finish. Davideo7 : In the future, will there be a function for walkthroughs like the function for reviews, where staff can assign a walkthrough to be the man one on a game's page? Davideo7 : In the future, will there be a function for walkthroughs like the function for reviews, where staff can assign a walkthrough to be the man one on a game's page? |
Vizzed Elite
Affected by 'Laziness Syndrome'
Registered: 05-01-11
Location: Kansas
Last Post: 3069 days
Last Active: 364 days
| Dominating RGR Competition Hall of Fame Table! |
Affected by 'Laziness Syndrome'
Registered: 05-01-11
Location: Kansas
Last Post: 3069 days
Last Active: 364 days
12-19-11 05:03 PM
Davideo7 is Online
| ID: 516856 | 21 Words
Davideo7 is Online
| ID: 516856 | 21 Words
Davideo7
Level: 356
POSTS: 19862/45600
POST EXP: 3520098
LVL EXP: 853457243
CP: 197353.4
VIZ: 127696209
POSTS: 19862/45600
POST EXP: 3520098
LVL EXP: 853457243
CP: 197353.4
VIZ: 127696209
Likes: 0 Dislikes: 0
The Owner
Owner, Developer, Advertiser, etc
Affected by 'Laziness Syndrome'
Registered: 12-06-04
Location: Wisconsin
Last Post: 5 days
Last Active: 1 min.
Owner, Developer, Advertiser, etc
| Founder, Mod, Investor |
Affected by 'Laziness Syndrome'
Registered: 12-06-04
Location: Wisconsin
Last Post: 5 days
Last Active: 1 min.
12-19-11 05:06 PM
rcarter2 is Offline
| ID: 516864 | 22 Words
| ID: 516864 | 22 Words
rcarter2
Level: 164
POSTS: 2086/8463
POST EXP: 758515
LVL EXP: 56919009
CP: 33704.4
VIZ: 1690746
POSTS: 2086/8463
POST EXP: 758515
LVL EXP: 56919009
CP: 33704.4
VIZ: 1690746
Likes: 0 Dislikes: 0
Vizzed Elite
Affected by 'Laziness Syndrome'
Registered: 05-01-11
Location: Kansas
Last Post: 3069 days
Last Active: 364 days
| Dominating RGR Competition Hall of Fame Table! |
Affected by 'Laziness Syndrome'
Registered: 05-01-11
Location: Kansas
Last Post: 3069 days
Last Active: 364 days
12-19-11 05:10 PM
Laian is Offline
| ID: 516873 | 56 Words
| ID: 516873 | 56 Words
Laian
Level: 92
POSTS: 380/2232
POST EXP: 457173
LVL EXP: 7583924
CP: 23733.5
VIZ: 3570463
POSTS: 380/2232
POST EXP: 457173
LVL EXP: 7583924
CP: 23733.5
VIZ: 3570463
Likes: 0 Dislikes: 0
Davideo7 : rcarter2 : Someone70 : WOOHOO!!! Lot of replies already?! 1) sorry I failed with my summoning. 2) I used Microsoft Works to type and organize the walkthrough (plus some pieces of paper ^^ ) 3) A Legend of Zelda walkthrough? Why not? It's a good idea 4) I agree with this idea rcarter2 : Someone70 : WOOHOO!!! Lot of replies already?! 1) sorry I failed with my summoning. 2) I used Microsoft Works to type and organize the walkthrough (plus some pieces of paper ^^ ) 3) A Legend of Zelda walkthrough? Why not? It's a good idea 4) I agree with this idea |
Vizzed Elite
Affected by 'Laziness Syndrome'
Registered: 10-21-11
Location: France
Last Post: 2444 days
Last Active: 1618 days
| Games have secrets, I have my eagle gaze. |
Affected by 'Laziness Syndrome'
Registered: 10-21-11
Location: France
Last Post: 2444 days
Last Active: 1618 days
(edited by laian on 12-19-11 05:47 PM)
12-19-11 06:26 PM
Davideo7 is Online
| ID: 516911 | 70 Words
Davideo7 is Online
| ID: 516911 | 70 Words
Davideo7
Level: 356
POSTS: 19864/45600
POST EXP: 3520098
LVL EXP: 853457243
CP: 197353.4
VIZ: 127696209
POSTS: 19864/45600
POST EXP: 3520098
LVL EXP: 853457243
CP: 197353.4
VIZ: 127696209
Likes: 0 Dislikes: 0
laian : Ok good, I just wanted to make sure you were typing it up somewhere safe in something that you can save often. Hopefully Legend of Zelda has no problems, maybe you could look through the comments to see if anyone has reported any problems with it, I'd hate to have the same thing happen with your last walkthrough where the game didn't work after a certain point Hopefully Legend of Zelda has no problems, maybe you could look through the comments to see if anyone has reported any problems with it, I'd hate to have the same thing happen with your last walkthrough where the game didn't work after a certain point |
The Owner
Owner, Developer, Advertiser, etc
Affected by 'Laziness Syndrome'
Registered: 12-06-04
Location: Wisconsin
Last Post: 5 days
Last Active: 1 min.
Owner, Developer, Advertiser, etc
| Founder, Mod, Investor |
Affected by 'Laziness Syndrome'
Registered: 12-06-04
Location: Wisconsin
Last Post: 5 days
Last Active: 1 min.
12-19-11 06:38 PM
rcarter2 is Offline
| ID: 516924 | 44 Words
| ID: 516924 | 44 Words
rcarter2
Level: 164
POSTS: 2099/8463
POST EXP: 758515
LVL EXP: 56919009
CP: 33704.4
VIZ: 1690746
POSTS: 2099/8463
POST EXP: 758515
LVL EXP: 56919009
CP: 33704.4
VIZ: 1690746
Likes: 0 Dislikes: 0
I just noticed something. If yo continue to make so many screenshots for your walkthroughs, you will eventually pass me in screenshots |
Vizzed Elite
Affected by 'Laziness Syndrome'
Registered: 05-01-11
Location: Kansas
Last Post: 3069 days
Last Active: 364 days
| Dominating RGR Competition Hall of Fame Table! |
Affected by 'Laziness Syndrome'
Registered: 05-01-11
Location: Kansas
Last Post: 3069 days
Last Active: 364 days
12-19-11 06:58 PM
Laian is Offline
| ID: 516941 | 52 Words
| ID: 516941 | 52 Words
Laian
Level: 92
POSTS: 383/2232
POST EXP: 457173
LVL EXP: 7583924
CP: 23733.5
VIZ: 3570463
POSTS: 383/2232
POST EXP: 457173
LVL EXP: 7583924
CP: 23733.5
VIZ: 3570463
Likes: 0 Dislikes: 0
Vizzed Elite
Affected by 'Laziness Syndrome'
Registered: 10-21-11
Location: France
Last Post: 2444 days
Last Active: 1618 days
| Games have secrets, I have my eagle gaze. |
Affected by 'Laziness Syndrome'
Registered: 10-21-11
Location: France
Last Post: 2444 days
Last Active: 1618 days
12-19-11 07:06 PM
rcarter2 is Offline
| ID: 516945 | 67 Words
| ID: 516945 | 67 Words
rcarter2
Level: 164
POSTS: 2107/8463
POST EXP: 758515
LVL EXP: 56919009
CP: 33704.4
VIZ: 1690746
POSTS: 2107/8463
POST EXP: 758515
LVL EXP: 56919009
CP: 33704.4
VIZ: 1690746
Likes: 0 Dislikes: 0
haha. I will. Like I said, after I finish assigning the ones I already made during that competition, I will be searching through all the systems games looking for those with no screenshots assigned. I will make screenshots for them until the site is complete. I have seen a lot that still have none. I estimate I will have at least 3,500 by the end of it. |
Vizzed Elite
Affected by 'Laziness Syndrome'
Registered: 05-01-11
Location: Kansas
Last Post: 3069 days
Last Active: 364 days
| Dominating RGR Competition Hall of Fame Table! |
Affected by 'Laziness Syndrome'
Registered: 05-01-11
Location: Kansas
Last Post: 3069 days
Last Active: 364 days
12-19-11 07:24 PM
Laian is Offline
| ID: 516958 | 22 Words
| ID: 516958 | 22 Words
Laian
Level: 92
POSTS: 385/2232
POST EXP: 457173
LVL EXP: 7583924
CP: 23733.5
VIZ: 3570463
POSTS: 385/2232
POST EXP: 457173
LVL EXP: 7583924
CP: 23733.5
VIZ: 3570463
Likes: 0 Dislikes: 0
Vizzed Elite
Affected by 'Laziness Syndrome'
Registered: 10-21-11
Location: France
Last Post: 2444 days
Last Active: 1618 days
| Games have secrets, I have my eagle gaze. |
Affected by 'Laziness Syndrome'
Registered: 10-21-11
Location: France
Last Post: 2444 days
Last Active: 1618 days
12-19-11 07:39 PM
rcarter2 is Offline
| ID: 516964 | 20 Words
| ID: 516964 | 20 Words
rcarter2
Level: 164
POSTS: 2112/8463
POST EXP: 758515
LVL EXP: 56919009
CP: 33704.4
VIZ: 1690746
POSTS: 2112/8463
POST EXP: 758515
LVL EXP: 56919009
CP: 33704.4
VIZ: 1690746
Likes: 0 Dislikes: 0
Well, I will just have to keep an eye on you screen shot count to keep that from happening then  |
Vizzed Elite
Affected by 'Laziness Syndrome'
Registered: 05-01-11
Location: Kansas
Last Post: 3069 days
Last Active: 364 days
| Dominating RGR Competition Hall of Fame Table! |
Affected by 'Laziness Syndrome'
Registered: 05-01-11
Location: Kansas
Last Post: 3069 days
Last Active: 364 days
