

 User Notice
 Forum Links


Thread Information
Thread Actions


Order
Walkthrough Legacy of Kain: Soul Reaver
Game's Ratings
Overall
Graphics
Sound
Addictiveness
Depth
Story
Difficulty
Average User Score
9.5
8
8.5
6.5
7
9.5
5.5
12-03-15 05:04 AM
Laian is Offline
| ID: 1223207 | 6524 Words
| ID: 1223207 | 6524 Words
Laian
Level: 92


POSTS: 2045/2232
POST EXP: 457173
LVL EXP: 7472315
CP: 23733.5
VIZ: 3570463

POSTS: 2045/2232
POST EXP: 457173
LVL EXP: 7472315
CP: 23733.5
VIZ: 3570463
Likes: 3 Dislikes: 0
 Hello folks, Laian here coming at you with another walkthrough! So it's October... oh no wait, that's two months later. Yup, lot of things happen; that is why it's been delayed. I don't wanna talk about these shenanigans guys and gals. Anyway, it's not "Phantasmagoria 2: A puzzle of flesh". I'll do that one later. This time, I'll make the walkthrough of "Legacy of Kain: Soul Reaver" for PSX. The story is simple: you are Raziel, Kain killed you for a transgression and you've been saved from an eternal damnation and death in order to avenge yourself. That's pretty much it. So let's get into it, shall we? BACK FROM THE DEAD Raziel does not approve the fact that he has been saved from death. Geez, he should be happy. Anyway, this is the tutorial part. As any other game, you'll learn how to use the controls. Go through the hallway to find a portal. It will be useful to fast travel through the world. Unfortunately, you need to find the other portals first and activate them. Keep moving forward, follow the instructions given by the game and the voice. Weaken the enemies a bit further and absorb their soul to completely destroy them and climb up the ledge. Use the blue portal to go to the normal world (yes, you were in the parallel world, also known as the spiritual world). You can't go through the gate to the left at the moment so go right, leap over the pool of water and open the door. Stun your enemies and use the surroundings to finish them. There's also a bonus to get behind a gate underwater but we shall see that in due time. For now, push the block to the left to reach the passageway up there and open the door. You'll reach the sanctuary. Notice the piece behind the gate (1), kill the two creatures (don't forget to absorb their soul) and carry on. Open the door with the symbol carved on it to activate the first portal for the fast travel system. Leave the room, kill the enemy and carry on. Go left after the cutscene, kill the enemy and open the door. Kill the next enemies, notice the piece to your right before the giant gate and carry on. Kill the creatures, open the door to the right to find another portal to activate then go open the other door to the left. Go right, kill the creatures and open the door. Kill more creatures, go up the stairs and flip the switch. A bridge will be lowered, allowing you to move on to the next area. Open the door, kill the new type of enemy, open the door and kill the unfortunate crossbowman and the creature in the graveyard. Go right, push the block, kill the enmy, go up, kill the two creatures and go through the door. Activate the portal, move on to the next area, reach the other side of the pool, kill the enemy and open the door. Kill both of the enemies in the next room and open the door. Hmm, there's a dead body but no vampires around. That's fishy, right? You can't go through the gates yet so swap to the spiritual world and face a new type of creature. After absorbing its soul, go up with the pillars to the left, go back to the normal world, jump on the ledge to the left, pull the block and use the new function. Now move the block to the small opening in the wall in order to open the gate. Crouch and jump on the ledge then glide to the platform to the left or to the right, move the block to the opening to open the other gate and go back up. Now, swap to the spiritual world, step on the other platform an reach the other side of the room. The next puzzle is a bit tough: you need to put the blocks in the openings BUT you have to make sure the symbol is visible. The gate will be open afterwards and you will be able to proceed to the next area. Push the block to make it fall down and drop down. That room should be familiar to you. Push the block to the right then the other one and lift it to build a pile of blocks and reach the next part. Kill the enemy by throwing him into the pool, don't go down (even though there's another piece of the circle to get but we shall see that later), leap over the slope, kill the other enemy and open the door. Kill the enemies, step on the elevator straight forward and flip the switch to go down. Go either to the left or to the right, kill your opponents, open the door, flip the switch and the handle to start the machine. Go back up and pull the lever. Go down, go through the hallway, use the torches to burn the wooden beams and make the upper platform go down, then place the torches at the angles of the platform to make it go down once more. Now go to the next area to face your brother. You cannot fight him with your bare hands, nor any weapon. You have to find another way. To the left and to the right, you'll see two small rooms with a lever. Go through the small openings to go in, activate the switch and attract him underneath the gate then release the lever to close the gate and hurt your brother. Do that with the other lever in order to weaken him. He'll go in the cage afterwards but he forgot there's a torture device above his head. Go back where he stood at the beginning of the fight, activate the handle to finish him. You'll get the power to go through gates at the end of the fight. Now that you have this power, you can go back from the beginning and get these pieces of the circle. Don't worry, mister Laian will tell you where to find them. THE FIRST PARTS OF THE CIRCLE AND THE FIRST GLYPH At this point of the game, you should have seen four parts of the circle. You need five of these to complete it and increase your endurance. I said "you should have seen", only if you're curious. Some of them are missable. Also, you can only get the first ones by going to the spiritual world. Leave the lair of your brother, dive down into the pool and go through the portal to get the first part. Go through the other gate, go back to the normal world and push the columns. The first glyph of the game will appear (2). It's a super power you can use anytime you want if you have some energies. This one costs one energy and creates a shockwave. Take it and leave this shrine. Go through the hallway underwater now, then go back to the surface and head back to the place where you've been ambushed. You'll see a dark column to the right and the piece of the circle trapped behind the gate. Push the block to reach it. Head back to the room in which you fought your very first opponents in the normal world, dive down into the pool and grab the third piece of the circle. Now head back to the sanctuary, grab the fourth piece of the circle and carry on.  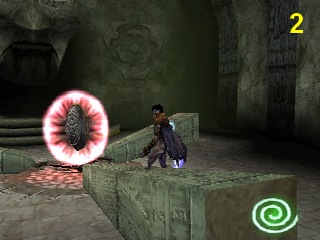 HEAD-TO-HEAD WITH KAIN Welcome to the sanctuary, folks. The lair of your clan. Weaken the spirits since you're in the spiritual world and absorb them. Then, go back to the normal world, kill the wampires to re-open the doors and move on to the corridor. Kill the vampires, go back to the spiritual world, go through the gates, go back to the normal world and open the door. Time to face Kain (what, already?! 0_0 ). Wait until he comes back and go punch him right in the face. You have to react fast because the power of the Soul Reaver will instantly destroy your normal shell and you'll be teleported to the spiritual world. Hit him three times and watch the cutscene. You now have Soul Reaver... well, a spiritual version of Soul Reaver. Kain just disappeared before your eyes and you met the spectre of a woman who despises Kain. You can only use Soul Reaver when your health is full, that's the only rule you have to keep in mind. Go back to the normal world, open the door and leave the sanctuary. The voice from the depths will give you a lead. Go back where the circle of colums is and go through the gate by going to the spiritual world. Carry on, go back to the normal world and go right. Kill the crossbowmen then go through the door in order to find a portal. Activate it, go back in front of the building outside, open the door with the Soul Reaver. Oh, there's a gate, how convenient. Go back to the spiritual world and go through it to enter the cathedral. THE CATHEDRAL Go right, go back to the normal world, turn back, leap over the pool, kill the creatures and open the door. Now climb up the column to your right, step on the roof then glide away to the right, don't go left, carry on and stand on the roof. Go right, then go right once more and carry on. Kill the creature, go up and open the door. Swap to the spiritual world, use the pipe to go up, swap to the normal world and carry on. Flip the switch, then lower the platform to block it. Now, open the door to the right, go to the spiritual world, go through the gate and swap to the normal world. Solve the puzzle by remaking the picture, thne go back to the main hall. Open the other door to the left, go flip the switch and go back to thep revious room to lower the platform. Now, use the steam and your wings to go up and open the door to the right, then the one to the left. Kill the enemies, go through the gate, go back to the normal and solve the puzzle. Go back to the previous room, carry on, open the next door, kill the enemies, go through the gate and solve the puzzle. Go back to the previous room, ring the bell then glide away behind you to ring the other bell. Go back up, turn the handle, swap to the spiritual world, fall down and go to the left. A new path has been unlocked: go there. Go left, switch to the normal world, kill the enemies, turn the valve to permanently reopen the way back to the passageway with the bell and open the door. Leap over the gap, open the door, kill the enemies and go to the next room. Destroy the creatures, notice the part of the circle in the dome to the left (3), swap to the the spiritual world and go through the gate. Once you got rid of the spirits, find the beacon and go back to the normal world to solve another puzzle. You can now get the fifth part of the circle, which increases your health bar. Now go back where the valve was and go left. Go up then swap to the spiritual world to go through the gate, carry on, note the panel on the ground and go through the next gate. Swap back to the normal world, go right, kill the enemies and open the two lids close to the round shape. Go to the other side, kill the next enemies and open the two lids far from the round shape. Now go through the gate, activate the four switches and go up. Step on the pipes and push the parts of the pipes then go in the hallway. Kill the creatures in the next room, activate the switch and go up using the platforms. Go through the gate, go down, kill the enemies, turn the valve and climb up the pipes to the right behind you. Kill the next enemies, move the block to turn the valve and carry on. In the next room, get rid of the creatures and go all the way up to find another valve to turn. Push the raising piece of the pipe in order to activate the steam and go back to the room with the two switches. You know, the ones in front of the two rock doors. Yeah, these ones. It's a long backtracking, I know. Although, you are probably used to this now with all the backtrackings in this cathedral. Time to go up when you've reached that room. Turn right to find a portal. We will use it to leave this place. Come back to the hallway and carry on. Time to face the boss of this place. First things first, wait unil one of his legs is stuck in the ground and cut it. Do this with the other legs. Then go hit the belly so he will release an egg. Take it, go to the torch, light the egg and throw it at your opponent. Two more shots like this one and you'll get his power: the power to climb walls only in the normal world. Now time to find some goodies and go to our next destination. MORE GOODIES TO GRAB, WOO! Go back to the portal and choose the one outside the cathedral. It's the one with a symbol that looks like a Pi with a dot. Go back to the circle of columns, climb up the wall and grab the sixth part of the circle. Find a portal and fast travel to the one symbolized by a "m" with a dot. Open the door. Land on the platform and climb the wall to the left to find the seventh part of the circle. Jump on the platform then on the other one to the north and open the door. The sarcophagus nearby the door can be moved now that you have the Soul Reaver. Press the square button right in front of it and go down. Open the door with the Soul Reaver and grab the gem in this room. It will increase you capacity of carrying energies used for glyphs. Now, it's up to 6. The last thing you can get at this point of the game is another glyph. From where you are, just go back outside, dive into the lake and go right. Go back to the surface, warp back to the normal world, scale the wall and carry on. This is a new area with a creepy looking skull. Although, this is where the glyph actually is. Kill the creatures (or ignore them), face the skull and turn back. Scale the wall to the right and open the door to find another portal. Go back outside, jump in the empty eye socket and kill the creatures. Go up, step on the wooden platform, then on the one to your right and swap to the spiritual world. Now, step on the next wooden platform. Jump to the right and swap back to the normal world. Use the wooden planks to make your progress, swap to the spiritual world and carry on. You'll reach the top, like you saw during the cutscene earlier. From here, glide away to the ledge right in front of you and carry on. Guess what? There's a puzzle to solve, yaaaaaaaaay. It's been a while since the last one, right? You have to place the blocks to the left and to the right so you'll recreate the pictures. This puzzle is however really tricky because there's a fake block, which means you need to find a real block to complete the picture. Due to a problem with the R2+L2 buttons function, I spent a ridiculous amount of time to find the damn hidden block. You'll find it on the alcove to the right at the entrance of the main room. Now solve the puzzle and the glyph will be yours. You got the last goodie you could get at the moment so head back to the room where you faced Kain and find a wall to scale. Carry on, drop down, kill the enemies and proceed to the next area: the tomb of the Seraphans. THE TOMB OF THE SERAFANS... BUT NO SERAFANS Yep, only vampires. Scale the platforms to the left to find a portal. Head back outside, swap to the spiritual world and go through the gate. Kill the creatures, pull the block a bit further to trigger a cutscene. Now swap to the spiritual world, go through the gate and swap back to the normal world with the halo to the left. You'll face a new enemy, which is in fact the boss of this area. All you have to do is avoid his shots and hit him with your best shot (well, hit). You'll get the power to throw projectiles with or without the Soul Reaver, at your opponents and obstacles. Don't worry about the door. It leads back outside. Shoot the block on the wall and push it to find a new section of the tomb. Carry on, go right (the other way leads to an energy recharger), swap to the spiritual world and go through the gate. Swap back to the normal world, get rid of the two creatures and shoot the pillar to place it against the wall. Swap to the spiritual world, go through the steel bars of the cage, step on the pillar jump and carry on. Swap back to the normal world when you can, locate the boat, land on it and swap back to the spiritual world. Jump to reach the ledge, move on, open the door to the right to find a portal. We shall see that other door after grabbing a few items. HUNTING FOR GOODIES You can only get three items with your new ability. Two are located inside the cathedral and one item is located in the area where you found the force glyph. Let's go find that item first. Go back to the ledge leading to the sanctuary of the glyph. Face east to see the piece of the circle and a block with a symbol carved on it. Use the new ability to push the block then glide there to scale the wall and grab the piece of the circle number 8 (4). Time to head to the cathedral for the two other goodies. Head to the room where you had to go up using the steam. Go to the spiritual world, use the pipes to reach the upper platform, go back to the normal world, jump on the other platform above you and climb up the wall to your left. Go right, blast the glass wall, go right to find an energy upgrade. Phase through the gate, drop down into the pit, go in the hallway, kill the creature and aim a projectile with the look mode to break the glass window. Now, scale the wall, go through the gate, kill the ghosts, go back to the normal world, break the window above your head and take the mallet. Turn back, scale the wall, throw the mallet at the new opening and swap to the spiritual world to step on the first column. Swap back to the normal world, jump to the last column then swap to the spiritual world to go in the opening. Swap back to the normal world, grab the mallet and go ring the bell at the end of the line. Grab the sound glyph. There's also a secret in the cathedral. You don't get any goodies but I want to let you know about this. Go back to the portal and choose to go to the one you activated before the fight against the boss fight. Head back to the first valve, swap back to the normal world, scale the wall to the left of the organ and open the lids. The creatures will instantly die and a secret energy recharger will appear. Now you can head back to the portal at the end of the tomb of the Serafans and open the door to the left to reach the drowned abbey. THE ABBEY Open the giant door to enter the abbey. Jump from platform to platform in order to face your first enemy. Shoot him with a projectile to impale him and carry on. Open the door, kill the enemies and go straight forward at the branching path. Kill both of the enemies, open the door, cross the pool of water, kill the enemy, open the next door, kill the enemies and carry on. Unfortunately, you have to go underwater and go to the spiritual world for a while. Go right when you reach the hall to find a platform. Jump on the other platform then on the one above your head and go back to the normal world. Scale the wall to your left, then go in the alcove to the left and use the beams to reach the opening at the other side. Kill the creatures, then blast the glass window and step on the gargoyles to the right. Jump on the central building then in the one to the right. Ring the bell, go down, step on the columns and go back to the normal world. You're going to face Rahab, the boss of the drowned abbey. He will only shoot projectiles at you just to make you fall into the water. Your projectiles will only tickle Rahab... however they will be useful to blast the little glass windows around you. Needless to go on every single column, just stay on the one you actually stand on and use the free look mode then aim your shots at the windows. Do this and Rahab will be defeated. You will acquire the power to swim underwater without going to the spiritual world. Yup, water will no longer affect your body. That means you can go to the new areas and find some goodies. MORE GOODIES TO PICK UP So you can get four pieces of the circle (which should complete the second circle and increase your health and start another one), two energy upgrades, the last glyphs and the fire blade. Ah, one thing I should tell you: it's nearly impossible to fight underwater so you better swim fast if you don't want to be hit by the creatures. Go back to the hall of the abbey. Locate a giant glass window and blast it. Go down, then go down the next staircases, find a glass window with a sword drawn on it and blast it. Go back to the surface and move forward to the fire. Swing your blade to imbue it with fire. You now unlocked the ability to get a fire attribute to your sword whenever you see an elemental forge like this one. Go back underwater. You'll lose the fire attribute. Go left, then go up, then left and finally right to find a new room. Find the opening, carry on and go left when you reach a giant room. You are back to the first section of the game. Open the door to the right then go to the portal. Choose the portal leading to the boat, go back to the lake with the boat and go east. Find the opening underwater and swim to find a new energy upgrade. Head back to the outside of the cathedral. Dive into the water and go west. Scale the wall and grab the ninth part of the circle. Go back underwater and phase through the gate. Go back to the normal world and swim to reach the lighthouse area. Turn right to find the portal and activate it. Now go back and start the ascent of the lighthouse area. Get rid of the enemies on your way until you find a door. Open it, kill the creature and go to the left. Open the door, kill the enemy in the room, scale the machinery to find a suspicious block and push it down. Start the mechanism with the crank, then move the block to the teeth of the gear to jam the mechanism. Leave the room, dive into the water down below, then land on the circular platform and go in the opening. Open the door, go down and open the door. Go through the first wheel, swap to the spiritual world to go underneath the other gears and go back to the normal world. Open the door, kill the creature and open the other door. Go left, move the blocks in the empty so you can connect the two pipes then go back up and activate the valve at the end of the pipe. Go back to the giant wheel, go to its right, use the steam to go up and carry on. Drop down in the last pipe to head back outside. Now, jump from platform to platform to reach the door nearby and open it. This is the sanctuary of the glyph and after all that effort, it will be yours. You just have to swap to spiritual world when the light beam appears to get the sunlight glyph. The next glyph requires the fire blade ability. If you followed that part of the walkthrough, you already have it. Head back to the portal and choose the one symbolized by the sign of Raziel's clan (it's the third portal just in case you're wondering). Open the wooden door outside, go left and swim underwater. Go in the sunken orangey hallway to find the fire sanctuary. Go back to the surface and open the wooden door. Kill the two creatures, turn the crank then swap to the spiritual world to hold the door open and go through. Go back to the normal world, use the crank to raise the gate to the left. Note the statue to the right and go back to the main room. Go in the hallway to the right, kill the creatures and open the door. Swap to the spiritual world to lower the columns and use them to reach the torch in the alcove shown during the cutscene. Imbue your blade with fire and go back to the statue you saw earlier. Swing your blade to light the torch and wake the statue up. The fire glyph will be yours. Take it (5). The last goodies are where you're supposed to go in order to progress in the main story. Go back to the place where you've been thrown like a garbage during the opening scene and glide to the left of the broken bridge. This is the human citadel. If you killed (by accident or on purpose) any human in the game, this part will have a lot of fights and the citizens will be afraid of you. Go back to the surface and open the door. Pull the blocks out of the walls, stack them and carry on. Make the gap to enter the citadel. Make some progress, open the double door then go left and open the door. Go up the stairs, open the door, then go left and scale the wall behind the waterfall. That leads to the last part of the second circle. You can get the fourth energy upgrade from here. Just turn back, jump on the ledge, turn back again, jump on the alcoves to the right and then on the ledge. Activate the switch, go down, scale the wall, kill the two guys and grab the upgrade. Go back to the previous area, find the stairs to the right leading to the portal and activate it. Go back to the courtyard, drop down into the water and go in the tunnel. Pass the fan, find another pipe and keep swimming. Avoid the creature, jump out of the water and scale the wall to the left. Keep moving forward until you see the piece of the circle number 11. Take it, go back where the creature is and go in the hallway in front of you. This is the sanctuary of the last glyph: the water glyph. Open the door to the right, leap over the waterway, find a suspicious block and pull it out of the wall. Guide this block to the grate at the bottom of the square room to fill it with water. Go back to the statue to claim the water glyph. Time to get the last piece of the circle and carry on the main story. Go back to the courtyard and go north this time. Open the door, go up the stairs, open the door, leap over the waterway and turn the valve. Go down, follow the waterway, kill the creature and use the blocks to reach the gate. This seems obvious that you have to swap to the spiritual world and phase through the gate. Go back to the normal world, open the gate with the switch and grad the piece of the circle number 12. We can now focus on the next part of the game.    THE RUINED CITY Head back to the swirl in the opening cinematic and glide to the broken bridge. Yup, you didn't make it although you can reach the ledge by jumping out of the water. Carry on, go right to find a portal to activate, go back to the previous room, scale the wall, glide to the other side and carry on after the cutscene. Go to the spiritual world, phase through the gate then the other one in front of you and go behind the central square to go back to the normal world. Use the projectiles to move the block to the wall, go back to the spiritual world, phase through the gate, go up using the block and swap back to the normal world. Drop down in to the hole, go left, pull the block out of the wall and use it to get on the ledge. Make the gap, carry on and, after the cutscene, go down. Go right to see a crank, turn it to empty the pools (this will wake the creature up by the way) and kill it. You now need to stack three blocks so you can reach the ledge shown during the cutscene. Keep in mind that you can move a stack of several blocks. Move forward to enter some kind of furnace room, go down, find the valve and turn it. Now, go activate the switch on the platform opposite to overload the furnace and blast the doors. Turn back, go in the passageway, push the block in the courtyard, go down and stack both of the blocks to reach the last path. In the next room, swap to the spiritual world, then go all the way up to see a lever and a portal. Swap back to the normal world and go flip the switch to lower the bridge. Carry on, turn right to see a gate and a block and use the block to reach the upper level (where you can see the halo of light). Now, step on the lowest column, then swap to the spiritual world, jump on the other pillar and swap back to the normal world. Jump on the one next to you and swap back to the spiritual world. Jump on the last pillar, glide in the opening to reach the central square and push the obelisk to blast the cage and the door. Go north now, open the door to face Dumah... oh wait he's THE LAST GOODIES Since you're in the ruined city, go back to the obelisk and go right to see a statue. Use your new ability to move it and open a door. Spin around the statue twice, kill your opponents and claim the piece of the circle number 13. The other rooms can be opened but you will only find an energy regenerator in the room to the right. Time to head to the drowned abbey now. Open the door with a projectile, dive into the water, then go left. Open the door, kill the enemies and spin around the drill to empty the pool. You can now push the blocks down below to find some energy spheres and the fourteenth part of the circle, kept by an enemy. Let's leave the drowned abbey by the crypt and, once you're out of the water, go north and open the door. You are back to that tower. Spin around the sundial and flip the switch every single time to unlock the last paths. One leads to a giant energy sphere, another one to the last piece of the circle and the last path to the last energy upgrade. In order to get the energy upgrade, you'll have to solve a block puzzle, yaaaaaaay. Now that you collected all the items of the game, you can head back to the nearby portal, go back to the one outside the ruined city and proceed to the next area. THE FINAL SHOWDOWN This title never gets old. Yeah, this is the last part of the game. From the portal outside the ruined city, go right, kill the enemies and spin around the sundial to open the giant door. Go through the open door, kill the two creatures and open the door. Go right to find a portal to activate. It's kinda useless to activate if you have collected all the items but let's activate it for the heck of it. Go back to the hallway and carry on. Kill the enemy and note a crack in the wall to the left. Swap to the spiritual wall to reveal a passageway, go in the next room and swap back to the normal world. Spin around the device to open a new door and block your way in. To the left and to the right, there's a gate. you can see a black symbol above an alcove in each side. Go right, swap to the spiritual world and phase through the gate. Go back to the normal world, remove the block to the left and drop it in the room with the dead body. Now remove the other block and move it the the alcove in front of it. Now, go back to the sundial and spin it. Drop down, do not take the weapon on the dead body and move the block to the left. Put it in the alcove with the black symbol, go back to the sundial and spin it. Go back to the right, move the block to the other alcove with the black symbol to open the doors and move on to the next area. Kill the enemy, spin the dial to open the door to your right and find an energy regenerator. Go left, phase through the gate, kill the enemy and jump to the right. Swap back to the normal world, go right, place the blocks into the specific alcoves to unlock the door and carry on. Also, dead body so do not remove the spear. Kill the enemies, spin around the dials they face the symbol to open the large locked door you saw a while ago and go back there. After the cutscene, do a little turn around the fire and carry on. Interact with the levers next to the statue so the clock shows 6:00 AM (or PM, whatever) then go down. Spin around each of the blocks once clockwise to blast the purple seal and go back up. Spin around the device in the centre of the room to shatter the other seals and proceed to the next area. Ignore the dead body, kill the next enemy and use the dials to solve the puzzle and open the door. Nothing really hard, you just have to make the colored hands match with the symbols next to the door. Go down, move the blocks that jam the mechanism, jump on the raised platform then on the ledge and then on the swinging platform. Go down, kill the enemy, push the block with a shot and do the same thing with the other block a bit farther. Go down, kill the creature and make the symbol on the floor with the blocks. That will open the door. Drop down, note the dials to the left and to the right and fight the last guys. This is by the way the last puzzle of the game. Look up in each room to find an arrow pointing at a direction. These are the clues to solve the puzzle. Go back to the dials and spin around them to match the symbols. Now use the platforms to flip the switches and go through the door you opened. After a few cutscenes, turn left to activate the last portal. This is your last chance to get all the items of the game if you haven't done that yet. Otherwise, leave the room and carry on to face Kain. You can only hit him with the Soul Reaver. It's the same exact way as the first time you faced him. Look around to see where he appears and catch him up to give it a taste of your blade. His attack will deal some damage but it won't one-shot you like the first time. Although, your only ally will disappear and you'll have to use the health regenerator in the middle of the room. After each hit, he will go up a level. After three hits, the fight is over. Enjoy the final cutscene. Congratulations, you completed "Legacy of Kain: Soul Reaver". And that concludes this walkthrough. As always, I will see you in the next walkthrough. Take care folks Hello folks, Laian here coming at you with another walkthrough! So it's October... oh no wait, that's two months later. Yup, lot of things happen; that is why it's been delayed. I don't wanna talk about these shenanigans guys and gals. Anyway, it's not "Phantasmagoria 2: A puzzle of flesh". I'll do that one later. This time, I'll make the walkthrough of "Legacy of Kain: Soul Reaver" for PSX. The story is simple: you are Raziel, Kain killed you for a transgression and you've been saved from an eternal damnation and death in order to avenge yourself. That's pretty much it. So let's get into it, shall we? BACK FROM THE DEAD Raziel does not approve the fact that he has been saved from death. Geez, he should be happy. Anyway, this is the tutorial part. As any other game, you'll learn how to use the controls. Go through the hallway to find a portal. It will be useful to fast travel through the world. Unfortunately, you need to find the other portals first and activate them. Keep moving forward, follow the instructions given by the game and the voice. Weaken the enemies a bit further and absorb their soul to completely destroy them and climb up the ledge. Use the blue portal to go to the normal world (yes, you were in the parallel world, also known as the spiritual world). You can't go through the gate to the left at the moment so go right, leap over the pool of water and open the door. Stun your enemies and use the surroundings to finish them. There's also a bonus to get behind a gate underwater but we shall see that in due time. For now, push the block to the left to reach the passageway up there and open the door. You'll reach the sanctuary. Notice the piece behind the gate (1), kill the two creatures (don't forget to absorb their soul) and carry on. Open the door with the symbol carved on it to activate the first portal for the fast travel system. Leave the room, kill the enemy and carry on. Go left after the cutscene, kill the enemy and open the door. Kill the next enemies, notice the piece to your right before the giant gate and carry on. Kill the creatures, open the door to the right to find another portal to activate then go open the other door to the left. Go right, kill the creatures and open the door. Kill more creatures, go up the stairs and flip the switch. A bridge will be lowered, allowing you to move on to the next area. Open the door, kill the new type of enemy, open the door and kill the unfortunate crossbowman and the creature in the graveyard. Go right, push the block, kill the enmy, go up, kill the two creatures and go through the door. Activate the portal, move on to the next area, reach the other side of the pool, kill the enemy and open the door. Kill both of the enemies in the next room and open the door. Hmm, there's a dead body but no vampires around. That's fishy, right? You can't go through the gates yet so swap to the spiritual world and face a new type of creature. After absorbing its soul, go up with the pillars to the left, go back to the normal world, jump on the ledge to the left, pull the block and use the new function. Now move the block to the small opening in the wall in order to open the gate. Crouch and jump on the ledge then glide to the platform to the left or to the right, move the block to the opening to open the other gate and go back up. Now, swap to the spiritual world, step on the other platform an reach the other side of the room. The next puzzle is a bit tough: you need to put the blocks in the openings BUT you have to make sure the symbol is visible. The gate will be open afterwards and you will be able to proceed to the next area. Push the block to make it fall down and drop down. That room should be familiar to you. Push the block to the right then the other one and lift it to build a pile of blocks and reach the next part. Kill the enemy by throwing him into the pool, don't go down (even though there's another piece of the circle to get but we shall see that later), leap over the slope, kill the other enemy and open the door. Kill the enemies, step on the elevator straight forward and flip the switch to go down. Go either to the left or to the right, kill your opponents, open the door, flip the switch and the handle to start the machine. Go back up and pull the lever. Go down, go through the hallway, use the torches to burn the wooden beams and make the upper platform go down, then place the torches at the angles of the platform to make it go down once more. Now go to the next area to face your brother. You cannot fight him with your bare hands, nor any weapon. You have to find another way. To the left and to the right, you'll see two small rooms with a lever. Go through the small openings to go in, activate the switch and attract him underneath the gate then release the lever to close the gate and hurt your brother. Do that with the other lever in order to weaken him. He'll go in the cage afterwards but he forgot there's a torture device above his head. Go back where he stood at the beginning of the fight, activate the handle to finish him. You'll get the power to go through gates at the end of the fight. Now that you have this power, you can go back from the beginning and get these pieces of the circle. Don't worry, mister Laian will tell you where to find them. THE FIRST PARTS OF THE CIRCLE AND THE FIRST GLYPH At this point of the game, you should have seen four parts of the circle. You need five of these to complete it and increase your endurance. I said "you should have seen", only if you're curious. Some of them are missable. Also, you can only get the first ones by going to the spiritual world. Leave the lair of your brother, dive down into the pool and go through the portal to get the first part. Go through the other gate, go back to the normal world and push the columns. The first glyph of the game will appear (2). It's a super power you can use anytime you want if you have some energies. This one costs one energy and creates a shockwave. Take it and leave this shrine. Go through the hallway underwater now, then go back to the surface and head back to the place where you've been ambushed. You'll see a dark column to the right and the piece of the circle trapped behind the gate. Push the block to reach it. Head back to the room in which you fought your very first opponents in the normal world, dive down into the pool and grab the third piece of the circle. Now head back to the sanctuary, grab the fourth piece of the circle and carry on. HEAD-TO-HEAD WITH KAIN Welcome to the sanctuary, folks. The lair of your clan. Weaken the spirits since you're in the spiritual world and absorb them. Then, go back to the normal world, kill the wampires to re-open the doors and move on to the corridor. Kill the vampires, go back to the spiritual world, go through the gates, go back to the normal world and open the door. Time to face Kain (what, already?! 0_0 ). Wait until he comes back and go punch him right in the face. You have to react fast because the power of the Soul Reaver will instantly destroy your normal shell and you'll be teleported to the spiritual world. Hit him three times and watch the cutscene. You now have Soul Reaver... well, a spiritual version of Soul Reaver. Kain just disappeared before your eyes and you met the spectre of a woman who despises Kain. You can only use Soul Reaver when your health is full, that's the only rule you have to keep in mind. Go back to the normal world, open the door and leave the sanctuary. The voice from the depths will give you a lead. Go back where the circle of colums is and go through the gate by going to the spiritual world. Carry on, go back to the normal world and go right. Kill the crossbowmen then go through the door in order to find a portal. Activate it, go back in front of the building outside, open the door with the Soul Reaver. Oh, there's a gate, how convenient. Go back to the spiritual world and go through it to enter the cathedral. THE CATHEDRAL Go right, go back to the normal world, turn back, leap over the pool, kill the creatures and open the door. Now climb up the column to your right, step on the roof then glide away to the right, don't go left, carry on and stand on the roof. Go right, then go right once more and carry on. Kill the creature, go up and open the door. Swap to the spiritual world, use the pipe to go up, swap to the normal world and carry on. Flip the switch, then lower the platform to block it. Now, open the door to the right, go to the spiritual world, go through the gate and swap to the normal world. Solve the puzzle by remaking the picture, thne go back to the main hall. Open the other door to the left, go flip the switch and go back to thep revious room to lower the platform. Now, use the steam and your wings to go up and open the door to the right, then the one to the left. Kill the enemies, go through the gate, go back to the normal and solve the puzzle. Go back to the previous room, carry on, open the next door, kill the enemies, go through the gate and solve the puzzle. Go back to the previous room, ring the bell then glide away behind you to ring the other bell. Go back up, turn the handle, swap to the spiritual world, fall down and go to the left. A new path has been unlocked: go there. Go left, switch to the normal world, kill the enemies, turn the valve to permanently reopen the way back to the passageway with the bell and open the door. Leap over the gap, open the door, kill the enemies and go to the next room. Destroy the creatures, notice the part of the circle in the dome to the left (3), swap to the the spiritual world and go through the gate. Once you got rid of the spirits, find the beacon and go back to the normal world to solve another puzzle. You can now get the fifth part of the circle, which increases your health bar. Now go back where the valve was and go left. Go up then swap to the spiritual world to go through the gate, carry on, note the panel on the ground and go through the next gate. Swap back to the normal world, go right, kill the enemies and open the two lids close to the round shape. Go to the other side, kill the next enemies and open the two lids far from the round shape. Now go through the gate, activate the four switches and go up. Step on the pipes and push the parts of the pipes then go in the hallway. Kill the creatures in the next room, activate the switch and go up using the platforms. Go through the gate, go down, kill the enemies, turn the valve and climb up the pipes to the right behind you. Kill the next enemies, move the block to turn the valve and carry on. In the next room, get rid of the creatures and go all the way up to find another valve to turn. Push the raising piece of the pipe in order to activate the steam and go back to the room with the two switches. You know, the ones in front of the two rock doors. Yeah, these ones. It's a long backtracking, I know. Although, you are probably used to this now with all the backtrackings in this cathedral. Time to go up when you've reached that room. Turn right to find a portal. We will use it to leave this place. Come back to the hallway and carry on. Time to face the boss of this place. First things first, wait unil one of his legs is stuck in the ground and cut it. Do this with the other legs. Then go hit the belly so he will release an egg. Take it, go to the torch, light the egg and throw it at your opponent. Two more shots like this one and you'll get his power: the power to climb walls only in the normal world. Now time to find some goodies and go to our next destination. MORE GOODIES TO GRAB, WOO! Go back to the portal and choose the one outside the cathedral. It's the one with a symbol that looks like a Pi with a dot. Go back to the circle of columns, climb up the wall and grab the sixth part of the circle. Find a portal and fast travel to the one symbolized by a "m" with a dot. Open the door. Land on the platform and climb the wall to the left to find the seventh part of the circle. Jump on the platform then on the other one to the north and open the door. The sarcophagus nearby the door can be moved now that you have the Soul Reaver. Press the square button right in front of it and go down. Open the door with the Soul Reaver and grab the gem in this room. It will increase you capacity of carrying energies used for glyphs. Now, it's up to 6. The last thing you can get at this point of the game is another glyph. From where you are, just go back outside, dive into the lake and go right. Go back to the surface, warp back to the normal world, scale the wall and carry on. This is a new area with a creepy looking skull. Although, this is where the glyph actually is. Kill the creatures (or ignore them), face the skull and turn back. Scale the wall to the right and open the door to find another portal. Go back outside, jump in the empty eye socket and kill the creatures. Go up, step on the wooden platform, then on the one to your right and swap to the spiritual world. Now, step on the next wooden platform. Jump to the right and swap back to the normal world. Use the wooden planks to make your progress, swap to the spiritual world and carry on. You'll reach the top, like you saw during the cutscene earlier. From here, glide away to the ledge right in front of you and carry on. Guess what? There's a puzzle to solve, yaaaaaaaaay. It's been a while since the last one, right? You have to place the blocks to the left and to the right so you'll recreate the pictures. This puzzle is however really tricky because there's a fake block, which means you need to find a real block to complete the picture. Due to a problem with the R2+L2 buttons function, I spent a ridiculous amount of time to find the damn hidden block. You'll find it on the alcove to the right at the entrance of the main room. Now solve the puzzle and the glyph will be yours. You got the last goodie you could get at the moment so head back to the room where you faced Kain and find a wall to scale. Carry on, drop down, kill the enemies and proceed to the next area: the tomb of the Seraphans. THE TOMB OF THE SERAFANS... BUT NO SERAFANS Yep, only vampires. Scale the platforms to the left to find a portal. Head back outside, swap to the spiritual world and go through the gate. Kill the creatures, pull the block a bit further to trigger a cutscene. Now swap to the spiritual world, go through the gate and swap back to the normal world with the halo to the left. You'll face a new enemy, which is in fact the boss of this area. All you have to do is avoid his shots and hit him with your best shot (well, hit). You'll get the power to throw projectiles with or without the Soul Reaver, at your opponents and obstacles. Don't worry about the door. It leads back outside. Shoot the block on the wall and push it to find a new section of the tomb. Carry on, go right (the other way leads to an energy recharger), swap to the spiritual world and go through the gate. Swap back to the normal world, get rid of the two creatures and shoot the pillar to place it against the wall. Swap to the spiritual world, go through the steel bars of the cage, step on the pillar jump and carry on. Swap back to the normal world when you can, locate the boat, land on it and swap back to the spiritual world. Jump to reach the ledge, move on, open the door to the right to find a portal. We shall see that other door after grabbing a few items. HUNTING FOR GOODIES You can only get three items with your new ability. Two are located inside the cathedral and one item is located in the area where you found the force glyph. Let's go find that item first. Go back to the ledge leading to the sanctuary of the glyph. Face east to see the piece of the circle and a block with a symbol carved on it. Use the new ability to push the block then glide there to scale the wall and grab the piece of the circle number 8 (4). Time to head to the cathedral for the two other goodies. Head to the room where you had to go up using the steam. Go to the spiritual world, use the pipes to reach the upper platform, go back to the normal world, jump on the other platform above you and climb up the wall to your left. Go right, blast the glass wall, go right to find an energy upgrade. Phase through the gate, drop down into the pit, go in the hallway, kill the creature and aim a projectile with the look mode to break the glass window. Now, scale the wall, go through the gate, kill the ghosts, go back to the normal world, break the window above your head and take the mallet. Turn back, scale the wall, throw the mallet at the new opening and swap to the spiritual world to step on the first column. Swap back to the normal world, jump to the last column then swap to the spiritual world to go in the opening. Swap back to the normal world, grab the mallet and go ring the bell at the end of the line. Grab the sound glyph. There's also a secret in the cathedral. You don't get any goodies but I want to let you know about this. Go back to the portal and choose to go to the one you activated before the fight against the boss fight. Head back to the first valve, swap back to the normal world, scale the wall to the left of the organ and open the lids. The creatures will instantly die and a secret energy recharger will appear. Now you can head back to the portal at the end of the tomb of the Serafans and open the door to the left to reach the drowned abbey. THE ABBEY Open the giant door to enter the abbey. Jump from platform to platform in order to face your first enemy. Shoot him with a projectile to impale him and carry on. Open the door, kill the enemies and go straight forward at the branching path. Kill both of the enemies, open the door, cross the pool of water, kill the enemy, open the next door, kill the enemies and carry on. Unfortunately, you have to go underwater and go to the spiritual world for a while. Go right when you reach the hall to find a platform. Jump on the other platform then on the one above your head and go back to the normal world. Scale the wall to your left, then go in the alcove to the left and use the beams to reach the opening at the other side. Kill the creatures, then blast the glass window and step on the gargoyles to the right. Jump on the central building then in the one to the right. Ring the bell, go down, step on the columns and go back to the normal world. You're going to face Rahab, the boss of the drowned abbey. He will only shoot projectiles at you just to make you fall into the water. Your projectiles will only tickle Rahab... however they will be useful to blast the little glass windows around you. Needless to go on every single column, just stay on the one you actually stand on and use the free look mode then aim your shots at the windows. Do this and Rahab will be defeated. You will acquire the power to swim underwater without going to the spiritual world. Yup, water will no longer affect your body. That means you can go to the new areas and find some goodies. MORE GOODIES TO PICK UP So you can get four pieces of the circle (which should complete the second circle and increase your health and start another one), two energy upgrades, the last glyphs and the fire blade. Ah, one thing I should tell you: it's nearly impossible to fight underwater so you better swim fast if you don't want to be hit by the creatures. Go back to the hall of the abbey. Locate a giant glass window and blast it. Go down, then go down the next staircases, find a glass window with a sword drawn on it and blast it. Go back to the surface and move forward to the fire. Swing your blade to imbue it with fire. You now unlocked the ability to get a fire attribute to your sword whenever you see an elemental forge like this one. Go back underwater. You'll lose the fire attribute. Go left, then go up, then left and finally right to find a new room. Find the opening, carry on and go left when you reach a giant room. You are back to the first section of the game. Open the door to the right then go to the portal. Choose the portal leading to the boat, go back to the lake with the boat and go east. Find the opening underwater and swim to find a new energy upgrade. Head back to the outside of the cathedral. Dive into the water and go west. Scale the wall and grab the ninth part of the circle. Go back underwater and phase through the gate. Go back to the normal world and swim to reach the lighthouse area. Turn right to find the portal and activate it. Now go back and start the ascent of the lighthouse area. Get rid of the enemies on your way until you find a door. Open it, kill the creature and go to the left. Open the door, kill the enemy in the room, scale the machinery to find a suspicious block and push it down. Start the mechanism with the crank, then move the block to the teeth of the gear to jam the mechanism. Leave the room, dive into the water down below, then land on the circular platform and go in the opening. Open the door, go down and open the door. Go through the first wheel, swap to the spiritual world to go underneath the other gears and go back to the normal world. Open the door, kill the creature and open the other door. Go left, move the blocks in the empty so you can connect the two pipes then go back up and activate the valve at the end of the pipe. Go back to the giant wheel, go to its right, use the steam to go up and carry on. Drop down in the last pipe to head back outside. Now, jump from platform to platform to reach the door nearby and open it. This is the sanctuary of the glyph and after all that effort, it will be yours. You just have to swap to spiritual world when the light beam appears to get the sunlight glyph. The next glyph requires the fire blade ability. If you followed that part of the walkthrough, you already have it. Head back to the portal and choose the one symbolized by the sign of Raziel's clan (it's the third portal just in case you're wondering). Open the wooden door outside, go left and swim underwater. Go in the sunken orangey hallway to find the fire sanctuary. Go back to the surface and open the wooden door. Kill the two creatures, turn the crank then swap to the spiritual world to hold the door open and go through. Go back to the normal world, use the crank to raise the gate to the left. Note the statue to the right and go back to the main room. Go in the hallway to the right, kill the creatures and open the door. Swap to the spiritual world to lower the columns and use them to reach the torch in the alcove shown during the cutscene. Imbue your blade with fire and go back to the statue you saw earlier. Swing your blade to light the torch and wake the statue up. The fire glyph will be yours. Take it (5). The last goodies are where you're supposed to go in order to progress in the main story. Go back to the place where you've been thrown like a garbage during the opening scene and glide to the left of the broken bridge. This is the human citadel. If you killed (by accident or on purpose) any human in the game, this part will have a lot of fights and the citizens will be afraid of you. Go back to the surface and open the door. Pull the blocks out of the walls, stack them and carry on. Make the gap to enter the citadel. Make some progress, open the double door then go left and open the door. Go up the stairs, open the door, then go left and scale the wall behind the waterfall. That leads to the last part of the second circle. You can get the fourth energy upgrade from here. Just turn back, jump on the ledge, turn back again, jump on the alcoves to the right and then on the ledge. Activate the switch, go down, scale the wall, kill the two guys and grab the upgrade. Go back to the previous area, find the stairs to the right leading to the portal and activate it. Go back to the courtyard, drop down into the water and go in the tunnel. Pass the fan, find another pipe and keep swimming. Avoid the creature, jump out of the water and scale the wall to the left. Keep moving forward until you see the piece of the circle number 11. Take it, go back where the creature is and go in the hallway in front of you. This is the sanctuary of the last glyph: the water glyph. Open the door to the right, leap over the waterway, find a suspicious block and pull it out of the wall. Guide this block to the grate at the bottom of the square room to fill it with water. Go back to the statue to claim the water glyph. Time to get the last piece of the circle and carry on the main story. Go back to the courtyard and go north this time. Open the door, go up the stairs, open the door, leap over the waterway and turn the valve. Go down, follow the waterway, kill the creature and use the blocks to reach the gate. This seems obvious that you have to swap to the spiritual world and phase through the gate. Go back to the normal world, open the gate with the switch and grad the piece of the circle number 12. We can now focus on the next part of the game. THE RUINED CITY Head back to the swirl in the opening cinematic and glide to the broken bridge. Yup, you didn't make it although you can reach the ledge by jumping out of the water. Carry on, go right to find a portal to activate, go back to the previous room, scale the wall, glide to the other side and carry on after the cutscene. Go to the spiritual world, phase through the gate then the other one in front of you and go behind the central square to go back to the normal world. Use the projectiles to move the block to the wall, go back to the spiritual world, phase through the gate, go up using the block and swap back to the normal world. Drop down in to the hole, go left, pull the block out of the wall and use it to get on the ledge. Make the gap, carry on and, after the cutscene, go down. Go right to see a crank, turn it to empty the pools (this will wake the creature up by the way) and kill it. You now need to stack three blocks so you can reach the ledge shown during the cutscene. Keep in mind that you can move a stack of several blocks. Move forward to enter some kind of furnace room, go down, find the valve and turn it. Now, go activate the switch on the platform opposite to overload the furnace and blast the doors. Turn back, go in the passageway, push the block in the courtyard, go down and stack both of the blocks to reach the last path. In the next room, swap to the spiritual world, then go all the way up to see a lever and a portal. Swap back to the normal world and go flip the switch to lower the bridge. Carry on, turn right to see a gate and a block and use the block to reach the upper level (where you can see the halo of light). Now, step on the lowest column, then swap to the spiritual world, jump on the other pillar and swap back to the normal world. Jump on the one next to you and swap back to the spiritual world. Jump on the last pillar, glide in the opening to reach the central square and push the obelisk to blast the cage and the door. Go north now, open the door to face Dumah... oh wait he's THE LAST GOODIES Since you're in the ruined city, go back to the obelisk and go right to see a statue. Use your new ability to move it and open a door. Spin around the statue twice, kill your opponents and claim the piece of the circle number 13. The other rooms can be opened but you will only find an energy regenerator in the room to the right. Time to head to the drowned abbey now. Open the door with a projectile, dive into the water, then go left. Open the door, kill the enemies and spin around the drill to empty the pool. You can now push the blocks down below to find some energy spheres and the fourteenth part of the circle, kept by an enemy. Let's leave the drowned abbey by the crypt and, once you're out of the water, go north and open the door. You are back to that tower. Spin around the sundial and flip the switch every single time to unlock the last paths. One leads to a giant energy sphere, another one to the last piece of the circle and the last path to the last energy upgrade. In order to get the energy upgrade, you'll have to solve a block puzzle, yaaaaaaay. Now that you collected all the items of the game, you can head back to the nearby portal, go back to the one outside the ruined city and proceed to the next area. THE FINAL SHOWDOWN This title never gets old. Yeah, this is the last part of the game. From the portal outside the ruined city, go right, kill the enemies and spin around the sundial to open the giant door. Go through the open door, kill the two creatures and open the door. Go right to find a portal to activate. It's kinda useless to activate if you have collected all the items but let's activate it for the heck of it. Go back to the hallway and carry on. Kill the enemy and note a crack in the wall to the left. Swap to the spiritual wall to reveal a passageway, go in the next room and swap back to the normal world. Spin around the device to open a new door and block your way in. To the left and to the right, there's a gate. you can see a black symbol above an alcove in each side. Go right, swap to the spiritual world and phase through the gate. Go back to the normal world, remove the block to the left and drop it in the room with the dead body. Now remove the other block and move it the the alcove in front of it. Now, go back to the sundial and spin it. Drop down, do not take the weapon on the dead body and move the block to the left. Put it in the alcove with the black symbol, go back to the sundial and spin it. Go back to the right, move the block to the other alcove with the black symbol to open the doors and move on to the next area. Kill the enemy, spin the dial to open the door to your right and find an energy regenerator. Go left, phase through the gate, kill the enemy and jump to the right. Swap back to the normal world, go right, place the blocks into the specific alcoves to unlock the door and carry on. Also, dead body so do not remove the spear. Kill the enemies, spin around the dials they face the symbol to open the large locked door you saw a while ago and go back there. After the cutscene, do a little turn around the fire and carry on. Interact with the levers next to the statue so the clock shows 6:00 AM (or PM, whatever) then go down. Spin around each of the blocks once clockwise to blast the purple seal and go back up. Spin around the device in the centre of the room to shatter the other seals and proceed to the next area. Ignore the dead body, kill the next enemy and use the dials to solve the puzzle and open the door. Nothing really hard, you just have to make the colored hands match with the symbols next to the door. Go down, move the blocks that jam the mechanism, jump on the raised platform then on the ledge and then on the swinging platform. Go down, kill the enemy, push the block with a shot and do the same thing with the other block a bit farther. Go down, kill the creature and make the symbol on the floor with the blocks. That will open the door. Drop down, note the dials to the left and to the right and fight the last guys. This is by the way the last puzzle of the game. Look up in each room to find an arrow pointing at a direction. These are the clues to solve the puzzle. Go back to the dials and spin around them to match the symbols. Now use the platforms to flip the switches and go through the door you opened. After a few cutscenes, turn left to activate the last portal. This is your last chance to get all the items of the game if you haven't done that yet. Otherwise, leave the room and carry on to face Kain. You can only hit him with the Soul Reaver. It's the same exact way as the first time you faced him. Look around to see where he appears and catch him up to give it a taste of your blade. His attack will deal some damage but it won't one-shot you like the first time. Although, your only ally will disappear and you'll have to use the health regenerator in the middle of the room. After each hit, he will go up a level. After three hits, the fight is over. Enjoy the final cutscene. Congratulations, you completed "Legacy of Kain: Soul Reaver". And that concludes this walkthrough. As always, I will see you in the next walkthrough. Take care folks |
Vizzed Elite
Affected by 'Laziness Syndrome'
Registered: 10-21-11
Location: France
Last Post: 2293 days
Last Active: 1467 days
| Games have secrets, I have my eagle gaze. |
Affected by 'Laziness Syndrome'
Registered: 10-21-11
Location: France
Last Post: 2293 days
Last Active: 1467 days
12-03-15 05:10 AM
Laian is Offline
| ID: 1223208 | 73 Words
| ID: 1223208 | 73 Words
Laian
Level: 92
POSTS: 2046/2232
POST EXP: 457173
LVL EXP: 7472315
CP: 23733.5
VIZ: 3570463
POSTS: 2046/2232
POST EXP: 457173
LVL EXP: 7472315
CP: 23733.5
VIZ: 3570463
Likes: 0 Dislikes: 0
To all the Vizzed members, I want to apologize for the long delay for this walkthrough specifically. Since my summer job, lot of shenanigans happen, mostly in my real life. I'm not going to go into details in this thread, expect another one real soon. I just wanted to say that I'm sorry and I'm grateful for your patience. I also want to make another walkthrough this month as a Christmas present To all the Vizzed members, I want to apologize for the long delay for this walkthrough specifically. Since my summer job, lot of shenanigans happen, mostly in my real life. I'm not going to go into details in this thread, expect another one real soon. I just wanted to say that I'm sorry and I'm grateful for your patience. I also want to make another walkthrough this month as a Christmas present |
Vizzed Elite
Affected by 'Laziness Syndrome'
Registered: 10-21-11
Location: France
Last Post: 2293 days
Last Active: 1467 days
| Games have secrets, I have my eagle gaze. |
Affected by 'Laziness Syndrome'
Registered: 10-21-11
Location: France
Last Post: 2293 days
Last Active: 1467 days
