

 User Notice
 Forum Links
Play Mega Man 2 Online
Thread Information
Views
1,183
Replies
2
Rating
1
Status
OPEN
Thread
Creator
Creator
tornadocam
02-25-14 09:19 PM
02-25-14 09:19 PM
Last
Post
Post
www.megamanzero
11-24-14 12:06 AM
11-24-14 12:06 AM
System
9.1
Views: 596
Today: 0
Users: 0 unique
Today: 0
Users: 0 unique
Thread Actions


Order
Mega Man 2 guide
Game's Ratings
Overall
Graphics
Sound
Addictiveness
Depth
Story
Difficulty
Average User Score
9.1
8.6
9.5
8.2
7.2
6.4
6.9
02-25-14 09:19 PM
tornadocam is Offline
| ID: 981331 | 4242 Words
| ID: 981331 | 4242 Words
tornadocam
Level: 103


POSTS: 760/3122
POST EXP: 781784
LVL EXP: 11387421
CP: 61424.1
VIZ: 4876874

POSTS: 760/3122
POST EXP: 781784
LVL EXP: 11387421
CP: 61424.1
VIZ: 4876874
Likes: 1 Dislikes: 0
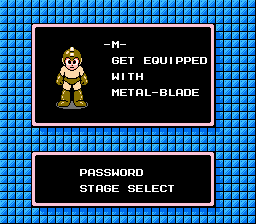
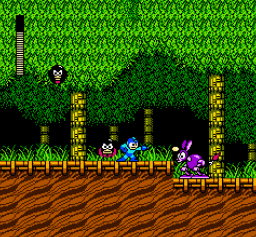
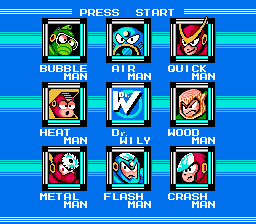
Are you having trouble beating Mega Man 2? Well, I hope to help you out in my guide. In addition, to offering a guide I plan on offering a difficulty Analysis. I will be using the following scale 1-2 Easy 3 Slightly difficult 4-5 Moderate difficulty 6-7 difficult 8-10 very difficult For the Boss Orders I recommend this order Metal Man Air Man Crash Man Bubble Man Heat Man Flash Man Wood Man Quick Man So Let's get started. Hope my guide helps you out. Meta Man Stage (difficulty 3/10) The first thing you will notice is you are on a conveyor belt. Just be careful and jump when you need to stop. Jump over a pit and get the energy tank. You, will then notice spike presses, these are not instant death but they do 25% damage. What you want to do is jump to get the press to fall, as it is going back up, that is where you pass under it. After, passing under the presses, jump the pit and get ready to shoot like crazy. The next area has drill moles. These like to come out from the ceiling as well as the floor. It is best to shoot them and proceed very slowly. After the drill mole section just get back on the conveyor belt and fall down the shaft. The next area continues the conveyor belt accept you have a new enemy here. The new enemy is a clown that likes to jump on wheels, just shoot the wheel out from under the clown and proceed. After the clowns you will meet a block enemy, the best thing to do here is shoot the block's face. But, beware cause sometimes the blocks will shoot toward you. Next you want to make a very careful jump as the pit is wide. Do not get the energy tank you see below it is a death trap. The next and final piece just has spring heads avoid them and head for the gate. Meta Man (difficulty 3/10) despite how metal man spams you with blades, he is not that difficult at all. He jumps and fires at your level so use this to your advantage he also jumps a lot. Still, use his AI pattern to your advantage and he will go down quickly. Difficulty Analysis okay this stage was not too bad. The only real threats here are the presses, moles and the big pit. Metal Man yeah he does spam you with metal blades but he has a terrible AI pattern. Air Man Stage (difficulty 7/10) Okay Metal Man's stage was not bad, that is going to change now. Okay, you want to proceed to the edge of the platforms and jump. After, you jump a monster will appear, use the monster as a platform. However, make sure you avoid the horns coming up out of the monsters head or they will knock you into the pit. It, also should be noted the monsters will produce gremlin like enemies from the side, so watch out for that. Now for a tricky part, you see a fan platform but there is an enemy riding them. Shoot the enemy and jump on the fan platform, do this and get on the next fan platform. Time your jumps carefully and do not assume a platform is behind the clouds that will cause you to lose a life. After the platform segment you will notice birds dropping eggs on you. The eggs if they hit the ground will send many birds that will swarm you. So, it is best to try and shoot the eggs before they land. Avoid the mines producing the horse shoes and fall down the shaft. Now you will have the monsters again, just use them as a platform like you did before. The next segment deals with the bird enemies and fan enemies. The fan enemies try to blow you off the platforms, so take them out quickly. Then take out the bird's eggs and head for the gate. Air Man (difficulty 5/10) Air Man can be a problem due the tornadoes he produces. The tornadoes are hard to dodge. After he fires them hit him with the Metal Blade or buster either one works. Difficulty Analysis- this stage can be difficult. What makes this stage difficult is the games you have to cross. Also, the birds do not help either. Air Man himself his tornadoes are hard to dodge and he can jump, but he is not too bad. It just requires picking your spots to win this battle. Crash Man Stage (difficulty 3/10) There really is not much to say about the first few rooms. All, you want to do is climb the ladders and dodge the Tellies. The Tellies can only have 3 on the screen at the same time so remember that. After the ladders you will see Mets and the block enemies again. The best thing to do is just shoot the Mets and Block enemies. The next 3 rooms have the same gimmick. There is a platform going around a track, so what you want to do is get on the platform. Also, remember the Tellies can only have 3 on the screen at the same time. If you get cornered by Tellies just shoot them and head up the next ladder. The next room just has more block enemies in it deal with them like you did before. The next, thing you want to do is climb the very long ladder till you get to the top. Before proceeding to the next ladder you will notice a met. To deal with the Met jump then jump back, the Met will fall down and out of the way. Climb up the ladder and you will find there are two ladders. Take the one on the right and head up. Now, the first bird will drop its eggs on you just take the hit and move up. As you are climbing the ladders look to the right. The birds will drop their eggs off the screen. For the final room just head to the gate and avoid the copter enemies. Crash Man (difficulty 2/10) you would think a robot with bombs as his weapon would be hard right? Wrong, this guy is easy he just jumps around and throws his bombs, but he gives you plenty of time to shoot him in the back. Also, for a quick win use the tornado weapon and he goes down in 3 hits. Difficulty Analysis the only real threat in this stage is the enemies. It is easy to get knocked off a ladder and have to climb the ladder again. Crash man is very easy he just hops around and leaves himself open for attacks. Bubble Man Stage (difficulty 6/10) The first room is pretty simple, it starts of with a waterfall. The only threat here is frogs that produce mini frogs. If you keep a mini frog around they will not produce more. Just shoot the frogs and move on. The next platforms fall as soon as you step on them so quickly jump from one platform to the next. You, will then head down a shaft and see a shell enemy. If you shoot the shell, the enemy will move faster so its jut best to ignore them. Fall down another shaft and your in the pool. Water physics in Mega Man games apply here: you can jump higher, but there are also death spikes. Head right and you will notice a lot of shrimp floating around. The shrimp are being produced by a lantern fish. Shoot, the top (the lamp like thing) of the lantern fish with metal blade as that takes out the fish quickly. Head right, but be careful how you jump as the ceiling is very low, and it has death spikes. Also you will notice strange enemies coming down only shoot these if you have too. Then jump and avoid the death spikes to deal with another lantern fish. After, defeating the second lantern fish you will again notice a low ceiling. Now, instead of the strange things coming down you will have frogs to deal with. Deal with the frogs as you did before, avoid the spikes and jump out of the pool back onto the water fall. The only threats here are crabs falling down from the waterfall. Pick your jumps carefully and head for the gate. Bubble Man (2/10) Bubble Man is not hard at all. The only hard part is the death spikes on the ceiling. Other than that, he just jumps around shooting bubbles at you. For a quick victory take him out with Metal Blade. Difficulty Analysis the stage can be hard. The hardest part of this stage is the underwater part. Mostly, due to enemy placement, and the spikes. It, is so easy to over jump and hit the death spikes. It is also easy to not make a jump and hit spikes. Bubble Man himself is pretty easy he is slow and not much of a threat at all. The only thing is sometimes you may need to jump, and it is easy to jump into the spikes. Heat Man Stage (difficulty 8/10) Okay this stage is a pain. The first stage has the copter enemies to deal with. These guys, just want to land on you, but they have a ton of health, so just ignore them. Next you have the Tellies coming out of holes in the wall shoot them, but do not fall in the lava. The lava in this stage is instant death. Carefully, take out the Tellies and jump on the platforms sticking out of the lava. After the Tellies section climb up on the platforms and avoid the spring enemies. There is a glitch in this game were you can make the spring enemies vanish, so use that if you want to. Now its time for a disappearing block segment. Memorize the pattern, get on top of the ladder and climb down. The next few rooms have the disappearing blocks as well as the Tellies. The first part of the room is not so bad. Just, jump on the block and proceed. Now after crossing a few pits you will jump on a platform. If you want to take a dare jump on the disappearing blocks to cross the long pit. But, if you want to make it easier on yourself use Item 2 (the rocket ) and rocket across to the other side. Thus, skipping the disappearing blocks over the pit and Lava. Climb down the ladder and take out the Sniper Joe, then head down the other ladder to the gate. Heat Man (difficulty 4/10) Okay heat man is a little bit more tricky. First of all, he will start the battle by throwing fire at you. Then he will zoom across the room and turn himself into a blaze of fire. He is tricky because the fire is hard to dodge. So, what you want to do is use Bubble Lead to put him out. Difficulty Analysis what can I say this stage was difficult. First you had the copter enemies to deal with. Second the Tellies over lava, and then you had the disappearing block segments. It is so easy to get hit and land in the lava in this stage. Heat Man can be a problem in that his fire is hard to dodge. Flash Man Stage (difficulty 2/10) Okay, this stage is a breather. You will notice how this stage is not an ice stage, but the floor behaves like one. If you start to slide just jump. The first big room just has cannons in it that shoot bullets at you, so just take them out. Fall down the shaft and take out the Sniper Joe, then fall down to the next shaft. While, your falling hang a left to get an easier path. It, should be noted that this stage is basically just a big maze. Avoid the Sniper Joe and proceed to the end of the area. You will notice Sniper Joe's underneath you, but they are not a threat on this path. At the end of the platform use Item # 2 to rocket across and get an energy tank. Next, use Crash Bomb to blast open the blockage and drop down to the gate. Flash Man (difficulty 1/10) this guy is not a problem at all. First of all, he is very slow. Second he is only dangerous when he freezes time. For a quick win take him out with Meta Blade. Difficulty Analysis this stage really isn't a problem. The only real threat is falling down a shaft and having to face a lot of enemies. Flash Man is not a problem at all, he is just too slow to be a threat. He also leaves himself open for attacks. Wood Man Stage (difficulty 7/10) Wood Man's stage can be tricky. The first room has Bubble Bats they just want to swarm you. The Robot Rabbits are durable and throw carrots at you. Take them all out and head down the ladder. Take out more Bubble Bats and head down another ladder. Now for a durable enemy called Hot Dog. The Hot Dog's spit fire at you and they are 3 of them in the next room. I recommend taking them out with Meta Blade, because they go down quicker. Take the first one and proceed to the next one, then the 3rd one. After, the 3rd hot dog. climb the ladder and meet more bats. The next room has gorillas that like to jump up and swarm you. In addition, the gorillas the birds are back. Both enemies love to knock you down into the pit, so be careful and take them out. The next three rooms just have the Robot Rabbits in them, so deal with the like you did before. The final room has chickens that are very fast. Whatever you do, do not fight these chickens. They are fast and very durable it is best to let them jump over you as you head for the gate. Wood Man (difficulty 7/10) wood man can be a huge problem. First of all he jumps and usually has his leaf shield up. In addition, he can cause leaves to fall causing more damage. The best weapon to use against him is the heat weapon. Remember the heat weapon can be charged up. Difficulty Analysis this stage is hard mostly due to the number of enemies. It is so easy to get hit in this stage and loose health quickly. The gorillas and birds make it easy to fall into the pit. Wood Man is also a problem as he is durable, and his leaves hurt too. Not to mention they are hard to dodge. Quick Man Stage (10/10) If you thought Heat Man or Wood Man's stage was a pain you haven't seen nothing yet. Welcome to the hardest stage in this game. The stage starts off with a shaft just head down. Head down the next shafts and avoid the lasers they are instant death. If you hang a right you can get an Energy Tank. After the first laser room, you will be in a new room with flame enemies. The lights also go on and off so that limits your visibility. The best thing to do is shoot the flame enemies and avoid the fire they toss at you. Now for the hardest part of the stage. The next shafts have more death lasers than the first room did. Carefully, make your way down as tempting as it is do not use the Time Stopper. The Time Stopper weapon should be saved for Quick Man. If, you survived the lasers of death you will be taken to the final room. The final room has Sniper Joe's in it so deal with them. Quick Man (10/10) this guy is a pain. He is very fast and will spam you with boomerangs. In addition he jumps around a lot. It is best just to get in hits when you can. Once his health bar is past the halfway mark, that is where you need to use Time Stopper. Difficulty Analysis this stage is very hard. The enemies are not so bad in this stage, but what makes it hard is all the laser beams. Then, there is Quick Man himself. Quick Man is such a pain. He is fast, has not pattern, jumps around a lot, and spams you with boomerangs. He is also hard to it. Better have an energy tank to tackle this guy. Dr. Wily Stage One (difficulty 4/10) The first room just has lots of birds, horse shoe mines, and towers to get over. To get over the towers use Item #1 to get over them. Now, you will notice a ladder that you cannot get to. So, how do you get up there? To get to the ladder use item #3 its an elevator and ride it up there. Just keep climbing the ladders. The only threat here is the Sniper Joe enemies. After climbing all them ladders guess what you have to climb. Yep, its another long ladder. After climbing that ladder you will notice another latter hanging down. What, you need to do is carefully place item #1's platforms to get to the other ladder. Climb, another ladder and avoid the Tellies. Head to the right and jump on the platforms. You will be chased by a dragon. The dragon is this stage's boss, do not panic and make it to the last platform. Mechanical Dragon is not too bad. It will try to spit fire at you and cause you to panic. The best way to deal with the dragon is to spam it with Quick Boomerang. Difficulty Analysis the only real problems in this stage are the horse shoe mines, and the big spaces between the ladders. It, is so easy to not place a platform correctly and end up falling. Mechanical Dragon is kind of hard but not too hard. He can cause you to lose a step and fall into the pit or he can knock you off he platforms with fire. Wily Stage Two (difficulty 5/10) The first area of the first room just has copter enemies. This time you need to shoot them down quickly to proceed. Next, you will notice a long area with spikes at the bottom, just use Item #2 to get across. Climb, the second ladder for an energy tank and head back down the next ladder. Continue to head down the ladder, but take advantage of the special weapon energy they give you to refuel any special weapons, that are low. Next, you will fall down a shaft stay to the center or you will land on death spikes. The long tunnel has Drill Moles in it so deal with them like you did in Metal Man's stage. Next, you have the pressers to deal with again so deal with them like you did before. To get up to the top platform, just use item #3 to get to the top. After dealing with the pressers jump down the next shaft, but land on the platforms to avoid the spikes. Now for a weird boss, this boss just causes the walls to form into a robot. The robot will shoot beams at you. To damage the boss just shot the robots down. Difficulty Analysis This stage the biggest problems were the Moles, the Pressers, and the spikes. It is very easy to land on spikes in this stage so that is not good. The boss is not real hard to deal with at all. The robot's the wall blocks make only take about 3 shots to shoot down, and their beams are easy to dodge. Wily Stage 3 (difficulty 4/10) Just head down the long shaft to start this stage off. You can also make rights and lefts as you fall to refuel your special weapons as well. Now, you will fall into the water, which means you can jump higher, but there are also death spikes to deal with. The last pit has a metal fish ,that jumps up, so just jump real high and glide over to avoid the fish. The next shaft has death spikes all over the wall so just avoid them as you fall. The next room before the boss just has a bunch of cannon enemies in it, so just take them out and proceed. The boss for this stage has Gutsman on top of a bulldozer, so it is called Gutsdozzer. What you want to do here, is jump on to the bulldozer part and shoot the face. The bulldozer will sometimes spit Mets out so watch out for that as well. Difficulty Analysis the only part of this stage that is difficult is all the death spikes. In fact, it is so easy to land on spikes in this game. A lot of the falls require special maneuvering to avoid the spikes. The boss really is not so bad in this game. The only real danger is the Mets that it produces. Wily Stage 4 (difficulty 9/10) The first room just gives you special weapons energy to refill your weapons. After, refilling your weapons climb the ladder. Climb up more ladders and take out the Mets in front of the ladders. It, also should be noted that some of the floors will cause you to fall through so beware of that. If you want to see were the fake floors are use the Bubble Lead. The next room has the track platform and the Tellies from Crash Man's stage. The only difference is you need to head down this time instead of up. If you do not want to worry about the Tellies you can use the Leaf Shield to protect yourself from them. The second track room does not have enemies but it requires tricky jumps to head downwards. The third, track room has the Tellies and the tricky jumps so carefully make your way downward. The forth, track room just has tricky jumps. Now, if you survived all of that, the next room has a few Sniper Joe's in it so deal with them. The boss is annoying it requires two weapons. The first weapon you will need is the platform weapon. The second the Crash Bomb weapon. This boss also has a puzzle to solve to beat it. While your figuring the puzzle out the orbs on the walls shoot beams at you. To solve this puzzle it goes something like this. First use item #1 to get to the platform, then put a bomb on the first orb. Second, fire a bomb on the wall guarding the orb, then put a bomb on that orb. Jump up and put a bomb on the orb above it. Next, fall down use item #1 to get back to were you started then use it again to go to the platform above it. Drop down take out the lower orb by blasting the wall then the orb. Use item #1 to get to the very top drop down and use the last bomb on that orb. Difficulty Analysis Ugh, this was a very hard stage. The problems are the track rooms. In fact, it is so easy to get hit with Tellies and land on the spikes. Also, if you are not careful you will miss the jumps and land on spikes. Then there is the puzzle at the end. If you do not know what are doing you can run out of Crash Bombs and be a sitting duck. So yeah, this was a very hard stage. Wily Stage 5 (difficulty 10/10) This is a rematch of all the robot masters that is why this stage is a pain Wily Stage 6 (difficulty 6/10) You start this battle off with Wily Machine #2. The first part is just easy just shoot the orb and dodge the balls he shoots at you. After you knock out the orb here is were a trick comes in handy. Hit the next part with a Crash Bomb it destroys the Wily Machine quickly. The next room leading to the final battle just has acid drippings from the ceiling so just avoid them. Now onto Wily. Wily, uses an alien hologram that will circle the room and fire bullets at you. There is only one weapon that can damage it and that is the Bubble Lead. If you hit the hologram with other weapons it recharges its health. Difficulty Analysis the only problem is Wily Machine #2. So many times is it easy to get hit with a beam of energy and lose health. Also, Wily Machine #2 really likes to try and ram you into a corner. The alien hologram is not so bad the bullets do pack a punch so watch out for that. Ending Basically, Wily begs for mercy and Mega Man just leaves him there. Mega Man walks back to Dr. Lights Lab, as he is walking he goes through different climates. The screen shows he goes through a snowy climate, a more temperate climate, and finally it shows him with his helmet on the ground indicating he is home. I will be using the following scale 1-2 Easy 3 Slightly difficult 4-5 Moderate difficulty 6-7 difficult 8-10 very difficult For the Boss Orders I recommend this order Metal Man Air Man Crash Man Bubble Man Heat Man Flash Man Wood Man Quick Man So Let's get started. Hope my guide helps you out. Meta Man Stage (difficulty 3/10) The first thing you will notice is you are on a conveyor belt. Just be careful and jump when you need to stop. Jump over a pit and get the energy tank. You, will then notice spike presses, these are not instant death but they do 25% damage. What you want to do is jump to get the press to fall, as it is going back up, that is where you pass under it. After, passing under the presses, jump the pit and get ready to shoot like crazy. The next area has drill moles. These like to come out from the ceiling as well as the floor. It is best to shoot them and proceed very slowly. After the drill mole section just get back on the conveyor belt and fall down the shaft. The next area continues the conveyor belt accept you have a new enemy here. The new enemy is a clown that likes to jump on wheels, just shoot the wheel out from under the clown and proceed. After the clowns you will meet a block enemy, the best thing to do here is shoot the block's face. But, beware cause sometimes the blocks will shoot toward you. Next you want to make a very careful jump as the pit is wide. Do not get the energy tank you see below it is a death trap. The next and final piece just has spring heads avoid them and head for the gate. Meta Man (difficulty 3/10) despite how metal man spams you with blades, he is not that difficult at all. He jumps and fires at your level so use this to your advantage he also jumps a lot. Still, use his AI pattern to your advantage and he will go down quickly. Difficulty Analysis okay this stage was not too bad. The only real threats here are the presses, moles and the big pit. Metal Man yeah he does spam you with metal blades but he has a terrible AI pattern. Air Man Stage (difficulty 7/10) Okay Metal Man's stage was not bad, that is going to change now. Okay, you want to proceed to the edge of the platforms and jump. After, you jump a monster will appear, use the monster as a platform. However, make sure you avoid the horns coming up out of the monsters head or they will knock you into the pit. It, also should be noted the monsters will produce gremlin like enemies from the side, so watch out for that. Now for a tricky part, you see a fan platform but there is an enemy riding them. Shoot the enemy and jump on the fan platform, do this and get on the next fan platform. Time your jumps carefully and do not assume a platform is behind the clouds that will cause you to lose a life. After the platform segment you will notice birds dropping eggs on you. The eggs if they hit the ground will send many birds that will swarm you. So, it is best to try and shoot the eggs before they land. Avoid the mines producing the horse shoes and fall down the shaft. Now you will have the monsters again, just use them as a platform like you did before. The next segment deals with the bird enemies and fan enemies. The fan enemies try to blow you off the platforms, so take them out quickly. Then take out the bird's eggs and head for the gate. Air Man (difficulty 5/10) Air Man can be a problem due the tornadoes he produces. The tornadoes are hard to dodge. After he fires them hit him with the Metal Blade or buster either one works. Difficulty Analysis- this stage can be difficult. What makes this stage difficult is the games you have to cross. Also, the birds do not help either. Air Man himself his tornadoes are hard to dodge and he can jump, but he is not too bad. It just requires picking your spots to win this battle. Crash Man Stage (difficulty 3/10) There really is not much to say about the first few rooms. All, you want to do is climb the ladders and dodge the Tellies. The Tellies can only have 3 on the screen at the same time so remember that. After the ladders you will see Mets and the block enemies again. The best thing to do is just shoot the Mets and Block enemies. The next 3 rooms have the same gimmick. There is a platform going around a track, so what you want to do is get on the platform. Also, remember the Tellies can only have 3 on the screen at the same time. If you get cornered by Tellies just shoot them and head up the next ladder. The next room just has more block enemies in it deal with them like you did before. The next, thing you want to do is climb the very long ladder till you get to the top. Before proceeding to the next ladder you will notice a met. To deal with the Met jump then jump back, the Met will fall down and out of the way. Climb up the ladder and you will find there are two ladders. Take the one on the right and head up. Now, the first bird will drop its eggs on you just take the hit and move up. As you are climbing the ladders look to the right. The birds will drop their eggs off the screen. For the final room just head to the gate and avoid the copter enemies. Crash Man (difficulty 2/10) you would think a robot with bombs as his weapon would be hard right? Wrong, this guy is easy he just jumps around and throws his bombs, but he gives you plenty of time to shoot him in the back. Also, for a quick win use the tornado weapon and he goes down in 3 hits. Difficulty Analysis the only real threat in this stage is the enemies. It is easy to get knocked off a ladder and have to climb the ladder again. Crash man is very easy he just hops around and leaves himself open for attacks. Bubble Man Stage (difficulty 6/10) The first room is pretty simple, it starts of with a waterfall. The only threat here is frogs that produce mini frogs. If you keep a mini frog around they will not produce more. Just shoot the frogs and move on. The next platforms fall as soon as you step on them so quickly jump from one platform to the next. You, will then head down a shaft and see a shell enemy. If you shoot the shell, the enemy will move faster so its jut best to ignore them. Fall down another shaft and your in the pool. Water physics in Mega Man games apply here: you can jump higher, but there are also death spikes. Head right and you will notice a lot of shrimp floating around. The shrimp are being produced by a lantern fish. Shoot, the top (the lamp like thing) of the lantern fish with metal blade as that takes out the fish quickly. Head right, but be careful how you jump as the ceiling is very low, and it has death spikes. Also you will notice strange enemies coming down only shoot these if you have too. Then jump and avoid the death spikes to deal with another lantern fish. After, defeating the second lantern fish you will again notice a low ceiling. Now, instead of the strange things coming down you will have frogs to deal with. Deal with the frogs as you did before, avoid the spikes and jump out of the pool back onto the water fall. The only threats here are crabs falling down from the waterfall. Pick your jumps carefully and head for the gate. Bubble Man (2/10) Bubble Man is not hard at all. The only hard part is the death spikes on the ceiling. Other than that, he just jumps around shooting bubbles at you. For a quick victory take him out with Metal Blade. Difficulty Analysis the stage can be hard. The hardest part of this stage is the underwater part. Mostly, due to enemy placement, and the spikes. It, is so easy to over jump and hit the death spikes. It is also easy to not make a jump and hit spikes. Bubble Man himself is pretty easy he is slow and not much of a threat at all. The only thing is sometimes you may need to jump, and it is easy to jump into the spikes. Heat Man Stage (difficulty 8/10) Okay this stage is a pain. The first stage has the copter enemies to deal with. These guys, just want to land on you, but they have a ton of health, so just ignore them. Next you have the Tellies coming out of holes in the wall shoot them, but do not fall in the lava. The lava in this stage is instant death. Carefully, take out the Tellies and jump on the platforms sticking out of the lava. After the Tellies section climb up on the platforms and avoid the spring enemies. There is a glitch in this game were you can make the spring enemies vanish, so use that if you want to. Now its time for a disappearing block segment. Memorize the pattern, get on top of the ladder and climb down. The next few rooms have the disappearing blocks as well as the Tellies. The first part of the room is not so bad. Just, jump on the block and proceed. Now after crossing a few pits you will jump on a platform. If you want to take a dare jump on the disappearing blocks to cross the long pit. But, if you want to make it easier on yourself use Item 2 (the rocket ) and rocket across to the other side. Thus, skipping the disappearing blocks over the pit and Lava. Climb down the ladder and take out the Sniper Joe, then head down the other ladder to the gate. Heat Man (difficulty 4/10) Okay heat man is a little bit more tricky. First of all, he will start the battle by throwing fire at you. Then he will zoom across the room and turn himself into a blaze of fire. He is tricky because the fire is hard to dodge. So, what you want to do is use Bubble Lead to put him out. Difficulty Analysis what can I say this stage was difficult. First you had the copter enemies to deal with. Second the Tellies over lava, and then you had the disappearing block segments. It is so easy to get hit and land in the lava in this stage. Heat Man can be a problem in that his fire is hard to dodge. Flash Man Stage (difficulty 2/10) Okay, this stage is a breather. You will notice how this stage is not an ice stage, but the floor behaves like one. If you start to slide just jump. The first big room just has cannons in it that shoot bullets at you, so just take them out. Fall down the shaft and take out the Sniper Joe, then fall down to the next shaft. While, your falling hang a left to get an easier path. It, should be noted that this stage is basically just a big maze. Avoid the Sniper Joe and proceed to the end of the area. You will notice Sniper Joe's underneath you, but they are not a threat on this path. At the end of the platform use Item # 2 to rocket across and get an energy tank. Next, use Crash Bomb to blast open the blockage and drop down to the gate. Flash Man (difficulty 1/10) this guy is not a problem at all. First of all, he is very slow. Second he is only dangerous when he freezes time. For a quick win take him out with Meta Blade. Difficulty Analysis this stage really isn't a problem. The only real threat is falling down a shaft and having to face a lot of enemies. Flash Man is not a problem at all, he is just too slow to be a threat. He also leaves himself open for attacks. Wood Man Stage (difficulty 7/10) Wood Man's stage can be tricky. The first room has Bubble Bats they just want to swarm you. The Robot Rabbits are durable and throw carrots at you. Take them all out and head down the ladder. Take out more Bubble Bats and head down another ladder. Now for a durable enemy called Hot Dog. The Hot Dog's spit fire at you and they are 3 of them in the next room. I recommend taking them out with Meta Blade, because they go down quicker. Take the first one and proceed to the next one, then the 3rd one. After, the 3rd hot dog. climb the ladder and meet more bats. The next room has gorillas that like to jump up and swarm you. In addition, the gorillas the birds are back. Both enemies love to knock you down into the pit, so be careful and take them out. The next three rooms just have the Robot Rabbits in them, so deal with the like you did before. The final room has chickens that are very fast. Whatever you do, do not fight these chickens. They are fast and very durable it is best to let them jump over you as you head for the gate. Wood Man (difficulty 7/10) wood man can be a huge problem. First of all he jumps and usually has his leaf shield up. In addition, he can cause leaves to fall causing more damage. The best weapon to use against him is the heat weapon. Remember the heat weapon can be charged up. Difficulty Analysis this stage is hard mostly due to the number of enemies. It is so easy to get hit in this stage and loose health quickly. The gorillas and birds make it easy to fall into the pit. Wood Man is also a problem as he is durable, and his leaves hurt too. Not to mention they are hard to dodge. Quick Man Stage (10/10) If you thought Heat Man or Wood Man's stage was a pain you haven't seen nothing yet. Welcome to the hardest stage in this game. The stage starts off with a shaft just head down. Head down the next shafts and avoid the lasers they are instant death. If you hang a right you can get an Energy Tank. After the first laser room, you will be in a new room with flame enemies. The lights also go on and off so that limits your visibility. The best thing to do is shoot the flame enemies and avoid the fire they toss at you. Now for the hardest part of the stage. The next shafts have more death lasers than the first room did. Carefully, make your way down as tempting as it is do not use the Time Stopper. The Time Stopper weapon should be saved for Quick Man. If, you survived the lasers of death you will be taken to the final room. The final room has Sniper Joe's in it so deal with them. Quick Man (10/10) this guy is a pain. He is very fast and will spam you with boomerangs. In addition he jumps around a lot. It is best just to get in hits when you can. Once his health bar is past the halfway mark, that is where you need to use Time Stopper. Difficulty Analysis this stage is very hard. The enemies are not so bad in this stage, but what makes it hard is all the laser beams. Then, there is Quick Man himself. Quick Man is such a pain. He is fast, has not pattern, jumps around a lot, and spams you with boomerangs. He is also hard to it. Better have an energy tank to tackle this guy. Dr. Wily Stage One (difficulty 4/10) The first room just has lots of birds, horse shoe mines, and towers to get over. To get over the towers use Item #1 to get over them. Now, you will notice a ladder that you cannot get to. So, how do you get up there? To get to the ladder use item #3 its an elevator and ride it up there. Just keep climbing the ladders. The only threat here is the Sniper Joe enemies. After climbing all them ladders guess what you have to climb. Yep, its another long ladder. After climbing that ladder you will notice another latter hanging down. What, you need to do is carefully place item #1's platforms to get to the other ladder. Climb, another ladder and avoid the Tellies. Head to the right and jump on the platforms. You will be chased by a dragon. The dragon is this stage's boss, do not panic and make it to the last platform. Mechanical Dragon is not too bad. It will try to spit fire at you and cause you to panic. The best way to deal with the dragon is to spam it with Quick Boomerang. Difficulty Analysis the only real problems in this stage are the horse shoe mines, and the big spaces between the ladders. It, is so easy to not place a platform correctly and end up falling. Mechanical Dragon is kind of hard but not too hard. He can cause you to lose a step and fall into the pit or he can knock you off he platforms with fire. Wily Stage Two (difficulty 5/10) The first area of the first room just has copter enemies. This time you need to shoot them down quickly to proceed. Next, you will notice a long area with spikes at the bottom, just use Item #2 to get across. Climb, the second ladder for an energy tank and head back down the next ladder. Continue to head down the ladder, but take advantage of the special weapon energy they give you to refuel any special weapons, that are low. Next, you will fall down a shaft stay to the center or you will land on death spikes. The long tunnel has Drill Moles in it so deal with them like you did in Metal Man's stage. Next, you have the pressers to deal with again so deal with them like you did before. To get up to the top platform, just use item #3 to get to the top. After dealing with the pressers jump down the next shaft, but land on the platforms to avoid the spikes. Now for a weird boss, this boss just causes the walls to form into a robot. The robot will shoot beams at you. To damage the boss just shot the robots down. Difficulty Analysis This stage the biggest problems were the Moles, the Pressers, and the spikes. It is very easy to land on spikes in this stage so that is not good. The boss is not real hard to deal with at all. The robot's the wall blocks make only take about 3 shots to shoot down, and their beams are easy to dodge. Wily Stage 3 (difficulty 4/10) Just head down the long shaft to start this stage off. You can also make rights and lefts as you fall to refuel your special weapons as well. Now, you will fall into the water, which means you can jump higher, but there are also death spikes to deal with. The last pit has a metal fish ,that jumps up, so just jump real high and glide over to avoid the fish. The next shaft has death spikes all over the wall so just avoid them as you fall. The next room before the boss just has a bunch of cannon enemies in it, so just take them out and proceed. The boss for this stage has Gutsman on top of a bulldozer, so it is called Gutsdozzer. What you want to do here, is jump on to the bulldozer part and shoot the face. The bulldozer will sometimes spit Mets out so watch out for that as well. Difficulty Analysis the only part of this stage that is difficult is all the death spikes. In fact, it is so easy to land on spikes in this game. A lot of the falls require special maneuvering to avoid the spikes. The boss really is not so bad in this game. The only real danger is the Mets that it produces. Wily Stage 4 (difficulty 9/10) The first room just gives you special weapons energy to refill your weapons. After, refilling your weapons climb the ladder. Climb up more ladders and take out the Mets in front of the ladders. It, also should be noted that some of the floors will cause you to fall through so beware of that. If you want to see were the fake floors are use the Bubble Lead. The next room has the track platform and the Tellies from Crash Man's stage. The only difference is you need to head down this time instead of up. If you do not want to worry about the Tellies you can use the Leaf Shield to protect yourself from them. The second track room does not have enemies but it requires tricky jumps to head downwards. The third, track room has the Tellies and the tricky jumps so carefully make your way downward. The forth, track room just has tricky jumps. Now, if you survived all of that, the next room has a few Sniper Joe's in it so deal with them. The boss is annoying it requires two weapons. The first weapon you will need is the platform weapon. The second the Crash Bomb weapon. This boss also has a puzzle to solve to beat it. While your figuring the puzzle out the orbs on the walls shoot beams at you. To solve this puzzle it goes something like this. First use item #1 to get to the platform, then put a bomb on the first orb. Second, fire a bomb on the wall guarding the orb, then put a bomb on that orb. Jump up and put a bomb on the orb above it. Next, fall down use item #1 to get back to were you started then use it again to go to the platform above it. Drop down take out the lower orb by blasting the wall then the orb. Use item #1 to get to the very top drop down and use the last bomb on that orb. Difficulty Analysis Ugh, this was a very hard stage. The problems are the track rooms. In fact, it is so easy to get hit with Tellies and land on the spikes. Also, if you are not careful you will miss the jumps and land on spikes. Then there is the puzzle at the end. If you do not know what are doing you can run out of Crash Bombs and be a sitting duck. So yeah, this was a very hard stage. Wily Stage 5 (difficulty 10/10) This is a rematch of all the robot masters that is why this stage is a pain Wily Stage 6 (difficulty 6/10) You start this battle off with Wily Machine #2. The first part is just easy just shoot the orb and dodge the balls he shoots at you. After you knock out the orb here is were a trick comes in handy. Hit the next part with a Crash Bomb it destroys the Wily Machine quickly. The next room leading to the final battle just has acid drippings from the ceiling so just avoid them. Now onto Wily. Wily, uses an alien hologram that will circle the room and fire bullets at you. There is only one weapon that can damage it and that is the Bubble Lead. If you hit the hologram with other weapons it recharges its health. Difficulty Analysis the only problem is Wily Machine #2. So many times is it easy to get hit with a beam of energy and lose health. Also, Wily Machine #2 really likes to try and ram you into a corner. The alien hologram is not so bad the bullets do pack a punch so watch out for that. Ending Basically, Wily begs for mercy and Mega Man just leaves him there. Mega Man walks back to Dr. Lights Lab, as he is walking he goes through different climates. The screen shows he goes through a snowy climate, a more temperate climate, and finally it shows him with his helmet on the ground indicating he is home. |
Vizzed Elite
Affected by 'Laziness Syndrome'
Registered: 08-18-12
Last Post: 75 days
Last Active: 22 days
Affected by 'Laziness Syndrome'
Registered: 08-18-12
Last Post: 75 days
Last Active: 22 days
Post Rating: 1 Liked By: MysteryMan007,
11-21-14 02:04 AM
MysteryMan007 is Offline
| ID: 1106449 | 46 Words
| ID: 1106449 | 46 Words
MysteryMan007
Level: 31
POSTS: 137/205
POST EXP: 8714
LVL EXP: 174464
CP: 3333.2
VIZ: 38620
POSTS: 137/205
POST EXP: 8714
LVL EXP: 174464
CP: 3333.2
VIZ: 38620
Likes: 0 Dislikes: 0
tornadocam : Based on your difficulty ratings for each stage, this one seems harder than Part 3. Interesting. Still that's reasonable, some second games are way harder than the first game if the first was too easy, then they use the third game to balance it out. |
Member
Affected by 'Laziness Syndrome'
Registered: 08-16-14
Last Post: 3389 days
Last Active: 687 days
Affected by 'Laziness Syndrome'
Registered: 08-16-14
Last Post: 3389 days
Last Active: 687 days
11-24-14 12:06 AM
www.megamanzero is Offline
| ID: 1107431 | 268 Words
| ID: 1107431 | 268 Words
Level: 15

POSTS: 33/39
POST EXP: 7005
LVL EXP: 14507
CP: 593.1
VIZ: 125

POSTS: 33/39
POST EXP: 7005
LVL EXP: 14507
CP: 593.1
VIZ: 125
Likes: 0 Dislikes: 0
ANGRY VIDEO GAME NERD: Another great review but what is a guide without a story well everything but6 am still writing the story ok 321 GO!!!: One year after the defeat of Dr Wily, Mega World(the city where Mega man live and the place Dr Wily attack) enjoy a year of peace and a break from Dr Wily but unknown to the people of Mega World, Dr Wily was using the time he have be gone to study Mega man and after many tries and fails Dr Wily finally made Flash man an perfect copy of Mega man however Flash man couldn't change his Flash buster into a hand and also he couldn't copy robot special weapon so Flash man was therefore wasn't a perfect copy of Mega man (more like a 98%) and thus Dr Wily gave up on that plan and brought Plan B(make your own robot master) and he made seven robot master of his own (along with Flash man). On June 9 the eight robot begin to attack the city while holding flag of Dr Wily, Dr Light, Mega man and Roll was taking a trip in the city heard that Dr Wily has been attack the city, send Mega man to stop Dr Wily and destroy the eight robot, Mega man standing on the roof of their rented house then start going to the location of the robot master while in his skull castle Dr Wily watch Mega man carefully finding a weakness and always upgrading his skull castle defences, and that the story this have and always has been AVGN signing out. ANGRY VIDEO GAME NERD: Another great review but what is a guide without a story well everything but6 am still writing the story ok 321 GO!!!: One year after the defeat of Dr Wily, Mega World(the city where Mega man live and the place Dr Wily attack) enjoy a year of peace and a break from Dr Wily but unknown to the people of Mega World, Dr Wily was using the time he have be gone to study Mega man and after many tries and fails Dr Wily finally made Flash man an perfect copy of Mega man however Flash man couldn't change his Flash buster into a hand and also he couldn't copy robot special weapon so Flash man was therefore wasn't a perfect copy of Mega man (more like a 98%) and thus Dr Wily gave up on that plan and brought Plan B(make your own robot master) and he made seven robot master of his own (along with Flash man). On June 9 the eight robot begin to attack the city while holding flag of Dr Wily, Dr Light, Mega man and Roll was taking a trip in the city heard that Dr Wily has been attack the city, send Mega man to stop Dr Wily and destroy the eight robot, Mega man standing on the roof of their rented house then start going to the location of the robot master while in his skull castle Dr Wily watch Mega man carefully finding a weakness and always upgrading his skull castle defences, and that the story this have and always has been AVGN signing out. |
Member
Affected by 'Laziness Syndrome'
Registered: 08-02-14
Location: Why would you care?
Last Post: 3152 days
Last Active: 3014 days
| Don't mess with the uchiha clan |
Affected by 'Laziness Syndrome'
Registered: 08-02-14
Location: Why would you care?
Last Post: 3152 days
Last Active: 3014 days
