

 User Notice
 Forum Links
Play Frogger Online
Thread Information
Thread Actions


Order
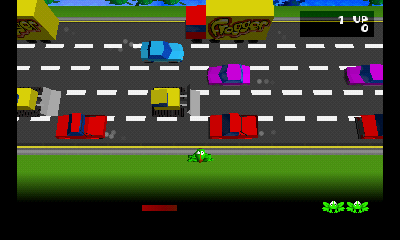
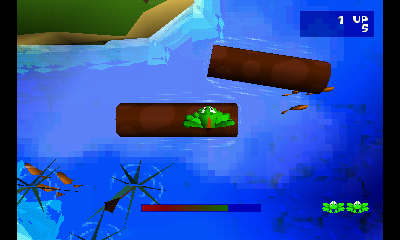
Frogger PSX Walkthrough: Part 2
Game's Ratings
Overall
Graphics
Sound
Addictiveness
Depth
Story
Difficulty
Average User Score
8.5
8
8
9
10
7
9
07-05-19 02:15 PM
 EX Palen is Offline
| ID: 1373084 | 8530 Words
EX Palen is Offline
| ID: 1373084 | 8530 Words
 EX Palen is Offline
| ID: 1373084 | 8530 Words
EX Palen
Spanish Davideo7
Spanish Davideo7
Level: 142


POSTS: 4875/6423
POST EXP: 1172098
LVL EXP: 34593104
CP: 194862.3
VIZ: 11341403

POSTS: 4875/6423
POST EXP: 1172098
LVL EXP: 34593104
CP: 194862.3
VIZ: 11341403
Likes: 1 Dislikes: 0
For the first part of the walkthrough, with the initial worlds and all the controls and basics, click here
ZONE 6 – THE CLOUDS We now move up to the sky, and have Frogger jump over birds and clouds while at an extreme altitude. Falling off in this zone is very easy because the “land” is very limited, so watch your step, and also don’t stay too much on the birds or they’ll take you out of bounds. Speaking of birds, there’s quite the variety of them: the common big one we’ve seen before (and we will see it later too), smaller and swifter seagulls and also ducks and geese, at one level even in a flock. The four levels of this zone aren’t as unique as we’ve seen In previous zones. The third one is a revisit of the first one, so it’s the only one with a somewhat familiar layout, and the fourth also has some similarities to those two. The second level, however, is very strange, with a long initial section that is almost a routine to follow before you’re able to get to the froggies. Level 6-1 – Looney Balloons Time: 70 seconds A basic layout to start this zone. The froggies are quite close from each other, so the path is very linear. Still, it hosts a few complications that can become a nuisance for untrained players, so be sure to practice this level and get a hold of how things work in this zone. As the name implies, we will see a few balloons in our way, besides the birds I’ve already mentioned. If Frogger hops on a green balloon it will ascend high until it pops; whereas if he hops on a yellow or red balloon it will descend until going out of bounds, with the difference that the yellow and red ones do return to their starting position once Frogger hops off them. Green: Hop up and wait for a bird to pass by. Hop onto it, then let it carry you left and hop up to the cloud ahead. Continue hopping up to the rows of balloons, wait for a bird to serve as bridge and cross ahead to the next cloud. The Green froggy stands near the top left corner. Orange: Follow the Green walkthrough, and keep going ahead to the edge of the cloud. Seagulls will fly by, so jump over one of them and let it carry you right. You can rotate the camera with L2 for an easier time as you travel. Hop off the cloud to your right (assuming you’ve rotated the camera) after passing a set of balloons, you’ll see the Orange froggy a few spaces to the right. Red: Follow the Orange walkthrough. Go up from its spot, where a geese will fly by. Stay in its trajectory and it will automatically carry you right. Rotate the camera again with L2, then wait until a slower geese lines up with the one carrying you, and hop onto it. Wait patiently until it does a U-turn, rotate the camera with R2 and hop onto the cloud up ahead with the help of the green balloon (the cloud is a bit higher, so you’ll need to ascend a bit). The Red froggy is nearing the right edge of the cloud. Purple: Follow the Orange walkthrough and stay on the froggy’s spot. A bird will pass by right next to you, so Superhop onto it. Rotate the camera again with L2, you’ll see the bird approaching a cloud with the Purple froggy on it just a hop away from you. Blue: Follow the Purple walkthrough, you’ll see a path of balloons up ahead from the froggy’s spot. Follow it, paying attention to what each balloon does since not all are at the same altitude, and they will lead you to the Blue froggy standing in a cloud to the left. Level 6-2 – Time Flies Limit: 22 seconds Quite a unique level, and the one truest to its name. There’s an initial section you must pass to get all the froggies, which also implies a very long trip in which you must eat as many time bugs as possible to not run out of time. After that section, the froggies can be retrieved rather easily just like in the previous level, minding the balloons and the high altitude while traversing the clouds. Initial section: There’s a maze you can follow, or you can also hop into the moving pink balloons for shortcuts. I prefer going through the maze to also eat the time bugs present here. There’s a golden bug after the first junction, with a silvery-blue further to the left on the dead end. Two more silvery-blue bugs are ahead, and a golden bug doing a small roundabout to the left. A last one is to the left during the path between the yellow and red balloons, minding the bird passing by. There’s also a worm, which grants you the Super Tongue, but it’s a one-time only so I recommend ignoring it (unless you want to boost your score in a specific run by eating other bugs slightly off the path). Once on the last stretch, go left towards a teal balloon and pop it simply by hopping onto it. A flock of five geese will fly to the right, so hop right just as they fly over you to hop onto them and let them carry you. They’ll fly in a spiral and over several time bugs of different colors, so try to eat as many as you can. I recommend staying on the leftmost geese for this trip, and don’t rotate the camera so you can better see when a time bug will be at your reach. Once the flock flies straight again after the spiral, they’ll make one last 90 degrees turn to the right, and it is here where the path to each froggy starts to differ, luckily with much more time left for maneuvers. Green: After the mentioned 90 degrees turn, hop to the uppermost geese and wait to pass by a line of balloons. Hop onto them and then further ahead onto the pink balloon, which moves sideways. You can let it carry you right to the elongated cloud or, due to its slow speed, progress forward as a “shortcut”. Two more pink balloons move between a few red balloons, so hop onto a red balloon right when it’s lined up with the next pink balloon. Hop up towards the elongated cloud, and the Green froggy will be on the leftmost corner. Orange: Follow the Green walkthrough. In case you didn’t see it before, it is on the same cloud as the Green froggy, but on the rightmost corner. Blue: After the 90 degrees turn, hop onto the lowermost geese and wait until you pass by an elongated cloud. Rotate the camera twice (or you can do it before hopping to the cloud, both are valid) and hop onto a pink balloon that serves as connector with the cloud ahead. Another balloon will connect it with a cloud further ahead, plagued with standard bugs which don’t give much score by the way. The Blue froggy is to the left of this cloud. Red: Follow the Blue walkthrough. When reaching the last cloud, this time head right instead of left to retrieve the Red froggy. Purple: Follow the Blue walkthrough again. You surely have seen the Purple froggy on a cloud ahead of the junction of the Blue and Red froggies. Two quick pink balloons serve as connectors with the cloud the Purple froggy is on, surrounded by bugs at both sides (which you can eat on your way to Blue and Red, respectively), so retrieve it to finish the level. Level 6-3 – Loonier Balloons Time: 34 seconds A revisit of the first level. It isn’t that much complicated regarding the layout, but it’s a bit more stressing due to the greatly reduced time limit. We will be hopping onto more birds here, and they fly much faster than in the starter level, so both speed and precision will be put to the test here. Green: Go up and hop onto the bird passing by. Hop up towards the next cloud, then go to the right edge and wait for a duck to fly by. You can also hop off the bird on the cloud below, where two golden time bugs are, because the duck also flies by the right edge in here. Rotate the camera once with L2 and hop onto it, then hop down to the next cloud. The Green froggy will be on the lower edge of the cloud. Orange: Follow the Green walkthrough. On the froggy’s cloud, rotate the camera back to normal and go to the upper edge, where a seagull or a duck will fly by very quickly to the right. Hop onto any of them, and hop down on the next cloud they fly over. The Orange froggy will be to the left of the lower edge of the cloud. Red: Follow the Orange walkthrough. Once you hop off the seagull or duck, head to the right edge. A goose will fly vertically, so hop onto it the way you did with its flock previously. A few time bugs can be found slightly ahead as it flies. Rotate the camera twice while you fly, then hop onto a slower geese to the right. There, hop right towards a set of balloons heading upwards, the Red froggy will be waiting on that cloud above. Purple: Follow the Orange walkthrough. Go to the right edge again, but wait for the bigger bird to fly sideways nearing the lower edge. Superhop onto the one going left, and it will carry you towards a small solitary cloud where the Purple froggy awaits. Blue: Follow the Purple walkthrough. On the solitary cloud, wait for a seagull to fly by the lower edge, and hop onto it. It will take you towards another solitary cloud, where the Blue froggy awaits. Level 6-4 – Airshow Antics Time: 60 seconds The last level in this zone gets rid of the birds to introduce jet airplanes and helicopters. The former are the method of transportation between the clouds, the latter act as obstacles due to their helix coming from below the clouds. And speaking of clouds, most of them in this level will cause Frogger to slide, like if they were made of ice, adding a bit more of salt to the mix. This level will need lots of practice, first to know the timing of the transports and obstacles and second to learn the safe spots and ideal paths through the icy clouds. Patience is also recommended, for you will probably need a lot of tries before completing this level. Red: Go up and wait for two planes to fly by, side by side. Quickly hop across them onto the cloud ahead, and follow the arrow to go left. Beware of the sliding and the helicopter in the way. Once you’re on the edge of the cloud, go up and, being extremely careful with the helicopter here, hop left onto the green balloons (the lowermost one, if possible). Keep going left through the balloons, managing how they go up and down according to their colors, until you reach the first red balloons. You’ll see a green balloon in the lower edge, so hop onto it and let it take you upwards towards the spot where the Red froggy awaits. Green: Hop onto the first plane passing by. When it makes a U-turn, hop to the cloud below and go left, towards a safe spot. Rotate the camera twice, and head to the balloons you see ahead. No need to go left and try your luck with the helicopter, simply hop onto the lowermost balloon from the safe spot. It’ll take you upwards towards a path made of red balloons. Follow it all the way to the right, then head up until you hop onto another green balloon. This one will take you upwards to the spot where the Green froggy awaits. Orange: Wait for the pair of planes to fly by, and hop onto the uppermost one (or hop onto the plane passing by, then hop onto the one joining it after the first U-turn). After the second U-turn, hop up towards the cloud and go left to avoid the helicopter. Now, go up and then left, through a stretch with three helicopters that can be quite tricky to pass safely. Once on the left edge, hop onto the uppermost green balloon and keep going left through the balloons. The last yellow one doesn’t take you to the green one, so you’ll have to hop from a safe distance. After this green balloon, hop west onto another one, then head north through the balloons until you reach the spot where the Orange froggy is. Purple: Hop onto the plane passing by, and rotate the camera twice while riding it. After the third U-turn, hop onto the cloud and slide to the left, you’ll see the Purple froggy surrounded by bugs a few spaces up from you. There’ll be hawks trying to hunt you down in this cloud, so be quick and diligent. Blue: Wait for the pair of planes to fly by and hop onto the uppermost one (again, you can alternatively hop onto the first plane passing by and then hop onto the one joining it after the U-turns). It will make four U-turns before going straight for a while, and then it will turn right. Once it does, hop down to the cloud it passes by, and quickly hop to retrieve the Blue froggy on the lower right corner (a plane passing by can accidentally pick you up if you’re not quick enough). Yellow: Follow the Orange walkthrough up to the yellow balloons. Once you hop to the second green balloon after them, go down instead of left/up, you’ll see the Yellow frog standing on a cloud very close to the balloon (you’ll need to hop back to the balloon quite quickly or it will ascend beyond your reach and leave you stranded there). ZONE 7 – THE CHEMICAL WASTES Ah, a sewer-like zone couldn’t be absent from this game, could it? All kinds of colored slimes or oils, greenish water, fish skeletons taking a dip, barrels with dubiously healthy content or right away explosive, rats and slugs running amok… I wish Frogger also had a customizable skeletal skin to go along with this level xD Anyway, don’t let the descr Level 7-1 – Bang Bang Barrel Time: 23 seconds Not the hardest of levels, but it surely has a big dose of trickiness. Precision, skill and speed will all be tested here, so you’ll also need patience to go through the several tries you’ll need to clear this zone. This zone kind of also features a starting section which must always be done before getting any froggy. However, this time the section is quite easy and quick, so I’ll simply include it in the first walkthrough and the rest will follow up from there. Red: Three rows of barrels go down the stream. Hop onto the first barrel passing you by, then hop onto the faster center one and let it carry you down (there’s a shortcut by hopping from barrel to barrel, but no real need to do it). It will do two U-turns, then hop up towards the upper row and on to the shore. There are five golden time bugs here to replenish the timer way above what we had at the start. After eating them, wait for the silver explosive barrel ahead to line up with the row of barrels up ahead. Do the same process with the newspapers up ahead and manage to land in one of them. When they make a 90 degrees turn, hop down to an opening between the boxes, then hop your way over them to the right where the Red froggy awaits. Blue: Follow the Red walkthrough. When the newspaper does the turn, immediately hop to the other shore. Go a few hops up, then you’ll see the Blue froggy on some elevated pipes, so Superhop your way to it. Orange: Follow the Blue walkthrough, but keep hopping up towards another set of pipes. Superhop your way towards the Orange froggy awaiting further ahead. Green: Follow the Orange walkthrough, eating as many time bugs in your way as possible (they weren’t needed until now). Go further ahead past the spot where the froggy was into the wooden boxes, then head right towards a set of bright green barrels. They float and dive into a dangerous liquid, so learn their pattern and hop your way right until reaching the spot of the Green froggy. Purple: Follow the Red walkthrough again, and this time let the newspaper carry you further right past the boxes. Wait until it lines up with a very slow newspaper ahead, or hop to the shore before you’re carried away. Once you get on the slow newspaper, it will carry you towards the spot where the Purple froggy awaits. Level 7-2 – Slime Sliding Time: 45 seconds Another level which involves sliding. It is noticeably more complicated than the previous level, with slugs making their first real appearance (they were present in the previous level, though we didn’t have to enter their territory) and our friend the big bird making a comeback so we see a known face among all the pestilence. While this level can prove hard to beat, it still is enjoyable. Mark these words, because from here on now you’ll hardly see them again, due to the extremely complicated levels we’re about to face. Also, several alternate paths can be found in this level, so more than ever this is a place where you can explore for other pathways if you feel blocked at any point. Red: Slide ahead until reaching the edge, at which point you must turn right. On the right edge, you’ll see barrels floating in circles on the “water” below. Time your jump perfectly so you land on one, then wait for it to line with the explosive barrel and jump onto it so it propels you towards the Red froggy. Purple: Slide ahead and go left after jumping off the edge. Then, when the slug clears the path, go up and then left, landing on a lower level. Avoid the yellow drops on the way to the left, then Superhop up to the peak. Rotate the camera with L2 and, once you see a rat passing by, hop onto the slimy stretch and make your way right towards the Purple froggy. Orange: Out of the many ways to get the Orange froggy, I prefer the only one where you don’t face any yellow drops. To do this, slide ahead and go to any side after jumping off the edge. Wait for the slugs to clear the path and reach the next edge up ahead. Follow the next stretch, minding the slugs, and halfway through the stretch hop down towards the lower level. The Orange froggy is just one hop away from you. Blue: Slide ahead and go left after jumping off the edge. Wait for the bird to fly by, then hop onto it. You’ll see this is an alternate path for the Purple froggy, but since the bird makes a small turn when reaching the only platform you can jump to it’s very difficult (at least for me) to time it properly. Anyway, as you ride the bird, rotate the camera once with R2 and hop onto the slimy ramps past the Purple froggy. Rotate the camera back to normal, and when a rat hops off the ledge right before your eyes, slide as fast as possible down the ramp. The next one should be free of obstacles, but just in case, this time you’re following the rat so be extra careful to not find it on your way. The last ramp has a couple of skeletal fishes jumoing over the ramp, so wait until they clear the path and storm down towards the Blue froggy. Green: Follow the Orange walkthrough. This time, when hopping to the lower level, we need to go up and leave the Orange froggy behind. You will have to avoid three yellow drops, so be careful. Here, you’ll face a stream with four rows, the odds with newspapers and the evens with barrels. Hop up very fast through the newspapers, then manage to make your way to the right to the spot where the Green froggy awaits. Level 7-3 – Uncanny Crusher Time: 40 seconds One of the hardest, or at least trickiest, levels in the whole game. The right section of the level is fully covered by oil, meaning you will slide heavily. What’s worse, this level is filled with spiked crushers you must avoid. The first three froggies aren’t excessively hard to retrieve, but the last two will put your patience, speed and precision to the test. Be sure to play around with the camera, if you’re not comfortable with the view there’s no chance you can beat this level. Green: Hop ahead along the tube and then hop onto one of the newspapers coming out of it. Let it carry you further ahead, and after a small downhill, avoid the horizontal crusher coming from both sides and Superhop to retrieve the Green froggy. Red: Hop onto a newspaper like before, then jump left when it lines up with a barrel. Hop left again to the shore, and pass through the vertical crushers all the way left. The Red froggy will be a couple hops down after the vertical crushers, and will need a Superhop to be retrieved. Blue: Follow the Red walkthrough up until the Superhop. From that point, head left and then down, hopping through a set of crushers in both sides. You can also Superhop atop the “wooden” section of the crushers if you see it’ll make the travel a bit easier, but be careful not to be crushed against the wall when the crushers retreat. There’s a second section of crushers after the first one, and they move a lot faster so watch out. The Blue froggy awaits right after this second crusher section. Orange: Hop onto a newspaper at the beginning, then jump to one of the barrels lined up to the right. Hop to the right shore, and pass through the vertical crushers in some kind of L fashion. I recommend rotating the camera behind Frogger so he always goes up and ahead, but leaving the camera untouched could be a plausible strategy too. Anyway, after the crushers there’s an oiled downhill in which Frogger will slide uncontrollably. A spiked crusher blocks the last part of the path, so be extremely careful. Avoid it, then hop left and avoid a lateral spiked crusher. Hop left again, there will be a set of spiked crushers coming from both sides. There can be safe spots along the way, but it’s also possible to pass them in a single go, while also eating a couple time bugs on the way. The Orange froggy is right after this set of crushers. Purple: Follow the Orange walkthrough. Further ahead there’s a giant spiked crusher moving laterally. Manage to hop ahead to the other side, close to the wall, then hop left. Avoid the crusher again as you keep hopping forward, the Purple froggy will be waiting on a secluded corner. Yellow: Follow the Orange walkthrough. After passing the froggy’s spot, avoid the giant spiked crusher by hopping ahead to the other side. The Yellow frog will be close to the right wall. Level 7-4 – Boom Boom Barrel Time: 50 seconds A revisit of the first level. The extended time limit has erased most of the time bugs, which also implies we can now take our time through the whole level. The changes aren’t very big, just that more precision is needed with the transports and more enemies are on our way, besides of a few changes in the location of the froggies. Red: Three rows of barrels go down the stream; hop onto the first barrel passing you by, then hop onto the faster center one and let it carry you down (it would be interesting to test the shortcut in later frogs since the timer can’t be replenished as easily now). It will do two U-turns, then hop up towards the upper row and on to the shore. Once ashore, wait for the silver explosive barrel ahead to line up with the row of barrels up ahead, but careful because the jump is done leaning to the right more noticeably than the last time. Do the same process with the newspapers up ahead, which now come in highly reduced numbers, and manage to land in one of them. When they make a 90 degrees turn, hop down to an opening between the boxes, then Superhop your way over them to the section where the Red froggy awaits. Purple: Follow the Red walkthrough and let the newspaper carry you further right past the boxes. Wait until it lines up with a very slow newspaper ahead, or hop to the shore before you’re carried away. Once you get on the slow newspaper, it will carry you towards the spot where the Purple froggy awaits. Blue: Follow the Red walkthrough, and hop onto the other shore. This is the “main piece of land” we didn’t even touch the first time. Head to the center, free of danger, rotate the camera with L2 then hop up nearing the edge. Be extremely careful with the rows of slugs passing by, and hop your way towards the Blue froggy to the right. Orange: Follow the Blue walkthrough. This time, when reaching the edge, go left instead of right. The slugs here are seemingly a bit harder to predict and avoid, but there’s a safe spot between the two pipes that can make things easier to retrieve the Orange froggy on the left corner. Green: Follow the Blue walkthrough, but you’ll need the shortcut on the initial section for this one. The shortcut is as follows: hop onto a barrel on the upper row, wait for it to be lined up with one ahead down the hill and jump on it, then quickly jump your way through the barrels as they line up from here on until getting ashore. Now, follow the walkthrough as stated and head further ahead on the center zone while avoiding the slugs. Newspapers will be floating on a small stream, so use them as connectors to get to the giant boxes. Here, go right through the green barrels, just like you did last time, and retrieve the Green froggy at the end of the path. Level 7-5 – Reservoir Frogs Time: 60 seconds A level that is kind of a mix-up of everything we’ve seen in this zone so far. Large streams with barrels and newspapers (and with the new additions of raccoons), slimy tubes, oily floor, spiked crushers, slugs… Finally the last level of a zone lives up to its status. This level is also one of the hardest, because the combination mentioned above makes up for a deadly combo. Retrieving the froggies will require a big dose of skill, patience and speed. If you haven’t beaten at least half of the previous levels of this zone, you have nothing to do here. Purple: Hop left onto the floating newspaper. Make your way to the left across the oil barrels and newspapers until you reach the shore, or be lucky enough to come across a silver explosive barrel that automatically shoots you to the shore. The Purple froggy is nearing the lower edge of the shore. If you think it will make things easier, rotate the camera with R2 before starting, then change “left” for “up” and “down” for “left” to make this walkthrough valid. Green: Follow the Purple walkthrough, and this time it’s mandatory to rotate the camera with R2, either at the start of the level or when reaching the other shore. There’s another stream ahead of the spot of the froggy, and traversing it is the trickiest section you’ll ever see. The exploding barrels on the odd rows must all be lined up so you’re sent flying towards the other shore. If you land on a non-explosive barrel, turn back and hop onto an explosive barrel so you can try again. Once you’ve crossed the stream, head right towards a path of explosive barrels, which will take you to the desired Green froggy (albeit in a very funny way, I must admit). Blue: Hop ahead along the stream, go down a slimy pipe and keep hopping ahead until reaching the edge. You’ll see an oily pathway to the right, which you must take. When nearing the end, go down. A set of spiked crushers coming from both sides is ahead, so make your way through them to get to the Blue froggy (rotate the camera if needed as a way to predict the crushers’ movements). Red: Hop ahead along the stream and go down the slimy tube. Here, you must cross the stream to the other side, like you did previously. Hop your way through the newspapers, barrels and raccoons to reach the shore, or wait for an explosive barrel to go by the middle row of newspapers so it can shoot you directly to the shore. Once there, head up and climb up to the log, then hop left to retrieve the Red froggy. Orange: Follow the Red walkthrough and climb to the log like before. This time, go right alongside the slime-covered log avoiding the slugs. Once you reach the other end, follow another log up, being careful with the overpass because it can somewhat block your view of the slugs to avoid. After passing this log, head left avoiding the very fast slugs. Now, Superhop your way in this uphill log, abusing this maneuver if you want to counter the sliding effects of the slime. Once at the peak, go all the way right, now at full speed because there are no more slugs to avoid. At the rightmost edge, jump down to a log below, then once again Superhop through the uphill that will take you to the Orange froggy. ZONE 8 – THE DESERT A frog’s least suitable environment due to the total absence of water, but whatever. This is the last true zone, with 5 levels of the highest difficulty and tons of enemies and obstacles to watch out for. You’ll need several tries to clear this zone, so take your time and endure the trial with patience and always learning from your mistakes. Like in previous instances, the first three levels are unique on their own, while the fourth and fifth are revisits of the first two. In this occasion, where difficulty is at its peak, the revisits are made much harder and complicated than the “standard” versions, to the point that the fifth level is clearly the most complicated in the whole game (staying true to its status of last level before the bonus zone). Level 8-1 – Cactus Point Time: 40 seconds While relatively easy compared to what we’ve been through in the previous zone, and the levels yet to come, you shouldn’t lower your guard too much on this level. Learning the pattern of the obstacles and enemies is crucial to safely traverse this level, and because this zone features unique enemies not seen anywhere else, it’s better to get used to them while things start out easy. Red: Fully traverse the buffalo stampede, heading a bit right if you can. It’s basically like the cars we encountered in the first zones, but a bit more complicated. Once done, keep going up and avoid the beetles circling the cacti (and the cacti themselves, their spikes are harmful). Still going up, avoid the snake moving horizontally and enter the zone with the falling boulders. Figure out a path where the boulders won’t hit you, then quickly go up and slightly right to retrieve the Red froggy. Purple: Traverse the stampede again, but this time head for the left path at the split. Avoid the beetles, cacti and snakes like before (the snakes move differently here, and the beetles now move on the opposite direction) and keep going forward to the falling boulders. Quickly make your way through the avalanche to retrieve the Purple froggy waiting ahead. Blue: Follow the Purple walkthrough, and go past the froggy’s spot. Rotate the camera with R2 and go straight up the incline, making sure to eat any time bug in your way. Stay close to the wall ahead and, being wary of the gila monsters, make your way left. Follow the tight path down, and you’ll reach an open zone with more gila monsters. Make your way left, towards a third open zone, then get as close to the left as possible before hopping down towards the screen. The Blue froggy will be at the lower edge of the path. Orange: Follow the Purple walkthrough, but this time rotate the camera with L2 and go straight up the incline (opposite from Blue, if it’s easier to understand). Turn right to a wide path, where more rocks will be thrown. The path has safe spots along the way if you need them, but the rocks can be avoided easily because the path is wide and the rocks are rather infrequent, and eat the time bugs if you want to go safe on time. When reaching the end of the path, hop down towards the screen to retrieve the Orange froggy. Green: Follow the Orange walkthrough, and wait for a bird to fly by the froggy’s spot. Hop onto it, you’ll be taken to the Green froggy (which oddly enough is standing atop the wall that makes the split after the buffalo stampede). Level 8-2 – Boulder Alley Time: 50 seconds Probably one of the toughest levels. It needs a massive dose of patience, because the key to beat it is simply great timing and precision, as well as a bit of luck you can’t waste. Every single move needs to be done at the right time, without rushing, which can only be achieved with practice. Another key is to not end up stuck anywhere, make your way back and forth if needed but don’t ever get stuck or it’ll be the end of the line. You might get a good chunk of Game Overs before even retrieving a single froggy, so make sure to at least learn something about enemy patterns that can help you get further and further with each try. Red: Go up, to the path the beetles are walking. It’s a tight path, meaning you can only go right or left. We’ll be heading right, opposite of the beetles. To do that, wait until the beetle is almost touching you and Superhop over it. Make your way to the right with this trick, and head up in the next junction, which also has beetles coming down your way (be extremely cautious with the merging of beetles from both paths). Make your way up, then head right at the first chance. Keep going right, and stop just before reaching another path of beetles. A bird will pass by the upper edge, so hop onto it and let it carry you towards the Red froggy. Green: Follow the Red walkthrough, but don’t deviate on the second path of beetles and keep going up. The tight path will now suffer from an avalanche of rocks, though safe spots exist along the way. Use those spots, or carefully visualize the rock’s shadow to see where it won’t be landing, and make your way up through the snaking path until you reach the Green froggy. Blue: Follow the Green walkthrough, eating all the time bugs in your way (you’ll need them now more than ever). Follow the path further up from the froggy’s spot, minding one last streak of falling boulders. The last stretch is free of peril, just stay away of the cacti as you hop your way towards the Blue froggy at the end of the path. Orange: Follow the Red walkthrough again. This time, we’ll be taking that path of beetles we ignored, so hold your breath and rotate the camera with L2 if needed. Superhop over any beetle coming your way, being extremely cautious at the point where another path collides. This section is tremendously difficult, so take as many tries as needed. Keep going through the second path, then head left for a third path, with much faster beetles coming your way. Once that’s done, head left and then up, eating any time bugs in your way. Follow the tight path to the right, but be careful with the boulders, since they fall now alongside the cliff like a true avalanche. Avoid the rocks as you climb, then before making that second U-turn, wait for a bird to fly by. Hop over it, and it will take you to the spot where the Orange froggy awaits. Purple: Follow the Orange walkthrough, but this time go all the way up the hill with the falling rocks. Eat the time bugs available at the U-turns, then at the third and final left U-turn go all the way up towards the wall. The Purple froggy will be a few hops to the left. Level 8-3 – Tumbling Valley Time: 30 seconds Another level where precision and timing, as well as patience, are put to the test. Quite unique enemies and obstacles await here, like the tumbleweeds, so pay close attention to their patterns. Also, don’t panic at the low timer, routes aren’t very long, so take your time to think your moves. Orange: When the tumbleweeds moving vertically clear the way, head right. Then, make your way avoiding the horizontally moving tumbleweeds so you can go up the incline. Rotate the camera twice to aid you here, because once again you’ll have to Superhop over the beetles. Be careful at the 90 degrees right turn, and keep avoiding the beetles as you head right to retrieve the Orange froggy. Green: When the horizontally moving tumbleweeds bounce away, hop up. Let the vertically moving tumbleweeds pass down and keep heading up, minding another set of horizontally moving tumbleweeds. You’ll need to go up that incline, so be set for it. Watch out for the vultures flying about, they can be touched with a Superhop. Avoid the beetles once again, be careful at the tight turn, and keep hopping ahead to retrieve the Green froggy. Purple: Follow the Green walkthrough, but this time avoid the incline and go further up, you’ll see a set of oddly-colored platforms. Beware of the vultures when they pass over the path, and don’t stay too much on any of these platforms because they fall down after a brief while. Hop onto the first platform, and from there on, go 3 hops left to a safe spot, 1 hop down, 3 hops left and finally 5 hops up towards the spot where the Purple froggy awaits. Red: Follow the Purple walkthrough. This time, hop all the way up through the first set of falling platforms, then head right to safe land. You’ll see on the upper right corner a spot with boulders rolling about in circles. Traverse that point the best way you can, the Red froggy is nearing the upper edge of that zone. Blue: Follow the Red walkthrough, but this time, head to the zone with the rolling boulders on the upper left corner instead. If needed, you can go another way through the falling platforms and have easier access not only to the zone with the boulders, but also have both of the grasshoppers to eat and have enhanced hopping abilities. Whether you eat them or not, which is not mandatory, the Blue froggy is nearing the upper edge, on the upper left corner of the boulder zone. Level 8-4 – Crumbled Point Time: 70 seconds A revisit of the first level, with a similar layout but made much more complicated. Enemies and obstacles are doubled or more in most cases, hence why we got more time to clear this level, and also some froggy routes have varied. Do not rush yourself, observe the patterns and keep practicing until you can find the way out of this level for good. Red: Just like the last time, make your way through the buffalo stampede and take the right path (no need to eat that grasshopper or worm yet). Avoid the beetles, cacti and snakes as you keep moving forward to the area with the falling rocks. Keep hopping forward as you avoid them, you’ll see the Red frog slightly to the right further ahead. Purple: Make your way through the buffalo stampede, but this time aiming for the left path. Like before, avoid the cacti, beetles and snakes and get ready for the rocks. Manage to cross a few layers, and you’ll see the Purple froggy to the left. Blue: Follow the Purple walkthrough and completely cross the falling rocks. Once at the other side, you’ll see two inclines, head for the left one. Rotate the camera with R2 and, avoiding the incoming boulders, keep hopping forward and eat the time bug (you’ll need it). Then, go left avoiding the gila monsters, and follow the tight path. Keep going left on the next zone with the gila monsters, and do the same on the third zone further ahead. When reaching the left edge, go down towards the screen to retrieve the Blue froggy. Orange: Follow the Blue walkthrough, but this time head to the incline on the right side. Move up the incline avoiding the rocks, rotating the camera with L2 to better aid you, and take the first path to the right. More rocks are coming at you from the right side here, so the safe spots along the path might be useful this time. Keep hopping right, then go down towards the screen to retrieve the Orange froggy at the end of the path. Green: Follow the Orange walkthrough. When standing on the spot the froggy used to be on, wait for a bird to fly by the lower edge and hop onto it. The bird will take you to the spot where the Green froggy awaits, once again atop the pillar separating the path after the buffalo stampede you crossed earlier. Yellow: Follow the Purple walkthrough. When you reach the area of the snakes, head a bit left away of them, and the camera will rotate automatically to show you the hidden spot where the Yellow frog is hiding. Level 8-5 – Big Boulder Alley Time: 75 seconds Hardest, toughest and probably also unfairest level in the whole game. Basically a revisit of the second level, which was already complicated enough, that has been made even more complicated. Staying calm throughout this level is nigh impossible. Beetles have increased their pace and also their numbers, new enemies like vultures were invited to the party, some froggies have been relocated and had their routes altered (because the original level was easy, you know)… Precision, patience and mostly trial-and-error will be your friends here, and also a good stash of lives to keep on trying without losing much time. Blue: Like before, go right and Superhop over the beetles, then go up on the crossroad and avoid the beetles the same way. There’s a vulture near the end of the path ahead, so be wary of it. Keep hopping forward, and be ready for a hillclimb with rocks falling on the path. Use the safe spots wisely, learn of the spots the rocks don’t fall on, and eat the golden time bug on the way as you climb. When reaching the peak, go straight to the edge, avoiding the cacti, and retrieve the Blue froggy. Orange: Go right and then up, avoiding all the beetles in the way, then go right avoiding the vulture on the path. Hop all the way right, being mindful of a couple vultures at the edge and a path of beetles coming towards you, and you’ll be able to retrieve the Orange froggy. Purple: Follow the Orange walkthrough, and this time head towards the path of beetles. Rotate the camera and Superhop over them. At the edge, you’ll have to go right, with another trail of beetles coming at you. Superhop your way forward, then head left through another path. Avoid the beetles there too, and be ready for the hillclimb with the avalanche. Just like in the last level, carefully make your way avoiding the falling rocks and eating the golden time bug on the third U-turn. This time, you have a silvery-blue grasshopper on the second U-turn, so make good use of it on your way up. When reaching the summit, go close to the wall ahead and hop left to retrieve the Purple froggy. Green: Follow the Purple walkthrough, up to the mountain. This time, don’t climb up the path, but go further ahead to a tight path with rocks bouncing from side to side. A bird passes right by the central point the rocks “orbit”, so go there and hop over it. Once it descends enough, jump off it and hop down towards a passage. Follow the tumbleweed passing right in front of you, because it describes the outer trajectory in a zone with several more tumbleweeds moving in circles. There’s another passage to the left, so go through it, eat the green time bug and go up towards a lake of sorts filled with crocodile heads in a perfect straight line. You’ll have to hop over them to cross to the other side, so take a bit of time to know when do they sink and which can open up to eat you. Manage to hop across the heads and the Green froggy will be yours. Red: Follow the Green walkthrough up until hopping off the bird. This time, head to the lower right corner and go right through a passage. The second section has a gila monster moving up and down, so be wary of it. When reaching an open zone, wait for the path to clear and go right through another passage. Be careful, though, because tumbleweeds are moving vertically at the other side, performing some kind of loop up and down the path. Manage to get behind a tumbleweed and follow it up to the edge, the Red froggy will be there awaiting to be retrieved. ZONE 9 – THE JUNGLE The bonus zone of the game couldn’t get more colorful than this. Amidst a tropical jungle, with its set of palm trees, rivers, big animals and… carnivorous plants! Well, I’m inclined to think they’re supposed to represent carnivorous plants, even though they don’t eat Frogger up. The last level of the game is located here, as well as the route to the game’s ending. Level 9-1 – Tropical Trouble Time: 45 seconds The wide variety of enemies makes this level quite unique, because patterns hardly repeat as you move deeper into the trees. It’s not very hard to complete, specially after all the trouble we’ve been through, but don’t let your guard down because the clock is ticking. Tropical Trouble somewhat “closes down” once you’ve unlocked the ending. The level can’t be replayed because the froggies are missing, and the enemies also vary or disappear completely. The only route available is for Yellow, so you can see the ending again (or if you forgot to retrieve any Yellow frog while focused on clearing the levels first). Blue: Cross the river up ahead by jumping over the three rows of crocodiles and logs. Once at the other side, be wary of the rhinos rampaging about and hop left.. When going left, you’ll see a bridge going down. Quickly cross it, avoiding the fish and making sure the bridge isn’t cut down, and retrieve the Blue froggy awaiting at the other side. Red: Cross the river like before, but this time attempt to cross it again by jumping over the logs and hippos. You’ll manage to reach another piece of land with rhinos running about. Go right through a path filled with carnivorous plants, and make your way up towards the edge and then left to retrieve the Red froggy. Orange: Follow the Blue walkthrough and continue going left ignoring the bridge. When at the edge, wait until the path is clear and hop up. Avoid the monkey circling the tree and continue forward. Next is a zone with two giant scorpions, one circling a tree and another moving vertically right besides it. Get behind the scorpion circling the tree and wait for the other scorpion to clear the path before going right. You’ll cross the river over a trunk serving as a bridge, then beware of the carnivorous plant and the pair of unknown creatures circling the area ahead. Make your way through the path on the upper right corner, then avoid another monkey circling a tree and use the stones to Superhop your way to the Orange froggy without having to pass besides the carnivorous plant. Purple: Follow the Orange walkthrough. When reaching the froggy’s spot, keep heading left past an ancient temple. You will eventually see a bridge heading down, so cross it. The Purple froggy awaits at the other side to be retrieved, alongside several bugs to up your score a notch. Green: Follow the Orange walkthrough again, and this time go all the way left past the bridge. Only here you’ll find a stone you can Superhop onto. From that stone, hop and Superhop your way across several other stones until you manage to get to the Green froggy. Yellow: After retrieving all the other froggies of this level, the temple’s entrance will open. Follow the Orange walkthrough one more to get to the temple and enter it. You’ll see the Yellow frog standing on a mini-pillar at the center, surrounded by 8 pillars which symbolize the other Yellow frogs you can retrieve in the other zones. When retrieving the Yellow frog, those pillars will ascend and show if you’ve attained the correspondent Yellow frog of that zone, and after that the credits will roll. And this is it! You’ve successfully cleared Frogger! Now go to challenge yourself and get the highest possible score in all levels! ZONE 6 – THE CLOUDS We now move up to the sky, and have Frogger jump over birds and clouds while at an extreme altitude. Falling off in this zone is very easy because the “land” is very limited, so watch your step, and also don’t stay too much on the birds or they’ll take you out of bounds. Speaking of birds, there’s quite the variety of them: the common big one we’ve seen before (and we will see it later too), smaller and swifter seagulls and also ducks and geese, at one level even in a flock. The four levels of this zone aren’t as unique as we’ve seen In previous zones. The third one is a revisit of the first one, so it’s the only one with a somewhat familiar layout, and the fourth also has some similarities to those two. The second level, however, is very strange, with a long initial section that is almost a routine to follow before you’re able to get to the froggies. Level 6-1 – Looney Balloons Time: 70 seconds A basic layout to start this zone. The froggies are quite close from each other, so the path is very linear. Still, it hosts a few complications that can become a nuisance for untrained players, so be sure to practice this level and get a hold of how things work in this zone. As the name implies, we will see a few balloons in our way, besides the birds I’ve already mentioned. If Frogger hops on a green balloon it will ascend high until it pops; whereas if he hops on a yellow or red balloon it will descend until going out of bounds, with the difference that the yellow and red ones do return to their starting position once Frogger hops off them. Green: Hop up and wait for a bird to pass by. Hop onto it, then let it carry you left and hop up to the cloud ahead. Continue hopping up to the rows of balloons, wait for a bird to serve as bridge and cross ahead to the next cloud. The Green froggy stands near the top left corner. Orange: Follow the Green walkthrough, and keep going ahead to the edge of the cloud. Seagulls will fly by, so jump over one of them and let it carry you right. You can rotate the camera with L2 for an easier time as you travel. Hop off the cloud to your right (assuming you’ve rotated the camera) after passing a set of balloons, you’ll see the Orange froggy a few spaces to the right. Red: Follow the Orange walkthrough. Go up from its spot, where a geese will fly by. Stay in its trajectory and it will automatically carry you right. Rotate the camera again with L2, then wait until a slower geese lines up with the one carrying you, and hop onto it. Wait patiently until it does a U-turn, rotate the camera with R2 and hop onto the cloud up ahead with the help of the green balloon (the cloud is a bit higher, so you’ll need to ascend a bit). The Red froggy is nearing the right edge of the cloud. Purple: Follow the Orange walkthrough and stay on the froggy’s spot. A bird will pass by right next to you, so Superhop onto it. Rotate the camera again with L2, you’ll see the bird approaching a cloud with the Purple froggy on it just a hop away from you. Blue: Follow the Purple walkthrough, you’ll see a path of balloons up ahead from the froggy’s spot. Follow it, paying attention to what each balloon does since not all are at the same altitude, and they will lead you to the Blue froggy standing in a cloud to the left. Level 6-2 – Time Flies Limit: 22 seconds Quite a unique level, and the one truest to its name. There’s an initial section you must pass to get all the froggies, which also implies a very long trip in which you must eat as many time bugs as possible to not run out of time. After that section, the froggies can be retrieved rather easily just like in the previous level, minding the balloons and the high altitude while traversing the clouds. Initial section: There’s a maze you can follow, or you can also hop into the moving pink balloons for shortcuts. I prefer going through the maze to also eat the time bugs present here. There’s a golden bug after the first junction, with a silvery-blue further to the left on the dead end. Two more silvery-blue bugs are ahead, and a golden bug doing a small roundabout to the left. A last one is to the left during the path between the yellow and red balloons, minding the bird passing by. There’s also a worm, which grants you the Super Tongue, but it’s a one-time only so I recommend ignoring it (unless you want to boost your score in a specific run by eating other bugs slightly off the path). Once on the last stretch, go left towards a teal balloon and pop it simply by hopping onto it. A flock of five geese will fly to the right, so hop right just as they fly over you to hop onto them and let them carry you. They’ll fly in a spiral and over several time bugs of different colors, so try to eat as many as you can. I recommend staying on the leftmost geese for this trip, and don’t rotate the camera so you can better see when a time bug will be at your reach. Once the flock flies straight again after the spiral, they’ll make one last 90 degrees turn to the right, and it is here where the path to each froggy starts to differ, luckily with much more time left for maneuvers. Green: After the mentioned 90 degrees turn, hop to the uppermost geese and wait to pass by a line of balloons. Hop onto them and then further ahead onto the pink balloon, which moves sideways. You can let it carry you right to the elongated cloud or, due to its slow speed, progress forward as a “shortcut”. Two more pink balloons move between a few red balloons, so hop onto a red balloon right when it’s lined up with the next pink balloon. Hop up towards the elongated cloud, and the Green froggy will be on the leftmost corner. Orange: Follow the Green walkthrough. In case you didn’t see it before, it is on the same cloud as the Green froggy, but on the rightmost corner. Blue: After the 90 degrees turn, hop onto the lowermost geese and wait until you pass by an elongated cloud. Rotate the camera twice (or you can do it before hopping to the cloud, both are valid) and hop onto a pink balloon that serves as connector with the cloud ahead. Another balloon will connect it with a cloud further ahead, plagued with standard bugs which don’t give much score by the way. The Blue froggy is to the left of this cloud. Red: Follow the Blue walkthrough. When reaching the last cloud, this time head right instead of left to retrieve the Red froggy. Purple: Follow the Blue walkthrough again. You surely have seen the Purple froggy on a cloud ahead of the junction of the Blue and Red froggies. Two quick pink balloons serve as connectors with the cloud the Purple froggy is on, surrounded by bugs at both sides (which you can eat on your way to Blue and Red, respectively), so retrieve it to finish the level. Level 6-3 – Loonier Balloons Time: 34 seconds A revisit of the first level. It isn’t that much complicated regarding the layout, but it’s a bit more stressing due to the greatly reduced time limit. We will be hopping onto more birds here, and they fly much faster than in the starter level, so both speed and precision will be put to the test here. Green: Go up and hop onto the bird passing by. Hop up towards the next cloud, then go to the right edge and wait for a duck to fly by. You can also hop off the bird on the cloud below, where two golden time bugs are, because the duck also flies by the right edge in here. Rotate the camera once with L2 and hop onto it, then hop down to the next cloud. The Green froggy will be on the lower edge of the cloud. Orange: Follow the Green walkthrough. On the froggy’s cloud, rotate the camera back to normal and go to the upper edge, where a seagull or a duck will fly by very quickly to the right. Hop onto any of them, and hop down on the next cloud they fly over. The Orange froggy will be to the left of the lower edge of the cloud. Red: Follow the Orange walkthrough. Once you hop off the seagull or duck, head to the right edge. A goose will fly vertically, so hop onto it the way you did with its flock previously. A few time bugs can be found slightly ahead as it flies. Rotate the camera twice while you fly, then hop onto a slower geese to the right. There, hop right towards a set of balloons heading upwards, the Red froggy will be waiting on that cloud above. Purple: Follow the Orange walkthrough. Go to the right edge again, but wait for the bigger bird to fly sideways nearing the lower edge. Superhop onto the one going left, and it will carry you towards a small solitary cloud where the Purple froggy awaits. Blue: Follow the Purple walkthrough. On the solitary cloud, wait for a seagull to fly by the lower edge, and hop onto it. It will take you towards another solitary cloud, where the Blue froggy awaits. Level 6-4 – Airshow Antics Time: 60 seconds The last level in this zone gets rid of the birds to introduce jet airplanes and helicopters. The former are the method of transportation between the clouds, the latter act as obstacles due to their helix coming from below the clouds. And speaking of clouds, most of them in this level will cause Frogger to slide, like if they were made of ice, adding a bit more of salt to the mix. This level will need lots of practice, first to know the timing of the transports and obstacles and second to learn the safe spots and ideal paths through the icy clouds. Patience is also recommended, for you will probably need a lot of tries before completing this level. Red: Go up and wait for two planes to fly by, side by side. Quickly hop across them onto the cloud ahead, and follow the arrow to go left. Beware of the sliding and the helicopter in the way. Once you’re on the edge of the cloud, go up and, being extremely careful with the helicopter here, hop left onto the green balloons (the lowermost one, if possible). Keep going left through the balloons, managing how they go up and down according to their colors, until you reach the first red balloons. You’ll see a green balloon in the lower edge, so hop onto it and let it take you upwards towards the spot where the Red froggy awaits. Green: Hop onto the first plane passing by. When it makes a U-turn, hop to the cloud below and go left, towards a safe spot. Rotate the camera twice, and head to the balloons you see ahead. No need to go left and try your luck with the helicopter, simply hop onto the lowermost balloon from the safe spot. It’ll take you upwards towards a path made of red balloons. Follow it all the way to the right, then head up until you hop onto another green balloon. This one will take you upwards to the spot where the Green froggy awaits. Orange: Wait for the pair of planes to fly by, and hop onto the uppermost one (or hop onto the plane passing by, then hop onto the one joining it after the first U-turn). After the second U-turn, hop up towards the cloud and go left to avoid the helicopter. Now, go up and then left, through a stretch with three helicopters that can be quite tricky to pass safely. Once on the left edge, hop onto the uppermost green balloon and keep going left through the balloons. The last yellow one doesn’t take you to the green one, so you’ll have to hop from a safe distance. After this green balloon, hop west onto another one, then head north through the balloons until you reach the spot where the Orange froggy is. Purple: Hop onto the plane passing by, and rotate the camera twice while riding it. After the third U-turn, hop onto the cloud and slide to the left, you’ll see the Purple froggy surrounded by bugs a few spaces up from you. There’ll be hawks trying to hunt you down in this cloud, so be quick and diligent. Blue: Wait for the pair of planes to fly by and hop onto the uppermost one (again, you can alternatively hop onto the first plane passing by and then hop onto the one joining it after the U-turns). It will make four U-turns before going straight for a while, and then it will turn right. Once it does, hop down to the cloud it passes by, and quickly hop to retrieve the Blue froggy on the lower right corner (a plane passing by can accidentally pick you up if you’re not quick enough). Yellow: Follow the Orange walkthrough up to the yellow balloons. Once you hop to the second green balloon after them, go down instead of left/up, you’ll see the Yellow frog standing on a cloud very close to the balloon (you’ll need to hop back to the balloon quite quickly or it will ascend beyond your reach and leave you stranded there). ZONE 7 – THE CHEMICAL WASTES Ah, a sewer-like zone couldn’t be absent from this game, could it? All kinds of colored slimes or oils, greenish water, fish skeletons taking a dip, barrels with dubiously healthy content or right away explosive, rats and slugs running amok… I wish Frogger also had a customizable skeletal skin to go along with this level xD Anyway, don’t let the descr Level 7-1 – Bang Bang Barrel Time: 23 seconds Not the hardest of levels, but it surely has a big dose of trickiness. Precision, skill and speed will all be tested here, so you’ll also need patience to go through the several tries you’ll need to clear this zone. This zone kind of also features a starting section which must always be done before getting any froggy. However, this time the section is quite easy and quick, so I’ll simply include it in the first walkthrough and the rest will follow up from there. Red: Three rows of barrels go down the stream. Hop onto the first barrel passing you by, then hop onto the faster center one and let it carry you down (there’s a shortcut by hopping from barrel to barrel, but no real need to do it). It will do two U-turns, then hop up towards the upper row and on to the shore. There are five golden time bugs here to replenish the timer way above what we had at the start. After eating them, wait for the silver explosive barrel ahead to line up with the row of barrels up ahead. Do the same process with the newspapers up ahead and manage to land in one of them. When they make a 90 degrees turn, hop down to an opening between the boxes, then hop your way over them to the right where the Red froggy awaits. Blue: Follow the Red walkthrough. When the newspaper does the turn, immediately hop to the other shore. Go a few hops up, then you’ll see the Blue froggy on some elevated pipes, so Superhop your way to it. Orange: Follow the Blue walkthrough, but keep hopping up towards another set of pipes. Superhop your way towards the Orange froggy awaiting further ahead. Green: Follow the Orange walkthrough, eating as many time bugs in your way as possible (they weren’t needed until now). Go further ahead past the spot where the froggy was into the wooden boxes, then head right towards a set of bright green barrels. They float and dive into a dangerous liquid, so learn their pattern and hop your way right until reaching the spot of the Green froggy. Purple: Follow the Red walkthrough again, and this time let the newspaper carry you further right past the boxes. Wait until it lines up with a very slow newspaper ahead, or hop to the shore before you’re carried away. Once you get on the slow newspaper, it will carry you towards the spot where the Purple froggy awaits. Level 7-2 – Slime Sliding Time: 45 seconds Another level which involves sliding. It is noticeably more complicated than the previous level, with slugs making their first real appearance (they were present in the previous level, though we didn’t have to enter their territory) and our friend the big bird making a comeback so we see a known face among all the pestilence. While this level can prove hard to beat, it still is enjoyable. Mark these words, because from here on now you’ll hardly see them again, due to the extremely complicated levels we’re about to face. Also, several alternate paths can be found in this level, so more than ever this is a place where you can explore for other pathways if you feel blocked at any point. Red: Slide ahead until reaching the edge, at which point you must turn right. On the right edge, you’ll see barrels floating in circles on the “water” below. Time your jump perfectly so you land on one, then wait for it to line with the explosive barrel and jump onto it so it propels you towards the Red froggy. Purple: Slide ahead and go left after jumping off the edge. Then, when the slug clears the path, go up and then left, landing on a lower level. Avoid the yellow drops on the way to the left, then Superhop up to the peak. Rotate the camera with L2 and, once you see a rat passing by, hop onto the slimy stretch and make your way right towards the Purple froggy. Orange: Out of the many ways to get the Orange froggy, I prefer the only one where you don’t face any yellow drops. To do this, slide ahead and go to any side after jumping off the edge. Wait for the slugs to clear the path and reach the next edge up ahead. Follow the next stretch, minding the slugs, and halfway through the stretch hop down towards the lower level. The Orange froggy is just one hop away from you. Blue: Slide ahead and go left after jumping off the edge. Wait for the bird to fly by, then hop onto it. You’ll see this is an alternate path for the Purple froggy, but since the bird makes a small turn when reaching the only platform you can jump to it’s very difficult (at least for me) to time it properly. Anyway, as you ride the bird, rotate the camera once with R2 and hop onto the slimy ramps past the Purple froggy. Rotate the camera back to normal, and when a rat hops off the ledge right before your eyes, slide as fast as possible down the ramp. The next one should be free of obstacles, but just in case, this time you’re following the rat so be extra careful to not find it on your way. The last ramp has a couple of skeletal fishes jumoing over the ramp, so wait until they clear the path and storm down towards the Blue froggy. Green: Follow the Orange walkthrough. This time, when hopping to the lower level, we need to go up and leave the Orange froggy behind. You will have to avoid three yellow drops, so be careful. Here, you’ll face a stream with four rows, the odds with newspapers and the evens with barrels. Hop up very fast through the newspapers, then manage to make your way to the right to the spot where the Green froggy awaits. Level 7-3 – Uncanny Crusher Time: 40 seconds One of the hardest, or at least trickiest, levels in the whole game. The right section of the level is fully covered by oil, meaning you will slide heavily. What’s worse, this level is filled with spiked crushers you must avoid. The first three froggies aren’t excessively hard to retrieve, but the last two will put your patience, speed and precision to the test. Be sure to play around with the camera, if you’re not comfortable with the view there’s no chance you can beat this level. Green: Hop ahead along the tube and then hop onto one of the newspapers coming out of it. Let it carry you further ahead, and after a small downhill, avoid the horizontal crusher coming from both sides and Superhop to retrieve the Green froggy. Red: Hop onto a newspaper like before, then jump left when it lines up with a barrel. Hop left again to the shore, and pass through the vertical crushers all the way left. The Red froggy will be a couple hops down after the vertical crushers, and will need a Superhop to be retrieved. Blue: Follow the Red walkthrough up until the Superhop. From that point, head left and then down, hopping through a set of crushers in both sides. You can also Superhop atop the “wooden” section of the crushers if you see it’ll make the travel a bit easier, but be careful not to be crushed against the wall when the crushers retreat. There’s a second section of crushers after the first one, and they move a lot faster so watch out. The Blue froggy awaits right after this second crusher section. Orange: Hop onto a newspaper at the beginning, then jump to one of the barrels lined up to the right. Hop to the right shore, and pass through the vertical crushers in some kind of L fashion. I recommend rotating the camera behind Frogger so he always goes up and ahead, but leaving the camera untouched could be a plausible strategy too. Anyway, after the crushers there’s an oiled downhill in which Frogger will slide uncontrollably. A spiked crusher blocks the last part of the path, so be extremely careful. Avoid it, then hop left and avoid a lateral spiked crusher. Hop left again, there will be a set of spiked crushers coming from both sides. There can be safe spots along the way, but it’s also possible to pass them in a single go, while also eating a couple time bugs on the way. The Orange froggy is right after this set of crushers. Purple: Follow the Orange walkthrough. Further ahead there’s a giant spiked crusher moving laterally. Manage to hop ahead to the other side, close to the wall, then hop left. Avoid the crusher again as you keep hopping forward, the Purple froggy will be waiting on a secluded corner. Yellow: Follow the Orange walkthrough. After passing the froggy’s spot, avoid the giant spiked crusher by hopping ahead to the other side. The Yellow frog will be close to the right wall. Level 7-4 – Boom Boom Barrel Time: 50 seconds A revisit of the first level. The extended time limit has erased most of the time bugs, which also implies we can now take our time through the whole level. The changes aren’t very big, just that more precision is needed with the transports and more enemies are on our way, besides of a few changes in the location of the froggies. Red: Three rows of barrels go down the stream; hop onto the first barrel passing you by, then hop onto the faster center one and let it carry you down (it would be interesting to test the shortcut in later frogs since the timer can’t be replenished as easily now). It will do two U-turns, then hop up towards the upper row and on to the shore. Once ashore, wait for the silver explosive barrel ahead to line up with the row of barrels up ahead, but careful because the jump is done leaning to the right more noticeably than the last time. Do the same process with the newspapers up ahead, which now come in highly reduced numbers, and manage to land in one of them. When they make a 90 degrees turn, hop down to an opening between the boxes, then Superhop your way over them to the section where the Red froggy awaits. Purple: Follow the Red walkthrough and let the newspaper carry you further right past the boxes. Wait until it lines up with a very slow newspaper ahead, or hop to the shore before you’re carried away. Once you get on the slow newspaper, it will carry you towards the spot where the Purple froggy awaits. Blue: Follow the Red walkthrough, and hop onto the other shore. This is the “main piece of land” we didn’t even touch the first time. Head to the center, free of danger, rotate the camera with L2 then hop up nearing the edge. Be extremely careful with the rows of slugs passing by, and hop your way towards the Blue froggy to the right. Orange: Follow the Blue walkthrough. This time, when reaching the edge, go left instead of right. The slugs here are seemingly a bit harder to predict and avoid, but there’s a safe spot between the two pipes that can make things easier to retrieve the Orange froggy on the left corner. Green: Follow the Blue walkthrough, but you’ll need the shortcut on the initial section for this one. The shortcut is as follows: hop onto a barrel on the upper row, wait for it to be lined up with one ahead down the hill and jump on it, then quickly jump your way through the barrels as they line up from here on until getting ashore. Now, follow the walkthrough as stated and head further ahead on the center zone while avoiding the slugs. Newspapers will be floating on a small stream, so use them as connectors to get to the giant boxes. Here, go right through the green barrels, just like you did last time, and retrieve the Green froggy at the end of the path. Level 7-5 – Reservoir Frogs Time: 60 seconds A level that is kind of a mix-up of everything we’ve seen in this zone so far. Large streams with barrels and newspapers (and with the new additions of raccoons), slimy tubes, oily floor, spiked crushers, slugs… Finally the last level of a zone lives up to its status. This level is also one of the hardest, because the combination mentioned above makes up for a deadly combo. Retrieving the froggies will require a big dose of skill, patience and speed. If you haven’t beaten at least half of the previous levels of this zone, you have nothing to do here. Purple: Hop left onto the floating newspaper. Make your way to the left across the oil barrels and newspapers until you reach the shore, or be lucky enough to come across a silver explosive barrel that automatically shoots you to the shore. The Purple froggy is nearing the lower edge of the shore. If you think it will make things easier, rotate the camera with R2 before starting, then change “left” for “up” and “down” for “left” to make this walkthrough valid. Green: Follow the Purple walkthrough, and this time it’s mandatory to rotate the camera with R2, either at the start of the level or when reaching the other shore. There’s another stream ahead of the spot of the froggy, and traversing it is the trickiest section you’ll ever see. The exploding barrels on the odd rows must all be lined up so you’re sent flying towards the other shore. If you land on a non-explosive barrel, turn back and hop onto an explosive barrel so you can try again. Once you’ve crossed the stream, head right towards a path of explosive barrels, which will take you to the desired Green froggy (albeit in a very funny way, I must admit). Blue: Hop ahead along the stream, go down a slimy pipe and keep hopping ahead until reaching the edge. You’ll see an oily pathway to the right, which you must take. When nearing the end, go down. A set of spiked crushers coming from both sides is ahead, so make your way through them to get to the Blue froggy (rotate the camera if needed as a way to predict the crushers’ movements). Red: Hop ahead along the stream and go down the slimy tube. Here, you must cross the stream to the other side, like you did previously. Hop your way through the newspapers, barrels and raccoons to reach the shore, or wait for an explosive barrel to go by the middle row of newspapers so it can shoot you directly to the shore. Once there, head up and climb up to the log, then hop left to retrieve the Red froggy. Orange: Follow the Red walkthrough and climb to the log like before. This time, go right alongside the slime-covered log avoiding the slugs. Once you reach the other end, follow another log up, being careful with the overpass because it can somewhat block your view of the slugs to avoid. After passing this log, head left avoiding the very fast slugs. Now, Superhop your way in this uphill log, abusing this maneuver if you want to counter the sliding effects of the slime. Once at the peak, go all the way right, now at full speed because there are no more slugs to avoid. At the rightmost edge, jump down to a log below, then once again Superhop through the uphill that will take you to the Orange froggy. ZONE 8 – THE DESERT A frog’s least suitable environment due to the total absence of water, but whatever. This is the last true zone, with 5 levels of the highest difficulty and tons of enemies and obstacles to watch out for. You’ll need several tries to clear this zone, so take your time and endure the trial with patience and always learning from your mistakes. Like in previous instances, the first three levels are unique on their own, while the fourth and fifth are revisits of the first two. In this occasion, where difficulty is at its peak, the revisits are made much harder and complicated than the “standard” versions, to the point that the fifth level is clearly the most complicated in the whole game (staying true to its status of last level before the bonus zone). Level 8-1 – Cactus Point Time: 40 seconds While relatively easy compared to what we’ve been through in the previous zone, and the levels yet to come, you shouldn’t lower your guard too much on this level. Learning the pattern of the obstacles and enemies is crucial to safely traverse this level, and because this zone features unique enemies not seen anywhere else, it’s better to get used to them while things start out easy. Red: Fully traverse the buffalo stampede, heading a bit right if you can. It’s basically like the cars we encountered in the first zones, but a bit more complicated. Once done, keep going up and avoid the beetles circling the cacti (and the cacti themselves, their spikes are harmful). Still going up, avoid the snake moving horizontally and enter the zone with the falling boulders. Figure out a path where the boulders won’t hit you, then quickly go up and slightly right to retrieve the Red froggy. Purple: Traverse the stampede again, but this time head for the left path at the split. Avoid the beetles, cacti and snakes like before (the snakes move differently here, and the beetles now move on the opposite direction) and keep going forward to the falling boulders. Quickly make your way through the avalanche to retrieve the Purple froggy waiting ahead. Blue: Follow the Purple walkthrough, and go past the froggy’s spot. Rotate the camera with R2 and go straight up the incline, making sure to eat any time bug in your way. Stay close to the wall ahead and, being wary of the gila monsters, make your way left. Follow the tight path down, and you’ll reach an open zone with more gila monsters. Make your way left, towards a third open zone, then get as close to the left as possible before hopping down towards the screen. The Blue froggy will be at the lower edge of the path. Orange: Follow the Purple walkthrough, but this time rotate the camera with L2 and go straight up the incline (opposite from Blue, if it’s easier to understand). Turn right to a wide path, where more rocks will be thrown. The path has safe spots along the way if you need them, but the rocks can be avoided easily because the path is wide and the rocks are rather infrequent, and eat the time bugs if you want to go safe on time. When reaching the end of the path, hop down towards the screen to retrieve the Orange froggy. Green: Follow the Orange walkthrough, and wait for a bird to fly by the froggy’s spot. Hop onto it, you’ll be taken to the Green froggy (which oddly enough is standing atop the wall that makes the split after the buffalo stampede). Level 8-2 – Boulder Alley Time: 50 seconds Probably one of the toughest levels. It needs a massive dose of patience, because the key to beat it is simply great timing and precision, as well as a bit of luck you can’t waste. Every single move needs to be done at the right time, without rushing, which can only be achieved with practice. Another key is to not end up stuck anywhere, make your way back and forth if needed but don’t ever get stuck or it’ll be the end of the line. You might get a good chunk of Game Overs before even retrieving a single froggy, so make sure to at least learn something about enemy patterns that can help you get further and further with each try. Red: Go up, to the path the beetles are walking. It’s a tight path, meaning you can only go right or left. We’ll be heading right, opposite of the beetles. To do that, wait until the beetle is almost touching you and Superhop over it. Make your way to the right with this trick, and head up in the next junction, which also has beetles coming down your way (be extremely cautious with the merging of beetles from both paths). Make your way up, then head right at the first chance. Keep going right, and stop just before reaching another path of beetles. A bird will pass by the upper edge, so hop onto it and let it carry you towards the Red froggy. Green: Follow the Red walkthrough, but don’t deviate on the second path of beetles and keep going up. The tight path will now suffer from an avalanche of rocks, though safe spots exist along the way. Use those spots, or carefully visualize the rock’s shadow to see where it won’t be landing, and make your way up through the snaking path until you reach the Green froggy. Blue: Follow the Green walkthrough, eating all the time bugs in your way (you’ll need them now more than ever). Follow the path further up from the froggy’s spot, minding one last streak of falling boulders. The last stretch is free of peril, just stay away of the cacti as you hop your way towards the Blue froggy at the end of the path. Orange: Follow the Red walkthrough again. This time, we’ll be taking that path of beetles we ignored, so hold your breath and rotate the camera with L2 if needed. Superhop over any beetle coming your way, being extremely cautious at the point where another path collides. This section is tremendously difficult, so take as many tries as needed. Keep going through the second path, then head left for a third path, with much faster beetles coming your way. Once that’s done, head left and then up, eating any time bugs in your way. Follow the tight path to the right, but be careful with the boulders, since they fall now alongside the cliff like a true avalanche. Avoid the rocks as you climb, then before making that second U-turn, wait for a bird to fly by. Hop over it, and it will take you to the spot where the Orange froggy awaits. Purple: Follow the Orange walkthrough, but this time go all the way up the hill with the falling rocks. Eat the time bugs available at the U-turns, then at the third and final left U-turn go all the way up towards the wall. The Purple froggy will be a few hops to the left. Level 8-3 – Tumbling Valley Time: 30 seconds Another level where precision and timing, as well as patience, are put to the test. Quite unique enemies and obstacles await here, like the tumbleweeds, so pay close attention to their patterns. Also, don’t panic at the low timer, routes aren’t very long, so take your time to think your moves. Orange: When the tumbleweeds moving vertically clear the way, head right. Then, make your way avoiding the horizontally moving tumbleweeds so you can go up the incline. Rotate the camera twice to aid you here, because once again you’ll have to Superhop over the beetles. Be careful at the 90 degrees right turn, and keep avoiding the beetles as you head right to retrieve the Orange froggy. Green: When the horizontally moving tumbleweeds bounce away, hop up. Let the vertically moving tumbleweeds pass down and keep heading up, minding another set of horizontally moving tumbleweeds. You’ll need to go up that incline, so be set for it. Watch out for the vultures flying about, they can be touched with a Superhop. Avoid the beetles once again, be careful at the tight turn, and keep hopping ahead to retrieve the Green froggy. Purple: Follow the Green walkthrough, but this time avoid the incline and go further up, you’ll see a set of oddly-colored platforms. Beware of the vultures when they pass over the path, and don’t stay too much on any of these platforms because they fall down after a brief while. Hop onto the first platform, and from there on, go 3 hops left to a safe spot, 1 hop down, 3 hops left and finally 5 hops up towards the spot where the Purple froggy awaits. Red: Follow the Purple walkthrough. This time, hop all the way up through the first set of falling platforms, then head right to safe land. You’ll see on the upper right corner a spot with boulders rolling about in circles. Traverse that point the best way you can, the Red froggy is nearing the upper edge of that zone. Blue: Follow the Red walkthrough, but this time, head to the zone with the rolling boulders on the upper left corner instead. If needed, you can go another way through the falling platforms and have easier access not only to the zone with the boulders, but also have both of the grasshoppers to eat and have enhanced hopping abilities. Whether you eat them or not, which is not mandatory, the Blue froggy is nearing the upper edge, on the upper left corner of the boulder zone. Level 8-4 – Crumbled Point Time: 70 seconds A revisit of the first level, with a similar layout but made much more complicated. Enemies and obstacles are doubled or more in most cases, hence why we got more time to clear this level, and also some froggy routes have varied. Do not rush yourself, observe the patterns and keep practicing until you can find the way out of this level for good. Red: Just like the last time, make your way through the buffalo stampede and take the right path (no need to eat that grasshopper or worm yet). Avoid the beetles, cacti and snakes as you keep moving forward to the area with the falling rocks. Keep hopping forward as you avoid them, you’ll see the Red frog slightly to the right further ahead. Purple: Make your way through the buffalo stampede, but this time aiming for the left path. Like before, avoid the cacti, beetles and snakes and get ready for the rocks. Manage to cross a few layers, and you’ll see the Purple froggy to the left. Blue: Follow the Purple walkthrough and completely cross the falling rocks. Once at the other side, you’ll see two inclines, head for the left one. Rotate the camera with R2 and, avoiding the incoming boulders, keep hopping forward and eat the time bug (you’ll need it). Then, go left avoiding the gila monsters, and follow the tight path. Keep going left on the next zone with the gila monsters, and do the same on the third zone further ahead. When reaching the left edge, go down towards the screen to retrieve the Blue froggy. Orange: Follow the Blue walkthrough, but this time head to the incline on the right side. Move up the incline avoiding the rocks, rotating the camera with L2 to better aid you, and take the first path to the right. More rocks are coming at you from the right side here, so the safe spots along the path might be useful this time. Keep hopping right, then go down towards the screen to retrieve the Orange froggy at the end of the path. Green: Follow the Orange walkthrough. When standing on the spot the froggy used to be on, wait for a bird to fly by the lower edge and hop onto it. The bird will take you to the spot where the Green froggy awaits, once again atop the pillar separating the path after the buffalo stampede you crossed earlier. Yellow: Follow the Purple walkthrough. When you reach the area of the snakes, head a bit left away of them, and the camera will rotate automatically to show you the hidden spot where the Yellow frog is hiding. Level 8-5 – Big Boulder Alley Time: 75 seconds Hardest, toughest and probably also unfairest level in the whole game. Basically a revisit of the second level, which was already complicated enough, that has been made even more complicated. Staying calm throughout this level is nigh impossible. Beetles have increased their pace and also their numbers, new enemies like vultures were invited to the party, some froggies have been relocated and had their routes altered (because the original level was easy, you know)… Precision, patience and mostly trial-and-error will be your friends here, and also a good stash of lives to keep on trying without losing much time. Blue: Like before, go right and Superhop over the beetles, then go up on the crossroad and avoid the beetles the same way. There’s a vulture near the end of the path ahead, so be wary of it. Keep hopping forward, and be ready for a hillclimb with rocks falling on the path. Use the safe spots wisely, learn of the spots the rocks don’t fall on, and eat the golden time bug on the way as you climb. When reaching the peak, go straight to the edge, avoiding the cacti, and retrieve the Blue froggy. Orange: Go right and then up, avoiding all the beetles in the way, then go right avoiding the vulture on the path. Hop all the way right, being mindful of a couple vultures at the edge and a path of beetles coming towards you, and you’ll be able to retrieve the Orange froggy. Purple: Follow the Orange walkthrough, and this time head towards the path of beetles. Rotate the camera and Superhop over them. At the edge, you’ll have to go right, with another trail of beetles coming at you. Superhop your way forward, then head left through another path. Avoid the beetles there too, and be ready for the hillclimb with the avalanche. Just like in the last level, carefully make your way avoiding the falling rocks and eating the golden time bug on the third U-turn. This time, you have a silvery-blue grasshopper on the second U-turn, so make good use of it on your way up. When reaching the summit, go close to the wall ahead and hop left to retrieve the Purple froggy. Green: Follow the Purple walkthrough, up to the mountain. This time, don’t climb up the path, but go further ahead to a tight path with rocks bouncing from side to side. A bird passes right by the central point the rocks “orbit”, so go there and hop over it. Once it descends enough, jump off it and hop down towards a passage. Follow the tumbleweed passing right in front of you, because it describes the outer trajectory in a zone with several more tumbleweeds moving in circles. There’s another passage to the left, so go through it, eat the green time bug and go up towards a lake of sorts filled with crocodile heads in a perfect straight line. You’ll have to hop over them to cross to the other side, so take a bit of time to know when do they sink and which can open up to eat you. Manage to hop across the heads and the Green froggy will be yours. Red: Follow the Green walkthrough up until hopping off the bird. This time, head to the lower right corner and go right through a passage. The second section has a gila monster moving up and down, so be wary of it. When reaching an open zone, wait for the path to clear and go right through another passage. Be careful, though, because tumbleweeds are moving vertically at the other side, performing some kind of loop up and down the path. Manage to get behind a tumbleweed and follow it up to the edge, the Red froggy will be there awaiting to be retrieved. ZONE 9 – THE JUNGLE The bonus zone of the game couldn’t get more colorful than this. Amidst a tropical jungle, with its set of palm trees, rivers, big animals and… carnivorous plants! Well, I’m inclined to think they’re supposed to represent carnivorous plants, even though they don’t eat Frogger up. The last level of the game is located here, as well as the route to the game’s ending. Level 9-1 – Tropical Trouble Time: 45 seconds The wide variety of enemies makes this level quite unique, because patterns hardly repeat as you move deeper into the trees. It’s not very hard to complete, specially after all the trouble we’ve been through, but don’t let your guard down because the clock is ticking. Tropical Trouble somewhat “closes down” once you’ve unlocked the ending. The level can’t be replayed because the froggies are missing, and the enemies also vary or disappear completely. The only route available is for Yellow, so you can see the ending again (or if you forgot to retrieve any Yellow frog while focused on clearing the levels first). Blue: Cross the river up ahead by jumping over the three rows of crocodiles and logs. Once at the other side, be wary of the rhinos rampaging about and hop left.. When going left, you’ll see a bridge going down. Quickly cross it, avoiding the fish and making sure the bridge isn’t cut down, and retrieve the Blue froggy awaiting at the other side. Red: Cross the river like before, but this time attempt to cross it again by jumping over the logs and hippos. You’ll manage to reach another piece of land with rhinos running about. Go right through a path filled with carnivorous plants, and make your way up towards the edge and then left to retrieve the Red froggy. Orange: Follow the Blue walkthrough and continue going left ignoring the bridge. When at the edge, wait until the path is clear and hop up. Avoid the monkey circling the tree and continue forward. Next is a zone with two giant scorpions, one circling a tree and another moving vertically right besides it. Get behind the scorpion circling the tree and wait for the other scorpion to clear the path before going right. You’ll cross the river over a trunk serving as a bridge, then beware of the carnivorous plant and the pair of unknown creatures circling the area ahead. Make your way through the path on the upper right corner, then avoid another monkey circling a tree and use the stones to Superhop your way to the Orange froggy without having to pass besides the carnivorous plant. Purple: Follow the Orange walkthrough. When reaching the froggy’s spot, keep heading left past an ancient temple. You will eventually see a bridge heading down, so cross it. The Purple froggy awaits at the other side to be retrieved, alongside several bugs to up your score a notch. Green: Follow the Orange walkthrough again, and this time go all the way left past the bridge. Only here you’ll find a stone you can Superhop onto. From that stone, hop and Superhop your way across several other stones until you manage to get to the Green froggy. Yellow: After retrieving all the other froggies of this level, the temple’s entrance will open. Follow the Orange walkthrough one more to get to the temple and enter it. You’ll see the Yellow frog standing on a mini-pillar at the center, surrounded by 8 pillars which symbolize the other Yellow frogs you can retrieve in the other zones. When retrieving the Yellow frog, those pillars will ascend and show if you’ve attained the correspondent Yellow frog of that zone, and after that the credits will roll. And this is it! You’ve successfully cleared Frogger! Now go to challenge yourself and get the highest possible score in all levels! |
Administrator
Site Staff Manager, Content Writer, Console Manager
Affected by 'Laziness Syndrome'
Registered: 07-03-13
Location: Barcelona, Spain
Last Post: 10 days
Last Active: 1 day
Site Staff Manager, Content Writer, Console Manager
| Vizzed #1 Hardstyle fan |
Affected by 'Laziness Syndrome'
Registered: 07-03-13
Location: Barcelona, Spain
Last Post: 10 days
Last Active: 1 day
Post Rating: 1 Liked By: Furret,
